Week #8 || Computer Controlled Machining
Software used:
Machine used:
Setbacks:
1. Design Background
I have already learned to use the Shopbot during my internship here at the Fab Lab last year. The design for this assignment was inspired by something I made earlier; a large root trainer for plants. This pot has a hexagonal shape, with sharp channels cut in the inside of the panels for the roots; when the roots of the plant hit the sharp channels they will change their growing direction and branch into more roots. The planter has sliding panel doors to access the roots from the sides, without having to dig up the plant.
This pot can be used for plants where the roots have a value as food or medicine, or where cuttings from the roots are needed for other purposes. It was originally made for the use of Chrysopogon zizanioides (Vetiver grass) which is propagated by splitting the roots.
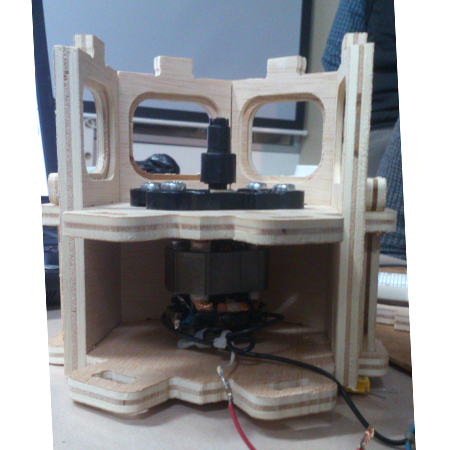
2. The Ex-Coffee-Grinder Centrifuge
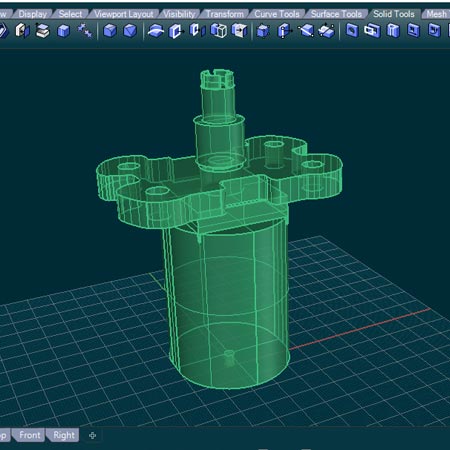
Besides Fab Academy, I am also doing a course called Biohacking Academy, organised by Waag Society in Amsterdam. Here, each week we make a DIY laboratory machine. The designs have already been made, the goal is to assemble them and to learn how to use them. This week however, I made the design myself. We had to make a centrifuge, and I had a motor I could use. A few months ago, I left my electric coffee grinder on the stove, and it melted down. I saved the motor though, and it is a powerful one! Now I finally found a new purpose for it. I started designing the centrifuge by creating the dimensions of my motor and the centrifuge head I would use.
First, I drew the outlines of the piece that holds the centrifuge head. I scanned it, vectorized it in Illustrator, and then imported and extruded it in Rhino.
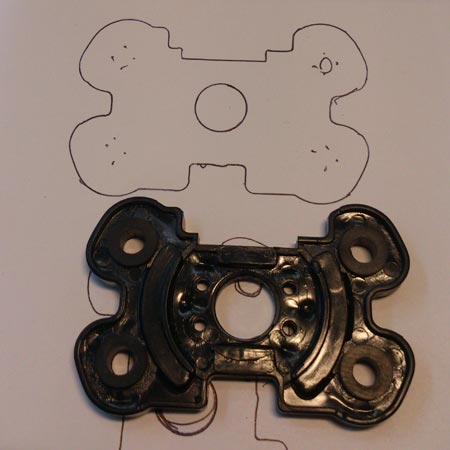

Then, I measured the dimensions of the motorblock and created shapes that correspond with them. Finally, I added the (modified) centrifuge head which was found on the Thingiverse.
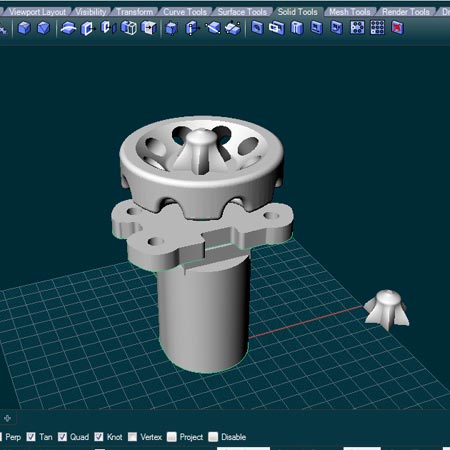
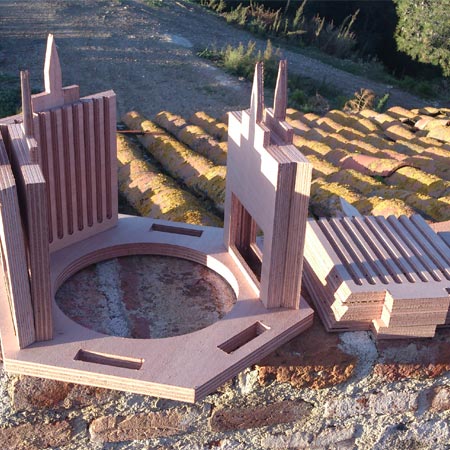
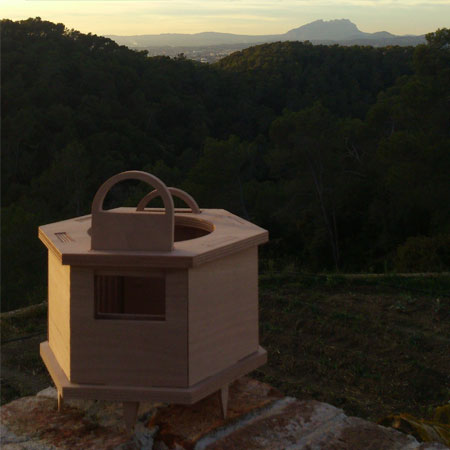
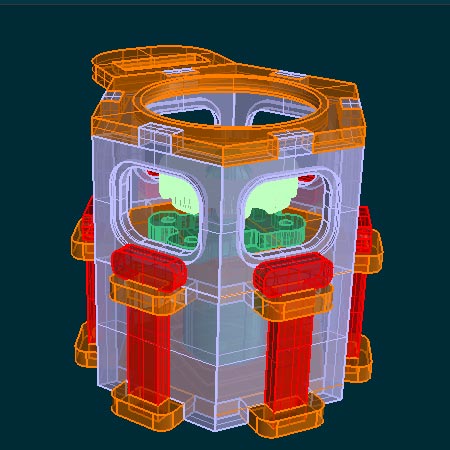
Now I started designing the housing to fit perfectly around the motor. I chose to go for the hexagonal shape again to approach the round shape of the centrifuge head.
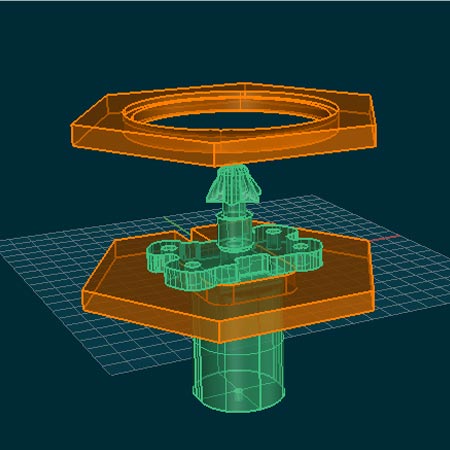
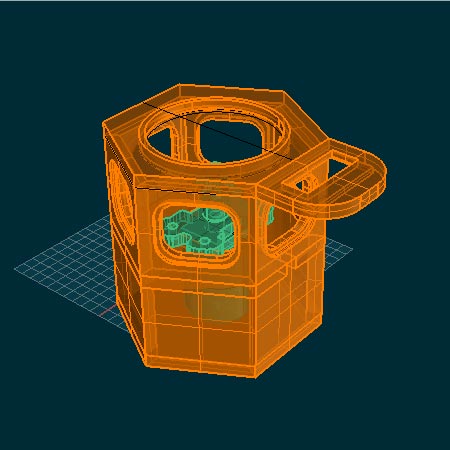
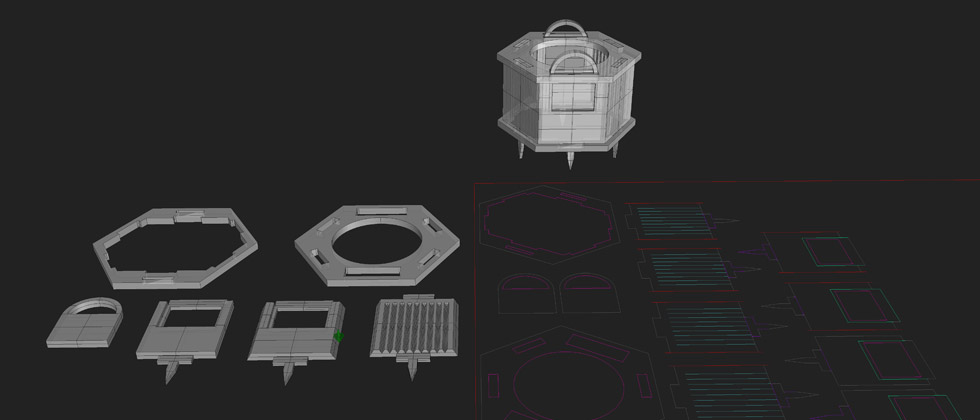
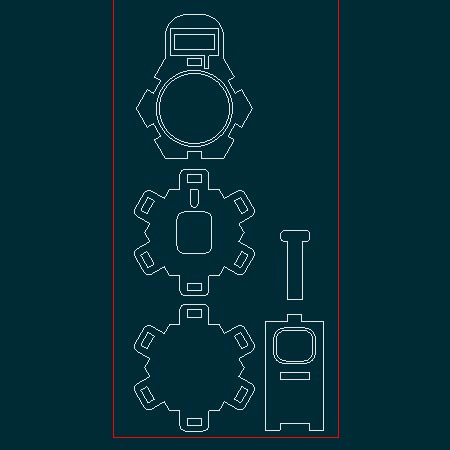
Once the rough design was there, I added the joints. I chose a press fit for the main body, and slots with locks holding the pieces in place. Once that was done, I used the Made2D command in Rhino to get all the curves for the creation the file that would go to the Shopbot via V-Carve Pro.
3. Milling
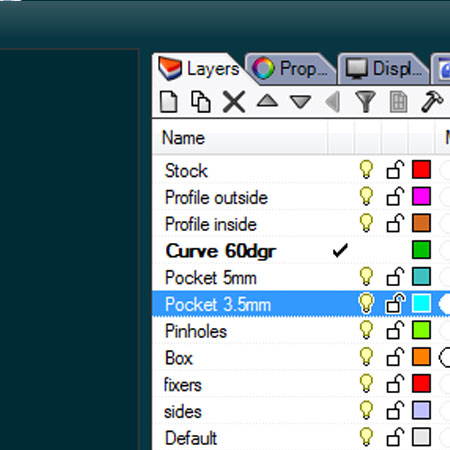
Before milling, the file from the design needs to be made fit for the Shopbot, to be converted into G-code toolpaths that fit all the different kind of cutting tactics. My object contains 60 degree angle cuts, pockets of various depths, inside cuts and outside cuts. Each different toolpath and/or millingbit requires it's own layer in Rhino in order to be converted into the corrert G-code files in V-Carve Pro.
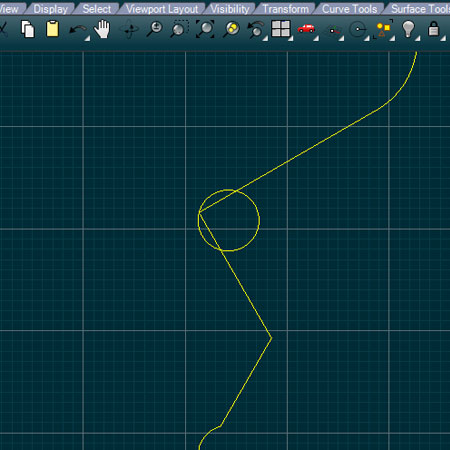
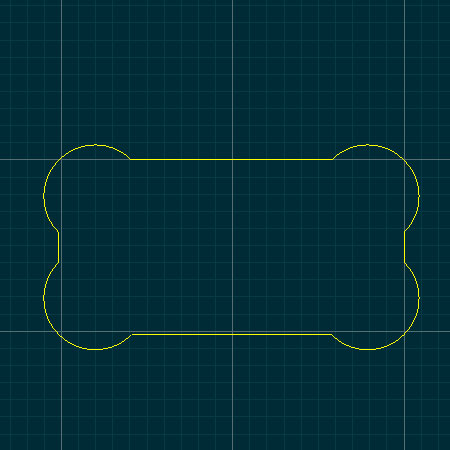
The image below on the left shows the different layers for each toolpath. The image to the right shows the nesting on the piece of wood I had used.
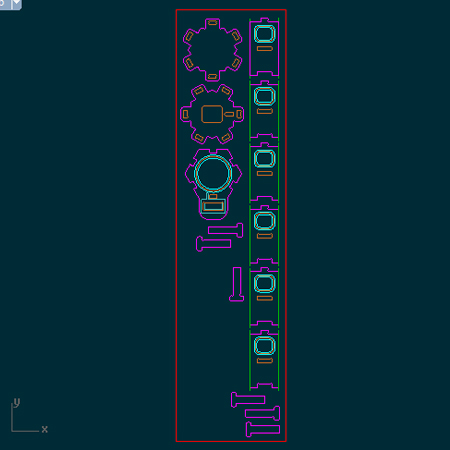
A side note, since the rounded tools can not cut sharp inside corners, I made 'dogbones' on all inside corners to make sure the joints would fit.
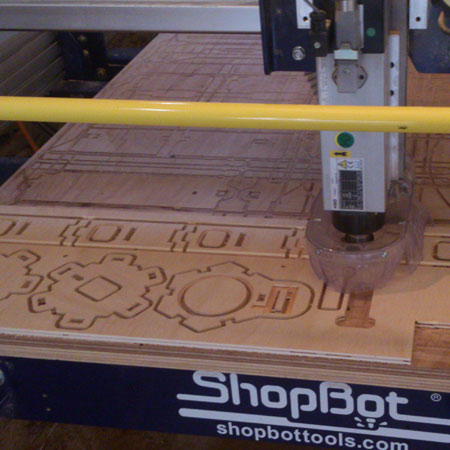
After exporting the G-code from V-Carve Pro, it was time to cut out the pieces with the Shopbot. I used a brand new 6mm up-spiral milling bit, and a 60 degree angle cutting bit.

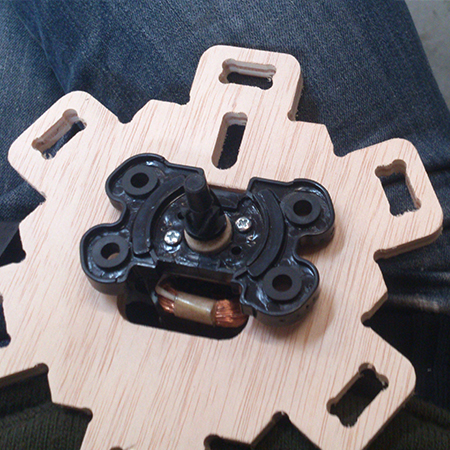
The pieces only needed minor sandpapering, and fitted together perfectly! The centrifuge still needs to be put together in terms of electronics. Besides the motor it should contain a Fabduino, an infrared sensor to sense rotation speed, and an LCD display to monitor and adjust rotation speed.
Files
Click here to download the 3D and 2D design/nesting file RHINO.