 Francesca Mereu
electronics design
The assignment for this week is to produce the Hello World board, adding at least a button and an LED to the original design, using some of the proposed software. Furthermore we should investigate the tools needed to simulate electronic designs.
Hello World board
I’m a designer and visual artist and I don’t have many experience with electronic design, so in order to experiment with this theme I started with the goal of creating a basic “ Hello World” board adding a led and a button.
Hello World board uses ATTiny44 as microconrtroller. ATtiny is produced by Atmel Corporation. Atmel The smallest in their AVR family of microcontrollers are the ATtiny series (8-bit core and fewer features, fewer I/O pins, and less memory than other AVR series, all of them are available in through-hole package).The AVR is a modified Harvard architecture 8-bit RISC single-chip microcontroller, which was developed by Atmel in 1996. The AVR was one of the first microcontroller families to use on-chip flash memory for program storage, as opposed to one-time programmable ROM, EPROM, or EEPROM used by other microcontrollers at the time.
First I spent some time on the ATTiny44 datasheet in order to have a clear idea of its pinout. I attached a link for this: (http://www.atmel.com/Images/doc8006.pdf)
Electronig design with Eagle cad software
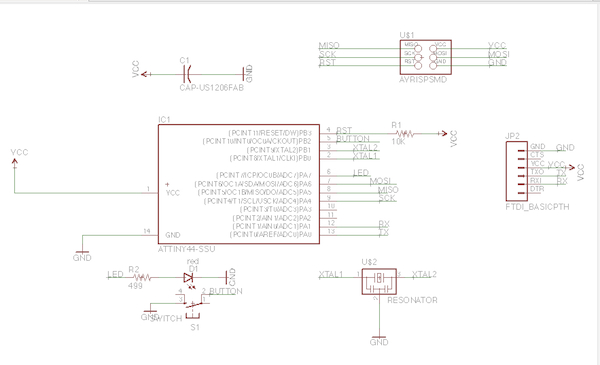
Getting back to the board, I started to model the schematics in Eagle, a software for designing prined circuit boards, and produced my first design, including a leds and the required resistors, plus a button. This was the first time that I design a board circuit so as first step I downloaded the software and the libraries of fablab and Sparkfun. EAGLE contains a schematic editor, for designing circuit diagrams. Parts can be placed on many sheets and connected together through ports. These are the initial design for the “helloboard”. Can you see some problems with the wire line near the ftdi element. It wasn’t good. I tried to change the line with the comand “miter”.
In order to complete the HelloEcho design in Eagle, I also used this time the network naming functionality, achieving a tidy look for the schematics.This is the final schematic board:
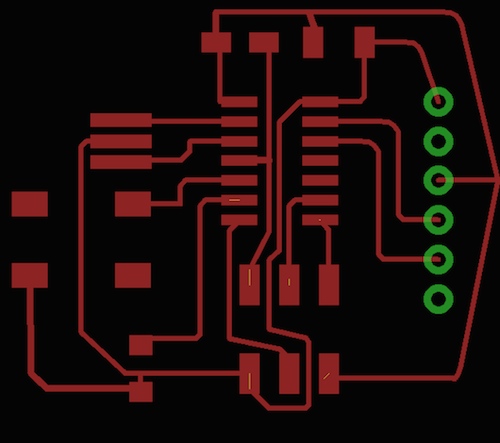
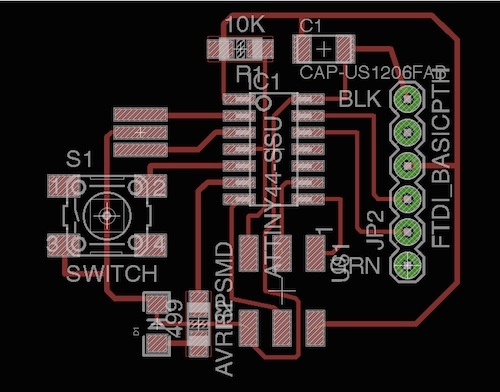
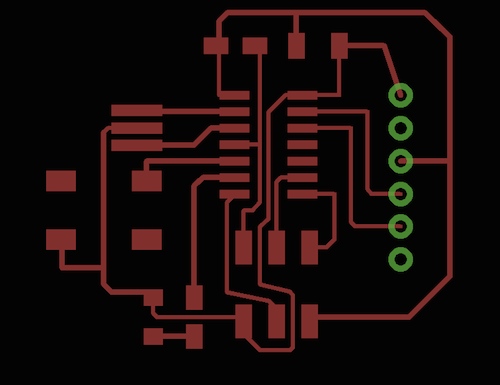
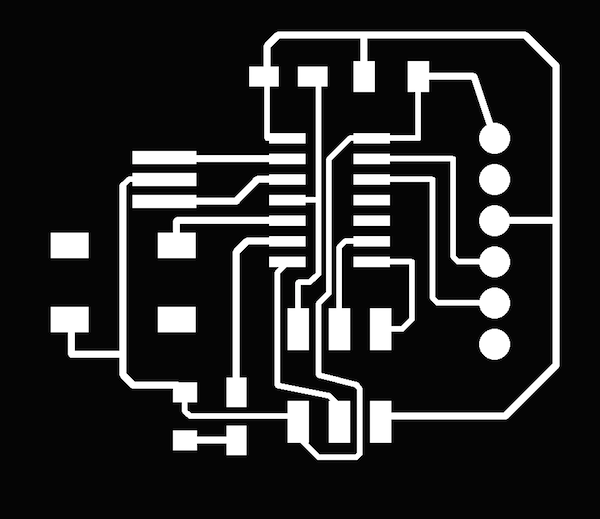
This is the final design board,with the layer’s element and the clean image, that I exported on .PNG monochrome with a resolution of 1000 px for the milling machine.
Milling and stuffing the board
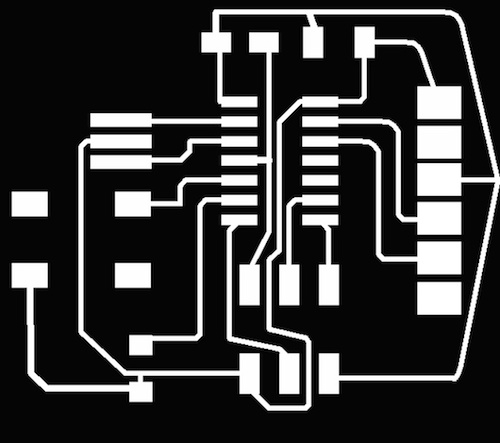
For milling the board I used the FabModules on Roland Modela MDX 15, site in FabLab Cascina. This is the loaded image board:
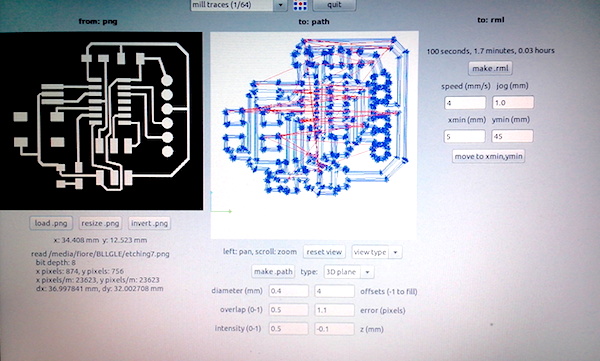
I was setting the parameters to milling:
- milltrace: 1/64
- cut: 1/32
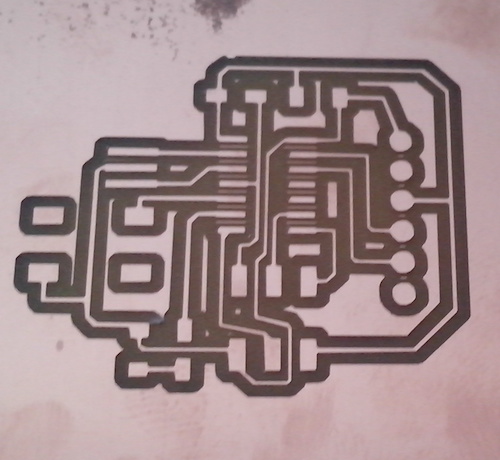
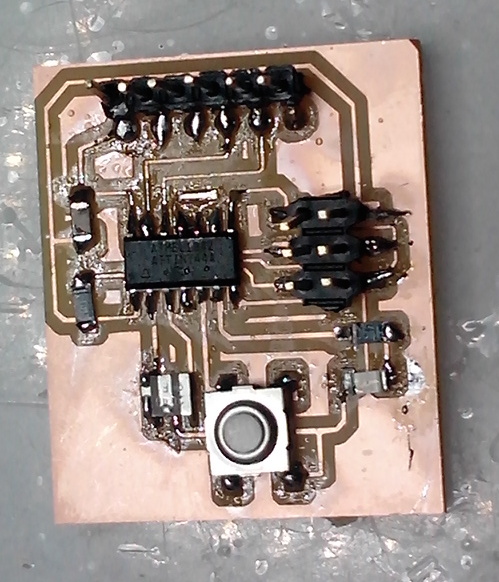
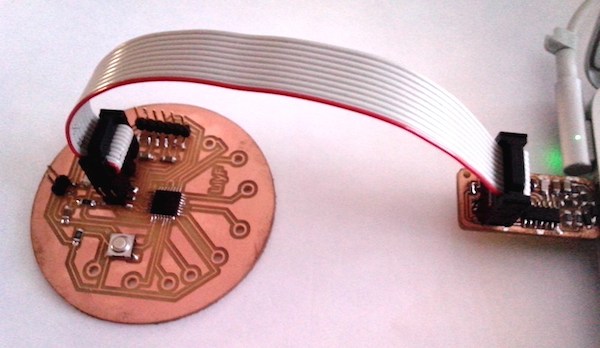
I didn’t many experience in soldering, so It was very difficult for me, but finally I stuff all the elements with the help of my instructor . That’s the final board.
Update on 21 April: lilyfab
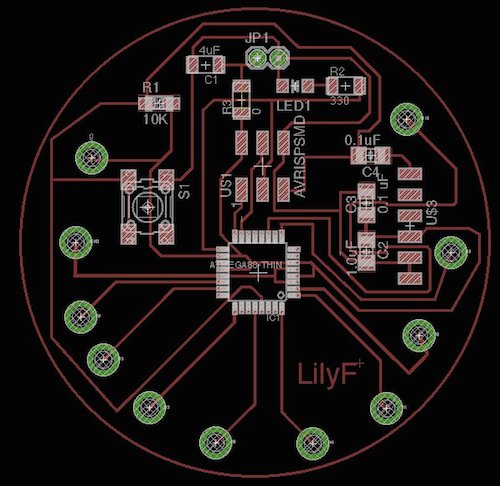
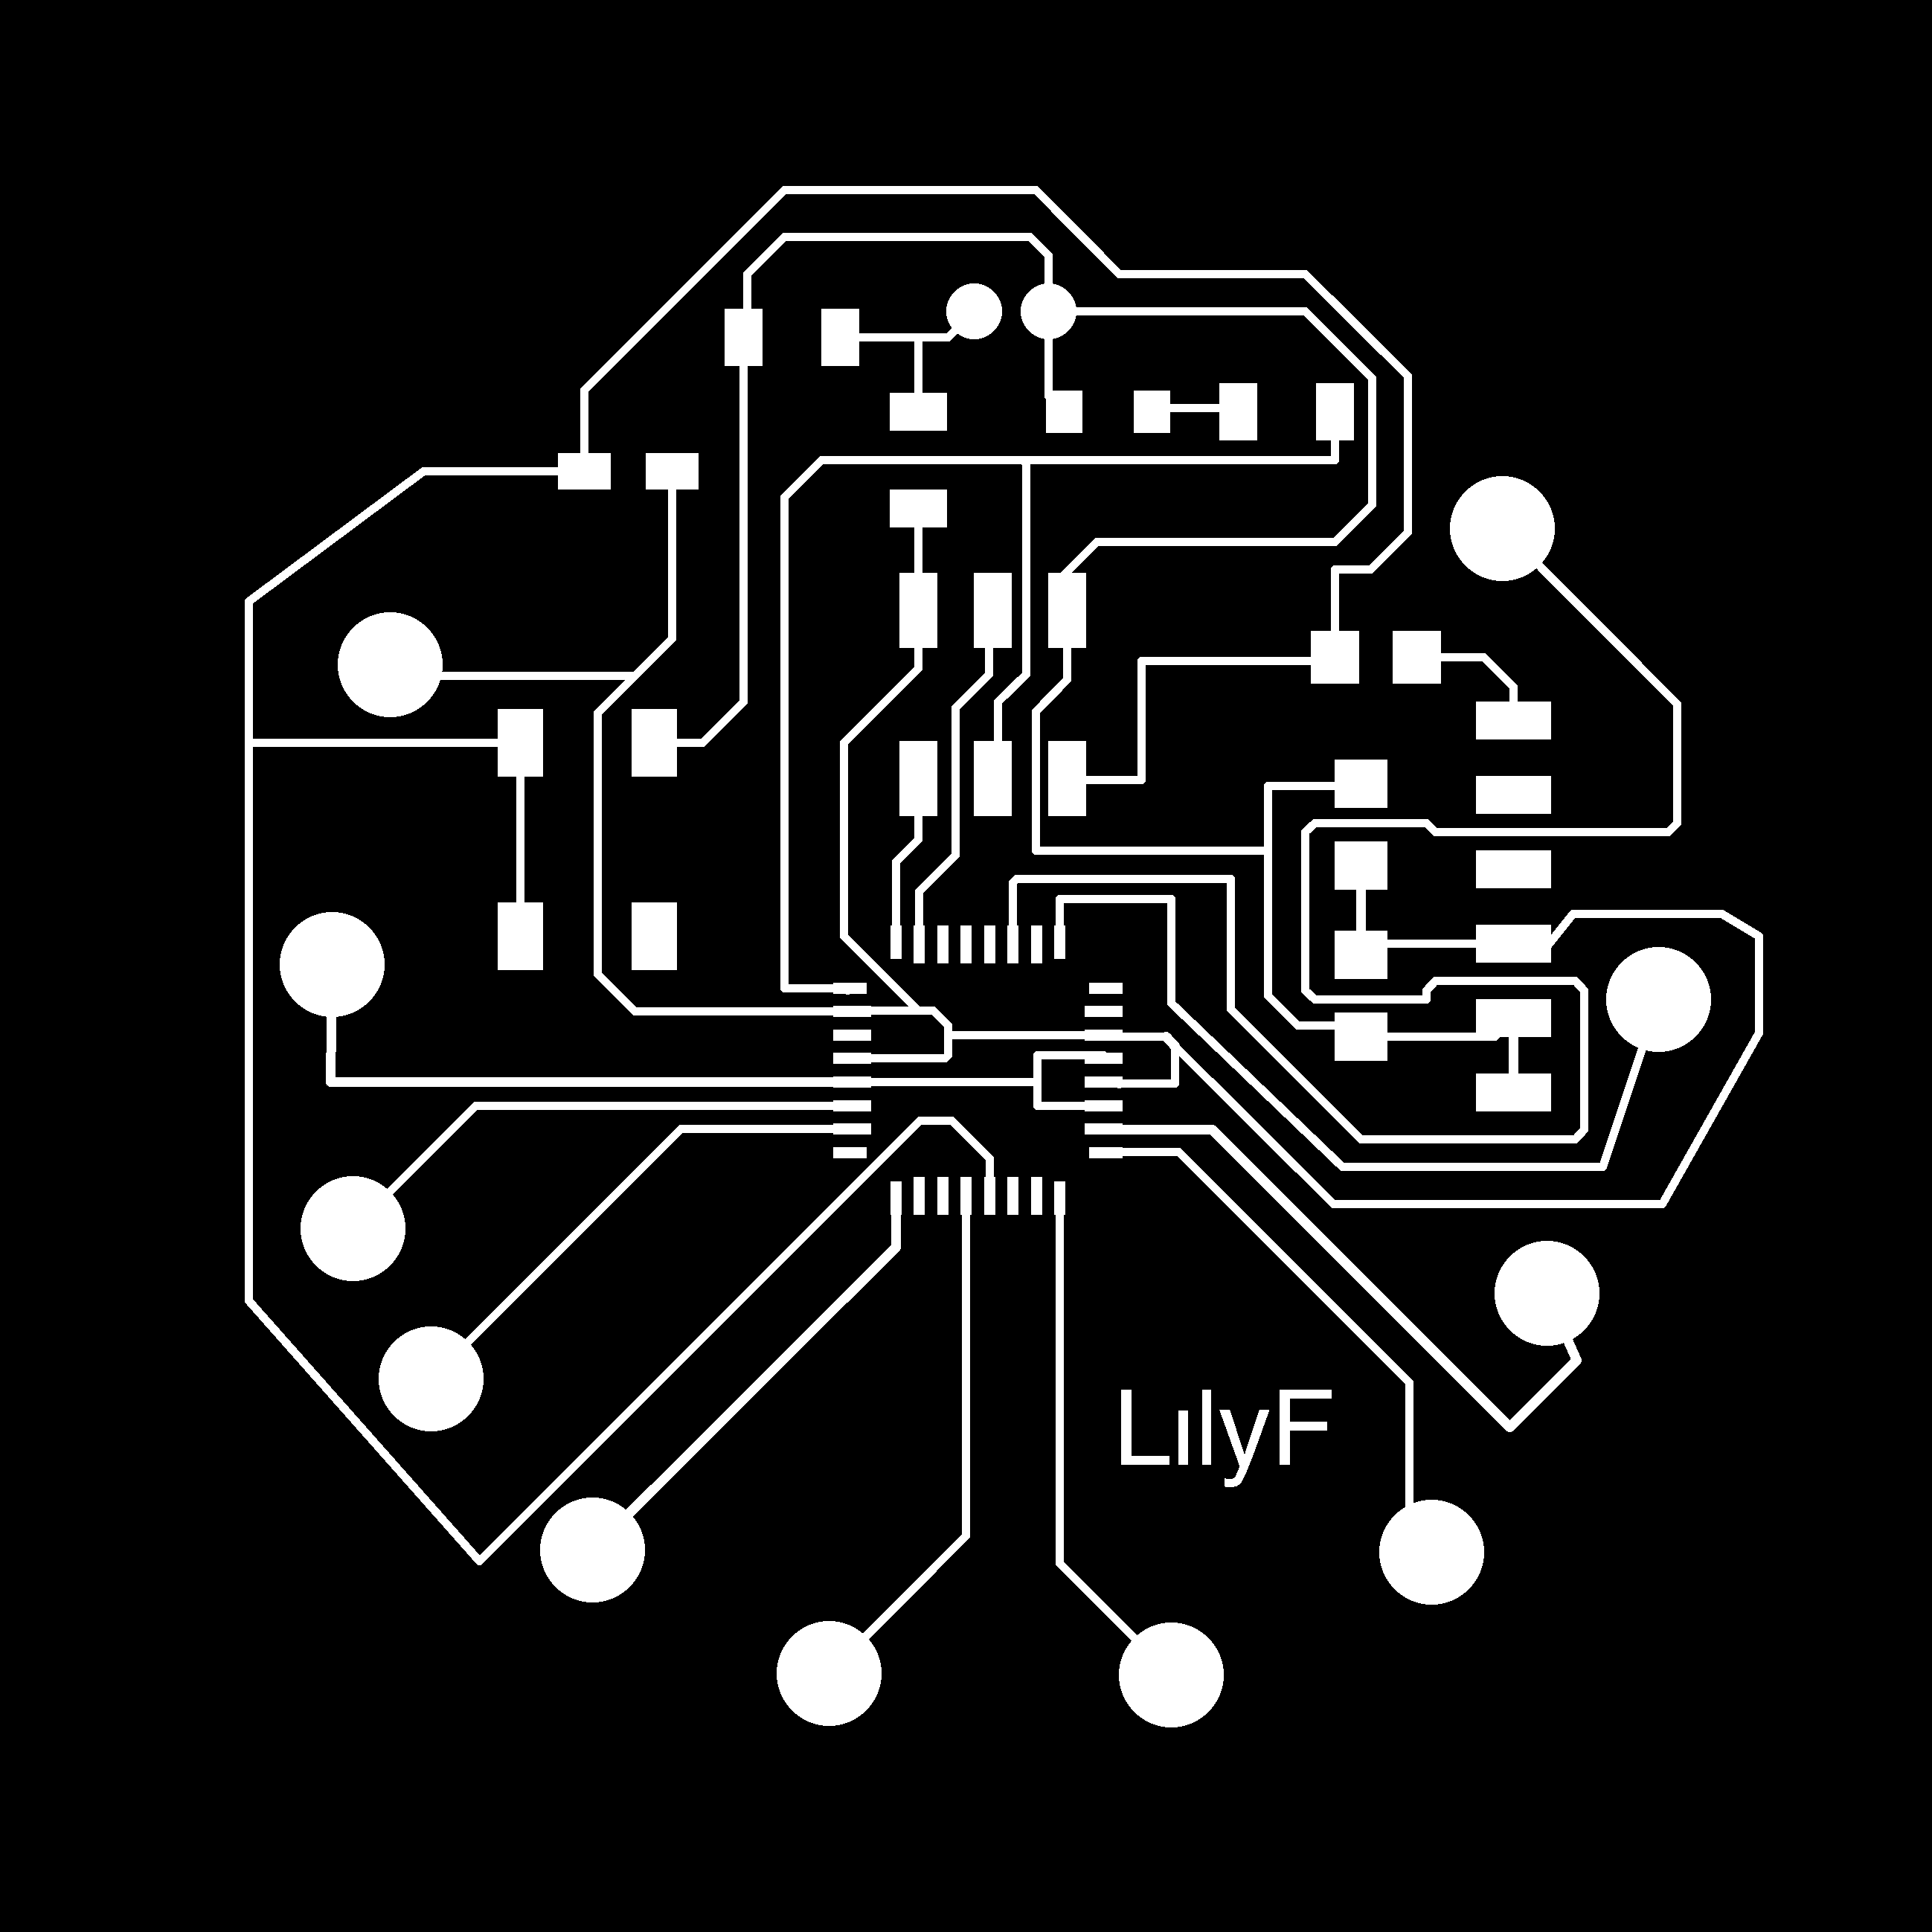
Since the first example board was not compliant with the Hello World board design, I decided to try another design. so I ‘m thinking to cloning the lilypad board. The LilyPad Arduino is a microcontroller board designed for wearables and e-textiles. It can be sewn to fabric and similarly mounted power supplies, sensors and actuators with conductive thread. The board is based on the ATmega168V (the low-power version of the ATmega168) or the ATmega328V. The LilyPad Arduino was designed and developed by Leah Buechley and SparkFun Electronics.
It maybe a part of my final project and also would give me a hard time having to create a single layer layout for components.
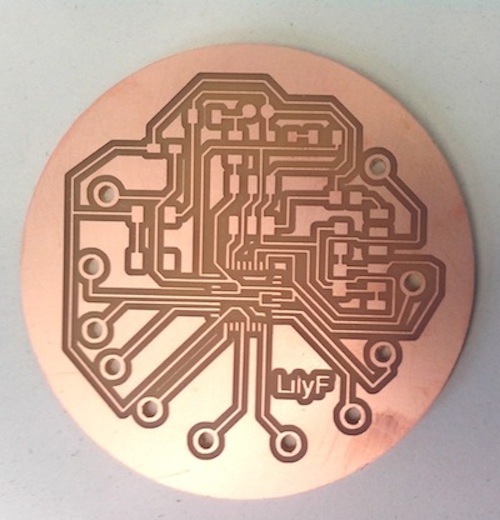
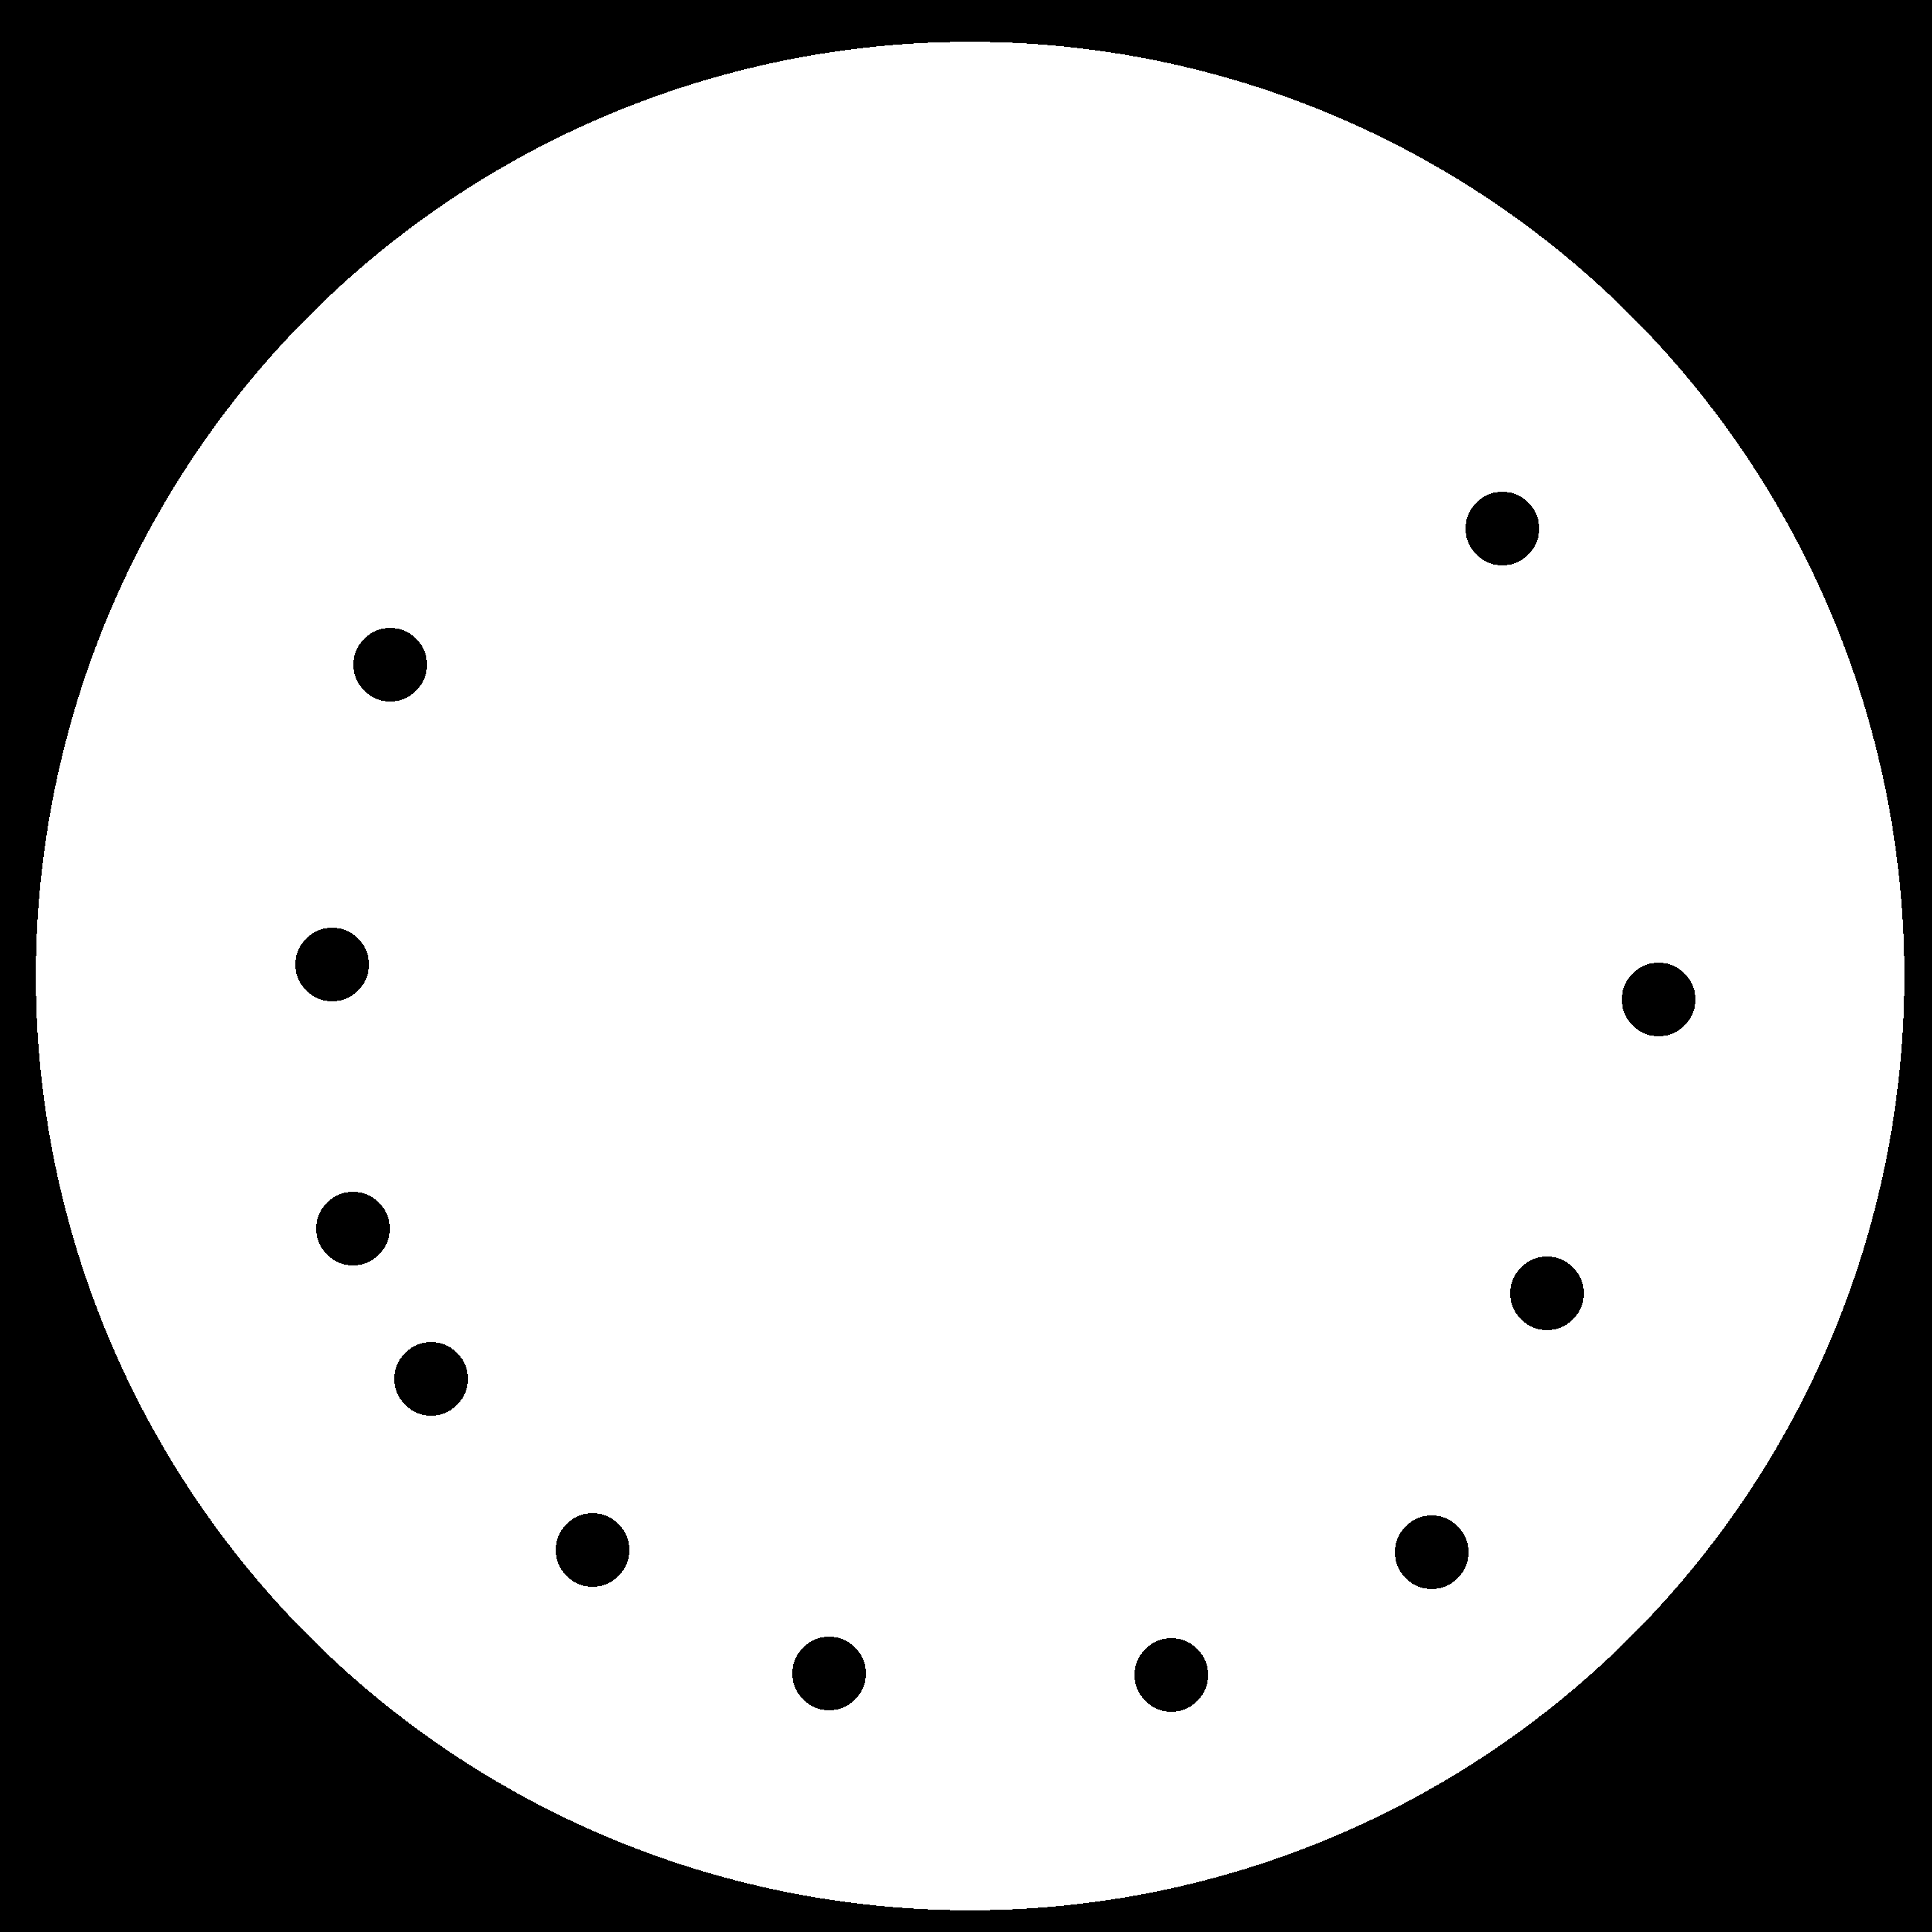
I started from the eagle schematic of the original board, and I modified to mill a new board with only one layer! The nex step is designing a second version of the board with two layers.
Then I programmed it in C:
Source Files
-helloboard
-helloboard-contourn
-helloboard-eagle
-helloboard-sch
-Lilyfab-eagle
-Lilyfab-sch
-Lilyfab-etching
-Lilyfab-sch
-Lilyfab-Code