 Francesca Mereu
3D scanning and printing
This week assignment is about creating a 3D model which cannot be made subtractively and print it, and possibly 3D Scan an object and try to print it too. I made several experiments for both tasks, using different software and approaches.
Modeling a 3D object for printing
This part is very important to testing a prototype of my model, so I decided use first my antimony’s model of the heel , and later a high heel model downloaded and modified by me with 123 Meshmixer
Also I was interested in studying the inherent limits of the FDM printing, as this is the technique used by the reprap Prusa and KentStrapper we have in the lab, trying to print objects with and without support structures and different plastic filaments
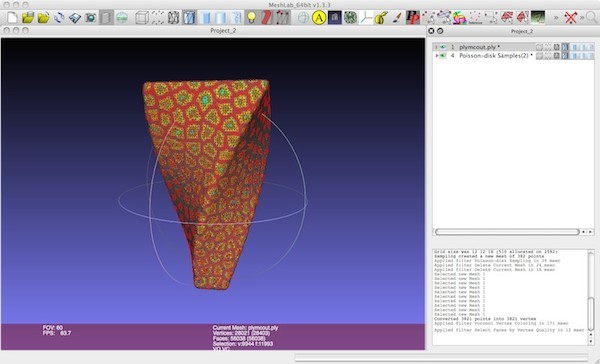
I started with a mesh created using Antimony, resulting in an overall shape for a small lamp I wanted to build, by cloning and scaling the same component mesh in order to achieve some organic look.
Creating voronoi wireframes
This alghorithm allows to segment a plane into poligons, starting from a point set. Each polygon has the characteristic that all the points in it are closer to the reference point than any other point in the point set. This basically creates a number of Voronoi Cell, whose boundaries when enlarged make up an aestetically pleasant wireframe of a shape. The same process can be applied to a solid object surface, resulting in an organic looking surface, similar to corals.
Voronoi is widely used in computer graphics. Many implementations exist for any programming language, and several tutorials are available on the Internet for creating this effect on 3D Models. I decided to use Meshlab, and went on learning how to create Voronoi wireframes for the modeled objects with it.
In Meshlab the process can be summarised as follows:
- Open the starting STL in Meshlab
- Reconstruct the mesh surface using VCG Reconstruction algorithm. This produces an appropriate mesh from the original one, also giving the opportuinity to reduce or increase the number of faces depending on the quality of the starting mesh.
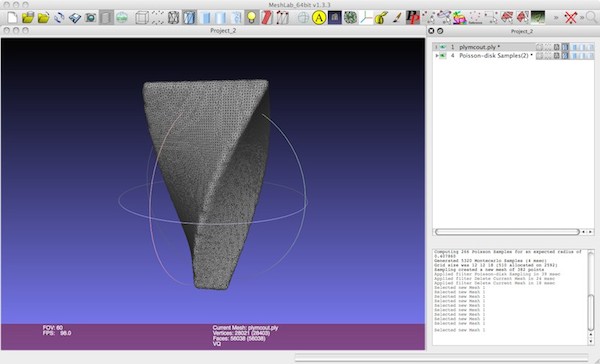
- Further smooth the surface using Laplacian Smooth .
4.Sample the mesh, using the Poisson method, in order to identify the points which will be designated as the lattice points for the Voronoi tesselation.
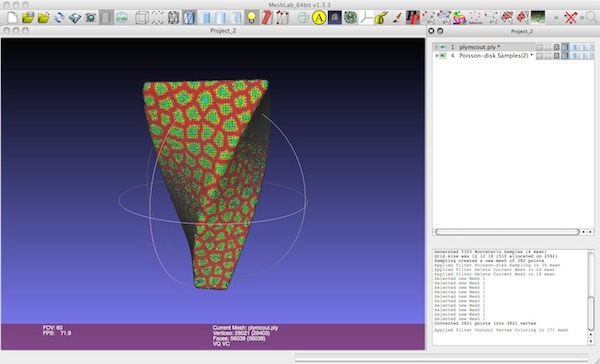
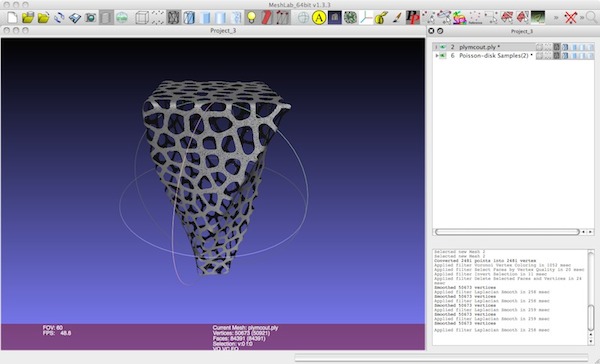
- Apply the Voronoi Vertex coloring algorithm to the reconstructed mesh.
6.Select faces based on Vertex quality. Tweaking the min and max quality settings allows to produce a thicker or thinner wireframe out of the unselected faces. Delete the selected faces, thus producing the basic wireframe.
-
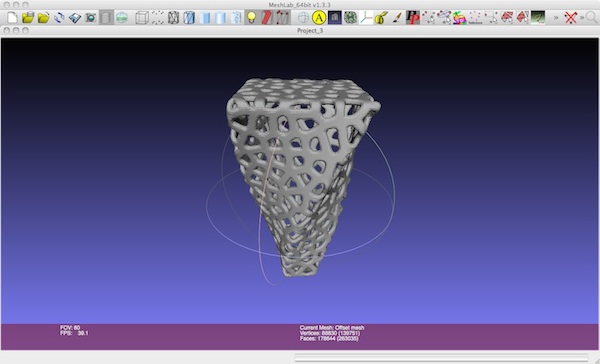
Further smooth the resulting wireframe, using the Taubin algorithm
-
Finally with the Uniform Mesh Resampling function you can add depth to the wireframe. This command creates a resampled mesh offsetting all the voxels in the original mesh by a given distance, then applying the Marching cubes algorithm to the resulting volume.
Remeshing a model with 123 Meshmixer
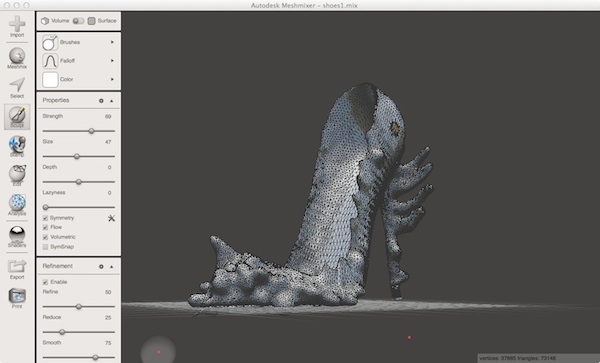
123 Meshmixer is a tool of 3D mashups and remixes. It’s a very good free software from Autodesk. I took a old model of high heel, that I had saved in the past and I thinkred to modify with MeshMixer. MeshMixer have a lot of tools. I used specials brush from sculpt, drag brush and inflate brush, and the result was good.
3-D printing the objects
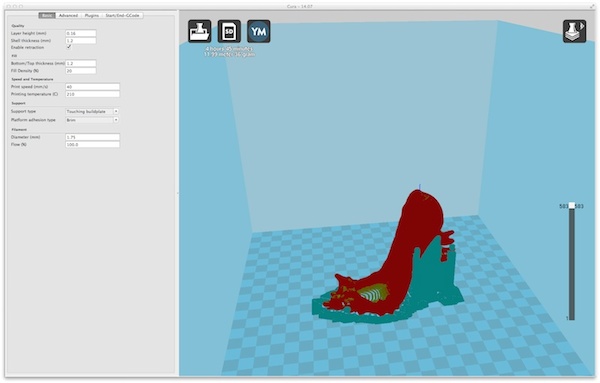
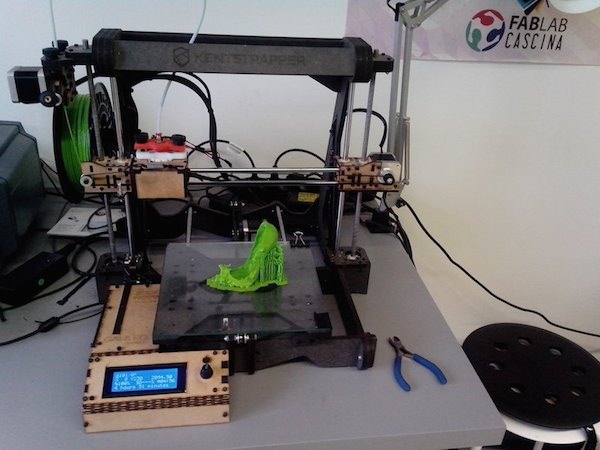
I moved the objects into the Cura software provided with the Kentstrapper and prepared it for printing. The shoes mesh required a support structure to be printed, and while this would be possible with other kind of objects, accessing and removing the support structure from the inside of the mesh wouldn’t be possible.
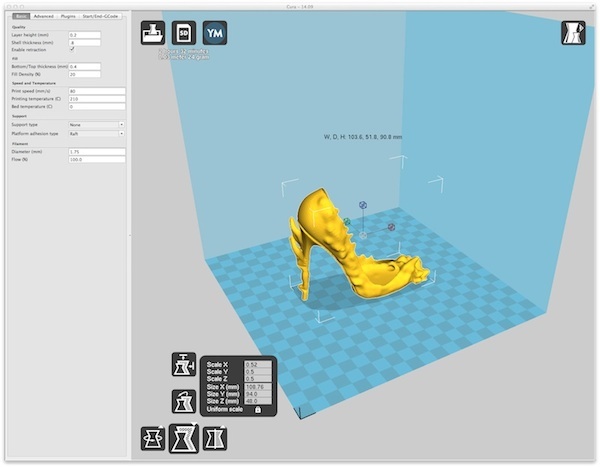
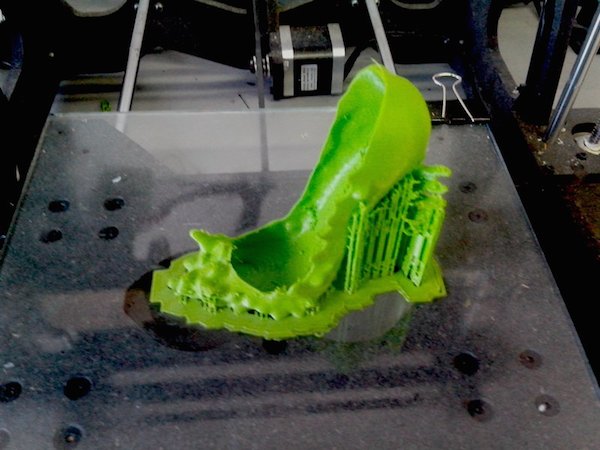
I scaled the object, because the size was bigger of the build plate. The process required a bit less than two hours to be completed, given I scaled the object down to few centimeters in order to reduce the printing time. The printed object shows a significant amount of artifacts due to some filament “skipping” problems during the process, maybe caused by the very small areas covered during each layer, but overall look was retained. I think that in fact these artifact add even more realism to the object. I think to use a green filament of PLA for this model. That’s the result:
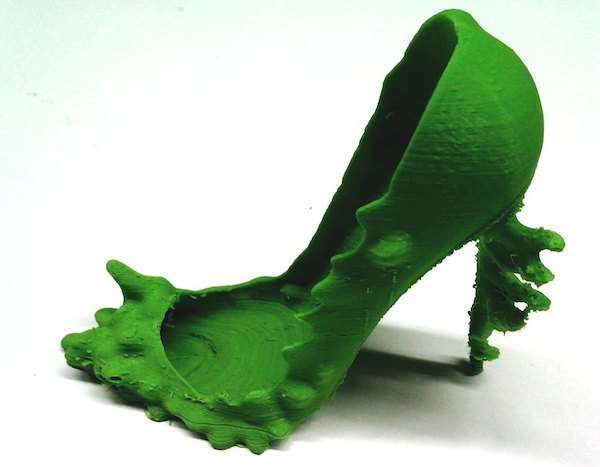
For the second object, the voronoy heel, I printed with a Prusa and I selected a new filament: colorfab XT. It is a copolyester filament produced from Amphora 3D Polymer bt Eastman Chemical Company. This filament has features excellent properties : high strength and very high toughness, odor Neutral processing, High Tg / improved temp. resistance.
3-D scanning objects
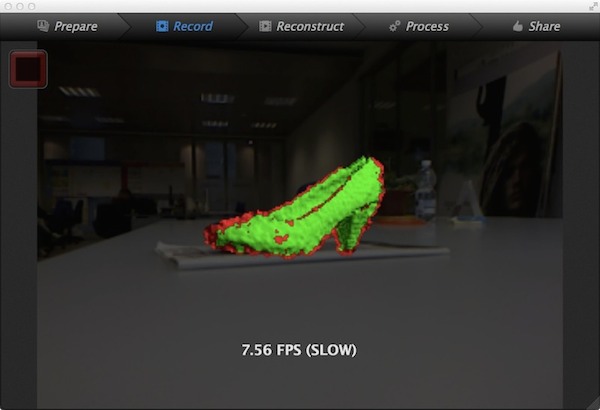
For 3D scanning I approached the task using the Android version of 123D Catch application. I initially wanted to scan my red shoes. The 123D Catch application requires to take several pictures from every angle, and it guides the user by showing circles with a number of tabs corresponding to the different required angles, both at the same level of othe object and from a top-view. It does so using the built-in compass of the mobile phone.

For experimenting with Kinect I tried two models. The same shoes used in 123DCatch, and a real human model. The dark hat proven to be a difficult subject for the Skanect too. Being uniform in color resulted in a poor quality scanned model, which presented holes on the top and didn’t reproduce very well the overall shape of the object. The application provides some features to fix the acquired model, but it deformed the model too much while fixing it. Also, the resulting texture was not matching the object at all.
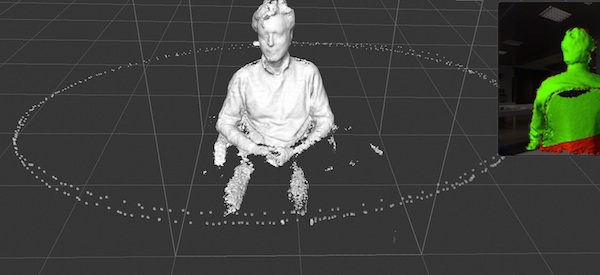
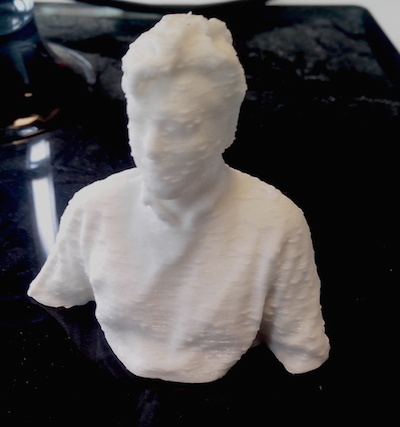
The second test with the human model, probably because of a much bigger scale did produce a good result. The scanning process was again very slow, and few scanning sessions were required to complete the whole process. The scanned mesh was very detailed, presented no holes and cropping only the torso of the model was straightforward.
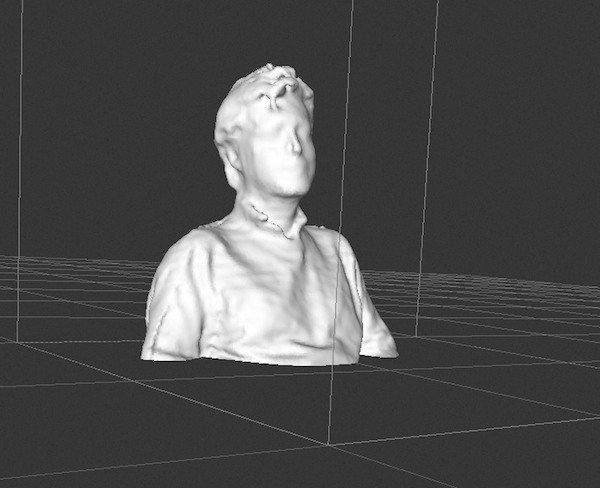
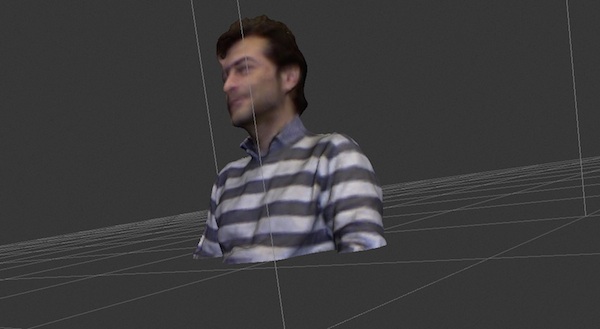
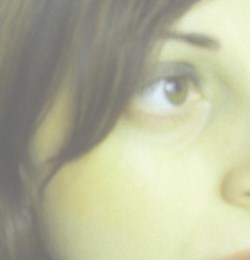
The scanned texture was quite accurate, except for the face of the model which looked distorted, but probably this was due to the model changing expression during the long scanning session.
Given the limitation of the free version of Skanect, allowing to export only 5000 faces objects, I must say the resolution is still acceptable for a small-size print.
Printing the scanned models
In order to validate the workflow I decided to print the two best models obtained from the scanning session, the shoes scanned in 123D Catch and the human model made with Skanect.
The shoes model resulted not very perfect print. Even if it had a high resolution, the cropped model obtained from 123D Catch was not manifold, and required fixing using Meshlab to be printed. This probably altered significantly the shape, also making it skewed on one side.
The human model was printed by a Prusa printer but the PLA it’s not very good quality and the print result with a lot of airbbubble.