Principles and Practice, Project Management
ASSIGNMENT UPDATE - 30th of June 2015
To start with Mercurial we must copy the access keys into the .ssh/academy folder (academy and academy.pub). After copying these keys, we'll create a folder in our computer where we'll save our FabAcademy files.
At first use, we'll have to clone the existing repository with the hg clone command using a terminal to our folder (in our case: FabAcademy2015/eu).
hg clone -v ssh://hg@fabacademy-local/academy.2015/Web/eu eu

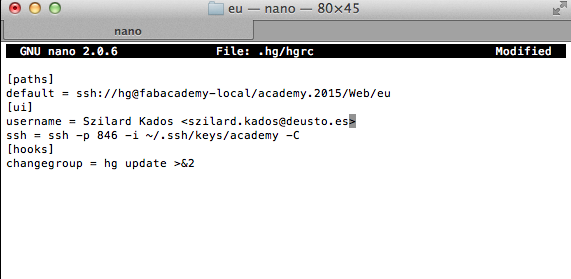
Then, we'll have to navigate to "eu" folder using the terminal and type:
nano .hg/hgrc

Once we have our fresh copy of the repository in our computer we'll have to repeat a “mantra” in order to upload our changes. To do this we'll have to follow these simple steps:
1. Save the possible changes in our repository: FabAcademy2015/eu/students/kados.szilard
2. Navigate to the "eu" folder using a terminal
3. Check the status of the repository using hg status command. Here we can encounter different options:
• ? before the name of a file means that the file is not tracked
• ! before the name of a file means that the file is missing
• A before the name of a file means that the file is added
• M before the name of a file means that the file is modified
• R before the name of a file means that the file is removed
o Ideally we have to get only A, M or R letters before every file and do not have any ? or ! signs
o If we have a ? sign, which means that Mercurial have detected new file(s) which are not tracked yet, we must type hg add to add the file
o If we have a ! sign, which means that Mercurial have detected a missing file, we must type hg remove the-complete-route/name-of-the-file to remove the file
o After all this we should check hg status again.
4. Next we should check if there is any change in the repository.
hg incoming
hg pull
(to download the latest version of the repository)
5. At this point, Mercurial will tell us something like:
hg update
6. We always have check the state of the archive:
hg heads
(if we have only a head it is ok, but if there are two or more heads, we will have to merge them with hg merge)
7. Next we will confirm the changes.
hg commit -m “Final Push”
8. Now, if we check the heads:
hg heads
(we should have only one head must appear and have the "tip")

9. Then test the files we'll going to upload with:
hg outgoing
10. Finally, and if we have the "tip", we'll upload everything to the central repository with:
hg push
A successful push would have a feedback like:
pushing to ssh://hg@fabacademy-local/academy.2015/Web/eu
searching for changes
remote: adding changesets
remote: adding manifests
remote: adding file changes
remote: added 1 changesets with 26 changes to 26 files
remote: 26 files updated, 0 files merged, 0 files removed, 0 files unresolved
In case of failure we'll never ever force Mercurial to push! We'll repeat all the process from pull.
ASSIGNMENT - 28th of January 2015
INTRODUCTION
The main goal of this class was to introduce us in to personal website development and project management tools. The assignment for this week was to develop a personal repository, where all our gained experience should reflect; describe and document our final project.
Personally, I have chose to develop my website in Dreamweaver, since I have experience with this program. My graphic design background allowed me to develop the website from scratch and have the desired control over it. Since I'm a graphic designer also, I tend to rely only on design, but I managed to maintain a simple structure and not overfill the page with secondary information.
PROJECT DESCRIPTION
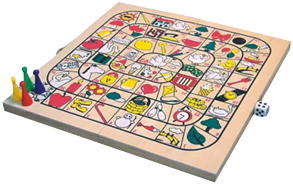
Since I'm interested in the implementation of the new technologies in everyday objects, I started to play with different ideas of implementing the new technologies in something traditional. From these wild ideas it occurred to me one really special: Interactive Goose Game. Not the traditional Goose Game where two children are playing each other face-to-face, but the interactive one! The one you can play over the Internet! A traditional game which connects to the Internet, synchronizes with another game and the users can play each other over the Internet.

The project itself can be a really ambitious project, but in the end I think it will worth it. In the next steps I'll try to describe the technical characteristics it may require the mentioned interactive game.
From mechanical point of view we would have only X and Y movement, which can be controlled by two stepper motors. These motors will move the token, which is synchronized with the other game over the internet. The actual movement (since the token is not fixed to the board) it can be made with magnets. The principal magnet moves along the X and Y, and drags along with him the token from the board. It can be made, but will have to check interference issues if they are any.
From electronics point of view a microcontroller will be needed for the game itself, and another one for the dice. Other electronic parts may include: bumpers, stepper motors, communication controllers, accelerometer, LEDs, etc.
From programming point of view a microcontroller can control all the movements, all the data income and outcome would happen with the communication controllers. If the dice will be connected we can control the token's movement even locally.
From 3D fabrication point of view I will have to design and build a slim box, which would contain all the electronics, making sure that everything fits together perfectly and works smoothly.


