Weekly_Assignments :
-    design, make, and document a press-fit construction kit

The task for this week was to design and build a press-fit kit using vinyl cutter and laser cut. Moreover, our instructor wanted us to gain extra credits by creating a vinyl sticker.
intro…
While looking for some examples to take inspiration from, I stumbled upon a peculiar way of working with cardboard, as shown in this video at the minute 2:00

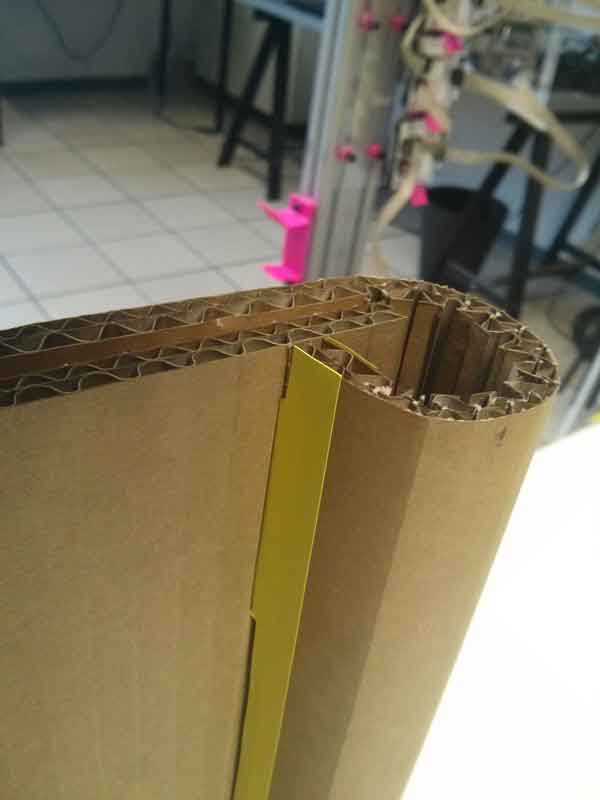
The video shows how to perfectly bend the cardboard cutting the opposite side in a very simple way.


the idea
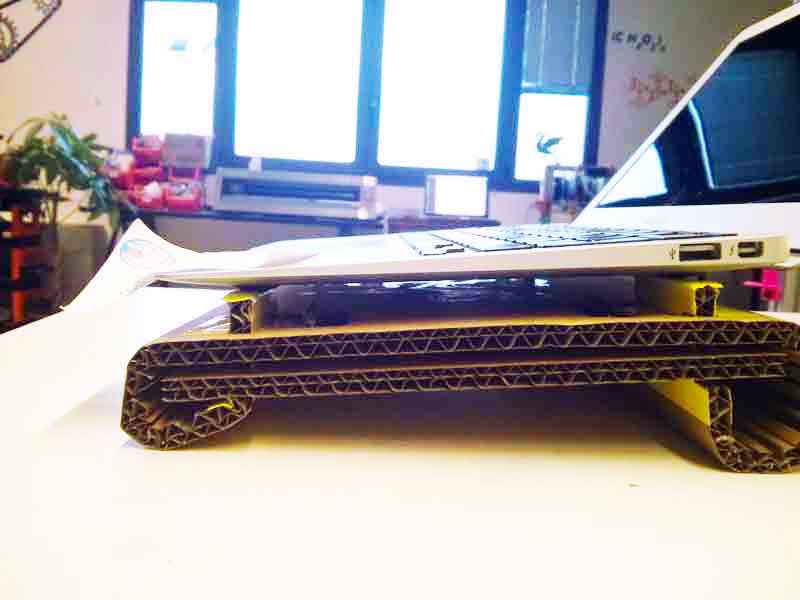
often use my macbook pro in the laboratory and I have to lay it over tables with dusty surfaces, that could scratch my precious laptop…so that, instead of buying an item like this (which litterally may cost a fortune, like 400 dollars to put your laptop on this way-too-much prestigious piece of wood) I wanted to create something that could suit my needs.
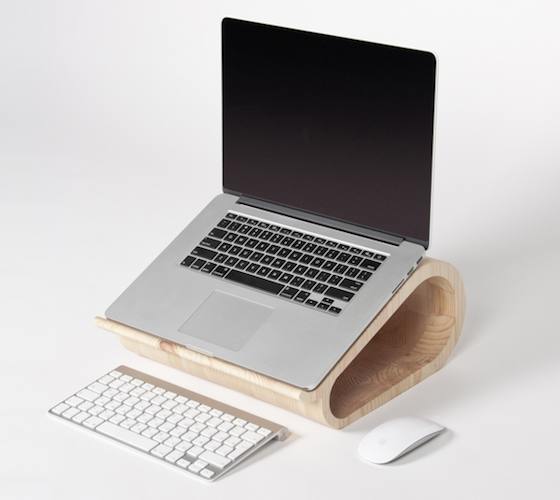
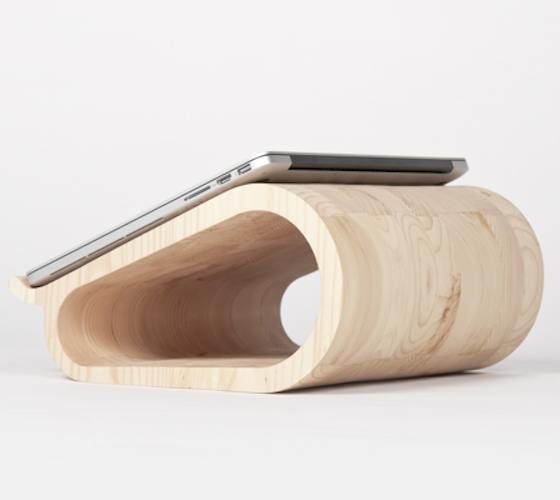

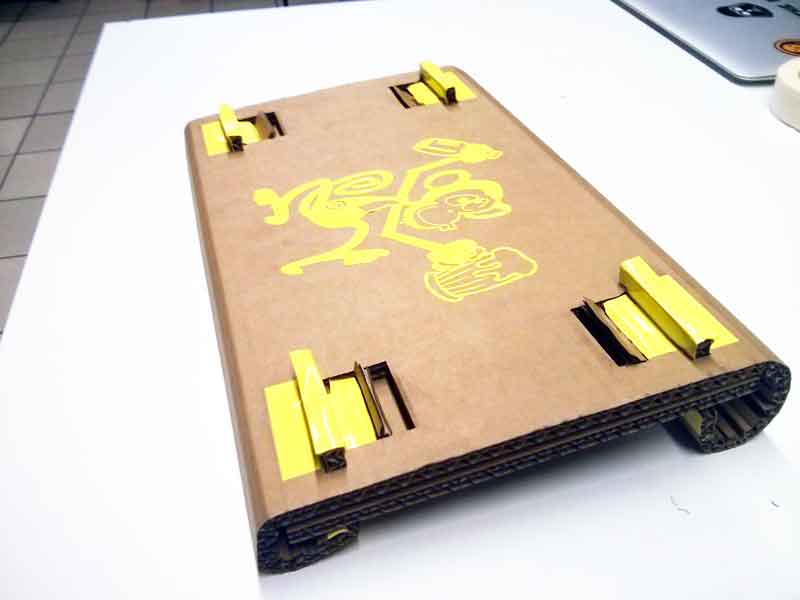
I wanted to spoil this assignment to create a laptop stand with a parametric configurator:
- using wates of cardboard or wood
- which can be easily built with press-fit joints
- including the vinyl cutter in order to make it cuter and less anonymous
workflow
Parametric project and test
-After writing some notes on a sheet of paper and writing a wrong code in OpenScad,
these are the settings to be included in OpenScad to generate your own laptop stand…obviously adding the kerf=K
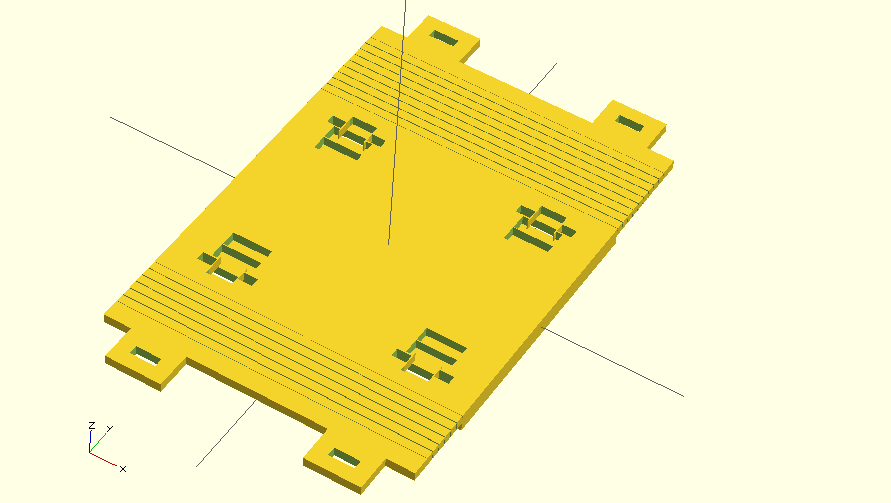
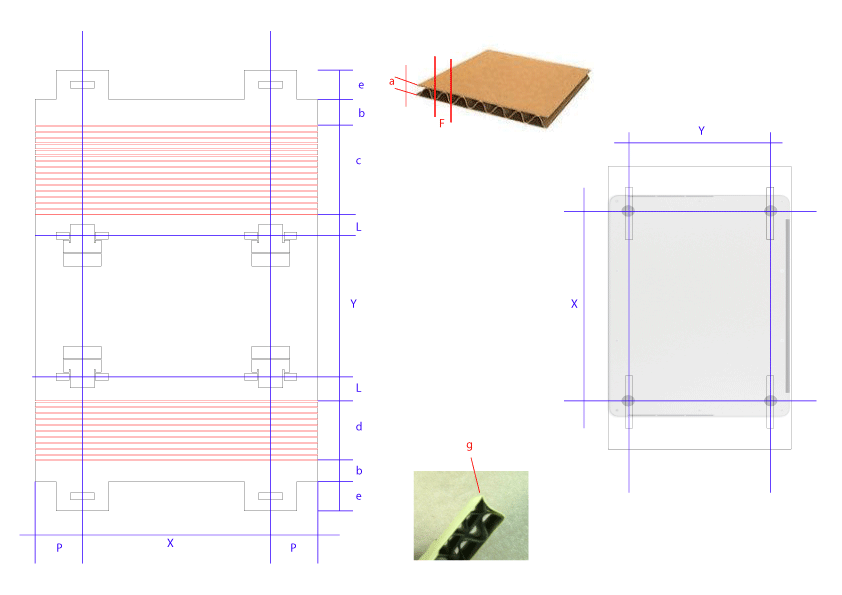
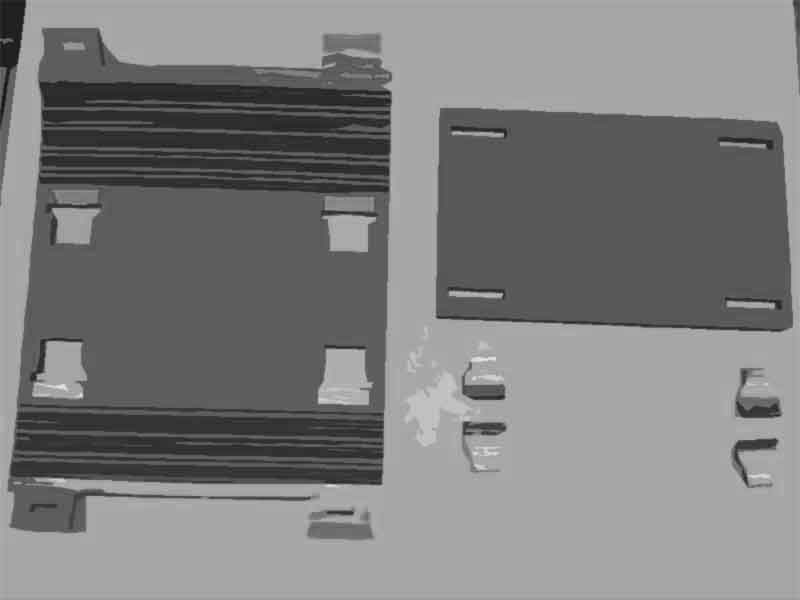
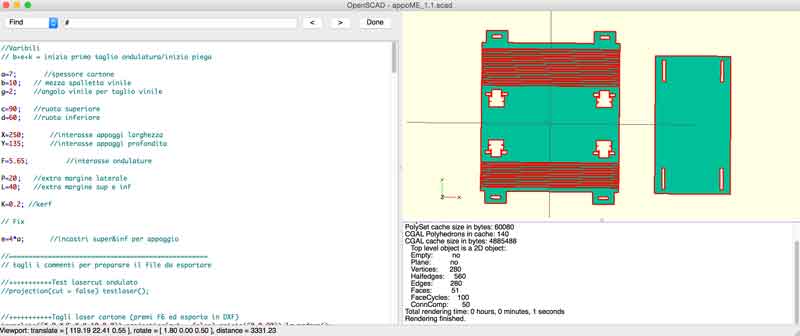
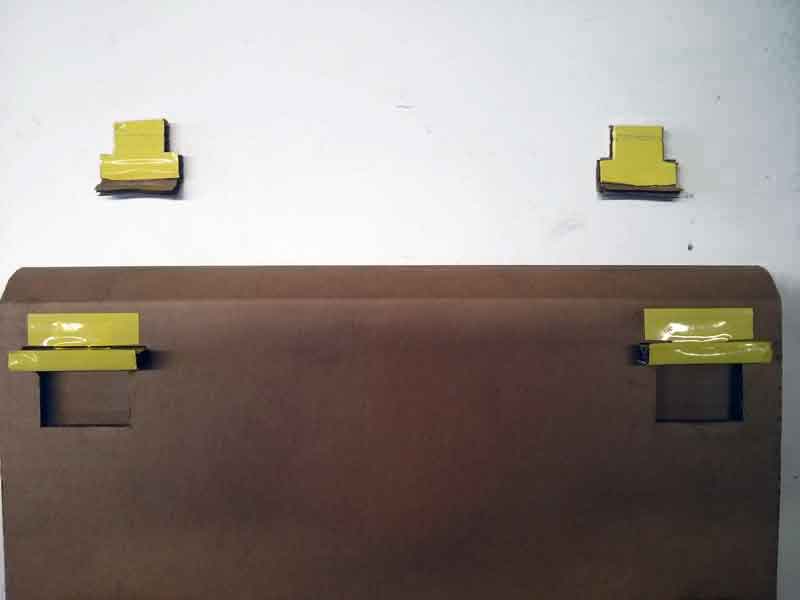
Once I put in the measures of my Mac and the cardboard (such as thickness and base dimples) I just had to export the file in DXF and uncomment (meaning removing “//” in the second line after //+++++++++++Laser Cut cardboard (press F6 and export DXF) as shown below
//+++++++++++Laser Cut cardboard (press F6 and export DXF)
translate([X+P+X/5+K+K+10,0,0]) projection(cut = false) rotate([0,0,90]) layerdown();
projection(cut = false) overup();
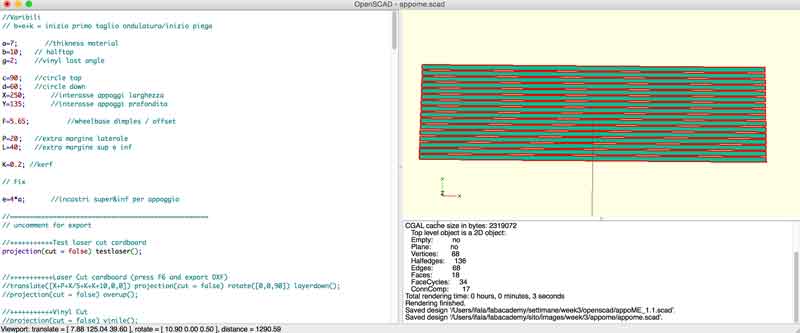
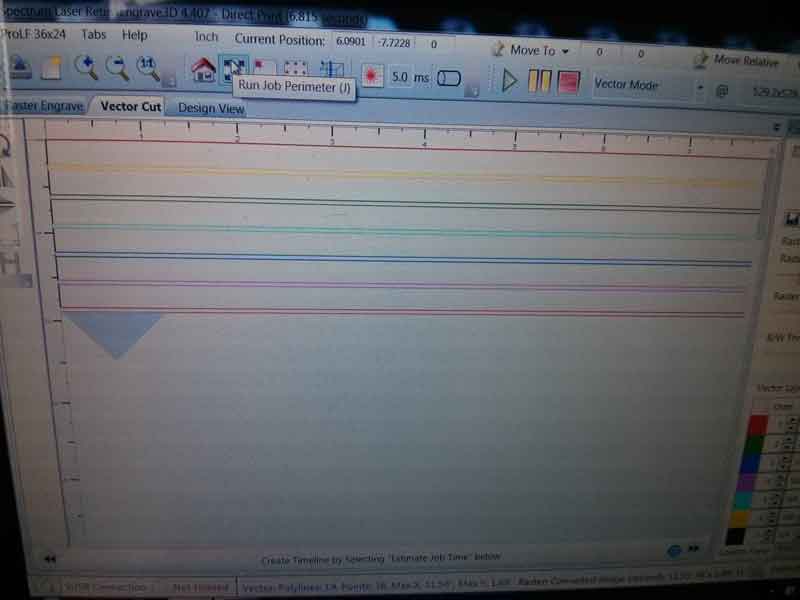
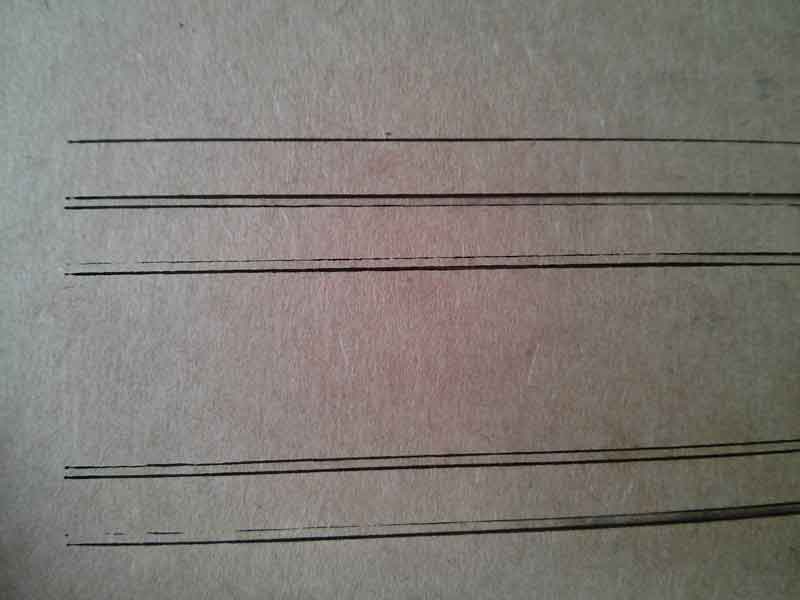
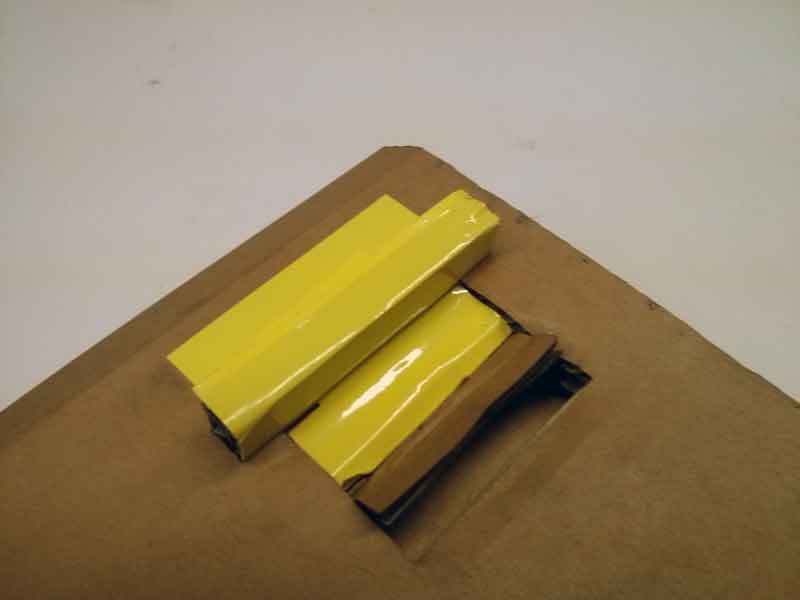
I have also created a small test to understand the power of the laser cutting and check the cuts in the flexible section of the project.
//+++++++++++Test laser cut cardboard
projection(cut = false) testlaser();
modify in Autocad
-Unfortunately, OpenScad doesn’t export colours, so I had to use Autocad in order to open the dxf and change the colours of the cuts
I began with editing the file to test the power of the laser cutter…


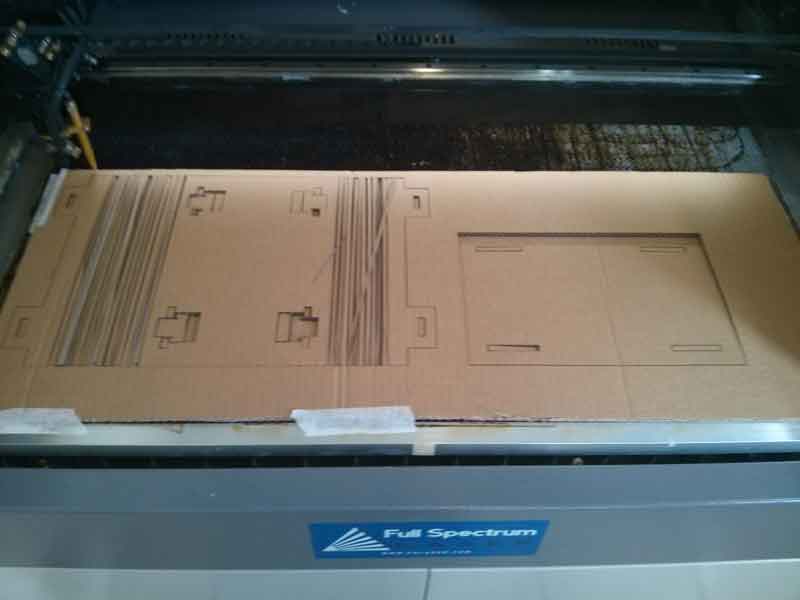
Lasercut!
- Unfortunately we can not use the fabmodules to send in cutting, but we have to create a pdf and send the job directly from the PC connected to the laser cutter.


After a few moments of discouragement, I realized that the cardboard was different from the one I used in the cutting test.
Looking around in the FabLab I found another piece of cardboard similar to the one I used in the laser cut test…In the meantime, my instructor asked me to change the parameters of the file, to test the project for his MacBook Air.
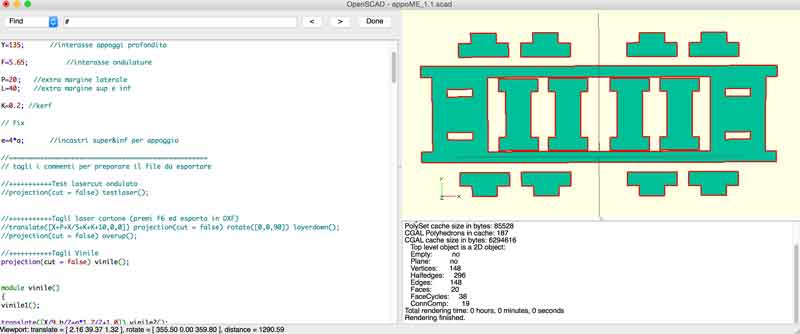
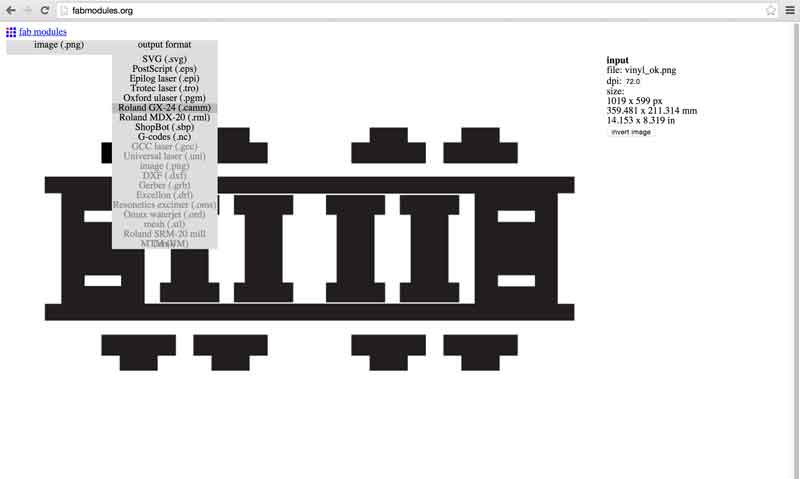
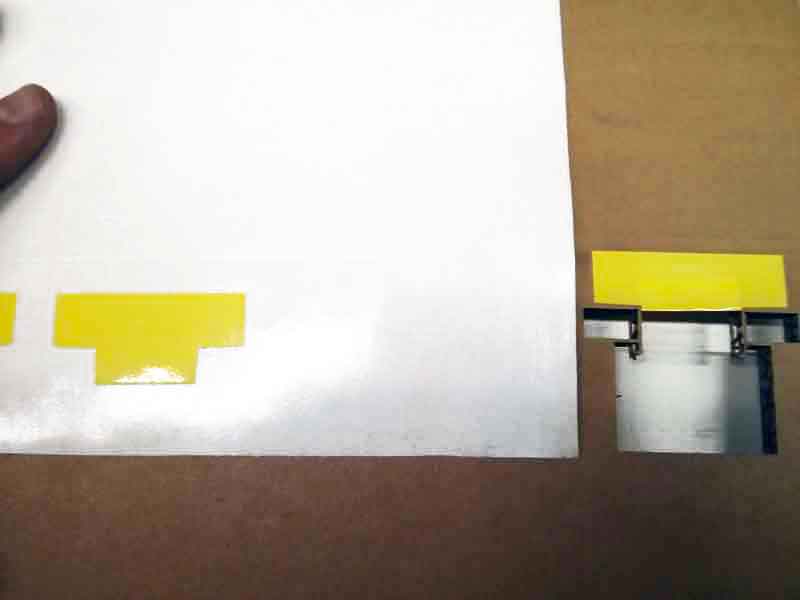
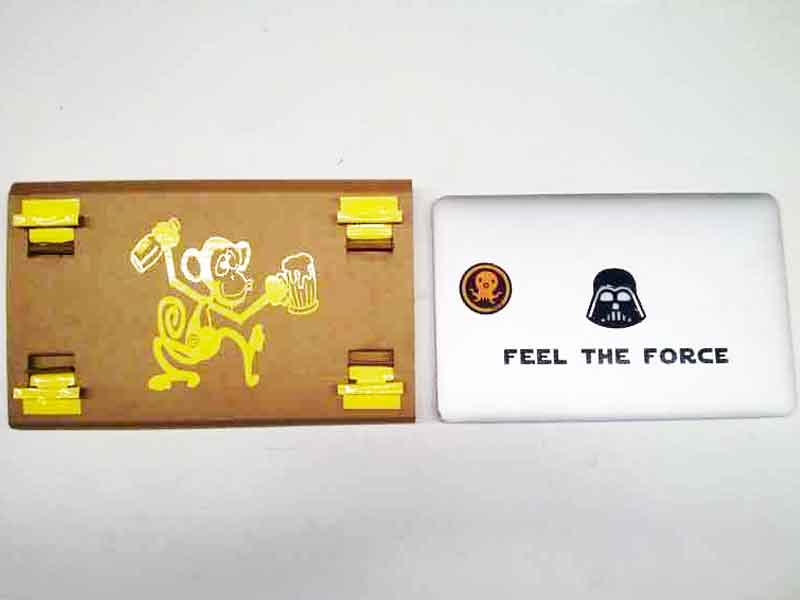
vinyl cut!
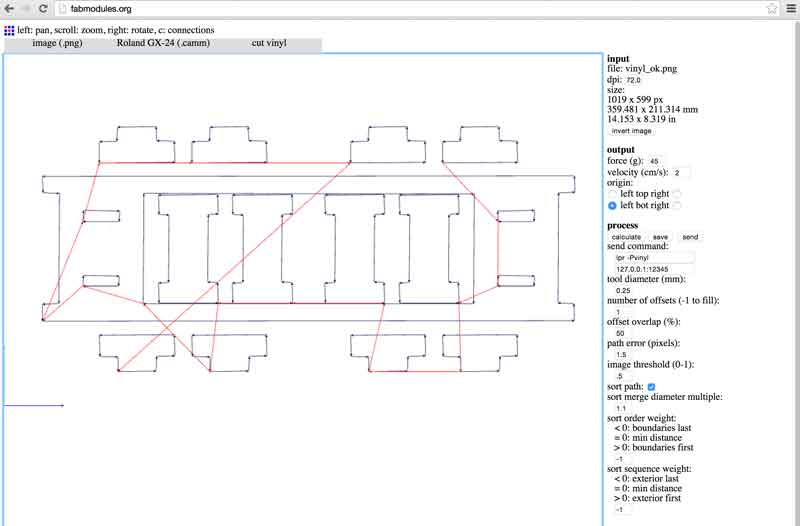
- Using the vinyl cutter with fabmodules is really easy and fun!
//+++++++++++Vinyl Cut
projection(cut = false) vinile();


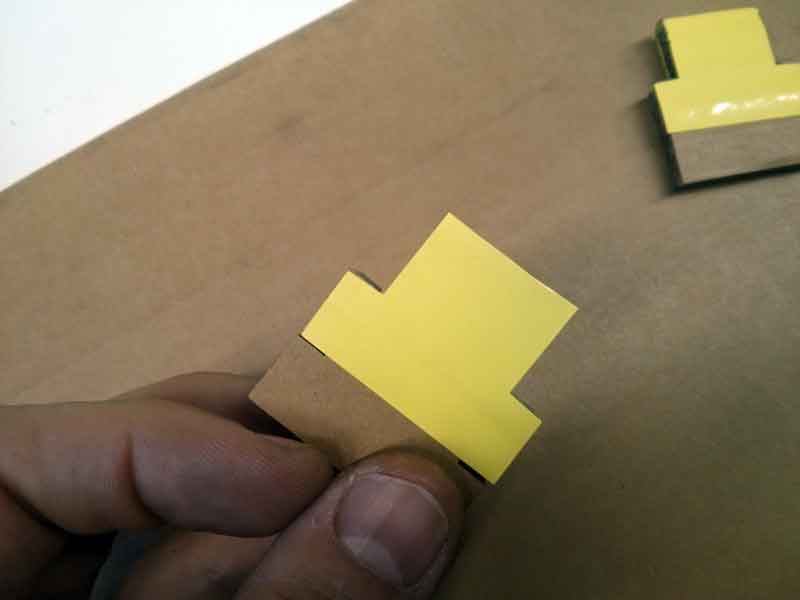
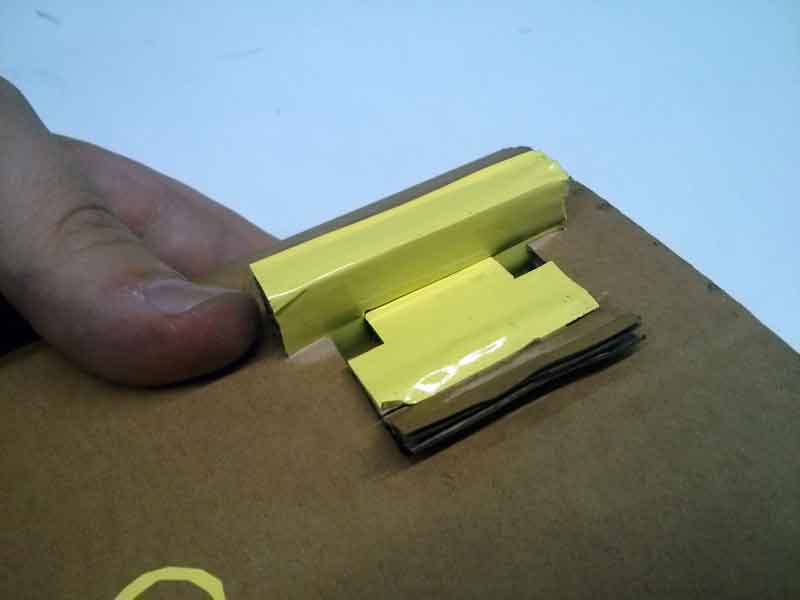
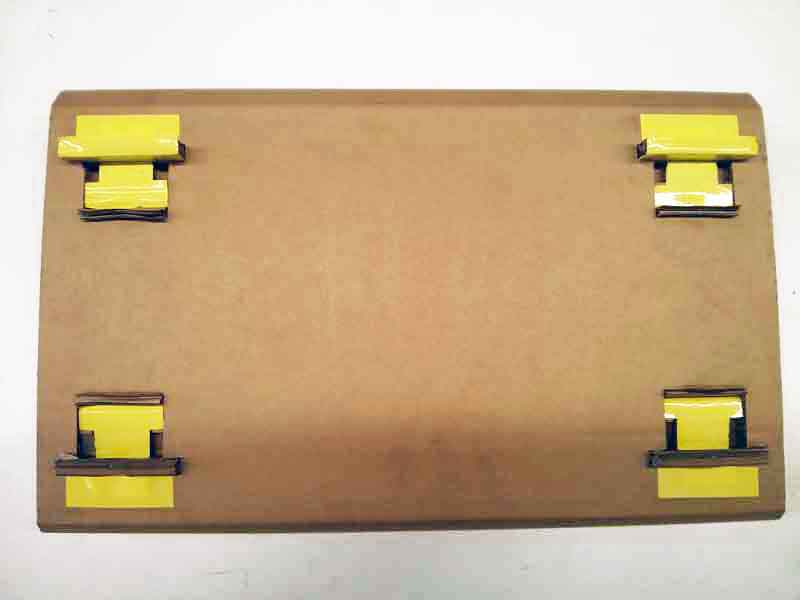
Build !


conclusion