
Weekly_Assignments
The assignments for the first week are:
- to build our own website github version[^1]
- introduce ourselves
- introduce our final project and sketch some ideas
- play with mercurial and git (commit…pull ..push)
- plan and sketch final project
set-up ”jekyll foudation markdown”
After setting up a ready made foundation-jekyll-markdown web site as shown in/with this tutorial
and following the tutorial instruction to set up the name of the repository (where I forked the ready made site) with “myusername.guthub.io”
I’m now online!
git and github setting up
I have download a template website in my mac and I try to use git via terminal :
First I cloned the repository locally:
git clone https://github.com/ifala/ifala.github.io
Then I copy the site inside my own folder called “sito_fabacademy”, and added it and its files to virtual index:
git add -A .
With the modifications inside virtual index, I can now commit to my local repository:
git commit -m "sito"
Just before pushing (command - git push) I pulled, so I’m sure that if anybody in the meanwhile made any push I get his modifications:
git pull origin master
Finally I pushed my modifications on the remote repository:
git push origin master
for modify the site I downloaded Textmate , very useful to modify and write in various programming language.
Install Jekyll
As described in this tutorial the best way to install jekyll is via rubygems
Workflow:
- download/install rubygems
- Follow Jekyll installation here
- Via terminal (OSX) go to the cloned folder of website template..and :
$ jekyll serve
- now, inside http://localhost:4000/ you started a development server where you can control the update of your site before update your github folder by using commit and sinc command.
Kramdown
(updated 31/03/2015)
For building a new post, you must create new file inside the folder _post with this type of configuration:
file: 2015-01-31-week1.md
---
layout: post //in this type of theme exist 3 type of layout: home - page - post
title: "Principles and practices, project management" // add name of article/post
description: "week 1" // add some description
category: Class_assignments // add_category
tags: [jekyll, kramdown, gems, foundation] // add tags directly connected to post
imagefeature: principles-and-practices.jpg // add in the root site an image that is visualize in the start of page with animation (I prefer redimension and add some filter into image)
---
Here you can write the text of your post/page…in KRAMDOWN
- what is kramdown?
kramdown is a sub language for programming easy web page. You write in kramdown (markdown alternative but very similar) and the jekyll serve translate/convert the code in html.
- Why use kramdown/markdown and not direct html code?
because is more fast and intuitive (for bold simply add before and after the world “**”)
- where I can learn to use kramdown?
Kramdown (markdown too) is really well documented, here I finded all that I need to make page, insert image, tab, paragraphs etc etc.
Foudation5
(updated 31/03/2015)
“Foudation is a responsive front-end framework” wikipedia
using the pre-compiled CSS file I gave a modern apparence to my site.
for a better experience of use consider to look the documentation here
Font Awesome
(updated 31/03/2015)
Useful scalable vector icon used by css for color size etc etc…
example how to compose html icon code
### Font Awesome <i class="fa fa-circle-o-notch fa-spin"></i>
top menu
(updated 20/02/2015)
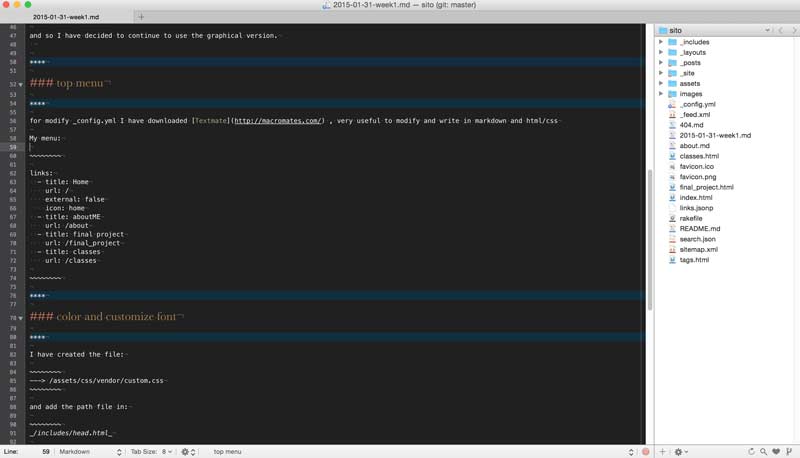
My menu:
links:
  - title: Home
    url: /
    external: false
    icon: home
  - title: aboutME
    url: /about
  - title: final project
    url: /final_project
  - title: classes
    url: /classes
color and customize font
(updated 20/02/2015)
I have created this file to change the font dimension to better control the image size and :
---> /assets/css/vendor/custom.css
.latest_updates {
	list-style: none;
	margin-left: 0px;
	padding-left: 0px;
}

ul.latest_updates li {

	padding-left: 0px;
}


.notepad-page-content > div:not(.notepad-page-title) a, .notepad-page-content > div:not(.notepad-page-title) code {
	color: grey;
}

.notepad-page-content > div:not(.notepad-page-title) ul, .notepad-page-content > div:not(.notepad-page-title) ol {
padding-left: 0;
font-size: 1.125rem;
color: black;
}


img[alt="mini"] {
  max-width:  200px;
}

img[alt="normal"] {
  max-width:  450px;
}

img[alt="big"] {
  max-width:  600px;
}

img[alt="verybig"] {
  max-width:  800px;
}
Some example to better undestanding difference between image dimension:
original image size (800x600)

verybig image size max-width:800px
big image size max-width:600px
normal image size max-width:450px
mini image size max-width:200px
and add the path file in:
_/includes/head.html_

    <link rel="stylesheet" href="//ifala.github.io/assets/css/vendor/normalize.css">
    <link rel="stylesheet" href="//ifala.github.io/assets/css/vendor/nprogress.css">
    <link rel="stylesheet" href="//ifala.github.io/assets/css/vendor/foundation.min.css">
    <link rel="stylesheet" href="//ifala.github.io/assets/css/style.css">
    <link rel="stylesheet" href="//ifala.github.io/assets/css/post.css">
--->    <link rel="stylesheet" href="//ifala.github.io/assets/css/custom.css">
This is the sequence of files for file creation final css.
difference post visualize btw classes / final project
I wanted to see in a different way the two page, the classes page only visualize the post inside post folder which have categories = class_assignments in reverse “reversed” list of insert date:
\`\`
\`<ul class="post-list">\`
\`<li><time datetime="2015-01-31T00:00:00+01:00" itemprop="datePublished"><span\` \`class="6-psecondary radius label">31 January</span></time> | <a href="/class_assignments/week1">Principles and practices, project management  </a></li>\`
\`</ul>\`
\`\`
\`<ul class="post-list">\`
\`<li><time datetime="2015-02-09T00:00:00+01:00" itemprop="datePublished"><span\` \`class="6-psecondary radius label">09 February</span></time> | <a href="/class_assignments/week2">Computer-aided design</a></li>\`
\`</ul>\`
\`\`
\`<ul class="post-list">\`
\`<li><time datetime="2015-02-16T00:00:00+01:00" itemprop="datePublished"><span\` \`class="6-psecondary radius label">16 February</span></time> | <a href="/class_assignments/week3">Computer-controlled cutting</a></li>\`
\`</ul>\`
\`\`
\`<ul class="post-list">\`
\`<li><time datetime="2015-02-22T00:00:00+01:00" itemprop="datePublished"><span\` \`class="6-psecondary radius label">22 February</span></time> | <a href="/class_assignments/week4">Electronic production</a></li>\`
\`</ul>\`
\`\`
\`<ul class="post-list">\`
\`<li><time datetime="2015-02-28T00:00:00+01:00" itemprop="datePublished"><span\` \`class="6-psecondary radius label">28 February</span></time> | <a href="/class_assignments/week5">3D Scanning and Printing</a></li>\`
\`</ul>\`
\`\`
\`<ul class="post-list">\`
\`<li><time datetime="2015-03-10T00:00:00+01:00" itemprop="datePublished"><span\` \`class="6-psecondary radius label">10 March</span></time> | <a href="/class_assignments/week6">Electronics Design</a></li>\`
\`</ul>\`
\`\`
\`<ul class="post-list">\`
\`<li><time datetime="2015-03-16T00:00:00+01:00" itemprop="datePublished"><span\` \`class="6-psecondary radius label">16 March</span></time> | <a href="/class_assignments/week7">Embedded Programming</a></li>\`
\`</ul>\`
\`\`
\`<ul class="post-list">\`
\`<li><time datetime="2015-03-23T00:00:00+01:00" itemprop="datePublished"><span\` \`class="6-psecondary radius label">23 March</span></time> | <a href="/class_assignments/week8">Computer-Controlled Machining</a></li>\`
\`</ul>\`
\`\`
\`<ul class="post-list">\`
\`<li><time datetime="2015-04-06T00:00:00+02:00" itemprop="datePublished"><span\` \`class="6-psecondary radius label">06 April</span></time> | <a href="/class_assignments/week9">Molding and Casting</a></li>\`
\`</ul>\`
\`\`
\`<ul class="post-list">\`
\`<li><time datetime="2015-04-12T00:00:00+02:00" itemprop="datePublished"><span\` \`class="6-psecondary radius label">12 April</span></time> | <a href="/class_assignments/week10">Input device</a></li>\`
\`</ul>\`
\`\`
\`<ul class="post-list">\`
\`<li><time datetime="2015-04-21T00:00:00+02:00" itemprop="datePublished"><span\` \`class="6-psecondary radius label">21 April</span></time> | <a href="/class_assignments/week11">Output device</a></li>\`
\`</ul>\`
\`\`
\`<ul class="post-list">\`
\`<li><time datetime="2015-04-29T00:00:00+02:00" itemprop="datePublished"><span\` \`class="6-psecondary radius label">29 April</span></time> | <a href="/class_assignments/week12">Composites</a></li>\`
\`</ul>\`
\`\`
\`<ul class="post-list">\`
\`<li><time datetime="2015-05-05T00:00:00+02:00" itemprop="datePublished"><span\` \`class="6-psecondary radius label">05 May</span></time> | <a href="/class_assignments/week13">Networking and Communication</a></li>\`
\`</ul>\`
\`\`
\`<ul class="post-list">\`
\`<li><time datetime="2015-05-10T00:00:00+02:00" itemprop="datePublished"><span\` \`class="6-psecondary radius label">10 May</span></time> | <a href="/class_assignments/week14">Interface and application programming</a></li>\`
\`</ul>\`
\`\`
\`<ul class="post-list">\`
\`<li><time datetime="2015-05-18T00:00:00+02:00" itemprop="datePublished"><span\` \`class="6-psecondary radius label">18 May</span></time> | <a href="/class_assignments/week15">Application and Implication</a></li>\`
\`</ul>\`
\`\`
\`<ul class="post-list">\`
\`<li><time datetime="2015-05-25T00:00:00+02:00" itemprop="datePublished"><span\` \`class="6-psecondary radius label">25 May</span></time> | <a href="/class_assignments/week16">Mechanical design, machine design</a></li>\`
\`</ul>\`
\`\`
\`<ul class="post-list">\`
\`<li><time datetime="2015-06-02T00:00:00+02:00" itemprop="datePublished"><span\` \`class="6-psecondary radius label">02 June</span></time> | <a href="/class_assignments/week17">Invention, intellectual property, and income</a></li>\`
\`</ul>\`
\`\`
\`<ul class="post-list">\`
\`<li><time datetime="2015-06-11T00:00:00+02:00" itemprop="datePublished"><span\` \`class="6-psecondary radius label">11 June</span></time> | <a href="/class_assignments/Project_Development">Project Development</a></li>\`
\`</ul>\`
\`\`
I can’t find the code mode syntax to visualize the correct information but is like:
open with {+% for post in site.categories.class_assignments reversed closed with %+}

final project page only visualize the post inside post folder which have featured: true.
What I learned
To build my own site, is funny ! jekyll-kramdown-foudation5 and also font anwsome are really easy to implement in the site, and online you can find a lot of example for using it! Definitely in this week I discovered a new method to build a very good site,fast and easy to update using github! To search final project is difficult for my mind. In the end I followed the way to learn something new thing about electronic and programming, unexplored world for me.
here is list of “focus thing” that I will learn/improve:
- understand electronics components
- microcontroller programming
- programming some micro for control it
- wireless comunication between own “hardware made”
- programming apps to control it
in the end but not of minor importance, I want something modular!