Week 5::3D Scanning and Printing
Assignments:
design and 3D print an object (small, few cm) that could not be made subtractively
3D scan an object (and optionally print it)
To perform the tasks in this this week I decided to use the following programs:
- Photoshop CS5: For the layout and retouching of images for the web.
- Catia: To design 3d Objects printed
- Cura: To define the parameters of 3D printing and generate the file in .gcode format
- Sense (Default Software): To process 3D scaned objects and persons .
3D Printing
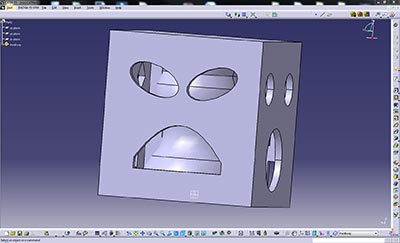
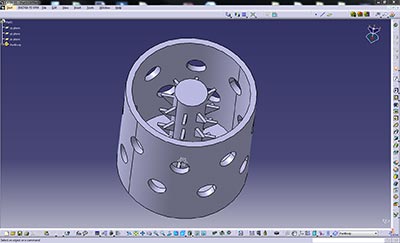
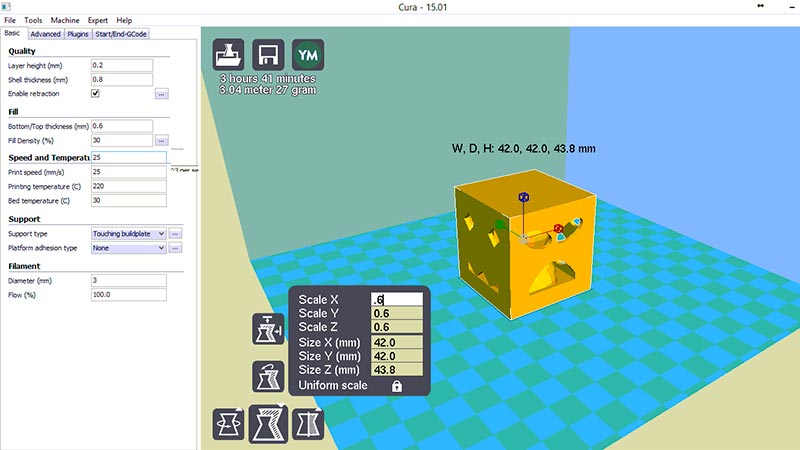
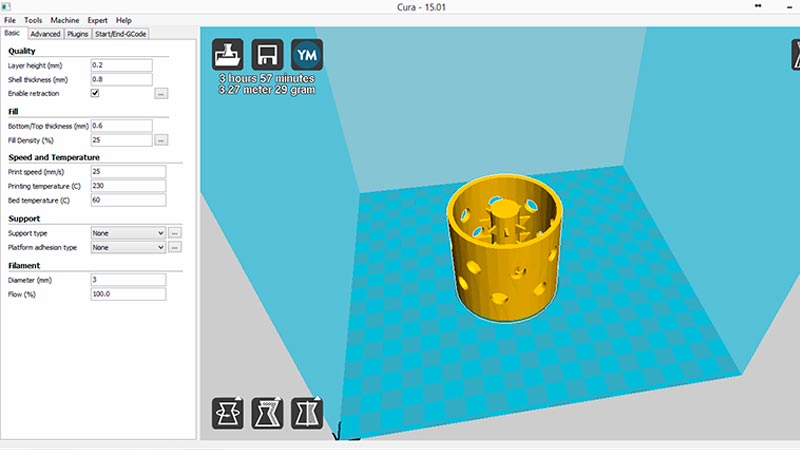
I made two 3D designs in Catia, not yet mastered 3D design in this software, but my goal is to make objects that are inside other objects. First, a cube with holes in different forms on all sides (to see the inside), and inside a kind of column, which was useful to close the top face of the cube. Secondly, I designed a hollow cylinder open on top. In the center of this cylinder, there is another small cylinder with a sort of circling spikes. The master cylinder has in it wall circular holes .
Design 1 on Catia:

Design 1 on Catia
Design 2 on Catia:
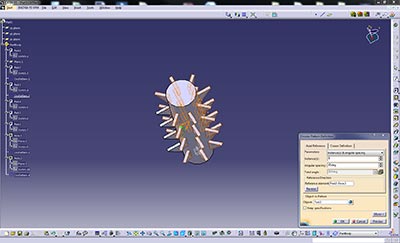
Design 2 on Catia
Now that I have the designs of the pieces I want to print in 3d it is time to prepare for the printers, I will use the 3D printers of Xtrene association, Prusa I3 for the first part (the cube) and a RepRap BCN3D+ for the other piece (cylinder). I used the print software "Cura" (v15.01) of Ultimaker, to generate .gcode file format, which is used by both printers. For the two pieces I will use as PLA material orange for the first piece and red for the second. The basic settings are detailed in the following screenshots.
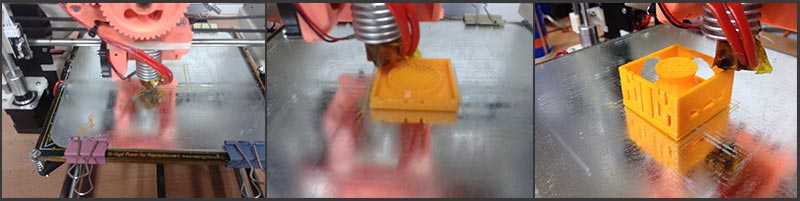
I store .gcode files previously generated on an SD card for the printer to work on an independent basis . Prepare the bed printer applying hairspray, specifically the Nelly (the cheapest in my country) brand, thus the piece is strongly adhered to the surface of the bed. Just have to wait a few hours to see the result.
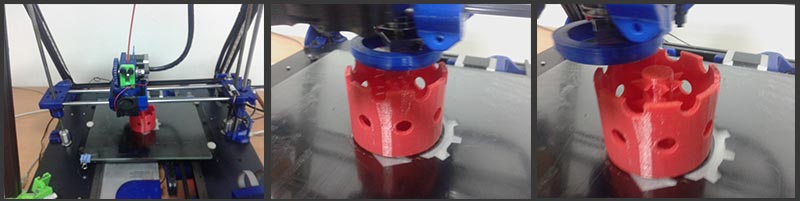
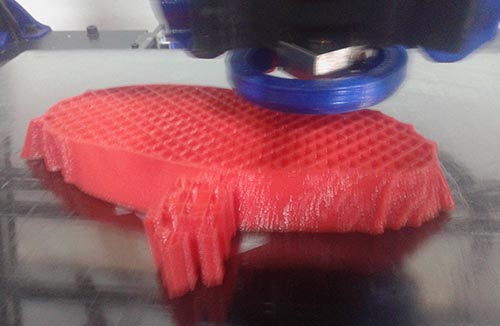
The second piece has more quality, is almost perfect, but at the last moment a fault on the x axis (possibly due to the belt) has caused a shift from print to the right (the last layers)

Files:
- Design 1: stl Format
- Design 2: stl Format
Extra Print
I have had the opportunity to print a 1:10 scale model of my final project, a cot. here is the result:

3D Scanning
I've seen this week many techniques or devices for 3D scanning, I had access to a Sense, the department of computer in my municipality has given
me for several hours. Installing the software in Windows is simple, you need to enter an activation code to work with this Sense software, this code
is facilitated by email after you register the product in the manufacturer's website.
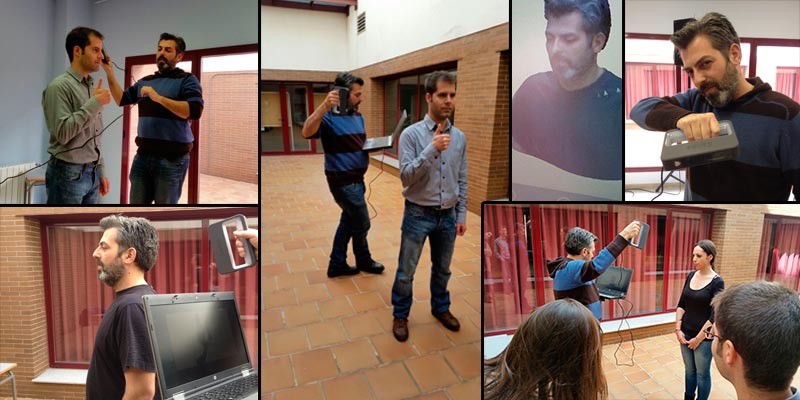
Using Sense is easy and intuitive, you must stick figure or person we are scanning within a designated area by the software, and maintain a constant distance when we're
moving the device around. For an optimal 3D scanning, we must avoid a fluorescence-based lighting. I conducted the 3d scanning the outside with natural light.
A couple of things to bear in mind, if we are scanning a person with glasses is advisable to remove them, and we must insist on facial areas that may be incomplete,
as the chin, ears and holes of the nose.
I tried 3D scanning several people, some, only the face and other, whole body, there are parts that software / device not well recognized, as certain types of garments shine.
Then I tried to scan multiple objects of different sizes, but the result was not as expected, it is easier for me to scan 3d people.
after making the 3D scanned with software Sense I save the results in 3 different formats: .py, .obj and .stl I'll try to print one of my scans with BCN3D + printer. I have obtained better results with low printing speeds, working hours of the machine are very high, but worth it. The material used is, again, PLA. The parameters entered in Cura to generate the .gcode can be seen in the following screenshot.