Assignment: Propose a project that includes at least: 2D and 3D computer aided designs (additive and subtractive), interface devices, and write code.
Project outline
Franz is a mechanical wall- mounted toy, it's wondrous and a bit weird. The kind of toy that grownups keep to themselves. You really want to touch it but you're never allowed because it's too precious to really play with.
Franz is a lazy bumblebee born with a spoon in his mouth, he's a bit overweight and just sits in his little capsule, looking at the world. Although it looks impressive in size, you can't help but wonder if it's already dead or not, you just hear it buzzing a little bit sometimes. You can't touch him but you can blow at him to find out if he still has some life in him.
Materials and components
The body
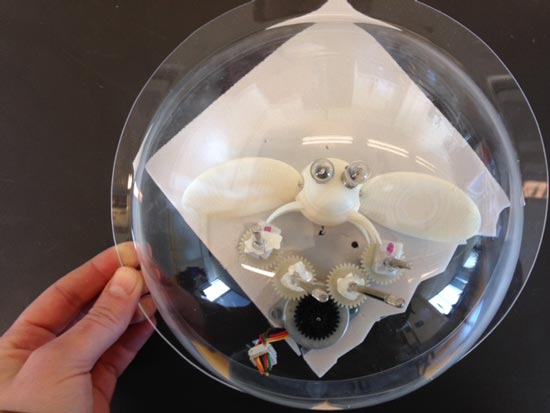
Franz's body is 3D printed. The hinges are also 3D printed and screwed into the body. His wings are made of a composite of textiles & SuperSap clear epoxy. The bell glass encasing is made of an acrylic sheet made with free dome blowing technique. The wooden frame is made with the shopbot (3D, onesided). His eyes are small incandescent light bulbs.
Electronics and mechanics
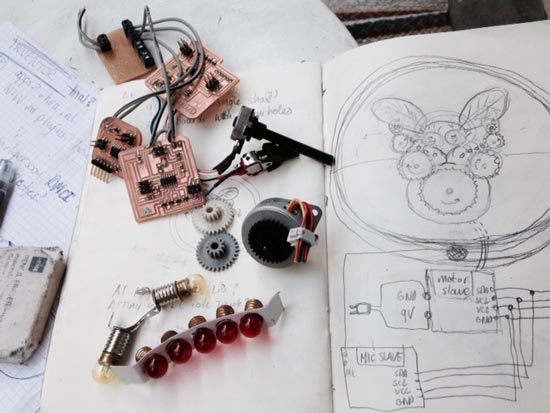
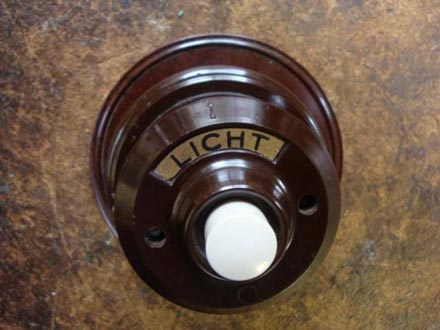
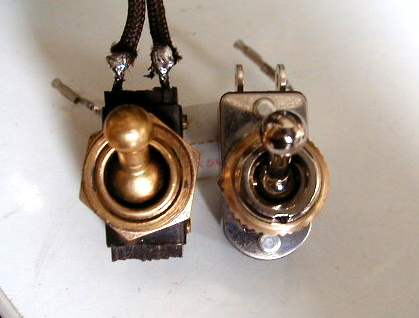
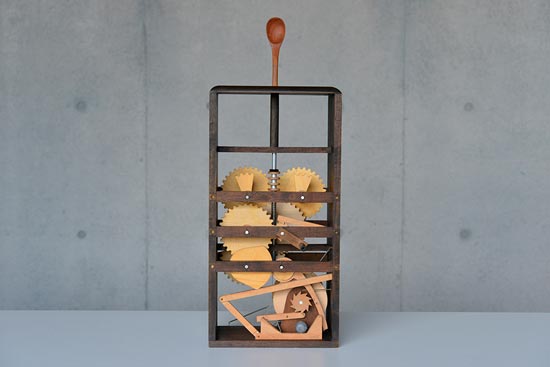
The electronic circuit is a milled board consisting of an attiny44, inerfacing an microphone/opamp combination as input, and a unipolar stepper motor as output. The microphone is encapsulated inside the wooden frame, outside the bell glass. The motor drives acrylic gears and two cams (lasercutter) to move the wings. The axes are off-the-shelf axes that are cut to size and given a thread where necessary to fasten with a bolt (off-the-shelf). Stops are cast in silicon in a mold made of machineable wax. Fastening of the gears is done by creating a flat box made of transparent acrylic with cutouts to hold the axes in place on both ends (lasercutter). Power supply is a repurposed laptop adapter. The on/off switch is a repurposed one from an old lamp (still have to find it, but there's a few good ones on the the Dutch equivalent of Ebay). Something like this:
Aesthetics
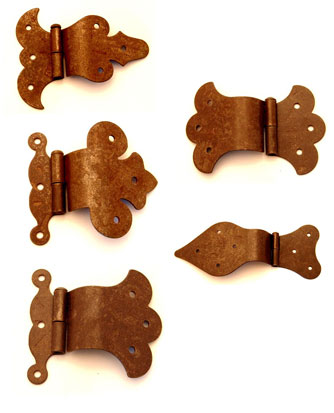
The aesthetic of the design should give a little wink to steampunk. I will design the hinges and latches to put the bug and the bell glass frame together. I will design my own decorated gears that will get the kind of aesthetic I used for the bird kit.
For finishing I'd like to experiment a bit with overdoing an aceton polish a little bit: so that it looks like it's been deteriorating. Might be a terrible idea in terms of construction because there's a risk of deforming the screwholes, but I'll try to see how it pans out.
Inspiration for hinges
Decorated components and gears from my bird pressfit kit
Sources of inspiration, building on others
A great source of inspiration are have been automata from back in the day, but also more contemporary examples. Moving things somehow are still a source of wonder. The book Making Things Move by Dustyn Roberts has been really helpful in understanding some of the basics. This BBC documentary is a nice account of the history of automata:
And Kazuaki Harada's work really embodies the simple joy of making moving apparatuses that are a bit non-sensical but very joyful at the same time. His automata - even when they're complex systems - have a very simple aesthetic and a sense of transparency that shows the beauty of the mechanics inside.
Finally there's loads of other examples in the domain of kinetic arts that have been hugely inspiring. Some of them are below. I suppose the challenge in these works is to achieve the right aesthetic in materials, forms and movements. The following examples are quite advanced, but having studied a range of examples for a first project, it seems that an interesting aesthetic can often also be achieved without necessarily creating very complex systems.
Jennifer Townley's "Bussola"
"Denizen" by Potts Sculpture
Then definitely worth mentioning are Ralph Steiner's Mechanical Principles videos from the 1930s. They show a wide range of beautiful ways to transfer movement.
Where do the materials come from & costs
Prices per unit are based on the Fablab inventory list or on prices at local/alternative suppliers. I've made a very rough prototype to figure out some of the sizing and dimensions to make an informed estimation for the numbers below. Some of the estimations are based on previous assignments. Total as listed below amounts to a total of $ 110.32 (or $ 149.54 when all materials that I already had or found are accounted for).
Bug's body & hinges - ($ 21.39) - $ 14.77
25 grams of PLA (incl support) x 3 iterations = 75 grams x $48,79 per kg = $3,65
50 grams of ABS (incl heavy support) for final product x 2 iterations (1x aceton polish) = $ 4,88 (via work) = PM = $ 0
Bio wash, to dissolve support from ABS object = $ 1,50 (via work) = PM = $ 0
Aceton, 0.01L x $ 6.25/L = $ 0.06 (via work = PM = ) $ 0
Can of spray paint = $ 8.00
Textile for wings (found) = $ 0
SuperSAP epoxy - 50 ml mixed: $254 for 11.3L = $1.12
High density foam 10x10cm ($62.67 for 24x35inch) = 1/48 = $1.30
design mechanics: hinges (3D), gears/case (2D), first iteration MDF (laser)
design mold for shaft stops
cut and thread shafts
CNC router: wooden frame
CNC router: high density foam mold for wings (lay-up composite)
Modela: mold for shaft stops
week 23:
lay-up composites for wings
3D print hinges (first iteration PLA)
optional: second iteration of gears/case
mechanics: final iteration of gears/case in acrylic
design (3D) bug body: first iteration in print
final iteration bug body & hinges in ABS - wash - polish
construction & debugging
week 24 - mon/tue:
debugging
project summary slide
update documentation
10 June: presentation day!
(Un)answered questions
Unanswered:
Ask advice on wood to use for wooden frame > ask Alex
Mechanics very inefficient: do iterations and await machine building week > ask Koen for advice
Need to learn how to thread shafts > do it at work, ask Cees
Answered:
Can I cut off shaft of motor with pinion gear? > yes, can't order it now
How to extend ribbon wire from motor to board? > solder and shrink tube
Fix mystery of the pullup resistor on PA2 in previous MIC board? (solved), rename input opamp net and connect to a pin in same register as opamp out
Do we have a laptop adapter I can use for the project? (6-26V, min 500mA) > Yes
How can I add the two incandescent light bulbs? > bit of a puzzle, because they are 3.5V, 0.2A. Discussed some options with Emma but the amount of Watts would be a problem and IC wouldn't be able to supply so much current (max 40mA). So opted for 2x NMosfet connected to IC, as controllable gates. Two bulbs in parallel with 2x2 of 10 ohm resistors for each bulb to get to resistance of 20 ohm per bulb while splitting the current to ease it out.
Why is previous motor board pulling so much current? Fix it! Use components that can deliver more Amperes because the stepper requires it. More amps on diode, more amps on regulator please.
Do I still need 1uF caps between VCC and GND? > No, put a 22uF on output of the new regulator as mentioned in the datasheet. This replaces the other ones used in previous assignments
Evaluation criteria
The object should to work smoothly and have the right aesthetic. Getting the interaction and the motion to work has first priority. Next to that, I consider it an arts project more than a product or solution. The user experience should be right in terms of timing, use of materials, proportions. Interaction between blowing into microphone and moving the wings with the motor should work well and smoothly, shouldn't get stuck.