{ Fab Academy 2015 : Koichi Shiraishi }
{ Home } { Final project } { Class } { Fab Academy }
- Week 14: Interface and Application Programming -
Weekly Assignment
- write an application that interfaces with an input &/or output device
Measuring light sensor
I developed application with an arduino and an ambient light sensor. It change circle diameter and color(gray scale).
Developed application
I developed by “Processing”.
I use a function"map" that change an analog value range to other range I offer.
The application effect the value to circle diameter and color(gray scale).
Arduino code
					const int red_LED = 13;
					const int sensorPin = A0;
					int val = 0;
					int state = 0;

					void setup() {
						pinMode(red_LED, OUTPUT);
						pinMode(sensorPin, INPUT);
						Serial.begin(9600);
					}

					void loop() {
					val = analogRead(sensorPin);

						if(val > 0){
							state=1;
						}else{
							state=0;
						}
						Serial.write(val/4);
						digitalWrite(red_LED, state);
						//Serial.println(val);
						delay(100);
					}
Processing code
					import processing.serial.*;

					Serial myPort;
					int val;
					float diameter;

					void setup() {
						size(450, 600);
						background(0);
						String portName = Serial.list()[5];
						myPort = new Serial(this, portName, 9600);
					}

					void draw(){

						if ( myPort.available() > 0) {
						val = myPort.read();
						diameter = map(val,0,255,550,0);
						}

						fill(0,255);
						rect(175,530,100,-60);
						fill(255,255);
						textSize(50);
						text( val,175,520);
						fill(val,10);
						noStroke();
						ellipse(width/2, height*0.4, diameter,diameter);
						println(val);
					}
Second challenge
I developed a temperature visualizing interface with “Hello temp board.” The circuit making process is written on my site “week10.”
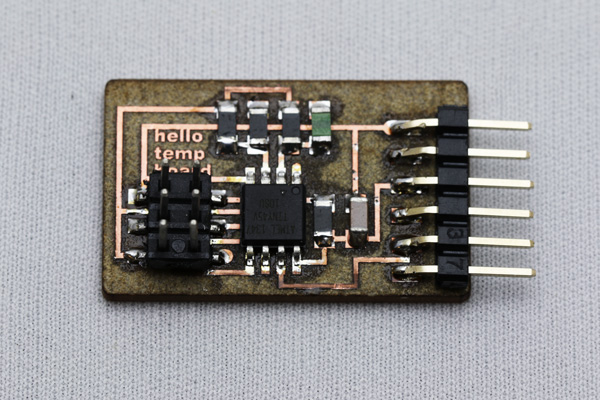
I connected between my pc with the circuit by FTDI.
TX = PB2
(RX =PB0)
I developed the code by Arduino IDE. The code is very simple. It is only send a sensor value. I used a “Soft ware serial” command. In this case, I did not use “RX” port. However SoftwareSerial need to set “TX” and “RX”. Therefore I set it on “PB0”.
Hello temp code
#includeint sensorPin = 3; int sensorValue = 0; const int tx = 2; const int rx = 0; SoftwareSerial mySerial(rx,tx); void setup() { pinMode(tx,OUTPUT); pinMode(rx,INPUT); mySerial.begin(9600); } void loop() { if ( mySerial.available() > 0) { sensorValue = analogRead(sensorPin); //mySerial.println(sensorValue); mySerial.write(sensorValue); delay(30); } }
Developed a interface
I developed GUI based on “Getting Started with Processing”.
First test
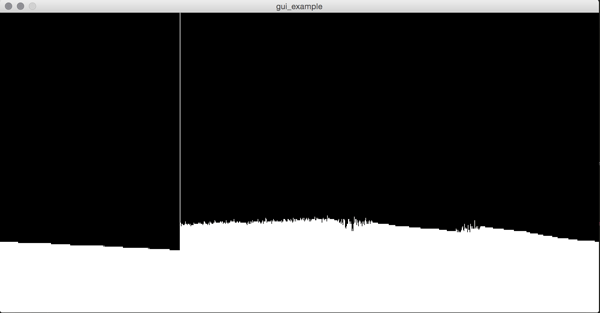
Result
It was vague visual. A point of recoding a recent data is good.
After testing, I changed two points.
1,Recorded a data by spectrum color.
2,Indicated a temperature.
I have completed. It is a video and code.
					import processing.serial.*;

					Serial port ;
					float sensorVal;
					float val;
					PImage img;

					int x;

					void setup() {
					  size(900, 300);
					  frameRate(30);
					  background(255);

					  println(Serial.list());

					  String portName = Serial.list()[2];
					  port = new Serial(this, portName, 9600);
					}

					void draw() {
					  if ( port.available() > 0){
					    sensorVal = port.read();
					    println(sensorVal);
					    val = map (sensorVal,50, 250, 0, height);
					  }

					  float y = ((300 - sensorVal)/5);
					  String  temp= nf(y, 2, 1);

					  img = loadImage("spectrum.png");
					  image(img, x, 0);
					  stroke(255);
					  line(x, 0, x, val -3);
					  fill(255);
					  rect(x+1,val-400,40,800);
					  fill(0);
					  text(temp + "c",x+5,val);

					  x++;
					  if (x > width){
					    x = 0;
					  }
					}