
09 Molding and Casting
Assignment
- Create a mold from a 3D object and cast it.
- Create a mold from a milled object and cast it.
- Look at different methods of casting
Journey
Soft Molding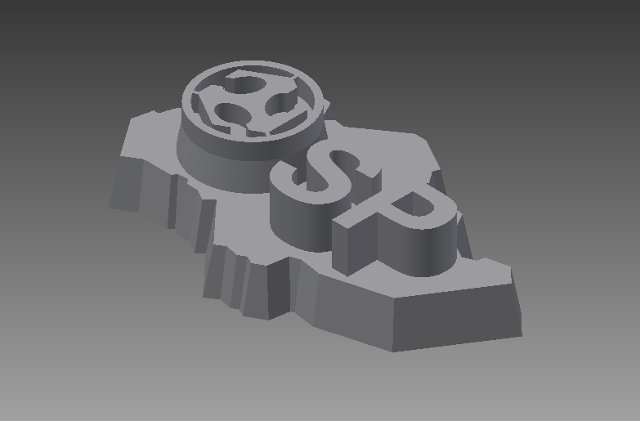
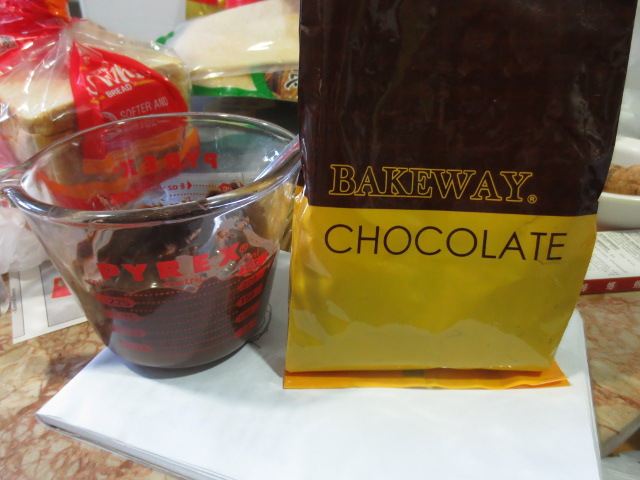
I decided that I would like to create molds for chocolate. Hence, I decided to design FabLab at SP, Singapore chocolate positives. Here is a sample on left, which I shall cast to make a negative food-safe mold.
The 3D object is created from 3 parts: Singapore map (vector extracted using Inkscape), the Fab Academy Logo from Thinkverse, and the letters SP.
The Inventor parts, assembly and STL file are here: fabsp.zip
The 3D object is 3D printed as a positive and will later be used to create a silicon mold.
- The finished product from the 3D printer is rather rough and using a magnifying glass you can see the lines and patterns left by the 3D printer.
One way of smoothing the positive is to use acetone and clean out or remove imperfections. However, since the shape is to be used for making a chocolate mold it is best not to clean it with any chemicals. - The 3D object is going to be used as a positive for the mold, hence the chocolate produced will have the same shape and size as this object.
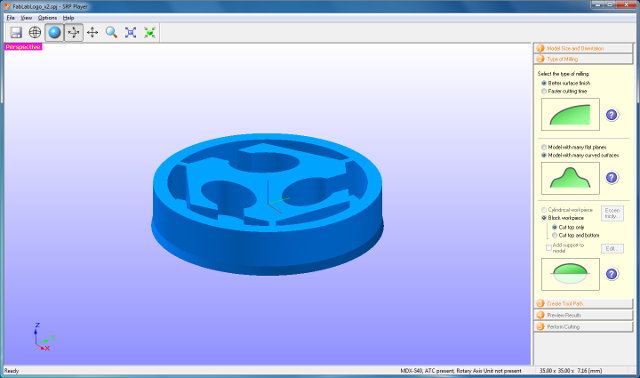
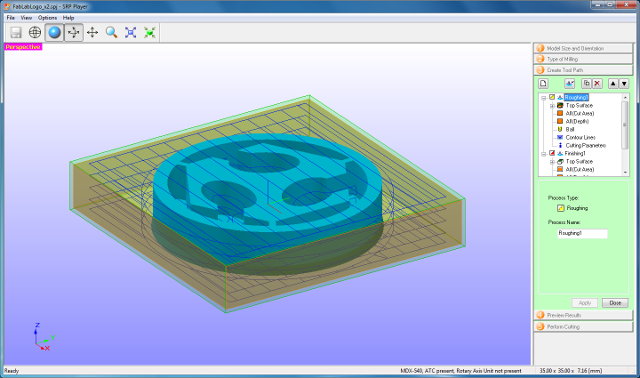
- We had a number of Machinable Wax millings available and we discovered that the Roland Modela DX240 has just come online with some quick fixes. The FabSP object created for the soft mold is not ideal for milling as we have a 2mm bit as the smallest mill. A quick edit, and I have the Fab Academy logo extracted to a STL file ready for milling.
- The "borrowed" machinable wax milling (no supplier in Singapore) was placed on the sacrificial layer. Using manual movement of the mill, we turned on the spindle and slowly removed a thin layer of the wax to provide a flat and even surface.
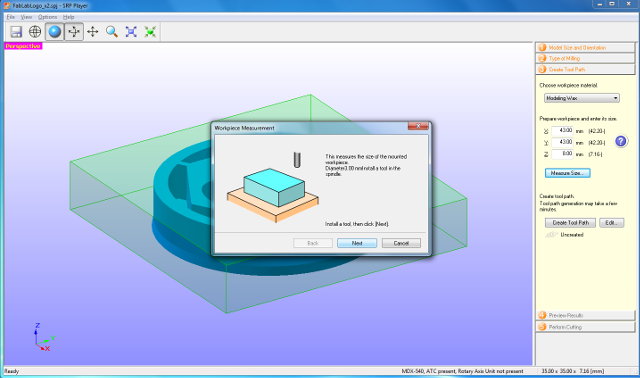
- The Roland Modela DX240 is then setup to measure the milling. Two diagonals are etched using a pencil onto the top surface. The Modela requires the ORIGIN to be at the center of the milling. The Modela software guides the user to perform measurements of the mill area as well as the zeroing of the X, Y and Z axes.
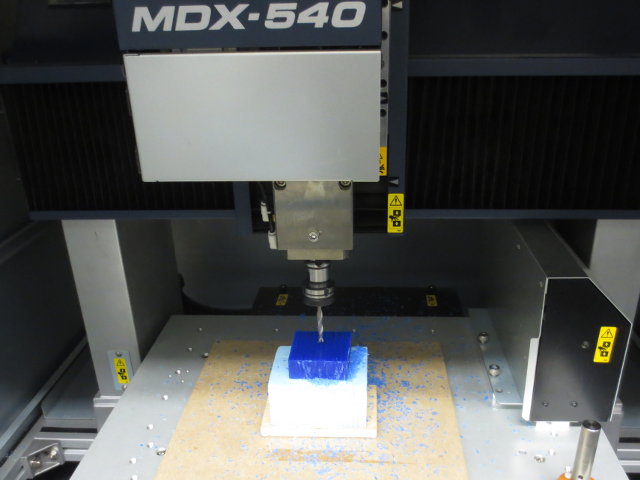
- The STL file is loaded and the START and FINISHING mills selected. In my case, we have decided to use the 6mm mill as the start mill and the 2mm mill as the finishing bit. I also have to indicate the type of material I wish to mill, which is Machinable Wax. Modela makes a good job of selecting the correct spindle speed and feed rates (assured by the Roland Agent!)
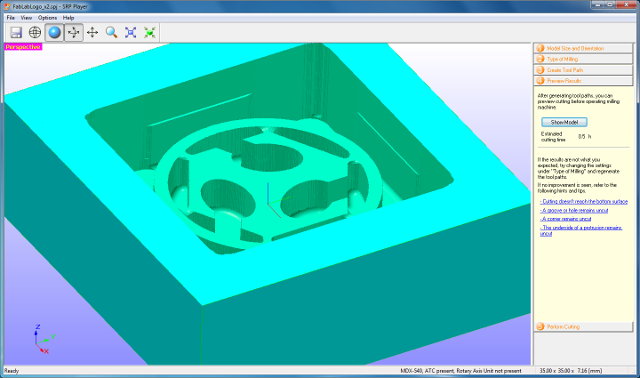
- The job is sent for milling and we sit back to await the results. I must say that the mill results are astounding and clean. I will clean up the positive to create a food-grade silicon mold for chocolates.
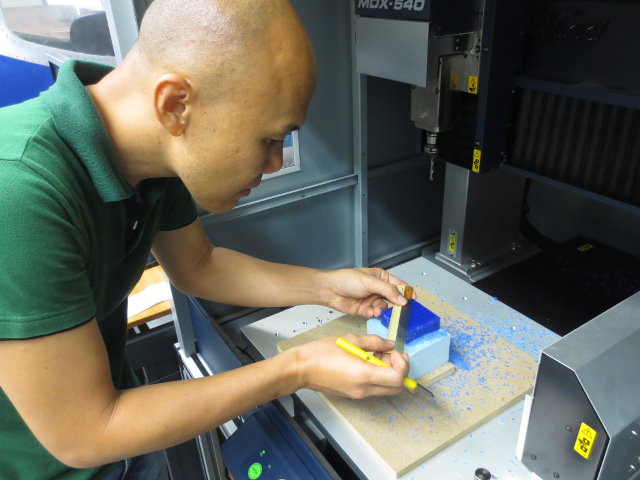
Roy setting MDX origin
MDX240 positions at origin
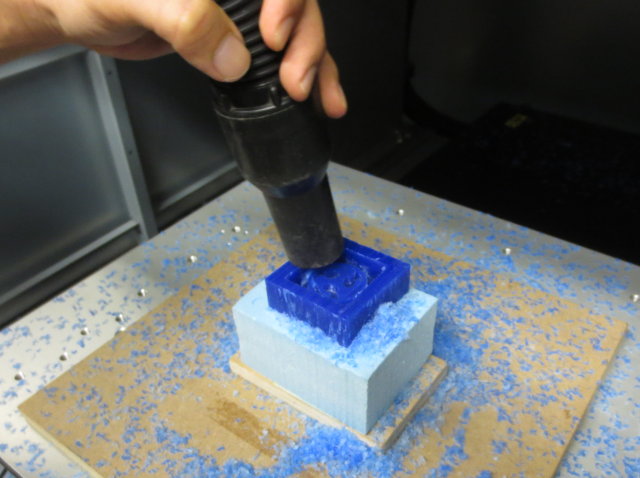
Removing the scrap after mill
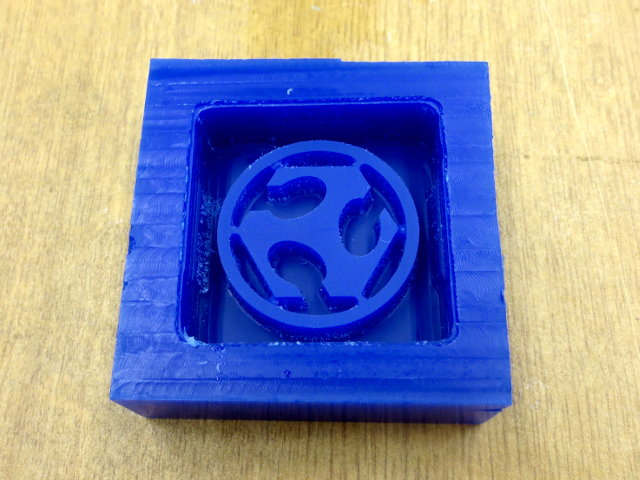
Mill complete, FabAcad logo
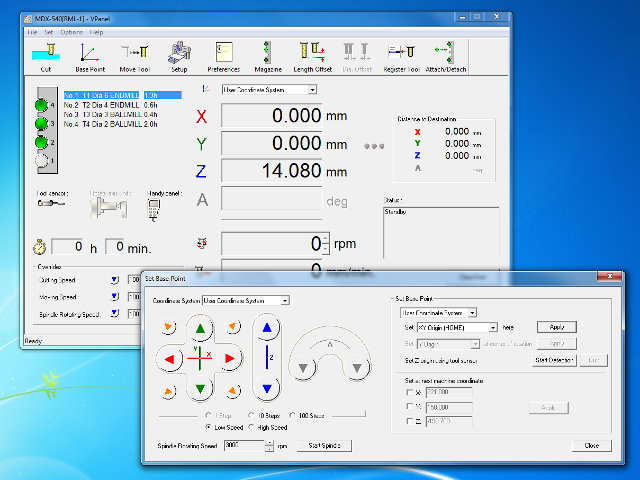
Modela control panel
Setting parameters
Auto Block sizing
Verifying tool path

Simulating Rough cut
Finishing cut
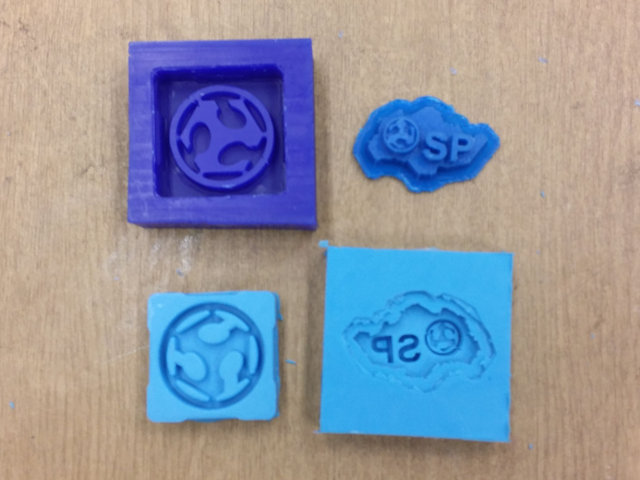
- We now have two molds:
- a 3D printed positive (Fablab@SP), and
- a milled 3D positive (Fablab logo)
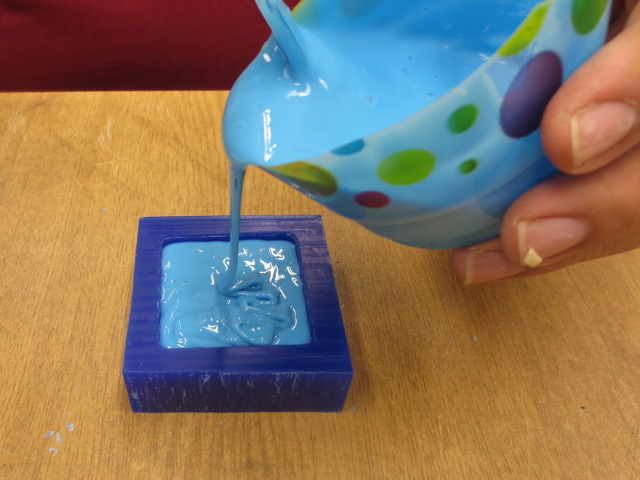
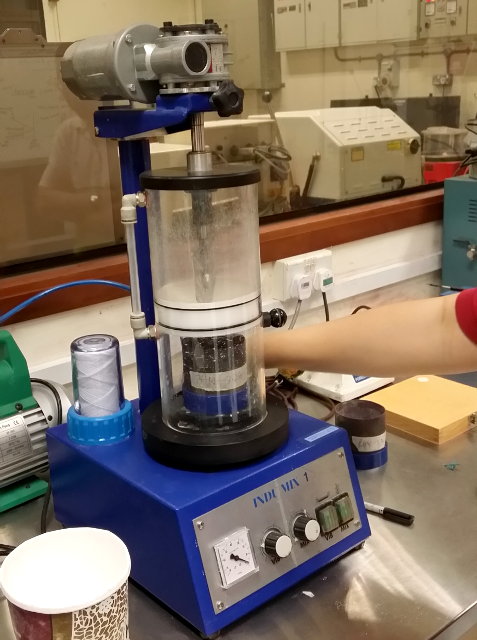
- The mold is made from food grade soft silicon rubber (EasyMold). It is made up of a two equal-part mixture (blue and white). The White portion is placed in a plastic cup and and equal amount of the Blue portion added. Both portions are semi-fluid (more like thick starch).
- The mixture is then stirred until homogeneous. This means that the mixture becomes totally light blue without any significant streaks of white or blue. The stirring is done with a metal spoon to reduce the introduction of air bubbles (which is inevitable!)
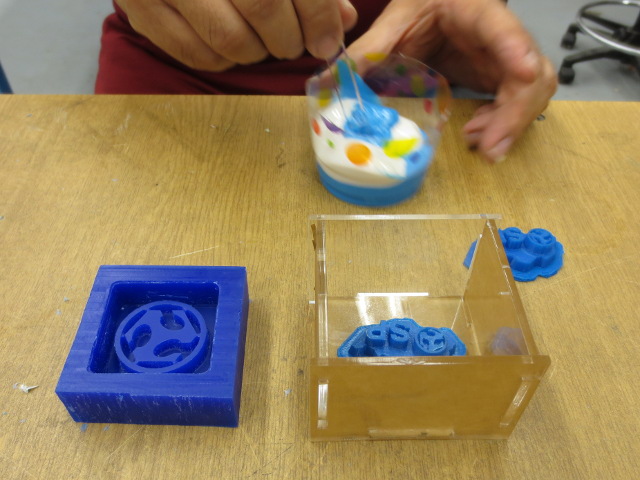
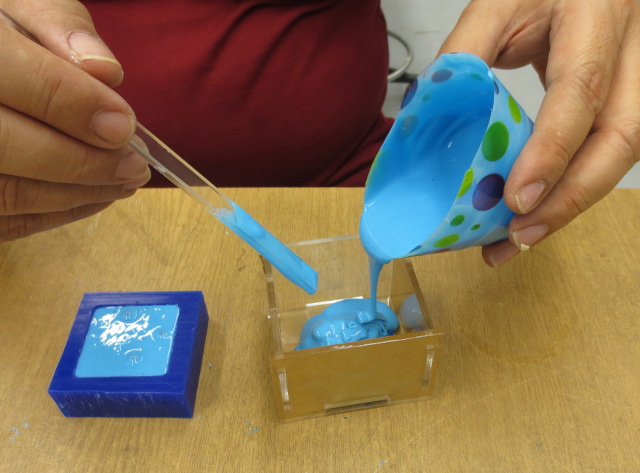
- The homogeneous mixture is then poured to make molds. In the case of the 3D positive, I built a small acrylic enclosure to hold the silicon. In the case of the milled object, the milling produced a natural enclosure.
- As the silicon settled, I tapped each mold gently on the table to remove bubbles. Of course, a better method was to use a vacuum pump, however, none was handy. Roy used a container with a vacuum cleaner, but this produced no better result than tapping on the counter
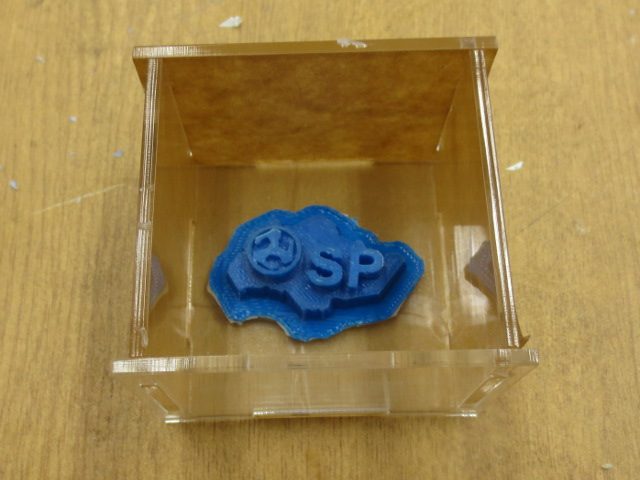
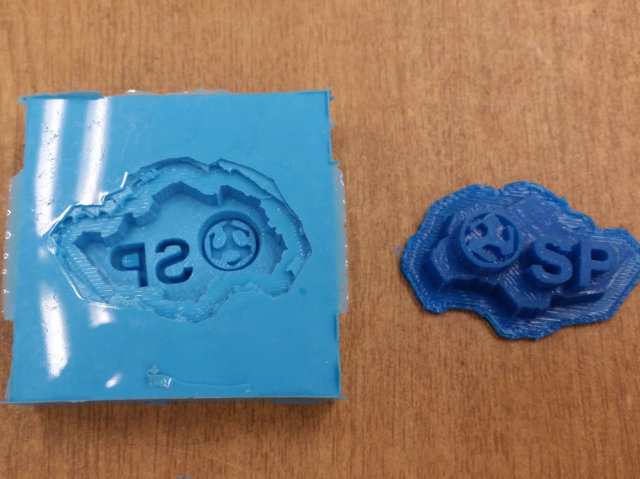
- After 24 hours, the molds were sufficiently dry to remove. Being flexible rubber, we could just gently peel off the molds from the positives. After a good was with soap and water, we are now ready to cast
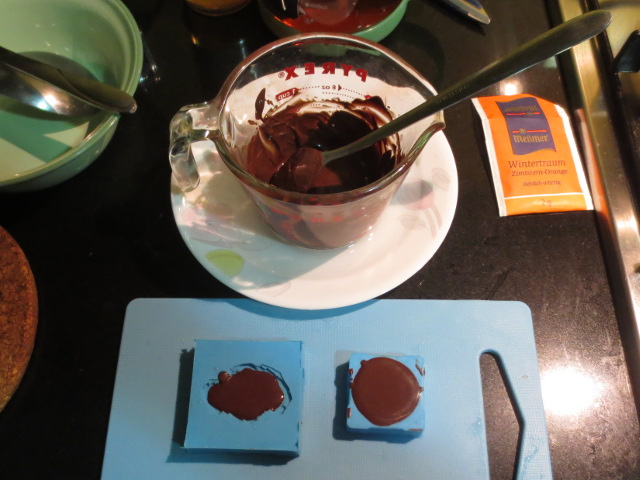
- The cooking chocolate was gently heated over a pot of boiling water until a semi-liquid. I added corn syrup and butter to taste following a receipe from the Internet. When fluid enough, the chocolate was gently spooned into the mold. Again the mold was tapped gently on the counter top to remove any trapped air bubbles. This seems to be the common way of removing bubbles (as seen from many How-to shows on YouTube!)
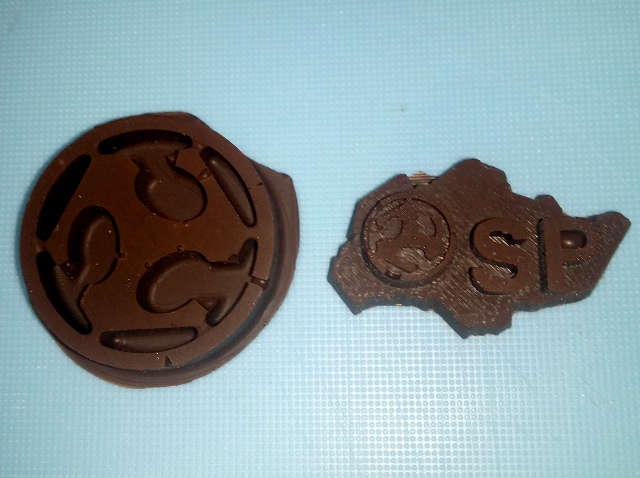
- The chocolate produced was wonderful, and the images and details were captured very well. (The chocolate tasted nice too!)
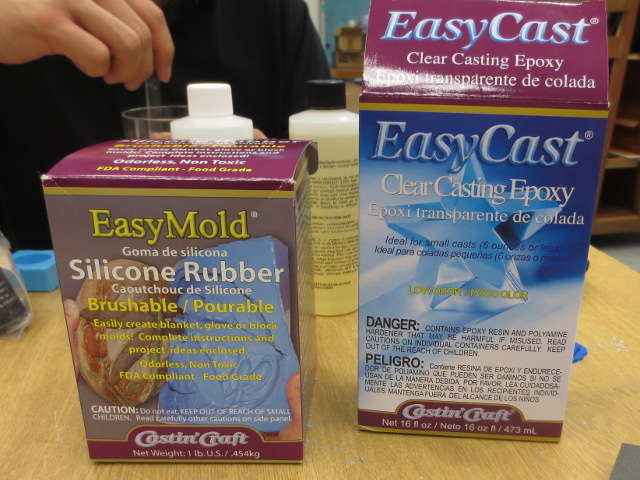
Easy Mold Silicon Rubber-
-Enclosure for 3D printed object-
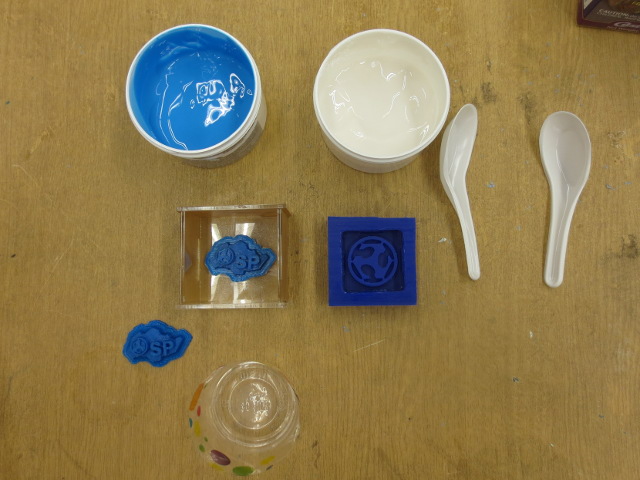
Utensils required
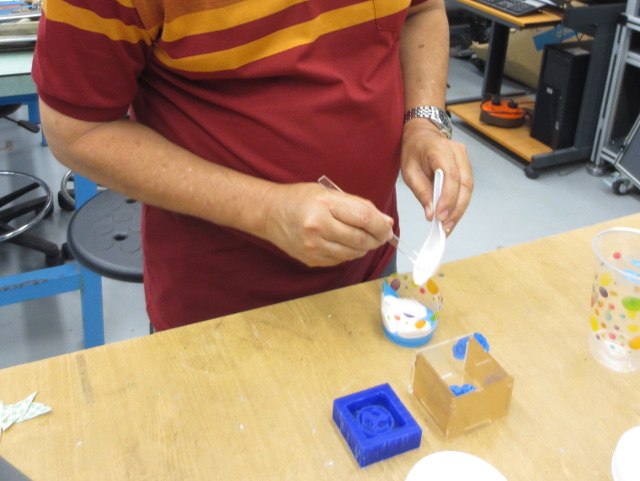
Mixing equal portions
Mixing
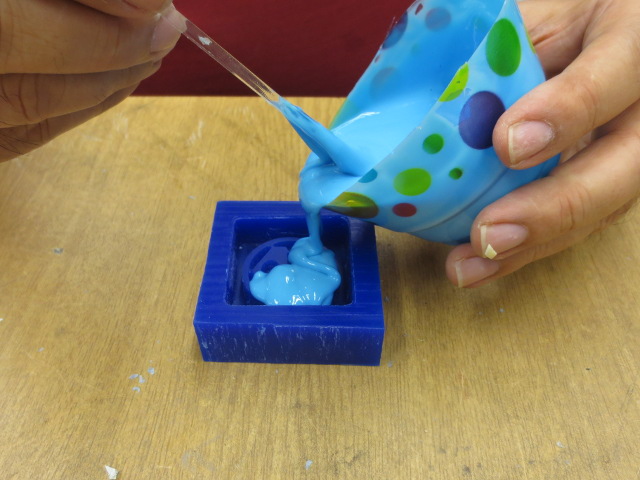
Pouring the silicon
Filling the mold
Filling the 3D enclosure
Resultant mold from 3D printed object
Resultant silicon molds
Chocolate Raw materials
Pouring chocolate into molds
Molded Chocolate results
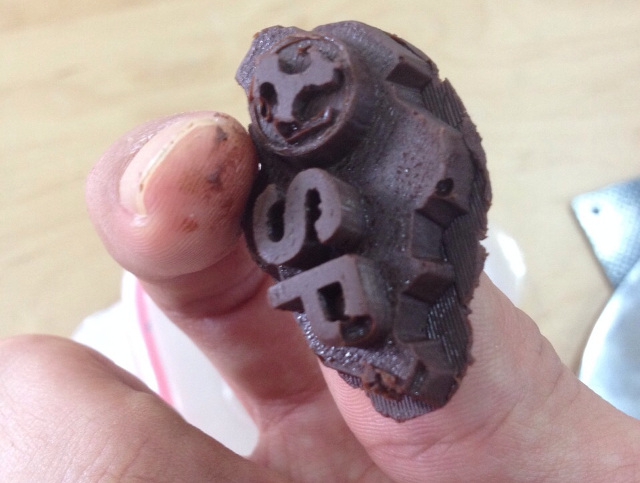
Testing the result: Yumm!
- Roy discovered a laboaratory within SP that does a molding technique called Investment Molding. The term Investment here means that heavy investment is needed to create the molded objects. Let me go through the methods used for the molding.
- Molds are already available, these are created from soft silicon blocks which have the negative of the objects to be created. These molds were created commercially and upon examination, fine detail could be obtained from such molding.
- The molds are hand-pressed together using 2 aluminium plates. The plates provide an equally balanced force in keeping the molds together. The mold is then hand-attached to a molten wax extruder. A vacuum is first created by the extruder and after a short period, molten wax is forced into the mold. A leg switch is used to activate the process (as both hands are used to apply pressure to the mold).
- After a few minutes, the molds are separated and a wax positive model of the object is created. It takes a few tries before we get proficient in the creation of the objects. There were a variety of molds as we soon had a number of objects created.
- A wax stem is then inserted into the casting base. The wax models are then soldered (yes, using a temperature controlled iron to melt the wax) onto the stem. The models are created at an angle so that the molten metal (bronze) could flow easily into the mold. It was important to fully utilize the mold, except that the maximum metal weight we can mold is 50gm.
- The base, stem and the objects are placed in an open-ended metal cylinder. The base forms one enclosure of the cylinder. Upon careful inspection, the base actually forms a funnel for the pouring of the molten metal. A measured volume of Calcium substrate is mixed with water and poured into the cylinder. As the Calcium substrate (currently liquid mass) is mixed and agitated using a shaker, vacuum is applied to remove any bubbles from cylinder. Once filled, the entire unit is left to harden.
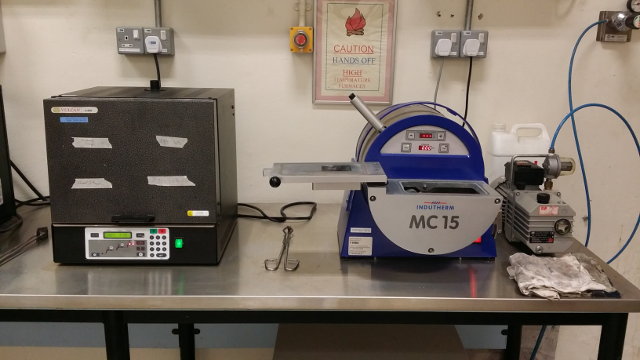
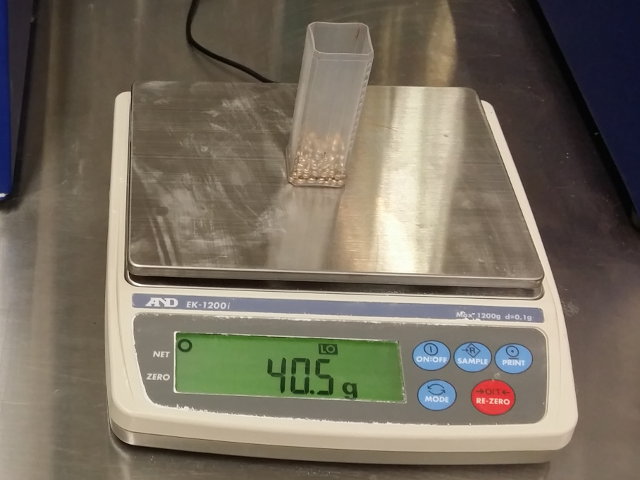
- The unit is then baked in an oven for at least 6 hours for the Calcium substrate to harden. The baking also melts the wax and is evaporated off in the high heat leaving a solid cast. While the mold is still very hot, brass pellets are weighed and measured for the cast. The maximum weight is 50gm, my cast with 3 items weighed only a mere 34gm! An induction oven is used to melt the brass, and when ready, the baking oven is opened and the hot mold placed into the induction oven. With a single fluid motion, the mold is swung back and the molten brass poured in. The entire process is hidden from view in an enclosure.
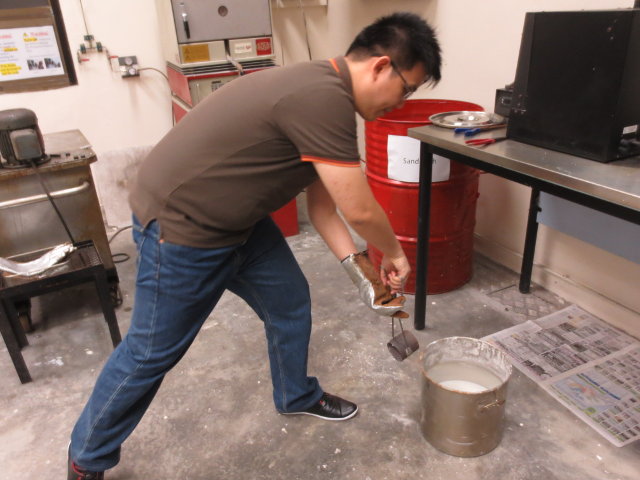
- After 2 minutes the casting arm and mold is rotated back into its original position. The mold is removed and slowly placed into a bucket of water to dissolve the Calcium substrate. When most of the substrate is removed, the mold with the brass cast is placed under running water to remove the remenants and to wash the positive casts. The items are cut from the stem, cleaned with a brush and then polished using a buffer and wax.
- The investment of such casting is quite high as the molds are destroyed on each cast. The remenants of the brass stem and scrap cannot be recycled as it contains impurities from the Calcium substrate. Comparing the weight of the objects cast and the stem, most of the brass is expended on the waste material.
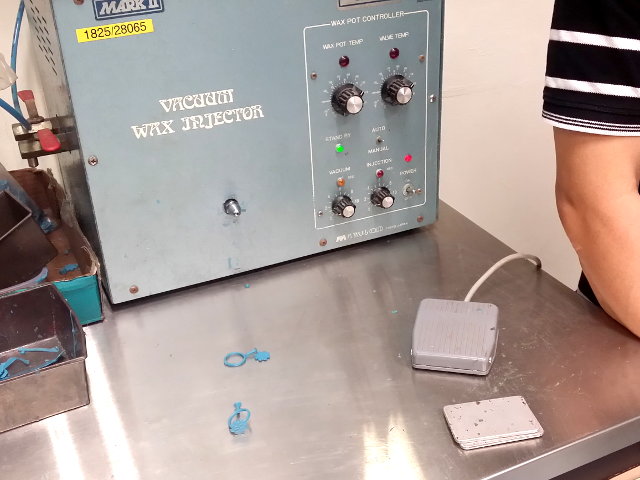
Vacuum wax injector system
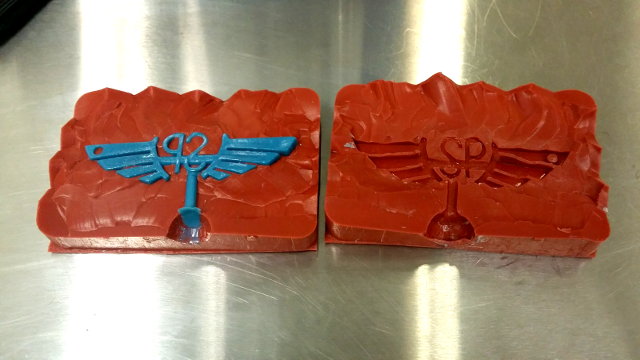
Mold with wax injected
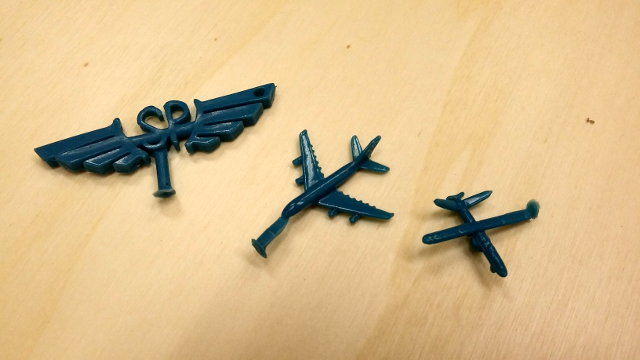
Wax models extracted from mold
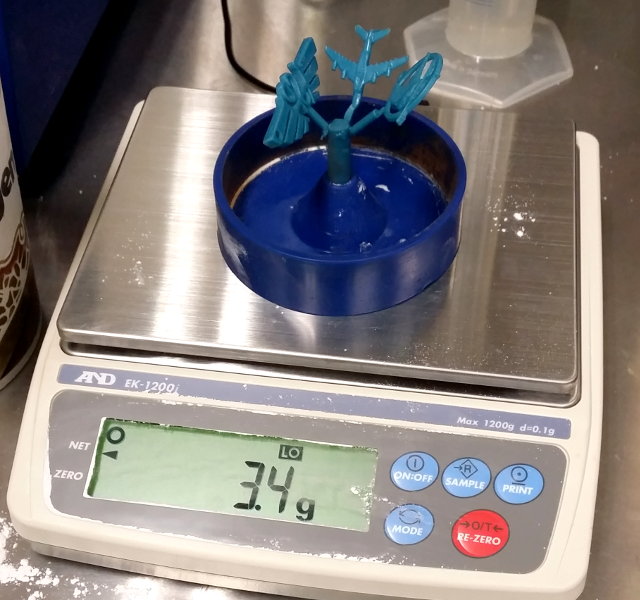
Weight of stem and models
Preparation of Calcium substrate
Baking & Induction ovens
Max wt is 50gm of brass
Cooling of mold to remove substrate
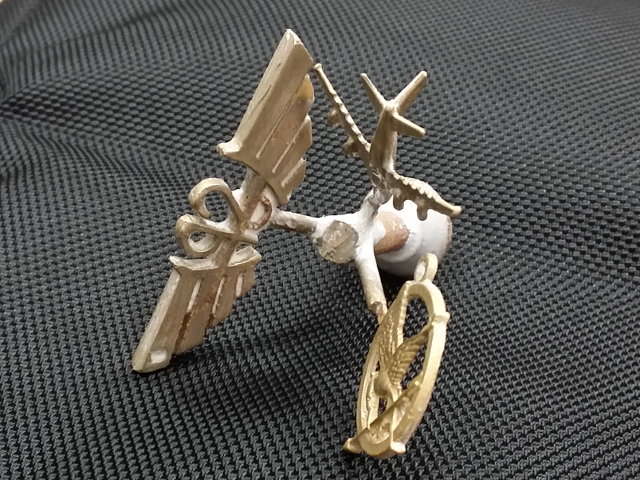
Molded objects on stem
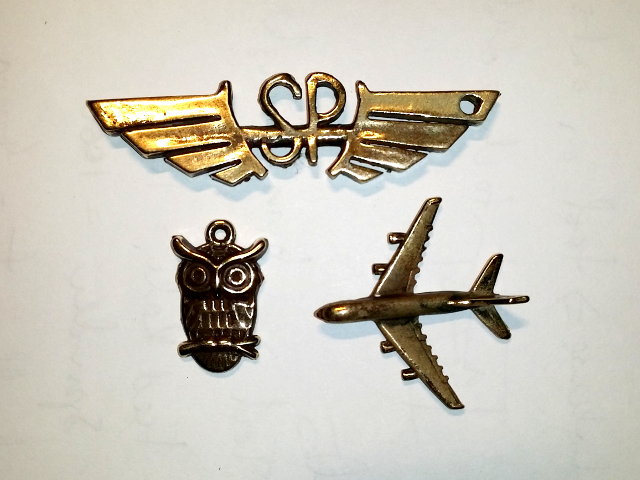
After polishing
Reflection
- Casting can be fun. I really learned a lot on Investment casting for small bronze objects and if had the time would like to look more into the creation of the bronze molds for small jewelery.
- Investment casting is expensive, with the materials used and the revovery of the metal being un-economical, however, I was very surprised to see the results in the details.
- It was very fun producing the molds, very frustrating too as I found one after another 3D printer in-operative. I think 3D printers must be properly looked after, otherwise the humidity is going to cause the equipment ot rust or fail.
- Milling a mold using the Roland DX540 is really simple and I am waiting to get the machine into the Fablab for further operations. However, the cost of machinable wax makes this rather an expensive venture.
- Molding in chocolate is really a fun way of conducting a class. I think I may use this as an example for further molding projects.
Not being of a artistic mind, I have shamelessly borrowed this template (simpleStyle_8) from html5webtemplates, in recognition of a simple, cool and functional webpage design.