

The discussion today focused on interfacing embedded systems with computer applications.
Details are below the video...
(Click this link if embedded video is not working)
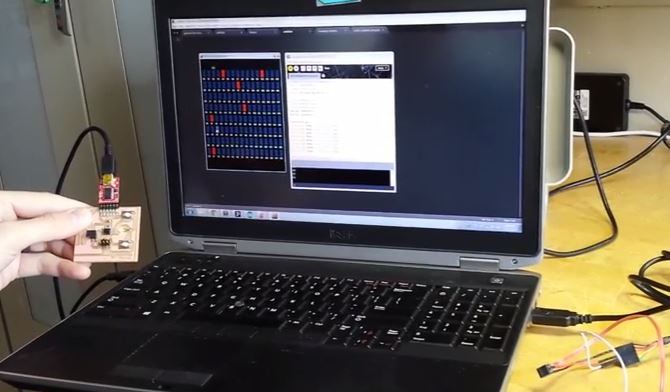
I wanted to build an application that was controlled by one of my boards from a previous week, and that would control my board from the "outputs" week. I've been interested in drum machines for a while, so i decided to make a drum machine-like system. I wrote a panel in processing with 8 rows of toggles with 16 toggles per row. Each row corresponds to a note in an octave. Each column represents a segment in time. I started with some example code for the interface I found online. I hacked on the code until I got the numbers of rows and columns correctly printing out a test message to the command window. Here's what the panel looks like:
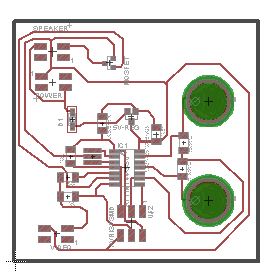
At this point, I knew it could send data out a serial port when a note was detected on the front panel. I chose a simple scheme, it simply sends the character of the note out the serial line. This isn't the best scheme since you can't really have two notes sent at the same time, but it works well enough. As for the output board, I modified the Arduino code I used in the "Outputs" week. The code now waits for an ASCII character to come in, checks it against which note that character corresponds to, then plays that note for a short time. This worked great, until I ripped the traces off my PCB while trying to take a video of it. While trying to fix this, more traces came off, and the lead on my transistor broke off as well. I suppose it is all for the best, I had redesigned the PCB to fix the errors I had in the "Outputs" week and hadn't had an excuse to mill the new PCB yet. I milled the new board and only populated the parts I needed.
Finally, I worked on the input board. I recommissioned one of my nodes from "Networking" week for this. I wrote some C code to read the buttons and increment or decrement a number and send that number out the serial port. This board will be used to change the speed on the drum machine panel. Once I had this all coded up I plugged it all in and debugged until it worked. You can see the results in the video at the top of this page.
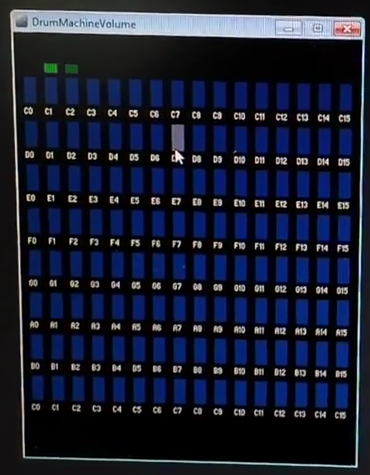
The image below shows the sequencer app. Each row represents a note. For instance, the top row is a low C, the second is D, etc. The green box at the top shows the current beat. This moves across the columns and if there is a selected noted in that column, it outputs that note's name on the serial port. When a note is selected, the button (the blue things) turns red. You can select it again to turn it off. It is hard to explain a musical object in text, but that is the gist of it. The video is much more descriptive.
Here you can download everything from this week's projects.
Web template design: davereederdesign.com