

The discussion today focused on embedded system outputs.
Download all my files for this week's project here.
In the week based on "Inputs" I designed a general-use I/O board that I expected to use this week as well. I ended up forgoing that idea and designed a new board from scratch. This new board incorporates a speaker (single-side driven by a MOSFET and attached to the hardware timer output pin), a video DAC, and two capacitive inputs for buttons all on a single ATtiny44. Using the 4-pin headers it could be easy to mix up which direction to plug in power, so I added a schottky diode in series with the voltage regulator and placed the power input such that it is is only easy to plug in the cable from one direction.
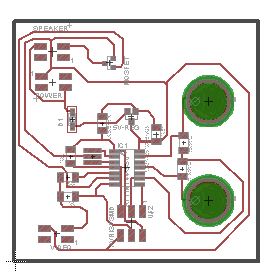
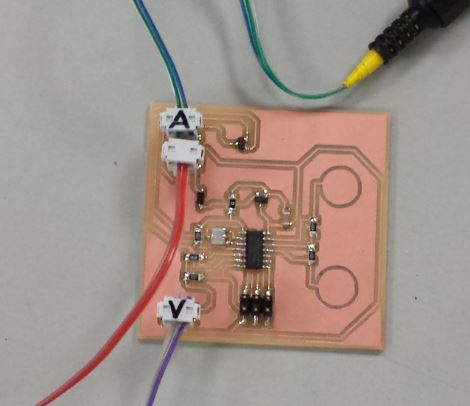
The "A" on the top plug stands for "audio" and the "V" on the bottom plug stands for "Video". The plug in the middle is power. Obviously, I got excited when I saw the video and sound examples and decided I'd try to make an incredibly simple video game. That's a pretty big dream for this hardware. Those dreams were dashed once I tested Neil's video code. I plugged the board up to my composite input on my TV, but you can see below what results I got. I was sure to burn the fuses to make sure the timing was correct.
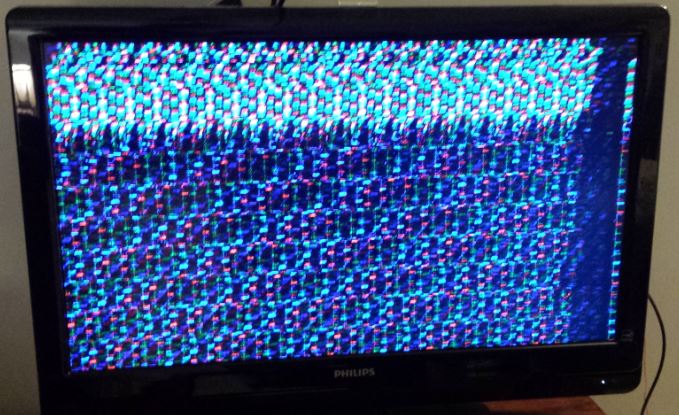
This pattern does not move like Neil's either. I tested with 3.3v and 5v and got roughly the same results. I am surprised it worked at all with 3.3v. I assumed the TV was looking for strict timing since it didn't display correctly at 5v. Just to be thorough, I tested the circuit on Component video (RGB) and got nothing at all. I also connected this up to my old Atari 2600 RF modulator and plugged it into my TV's antenna, and again, nothing at all as expected.
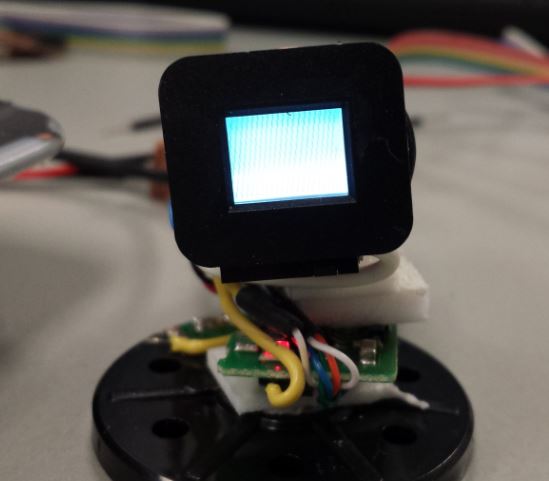
Then I connected it up to the only other display device I had with a composite input. It was "the tiniest game system" I built a while ago (picked up by Hackaday, which I used to write a little for way back when). The result was that I got a somewhat correct video output. It wasn't exactly like Neil's, but it was at least moving approximately as expected. Below is the best pic I could get of it. You can see that the grey bars are missing from the screen. I think that this is due to the voltage being a bit too high for the mid-range.
I could spend a long time trying to debug the video code on my big TV for the long shot of trying to squeeze in the ability to move a ball on screen but I've spent time in the past working on exactly the same kind of project which never worked out. It was a waste of time because I never figured out why the circuit didn't work and therefore didn't learn anything from it. I didn't want to run down the clock falling down that rabbit hole again this week.
I moved on to making the speaker work. When verifying my circuit using Neil's example code, I found that I had somehow tied the other end of my speaker to GND instead of VCC. I hacked a little on the board to fix it and the sound test was successful. I then went about writing some custom code to play "Daisy Bell" in an homage to HAL 9000 from 2001 A Space Odyssey. After playing around hardcoding the notes in C and testing to see if it sounded correct by ear, I decided to look for the actual frequencies of the notes I was trying to make. I stumbled on some code from a previous Fablab student that already implemented a full octave in Arduino code. Once I had this code, it was a breeze to make my little speaker sing "Daisy Bell." The first video below shows this.
Then used some jumper wires on the ISP
pins to sweep a servo back and forth. Of course you have to remove
the ISP header after the chip is programmed first. The key here is
to make sure to burn the fuses from the Makefile. The Second video
below shows the servo sweeping. Additionally, you can program this
AtTiny44 from Arduino and use the SoftwareServo library to get it
working. In arduino versions >1.01 you have to go to ~/My
Documents/Arduino/libraries/SoftwareServo/SoftwareServo.h and
replace #include <WProgram.h> with #include
"Arduino.h" to make it work. And, of course, make
sure you call SoftwareServo::refresh(); at least once every 50ms
to update your servos.
(Click this link if embedded video is not working)
Web template design: davereederdesign.com