Week 5 Electronics Production
by Moritz Begle
Posted on February 23, 2013 at 15:00 PM
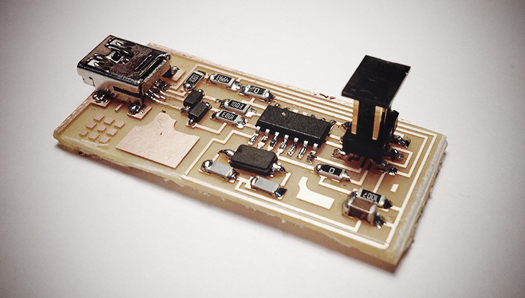
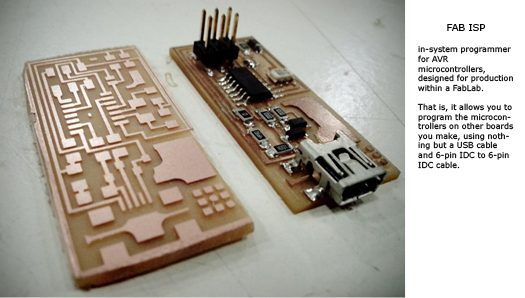
The aim of this class assignment was to make the FabISP in-circuit programmer. The content of the class can be found "here" . This Link also contains the FAB ISP Files.
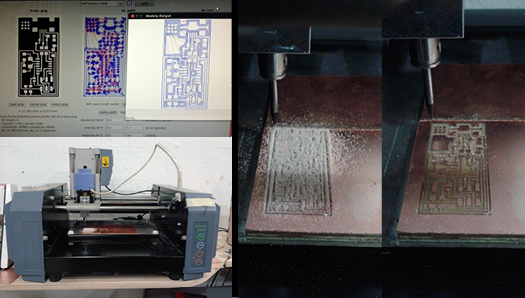
Milling:The File is being prepared as a negative black and white png which is being converted to a generic path file. One of the most important rules on milling is "inside out" and "small parts first". The paths are being milled with a 1/64 bit and the cutting with a 1/32 bit. Make sure that Circuit board is properly fixed to the platform an clean.
 Soldering:
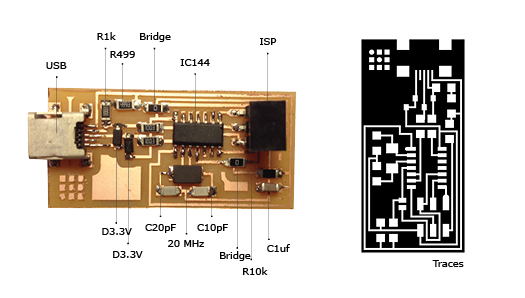
Start with the shorter components. If you haven't soldered before, it's probably good to practice with the smaller components (e.g. resistors and capacitors) before trying the microcontroller. The USB connector is probably the hardest, because the traces are so narrow. Do the ISP header at the end, so it doesn't get in the way when you're trying to solder other components. Most of the components can be oriented either way, with the exception of the microcontroller (the circle marking pin 1 should be in the lower left) and the zener diodes (the lines on the case should align with those in the Eagle board file).
 Programming:
After checking if there are any short circuits, and doing the smoke test, the panel is ready to be programmed.
Steps:
- Download Crosspack AVR - http://www.obdev.at/products/crosspack/index.html
- Download Firmware - http://academy.cba.mit.edu/classes/embedded_programming/firmware.zip
- Download X Code - http://itunes.apple.com/us/app/xcode/id497799835?ls=1&mt=12
- Power the FabIsp and connect it to the USBtiny
- Edit the Makefile
- Program the FabIsp - (Make clean, Make hex, Sudo make fuse, sudo make program
- remove the Bridges resistors
After the second soldering attempt i finally made the Fab ISP work.
Blog Search
Keywords
Electronics Production, FAB ISP, Programmer, Roland