
Trying the Echo Mode
First of all I used the Hello Board like Echo Board. I did this part in Ubuntu OS.
Programing the Hello Board

Step 01.- Start downloading the hello.ftdi.44.echo.c and hello.ftdi.44.echo.c.make. Place it on the Desktop, or where you want.
Step 02.- Connect the FabISP and the Hellow Board like the next picture. Verify that the devices was recogniced (use lsusb in the terminal to check).
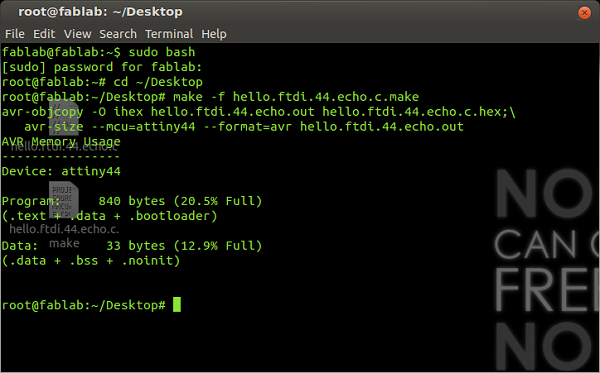
Step 03.-In the Terminal like super user go to the desktop (or where you download the files) and then type in:
make -f hello.ftdi.44.echo.c.make
The following text will appear:
Step 04.- Then type in:
make -f hello.ftdi.44.echo.c.make program-usbtiny-fuses
The following text will appear:

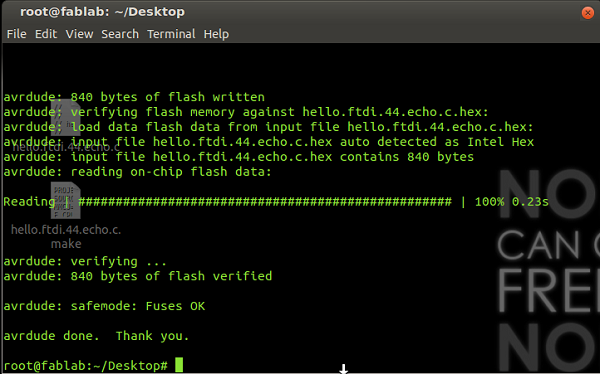
Step 05.- Then type in:
make -f hello.ftdi.44.echo.c.make program-usbtiny
If The following text appear the Hello Board is programed correctly:
Using the Serial Monitor
I used Arduino software for the Arduino's Serial Monitor, to check the correct function of the Echo program.
Step 01.- You will need the to download the Arduino software and install it and open it.
Step 02.- Set the serial port, >>> >>> choose the serial port that you are using.
Step 03.- Go to >>> or use the hotkey Ctrl+Shift+M to open the Serial Monitor Window. Verify that the 115200 baud is selected (right-bottom corner)

Step 04.- Type letter by letter.
i.e.: "f"+ , then "a"+ and then "b"+...to show "fab".
Personally I did with the words "hola mundo" (that main the same as "hello world")

Programming in ATMEL Studio
For this part I used ATMEL Studio 6 software and the AVRISP mkII programmer. And I did it in Windows 7 OS.
Step 01.- Connect and Hello Board to the AVRISP (for program) and the serial port to the serial cable (for power supply) (check the AVRISP LED is lighting green).

The Hello Board (Led+Button) connected to the AVRISP mkII |

New Project window |

Device Selection window |
/*
 * Button+LED.c
 * Author: ETTY
 * Fab Academy 2013
 * FabLabUNI - Lima - Peru
 */

#include <avr/io.h>
#include <util/delay.h>

int main(void)
{
	DDRB = 0b00000100;	//Set PB2 (LED) as output pin
	PORTB = 0b00000000;	//Set output pins in 0v

	DDRA = 0b01111111;	//Set PA7 (Button) as input pin
	PORTA = 0b10000000; //Set PA7 pull-up resistor on

    while(1) //Infinite loop
    {
       if (bit_is_clear(PINA, PINA7)) //If button is pushed (PA7 == 1)
       {
		   PORTB = 0b00000100; // Turn ON the PB2 (LED)
		   _delay_ms(300); //Delay for 0.3 seconds
		   PORTB = 0b00000000; // Turn OFF the PB2 (LED)
		   _delay_ms(300); //Delay for 0.3 seconds
		}
	}
return 0;
}
Step 05.- When finished the code, debug it with the play button or hotkey . Check all error and/or warning and correct all.

Program window at the end of debugging |
If the debugging succesful, you can go to >>> a window will appear.

|

|
Testing
Now is time to test the program. (The photographs not show the blinking but it really works)

Button unpushed - LED OFF |

Button pushed - LED ON (Blinking) |