3D Scanning & Printing
This weeks assignment was designed around Scanning & Printing. With this assignment i used the NextEngine 3D Scammer and a Stratus 3D printer. I also used AutoDesk Inventor CAD software to design and model a container to house the FabISP component. T
The goal of this project was to understand the relationship with scanning and printing and although i printed a different part than i scanned, it woud have been possible to print the Chess image i scaned. I plan to do this in the next week and add it to this site.
I decided to design a housing to protect the fragile components of the FabISP that we produced last week. Although I have used other CAD programs in the past, Auto CAD and Corel Draw, I had not used the AutoDesk Inventor software. I plan on becoming more knowledgeable and skilled with this tool. There are seveal reasons why I am using this software, one because we have an academic license and it interfaces well with our 3D printers. I am also planning to use additinal open source tools in the future including FreeCAD and Blender because I am incorporating Ubuntu more and more into my computational machinery.
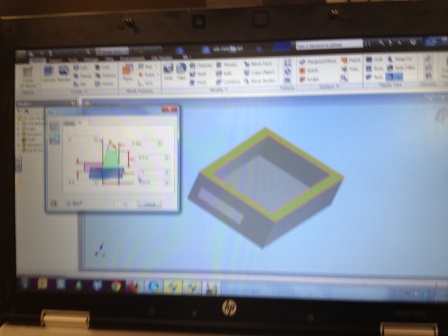
The Inventor CAD of the ISP Housing was my first attempt to design for prototyping a model. The screen shots of the steps involved in completing the 3D Printed Model.
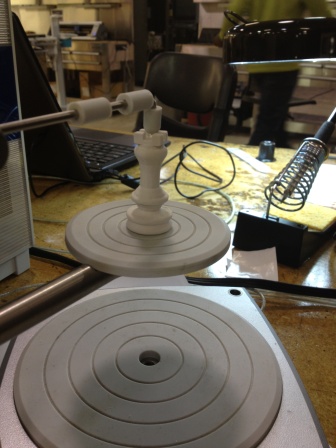
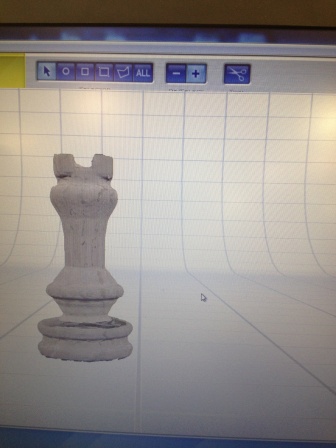
I scaned a chess piece on the Next Engine Scanner with good results.
Next, I decided to design and build a case for the FabISP which i designed in Inventor and printed on the Stratus 3D printer.
This is the 2D image for the housing design for the FabISP.
(insert 2D image here)
This is the 3D model of of the housing used to view the edging joinging detail for the snap together componenets for the 2-part design.
The printed components below were produced on the Stratus 3D Printer. These parts are on the black carrier board and will be prepared for imersion in the wash/clean out tank for memoval of the White support material.

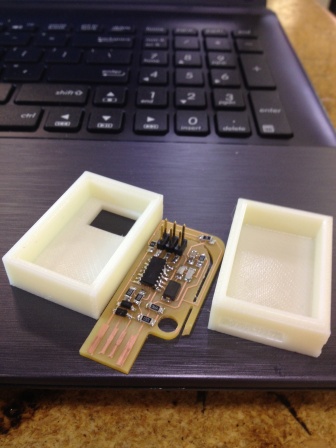
The illustration below shows the final products from design through finished product. Note the opening on the left half of the top portion of the housing where the 6-pin headder will pass through the case to allow connection to the FabISP module.