Fab Lab Barcelona SuperNode /Fab Lab Sevilla /Jose Perez de Lama
Week 07 / molding & casting / 06.03.2013 /
[assignment]
Design a 3D mold, machine it, and cast parts from it.
Link to class syllabus:
http://academy.cba.mit.edu/classes/molding_casting/index.html
[assigment development]
[piece and mold design]
I decided to work on a middle difficulty project, being my first project with molding and casting. The mold would have two pieces, but it would be a small piece, and not to complicated. I recovered the golden rhombohedron i had defined with Grasshopper for class 03. I baked an instance in Rhinoceros and started thinking how the mold would have to be designed, and began drawing it in Rhino.
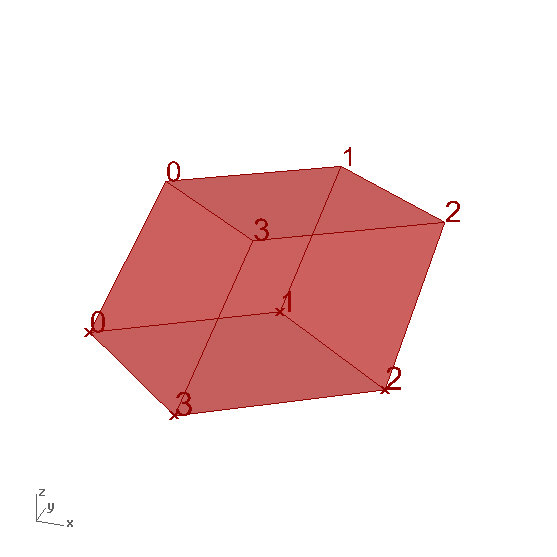
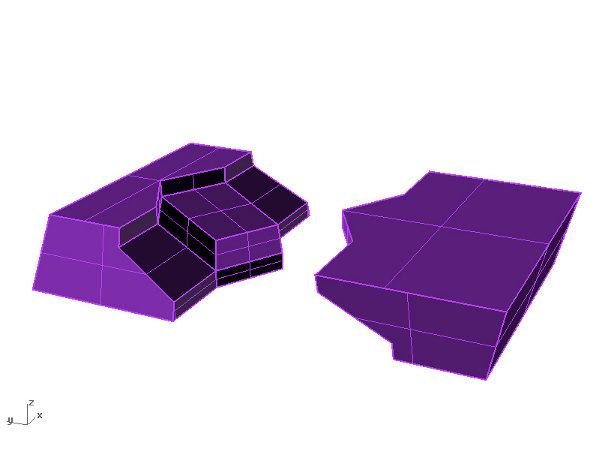
This is the sketch for one of the parts of the mold [positive]. The planes surrounding the actual three faces of the rhombohedron will help fix the two parts of the mold together. The angled shape of these walls and the horizontal common surface will act as geometric control elements when putting both parts of the mold together. Attention has to be paid to the height of the vertical walls that will connect the two parts of the mold. We measured the height of the mill we were going to use and estimated it shouldn't be taller than to 3mm, which was the dimension i gave it.
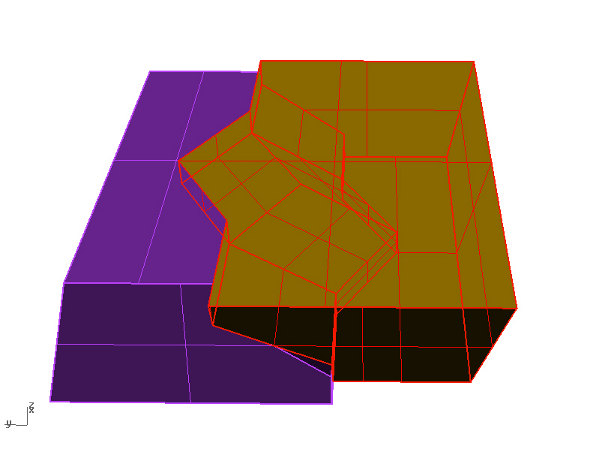
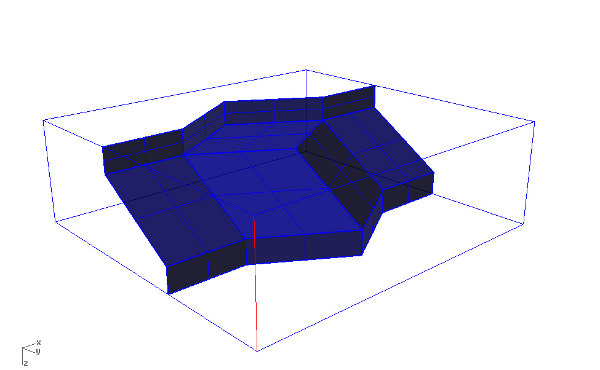
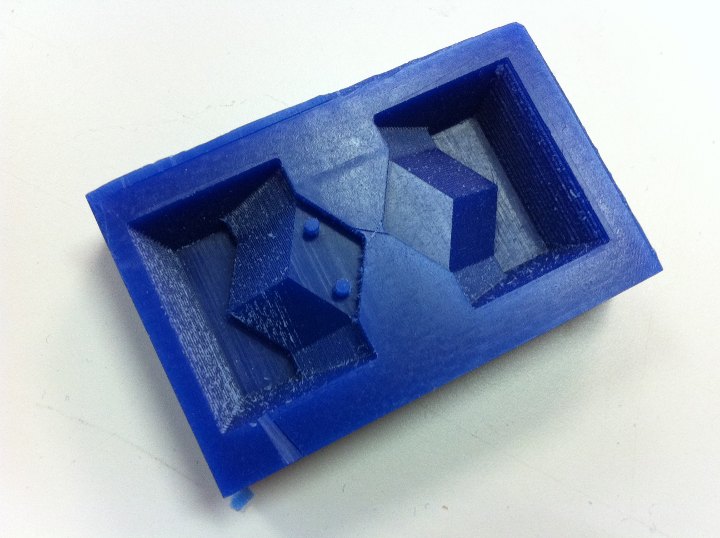
Above, the two simmetric parts of the mold, as they will be once filled with silicone. Below, a test of the two parts of the silicone mold coming together. The strange apparent disjoints that can be seen in the front side are due to the inclined walls of the pieces to mill. This inclination is needed for the blade to move down vertically without its shaft colisioning with the actual walls being milled.
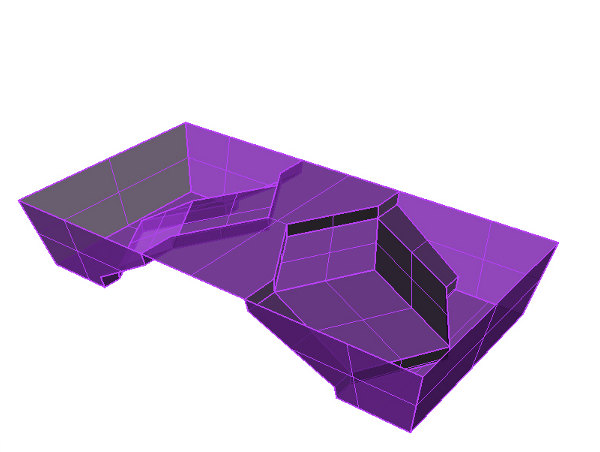
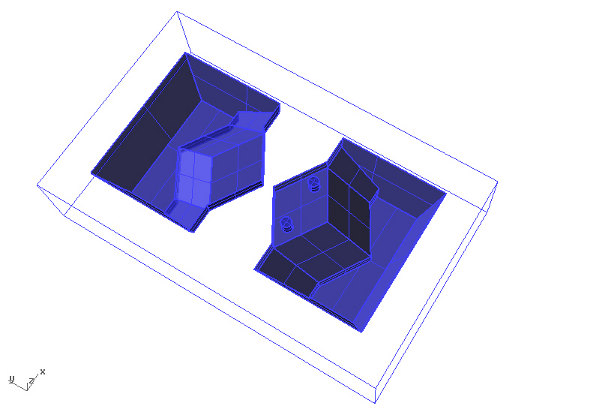
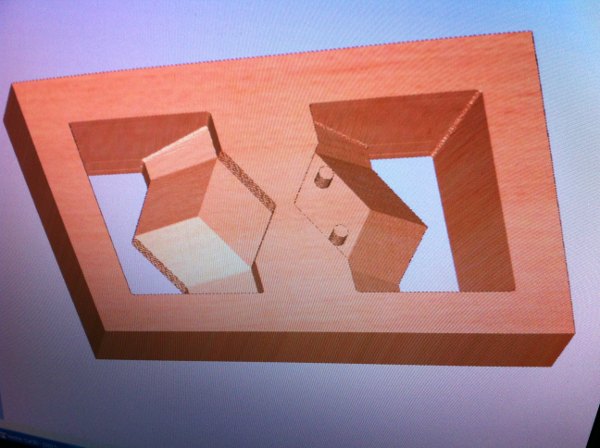
The next pictures show the various steps of the cad drawings of the piece to be milled in wax. The two pieces are put together in the same wax mill. They are not only symmetrical but exactly the same. In the second image there can be seen the two vents to fill and extacat the air of the mold. They are placed on the top horizontal surface of the piece to ease its filling.

[milling]
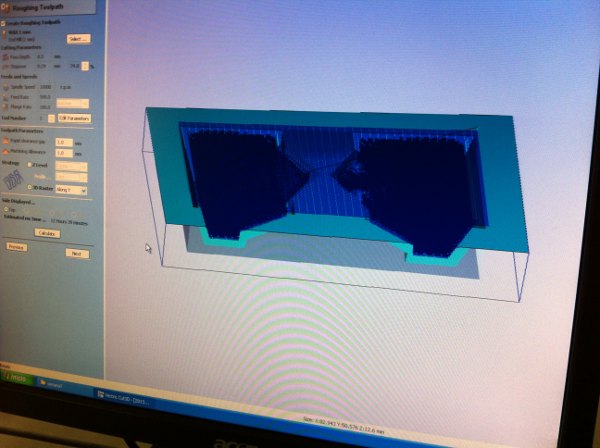
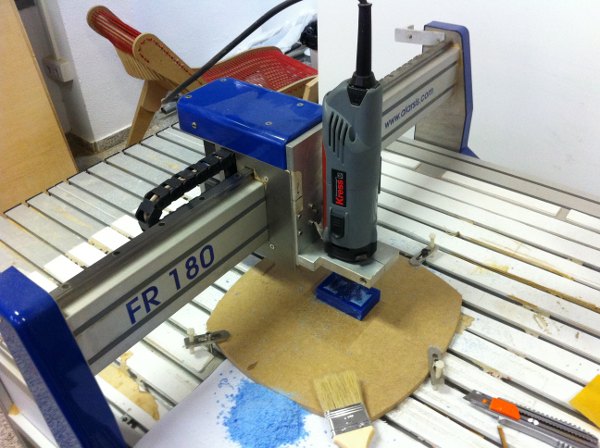
We have milled this piece with a mid size machine that we have in the lab, and Alarsis FR180. The main reason that we used it instead of the iModela is because it is much faster, and with these long-lasting processes we wanted to be on the secure side, and maybe later on, try with the iModela if we had time. First of all was manually cutting the wax blocs to a suitable size, the fizing it to the milling machine board with double sided tape, and CNC milling a horizontal surface on it. To mill the actual piece i used a 1mm diameter end mill; for both the roughing and the finishing; again looking for a compromise between time and quality. Being the first try it was very probable that it would become some kind of mistake... Immediately below are two visual simulations of the milling process produced by the machine software, Vectris V-Carve: roughing paths and roughing final look.
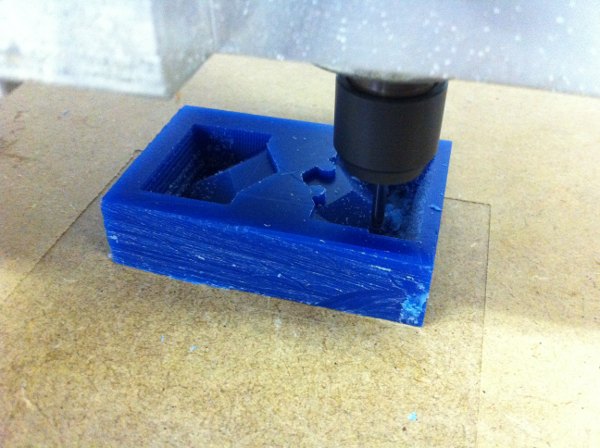
Milling process above, and finished piece below. The result seems to me rather improvable. While milling it could be seen that the 12º slope that we gave to the side walls was barely enough. For the finishing milling i only used the x axis, and at some moment it looked like it was going too fast; adviced by Jose Buzón who has much more experience with this machine than myself, i slowed it down, resulting in a better finishing of the left part of the piece [the right on the image below]. After the milling, i tried to clean the piece of parts of wax that had remained sticked. Two of the sloped sides of the rhombohedron, below on the left, remained however with a poor quality.
[silicone rubber mold]
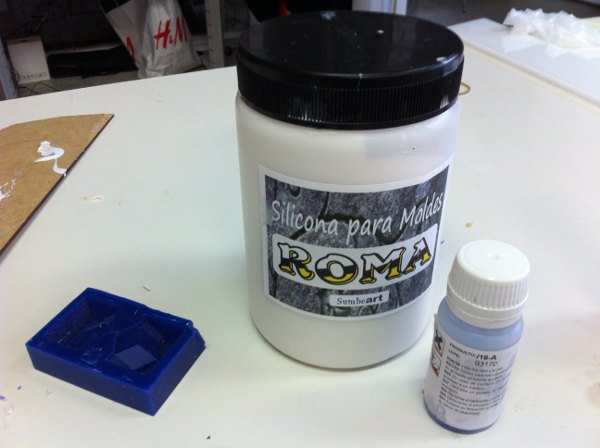
Then i prepared the silicone rubber. We bought a local version, [Silicona para moldes "Roma /16-Azul" plus a catalyzer sprecific for this silicone "Catalizador Roma/16-A], which has proved to work very finely. The catalyzer is mixed in a 5% proportion. We weighed the two components and then mixed them. The color reaction is helpful. The silicon is white and the catalyzer is a strong blue, but once they are combined and react, the mix becomes completely white again. The mix is quite fluid and it fills the mold with ease. In this case i was concerned with leaving the vents visible, and therefore open later on for the casting. I actually had to retire part of the silicone once poured. I did this with a spatula [is this the right word?]. It got a bit messy... Estimated curing time is 26 hours.

Then i tried to test an infrared lamp to accelerate the curing process... But it was to hot and the wax closer to the lamp almost started melting. So i left the piece to cure until the next morning... That was saturday evening.
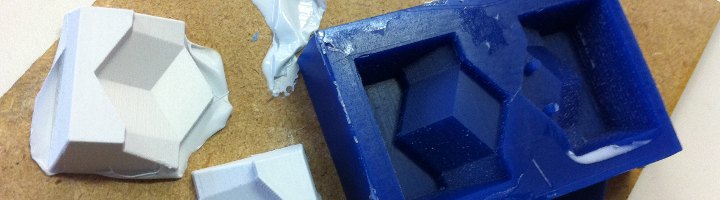
Sunday afternoon i was able to get back to the lab to check how the molds had come out. It was very easy to split them apart from the wax counter-mold, and they do look great. Geometry, as far as the walls that have to fit together is not 100% perfect, but being very flexible i could push them together. As mentioned, i had been careful trying to leave the vents with no silicone covering. I just had to remove with en Xacto knife a very thin film over one of them.
Later on i have discovered that the local store has Oomoo in stock. It is a bit more expensive, but we will try it next time.


Testing the two parts of the silicone mold. On the right image, there can be seen the two vent holes, and the odd angles on the sides due to the milling constrictions.
[casting]
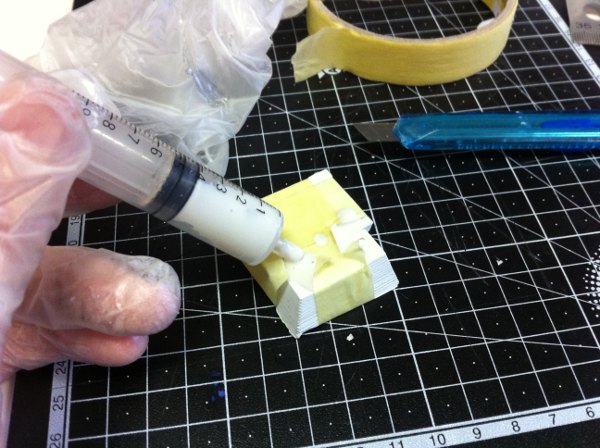
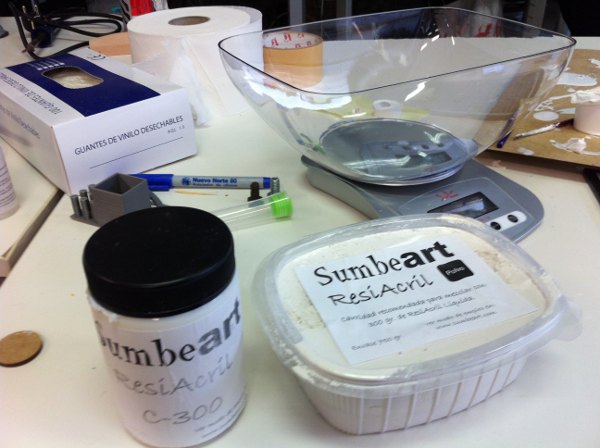
Unfortunately no Drystone or Hydrostone were available at our local supplier. We did think they had them, but then it was a misunderstanding on our side. Instead, the supplier suggested we should use acrylic resin. The brand we used is "Sumbeart Resiacril C-300", it looks like it is their own production. It is made out of two components. It is said to be non toxic; no mask is needed to work with it according to their specs. It is "very fast" again according to the web info, and as we did experience ourselves. The catalyzer is in powder form, white colored. The resin is a fluid liquid, white as well. The proportion , in weight, is 2.5 parts powder and 1 part liquid. I put a pair of vynil gloves on and weighed again both elements and then mixed them stirring with a small stick. I might have put a bit too much liquid, but i was concerned about the fluidity and the tiny vents in the mold.
As the silicone mold was kind of tiny, i fixed the two pieces together with painter masking tape, and then removed the parts of the tape that were over the vents.
Then i used a syringe to inject the resin inside the mold. This time i had calculated the amount of material to mix much more sharply than for the silicone. The resin flew out of the second vent right away - the volume of the rhombohedron is indeed very low. I insisted a little bit, to confirm that i had filled the piece completely, and more mix came out throught the second vent. Now i am waiting [Sunday early evening].
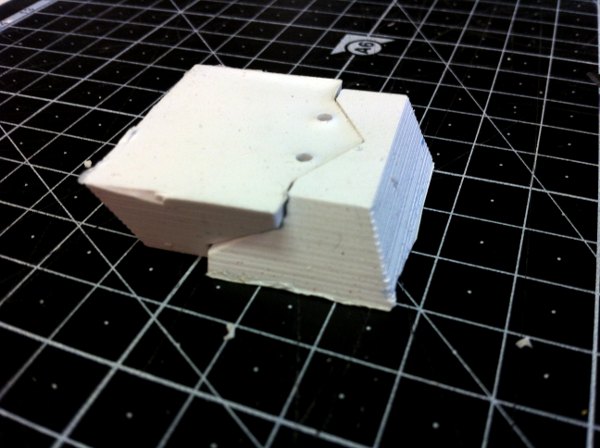
After 1 hour and 10 minutes i opened the two parts of the mold. The piece looked a little wet still, but extremely fine. I was very surprised with the quality of it. Learning this process has been a great present from the Fab Academy! The wax and silicone molds look perfect and i am ready to cast more pieces as soon as i can!
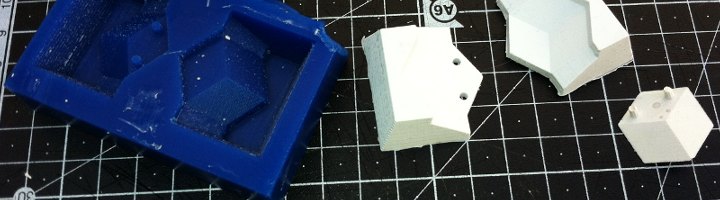
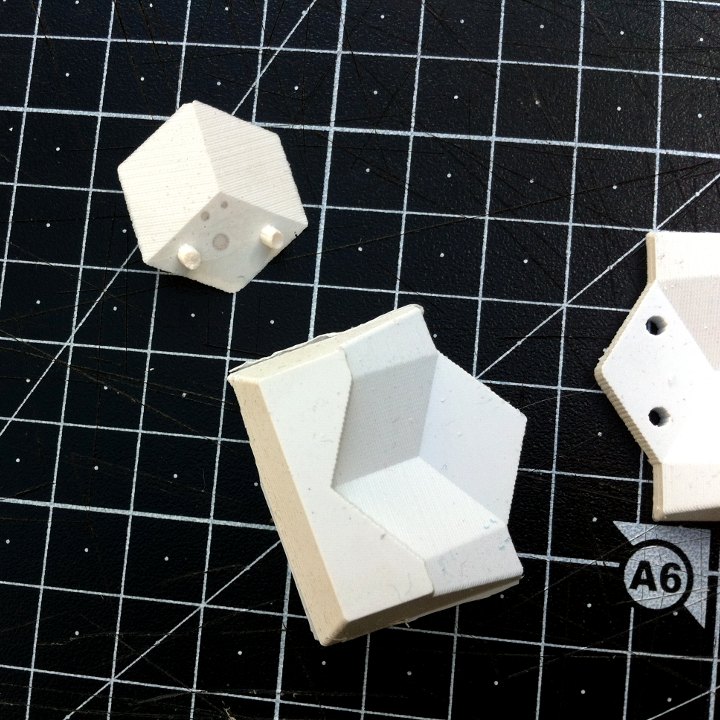
Eventually, Monday morning i extracted the resin piece from the mold. One of the nodes, as might be appreciated in the second picture, is not perfectly clean cut. And i didn't want to cut out the two small cylinders of the vents, not to break the model... I will cast some more pieces and go on testing them.
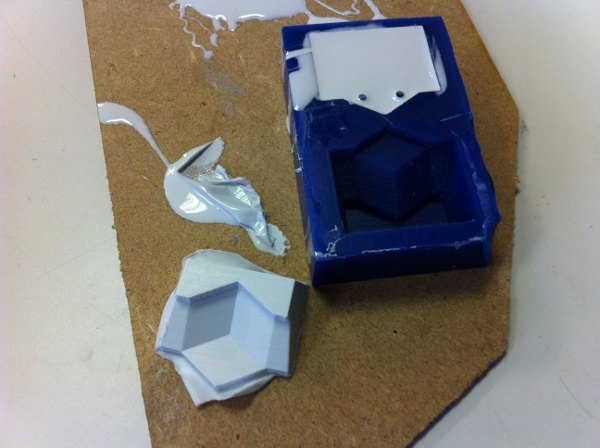
In the images below the "material sequence" from machinable wax mold, to silicone rubber molds to resin cast part.
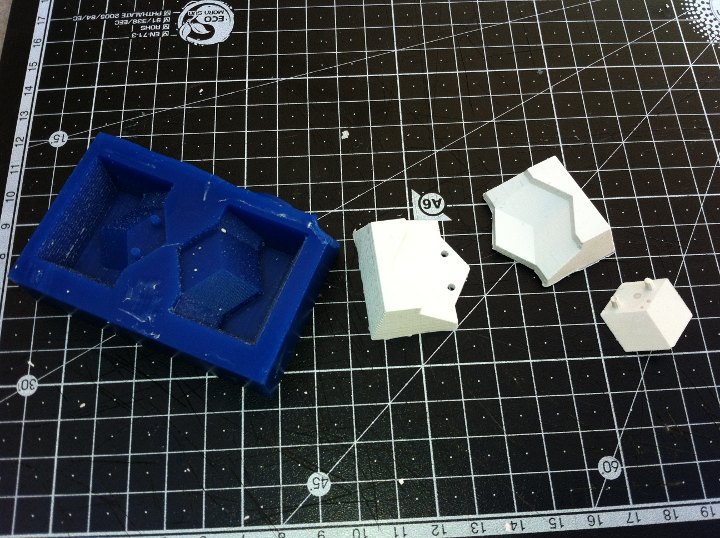
Image below: on the left top, the cast part, with the vent cylinders on the top face, which was in a horizontal position within the mold while casting; to the center and lower right the silicone mold.
The references for the materials that i have used are the following:
Machinable wax:: Inventables
Later on we have found machinable wax in several places in Barcelona, but as we decided to order the FR1 boards from Inventables, i took advantage of the shipping.
Silicone rubber:: Silicona para Moldes Roma 16/A; catalizador
Acrylic resin:: Sumbeart Resiacril C-300
The recommended materials, that we will try to use in next tests are: Oomoo [silicone] and Drystone or Hydrostone for casting.
[some conclusions]
I am thinking of improving the mold design some. Designing a non symmetric mold could be interesting, with the lower part a little bigger and including some kind of step where the upper part would fit with more precision...
And again, i would like to test with other materials, especially the drystone, to cast stronger pieces. The one i made does feel a bit soft, i need to break it to see how strong it is indeed, but i don't want to do this until i have made a couple more of it.
[files download]
Information and files are downloadable under a Creative Commons Attribution-Share A Like license; attribution: Jose Perez de Lama / Fab Lab Sevilla / Fab Academy 2013

# Golden rhombohedron oblate Grasshopper file [.gh]
# Rhombohedron milling mold Rhinoceros file [.3dm]
# Rhombohedron milling mold stl file [.stl]
Software:: Grasshopper v. 0.9.0014, Rhinoceros 4 SR9, Vectris V-Carve Pro; studied: Modela Player 4
Hardware:: Alarsis FR180 CNC milling 2.5 axis machine; Roland MDX-3ºº [wax surface preparation], Roland iModela [testing]
Materials:: Machinable Wax [Inventables], "Roma 16A" silicone rubber + catalyzer, Acrylic Resin Sumbeart C-300 [Sumbeart, Sevilla]
previous page:: 06 electronics design / next page:: 08 embedded programming
return home /perezdelama.jose