07 - Hello Arduino / Fabduino / Eagle Tutorial
Added to Tutorials:
I created a work-in-progress Eagle tutorial page: http://academy.cba.mit.edu/tutorials/eagle/eagle_resources.htmlUpdate: Working Hello Aduino:

For reasons I haven't uncovered yet, I was unable to use the Arduino IDE to burn the bootloader to a fabbed Arduino board. For my first attempt at this, see Fabkit / Fabduino description (below. Also see Ed Baffi's Fabkit / Fabduino page for how to program an fabbed Arduino without an external clock through the Arduino IDE. In both OS X and Ubuntu I was unable to connect to the board through the IDE. Shawn Wallace suggested that I use the following code. (See "To Program Your Arduino" section below) The code below worked for me in Ubuntu. NOTE: This code below works for a using an external 8MHZ resonator, see the links to the .png files.
Arduino in Acton - Running Servo
Download the Files
Download Files to Mill Get the files from the Fab Academy site Download the Arduino Bootloader File for the Atmega168 Right click to save the filesTo Program Your Arduino:
Set the fuses with:
Paste code is all in one lineavrdude -c usbtiny -p m168 -B 5 -u -U lock:w:0x0F:m -U efuse:w:0x00:m -U hfuse:w:0xdd:m -U lfuse:w:0xf6:m -P usb
Burn the bootloader with:
Paste code is all in one lineavrdude -P usb -c usbtiny -p m168 -u -U flash:w:ATmegaBOOT_168_pro_8MHz.hex -U lock:w:0x0F:m -B .2The options used:
- -u --> Disable safemode, default when running from a script.
- -U
:r|w|v: [:format] --> Memory operation specification. Multiple -U options are allowed, each request is performed in the order specified.
Fabduino Board - Incomplete:

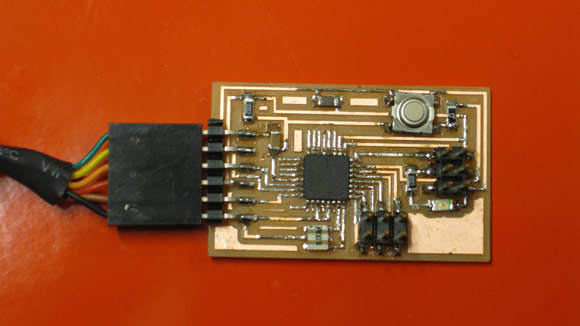
I milled and stuffed Ed Baafi's Fabduino board version 2. I am still troubleshooting the board, but I may just start over. So far avrdude cannot talk to the chip to burn the bootloader. I have tried the USBtiny and the ATAVRISP2, but I did not have any luck with either one.
I have also tried using just avrdude and the Arduino IDE without success. I have also tried every possible configuration of FTDI plus jumpers to the ISP. (As well as just jumpers to the ISP). I will likely start over, perhaps I overlooked a trace when I was editing the .png file - see "other issues" below.
Error Message (both avrdude and Arduino IDE):
avrdude: initialization failed, rc=-1
Double check connections and try again, or use -F to override this check.
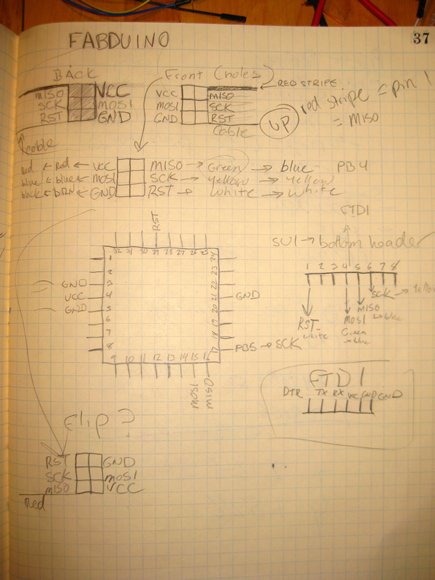
Figuring Out the Pin to Microcontroller Setup:
The Fabduino does not have a 6-pin header, so it needs to be programmed using jumpers attached to the pins that would be on the programming header.

Other Issues:
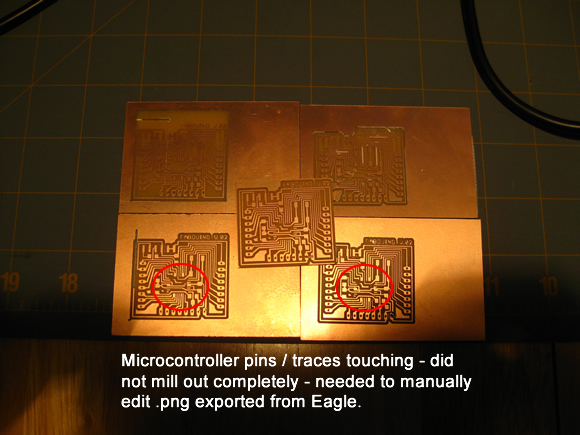
I milled this board several times. When I exported the file as a .png from the origional Eagle board file, there were some jagged edges that caused the toolpath around the microcontroller pins to remain connected. At first I thought that this was due to the Fab modules settings or the bit size. I later figured out that if I cleaned up the problem areas in the .png manually in The Gimp, the toolpath issues went away.


