Week 15
System Integration
Week Outline
- Wednesday: Global Class on System Integration.
- Wednesday: Global review (I got called up in the random generator!).
Global Class
On this week's global class, Neil focused on the different aspect of system integration. He started by covering failure nodes and explaining what not to do and why not. Then he explained how to do what we should do. So he covered design considerations, packaging considerations, and testing techniques. He also covered the concept of repairability and product lifecycle.
Assignment
Design and document the system integration for your final project
The documentation of the design process and system integration for my final project is available in full detail on the Documentation section on my Final Project Fabrication page.
Mechanical parts alignment
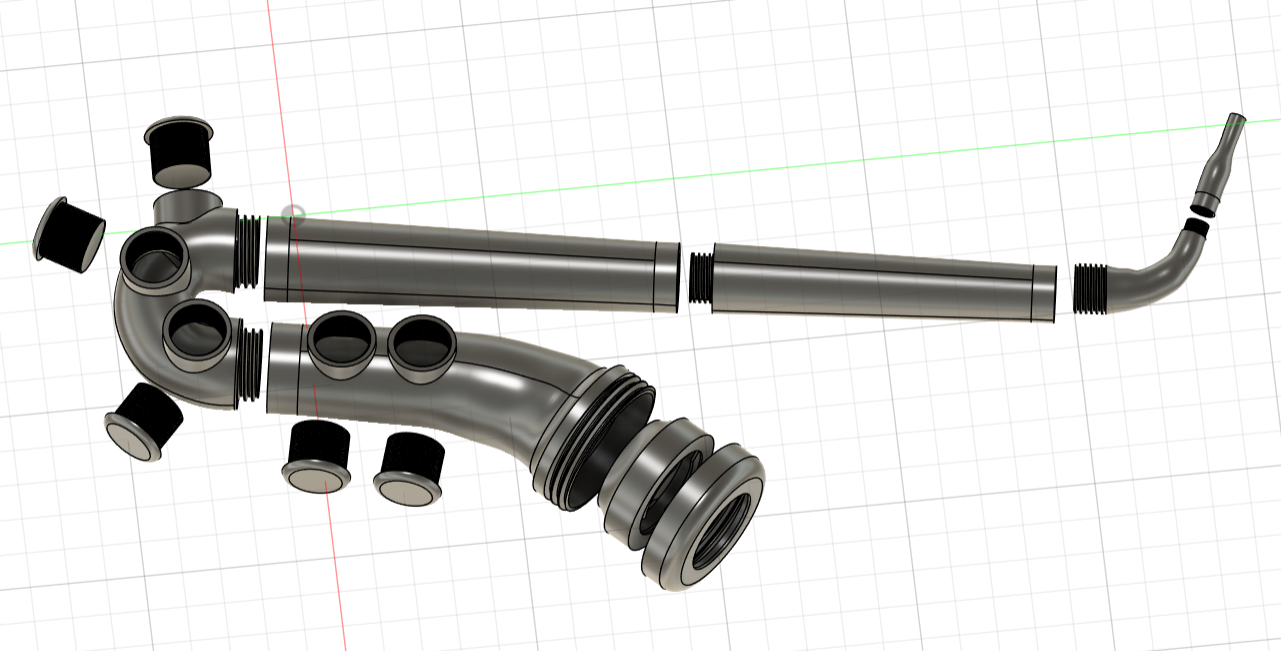
As you can see above, the mechanical assembly of my electric saxophone is modular. This is due because of the sizing limitations of the 3D printers we have at the lab, so that it can easily be assembled and disassembled in order to repair parts, and so that it can be easily spiralled.
To align the parts and make sure the structure is robust enough, I used threads between pieces. The size and pitch of the thread depends on each piece's sizing, but they all match up together thanks to Fusion's very useful "create thread" tool.
PCB and electrical components mounting
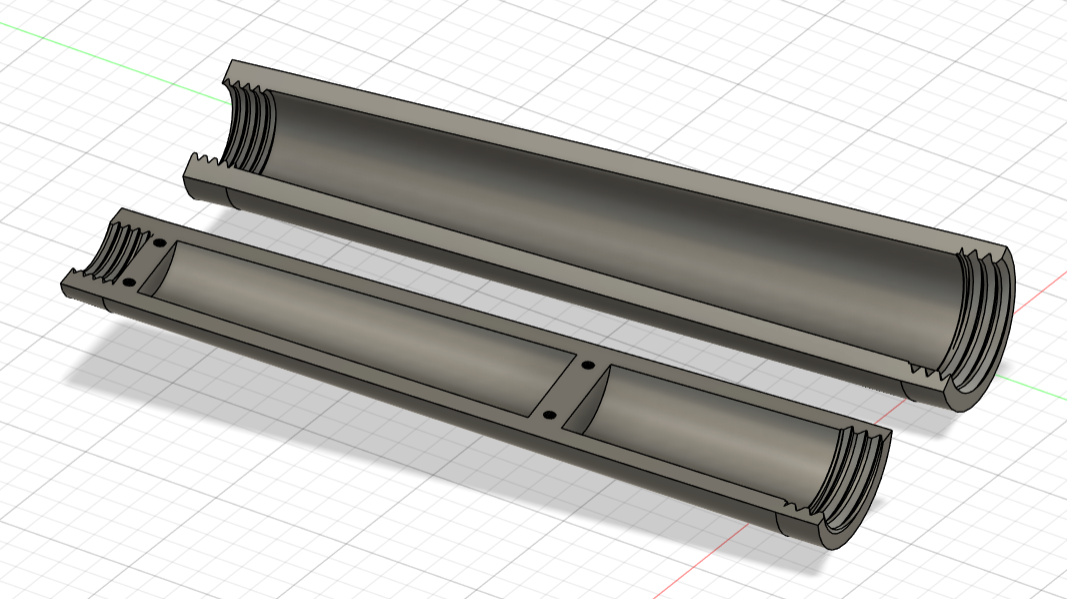
The two parts of the main body of the saxophone are modular themselves, enabling easy access to the electrical components inside. Above you can see the bottom part, with the screw holes for the daughterboard PCB.
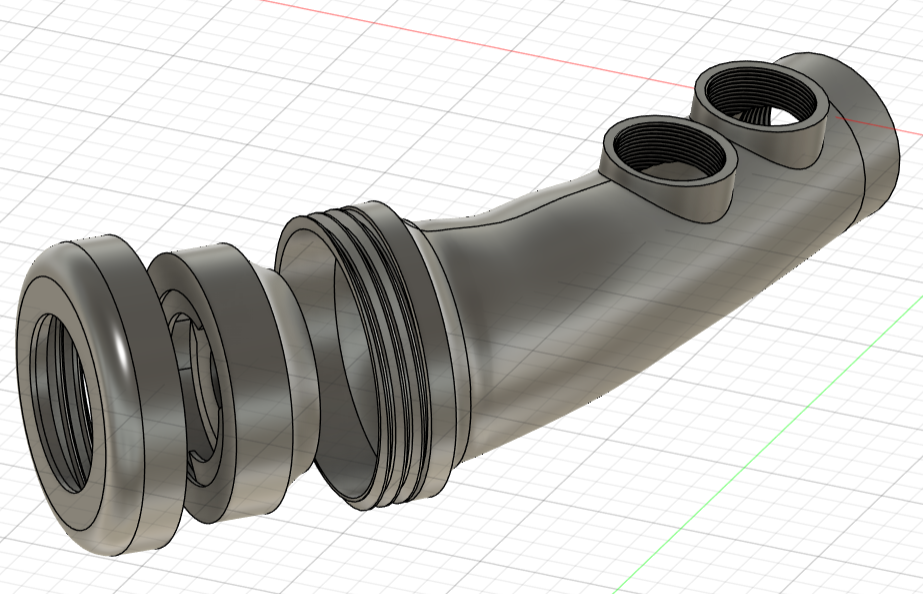
The bell of the saxophone actually consists of 5 modules in itself which are (from left to right):
- The lid
- A holding piece for holding the acrylic cutout, the neopixel, and the speaker
- The main bell body which includes two modules for spiral design implementations (more neopixel rings or possibly small LCD screens)