Week 13
Molding and Casting
A.K.A. Potty Pottery Lab
Week Outline
- Wednesday: Global Class on Molding and Casting.
- Thursday: Local Class on Molding and Casting.
Global Class
Local Classes
This week's global class started with Julia explaining to us the different steps, processes, and techniques used for molding and casting. Then we got to experiment as a group with all of them.

Assignments
1. As a group, review the safety data sheets for each of your molding and casting materials, then make and compare test casts with each of them.
The documentation of the work we did can be found here.
2. As a group, compare mold making processes
The documentation of the work we did can be found here.
3. Design a mold around the process you'll be using, produce it with a smooth surface finish that does not show the production process toolpath, and use it to cast parts.
I wanted to use the modeling wax on the CNC since I thought that was the coolest technique. I struggled to decide what to do for my mold, but in the end I deccided I wanted to do a silicone ring, so that's what I set out to do.
Design
I used Fusion to design my ring and then to design the mold around it. I knnew it was going to take me a couple of tries to decide on sizes, so I began by setting up the parameters for the design so that I could change dimmensions easily if needed:

Using these parameters as my guidelines, I designed the ring I wanted:

Then I made a box around it for the mold:

And I created the channels for filling the mold with the silicone and for letting the air escape:

I did a boolean difference between the ring and channels and the mold block:

Then I split the mold block in to two separate pieces:

And I added some aligment pieces between both faces of the two pieces of the mold:

I finished by modelling the block of wax I was going to cut into and positioning both mold pieces where I wanted them:

The fusion file for the mold can be downloaded here.
Mold Production
Once I had the design in Fusion, I exported it as an STL file, since that is what the Modela software that the Roland CNCs that we have use. The steps for setting up the software are as follows:
- File -> Select Machine
- Options -> Add/Remove tools: 1 for roughing, another one for finishing: eg 1/8" flat then 1/16" ball nose.
- Add/Remove tool:
- Set diameter and shape.
- Click "Cutting parameters"
- Select "Modelling wax"
- Click on "Set parameters" -> "Register"
- Load the stl
- Set 0 to bottom left (in xy), top (in z) corner
- Create roughing operation: contour.
- Create finishing operation: scan lines X + Y.


Then I generated the toolpath for the roughing and made sure it looked ok:

And then I generated the toolpath for the finishing and made sure it looked ok:

Once I had the files, I exported them and loaded them into the CNC's computer. I loaded the end mill on the CNC and ran the roughing toolpath, then changed the mill and ran the finishing toolpath.
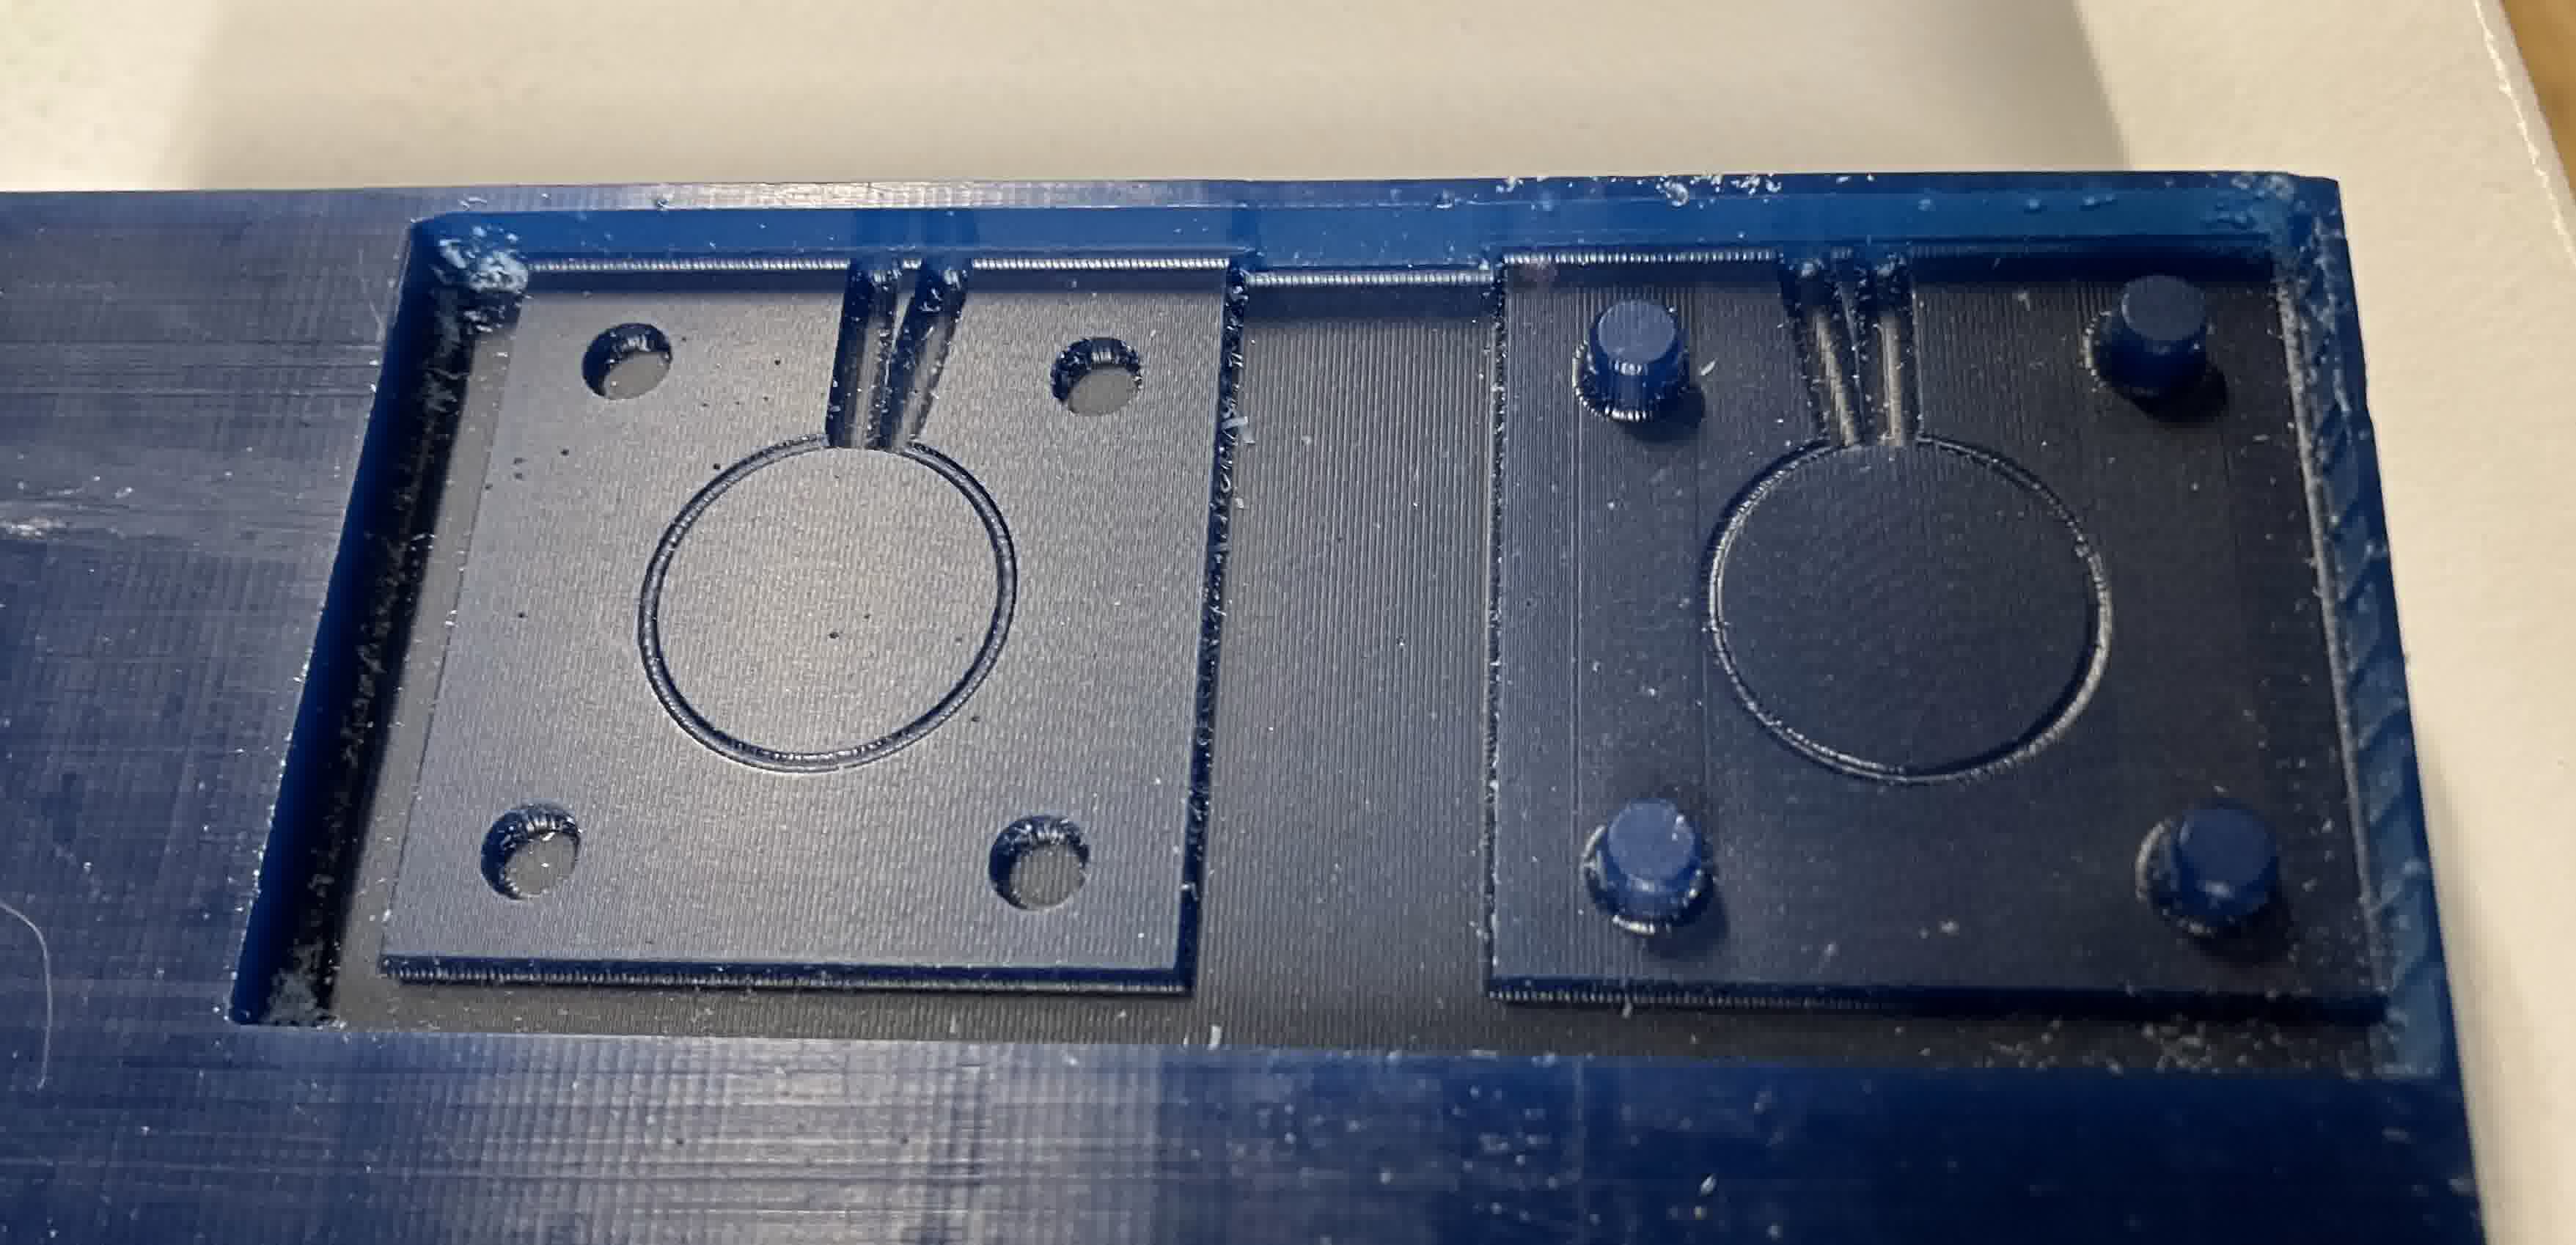
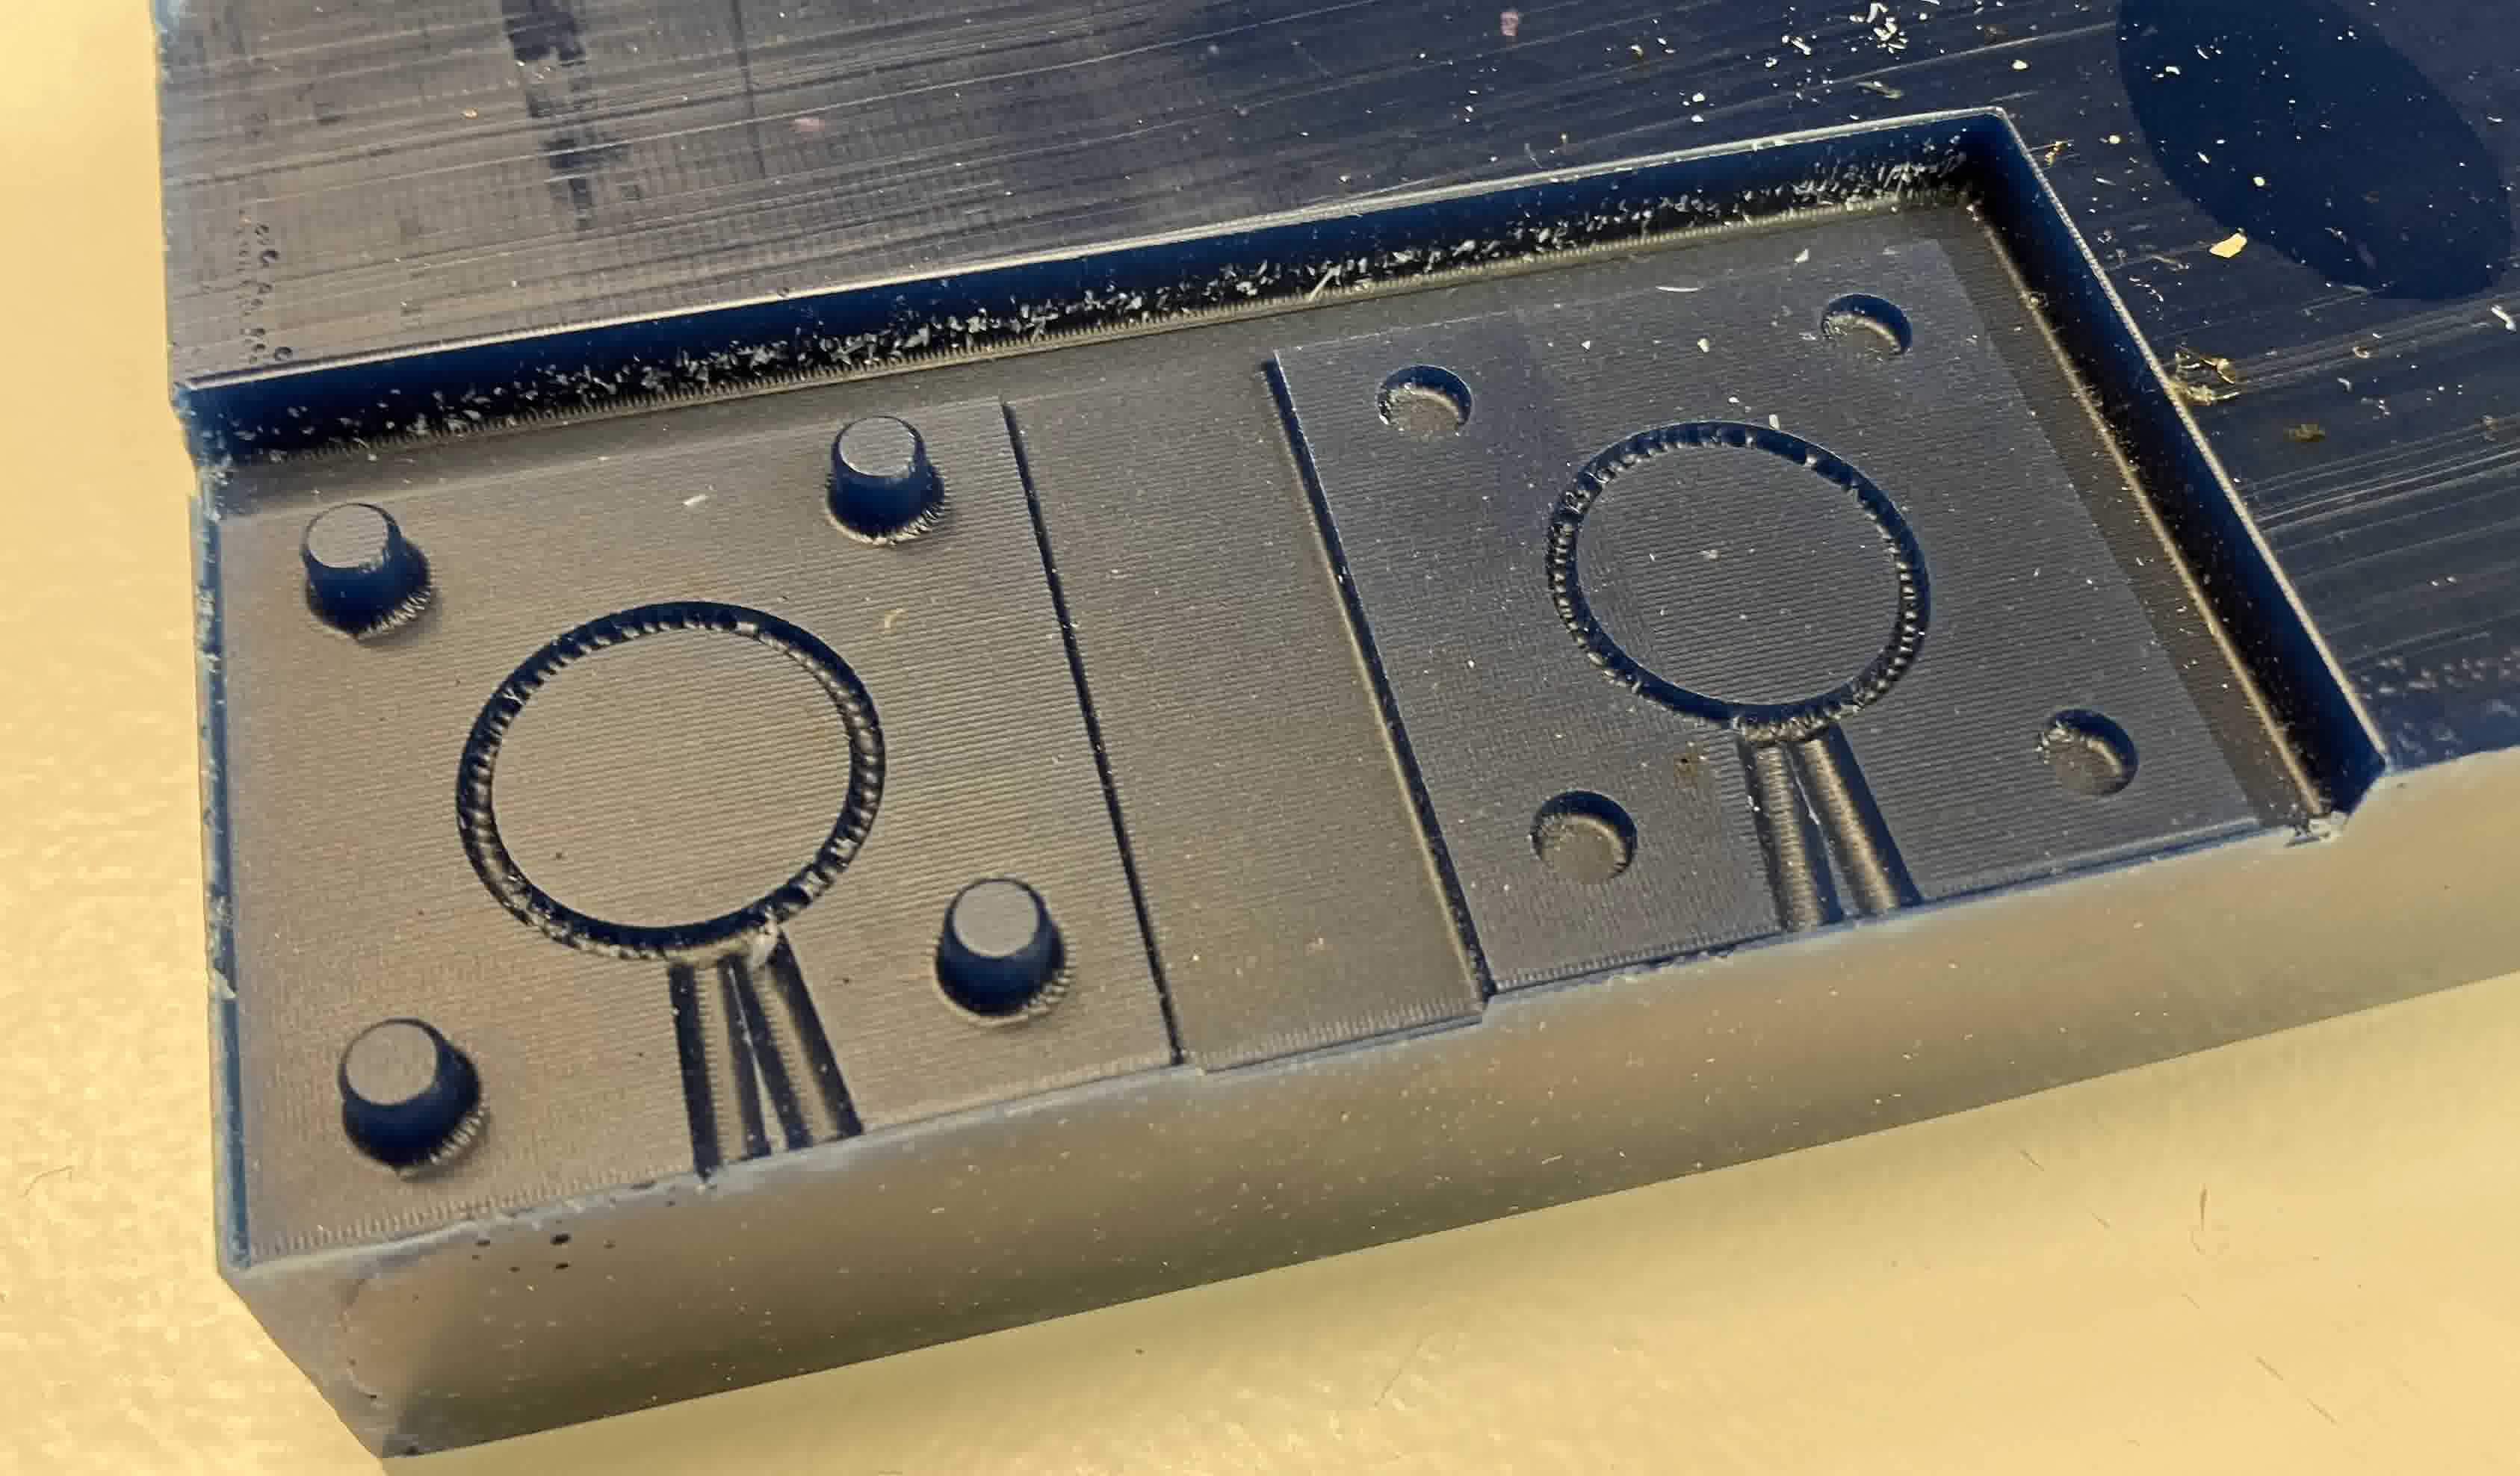
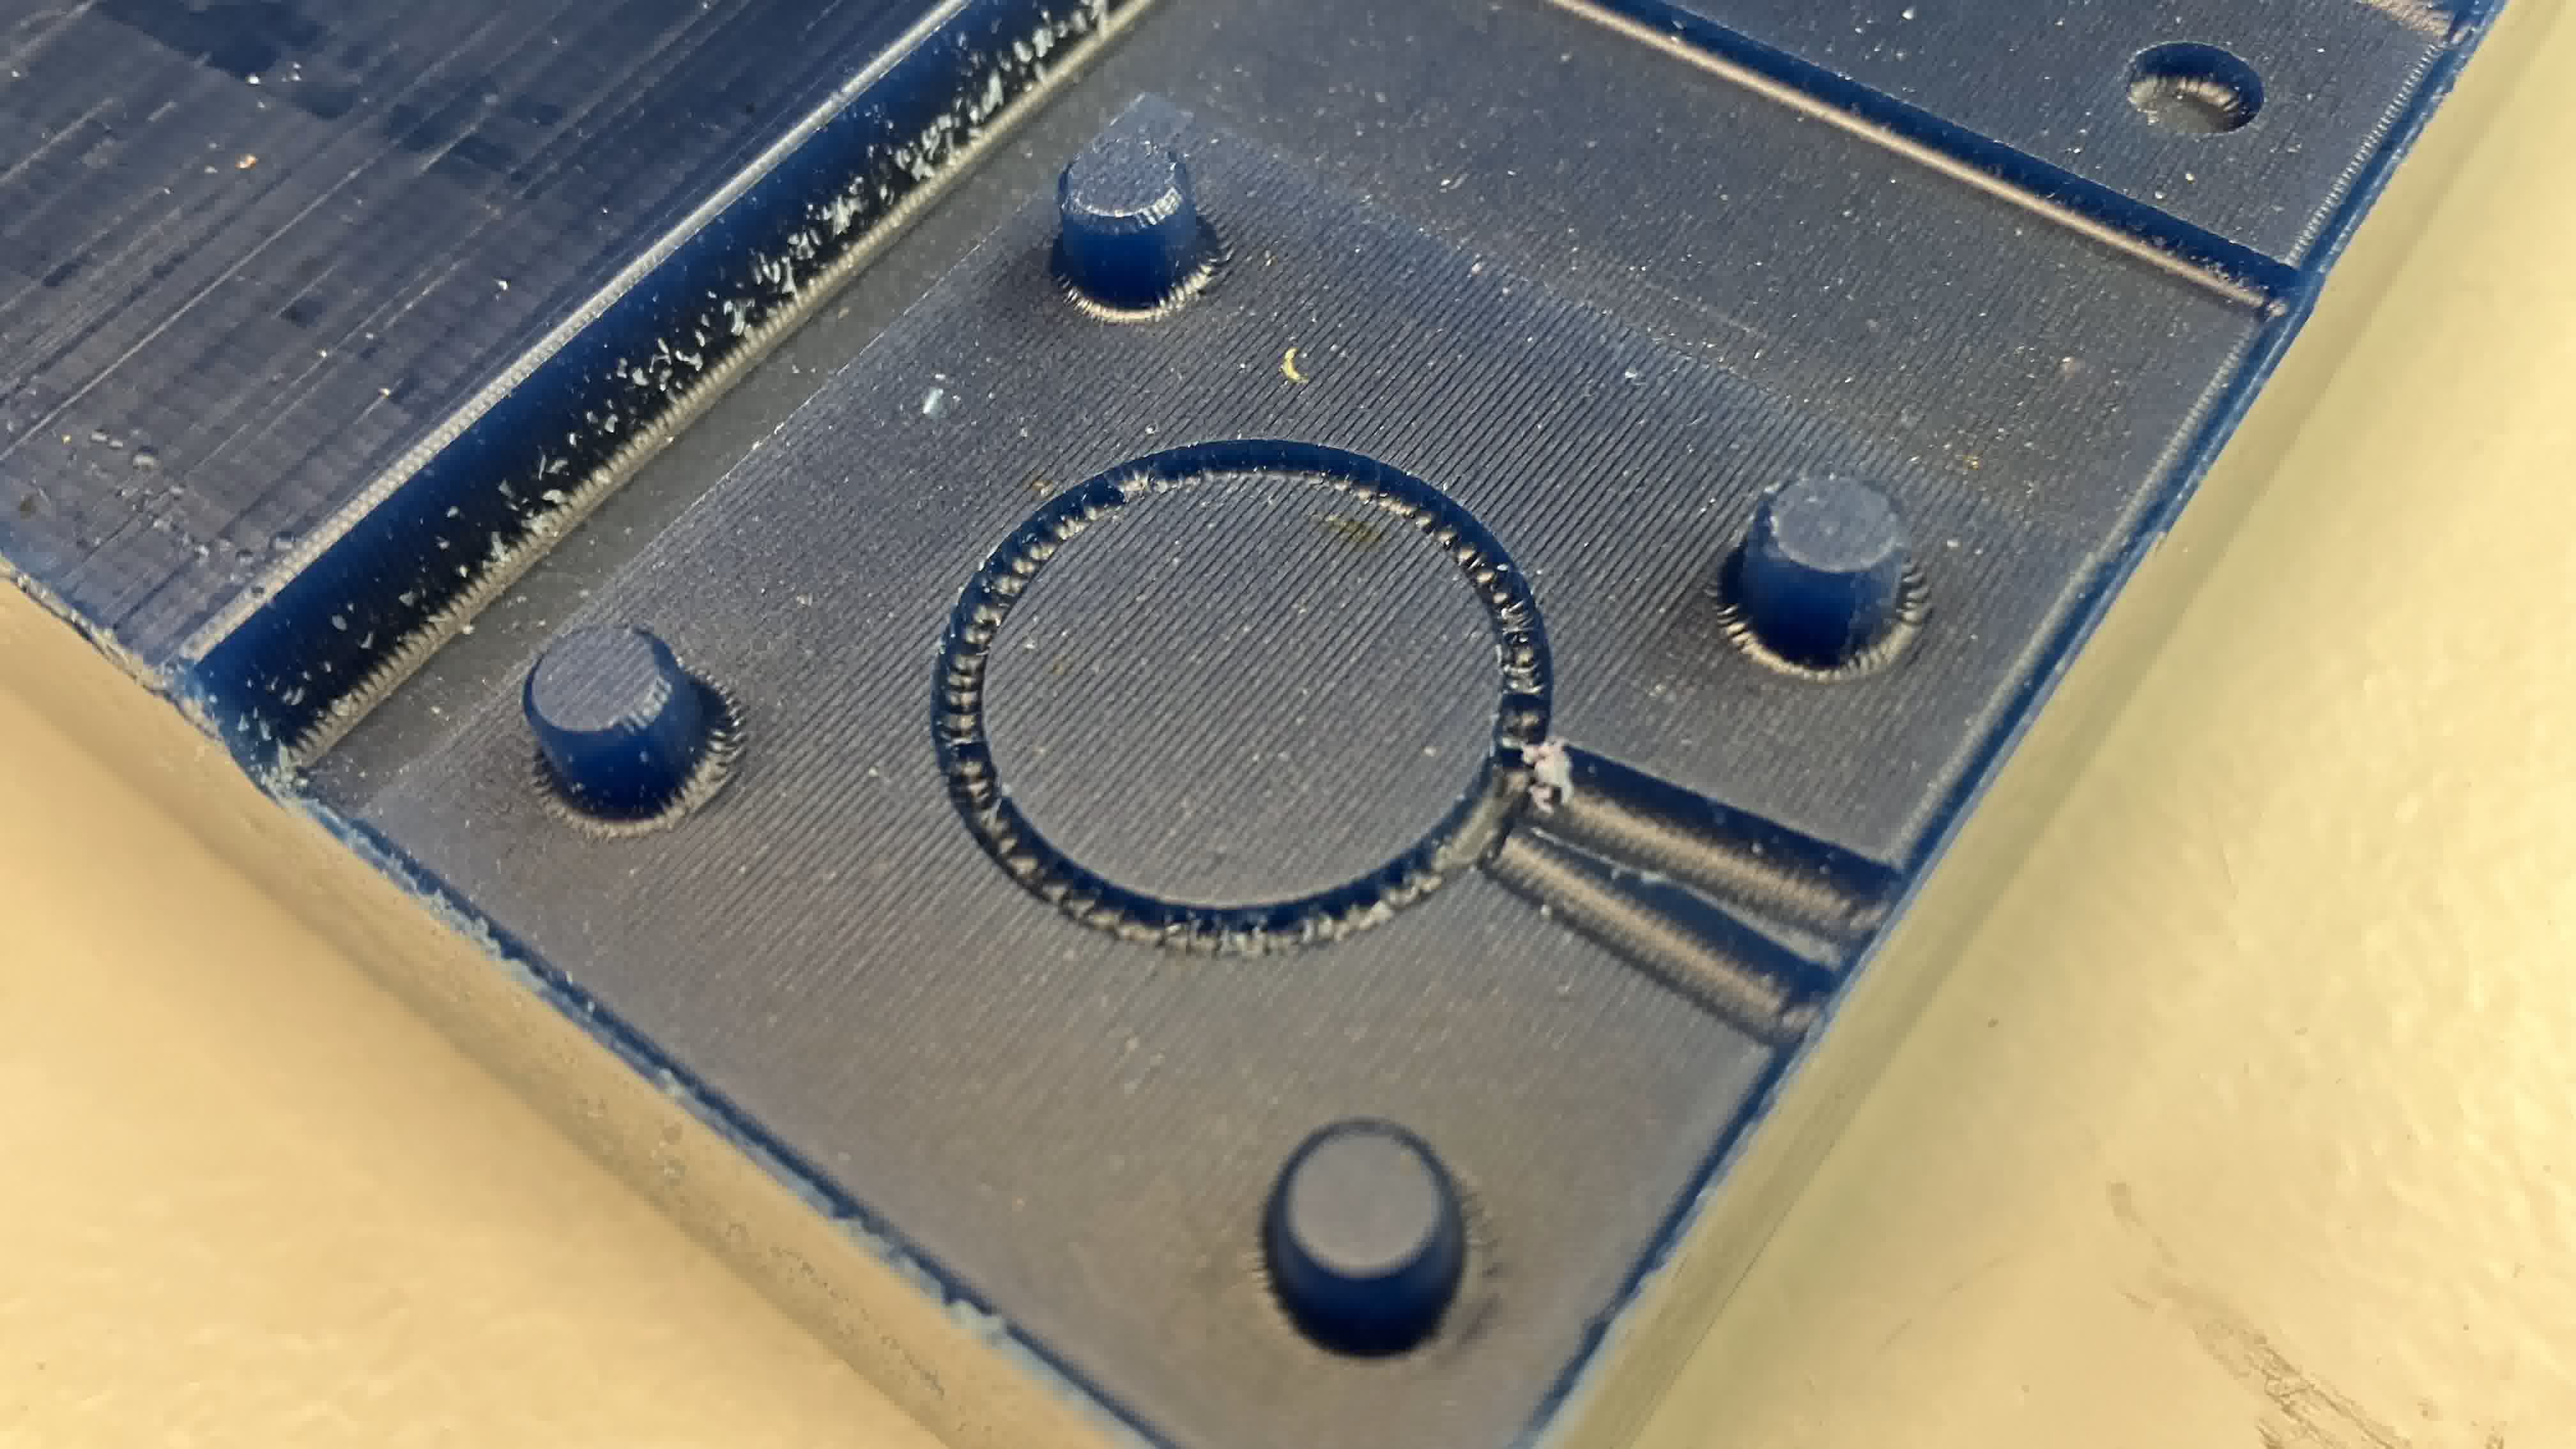
Once the mold cam eout, I realized the end mill was thicker than the ring, and so it hadn't fully traced the depth of it. I went bacck to Fusion and edited the dimensions of the ring to fix this (that's why it was helpful to have it be a parametricc design). After re-running through the whole toolpath prep process, I ran the files again. This time it looked better although it still wasn't perfect, but it was good enough for a first try.
The toolpath for the roughing can be downloaded here. The toolpath for the finishing can be downloaded here.
Castings
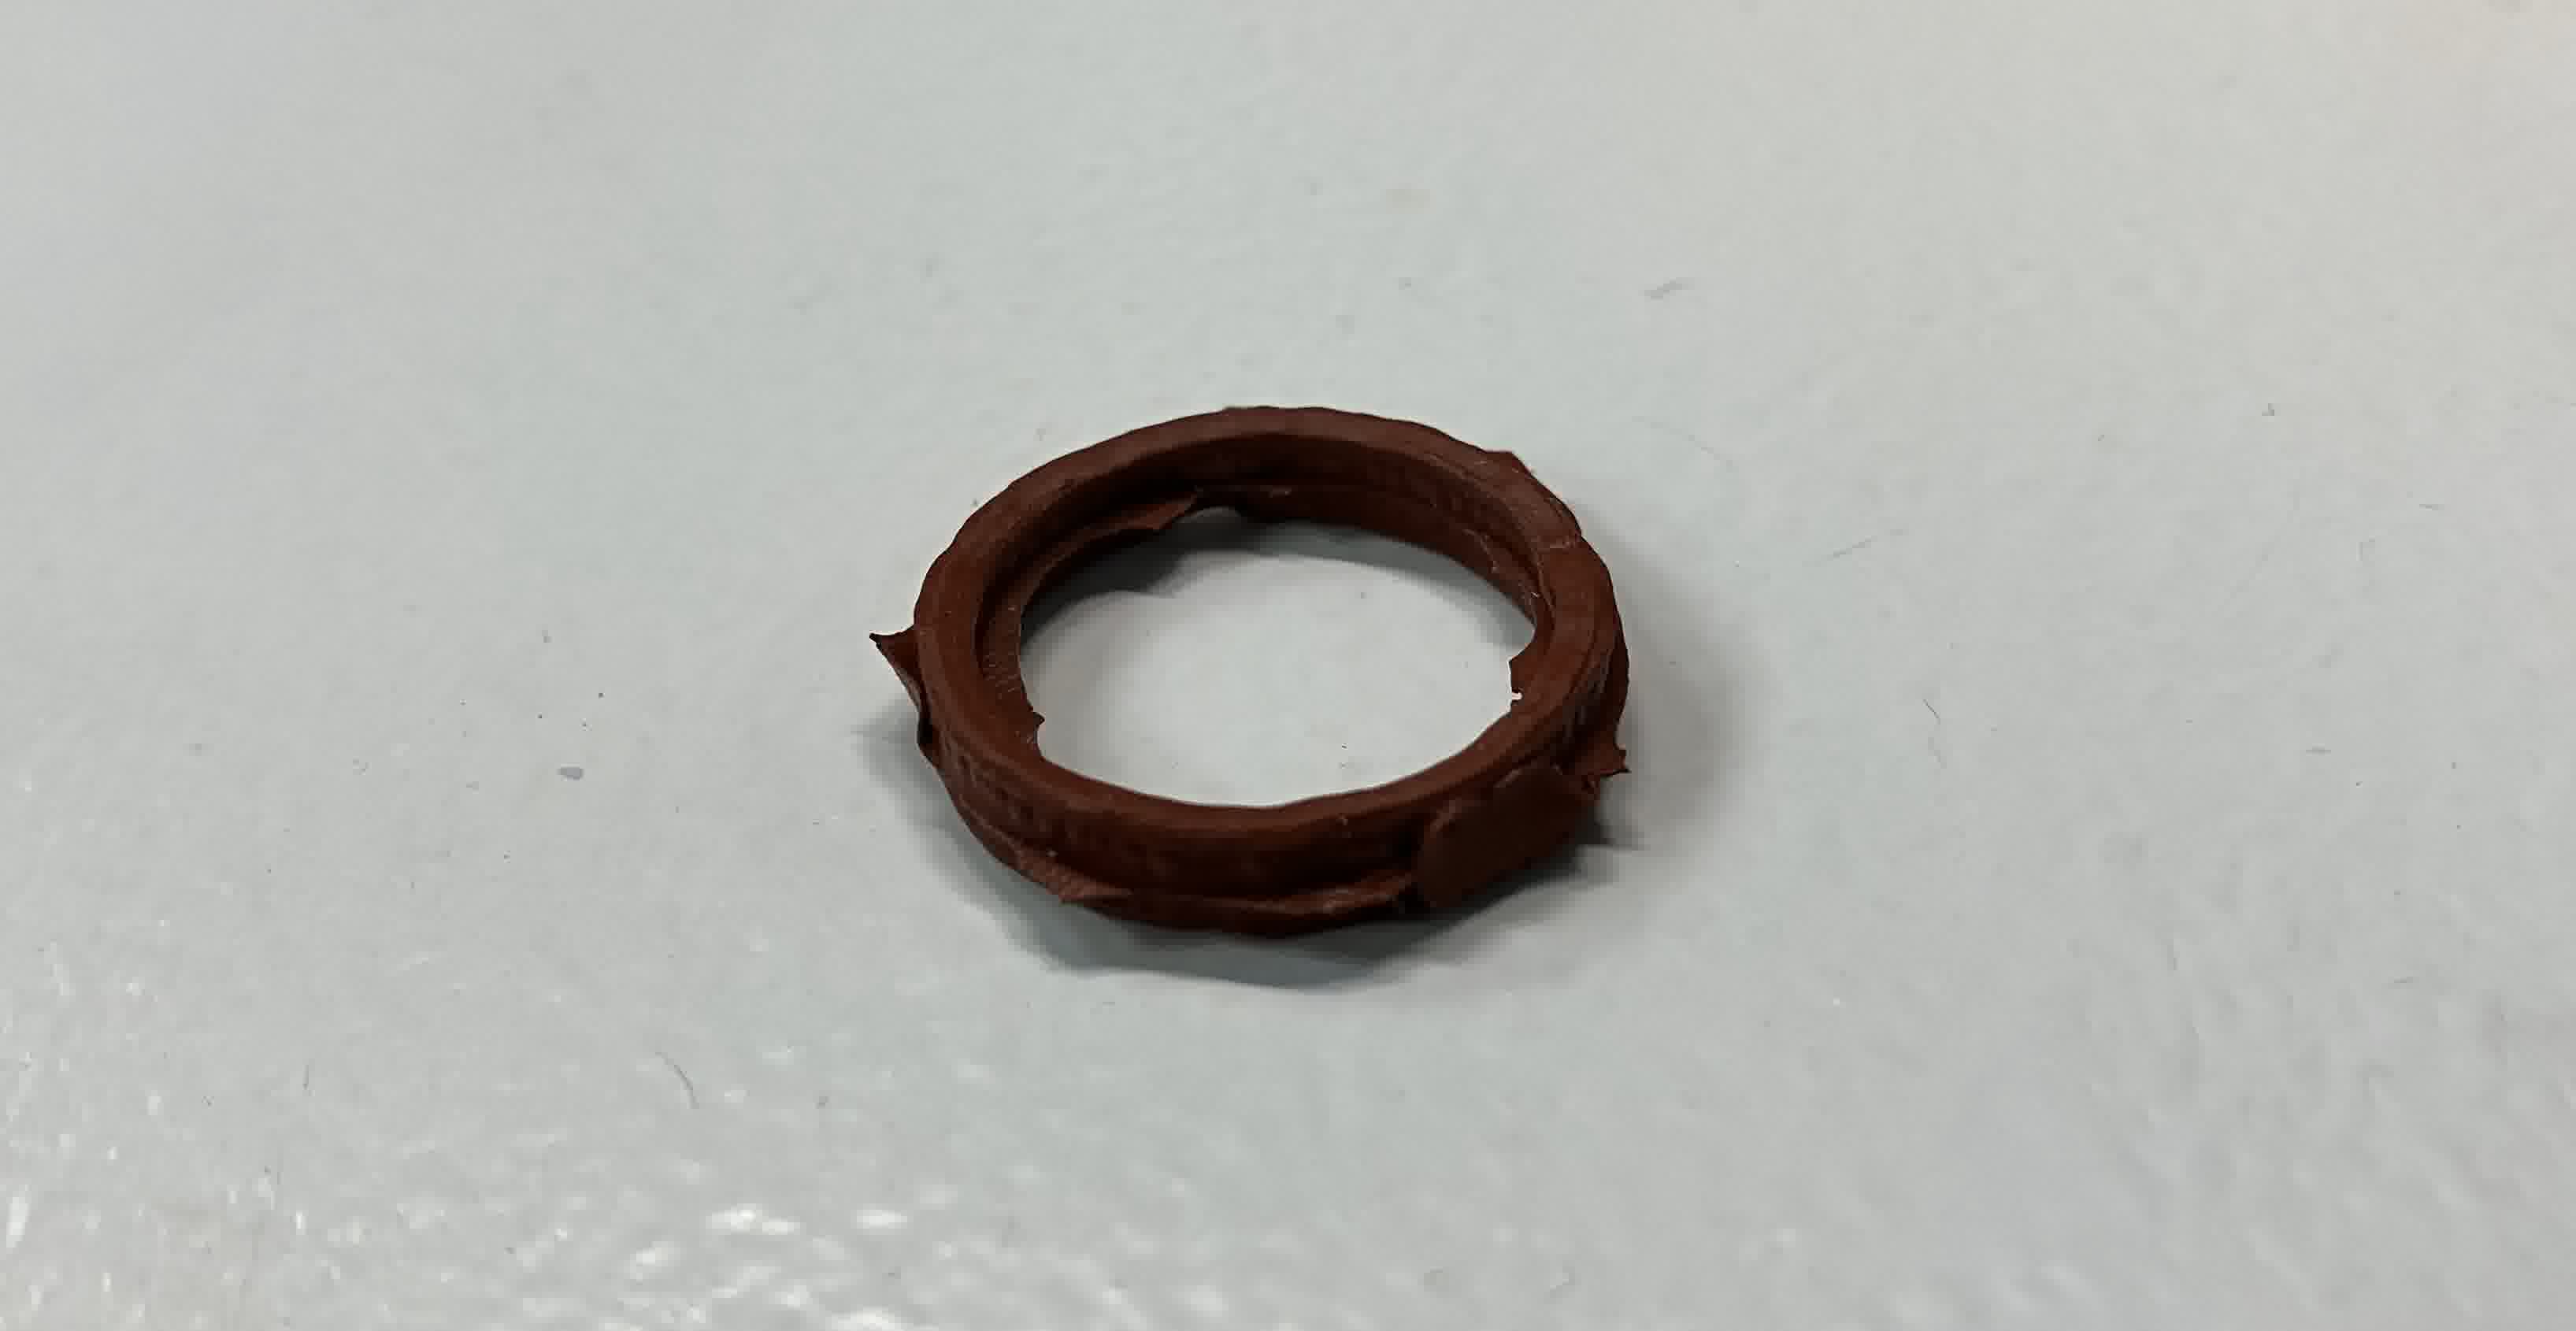
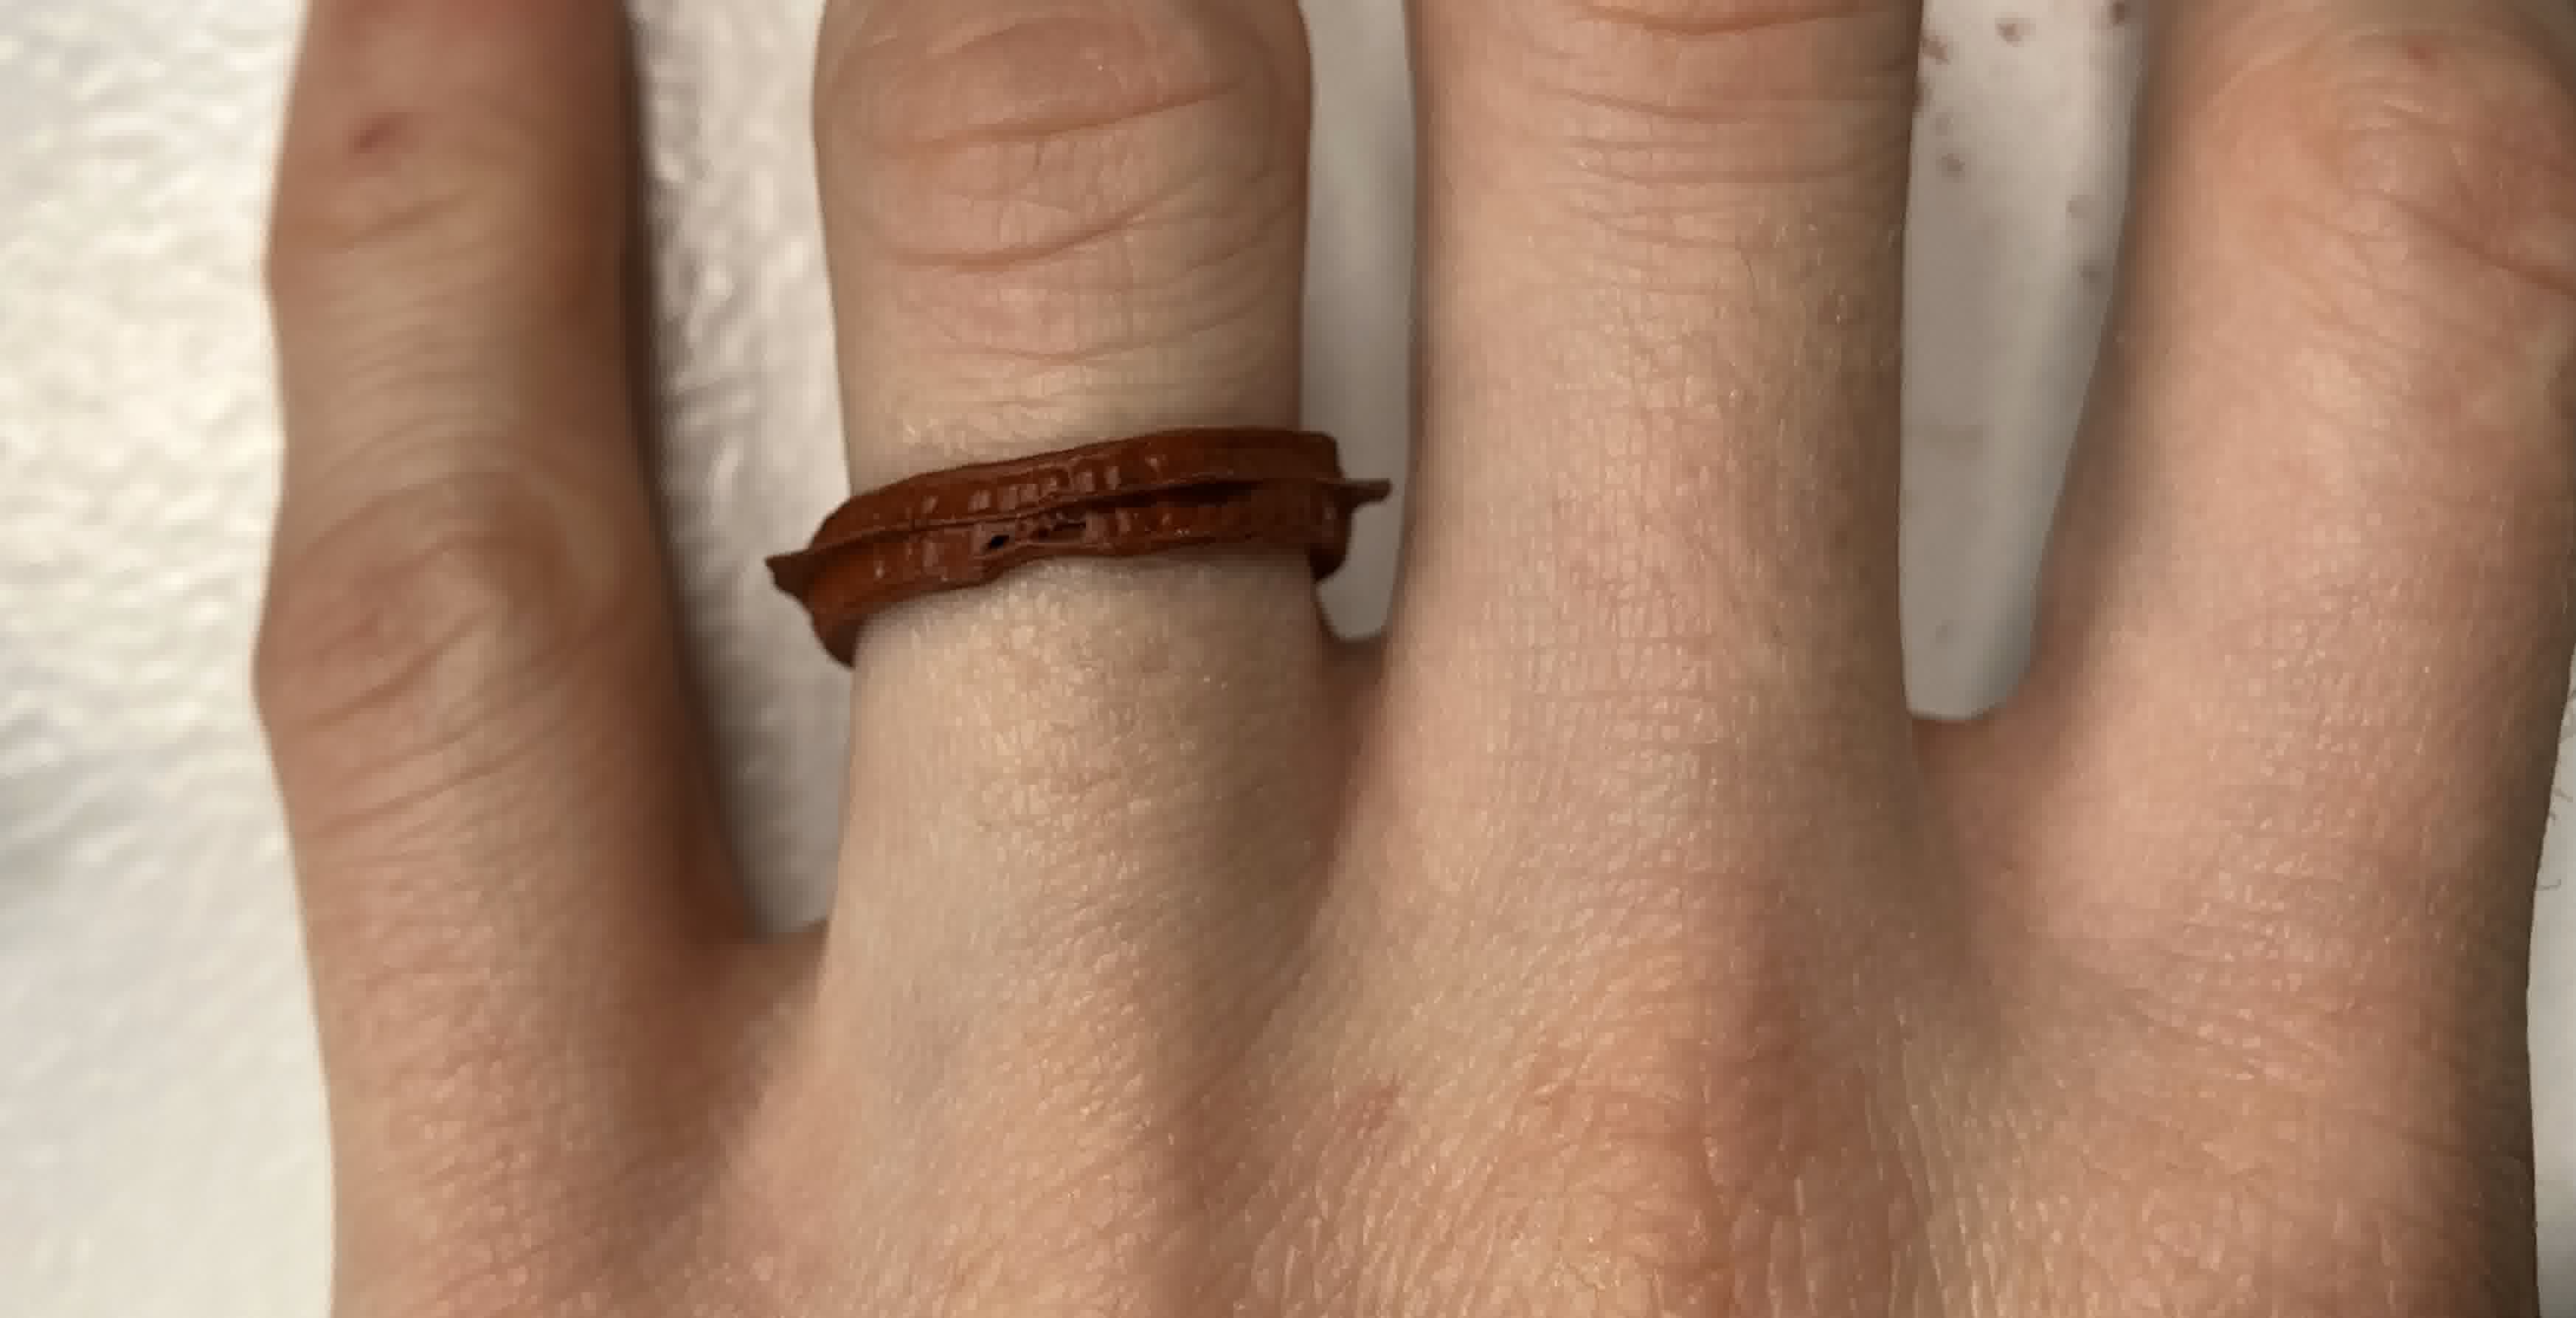
I wanted to have a hardcore ring where I wouldn't be worried about it melting or breaking too easily, so I selected Tinsil 70-60 Tin-cured silicone for low casting metals.
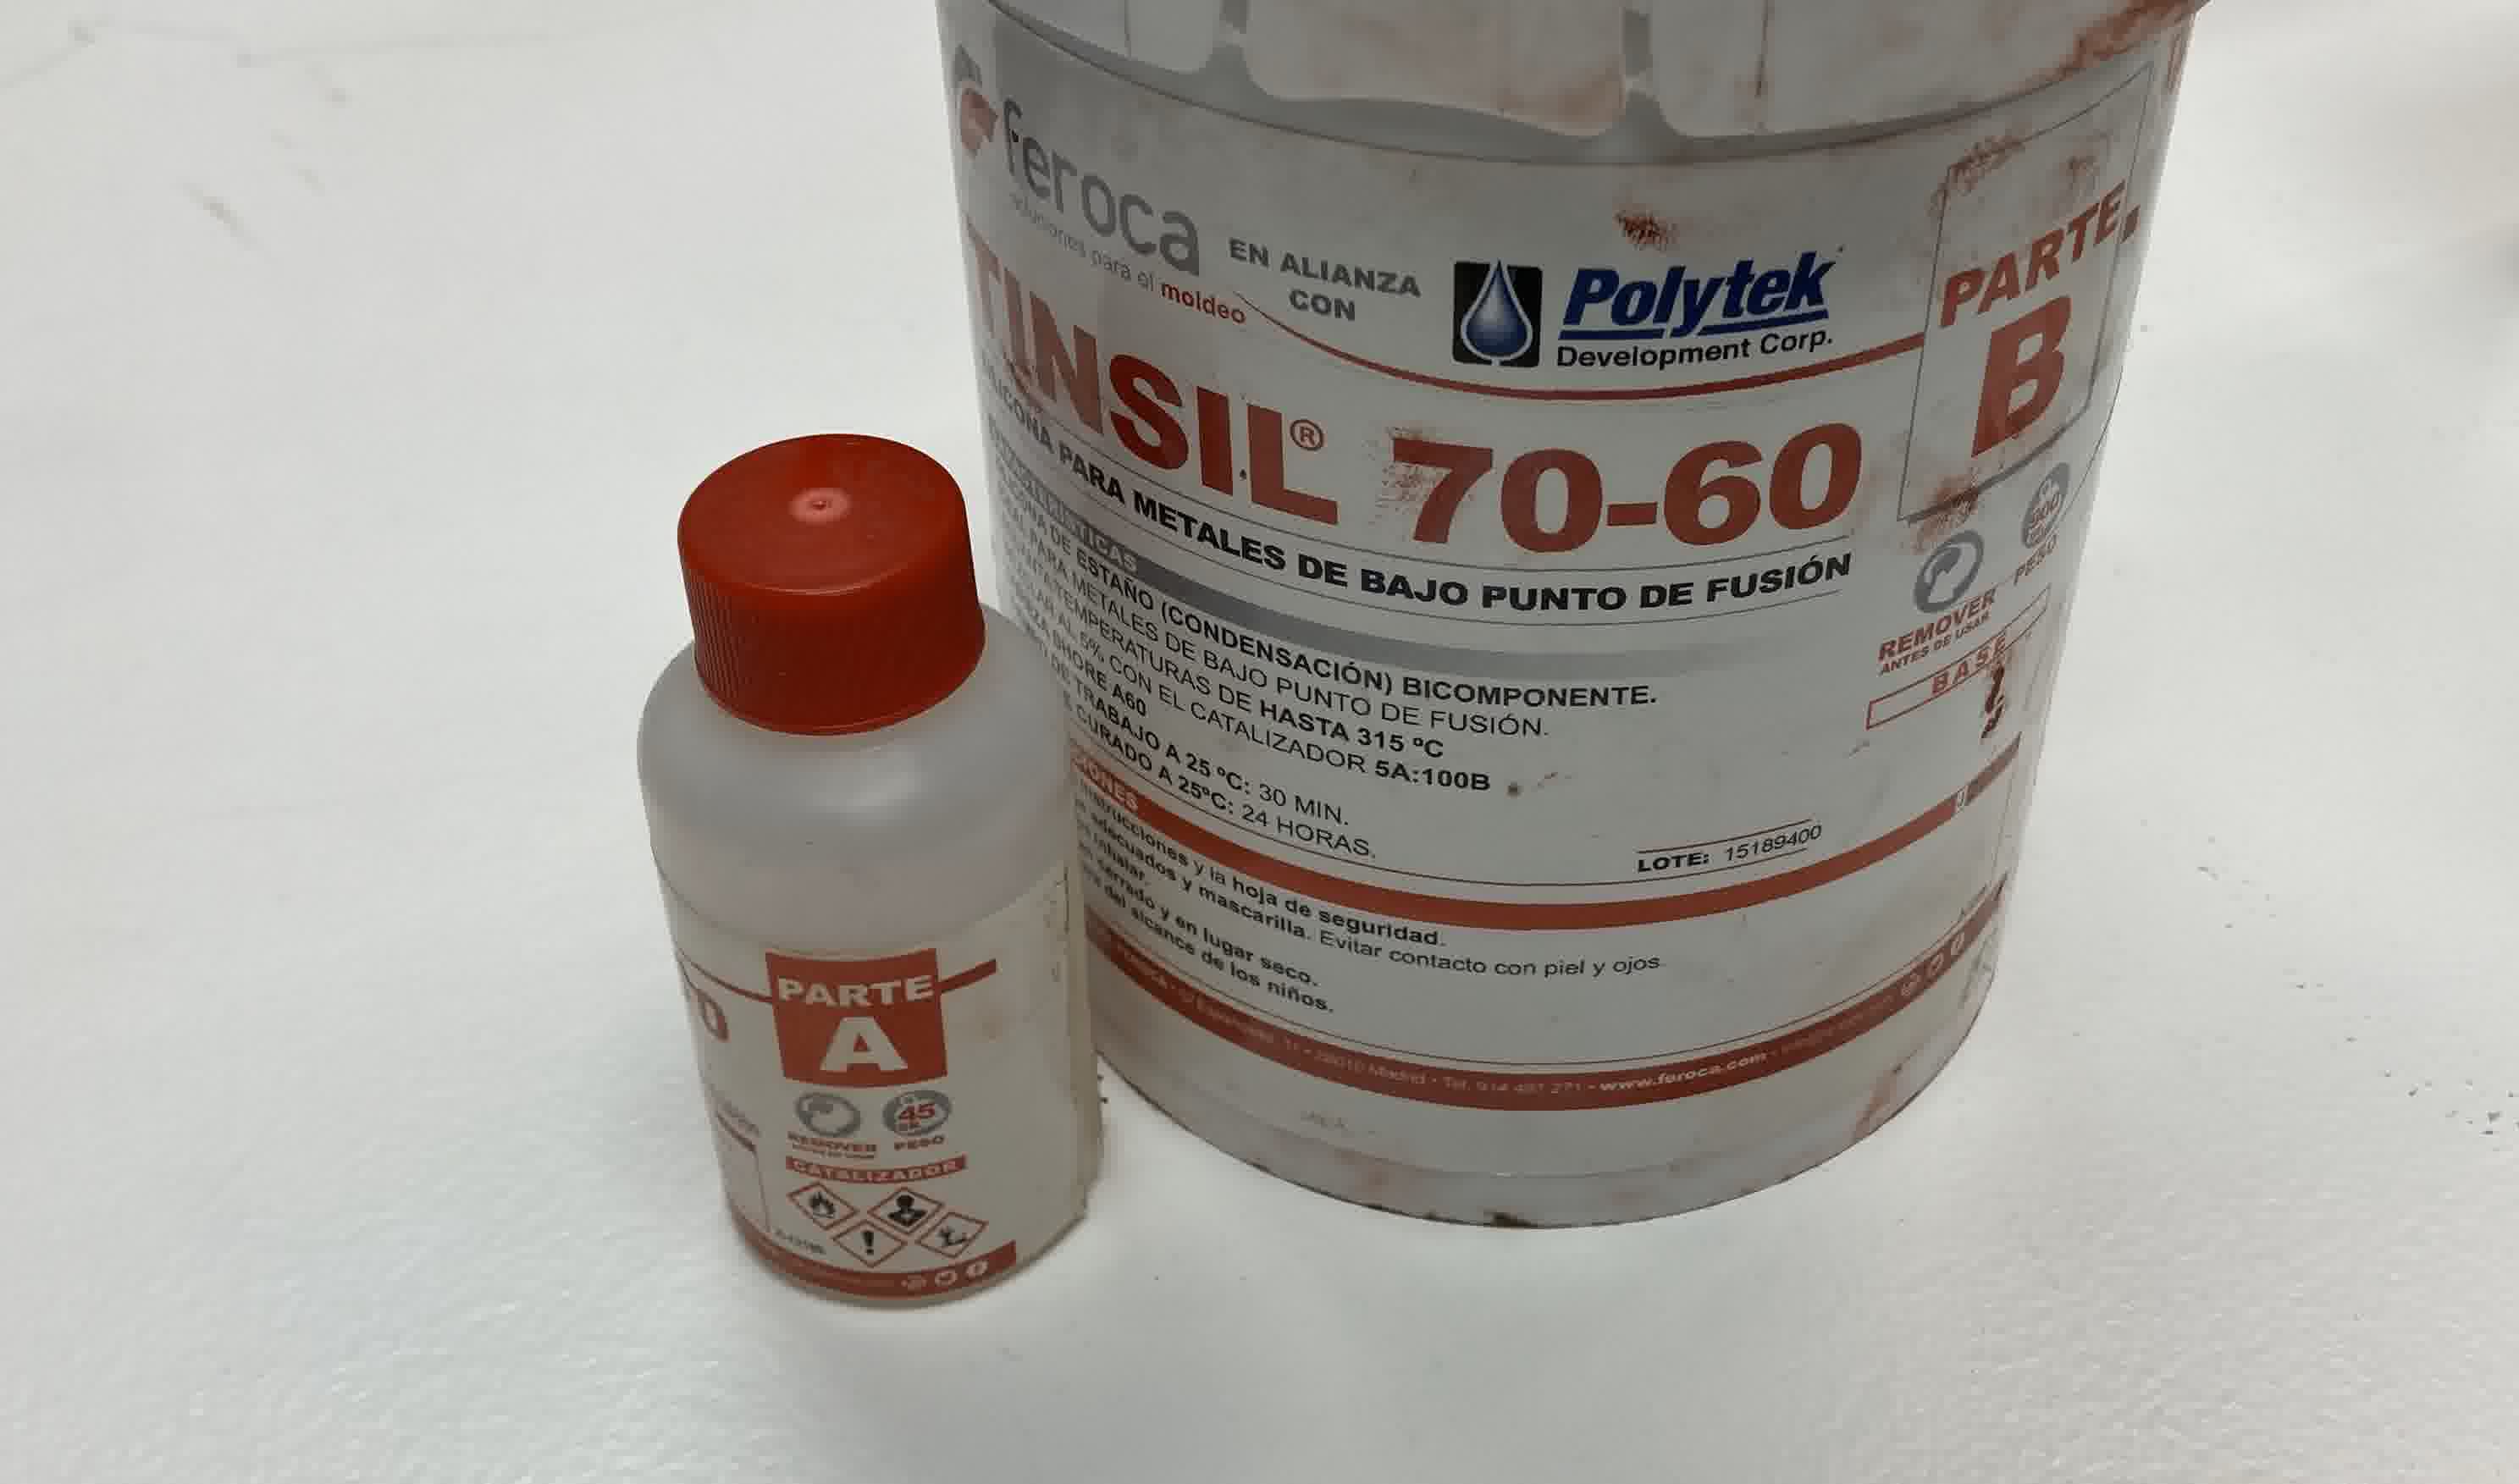
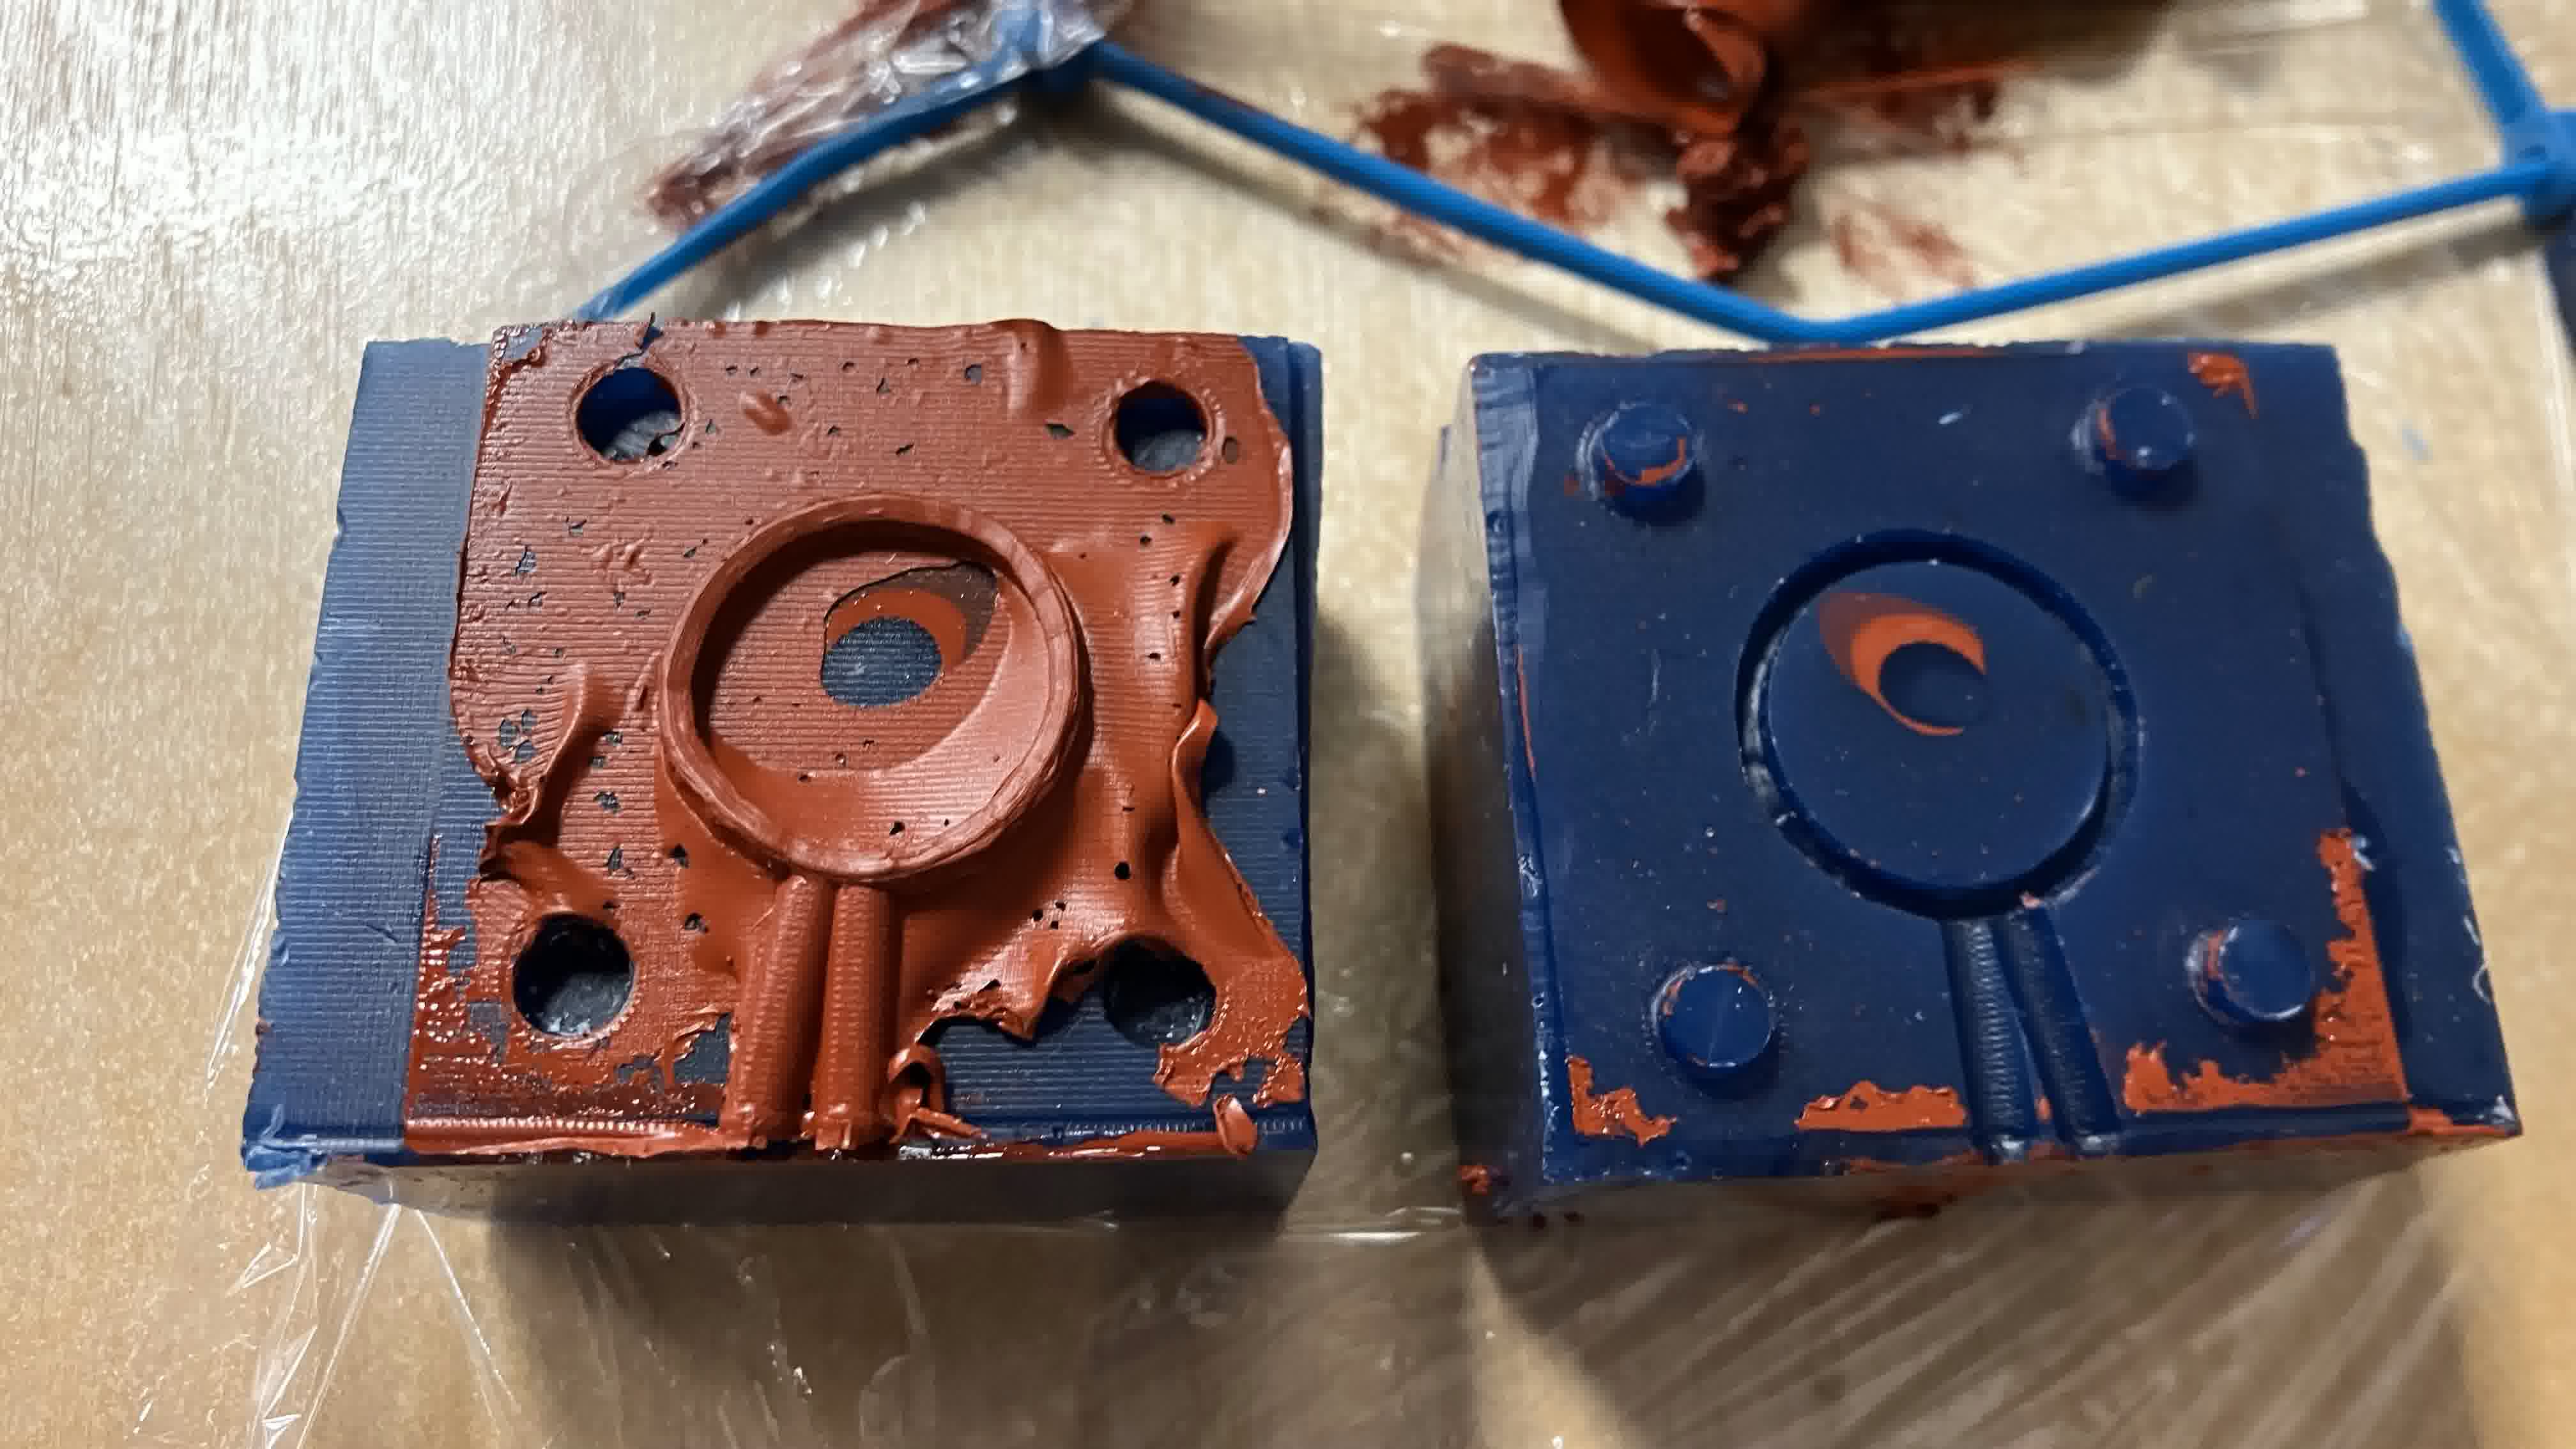
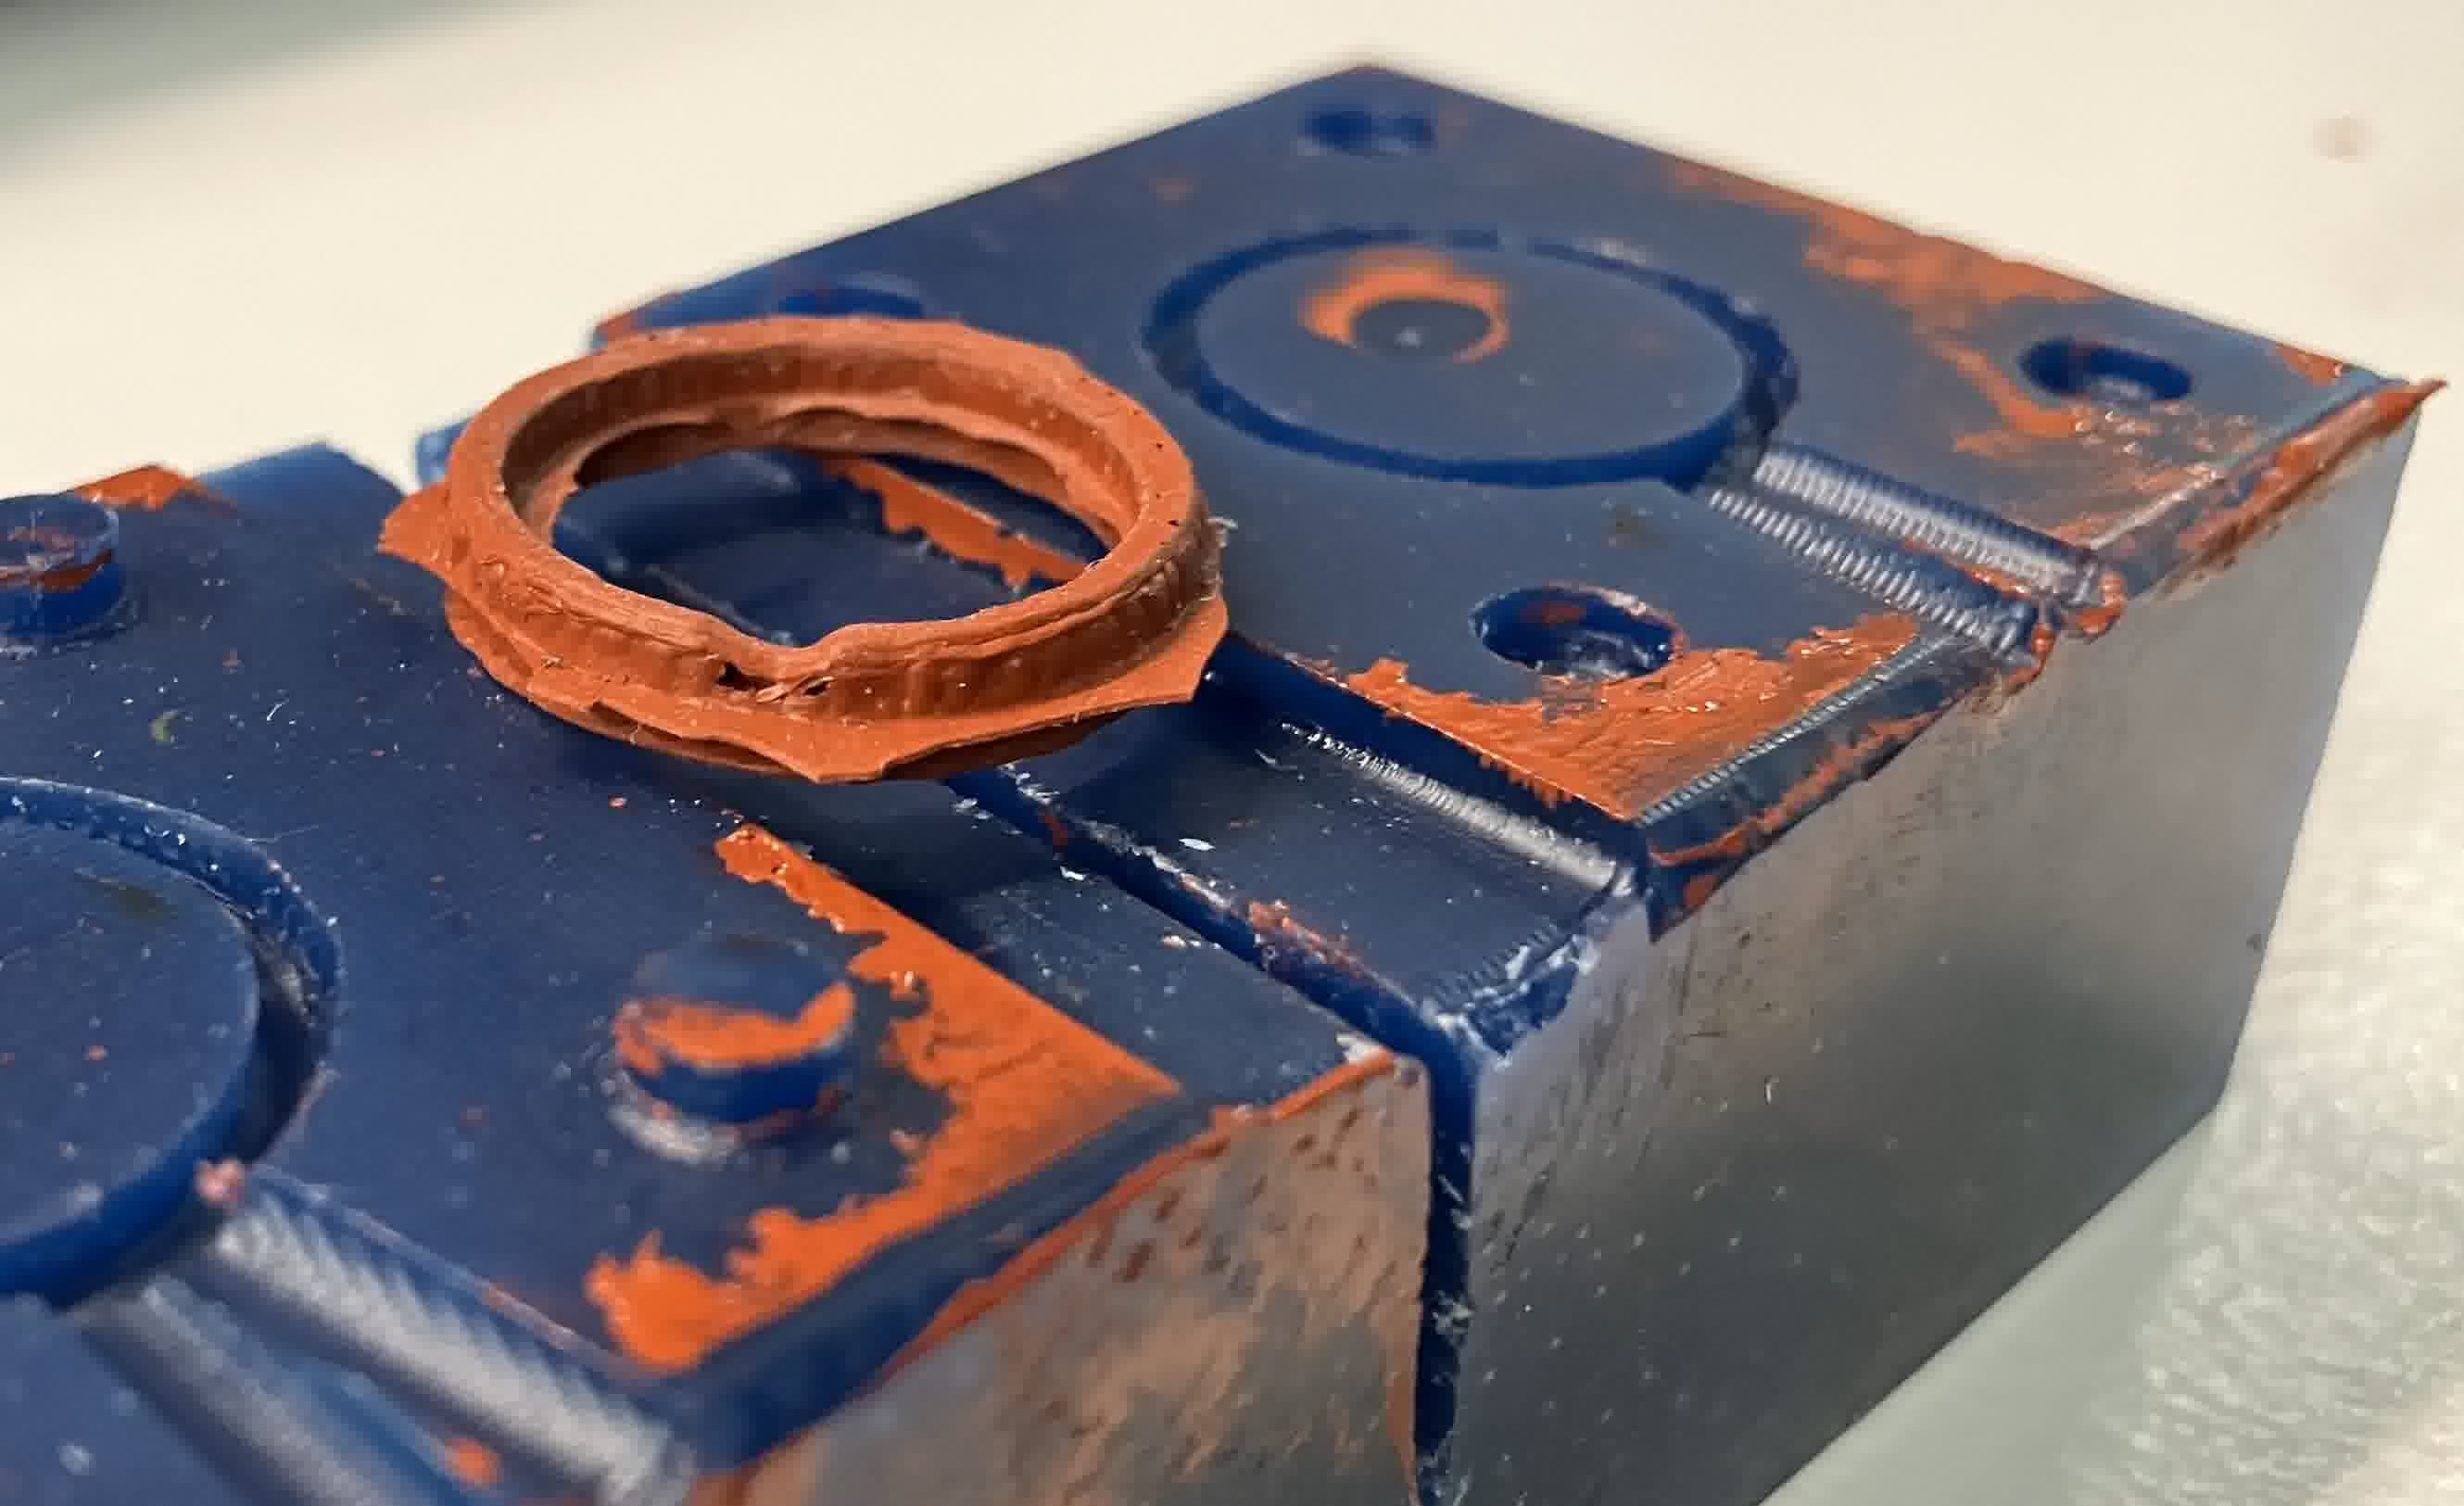
I prepared the silicone in a container following the instructions on the containers and then used a syringe to inject it into my mold. I poured the remaining material into another mold I found lying around.

Then I left them curing for a couple of days because I forgot about them.
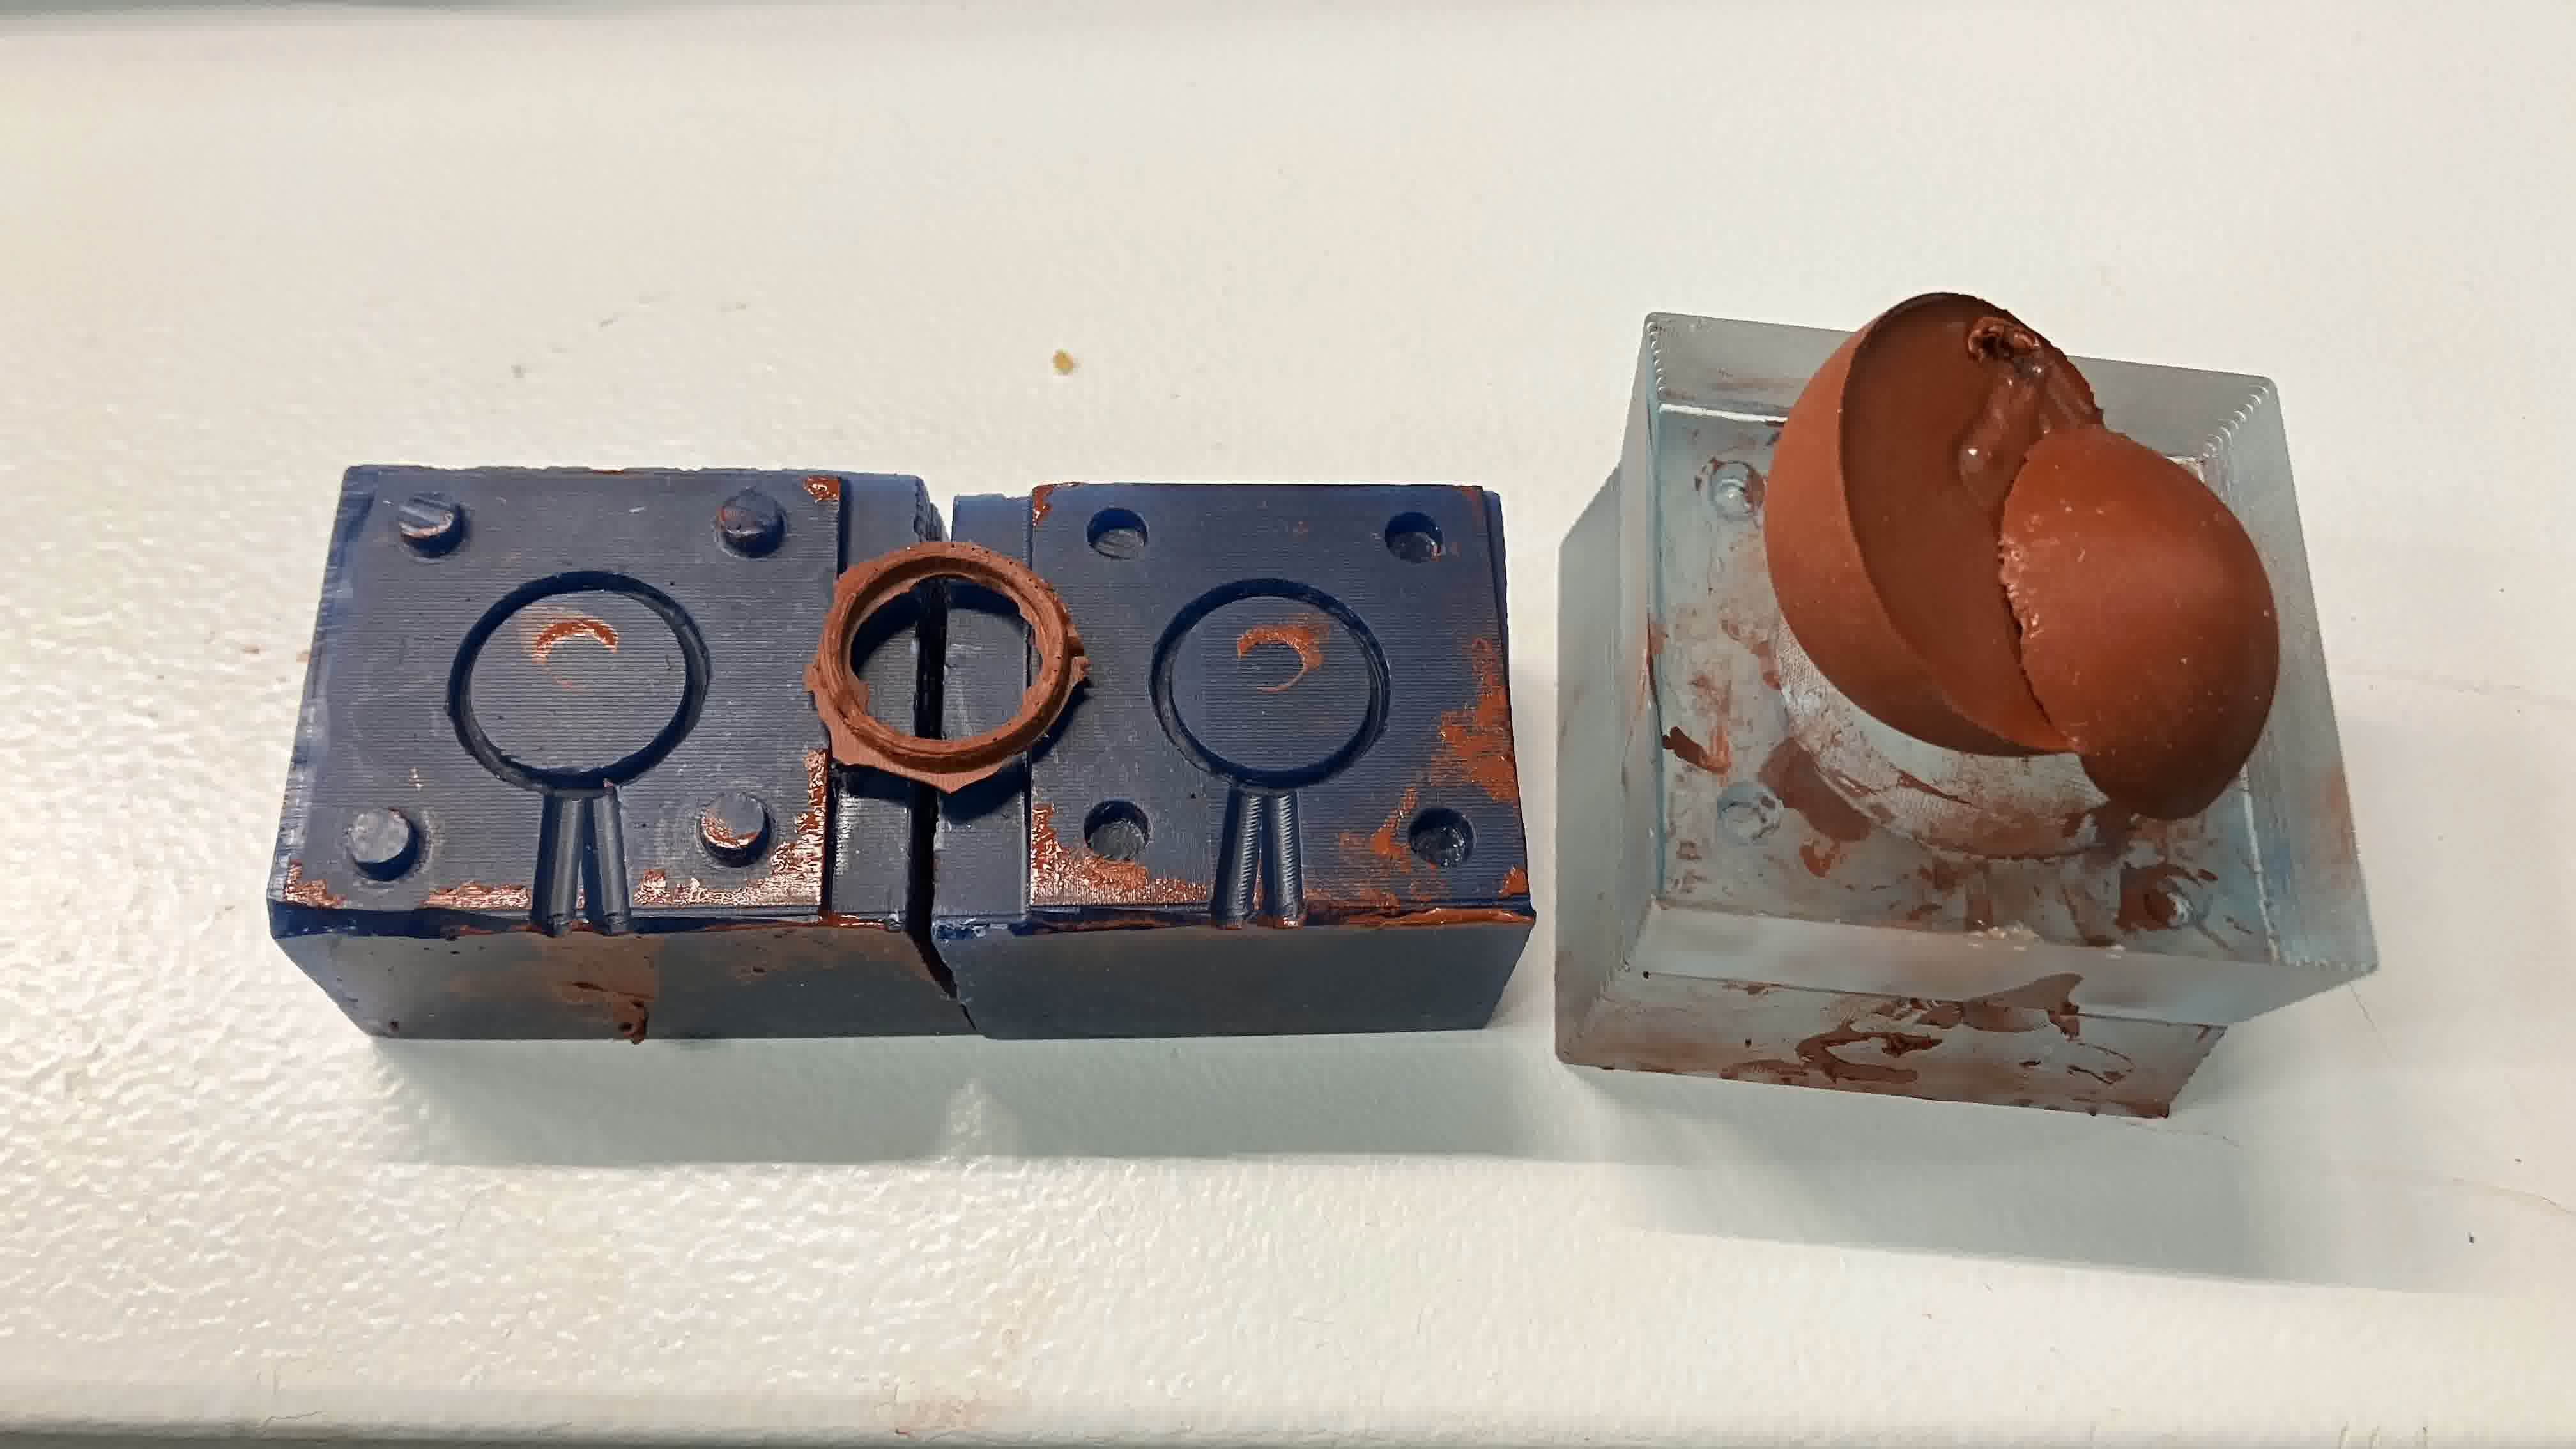
They were both easy to remove because the material had cured well, but the ring was a bit messy. I poured too much material into the mold so it leaked and there were some bubbles so the finishing wasn't perfect.