Final Project : FabArcademy
What’s this about?
This result of this project is a demonstration furniture for the fablab but also for the fabacademy.
This project is the result of a reflection on how to present the possibilities that a fablab represents with the machines and the skills of everyone.
In this slide, you can see the work of all the combined machines

Here is the project in video which tries to show the various stages of realization but also the final result.
Project definition
Creation of a modular retrogaming arcade terminal
The aim of this project is to show what can be done in the fablab. We integrate the use of several machines (laser cutter, digital milling machine, 3D printing, electronics, vinyl cutter, etc)
I would like to show visitors and members the different possibilities offered by the different machines in the Fablab. It’s a kind of promotional piece of furniture
The modular part allows, in fact, to make the part you want. You don’t have to make all the elements.
I did not have any particular problems with the realisation of this project. I had more of a problem with the commercial part. I made a case for the controller that I had closed. In case of a problem, you have to dismantle everything for reprogramming. So I decided to add a USB extension directly accessible on the top of the joystick (usefull for reprogramming the keys with a keyboard and/or mouse and also to add an additional controller)
Choice of licence
Being an activist for free software for many years, I think I can share what I have done under the same conditions. I like the idea of the “fab” license:
(c) date of owner
This work may be reproduced, modified, distributed, performed, and displayed for any purpose, but must include “project name”. Copyright is retained and must be preserved. The work is provided as is; no warranty is provided and users accept all liability.
This licence is very similar to the Creative Commons licences that I have been using for some years now. Indeed, I used to be a teacher and all my courses are directly shared on the net.
For me, sharing knowledge is essential to evolve in this society.
If you want to make money with this kind of licence, I think it is on the services that you can do it.
All files will be accessible and modifiable.
Realisation of Project
The initial idea drawn on paper
 ]
]

Render
Following week 2, our exercise was to make a render. Following the learning of Blender for the notion of rendering, here is the result


Who has done what beforehand ?
This idea has been on my mind since I started working in fablabs. I wanted a product that was “easy” to transport and to be able to present the different facets of the fablab via this product.
What will you design?
-
The furniture will be completely designed to be fully customizable according to the desired options.
-
The main “joystick” will be created to integrate all the necessary elements.
-
All the decoration will be created.
-
The promotional items
-
An additional joystick created from scratch.


Module 1
In module 1 (joystick), we will find buttons and a joystick handle and a Raspberry Pi with Recalbox installed. We will only use the complete joystick module for the test? We will use the possibilities of the Raspberry Pi to manage directly the joystick


Note
In module 1 (joystick), we will find buttons and a joystick handle and a Raspberry Pi with Recalbox installed. We will only use the complete joystick module for the test? We will use the possibilities of the Raspberry Pi to manage directly the joystick (GPIO)
Pinout
Let’s take as an example a 7 button panel with this layout:
- . ↑ Ⓨ Ⓧ Ⓛ
- ← → Ⓑ Ⓐ Ⓡ Ⓗ
- ↓
With
- Ⓡ = Right trigger = TR | Ⓛ = Left trigger = TL | Ⓗ = HK = Hotkey
On RPI B+, RPI2 and RPi3, you have to connect your buttons following this pinout :

1st step - creation of the joystick box
Create the box that will contain the controller and the raspberry pi.
For this, there is an excellent website that allows you to generate boxes / shapes of all types and all this in a file that can be modified as you wish
the site is called boxes.py and can be found at: https://festi.info/boxes.py/?language=en
We find ourselves on a page with lots of sub-headings. We go to Boxes –> ElectronicsBox -


file : joystick-opensource.svg
Thanks to this site, if you make a mistake, you can quickly start again.
Switch to engraving and laser cutting
| Type | Power | Speed |
|---|---|---|
| Engraving | 100 % | 100 % |
| Cutting | 80 % | 15 % |
For a cleaner work, I first make the cut, I sand and I make the engraving.
cut


assembly


wiring


2nd step - raspberry pi configuration
Go to download
https://www.recalbox.com/download/

Selection of category

Selection of Raspberry Pi Board

Installation

Selection of operating system

Select recalbox


Selecting storage

Write

Accept


3nd step : making a joystick
Here is the final realisation.


To make the same one, here are the different useful links to make it step by step
-
Making the PCB with Kicad - https://fabacademy.org/2022/labs/ulb/students/sylvain-denis/assignments/week07/#individual-assignment
-
Programming the joystick - https://fabacademy.org/2022/labs/ulb/students/sylvain-denis/assignments/week09/#programming-the-circuit
-
Link to download printable parts via thinkercad - https://www.tinkercad.com/things/0npPgC4TlcX-minijoystick/edit?sharecode=L15WBA13RoEvThTGQDSbkTnl8tHs_ZPdZik5bTu5HUk
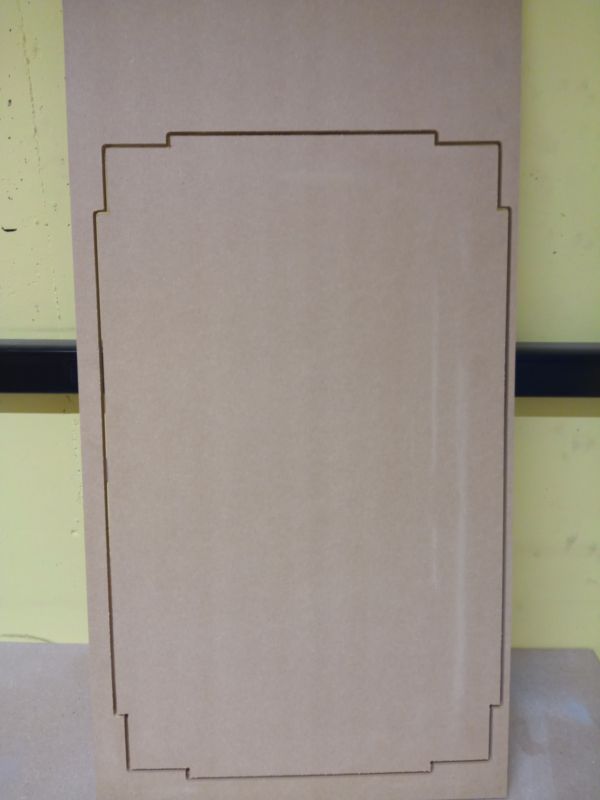
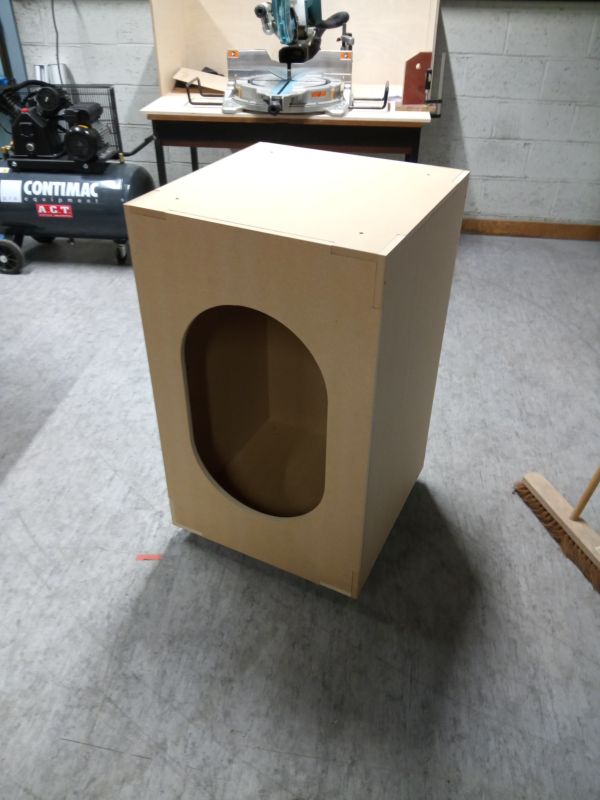
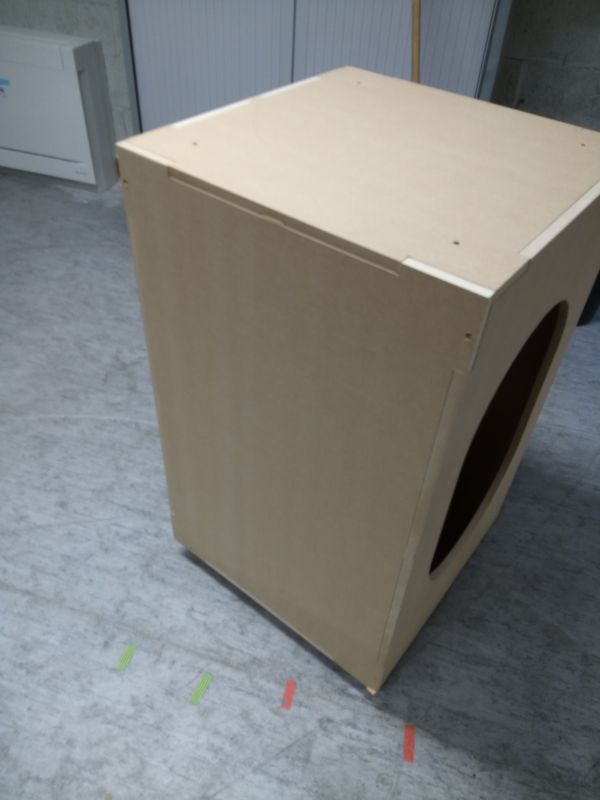
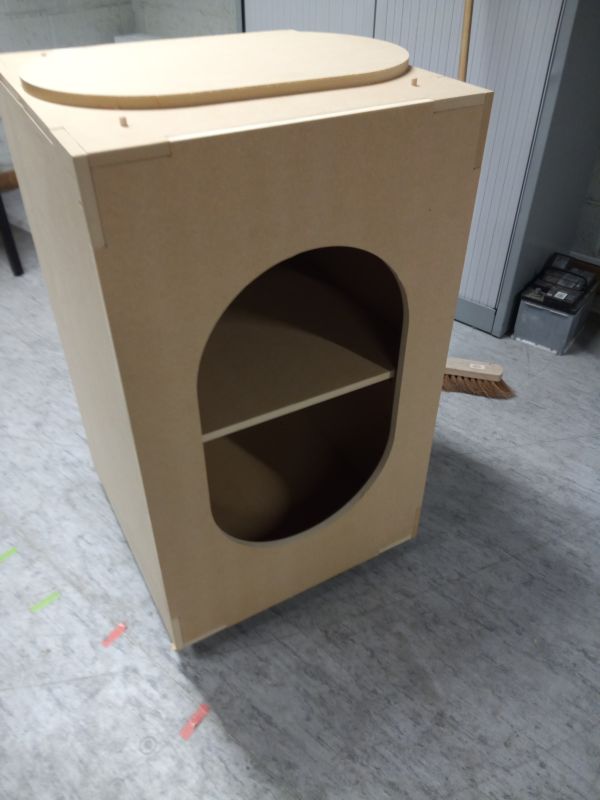
Module 2-3 Realisation
This is a part of the furniture of my project here in brown.

To simplify the task, I have duplicated my work so that I only have the digital milling work on one file. This also makes the original file safe and prevents having too big a construction tree.
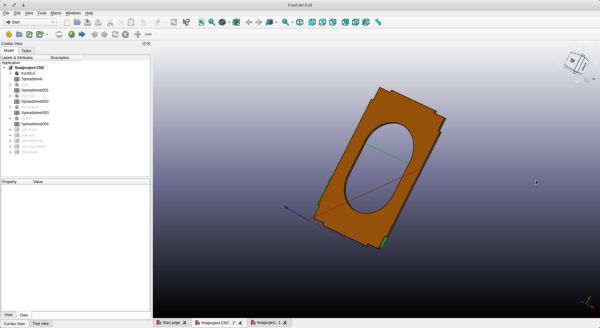
You can download both files and the gcode files below
- finalproject.FCStd
- finalproject-CNC.FCStd
- module3-board.nc
- module3-front.nc
- module3-rear.nc
- module3-right-left.nc
- module3-top-bottom.nc
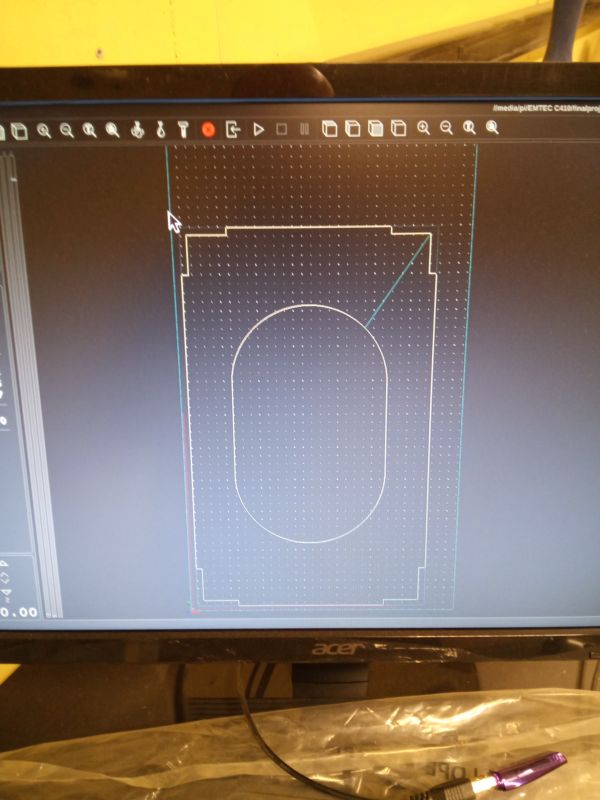
We’re off to cut. All in all, I had two hours to do it
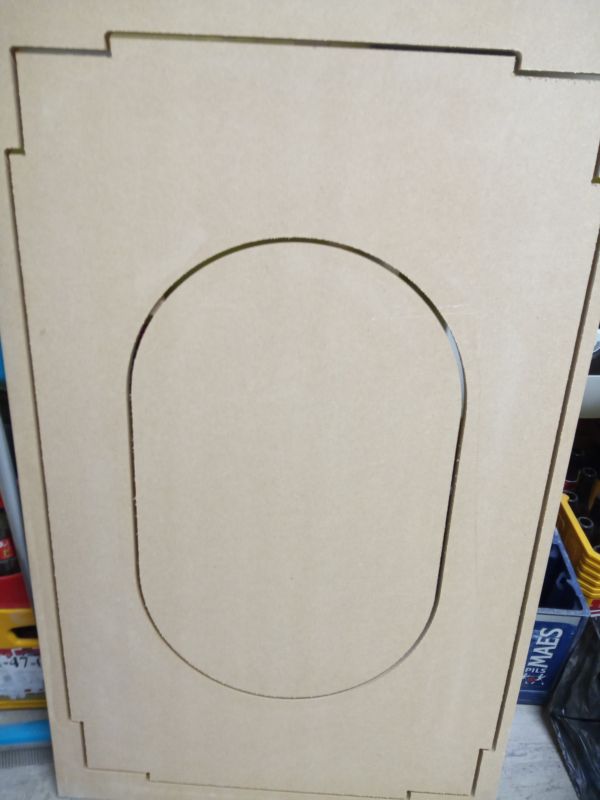
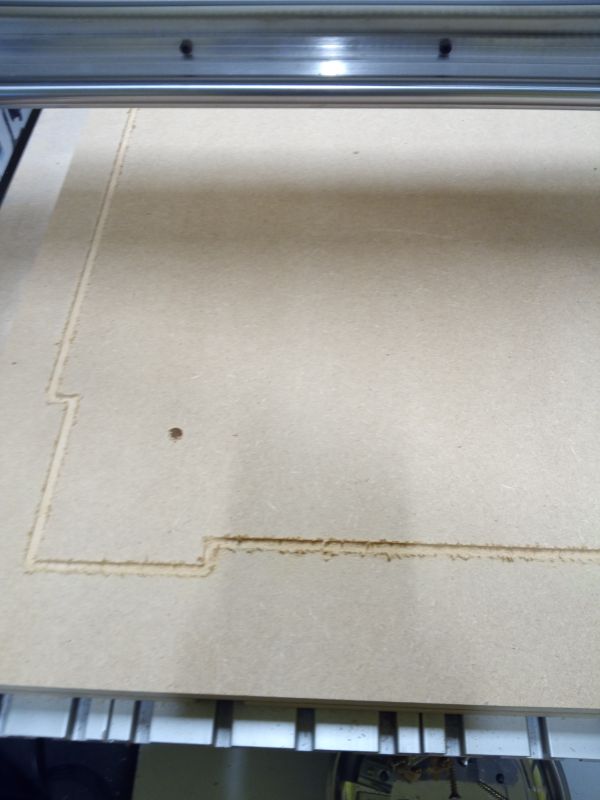
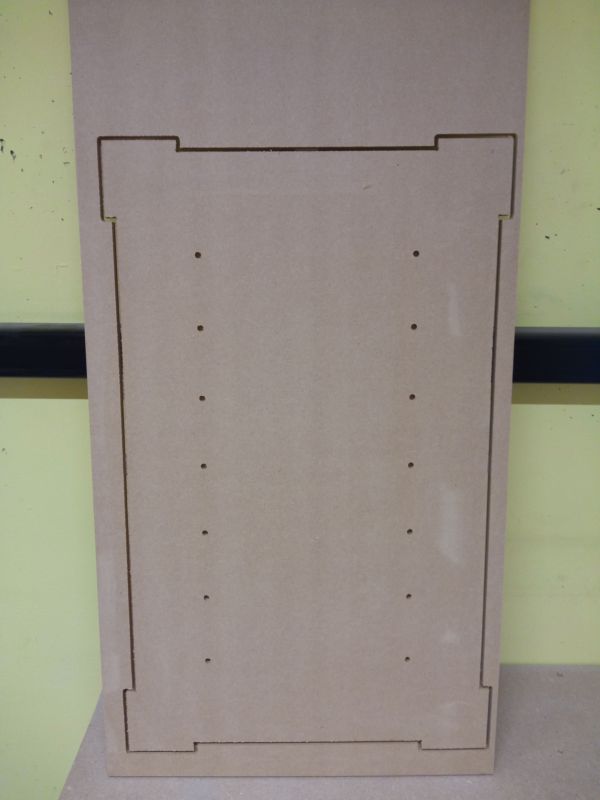
Cutting out the retaining tabs
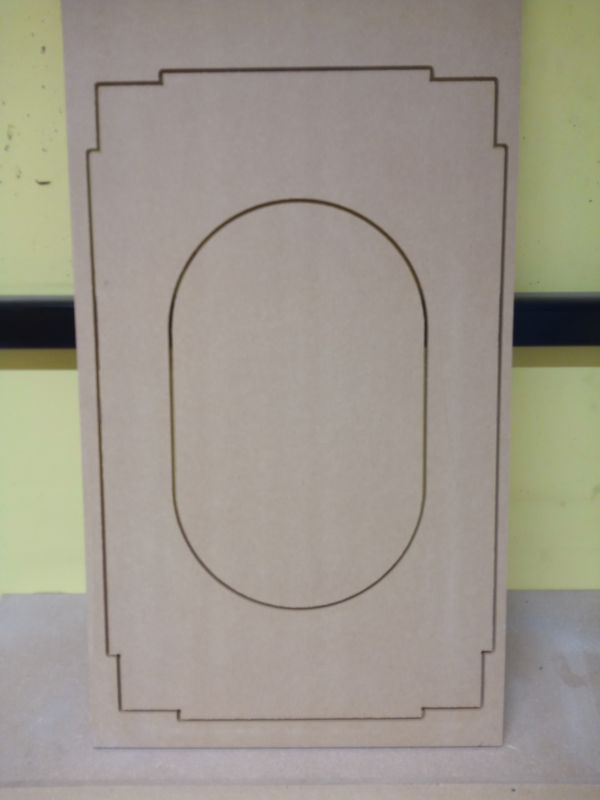
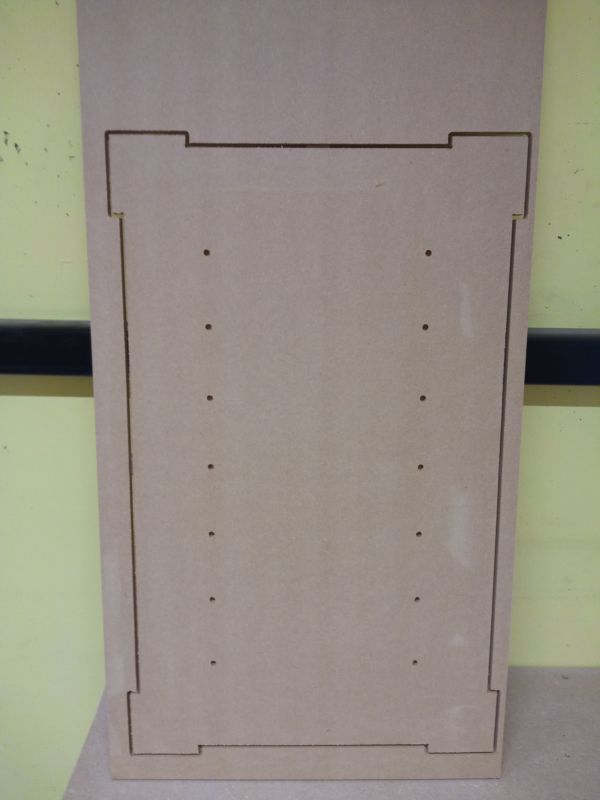
A little sanding
Final Result

Modification of the principal joystick
We add to the principal joystick a controller for presence detector, rgb and capacity touch.
For the final touch, it was decided to modify the joystick
- replacing the “START”, “SELECT” and “ESC” buttons by a capacitive pad.
- adding a presence detector to exit the demo mode in game mode
- by managing the RGB which changes from red in demo mode to green in player mode.
Capacitive Pad


RESULT :

SAMD21DEV KIT


** RESULT :**

Code for SAMD21
#include <Wire.h>
#include <VL53L1X.h> // https://www.arduino.cc/reference/en/libraries/vl53l1x/
#include <Adafruit_FreeTouch.h> // https://www.arduino.cc/reference/en/libraries/vl53l1x/
#include <Adafruit_NeoPixel.h>
#include "Keyboard.h" // library Keyboard.h


// define CAP + LED
#define PIN_CAP1 4
#define PIN_CAP2 3
#define PIN_CAP3 2
#define PIN_LED1 5
#define PIN_LED2 6
#define PIN_LED3 7

// define RGB
#define PIN_NEO    23
#define LED_COUNT  60
#define BRIGHTNESS 50
Adafruit_NeoPixel strip(LED_COUNT, PIN_NEO, NEO_GRB + NEO_KHZ800);

#define N_BTN 3 // Declare Num BTN


// define VL53L1X
VL53L1X sensor;


// define Capacitif
Adafruit_FreeTouch qt1(PIN_CAP1, OVERSAMPLE_4, RESISTOR_50K, FREQ_MODE_NONE);
Adafruit_FreeTouch qt2(PIN_CAP2, OVERSAMPLE_4, RESISTOR_50K, FREQ_MODE_NONE);
Adafruit_FreeTouch qt3(PIN_CAP3, OVERSAMPLE_4, RESISTOR_50K, FREQ_MODE_NONE);

// define array for CAP
byte key_btns[] = {KEY_RETURN,' ',KEY_ESC}; //declare function of buttons

int pin_btns[] = {PIN_CAP1, PIN_CAP2, PIN_CAP3};
int pin_leds[] = {PIN_LED1, PIN_LED2, PIN_LED3};
int state_btns[] = {false,false,false}; //Button status creation in the down position
int state_btns_new[] = {false,false,false}; //Creation of a 2nd state of the buttons in the down position for comparison

void setup() {
  SerialUSB.begin(115200);
  Wire.begin();
  Wire.setClock(400000); // 100 KHz I2C
  sensor.setTimeout(500);

  if (!sensor.init()) {
    SerialUSB.println("Failed to detect and initialize sensor!");
    while (1);
  }

  sensor.setDistanceMode(VL53L1X::Long);
  sensor.setMeasurementTimingBudget(50000);
  sensor.startContinuous(50);

  for (int i = 0; i < N_BTN; i++) {
    pinMode(pin_leds[i], OUTPUT);
    digitalWrite(pin_leds[i], HIGH);
  }
  qt1.begin();
  qt2.begin();
  qt3.begin();

  strip.begin();           // INITIALIZE NeoPixel strip object (REQUIRED)
  strip.show();            // Turn OFF all pixels ASAP
  strip.setBrightness(BRIGHTNESS);

  // initial value
  colorWipe(strip.Color(255,   0,   0)     , 50); // Red

  // initialize control over the keyboard:
  Keyboard.begin();
  SerialUSB.begin(0);
}

int count = 0;
bool presence = false;

void loop() {
  int presence_new = presence;

  sensor.read();
  int distance_value = (sensor.ranging_data.range_mm);
  SerialUSB.println(sensor.ranging_data.range_mm);

  if (distance_value < 500) {
    count++;
  } else {
    count = 0;
    presence_new = false;
  }

  if (count >= 10) {
    count = 0;
    presence_new = true;
  }

  if (presence_new && !presence) {
    // someone is now present -add keybord F1
    Keyboard.press('p');
    delay(1);
    Keyboard.releaseAll();
    colorWipe(strip.Color(0,   255,   0)     , 50); // green
  }

  if (!presence_new && presence) {
    // someone left
    colorWipe(strip.Color(255,   0,   0)     , 50); // Red
    Keyboard.releaseAll();
  }

  presence = presence_new;
  read_capa();
  delay(1);
}

void colorWipe(uint32_t color, int wait) {
  for(int i=0; i<strip.numPixels(); i++) { // For each pixel in strip...
    strip.setPixelColor(i, color);         //  Set pixel's color (in RAM)
    strip.show();                          //  Update strip to match
    delay(wait);                           //  Pause for a moment
  }
}


void read_capa() {
  int val[] = {qt1.measure(), qt2.measure(), qt3.measure()};

  for (int i = 0; i < N_BTN; i++) {
    state_btns_new[i] = val[i] > 900;

    if (state_btns_new[i] && !state_btns[i]){
      Keyboard.press(key_btns[i]);
      digitalWrite(pin_leds[i], LOW);


    }

    if (!state_btns_new[i] && state_btns[i]){
      Keyboard.release(key_btns[i]);
      digitalWrite(pin_leds[i], HIGH);
    }

    state_btns[i] = state_btns_new[i];
  }
}
Questions ?
What materials and components will be used ?
- MDF panel x8
- Poplar Multiplex Panel 4mm x2
- Blue plexiglass panel x1
- SMD components for additional joystick, and decoration
- Copper PCB plate
- Vinyl for decoration
- Thread for embroidery
- Mould and resin
- screws for wood
- wheels for furniture
Where will they come from ?
All materials will come from the fablab.
Online ordering for the “commercial” joystick components.
The screen and speakers will be recycled.
Screws and wheels will be from a classic bricolage shop.
How much will they cost ?
I have an estimation :
- Rapspberry PI 3 : 55 €
- Kit Arcade joystick : 25 €
- MDF : 48 €
- Poplar Multpiplex : 14 €
- Plexiglas (optional) : 30 €
- SMD and PCB : 10 €
- Decoration : 10 €
- Various : 10 €
Total : 202 €
For information, a multi-game arcade terminal of the same size costs in the trade from 500 €.
What parts and systems will be made ?
The furniture will be completely designed so that it can be easily made and assembled. It is symmetrical so there is no problem between the right and the left (you can reverse).
The door of module 3 will be made in plexiglass with laser cutting and engraving.
The joystick is created with a laser to integrate the different elements (joystick, buttons, raspberry pi).
A second controller will be created to integrate electronics and circuit creation. It can be used as a second joystick.
Moulding and resin will be used to make promotional items.
Vinyl will be used for decoration.
Embroidery will also be used for promotional items
Translated with www.DeepL.com/Translator (free version)
What processes will be used ?
- CNC machining : Furniture
- Lasercut machining : “Commercial” Joystick box + Furniture door + Decoration
- 3D printing : Handle, sound module fixation, speaker cover
- PCB machining : Circuit for second joystick
- VinylCut : decoration
- Digital embroidery machine : Decoration, promotional item
What questions need to be answered ?
There is a real question:
Can we see the technical possibilities that the fablab machines offer when we see the furniture?
How will it be evaluated?
The project will be successful if visitors and members see the possibilities offered by the fablab machines. Indeed, during visits, the machines do not necessarily work and it is therefore hard to show a concrete example.
The sound game part can attract the eye. As it can move, it can be placed in strategic places.
Downloads
Module 2
- finalproject-module2
- module2-bottom
- module2-front
- module2-joystick
- module2-screen
- module2-rear
- module2-top
- module2-left+right
Module 3
- finalproject.FCStd
- finalproject-CNC.FCStd
- module3-board.nc
- module3-front.nc
- module3-rear.nc
- module3-right-left.nc
- module3-top-bottom.nc
MiniJoystick
- Making the PCB with Kicad - https://fabacademy.org/2022/labs/ulb/students/sylvain-denis/assignments/week07/#individual-assignment
- Programming the joystick - https://fabacademy.org/2022/labs/ulb/students/sylvain-denis/assignments/week09/#programming-the-circuit
- Link to download printable parts via thinkercad - https://www.tinkercad.com/things/0npPgC4TlcX-minijoystick/edit?sharecode=L15WBA13RoEvThTGQDSbkTnl8tHs_ZPdZik5bTu5HUk