6. 3D Scanning and printing
This week I worked on 3D printing and the individual assignment was to design and 3D print a small object limited by our printer that could be made substractively and 3D scan an object and print it as optional.
As usual, to carry out my assignment I first have to search for keywords in this week assignmwent:
3D printing:
3D printing is also known as additive manufacturing where successive layers of material are deposited on top of one an other to create a 3D model with the help of G-Codes which are obtained by slicing of STL files of any 3D model object through slicing software.
As our 3D printer is Ender 3, I searched on how it works and I found a helpful Pdf guidance document here on how to operate Ender 3(3D printer).
Steps to operate ender 3
-
your file to be printed must be in STL file format and your 3D model to be printed on ender-3 must have a maximum size of 220x220x250 mm made of Plastic Filament(PLA).
-
You need a slicing software to produce gcode file from STL file
-
For slicing software I have used Ultimaker cura.
To continue my work, I first need to have STL file from a 3D model below are steps used to produce my STL file to print.
Producing STL file(3D modeling a mug in solidworks)
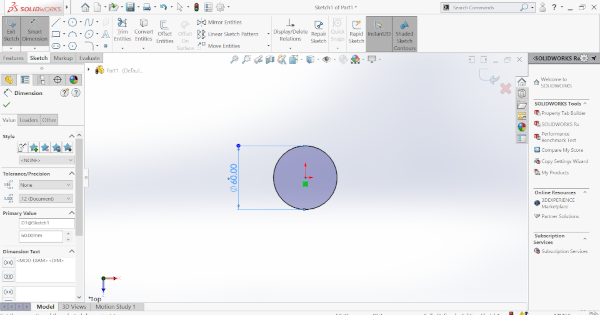
Below, is the circle base of my mug
Now, I extruded my mug base to the length I want it to have 100mm.

Below, I scketch my mug handle using the right plane because I want that handle to be at the right side of my mug.

Below, I use right plane to draw an elipse where I want the handle to start , by chanching the view for clear appearance it allow me to identify that handle origin.

Below, I use Sweep tool by identifying the created elipse as profile and the handle line form as Path.

Now, I created a circle and extruded cut my mug to create a hole in it.

Below, I was trying to put multiple fillets on my mug.

Now, finaly I made a mug and export it as an STL file .

Producing Gcode(Slicing)
First I downloaded Ultimaker slicing softwarehereand installed it on my laptop, I opened it and select the printer to use(mine was Ender 3) –> Select the material to use in our case it is PLA(Polylactic Acid) then import your designed 3D model STL file in ultimaker cura software to be sliced in order to produce gcode for Ender3 3D printer –> and by clicking on your 3D model, you may move, scale, rotate it easily as you want.
Below, are the basic settings

Parameters used
- 3D printer: Ender-3
- Material used: PLA
- Others:
- Printing temperature: 200 degree celsius
- Bed temperature: 60 degree celsius
- Speed: 50mm/sec
- Layer height: 0.12mm
- Retraction distance: 5mm
- In fill: 20%
- Initial layer speed: 20mm/s
- Initial fan speed: 0%
I have used support with zigzag pattern(it is easy to be removed on) because the overhang of my model handel was greater than 45%.
Below, is my mug in cura

Then save your file to the SD CARD(through its USB drive): Save the GCode(your cura file) to the SD Card under the name CE3_+ your 3D file name and see time and filament amount you are going to use.
-
Setting up the mahine:
-
Turn ON the right side of the machine
- Plug in the USB or the SD card which has your file to print.
- Check that there is enough filament to complete your file beforehand.
- Put print head in the front left corner by clicking(Click–>Prepare–>Autohome)
- Preheating PLA(I have used 200 degree Celsius) and the printer bed(60 degree Celisius used) to start preparing for the print(click–>prepare–>).
Below, the machine after receiving commands start to print my mug layer by layer.

Below, is my mug almost printed with its support.

Below, is my printed mug after removing on support.

Below, is me holding my mug and enjoy the production.

Designing a door hinge in SolidWorks
I designed also a door hinge in solidworks and below is a rectangle sketch part of my hinge.

I extruded my rectangle

I draw a circle on the edge of my rectangle

Below, I extruded my edge circle

Below, I cutted two holes on my door hinge

Below, I choose right plane and sketch on a circle

Below, I cutted on my hinge

Linear Partern of my shinge small circle

Below, I was Creating hinge liaison

Mirroring my liaison parts

Evolve of my liaison

Below is the outcome; My phinge part1

I have tried and succed to modify my door hinge part1 in order to create my door hinge part 2 and Below is the resulted door hinge part 2.

Below, is the assembly of my door hinge

My door hinge in cura software in order to produce STL file

Below, is my door hinge produced on our 3D printer

Below, is my produced door hinge and it is flexible you can bend it. It look like line a normal door hinge.

Advantages of 3D printing:
-
Flexibility: 3D printing enables you to design even complex structures that are impossible to design through traditional printing; Manufacturers can produce components that generally have complex geometry and are difficult to make. Then 3D printing overcomes such limitations of traditional printing restrictions easily.
-
Quick Prototyping Solutions: Quick printing solutions are one of the significant benefits of additive manufacturing. Aerospace, Fashion, Automotive, Architecture, and healthcare industries use the technology to build prototypes that are quick to design and cost-effective.3D printing takes a few hours to finish the production.
-
3D Printed Components are Durable & Lightweight: Metals and plastic materials are generally used to manufacture 3D printed components. Plastics are lighter than their metal counterparts. Plastic parts are helpful in the aerospace and aviation industries as they don’t put much weight on the aircraft.
-
Minimal Waste: The only thing that a 3D printer requires is the material to print.
-
Environment-Friendly: Environment-friendliness is among the key advantages of 3D printing. As this technology cuts the amount of material wastage with no emissions and carbon footprints, it can be an eco-friendly option. The environmental benefits of 3D printing extend in terms of improved fuel efficiency from using lightweight parts.
Disadvantages of 3D printing:
-
Cost is among the biggest Disadvantages of 3D Printing Machines: 3D printing machine price depends on the size and functionality, it can vary from $10,000 to $100,000 or higher. The newer the technology, the higher is the cost. The materials and equipment used in 3D printing is expensive in comparison to the traditional manufacturing material.
-
Limited Materials: As the printed material used in Aviation and aerospace industries is of high quality, campanies can’t compromise with quality. the availability of quality raw material is one of the significant drawbacks of 3D printing; Because not all the metals or plastics can be temperature controlled to allow 3D printing; only rare metals and plastics can be used.
-
Size Limitations of 3D Printing: Printers have small print chambers which limit the size of parts to be printed; you can only print small-sized components. For the bigger one you will need to print in separate parts and joined together once printed; This increases costs and time but also makes the printing process complicated.
-
Reduction in Manufacturing Jobs: The things that can be done by labour are done using 3D printers; Many developing countries still rely on low skill jobs to keep their economies running, and this technology could cut these manufacturing jobs by automating the manufacturing process.
-
Prohibited Components and Pirated Products: Automated 3D printer awaits user’s commands, it is easy to create illigal or prohibited components because 3D printing technology can print everything; Since an automated 3D printer awaits user’s commands, it’s easy to create illegal or prohibited components, people can use it to break laws for self-interest.
Advantages of additive manufacturing over substractive manufacturing
- Highly efficient and eliminates waste
- Faster route from design to production
- Create complex designs easily
Disdvantages of additive manufacturing over substractive manufacturing
- Has a limited range of materials compared to other processes
- It can be expensive when it involves the use of metals
- Not ideal for large quantity production
3D Scanning 
3D Scanning is a process of analyzing an object from the real world, to collect all the data in order to recreate its shape and appearance digitally. The object can become a 3D model which could help you as a base for the 3D printing project. 3D scanning can be faster and easier techinique to create 3D models for 3D printing if you just want to receate an existing object. 3D scanning has many applications especially in medical sector like in dental sector for instance in creating dental devices like implants, braces, and dentures.
There are many 3D scanning techniques such as Laser 3D scanning:, Photogrametry, Structured light scanning,.. for more information visit this link.
For scanning, I have used sense scanner to scan my classmate Enock Mwine. Below, is ourr local fablab scanner

First, I downloaded sense softwareherein order to use it in sense scanner and when you open it at the first time, you will see the below interface.

There two options and you have to choose one according to what you want to scan; on my case I have choosen Person, because I want to scan a person.

Below, is me scanning Enock Mwine, my FabAcademy_2022 classmate

Problem during scanning:
- Few points are captured: a prompt occur saying point amount few which means there aren’t enough point captured, which is because the scanner is too far away or too close to the object, the bar color was red. Then the solution was found by adjusti ng the distance between the scanner and the object until the color turns green(recommended distance is 30 cm).
Below, is the scanned person in Ultimaker Cura silcing software in order to produce an gcode file to be printed by our 3D printer.

File Used Here