Compare the performance and development workflows
for other architectures
Individual assignment:
Read a microcontroller data sheet
program your board to do something,
with as many different programming languages
and programming environments as possible
The ATtiny212/412 microcontrollers are using the high-performance low-power AVR® RISC architecture,and is capable of running at up to 20MHz, with up to 2/4KB
Flash, 128/256bytes of SRAM and64/128bytes of EEPROM in a 8- pin package. The series uses the latest technologies with a flexible andlow power architecture
including Event System and SleepWalking, accurate analog features andadvanced peripherals.
This week has been one of the most complicated, this because I am doing the fablab remotely, in virtual mode.
The university where I work as a teacher is implementing a FabLab but we have had delays in the delivery of the equipment, this due to the pandemic,
this has caused delays in the creation of the printed circuits, and the shipment of the components from Quito as well , it has been delayed by various external factors.
For the activities, the components that were in our FabLab were used, for this we used the ATtiny 45, and the ATtiny 44.
The datasheets are instruction manual type specifications for microcontrollers and electronic components, here we can find several technical details
about the operation of microcontrollers.
image taken from joseph-zoulikian page
The data sheet and the pinout are very important because it helps us to identify each of the pins, what is their function and how can I use them,
With the data sheet we learn how our controller is structured, what are its functions and internal elements, how to use the internal oscillator between
the calculation of other operating parameters.
The main problem when you start reading the datasheet is learning to interpret the color code of each pin, It is important to be aware of the function of each pin.
It is very important to read the data sheet, both for the microcontrollers and for other elements that have this information. This information helps us to use the
components, their features, capabilities, and others.
Depending on the design needs, we can choose the best component and use all its features and functionalities, as well as its limitations.
It is important to know the input components that we are using, if it is digital or analog, otherwise the microcontroller cannot transform the
information it receives from the sensor into digital data.
image taken from
amazon The Microcontroller par excellence in Arduino
But what is a microcontroller? It is a free hardware platform. It has an integrated circuit by which instructions can be recorded. In turn, these instructions
are written using a programming language that allows the user to establish programs that interact with electronic circuits.
The arduino is a board that has all the necessary elements to connect peripherals to the inputs and outputs of a microcontroller. That is, it is a printed
board with the necessary components for the microcontroller to work and its communication with a computer through serial communication.
How does the Arduino work?
The functions of the Arduino, as with most microcontroller boards, can be summed up in 3 factors:
It has an input interface. This can be directly attached to the peripherals, or connected to them through ports.
The input interface is intended to transfer the information to the microcontroller. The microcontroller is the piece that is responsible for processing
this data. In addition, it varies depending on the needs of the project in which you want to use the board, and there are a wide variety of manufacturers
and versions available.
It also has an exit interface. This is in charge of taking the processed information to the authorized peripherals to make the final use of that data.
In some cases, it may be another panel in which the information is centralized and processed in a completely renewed way, or it may simply be a screen
or a loudspeaker in charge of displaying the final version of the data
.
Arduino programming language: C ++
What language does this type of programming use? The Arduino platform is programmed with its own language based on the high-level programming language
Processing, which means that it is similar to C ++.
What does this mean? That it is a general-purpose programming language associated with an operating system called UNIX.
This mid-level language deals with basic objects such as characters, numbers, bits, and memory addresses, among others.
This type of language has great portability. Thanks to this, it is usually used for programming systems such as the construction of interpreters,
compilers, and text editors.
Microprocessor (Raspberry pi):
image taken from pcworld.com My favorite microcomputer is the Raspberry pi
Raspberry Pi, is a "it's a credit card size computer that connects to your TV and a keyboard." It's a board that supports various components needed in a common computer.
“It's a capable little computer, which can be used for many of the things your desktop PC does, like spreadsheets, word processors, and games. Also plays high definition
video they point on the product web page.
The board, which was smaller than a credit card before, has several ports and inputs, two USD, one for Ethernet and HDMI output. These ports allow you to connect the
minicomputer to other devices, keyboards, mice, and displays.
It also has a System on Chip that contains an ARM processor that runs at 700 Mhz, a VideoCore IV graphics processor and up to 512 MG of RAM. It is possible to install
free operating systems through an SD card.
One of the interesting things is its price. It is sold in two models, A and B. The A is less complete and its RAM is 256 MB, it is obtained for 19.76 euros
although
it is currently out of stock. The Model B, recommended by engineers and web developers, is available for 28.31 euros.
But the Raspberry is not the only product of this nature on the market. There are at least two more options: Gooseberry and Cubieboard. The first is achieved by
more than 40 euros and
contains an A10 ARM Cortex-A8 processor, Mali 400 graphics, 512 MB RAM, 4GB of storage, Wi-fi, microSD card input, mini HDMI port,
USB and comes preloaded with Android operating system.
The second, Cubieboard sells for 52 euros, has an ARM cortex-A8 processor that runs at 1 Ghz, Mali400 OpenGL graphics card, 1GB Ram memory, output of
HDMI video, Ethernet port and 4 GB of flash memory.
Some ideas
It is a very functional computer and due to its size it can work for many other purposes, of course, you have to have some ideas about programming or
computing. For example, a young man's first project with Raspberry Pi was to turn his damaged NES console into a working one and he was able to play some old titles.
First steps:
For this assigment some arduino components will be used, in this specific case an arduino uno and a proximity sensor will be used
Materials:
Arduino One
Proximity sensor
Proto board
Red Led
Resistence
As a first attempt we will test the arduino uno and the proximity sensor, and their respective programming,
this to remember the code as well as the connection to the different pins used.
In the previous exercise we tried to connect a proximity sensor directly to our arduino uno to test the connections
and the functionality of the code, the variables and the use of libraries.
In the following image we can see the schematic design of the connections of the proximity sensor and our arduino
image taken from naylampmechatronics.com/
Improving the first try
Now that we have our motion sensor working and we can observe values on the serial monitor, we are going to improve our design. we will include an indicator
in the circuit, in this case we will use a led which will turn off when the distance of an object is very close to the sensor
You can download the code in the following link File download
Arduino IDE
Programming the ATtiny 44:
For this assignment we need first Arduino software, we can download from this link Download Arduino
The link for download the libraries "https://raw.githubusercontent.com/damellis/attiny/ide-1.6.x-boards-manager/package_damellis_attiny_index.json"
In this way we can use our Arduino as an ISP programmer, this as a second option to our program created in the electronic production assignment
Now we are going to program our controller by using our arduino as an Isp programmer, for this we go to the toolbar, for example, ArduinoISP, then we
must include the indicated libraries to be able to program our ATtiny 44 for this we can include them, from the toolbar, file, preferences, within
the option Card Additional URLs Manager we will include the following link:
https://raw.githubusercontent.com/damellis/attiny/ide-1.6.x-boards-manager/package_damellis_attiny_index.json
Next action we will install the attiny option as seen in the following image by clicking the install button
Now from the toolbar, tools we can choose our ATtiny / 24/44/84 pcb board, ATtiny drivers and choose ATtiny24 / 44/84
followed by this from the toolbar, tools we choose the ATtiny44 processor, here it is important to choose the
frequency of the controller's internal relog, for our case 1 MHz
The necessary program for our arduino to work as ISP can be downloaded from the following link
Download ArduinoISP
Now we can load our programs in our ATtiny 44 programmer with our arduino as ISP
Connecting our ATtiny and loading the code
Now we will load our ATtiny44 controller through the use of our programmer, how the programming and use of the
FabIsp is carried out we can find it in more detail in the week of electronic production from the following link
Electronic production
Trying to turn on a led
In the following video we carry out a new test of sending the program through our arduino, for this we use a code that comes within the arduino
software in the integrated examples, this to better understand the use of pinMode, delays and the use of digitalWrite, for this we go to the toolbar,
file, examples, Basic, Blink and then we simply upload this example code to our controller
With a battery
just as a verification and as a practical example to demonstrate that the code is inside the controller and not the Arduino, we disconnect our
arduino from the ATtiny44 controller and connect it to an external power supply with a battery
Turning on the led of the circuit board with the integrated button
Finally we reconnect our ATtiny44 board to our FabISP programmer to load a last code, in this case we are going to upload a program
that turns on and off the led integrated in our board using the button on it.
The code
We can see the code necessary to turn the led on and off with the button integrated in the following image
Atom, Visual Code plus PlatformIO IDE
Visual studio also has an Arduino plugin with which we can program code for this micro controller
To teach students to develop their mobile and web application projects we use Atom, Visual Studio Code even Visual Studio 2019 , in the same way we use the PlatformIO
ide for robotics classes in conjunction with Arduinos as an alternate development environment that students enjoy very much
I invite you to try these applications, we can find many tutorials on youtube to use and develop many interesting things
A good design and placement of the elements, the appropriate parameters for the cnc introduced in the Mods, will help
us to manufacture a good plate and in this way we can weld the components without fear of circuits, of course the help of a
microscope makes a precision and quality work.
It is very important to carry out the calibration of the cnc, some correct adjustments will help us to make a good printed circuit
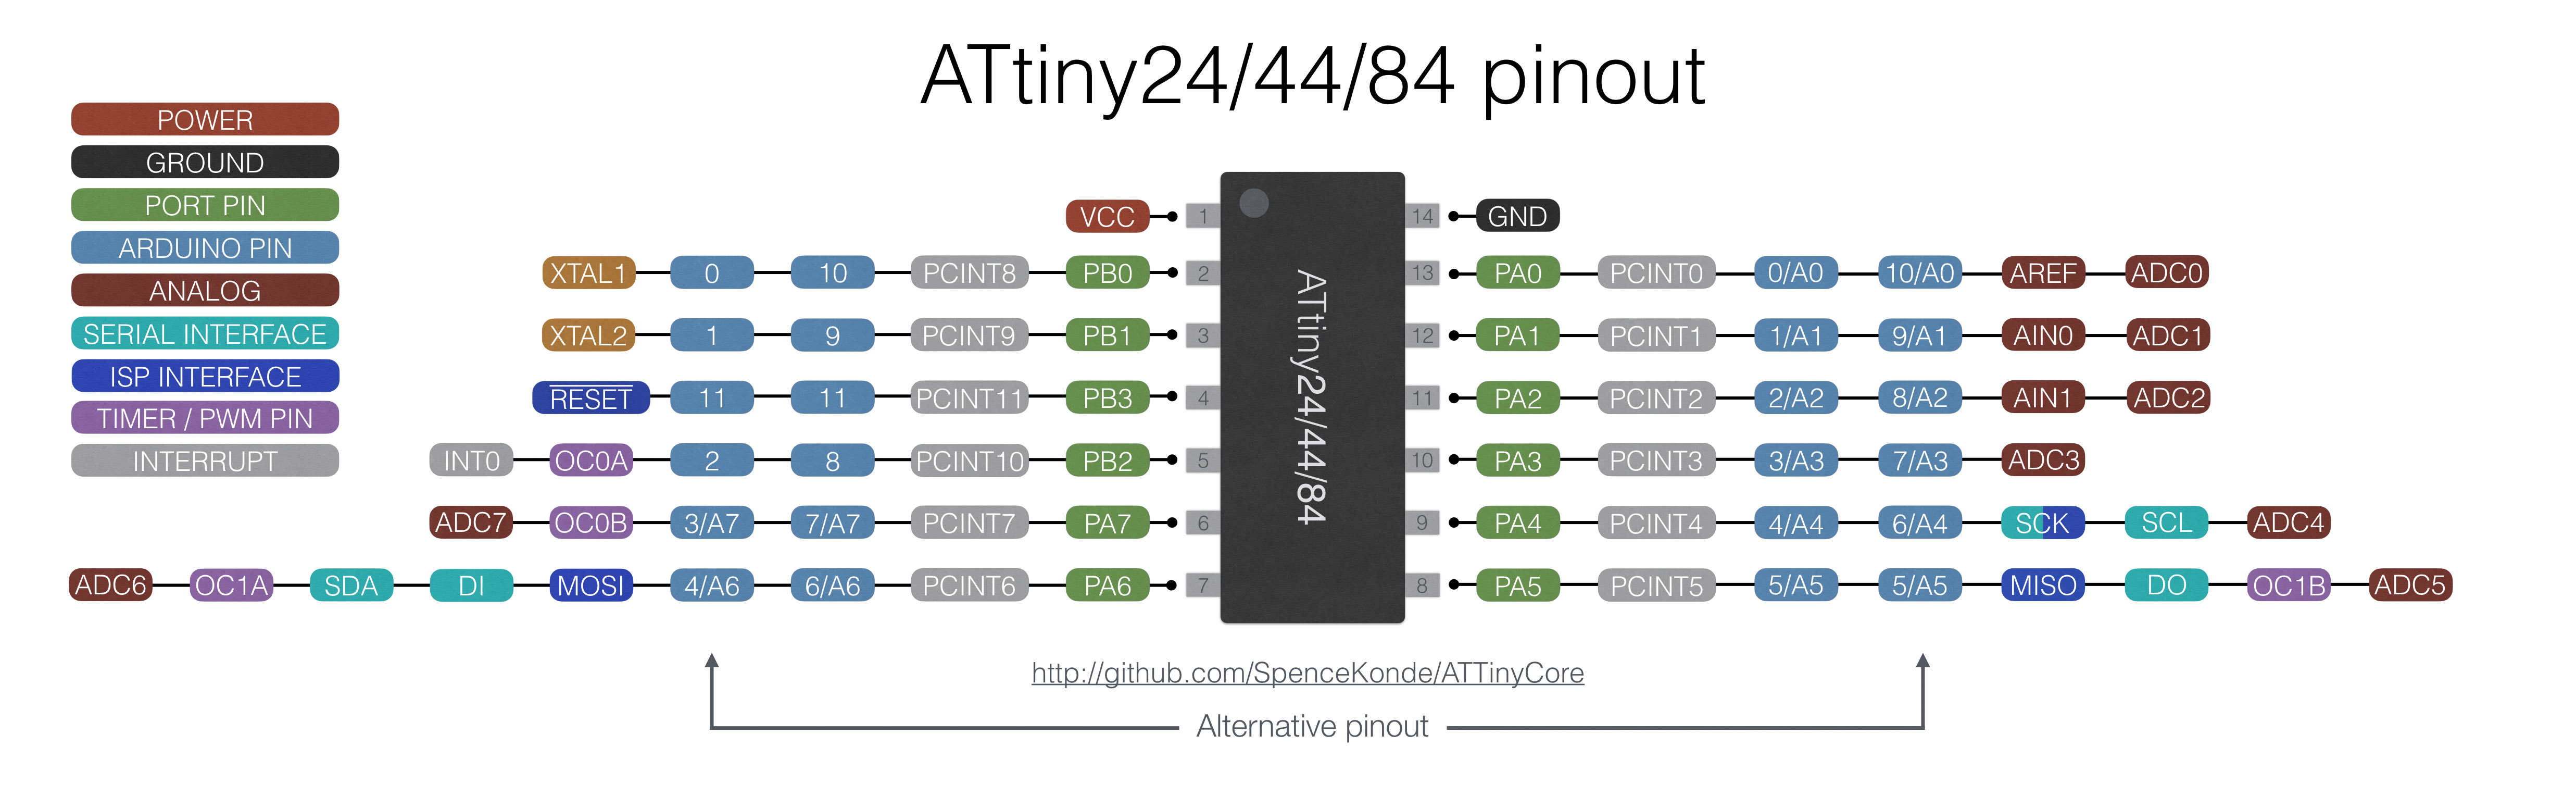 image taken from joseph-zoulikian page
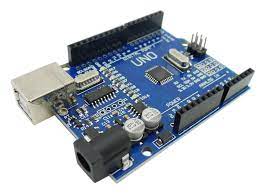 image taken from
amazon
image taken from
amazon
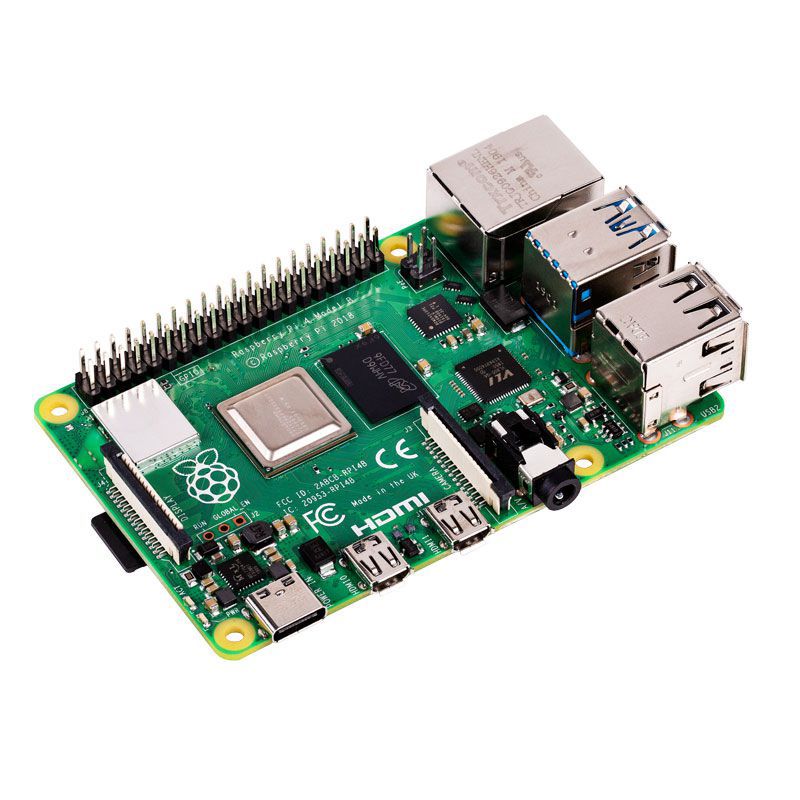 image taken from pcworld.com
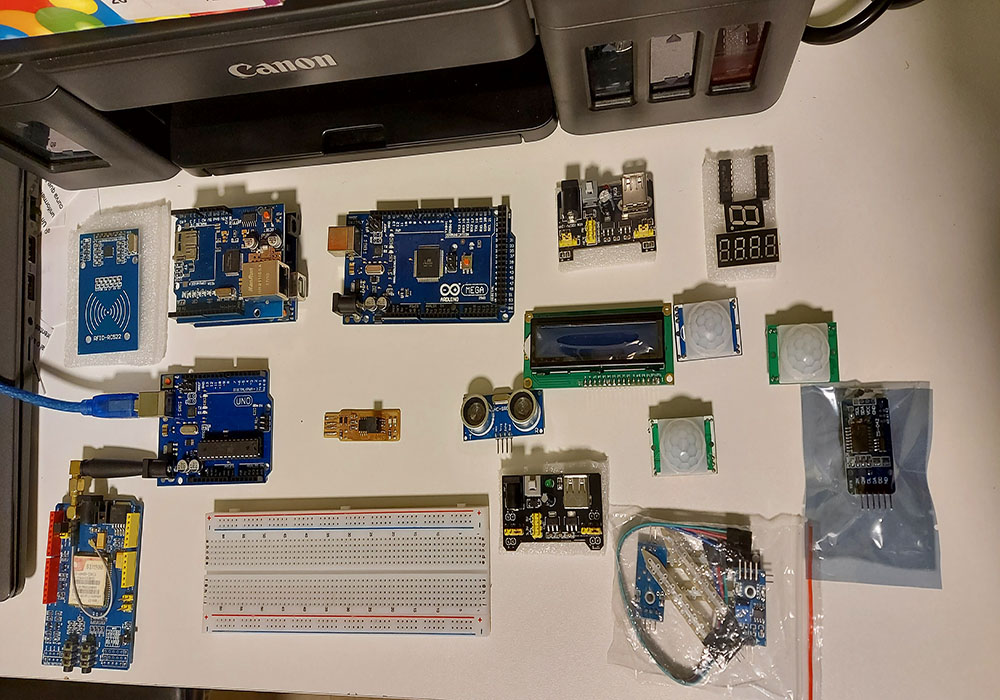


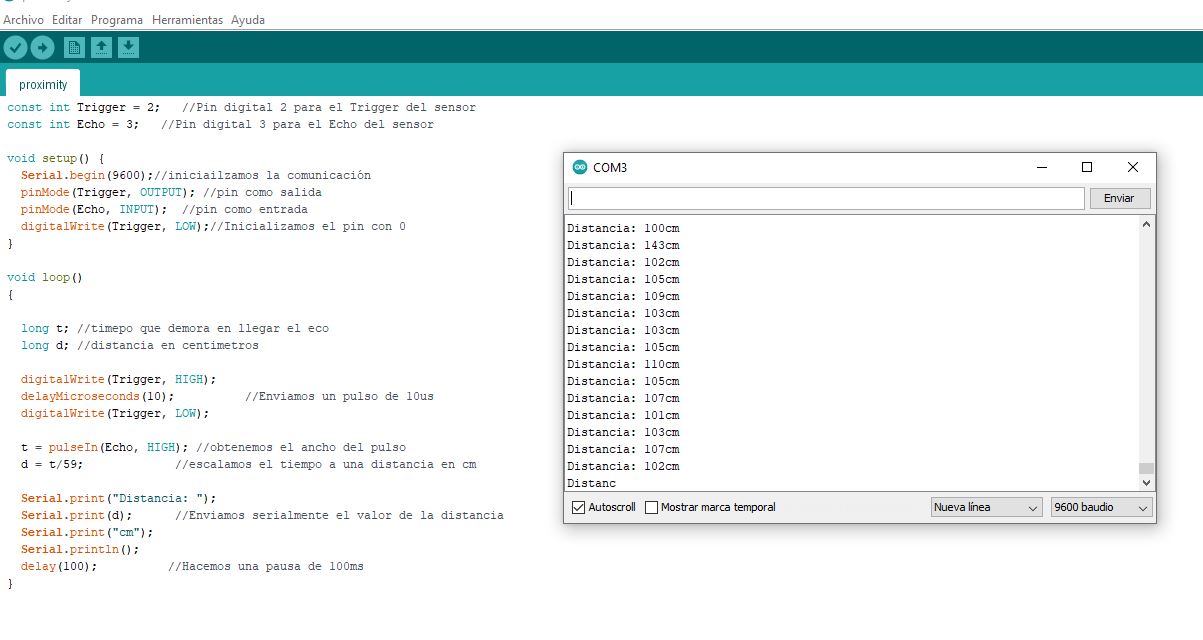
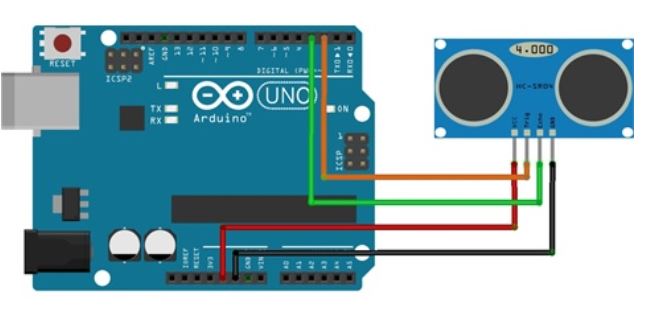 image taken from naylampmechatronics.com/
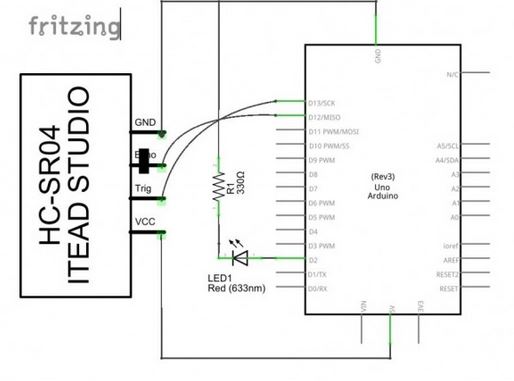
 image taken from https://fritzing.org/
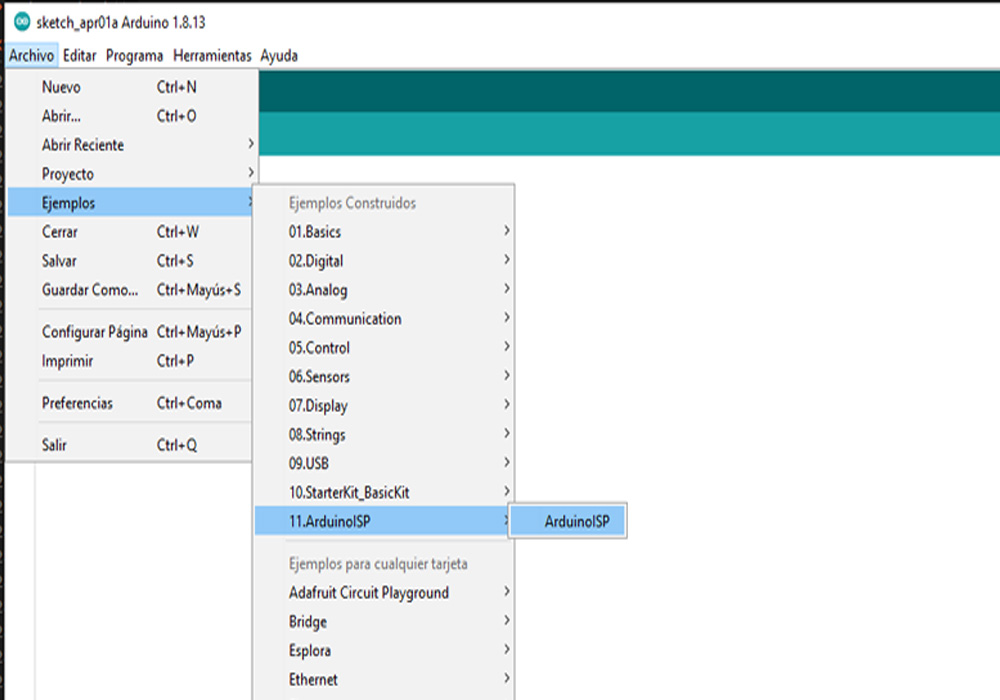
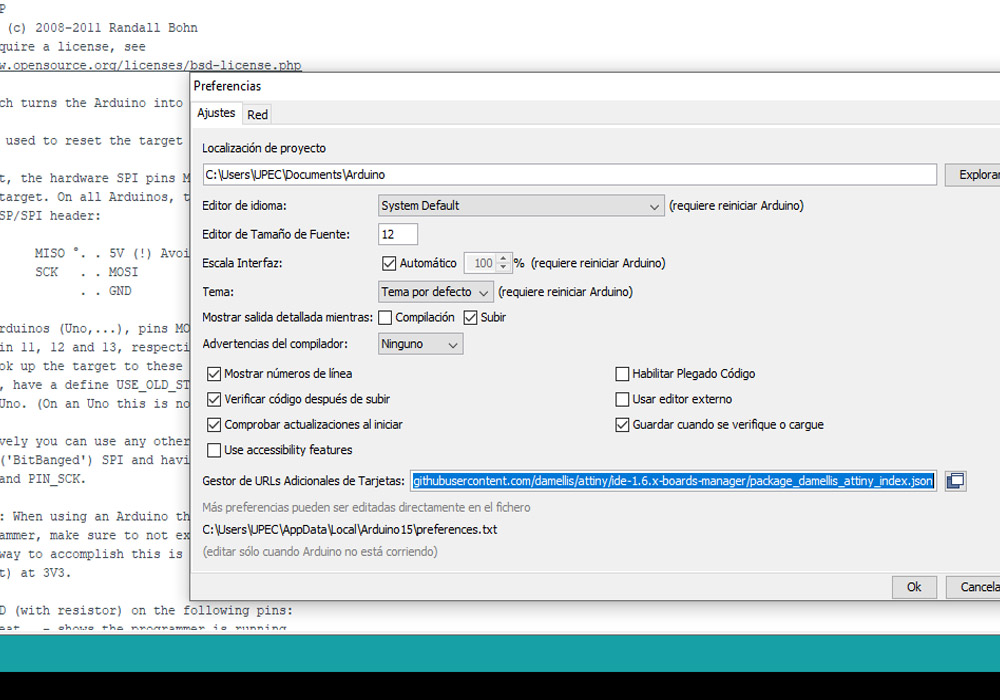

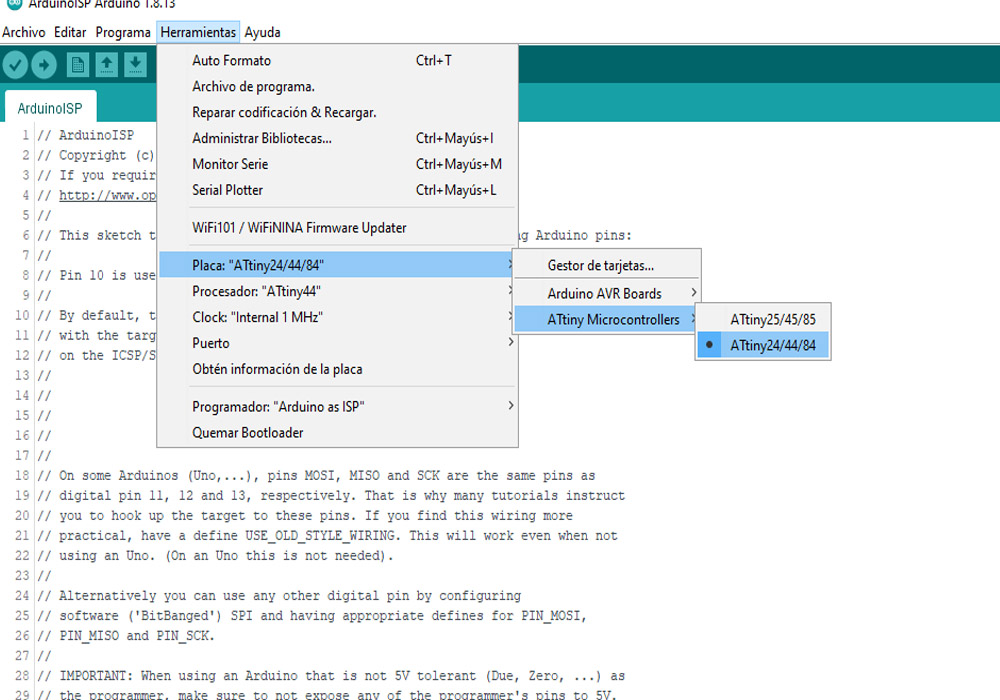
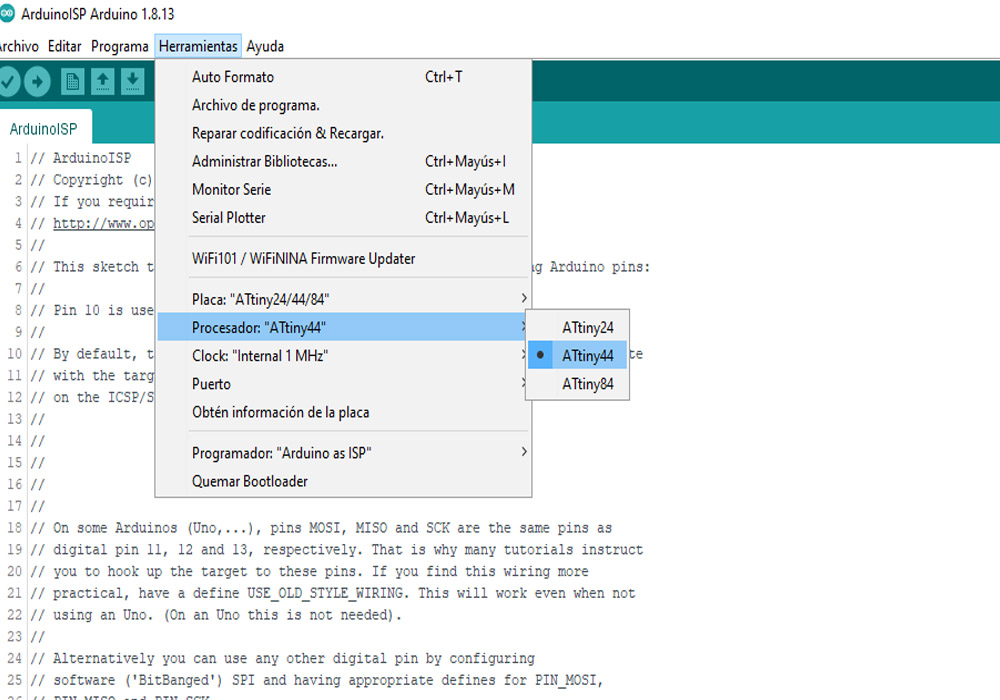
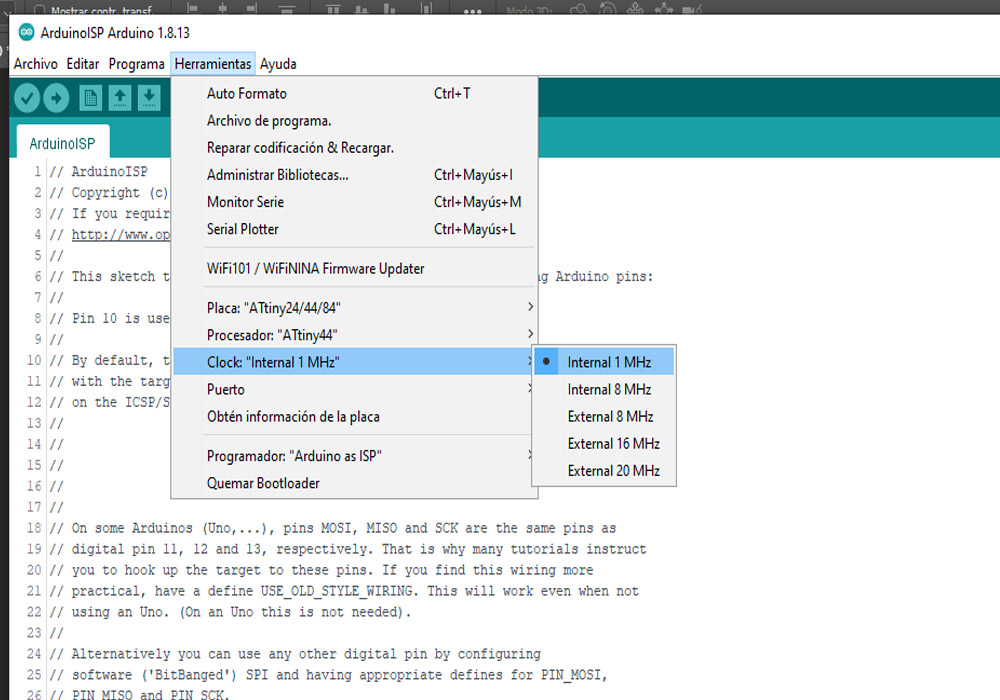
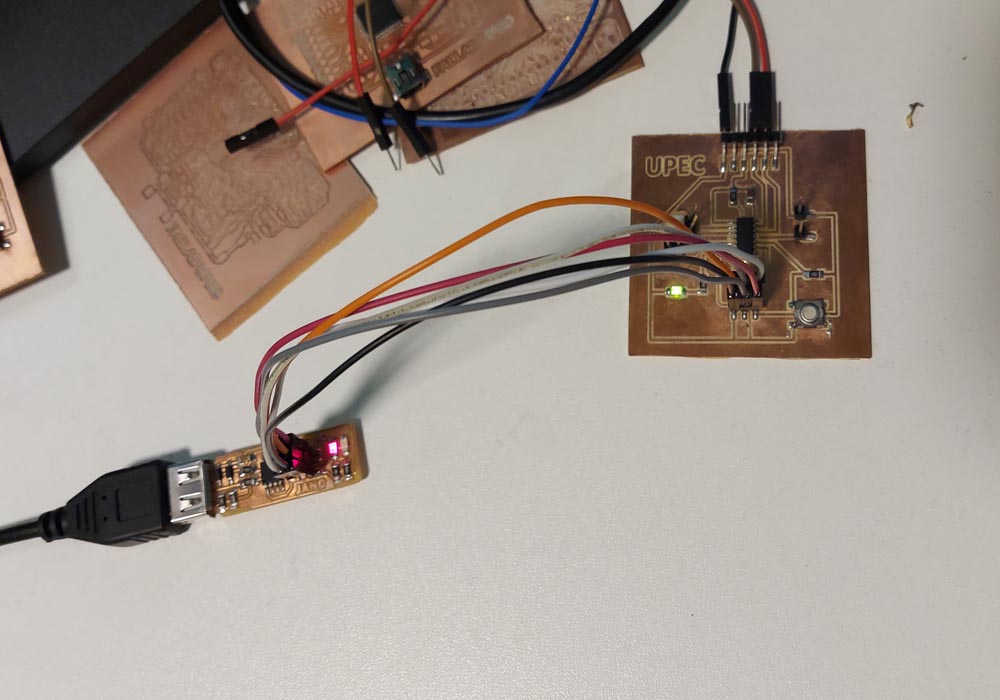
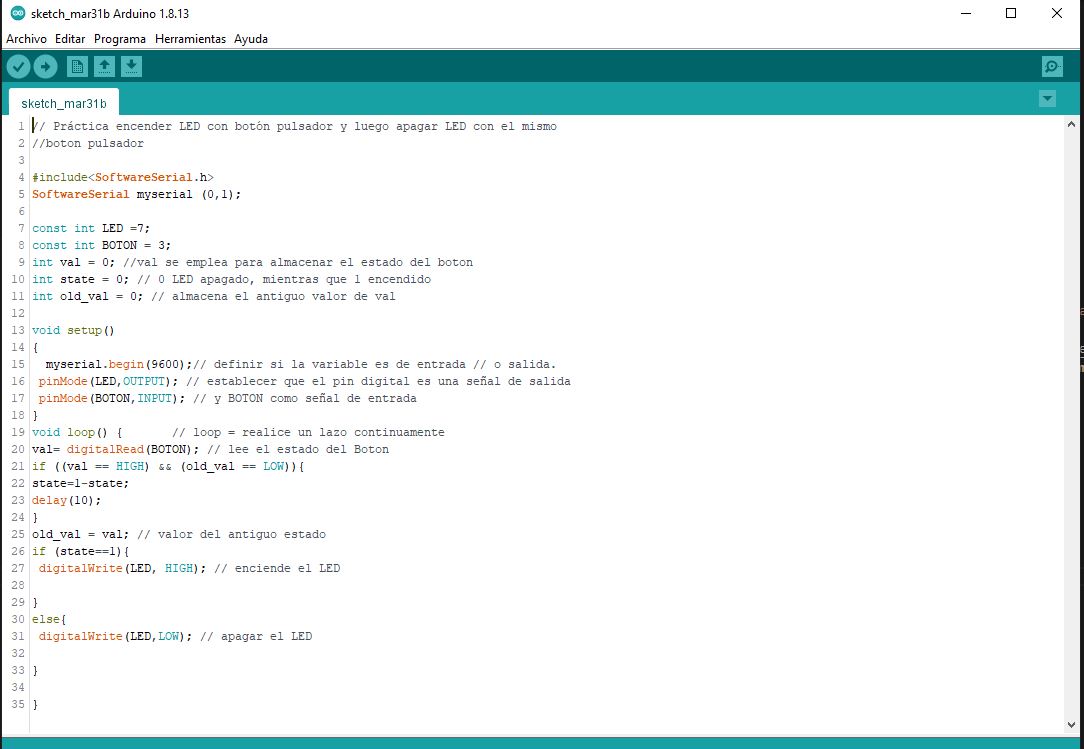
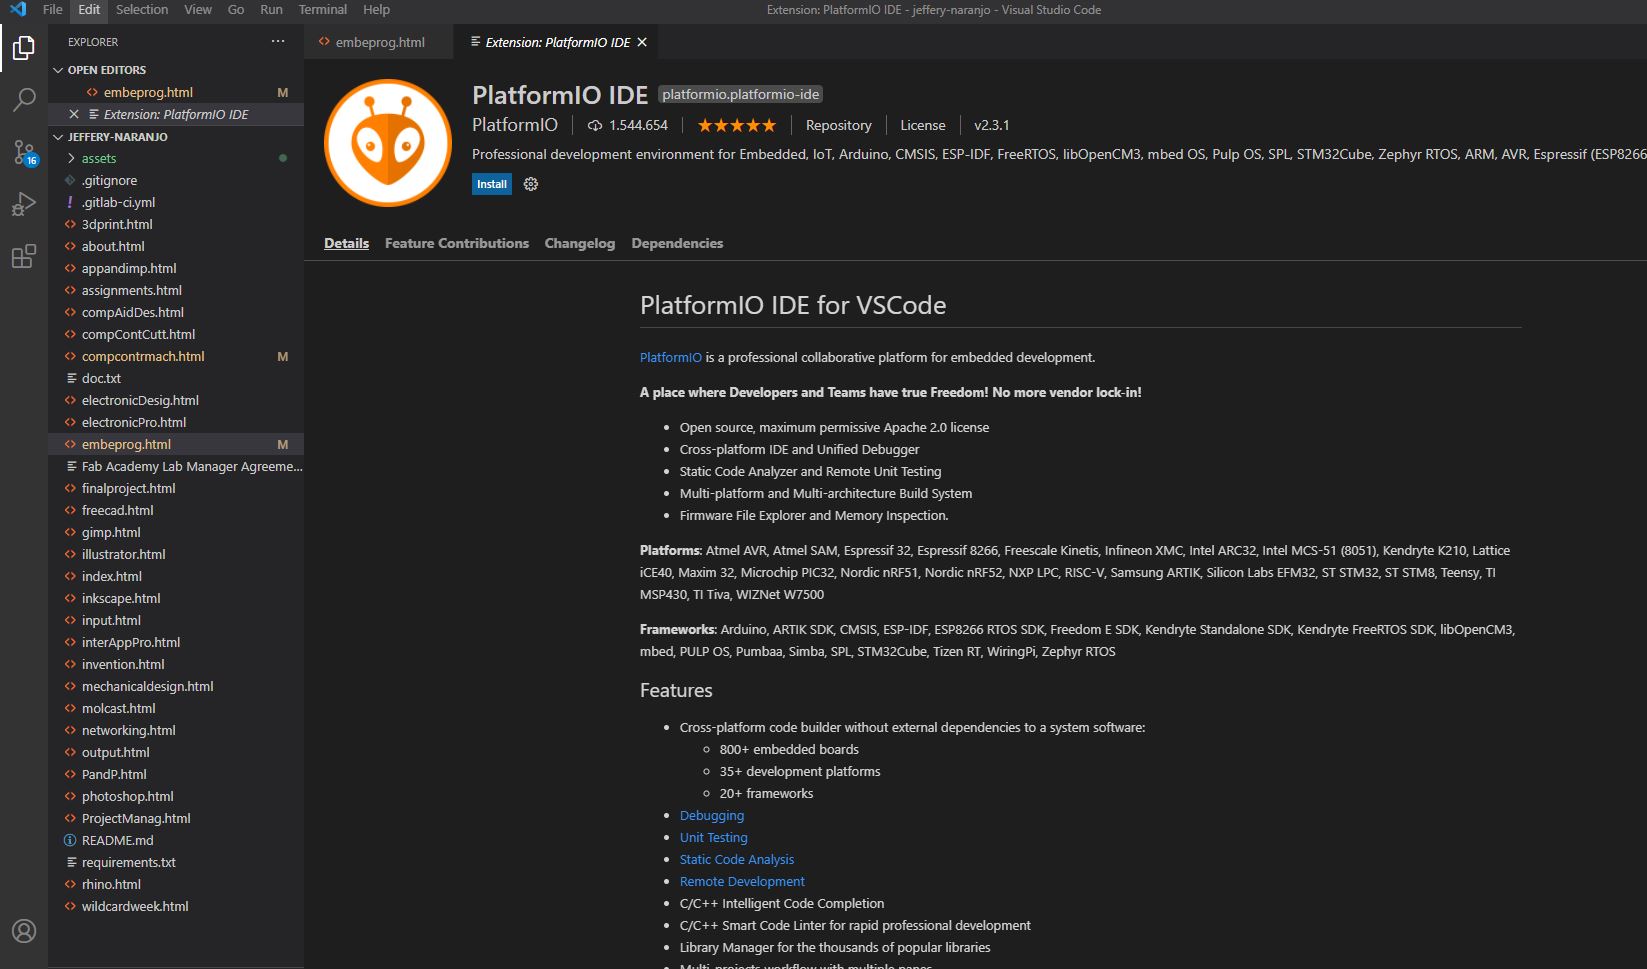
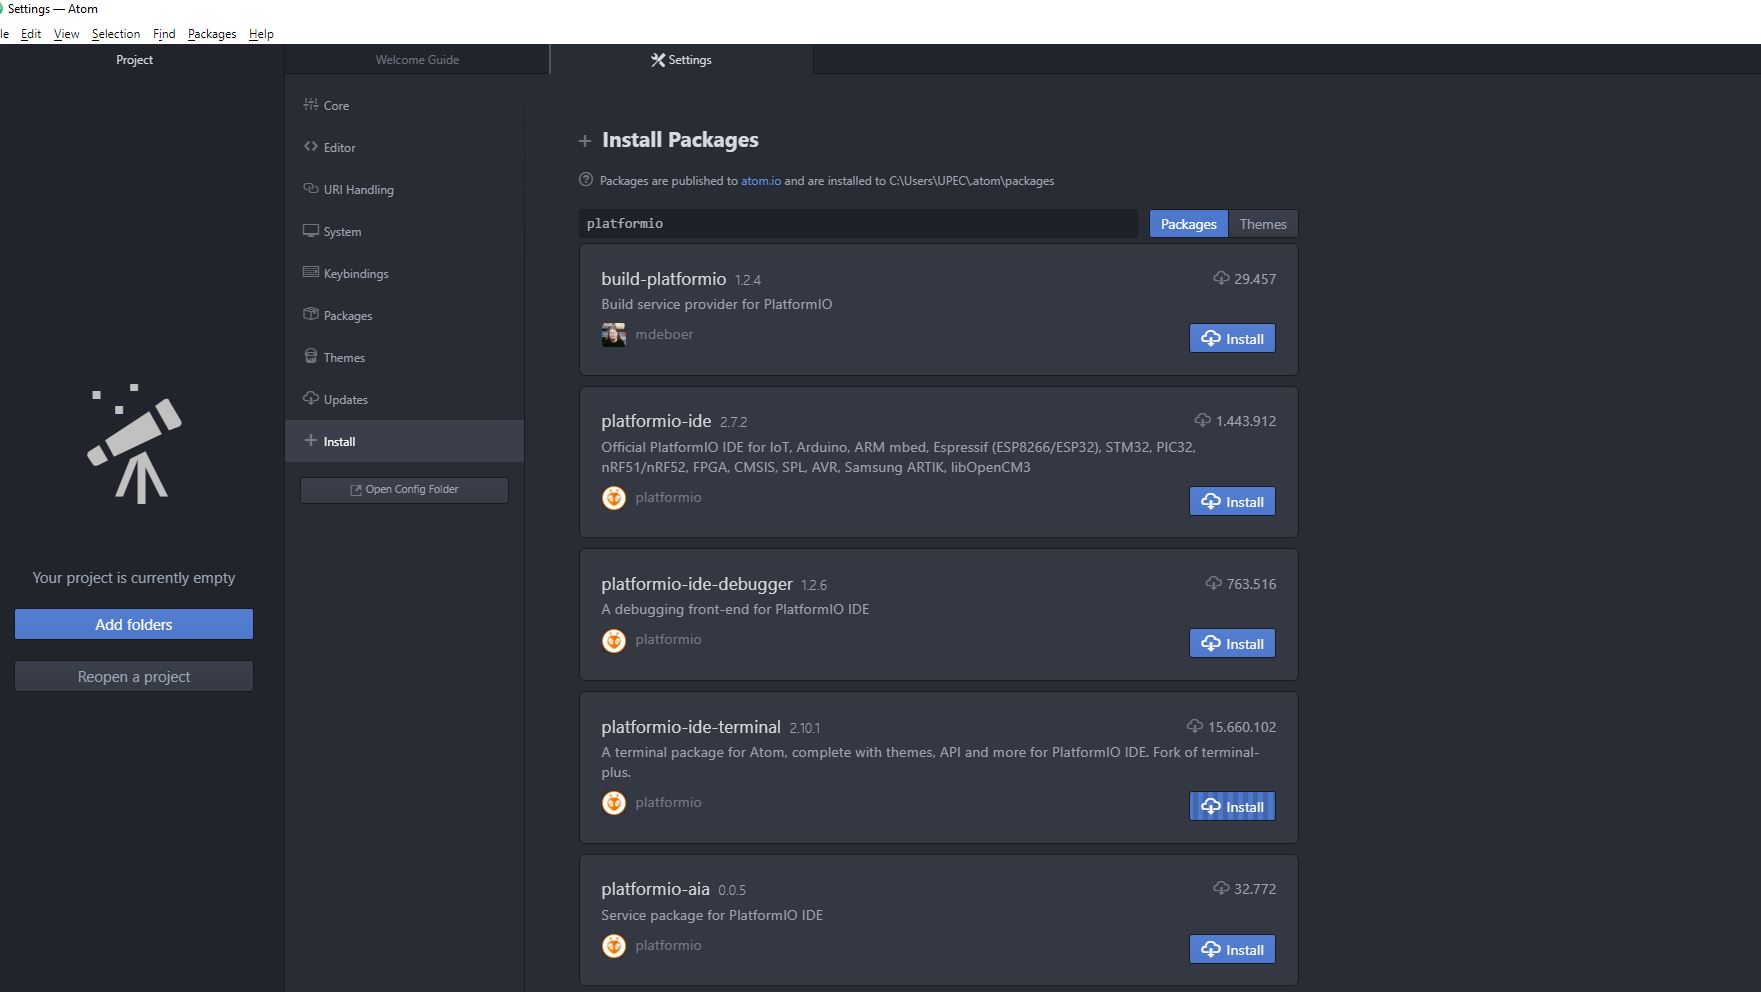
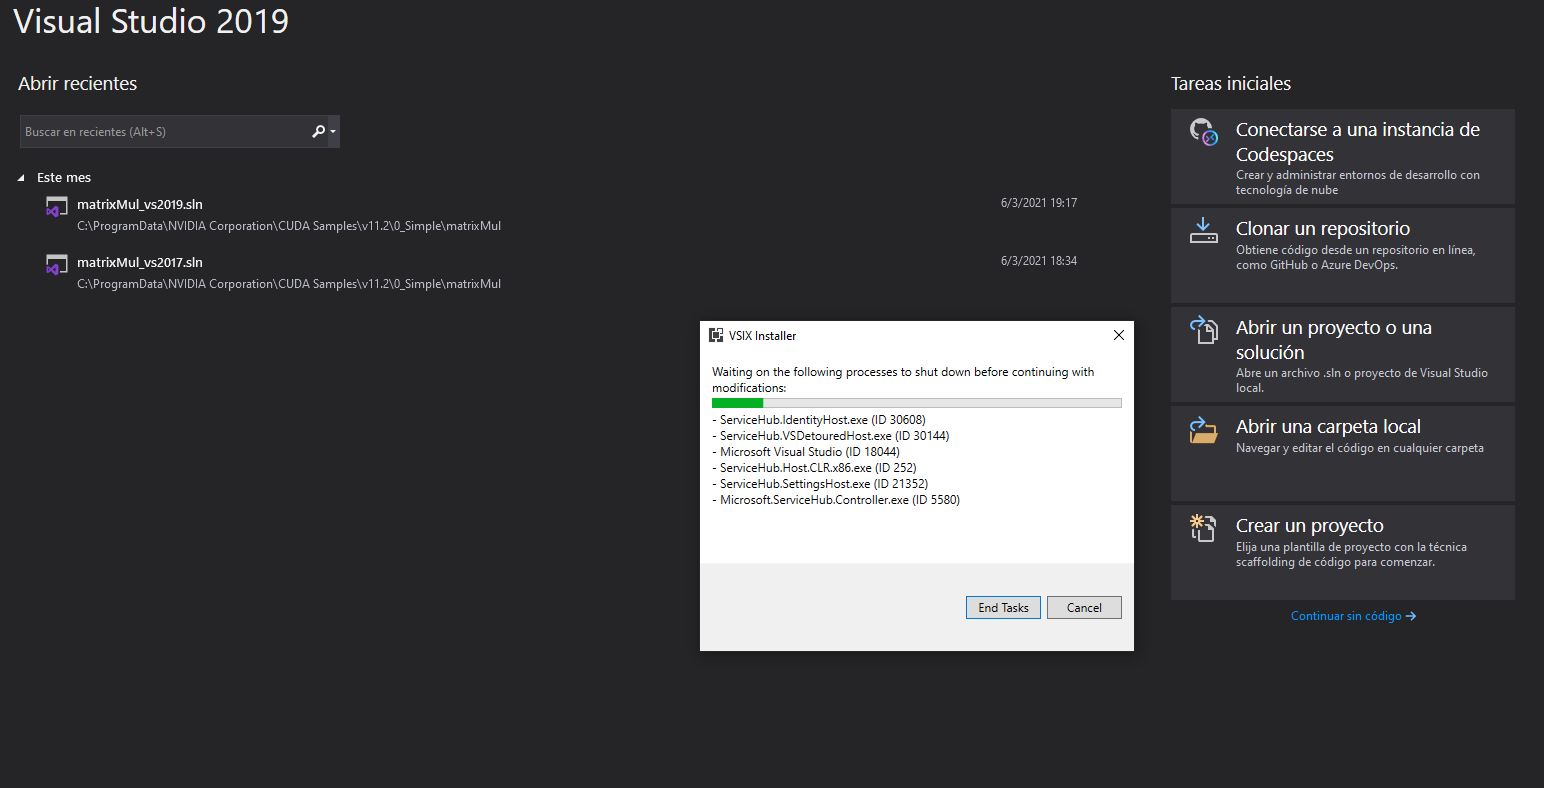
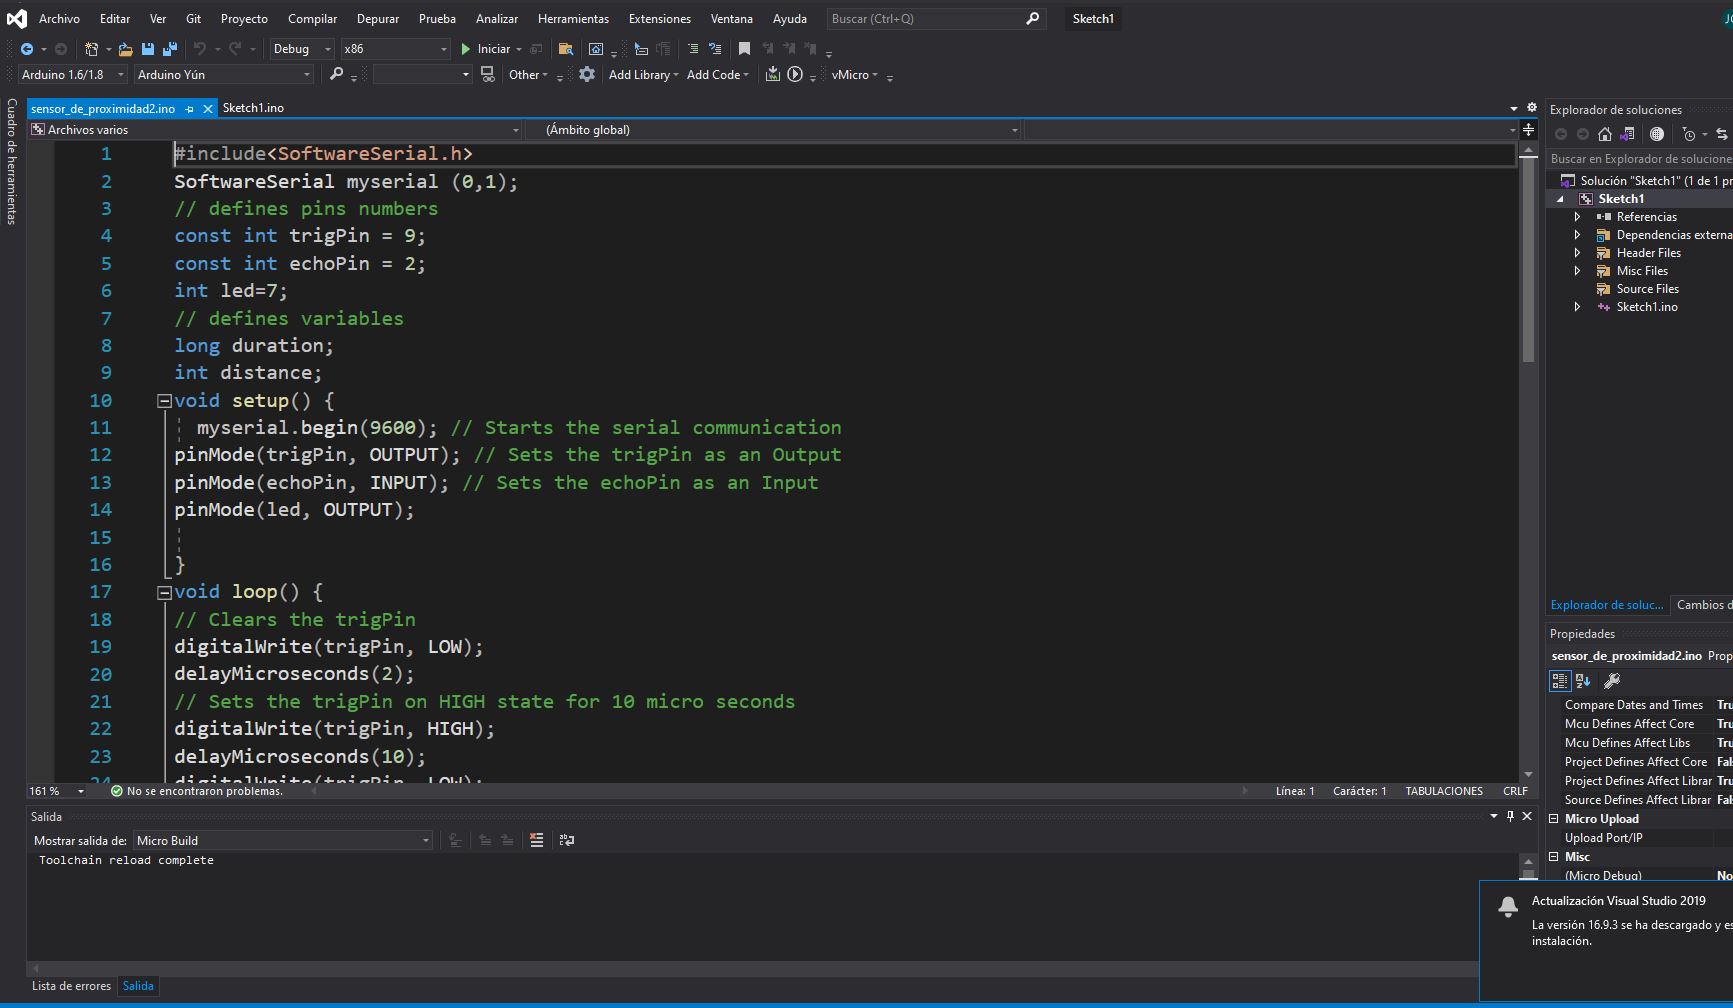
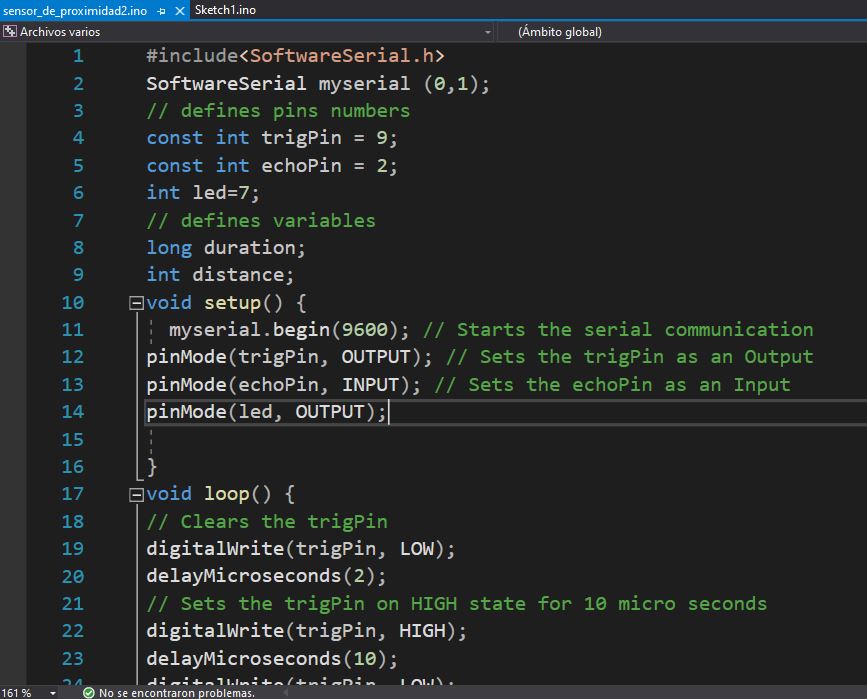
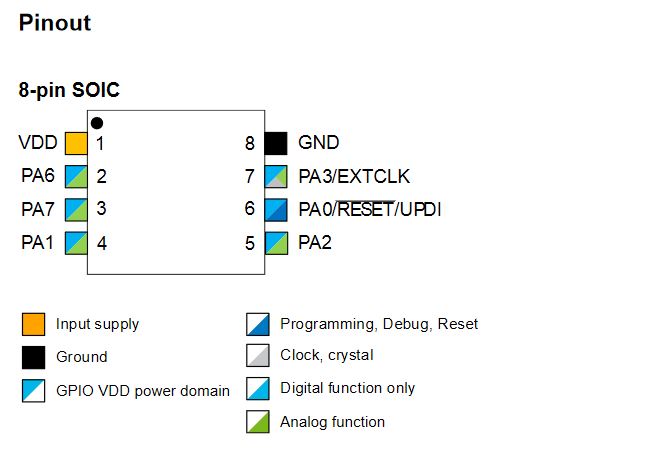 image taken from
 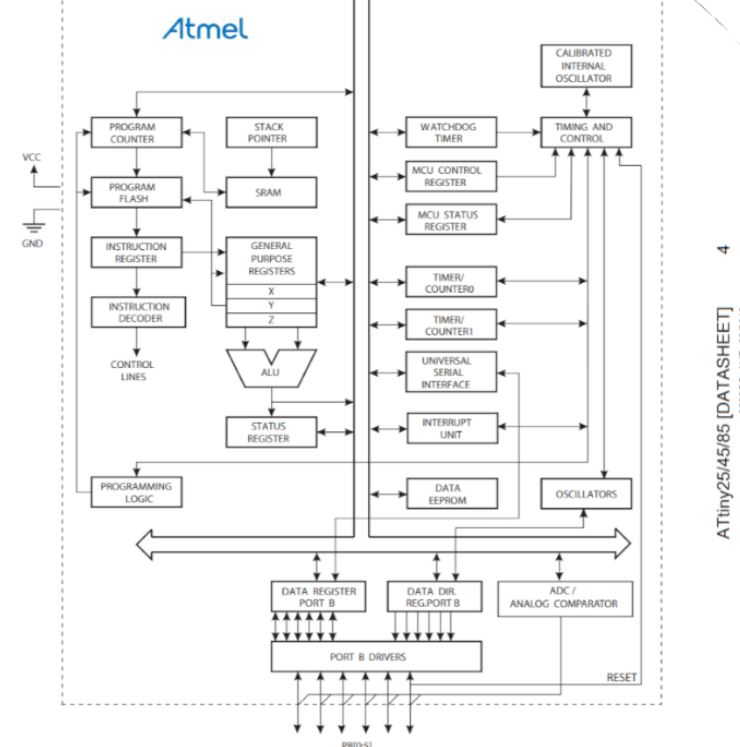 image taken from