MOLDING AND CASTING
Molding or Moldmaking is the act of creating the cavity / form that carries a negative or reverse impression of an
original model. Molds can be made of a rigid material, such as plaster or plastic resin or more commonly, a flexible material
such as rubber. The material to use should be chosen considering the material of the model, the material to be used to make
castings, and whether there are any undercuts.
Casting is the act of pouring liquid material into the cavity of a mold. After a period of time, this liquid will cure
via chemical reaction or cooling. The solidified part is also known as a casting, which is ejected or broken out of the mold
to complete the process. Casting materials are usually metals or various cold setting materials that cure after mixing two or
more components together; examples are epoxy, concrete, plaster and clay.

GROUP ASSIGNMENT
Find out the details of our common work al ZOI
Here.
Decorlac Laca catalizada
Lacquer designed to give a durable and resistant finish to wooden surfaces. You can find the data and safety sheet in the following link:
Pinturas condor
Evans matt clear lacquer
Multipurpose spray paint based on acrylic resins, high covering power, wide variety of colors, point and fan nozzle. We used the matt and clear one
to give a finishing to our molds.
Evans
Smoot on - Task 16 urethane
TASK™16 is a low odor, fast-setting Shore 80A/30D urethane that offers very high tear strength, impact resistance and wear resistance.
You can find further information in this web site:
Smooth-on
Also the safety sheet:
Smooth-on
DESIGNING THE MOLD
First, get some inspiration
I found this week very interesting specially for interior design projects. For a while I've been thinking on some decoration objects
that could be affordable, because in my city despite most of these objects come from China they are really expensive and scarse.
I have a lot of ideas on mind that I want to develop and thanks to FabAcademy now I have the tools and knowledge to do them.
For this assignment I had some ideas I wanted to base my mold on, I wanted it to be geometric, home for plants and decorative,
here you can see my top 3.
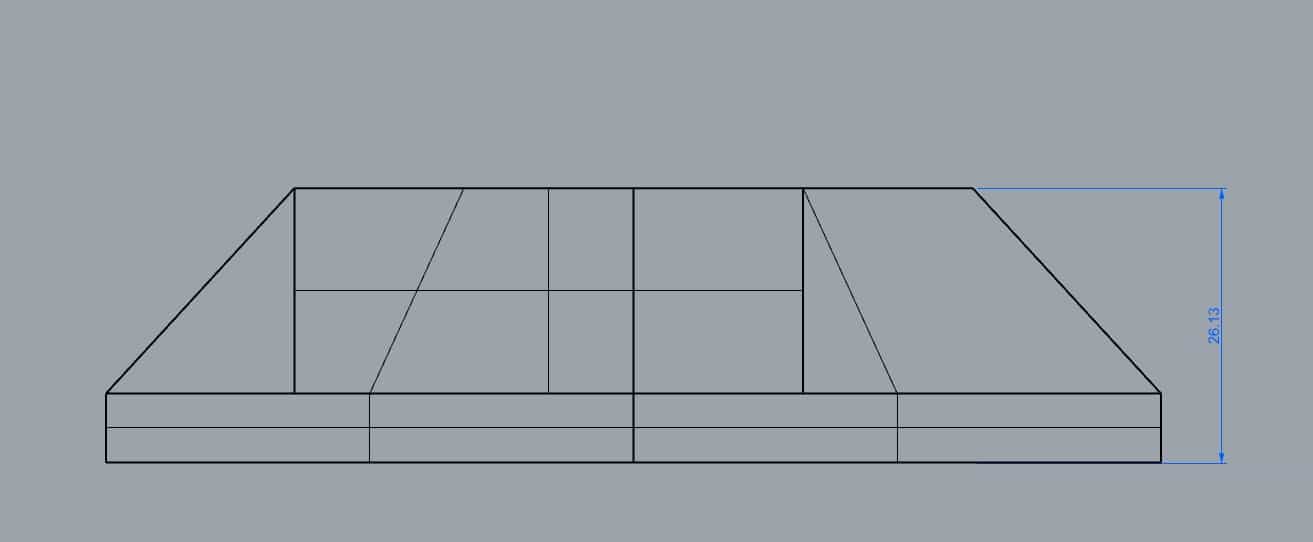
3D MODEL
To build this model I used Rhinoceros. There were some considerations to have on mind at the moment of designing, "design with the
tools avaliable on mind":
- The material we will use for the mold is a 30mm mdf, so this is a particular restriction on the height
- The roughing will be made with a flat 1/2 end mill
- The finishing will be made with a 1/4 ball end mill
When the 3D is ready export it as .stl
FILES
Rhinoceros file
.stl file
SOME TOUGHTS ABOUT THE DESIGN
When designing it is important to keep in mind the tools and materials that will be used in manufacturing. First point: the material, I had initially planned
that my pot can contain larger plants, however the material available and which we were going to use in the lab was a 30mm mdf. For this reason I had to adjust
the height of the object to this limitation. Second point: the cut and roughing mills. It was planned to use a 1/2 bit for roughing and a 1/4 for finishing.
I did not have many demands on the rounded finish at the corners. I think it was an interesting outcome and that it contributed to my design. I am aware that
the final result will be different from the design.
3D MILLING
To generate the Gcode we used ArtCam, which is pretty intuitive and easy to use, I'll detail the process:
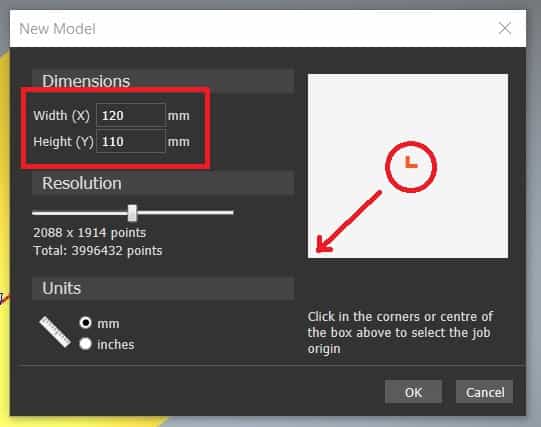
ARTCAM WORKFLOW
- Set the size of the model bigger than the 3d, taking into account the end mill diamater so it can pass around with no problem
- Make sure to set the red cross on the corner to set x and y on 0
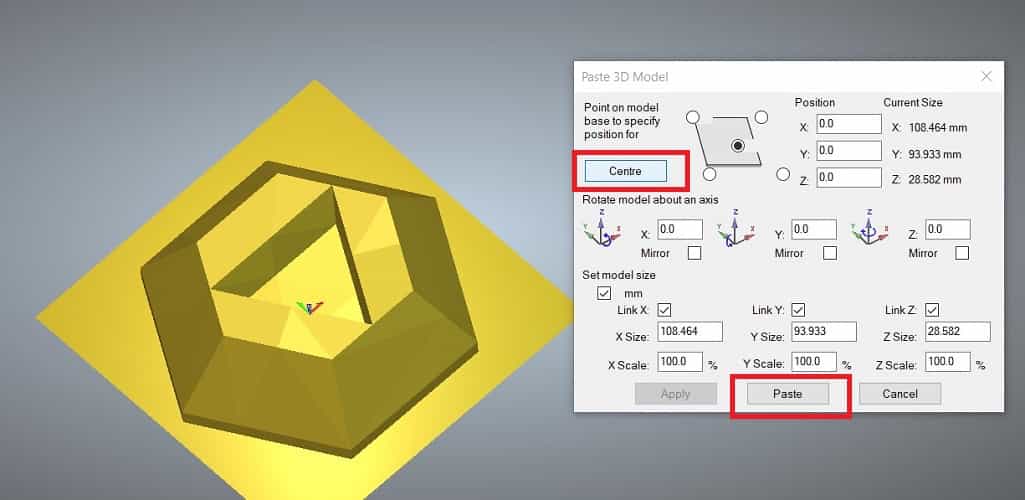
- In Relief select Import> import 3D model
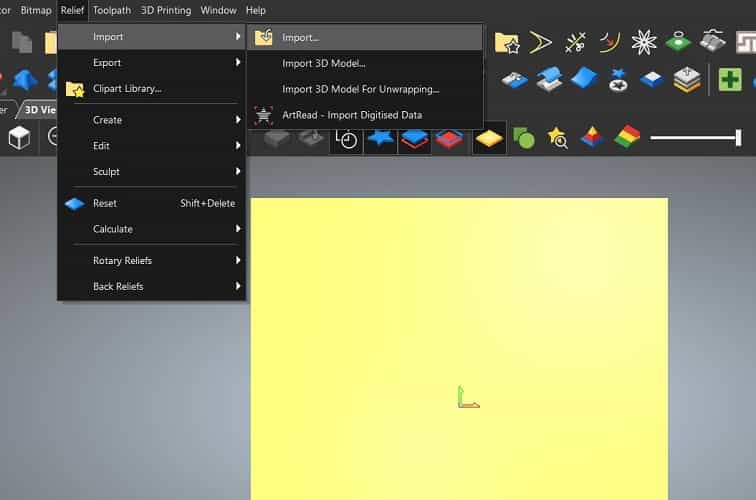
- In the paste window, select center to locate the 3d, here you can change the scale, position. When ready clic paste and close the window
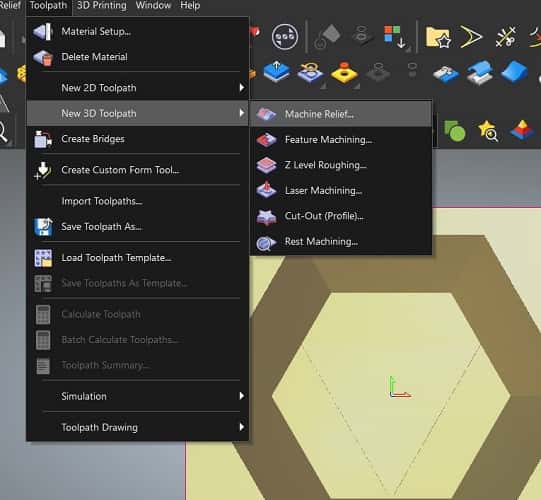
- In toolpath select 3d toolpath and machine relief
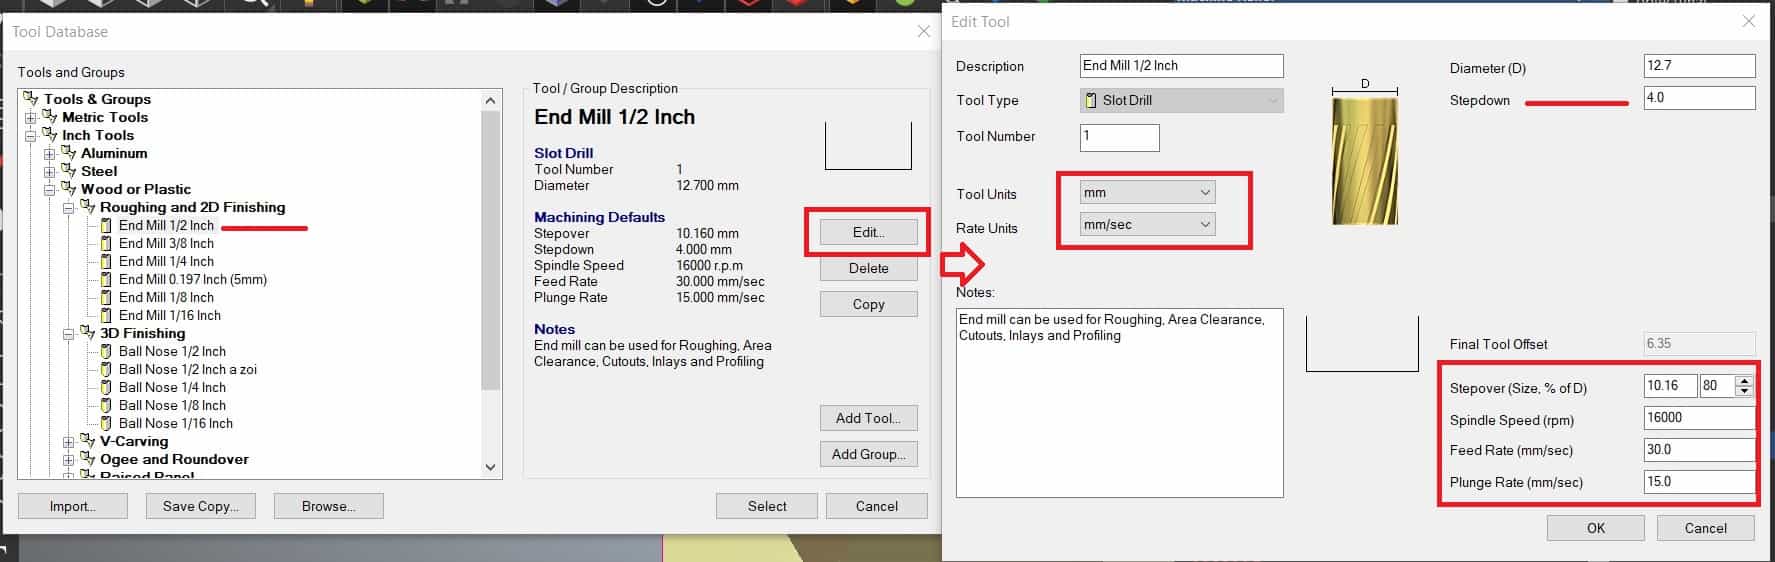
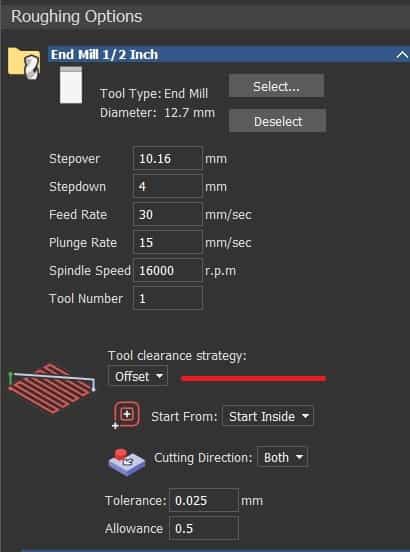
- These are the parameters I set for the roughing: select the wood or plastic> roughing and 2D finishing > End mill 1/2 inch
- Tool units in mm
- Rate units mm/s
- Step down: 4
- Step over: 80%
- Spindle speed: 16000
- Feed rate: 30
- Plunge rate: 15
- In this case we selected tool strategy offset
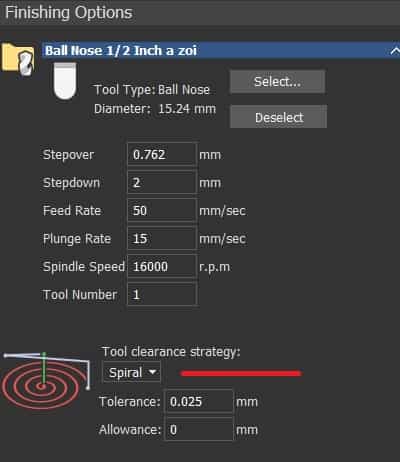
- The parameters for the finishing: select the wood and plastic> 3D finishing> ball nose 1/2 inch
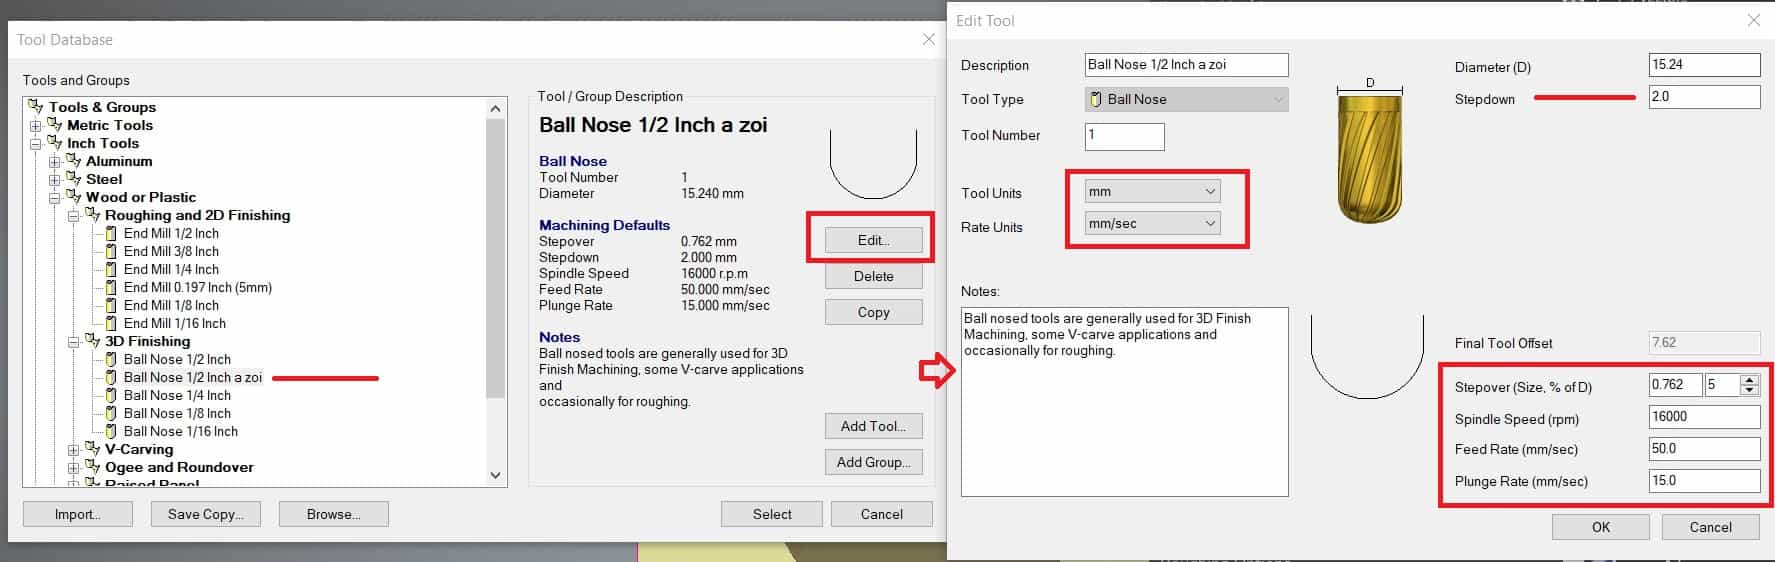
- Tool units in mm
- Rate units mm/s
- Step down: 2 to have more detail
- Step over: 5%
- Spindle speed: 16000
- Feed rate: 50
- Plunge rate: 15
- In this case we selected tool clearance strategy: spiral
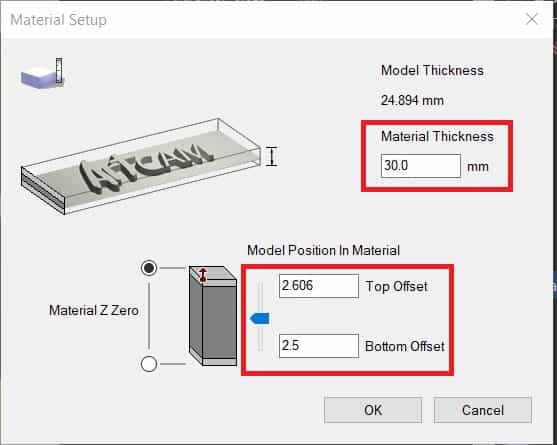
- Set the material: 30mm Left some mm on top and bottom to have some free space to pour the silicon later. But now I realize I should have left it 0 on the bottom
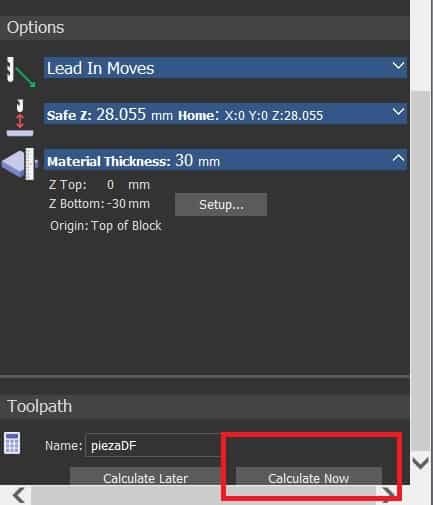
- When everything is ready, add a name and press calculate now
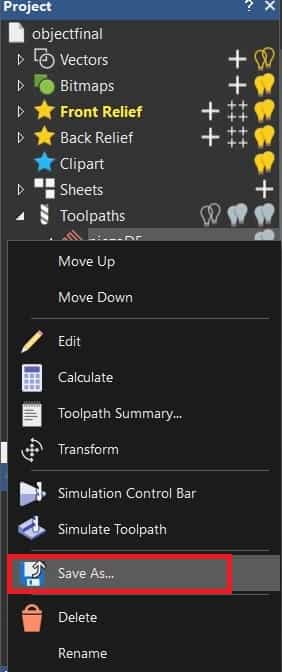
- There is a simulation option really useful to see the final result in advance. Right click on the toolpath and select simulate

- To generete the Gcode, right click and select save as
- In the save toolpath make sure to select machine file format: Gcode (mm).tap
- Run the code in the CNC. Start with the roughing process. This is the result of my piece, it has a lot of rounded corners.

- Run the finish code. It was planned to use a different mill to do this step, but my tutor recommended me to use the same one as the roughing process a 1/2 ball nose.
This was an exercise we did during our confinement, we had strict restrictions so our time out and when using the lab were limited. However the result looks interesting
although it could have been more accurate by changing the end mill to a thinner one.
- Remove the screws used to adjust the material and remove the piece.
PREPARING THE MOLD
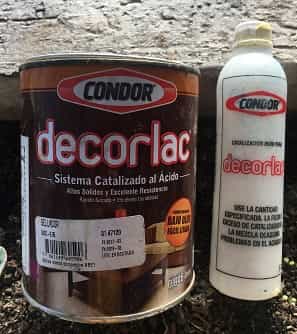
With the 3d model ready, I sanded it down and prepared to seal it. As we made the positive in mdf it was necessary to use a wood sealer, in this case
we used "decorlac" from which I attach its data sheet and necessary care and precautions. This sealant is made up of two liquids, the sealant and the
catalyst, which must be dissolved in proportions of 1:20.
In the instructions it mentions that once mixed it should be left to rest for 15 minutes and apply, let it dry for at least 1 hour, sand with a thin
sandpaper and apply a second coat. I applied it using a brush and let it dry.
After a couple of hours, it is ready to lacquer. In this case I used a transparent matte lacquer. It is important to apply it evenly at a distance
of 15-20 cm and let it dry for at least 2 hours.

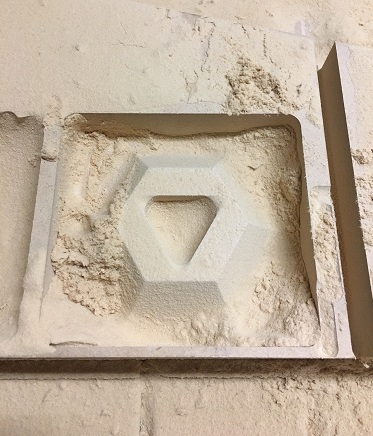
To know the quantity of silicon needed we have to know the volume of my mold, to find out this value I used rice as the following pictures show:
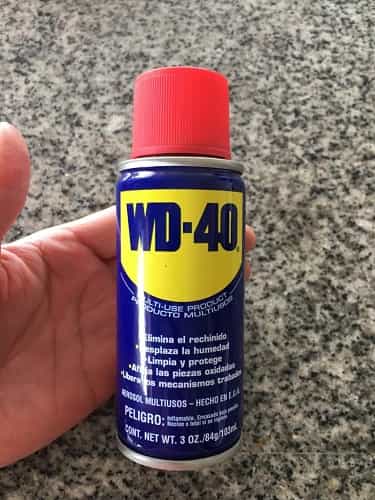
To remove the silicone mold easy, a small layer of DW40 oil was added to the mdf.
The next step is to prepare the silicone. In this case I used silicone rubber from "La casa del pintor" that comes in two parts, the silicone and
the catalyst. I prepared it in proportions of half and half, placed in a disposable plastic container, I mixed it according to the instructions of
the class to have the least amount of bubbles and once it began to solidify I poured it into the mold until it was completely covered.
It should be left in the open air until it dries in about 48 hours.
Safety rules are very important to have on mind, remember to use gloves, eyes protection and do this outside or with a good ventilation.
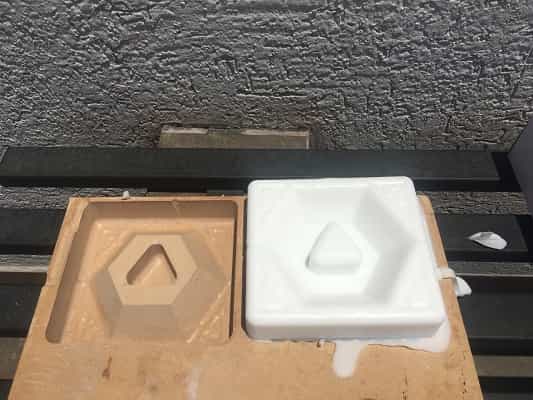
Once the silicone had dried it was easy to unmold.
The next step is to mix the resin. An important recommendation is to read the information and safety sheet first. Here you can find the preparation instructions
and a 1 minute video that shows how the product works.
Mix A and B in 75A:100B proportions, mix during 1 minute and pour. While mixing you can feel how it gets warm.
Leave it to dry for at least 1 hour, it starts to harden very quickly in a well ventilated place. I did this process twice and this is the final result.
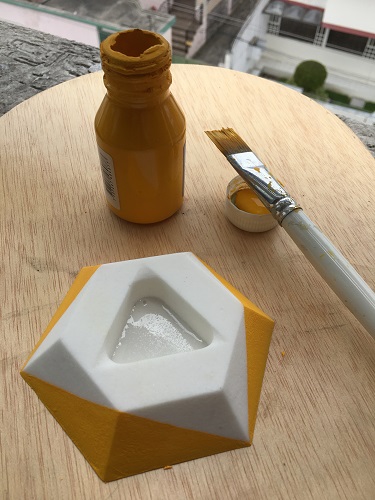
The final pieces look smooth with very little bubbles, should mix it with more care to avoid this. Then added somo final touches with
acrylic paint and put some plants in it which need very little care.
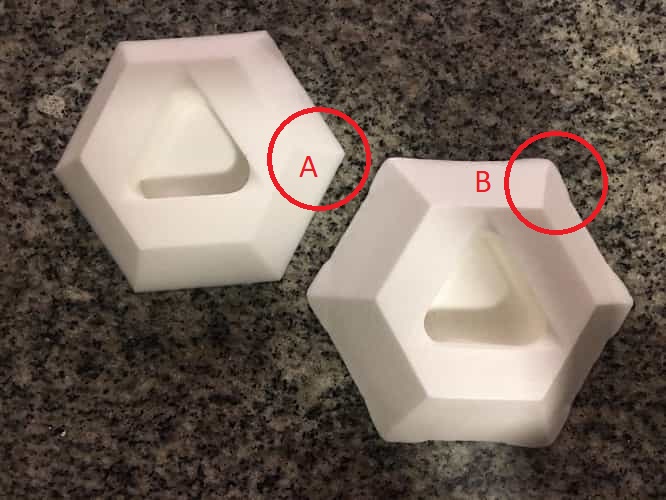
Some thoughts about this outcome
I made two tests to see the differences of the base finishing, in the first attempt I did not pour the resin to the edge of the silicon mold, which generated a
clean finish as can be seen in figure A. However, I had to complete the interior with an additional layer to close the base, once the piece had dried.
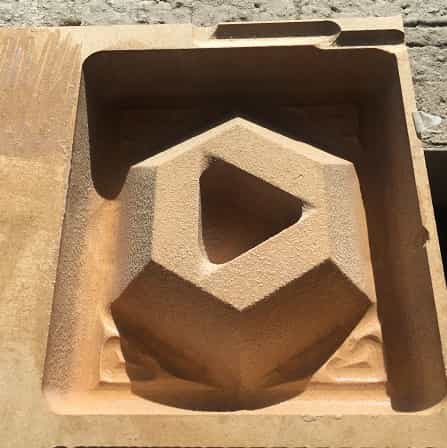
For B piece, I poured the resin all the way to the top of the silicone mold, which generated those jagged edges, an "error" that was present from the
generation of the initial mold.
The following picture shows what I mentioned, didn't pour the resing all the way to the top. Once the piece was unmold, I placed duct tape on the base
and added additional resin to close the piece at the bottom.

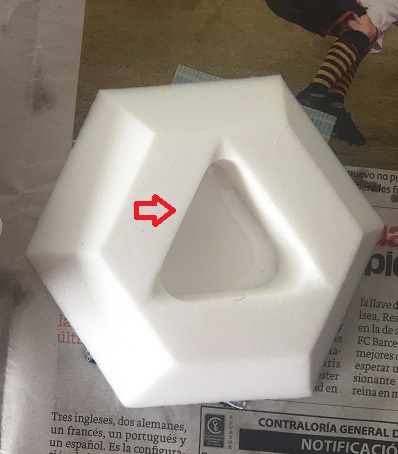
Even though the final dimensions changed even more, I like the result with the clean, straight edges.
Final thoughts about this week
This processes takes quite a long time, starting with the design, then the millin, the molding, the casting, adding some finishing.
But I find it very interesting, it has open a big panorama to try, I am interested in producing some decoration objects and this
technology is a good way to produce them. I still want to try with different materials and keep enjoying this practices.