Assignment:
Group Assignment:
1# Test runout, alignment, speeds, feeds, and toolpaths for your machine.
Individual Assignment:
1# Make something big (on a CNC machine).
Brainstorm
Softwares:
 - Fusion 360 - A CAD software that allows both 3D and 2D designing
 - VCarve Pro - This is a CAM software that allows you to turn 2D sketches in to 3D toolpaths and render them.
Machines:
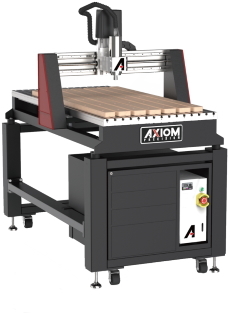 Axiom Precision AR4 PRO - This is a CNC which has fairly god precision to its cuts which allows you to cut joints really well.
Group Assignemnt
For our group assignment this week, we have tested the runout, alignment, speeds, feedrates and toolpaths for our machine. We will be using Axiom Precision AR4 PRO CNC machine. Our Fablab also has a 5 axis ShopBot CNC, however, for this assignment we will be using Axiom.
Instead of having lots of different files for each test, we designed an all-in-one test that allows us to check all of the things. Moreover, we have checked the G-Code (.NC) of each file post processed. For this group project assignment we have used VCarve software. The reeason to this is beecause it is really simple to use and it is really efficient in what we are trying to do for this group assignment.
we have designed two interlocking pieces with some drill holes on them. The interlocking mechanism will check the booth the alignment and runout. The holes will check runout and the dimentions of the pieces will check alignment. For the speeds and feedrates we have chose different tools and settings and checked the G-code.
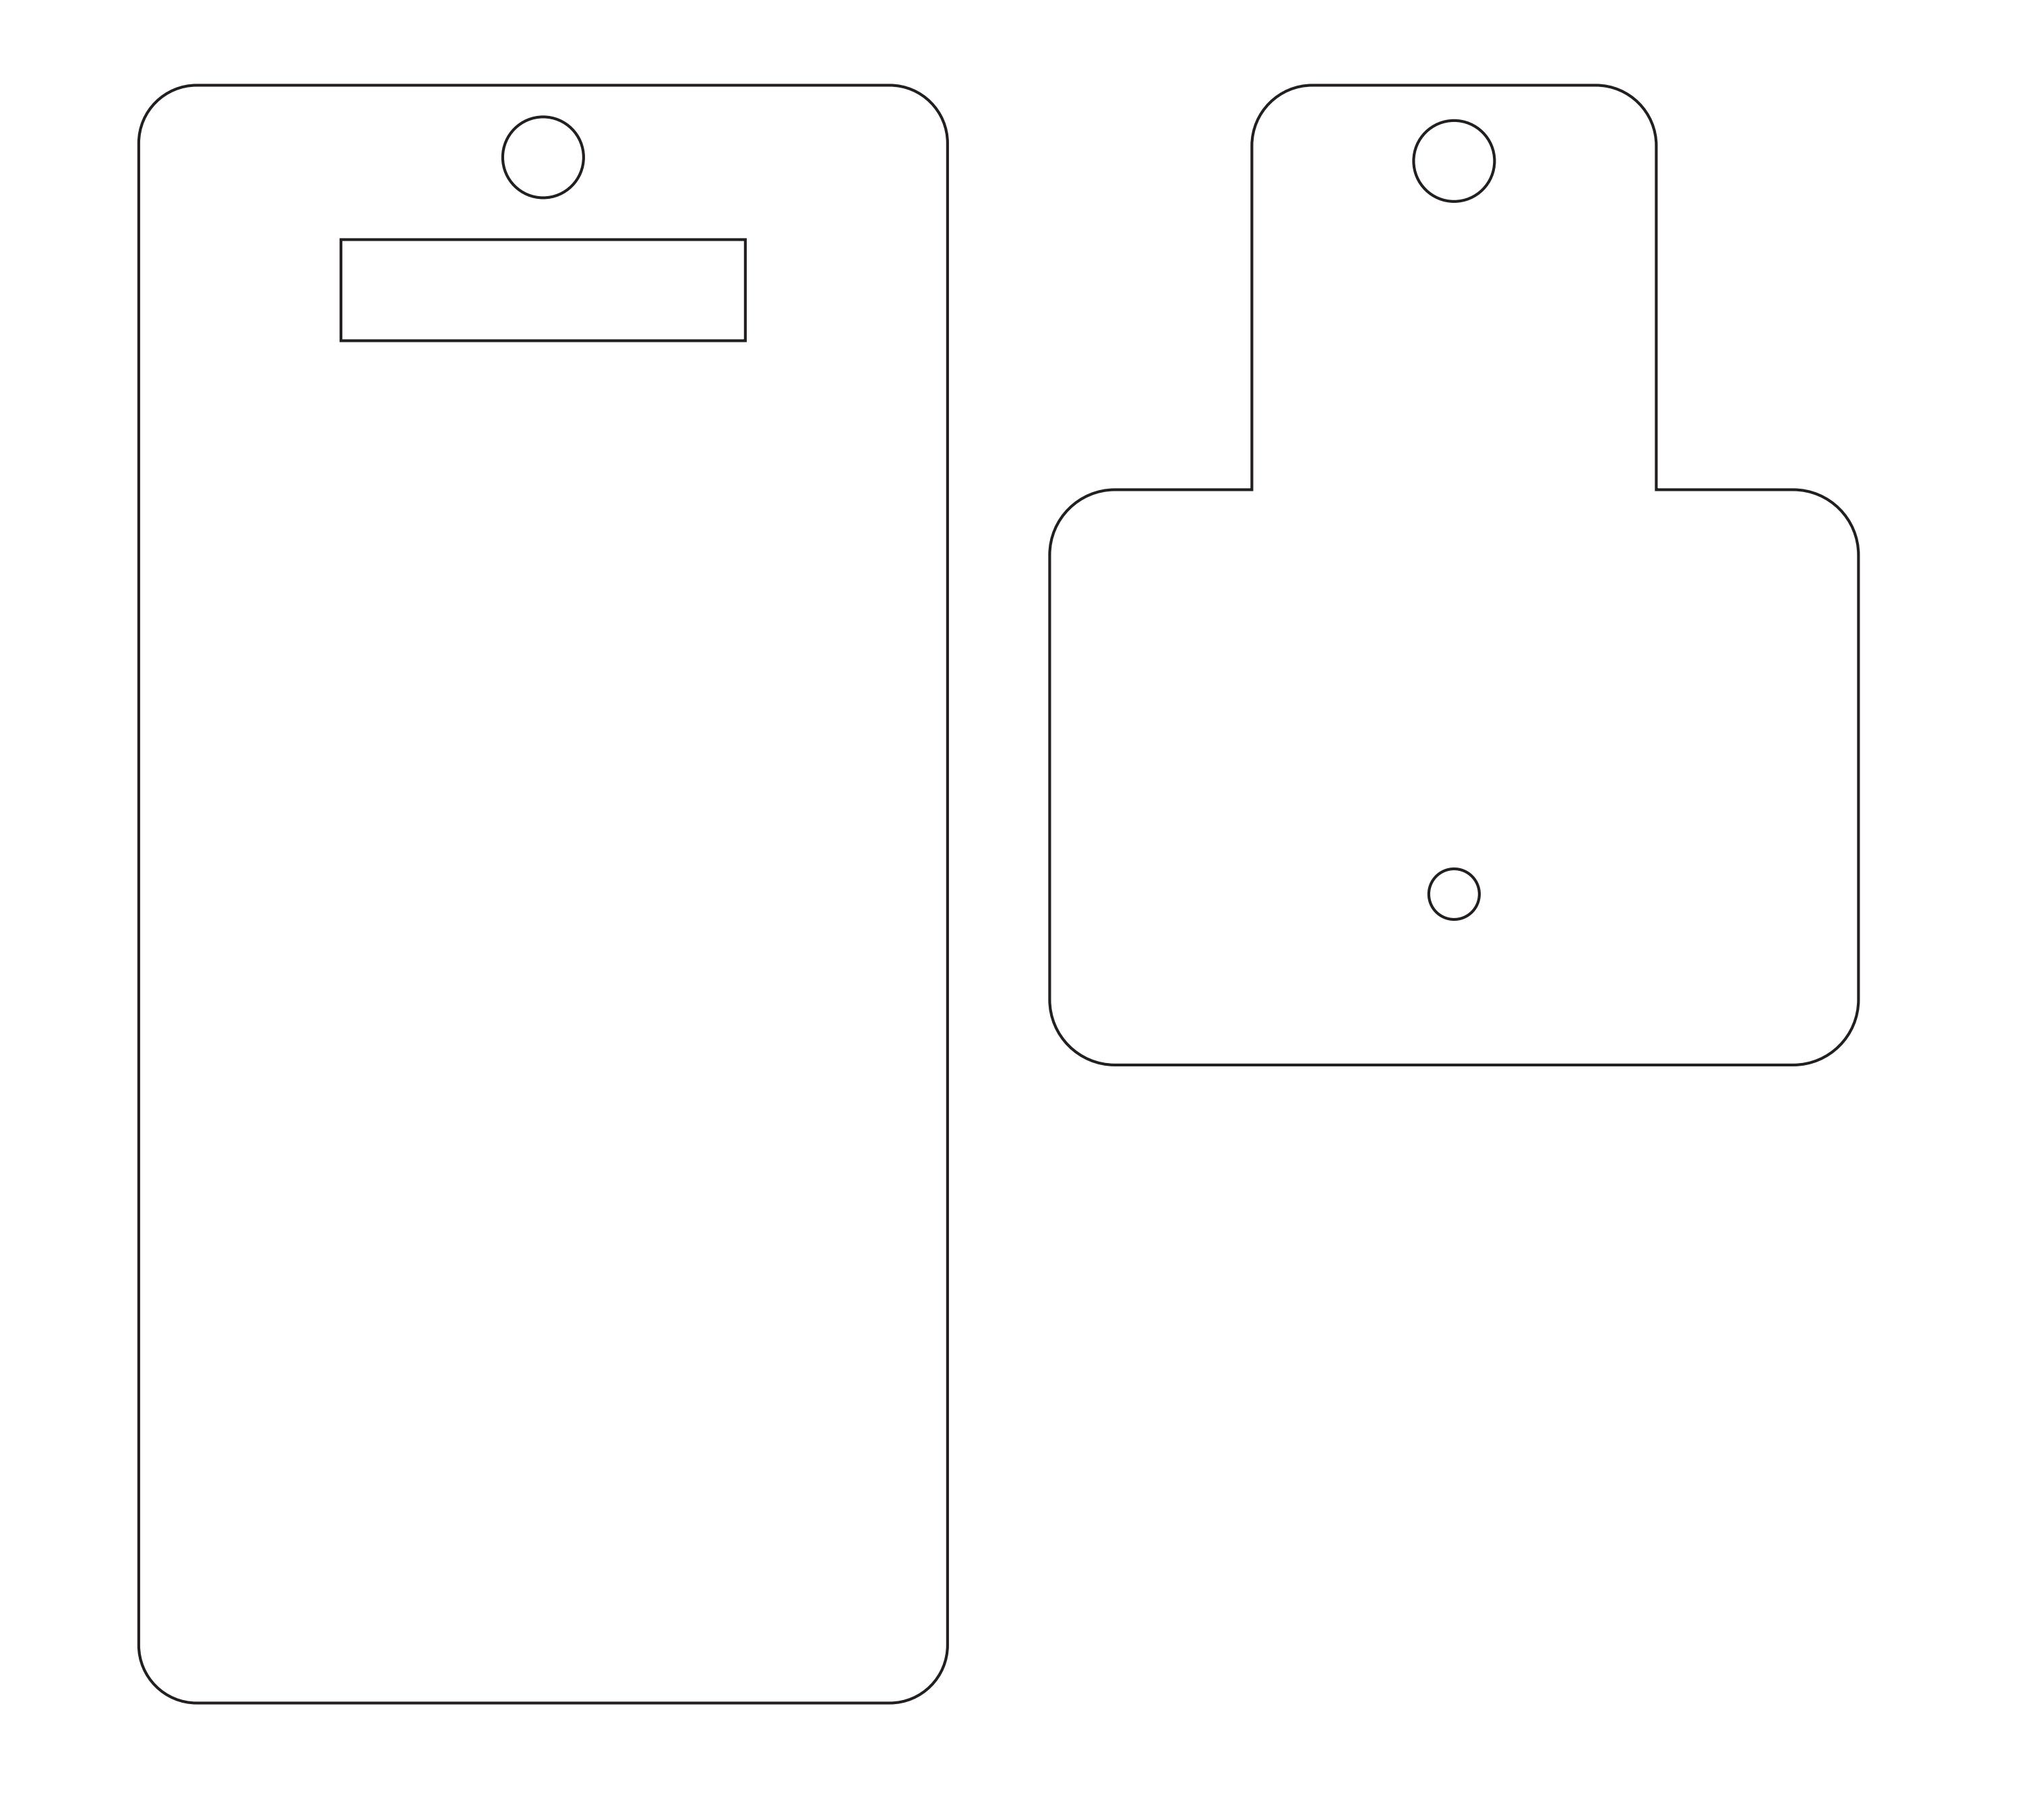
We drew this on Adobe Illustrator and then exported to VCarve as png. Which then Vcarve takes that PNG and converts it to vector image which it can manipulate and edit.
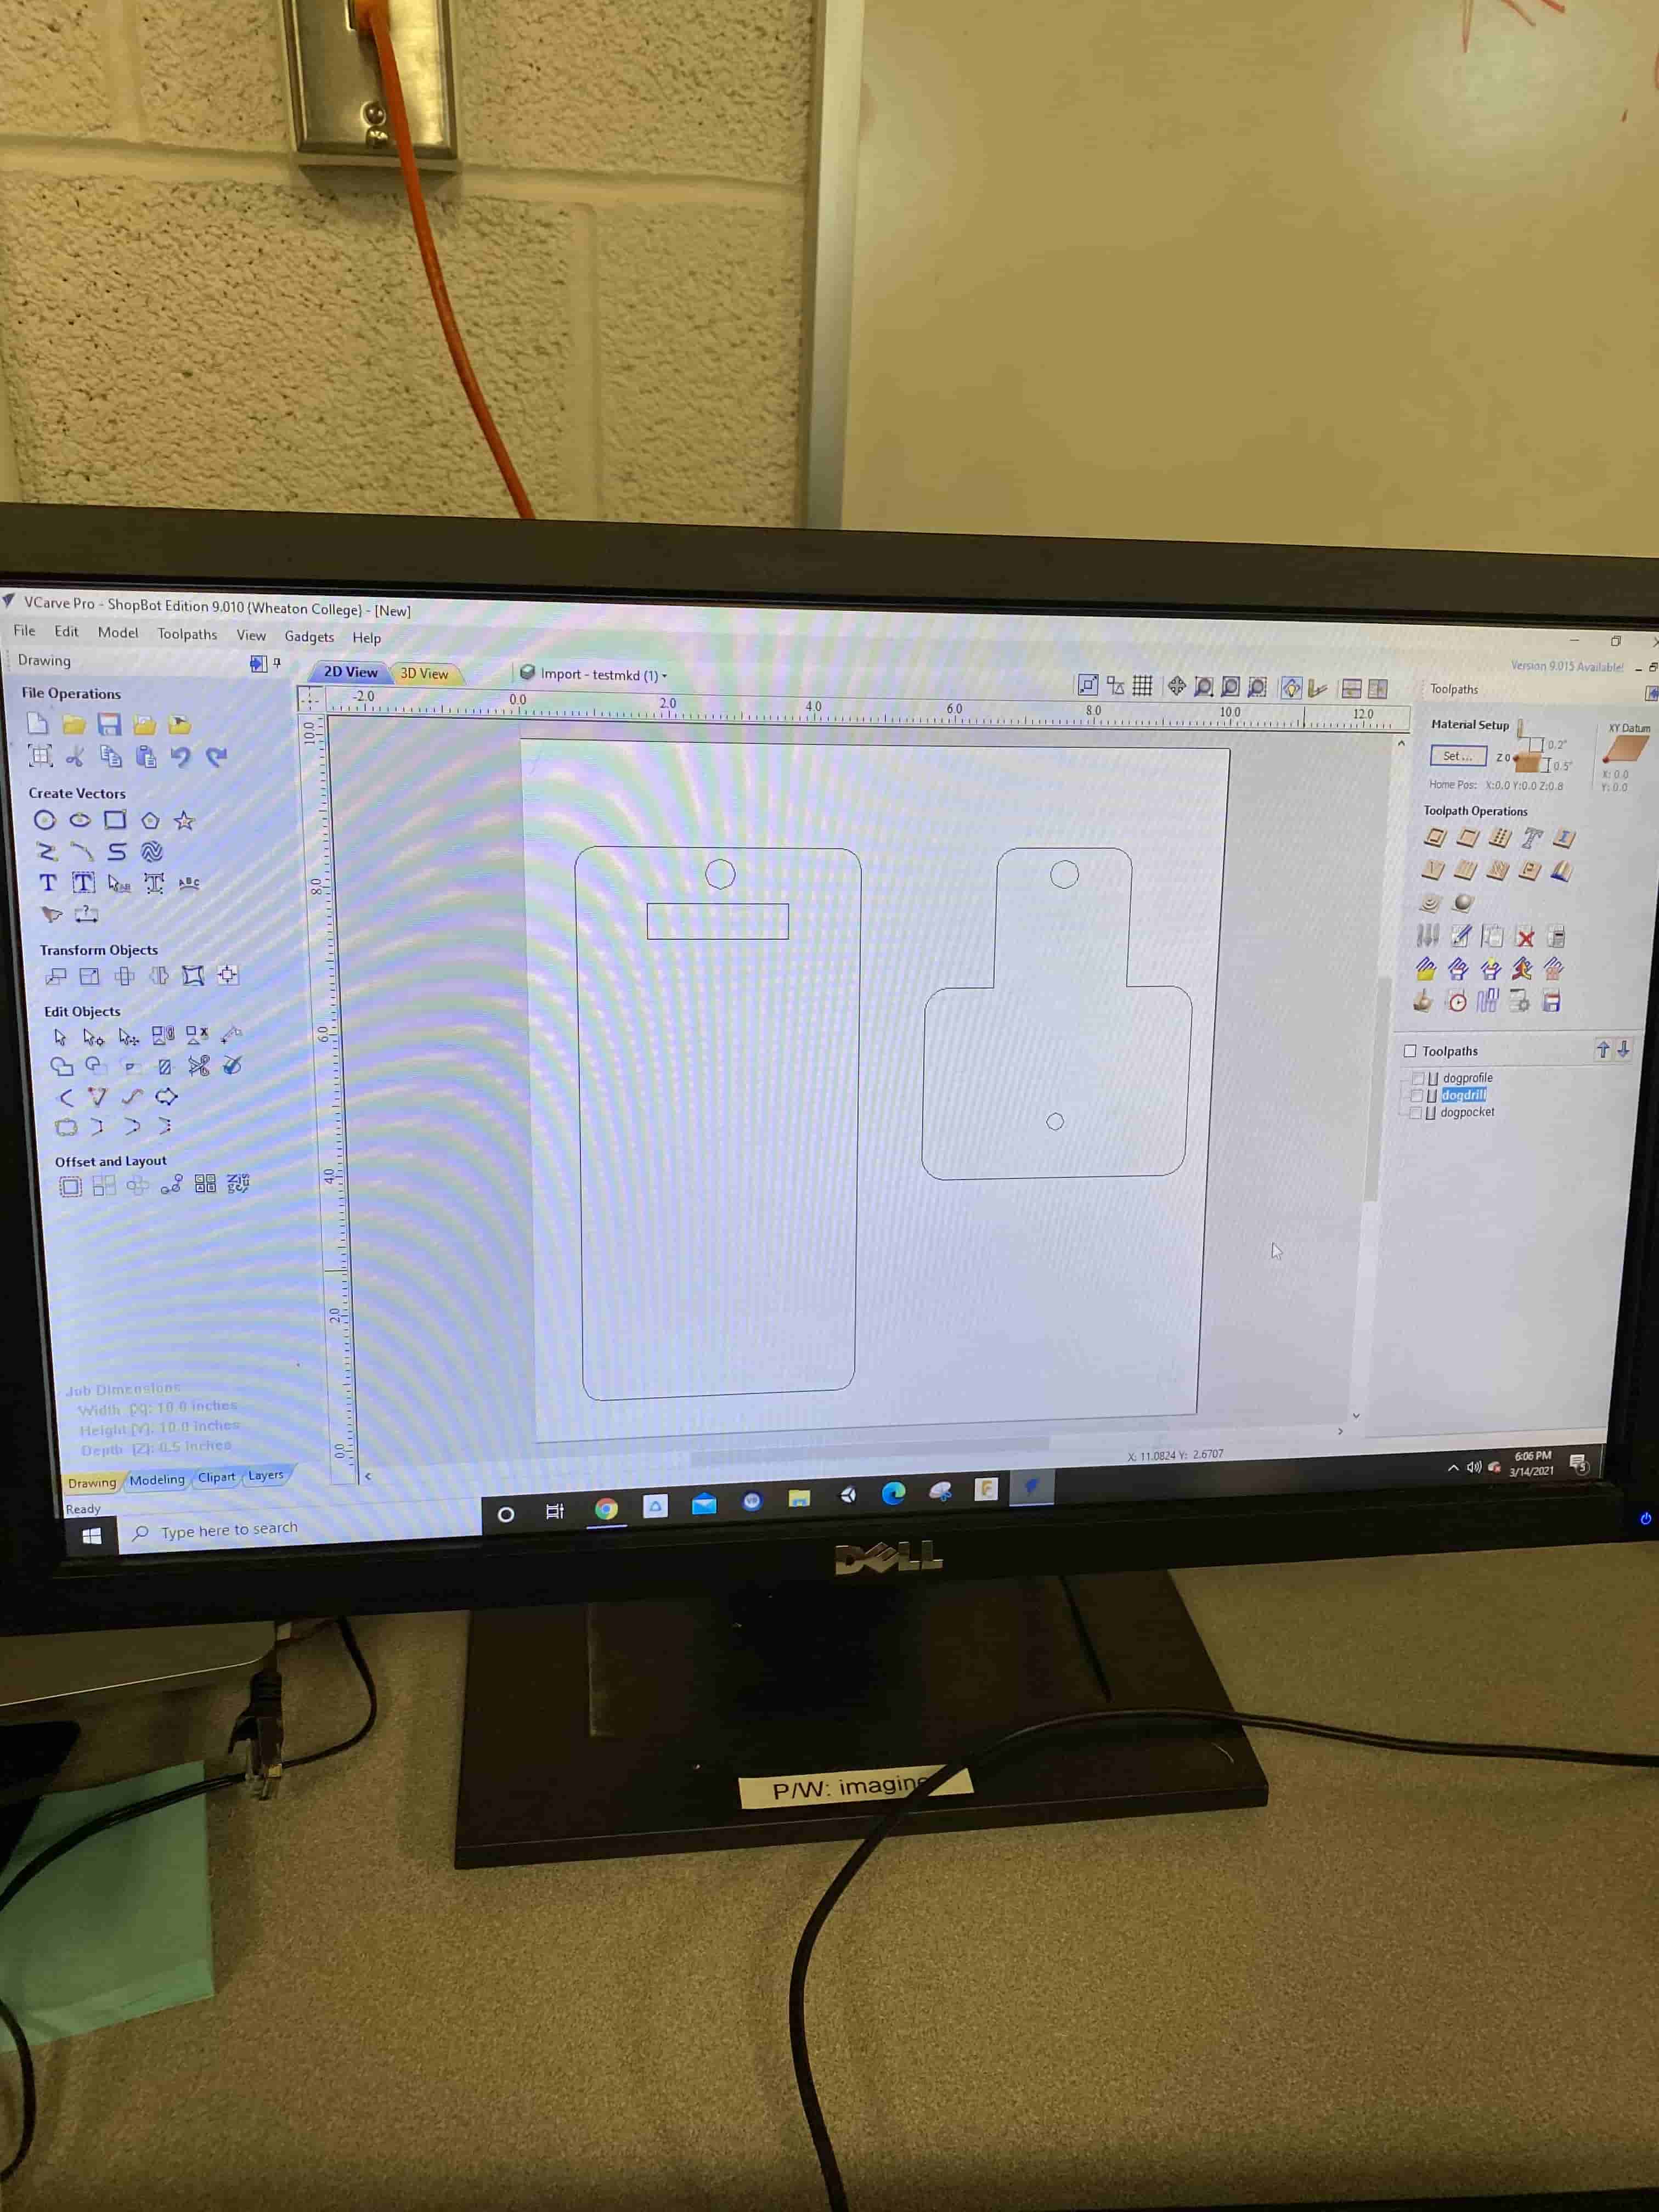
Now that we have our design in VCarve, we need to change the settings for the material thickness, endmill selection, toolpath type, tabs, dogbones, etc. These are all important for the success of this cut. If even the cut isn't working than you cannot even test your cuts.
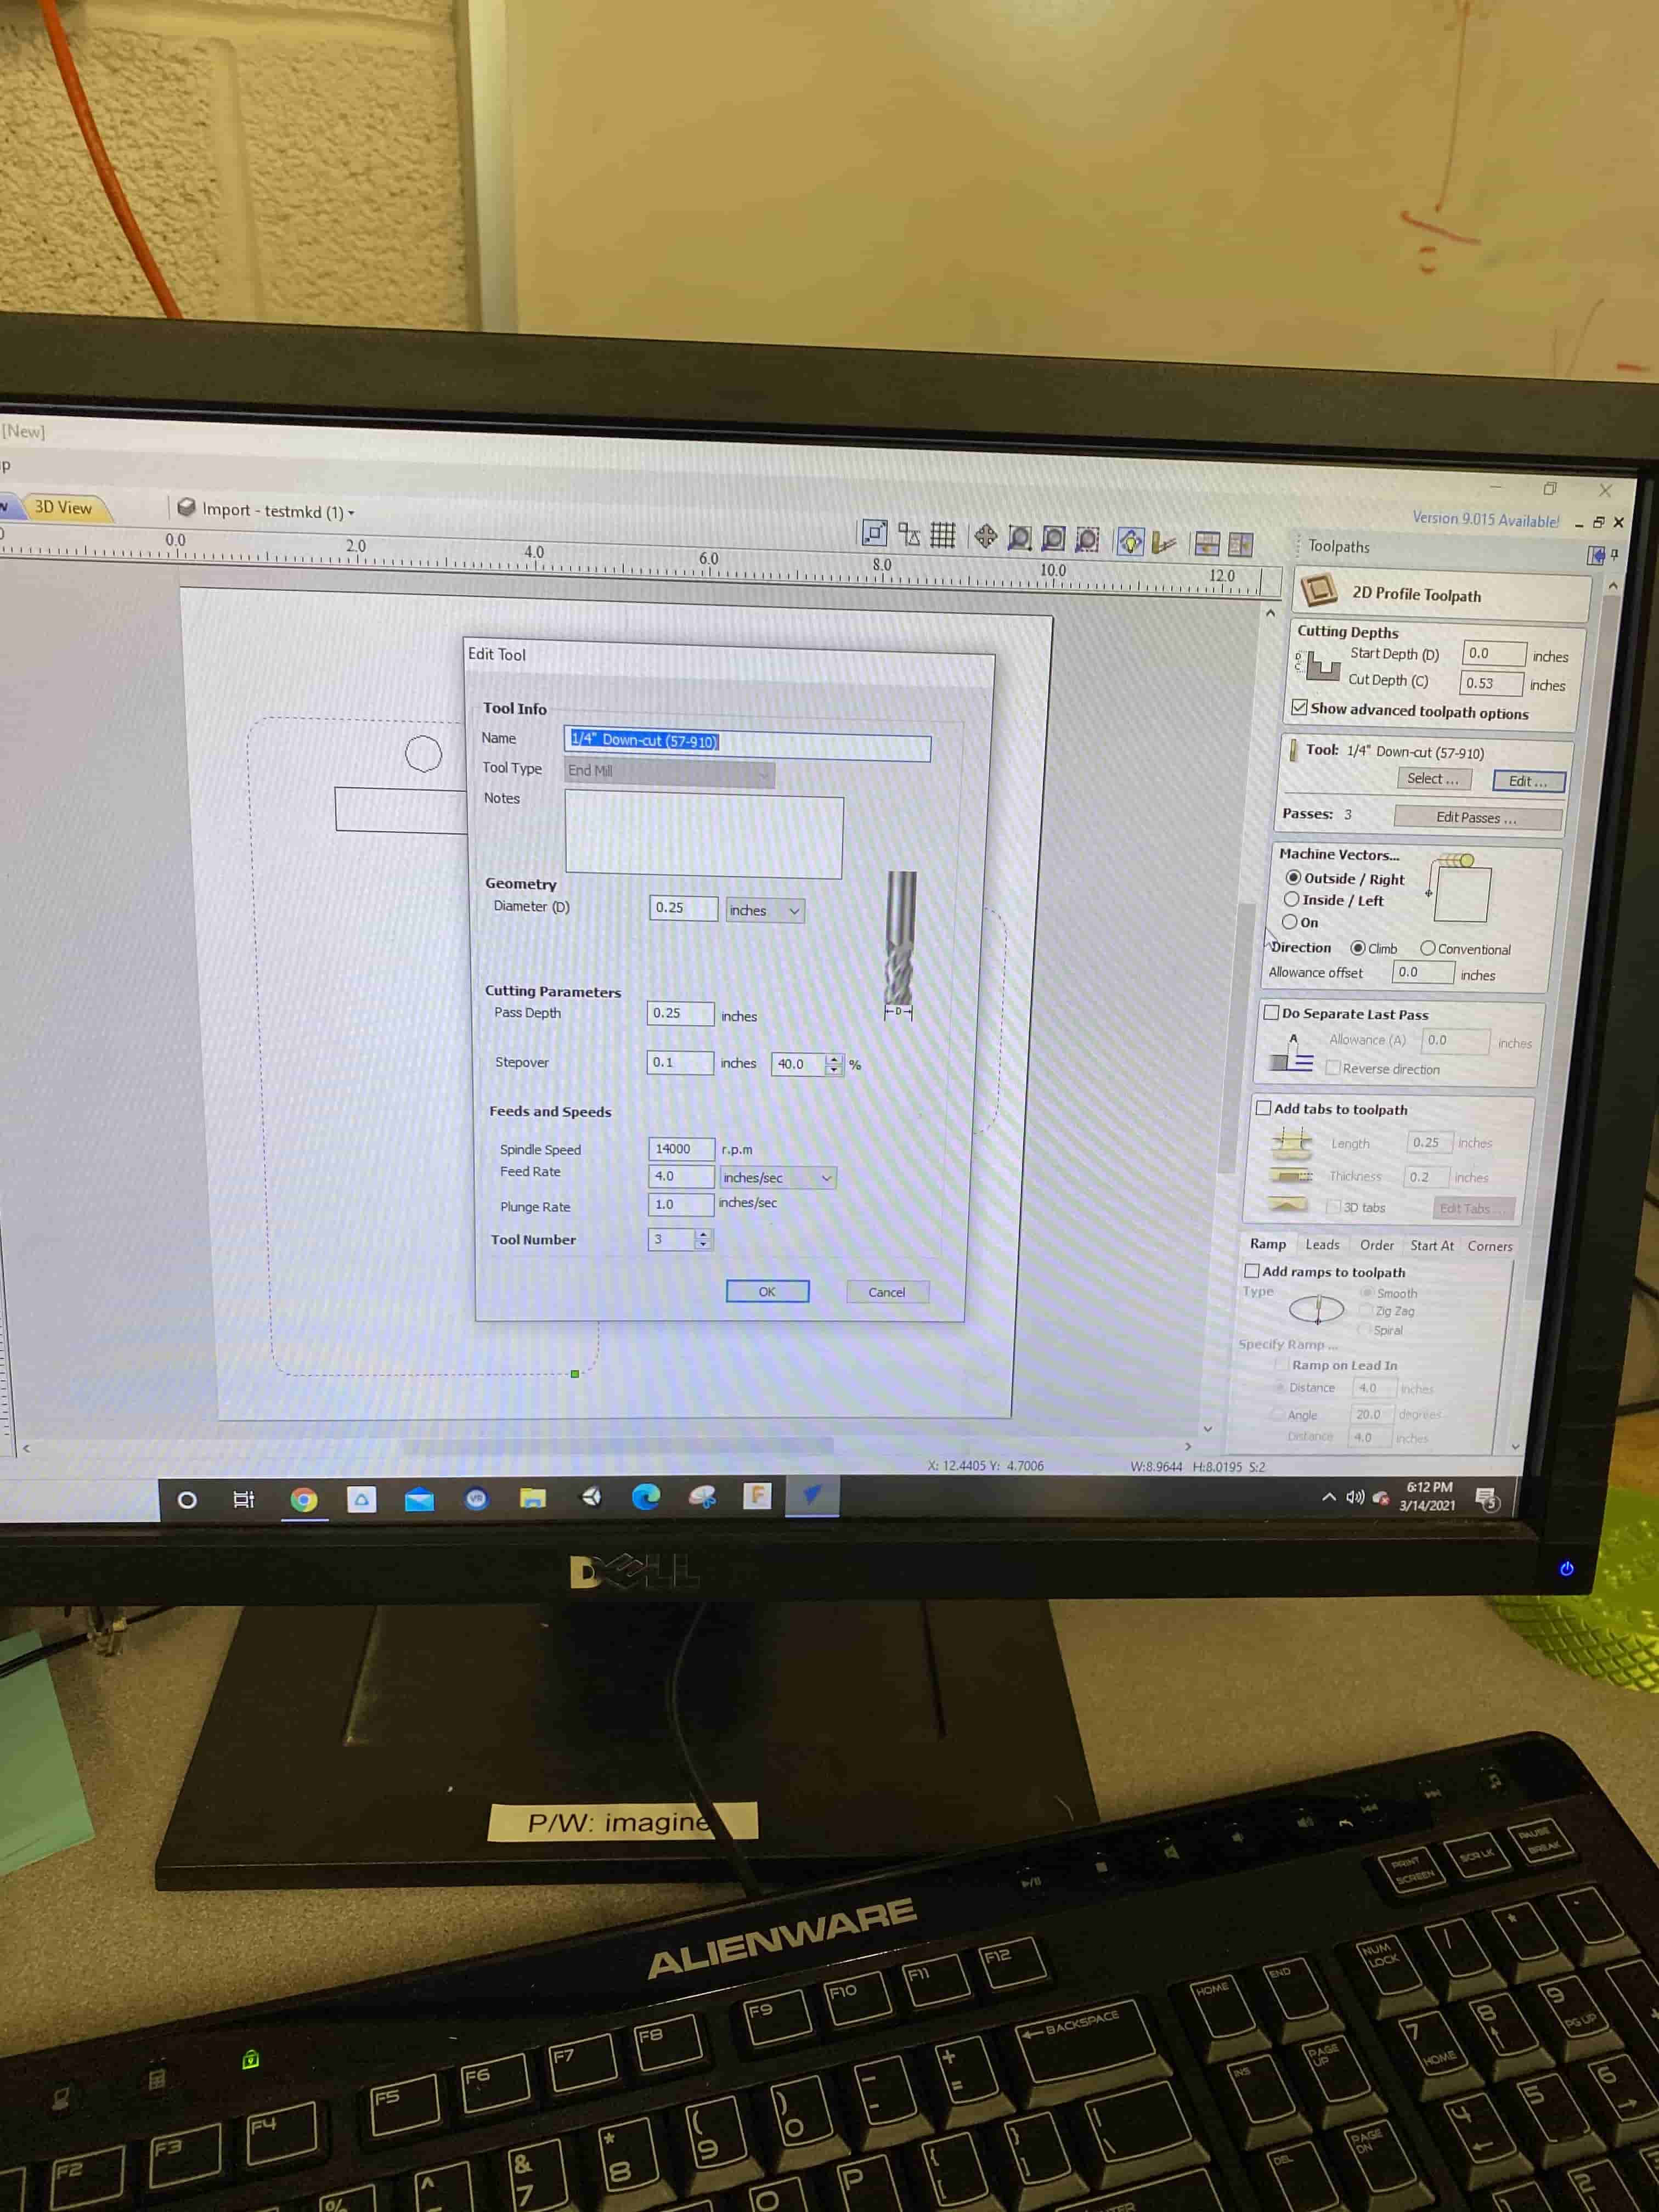
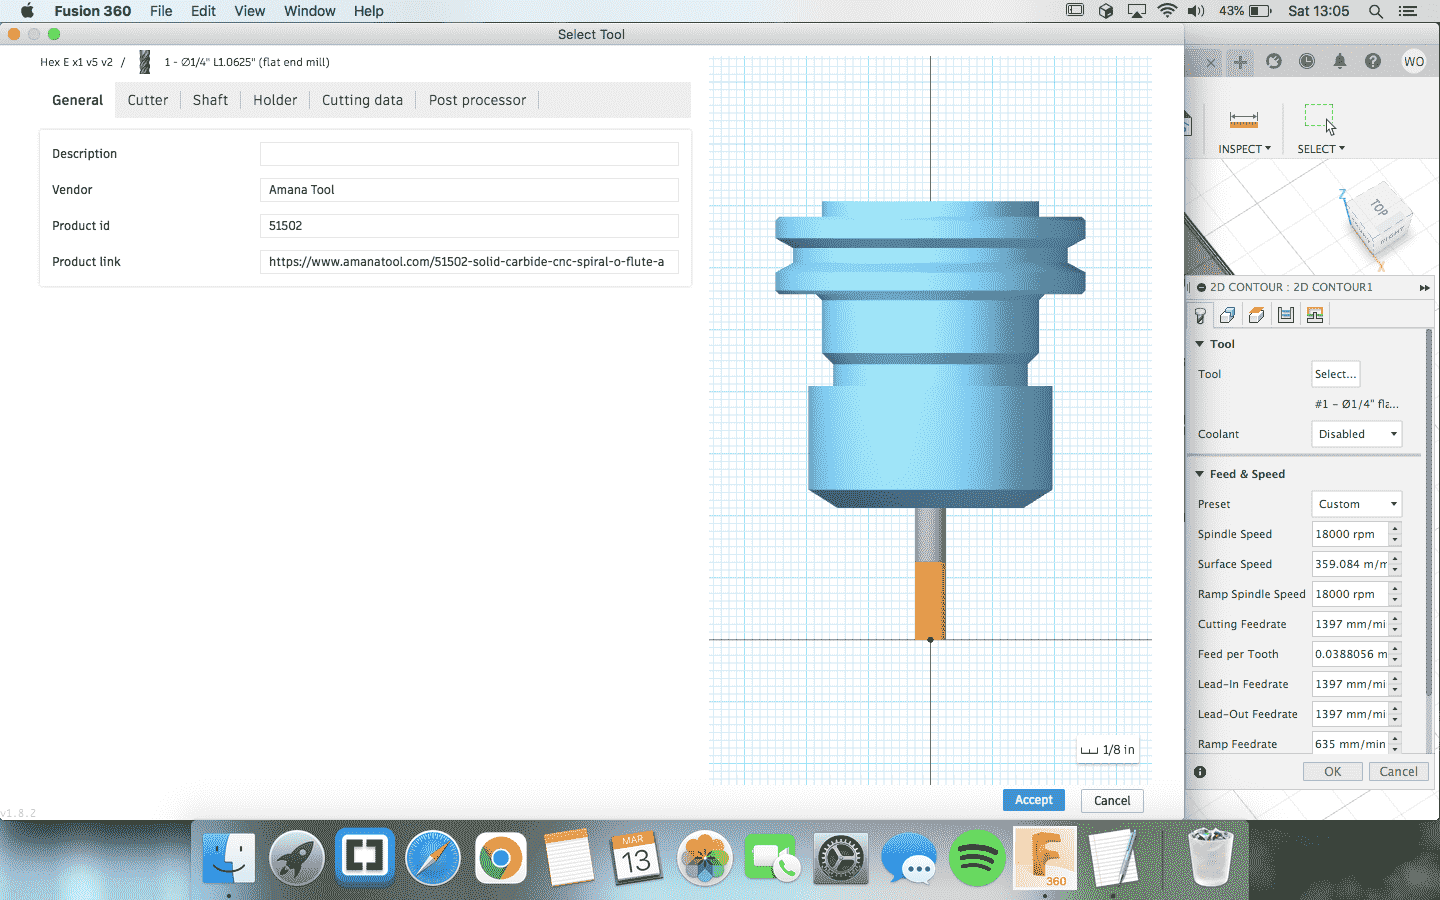
We selected the right tool and set the settings for the VCarve.
We exported each toolpath in 3 seperate files. One file for thee drill holes. One file for the pocket cut that will cut the hole for the interlocking. One for the countour cutting. After uploading the files to a USB stick, we plug it in to the Axiom CNC. We also checked the G-Code of the files to see how the machine works:
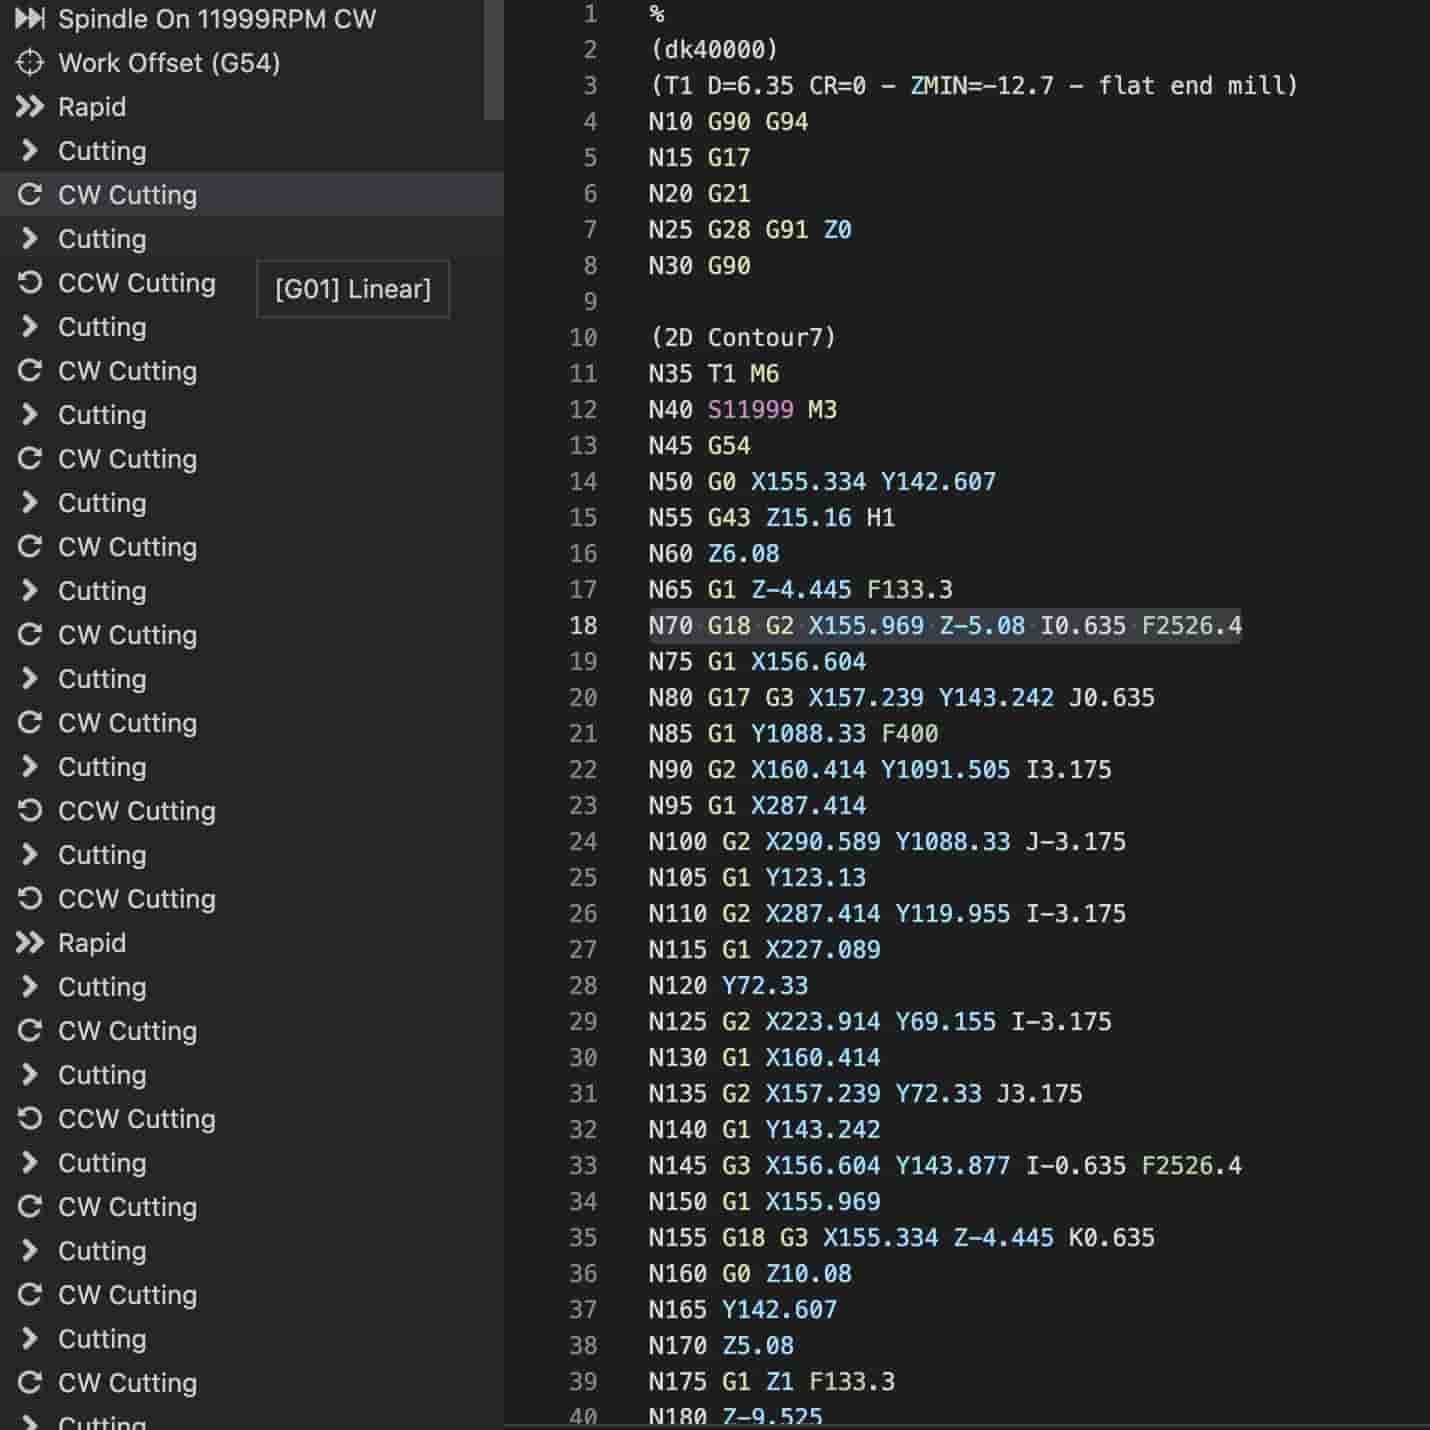
I opened the G-Code in Visual Studio Code and Visual Studio Code has lots of extentions. Hence, I was able to find a correct extention that allows me to interpret each line on G-Code.
However, before starting we should put the material we are going to cut on the Axiom's bed.

To secure the material on the Axiom Bed we use two diffreent methods. First we taped underneeth the area we are going to cut. This is because even though we used tabs, there is still a possibility that something can go wrong and that Axiom might just not do any tabs and cut the piece right out. In that case there is a danger of the pieces flying in many directions.
The second method we used for securing the board is to use 4, 0.5 inch screws. We screwed our board to the scrapboard we use on the Axiom to secure it to place. This makes sure nothing moves even under a lot of force.
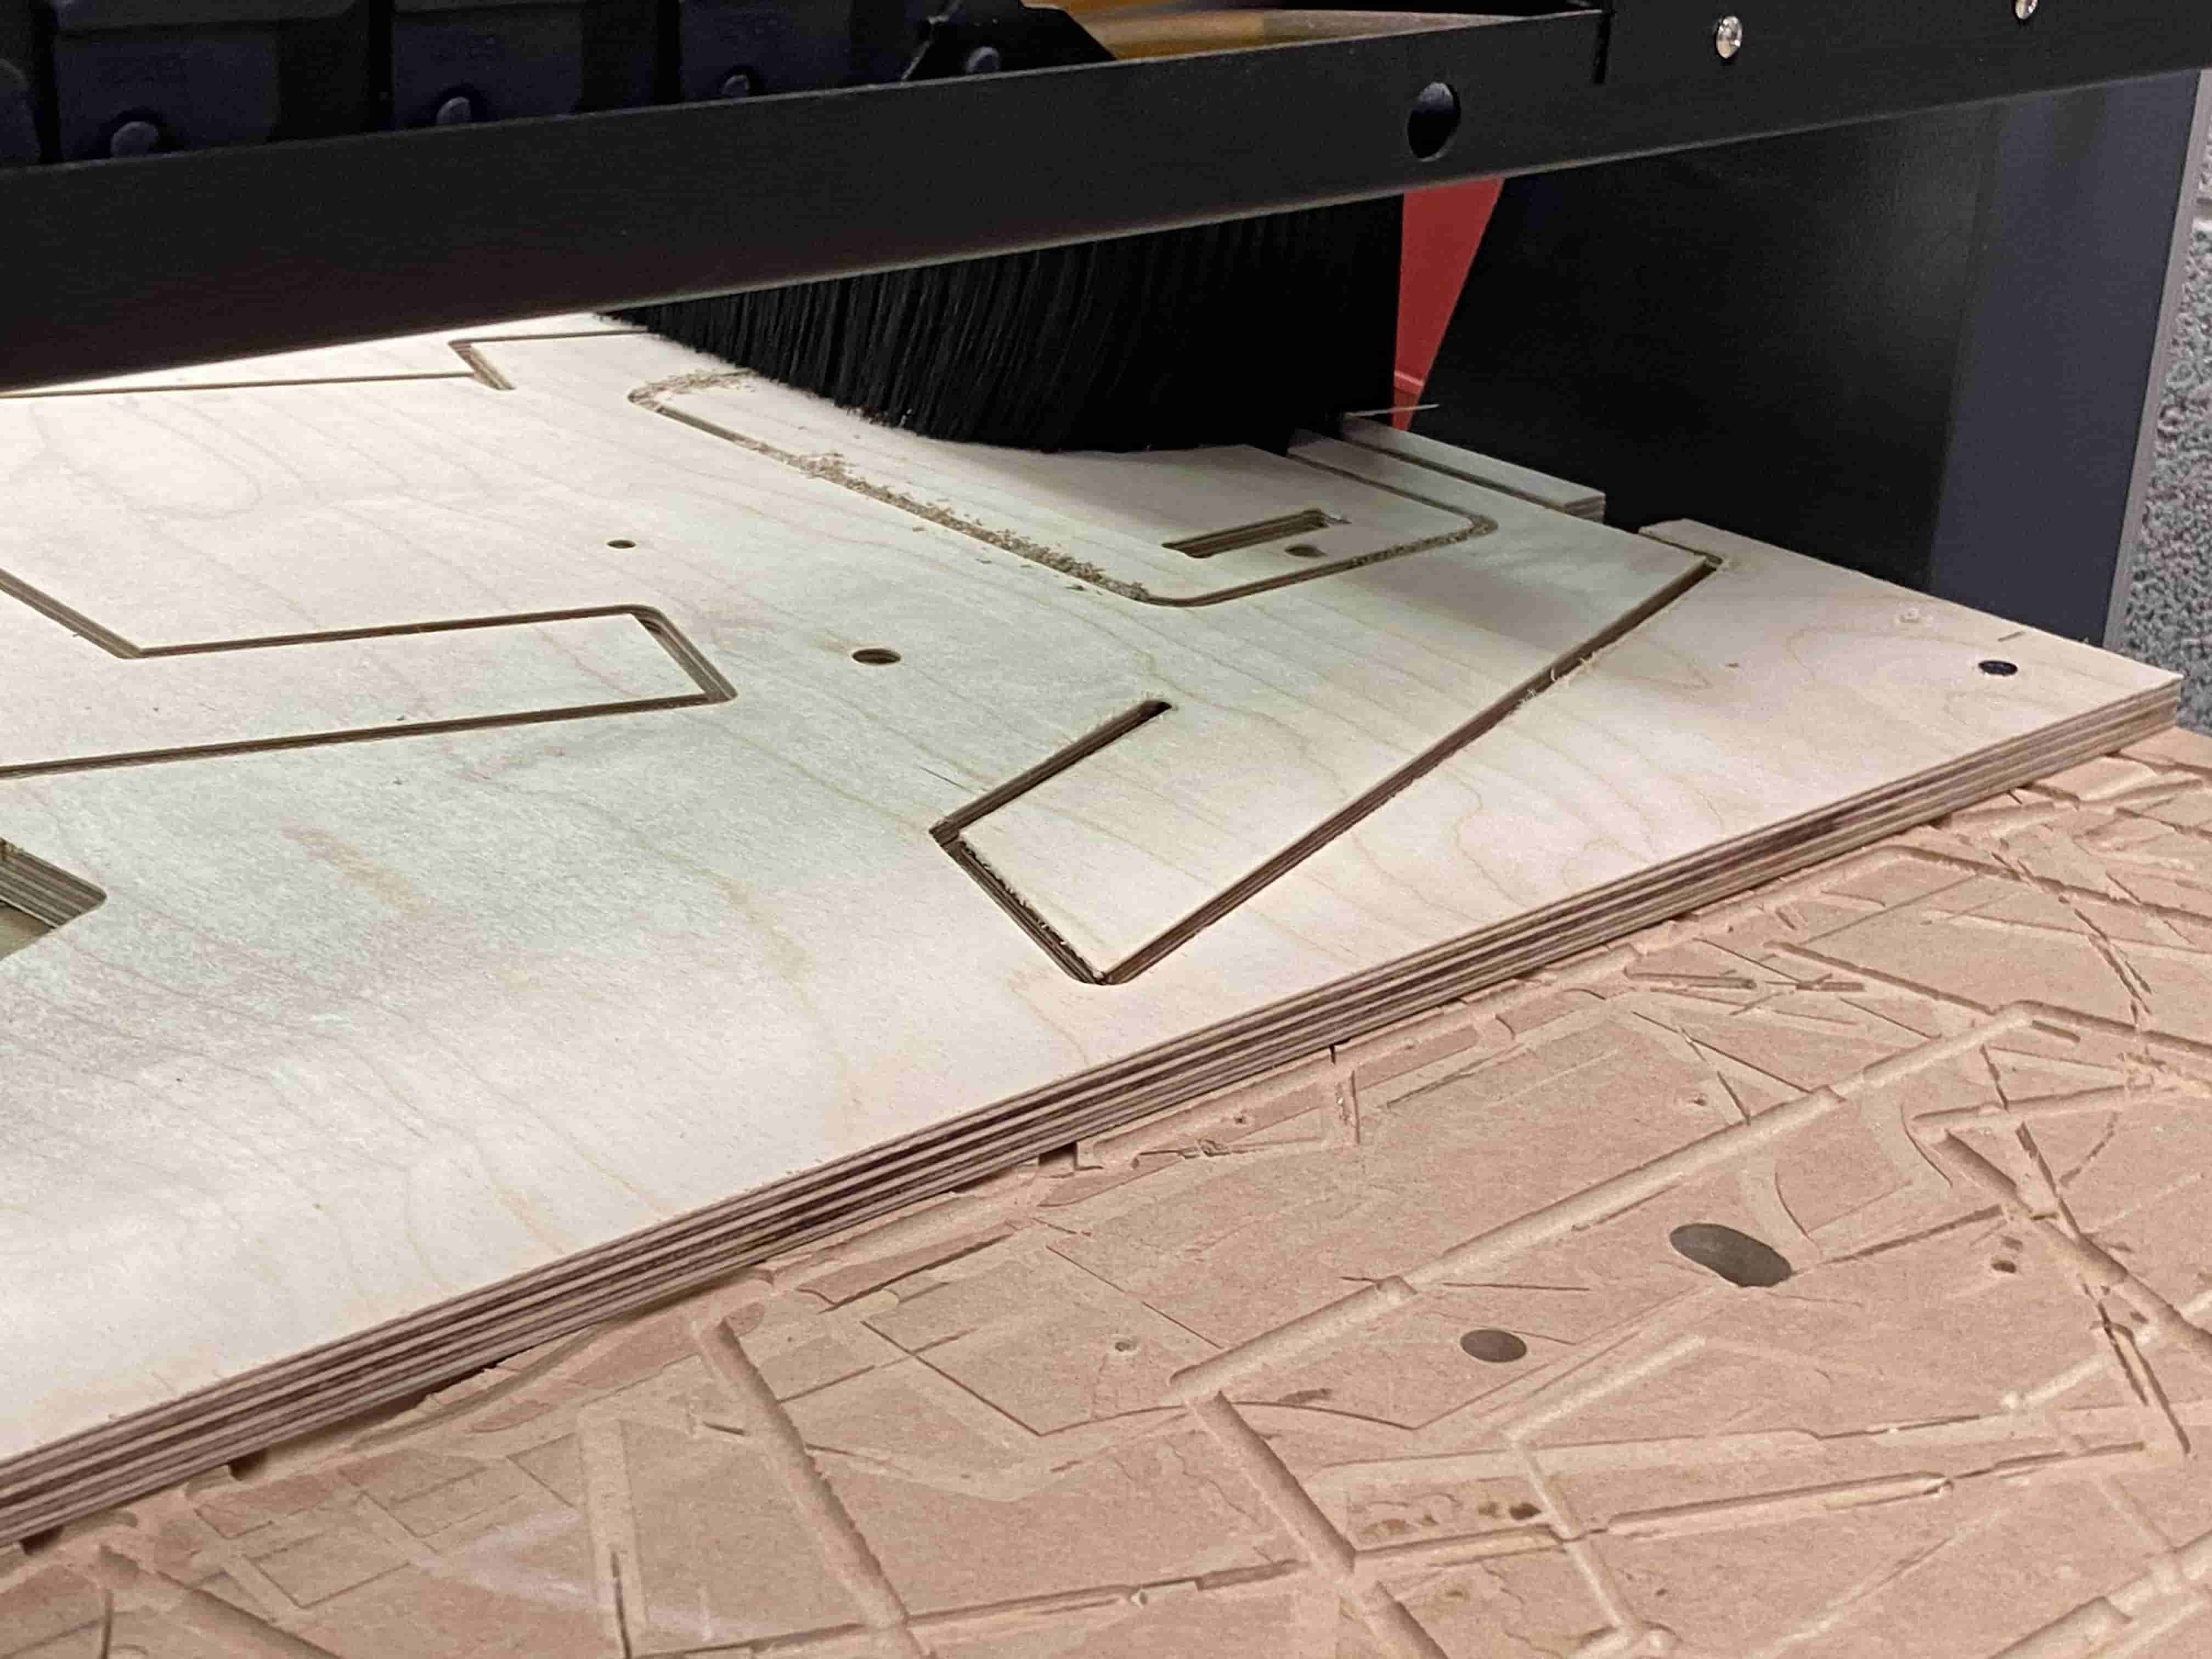
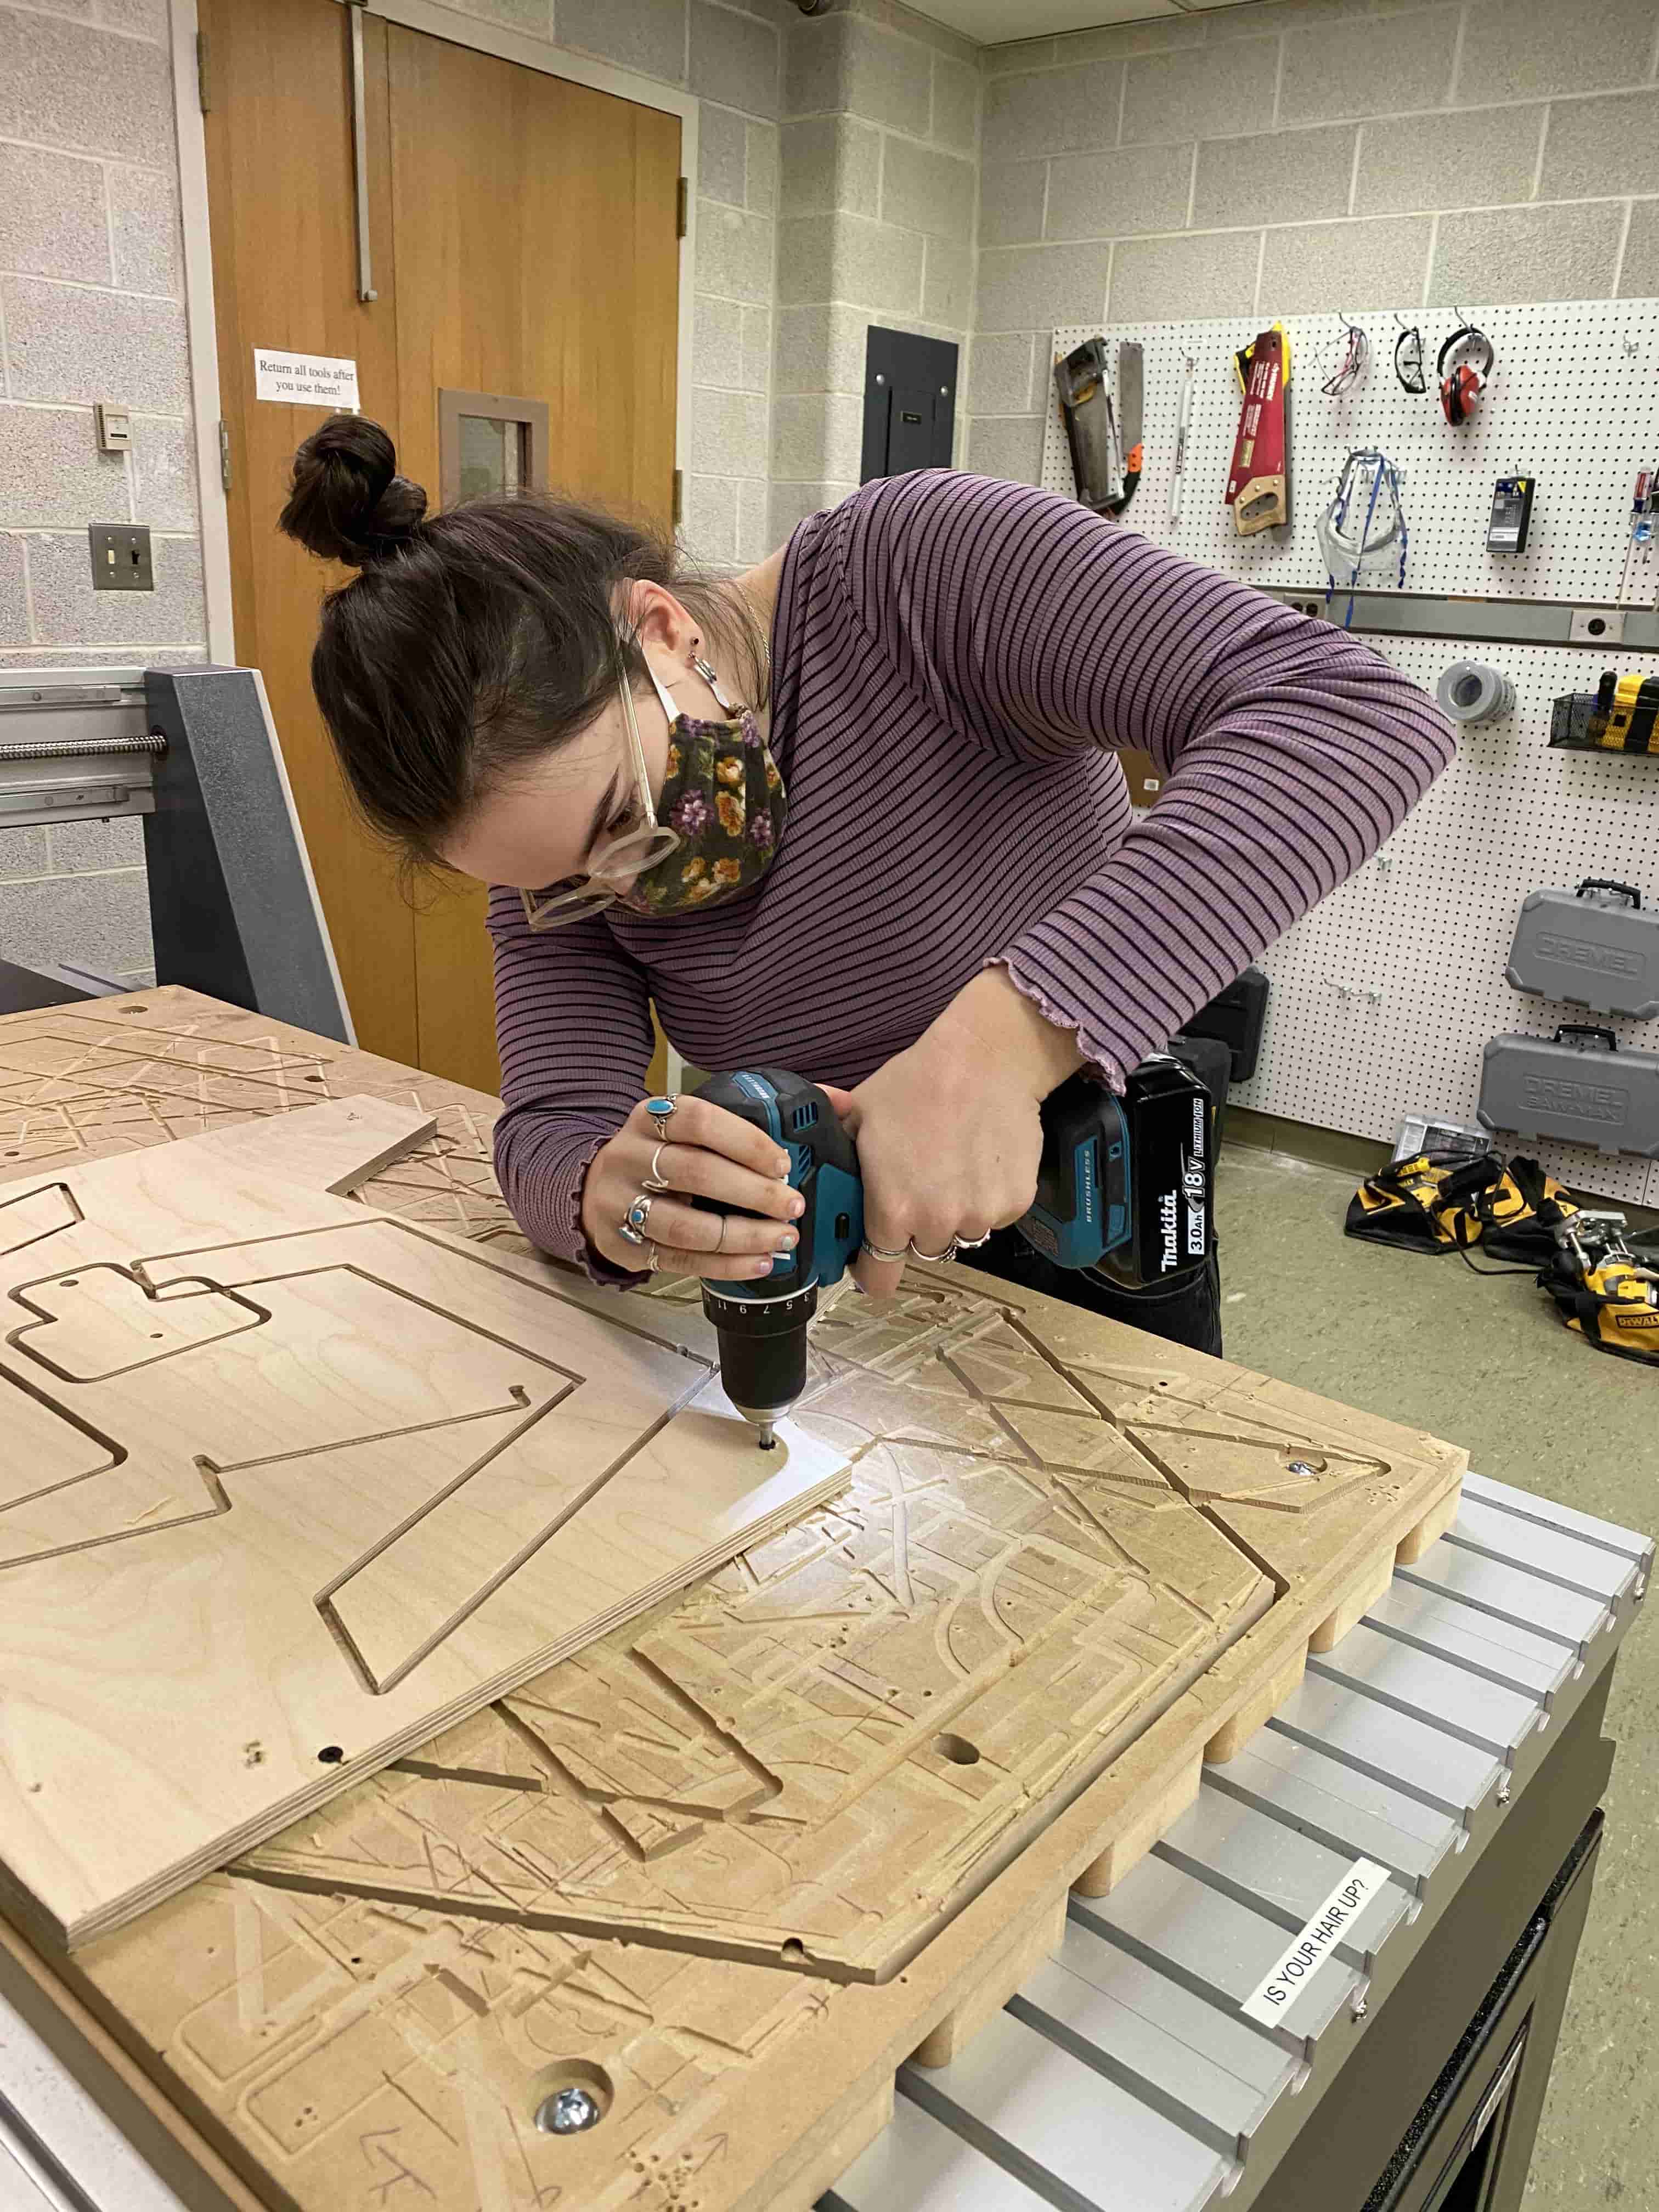
The above image is taken while the CNC is cutting the pieces out. We have used 0.25 inch Stepdown for each pass and it cut the board out in 3 passes.

After cutting it out it looked like this. The pieces interlocked nicely because we put dogbones on the connection part of the pieces.
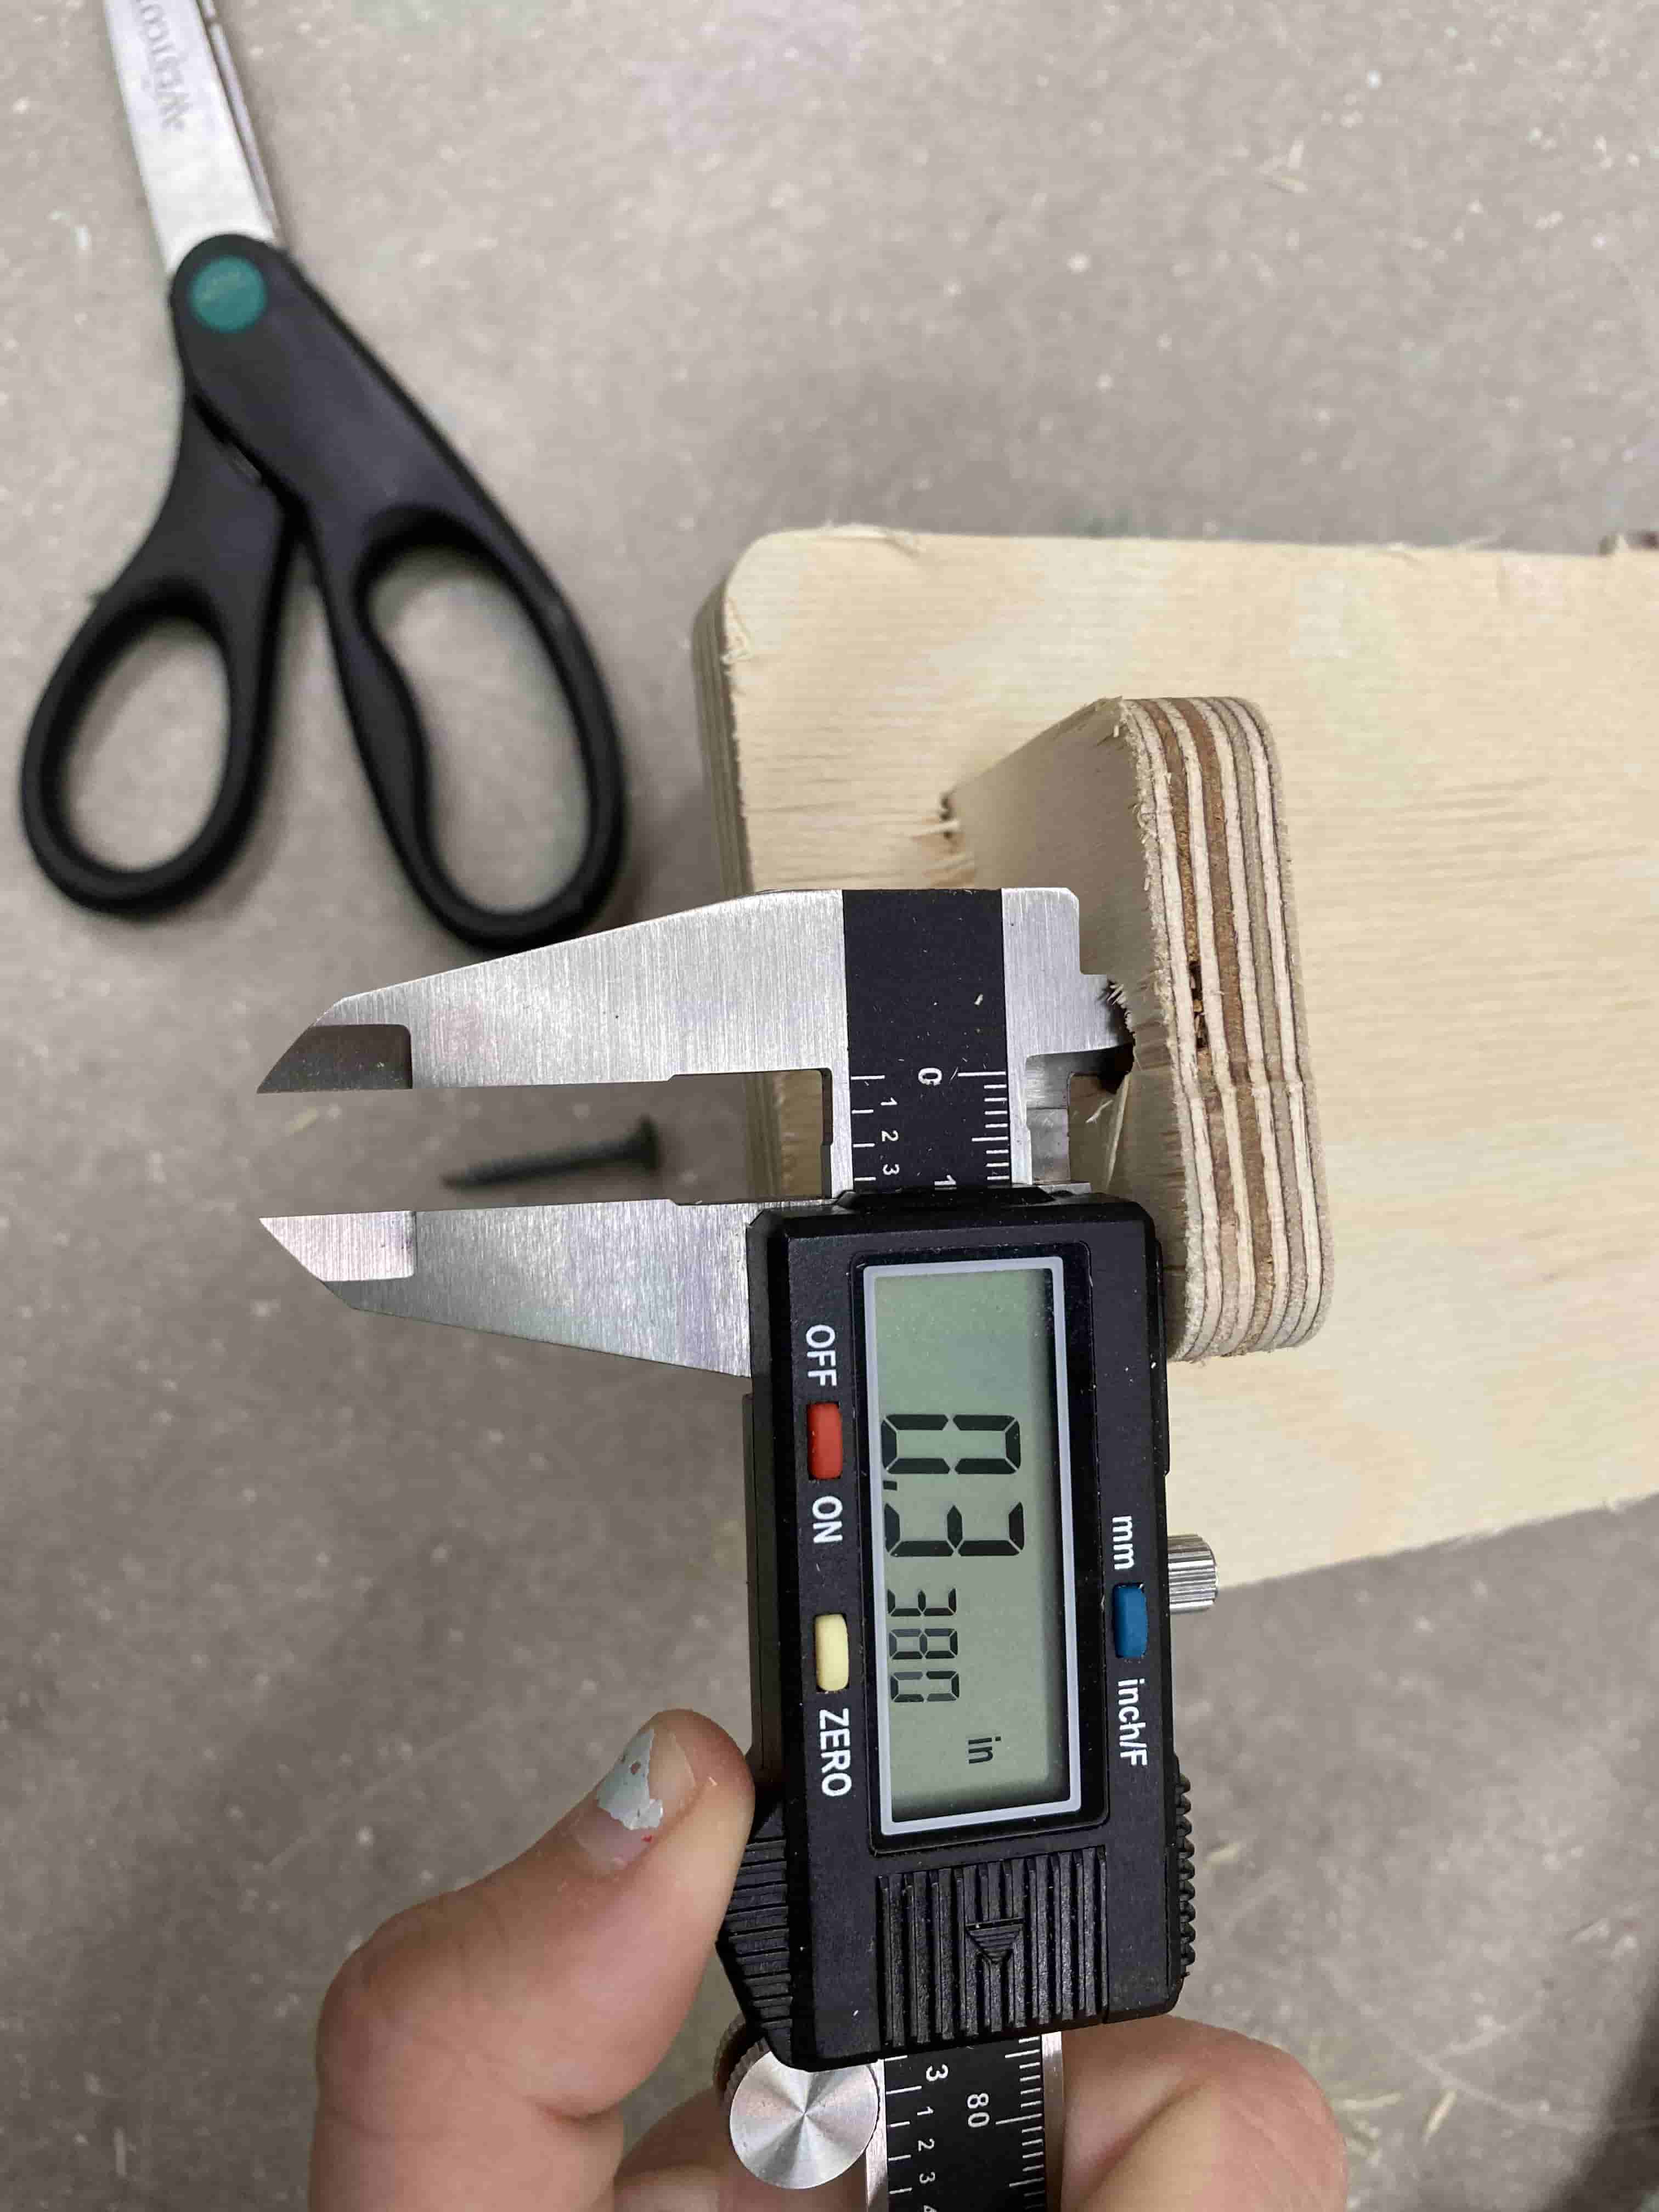
We tested the pieces using a Verneer Calliber and found that there was a 0.01 inch error margin which can be either caused by just the error margin of the Axiom or the error margin of the calibier.
Individual Assignment
Building a Pavilion
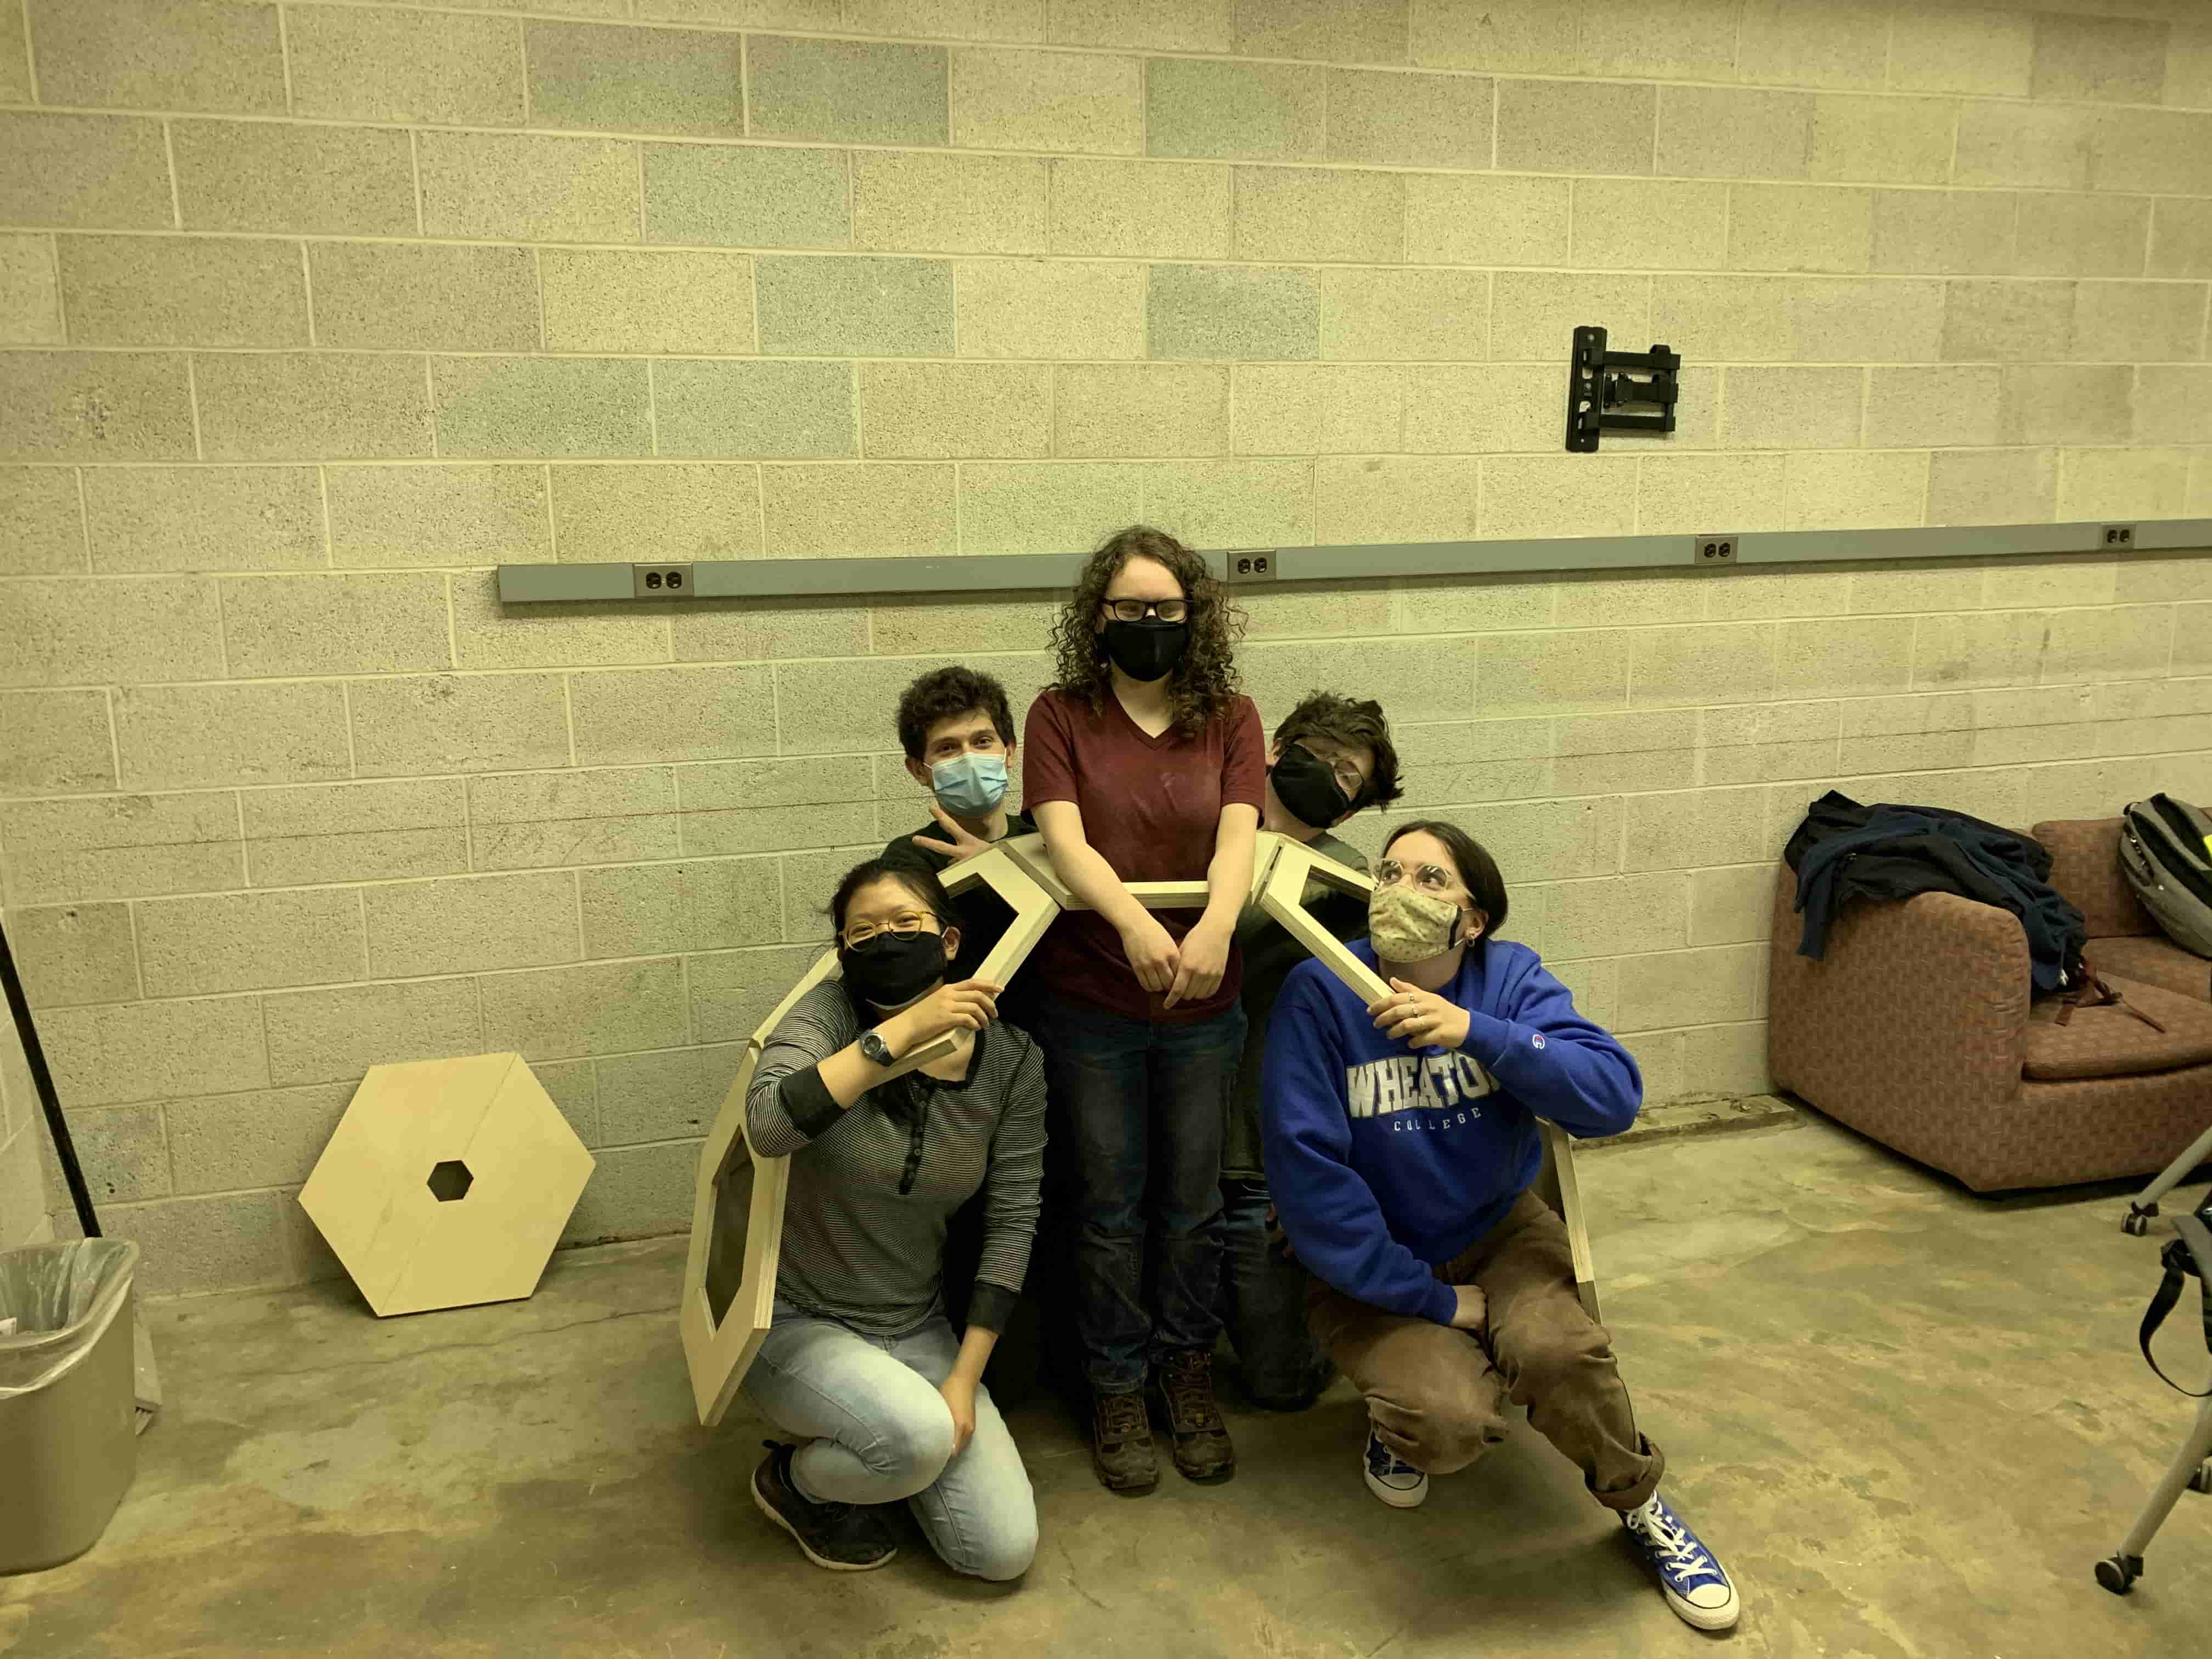
For this weeks individual assignment I have grouped up with friends and decided to build a big Pavilion. Our labs bought 4, 48 by 24 by 0.5 inch PlyWoods for us and by teaming up we were able to get 20 PlyWood in total. In our planning process we looked at multiple different outdoor and indoor Pavilion designs.


After doing our research we have concluded that we don't have enough time and resources. Hence, we should find a design that will take the least amount time and reasources, while still being structually strong and stable. For this we got inspired by the nature and selected Hexagons for building a semi-dome. Before, we started cutting or even designing on Fusion360. We have cut out Hexagon Pieces on a paper
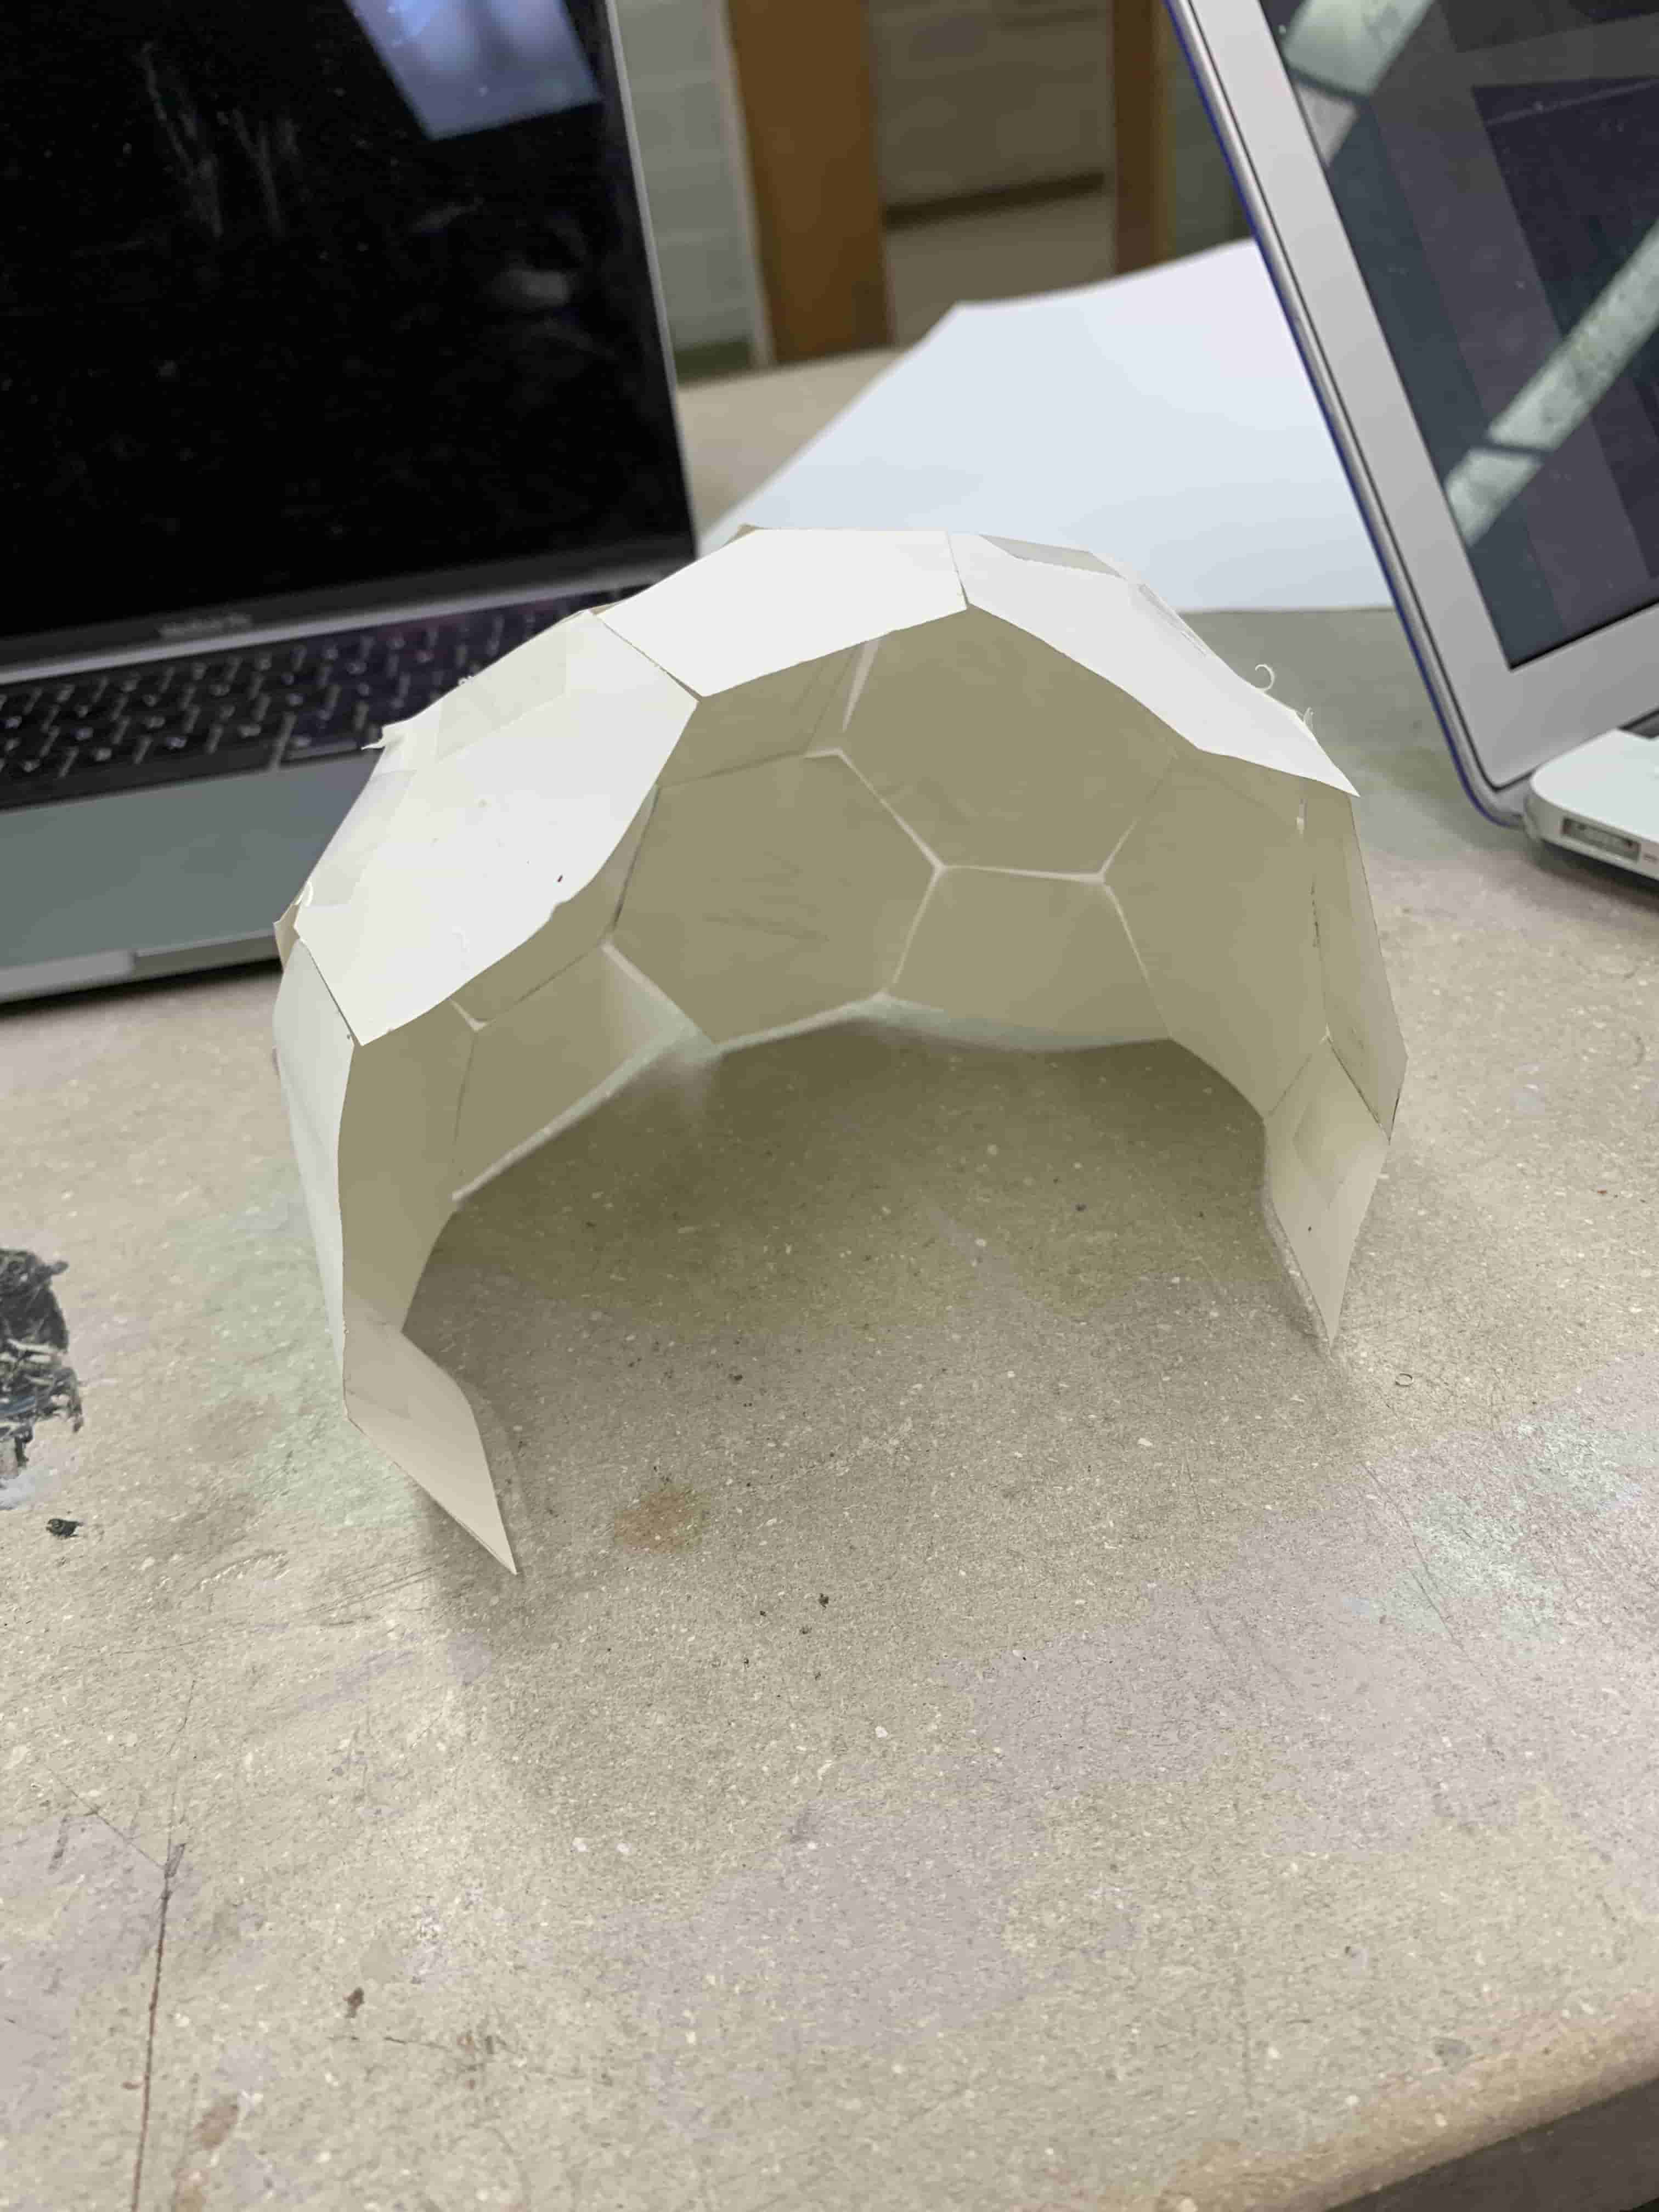
With this we realize that even with using Hexagons we are not able to do a dome. We are able to do a cylinder but not a dome. Hence, we added pentagones which solved the problem.
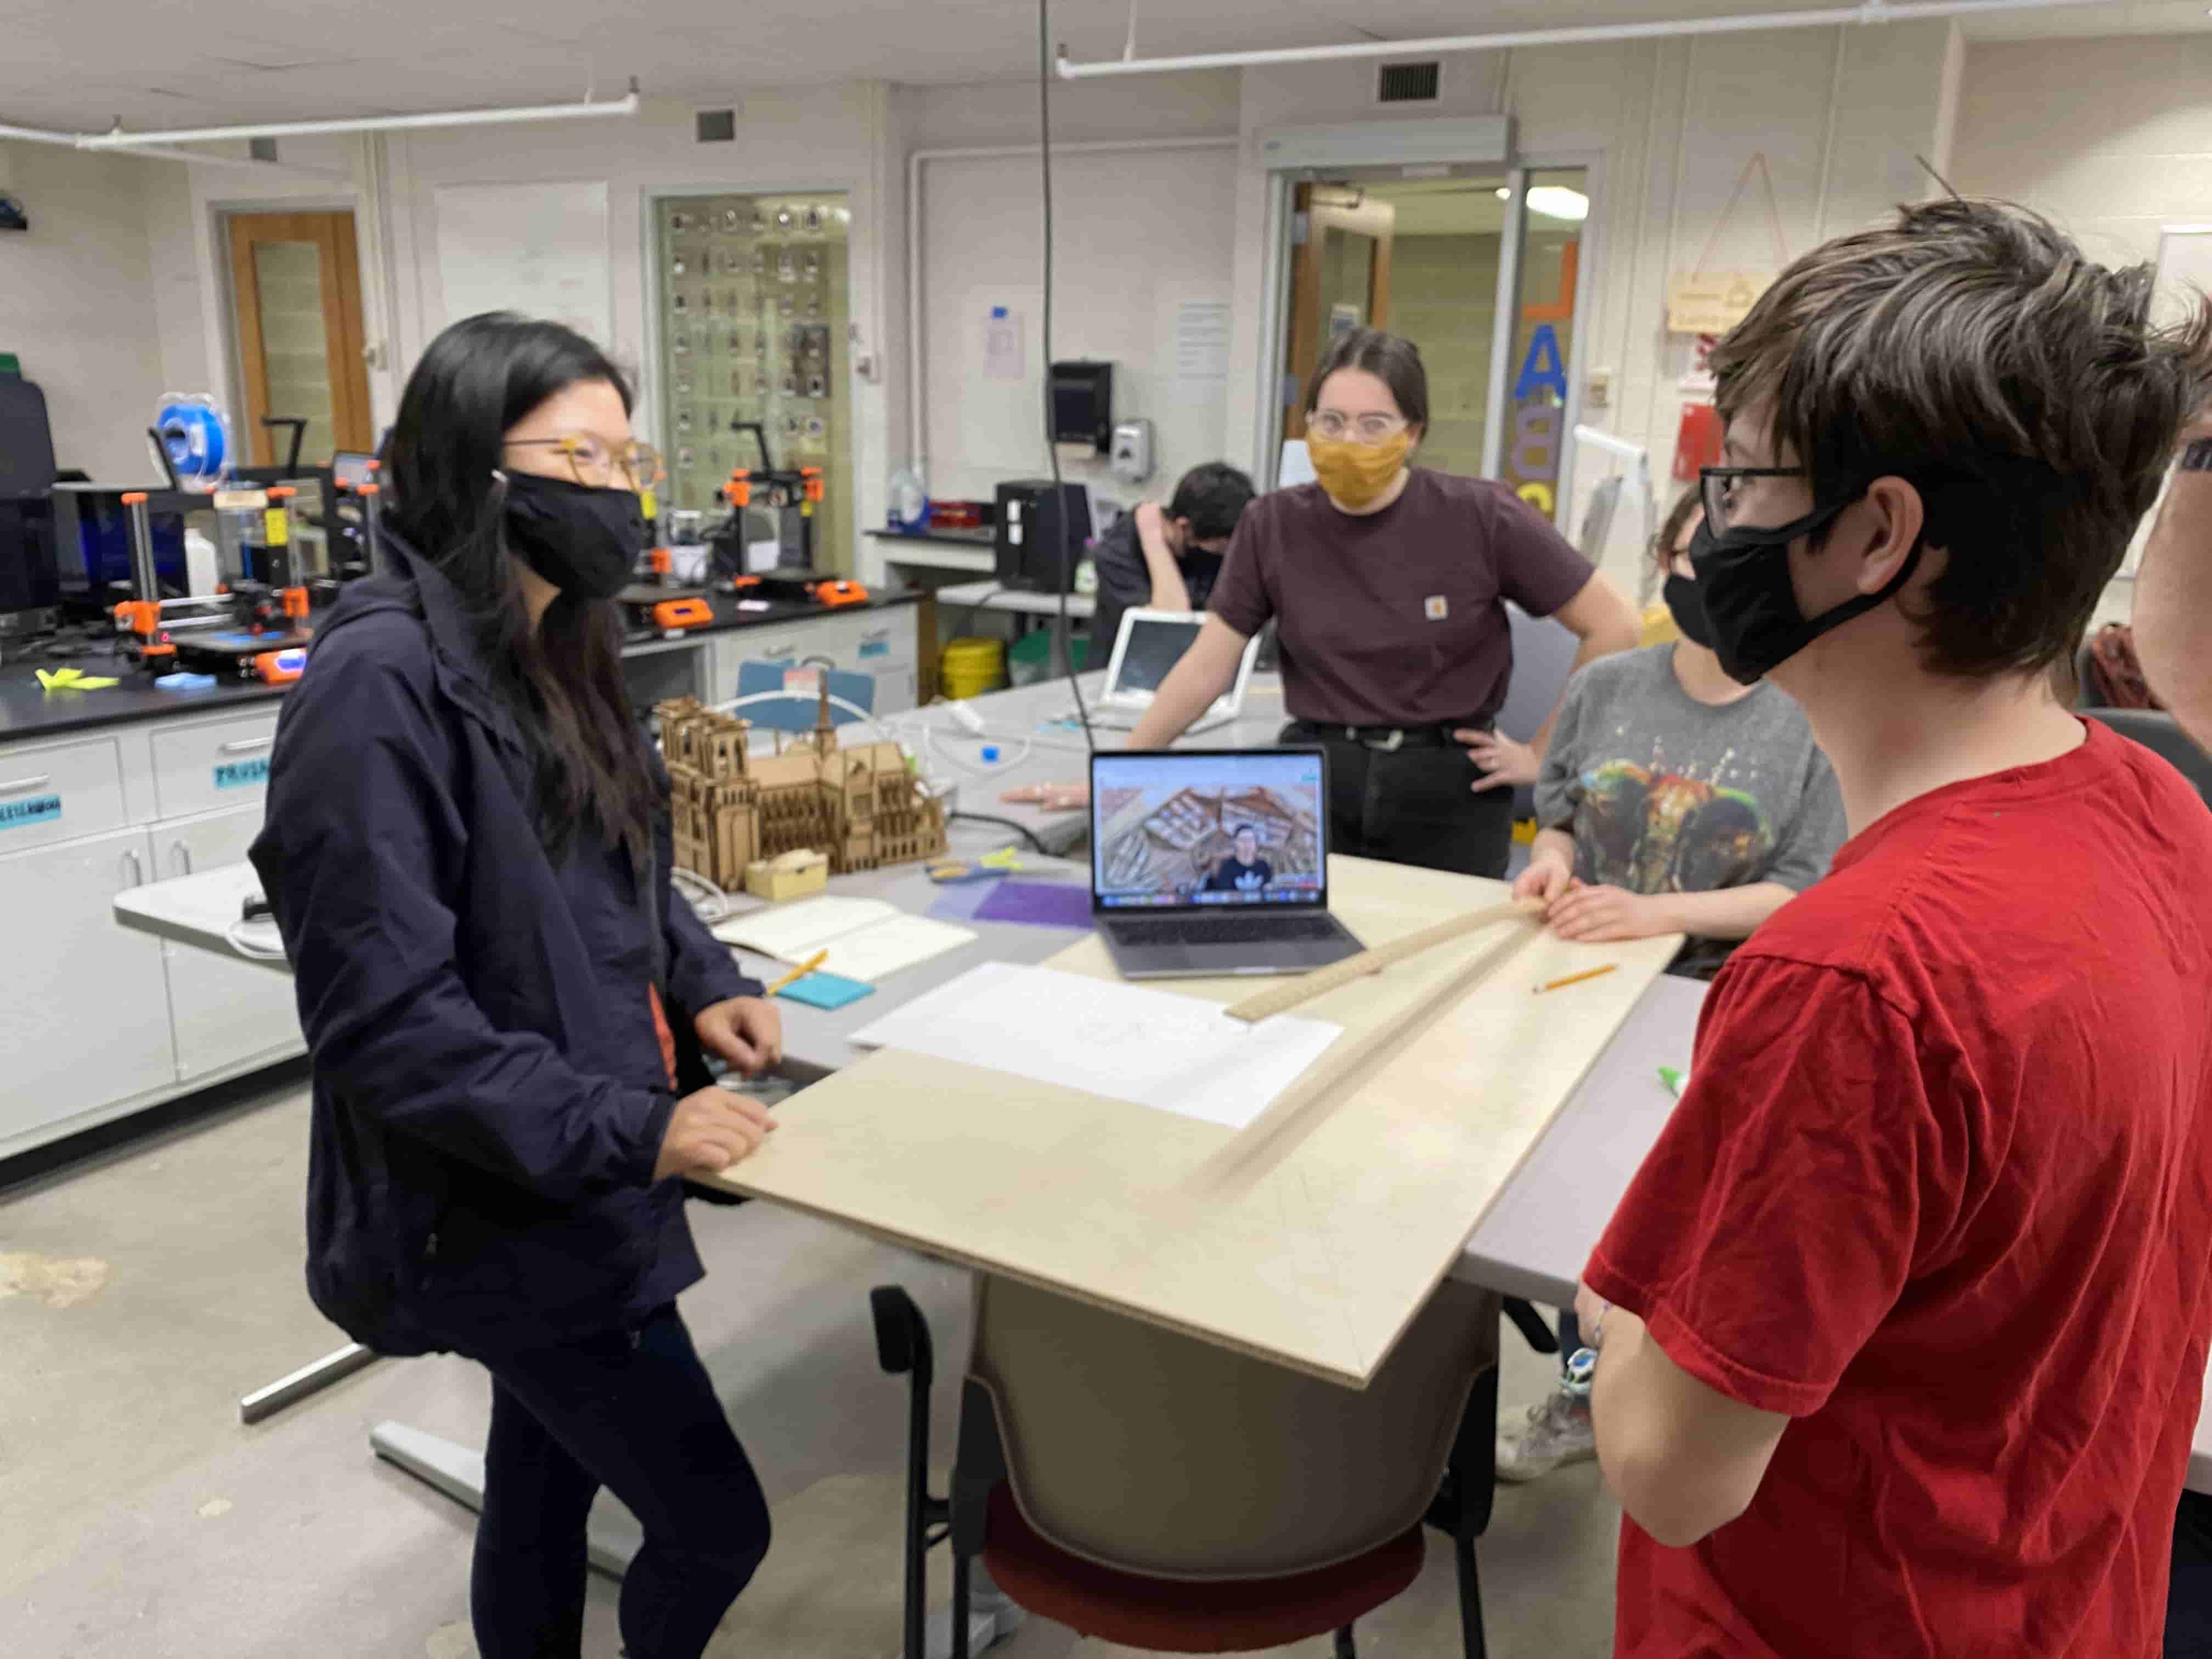
Then we went on to the sketch board and calculated how many hexagons and how many pentagons we need and theen decided that we are going to cut them out in semi shapes on the board. We had a disscussion on how to combine them together. On the example we saw people were using metal connections or really strong screws which we did not have. Hence I came up with the idea of using door hinges. At first it seems silly but because of the shape of the structure holds itself upright we just need the door hinges to align the hexagons and once we have a full rotation it will lock itself and work.
After this we went on to designing it. We used Fusion360 for Designing our semi hexagons and semi pentagons.
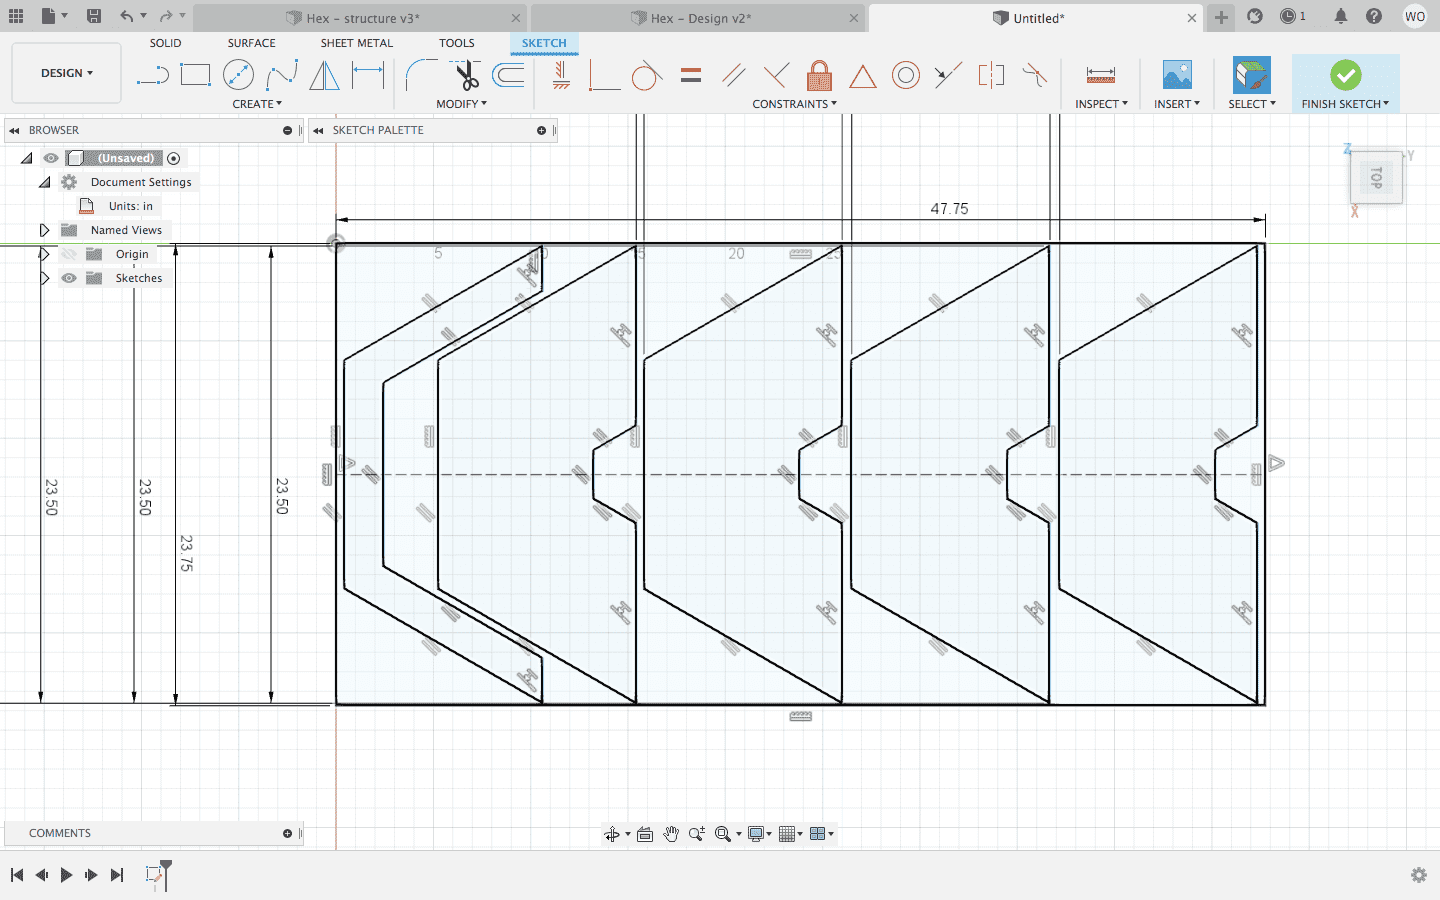
After Designing them, we first extruded the individual pieces and then went to the manufacturing tab of Fusion. From there we did a 2D Countour around the objects, select the pieces as cutout models and selected the origin to fit correctly. Then we selected the right endmill.
Then after setting up everything it became like this:
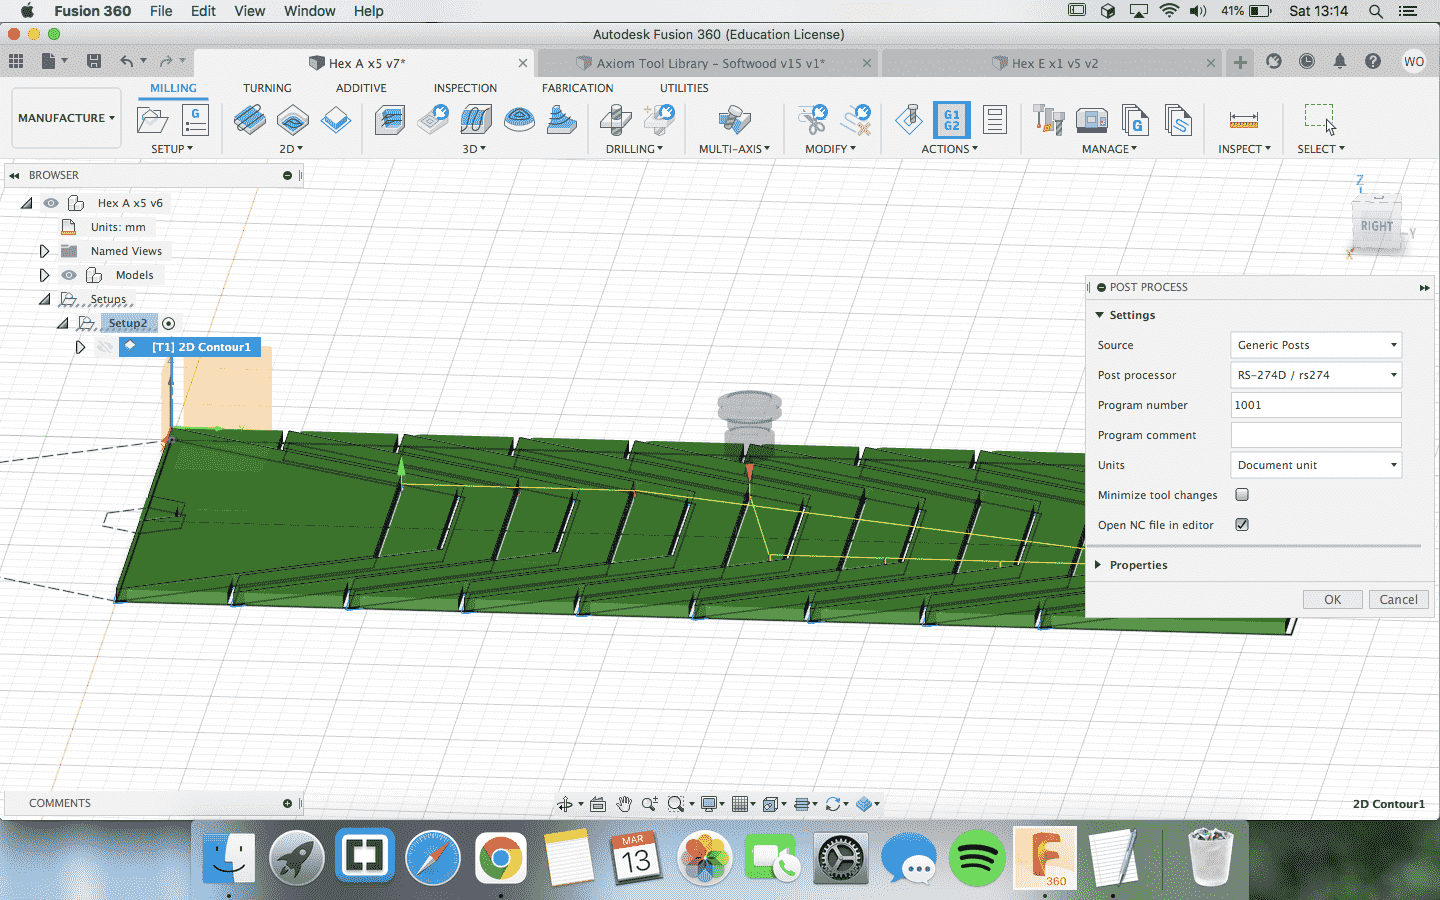
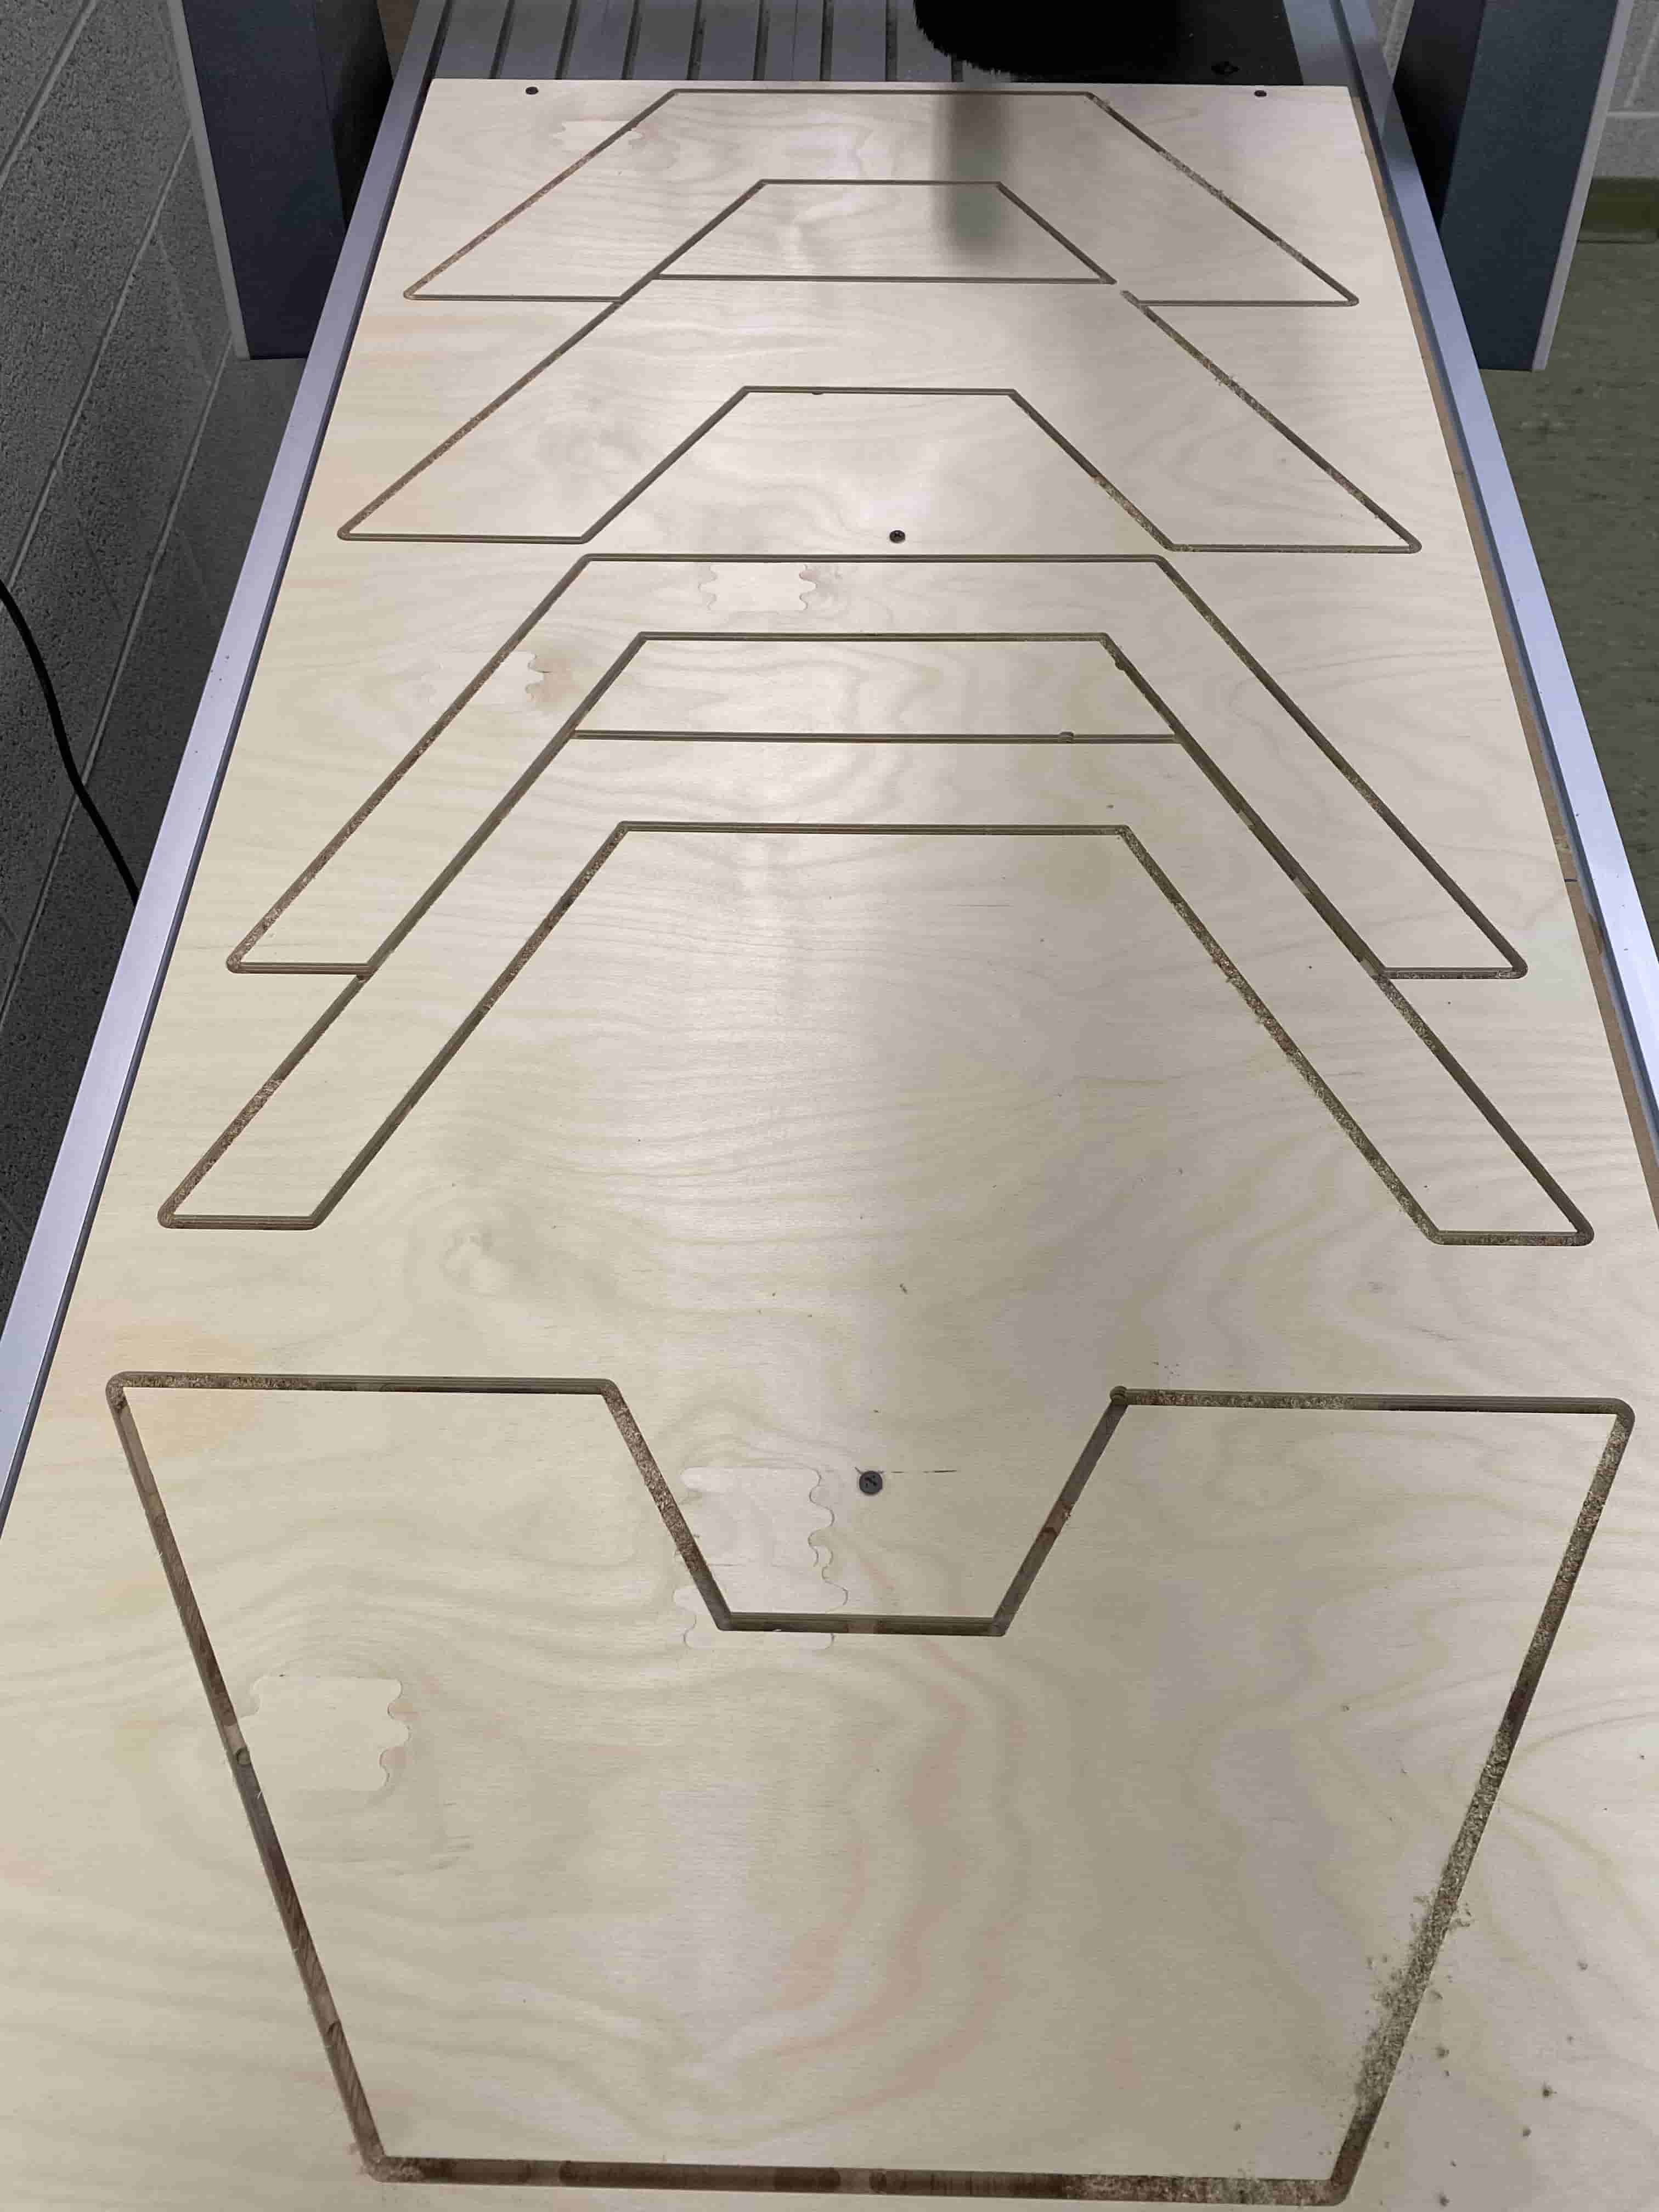
Then we did post process and selecteede RX-277 as our machine. The reason to this is because Fusion360 does not have Axiom as it's machine but the one we selected was similar enough to work. Unfortunately when we loaded the file to the Axiom and went through the same stages of setting up the mateerial in the group assignment, when we tried to start the cut, it gave an X,Y axises out of bound error. We did a research and we found out that that's because the endmill cannot reach to those spaces so we had to go back to the design board and shrink the design from 48 by 24 by 0.5 to 46 by 22 by 0.5 inches. Then we readjusted the home position and it started working:
However, we were lucky with this cut because on our later cuts the Axiom just did not go in the speed set in Fusion. We tried multiple different files but then we found out that it was because of differences in document unit and the different endmill selected in different files.
The file that I created cut in the correct speeds but all the other files that re created by other peeople were slower than what Fusion was showing. After some investigation we concluded on me sharing the endmill I am using with everyone and that way everyone's files worked. However, the very next day when we tried to have the rest of the cuts, the Axiom started acting weird again. However, I was able to fix it by editing the Feed number (F####) on the G-Code. The reason I knew this will work is because, while working at the Fablab last semester, I was helping someone and they wanted to continue their failed print from a specific Z height, hence, meanwhile helping her I was able to teach myself how to read G-Code. Hence, when we had this slow feed rate problem, I checked the G-Code and it was saying F25 or in other words 25 mm per min which is extremely slow. I changed it to F2200 which is 2.2 meters per minute. Even though this seems fast this is around the right speed of the endmill we are using and also we were able to increment it down using the controller on the Axiom.
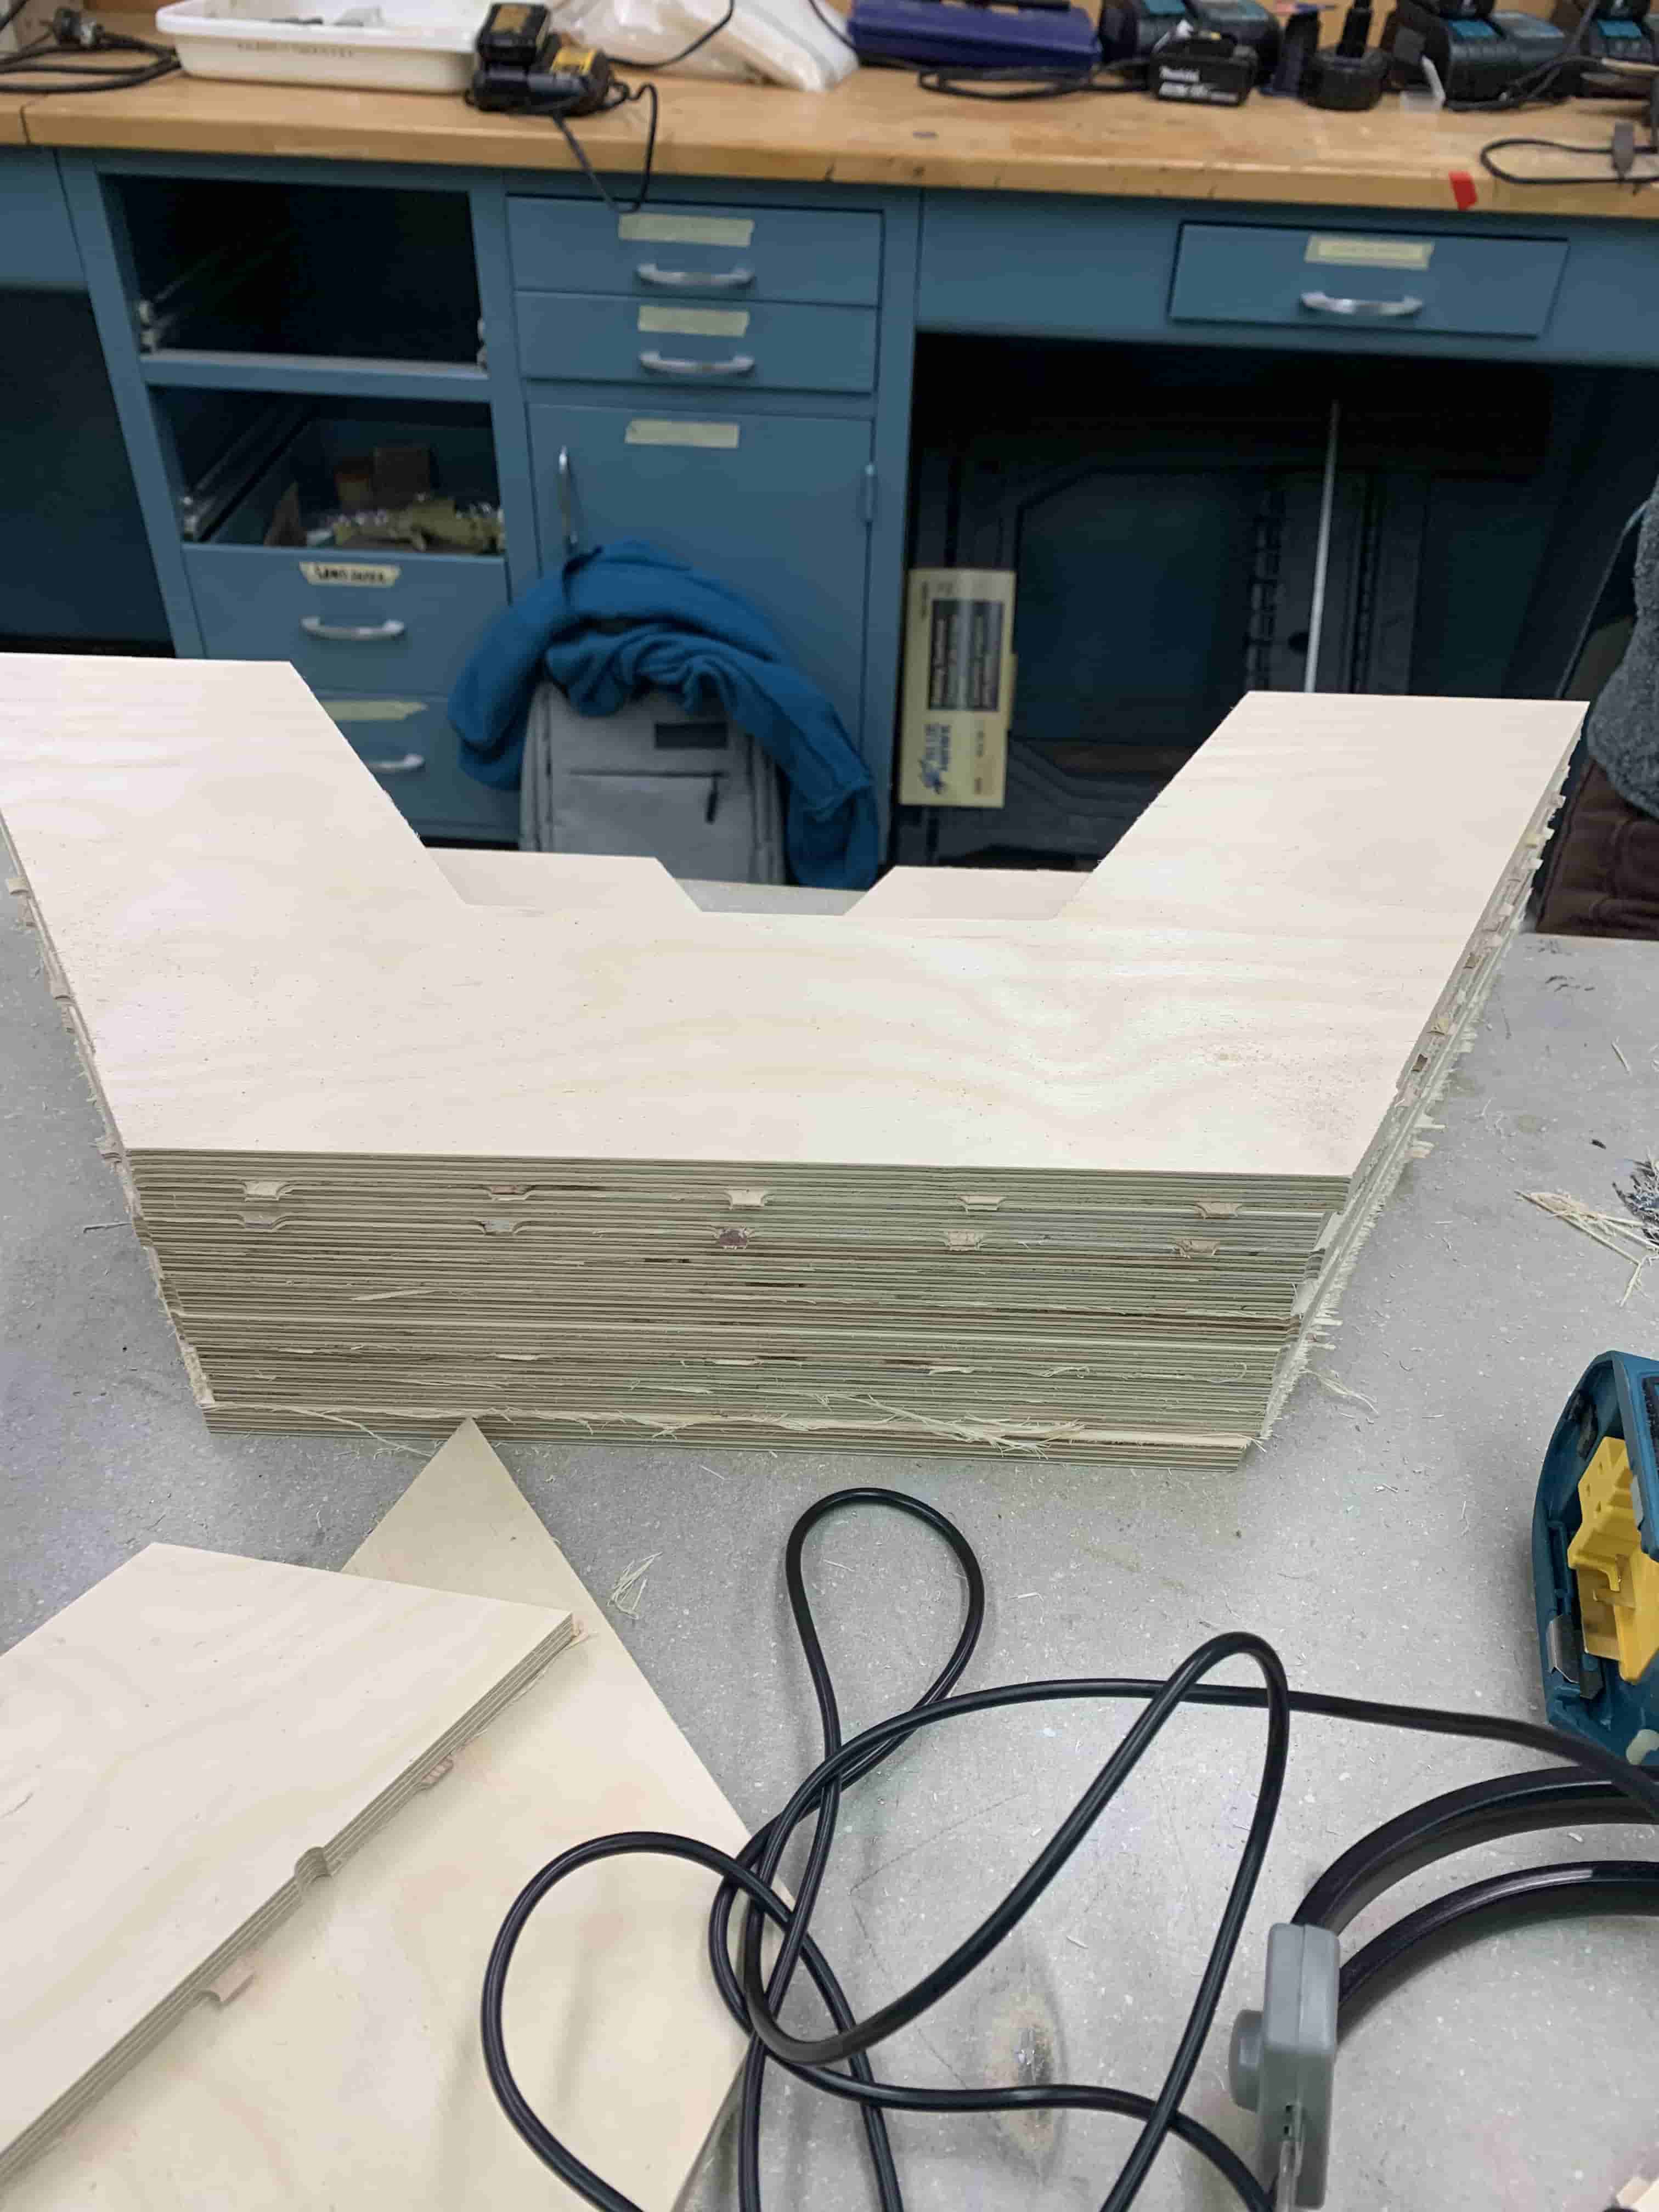
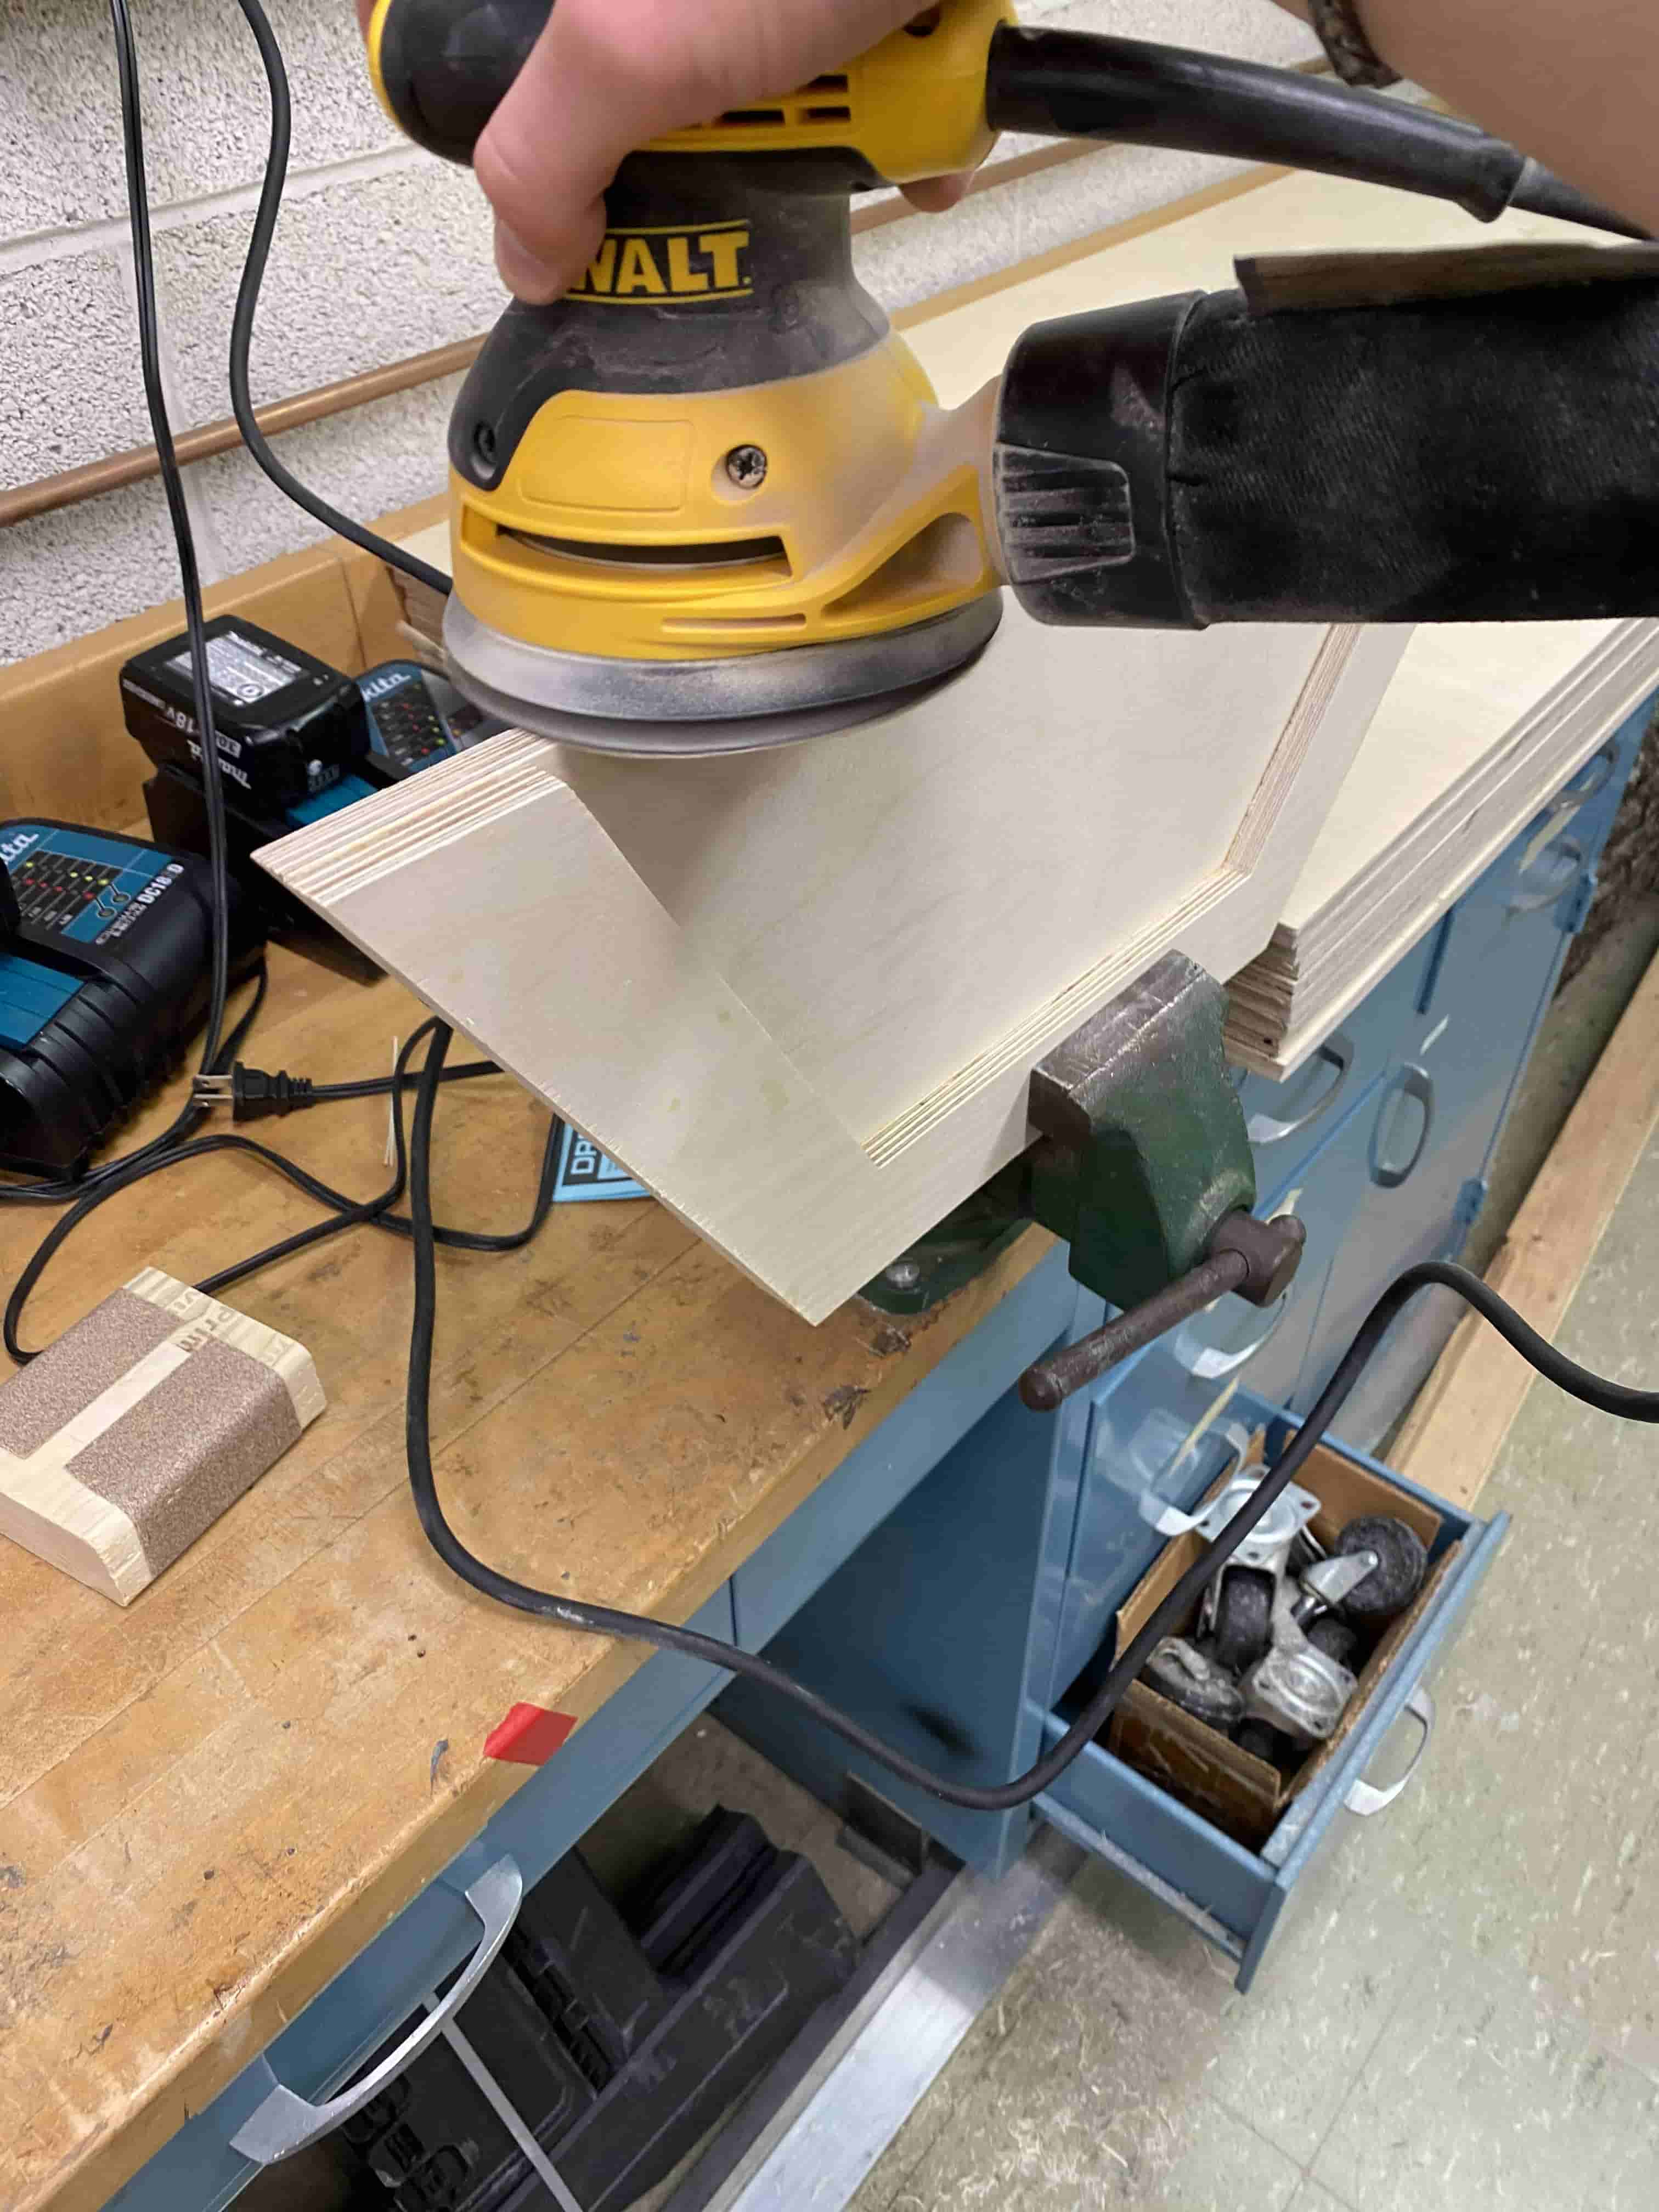
After cutting out the pieces off the Axiom, we ended up having so many tabs and wood scraps. Hence to clean them off we used sanding machines and sand papers. Because we were multiple people we were able to finish it fairly wuick but it still took 2 days just to sand them all to a smooth layer.
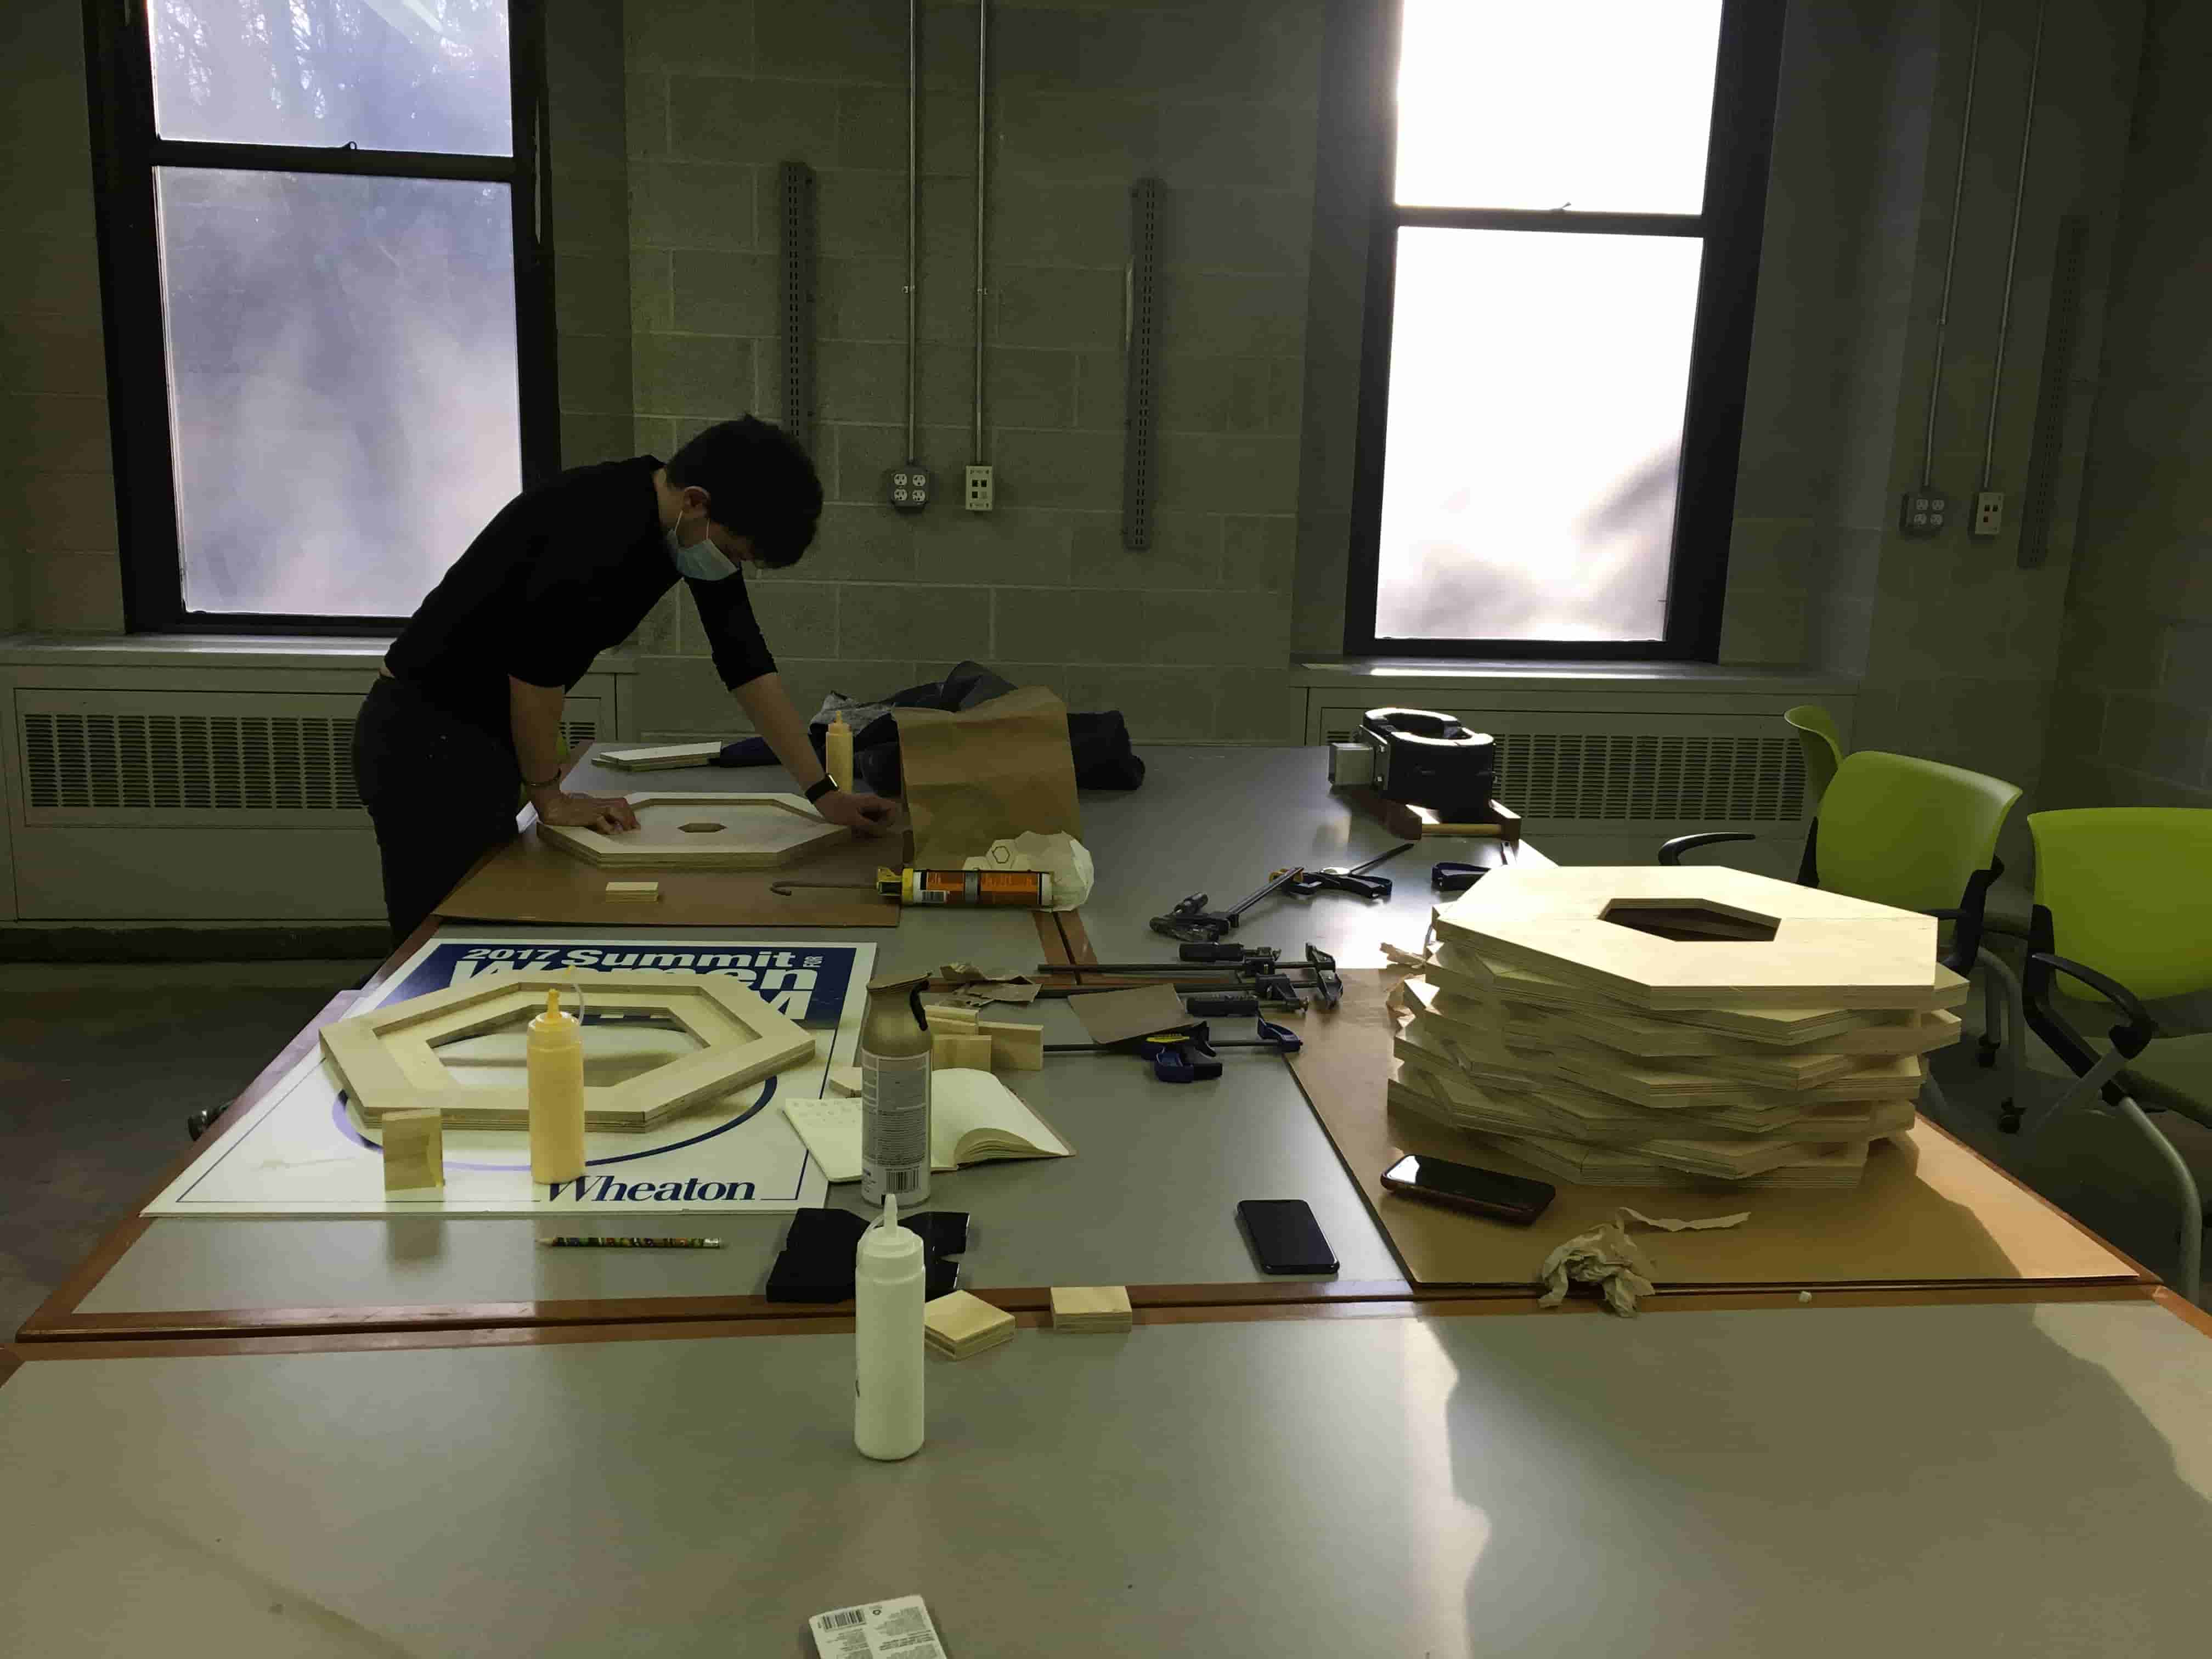
Then after sanding the tabs off and making them holdable by hand. We started gluing them with other pieces in different rotation. The reason why we did this is because in our discussion meeting almost a week ago, I told everyone that if we are planning on cutting out haif Hexagon pieces right out the Plywood then when we try to glue them together it will still be really weak. Hence, I told everyone that we should use multiple layers and rotate each layer so that the seperation lines will never be parallel to eachother, therefore it will be structually strong.
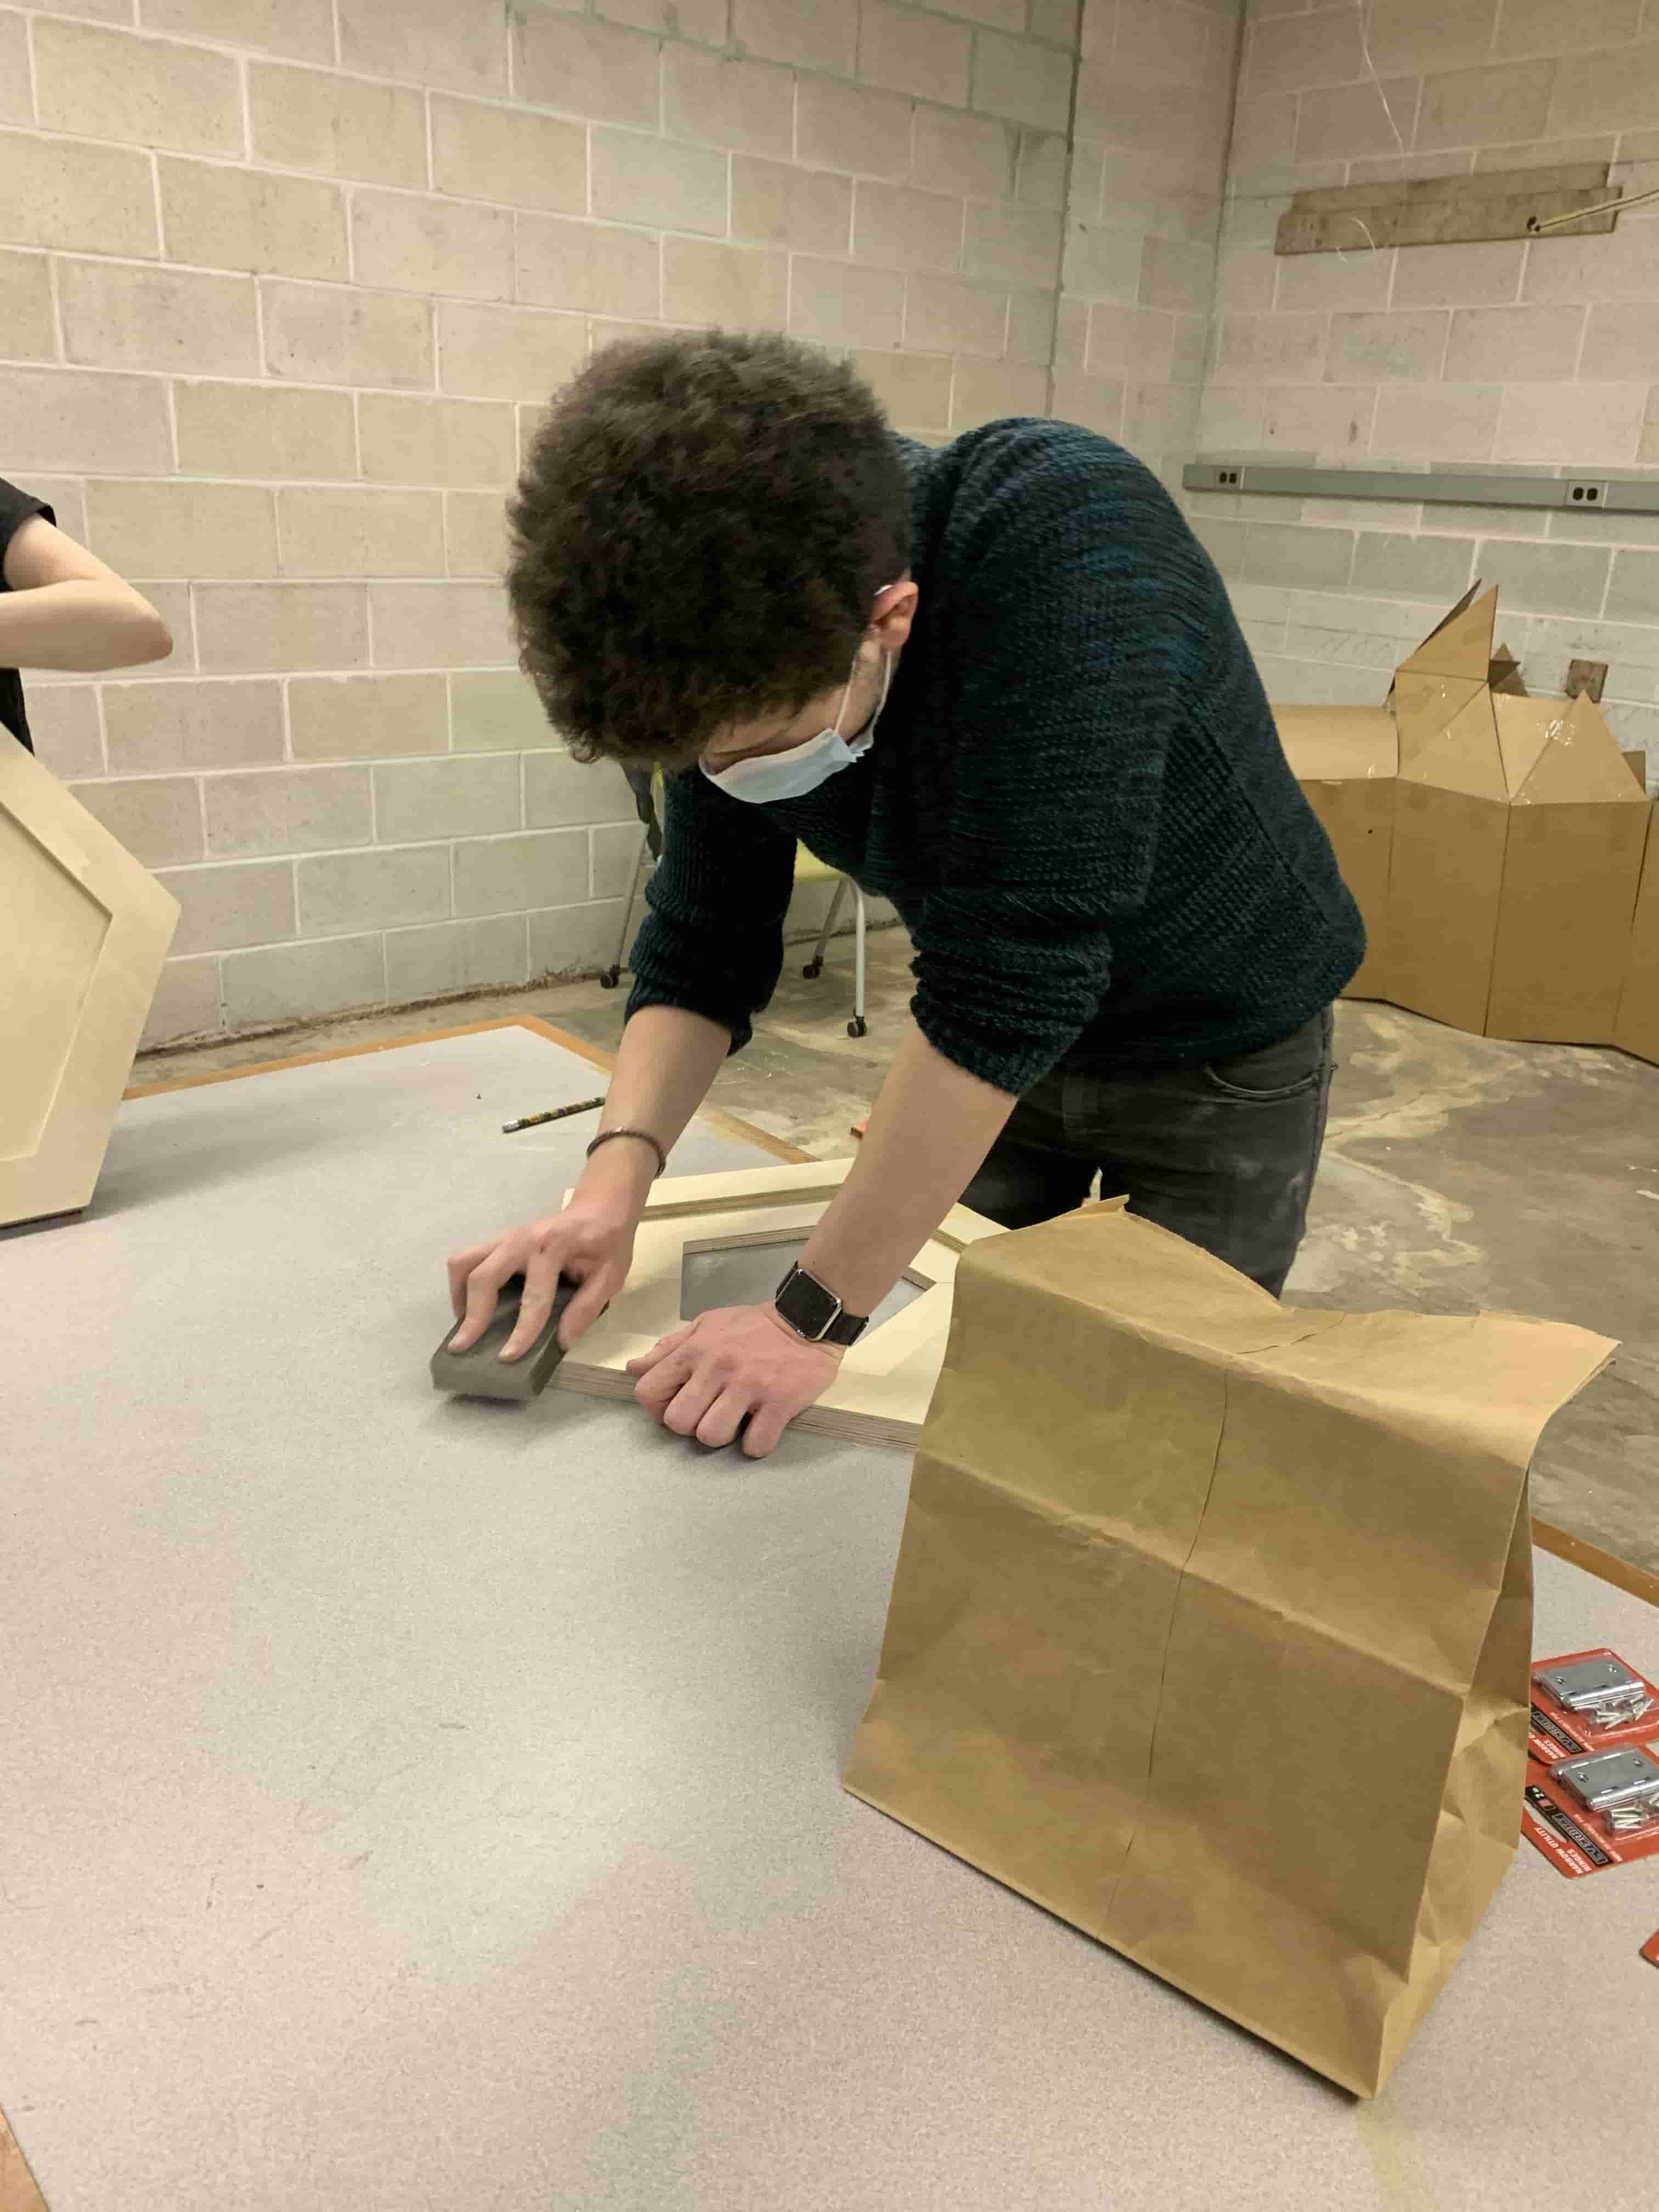
After gluing everything togerher, we sand them all again using lower grid sand papers to get rid of the excess glue and make them smoother so while working on assembling the pieces we wont cut our hands etc.
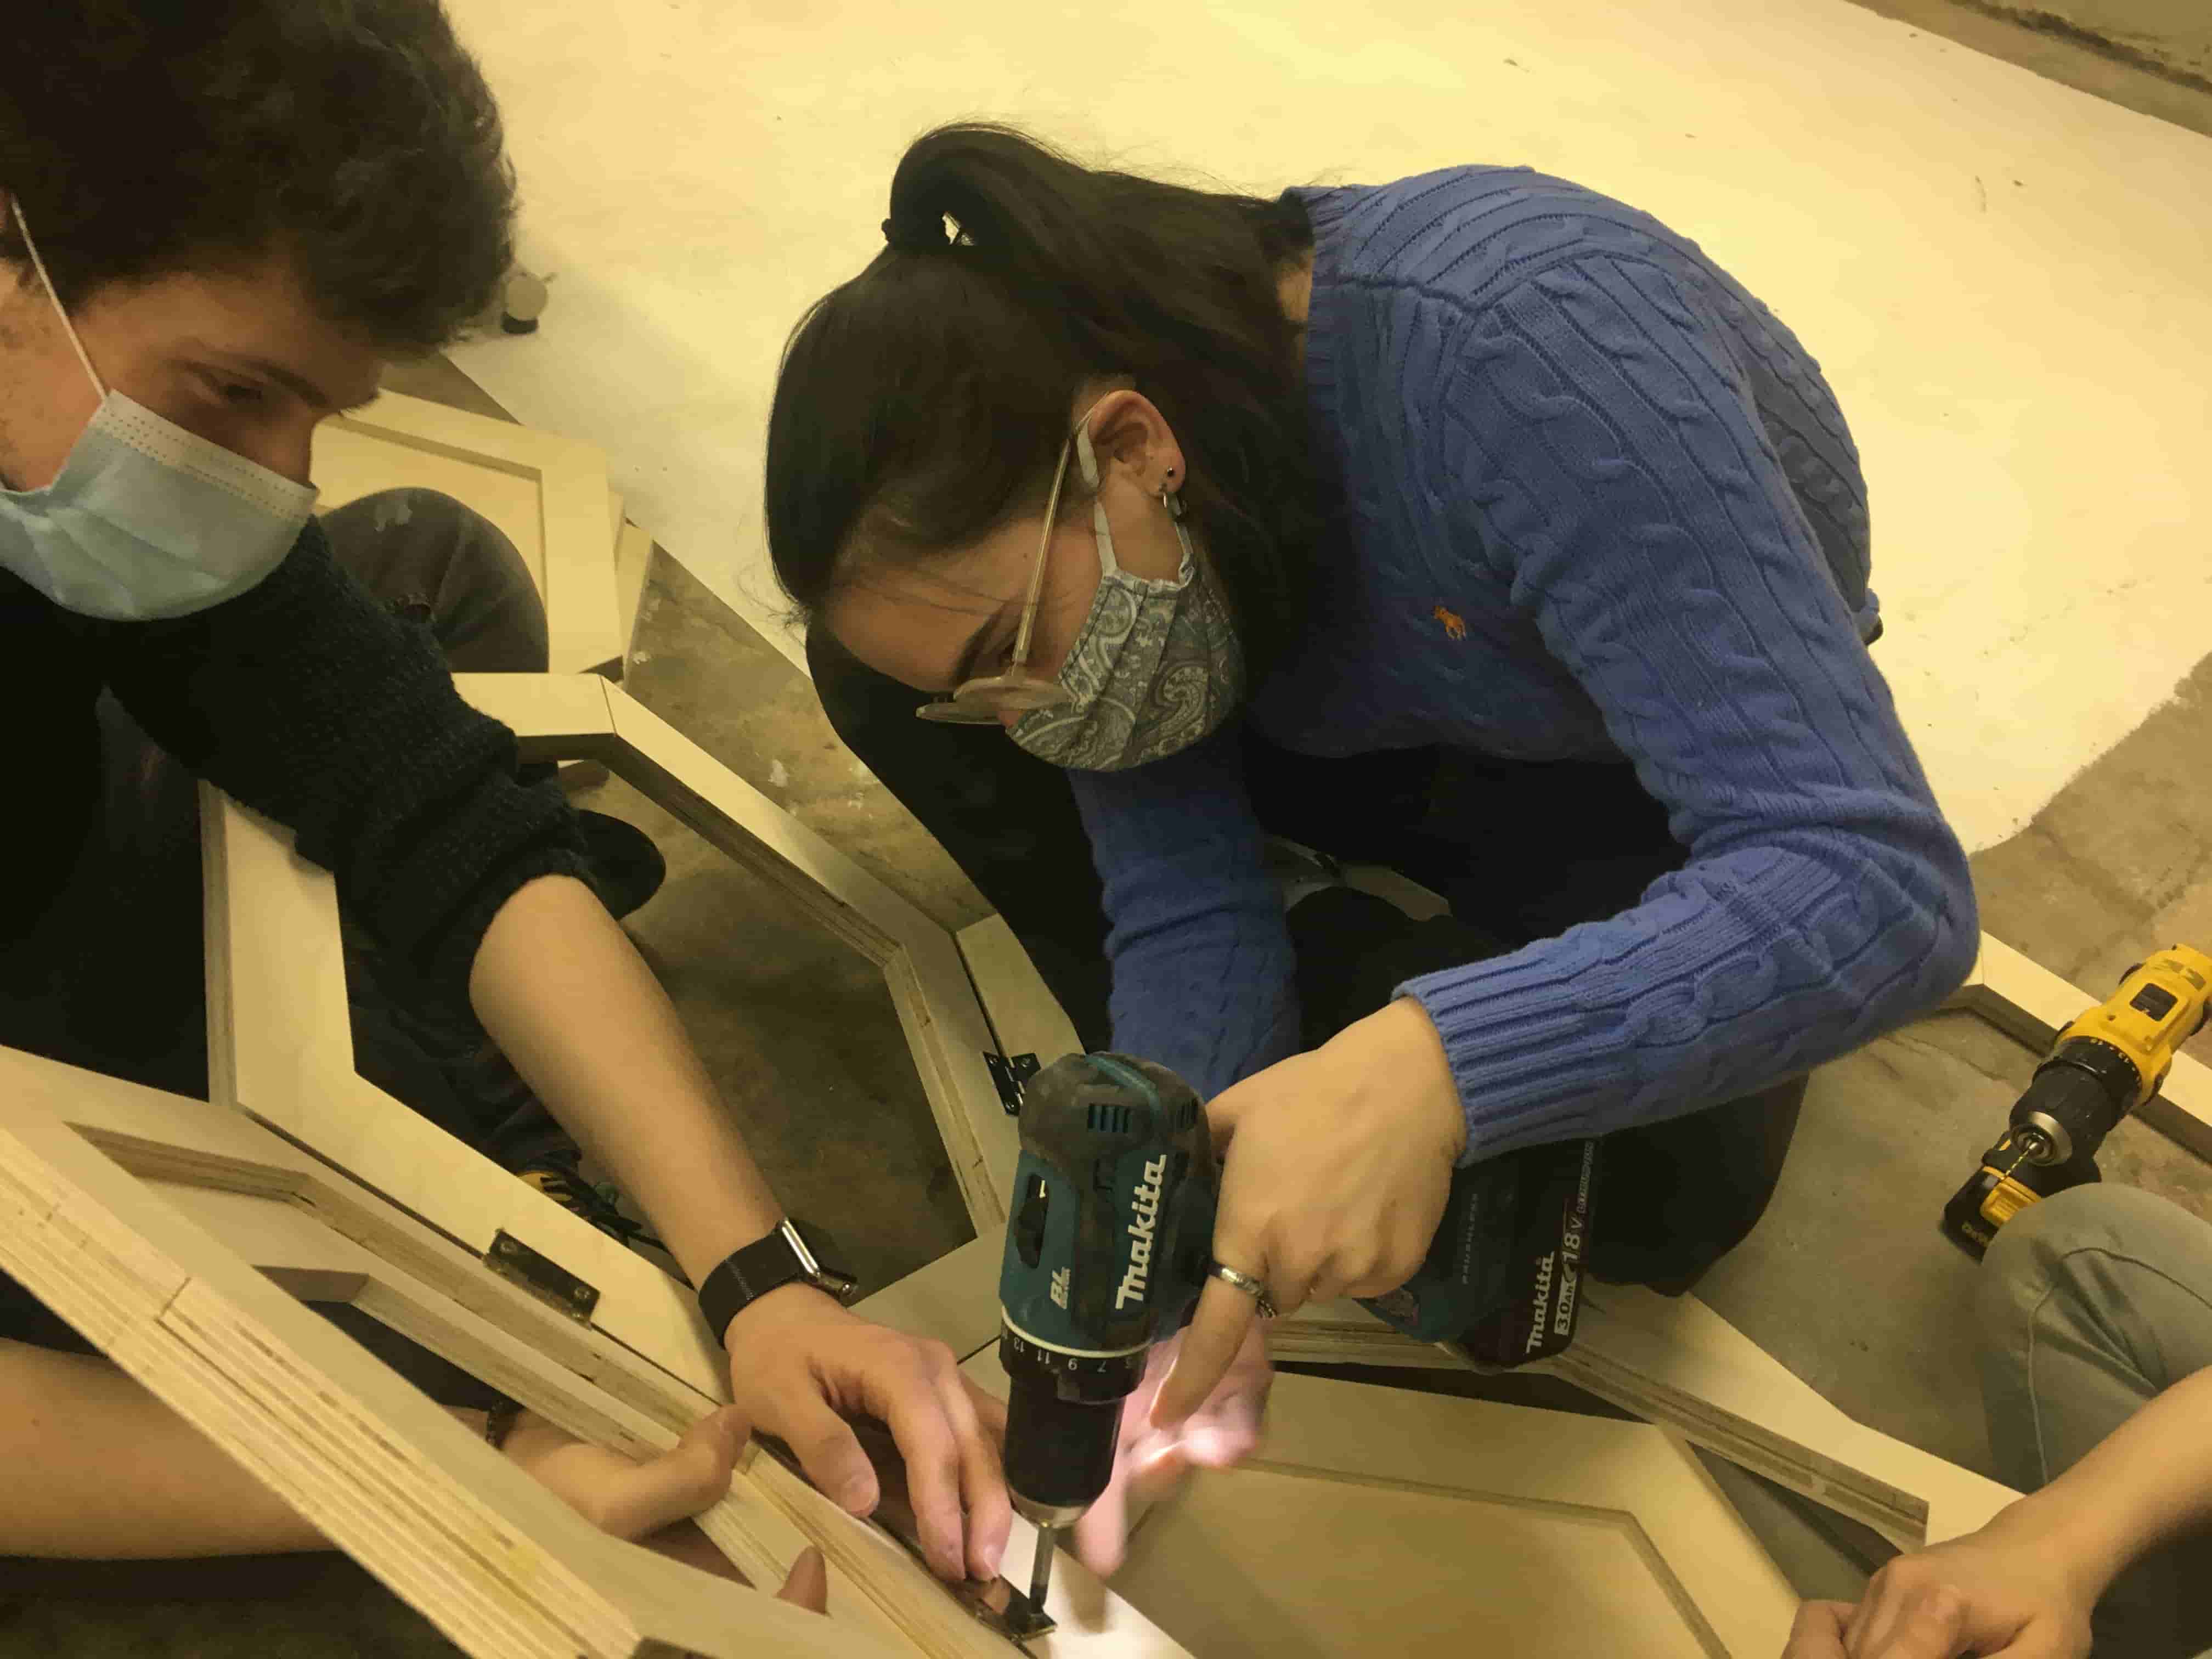
Another one of my ideas that got adapted to this projeect was using door hinges to hold the parts together. But why door hinges? There are multiple reasons. The first reason is that we couldn't be able to get our hands on actual metal parts that are made for this with the right angles for each row in time. The second reason is, door hinges are metal and they are strong enough to lift a door, hence, they should be strong enough to carry our object too. The third reason is because they are not too heavy so they will not break the center of mass planned in the beginning of this project. The forth and the most important reason is that, because they can take any angle, we wouldn't need to calculate the exact angle needed and bend some metal and then realize that we did it wrong, but with hinges all you need to do is just lift the wood in the right angle you want and then screw down the hinges and combine the wood pieces together. And because its ina dome shape all the pieces locks themselves down when hinges used.
Hence, everybody liked my idea and we started assembling it using hinges. At the end it looked like this, it wasn't as big as we imagined but we all were able to fit in it.