Week 15: Wildcard week: composites
Assignments:
-
Group assignment: Create test coupons
-
Individual assignment: Design and produce something with a digital fabrication process (incorporating computer-aided design and manufacturing) not covered in another assignment, documenting the requirements that your assignment meets, and including everything necessary to reproduce it. Possibilities include (but are not limited to):
What to learn:
-
Demonstrate workflows used in the chosen process
-
Select and apply suitable materials and processes to do your assignment.
Have you?
-
Documented how you made your creation
-
Described problems and how you fixed them
-
Included your design files and ‘hero shot’ of the result
DOUBT: Can I make the assignment by hand? Answer: Although there can be manual processing steps, to count as digital fabrication the workflow should pass through design in a computer and some kind of automated output process.
DOUBT: Do I have to do the group assignment if I choose to do composites? Answer: Yes, you have to make test coupons.
What are composites?
This week is wildcard week and in our lab we are going to work with composites. Composites are a combinations of components with different physical and chemical properties which are combined to create another material. Composites are typically designed with a particular use in mind, such as added strength, efficiency or durability.
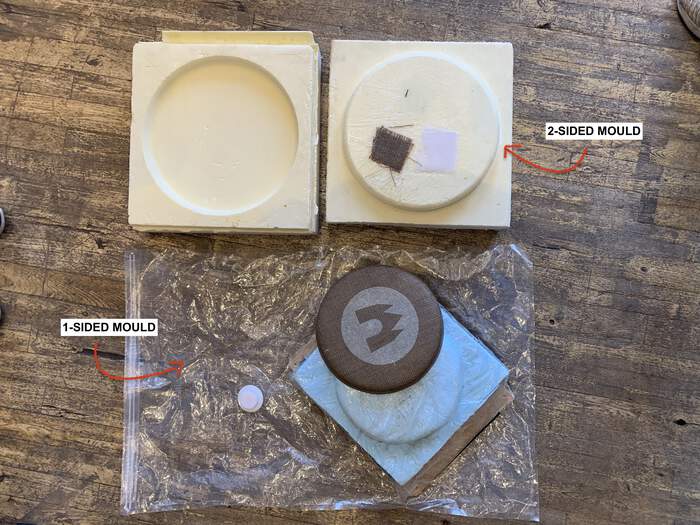
Henk explained us different examples of creating moulds with epoxy:
-
Using a 2 sided mould and a 1 sided mould
-
To use a 1 sided mould you have to vacuum it with a vacuum bag. For this you put on the mould the cling foil (to make it as flat as possible, because the downsides of this method is that it never stays completely flat) + then you put vaseline and then the fabric you want to transform. (Another trick from Henk is to also add baking paper).
The steps for this week are:
-
Create the 3D design in computer of what we want to create
-
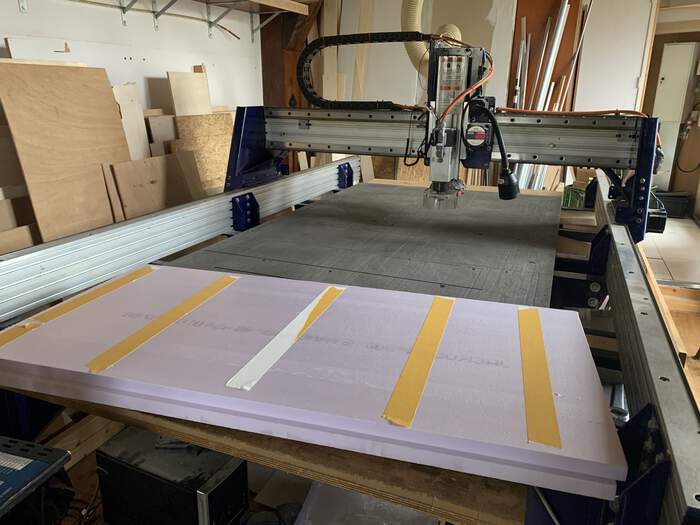
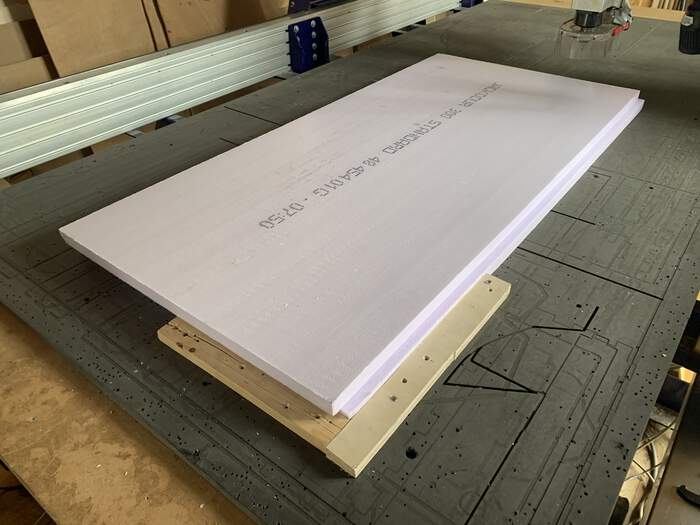
Take a sheet of foam (we will be using PIR type foam: it is a very sturdy type of foam).
-
We will then use computer controlled machining (Shopbot) to cut the foam and cut the 3D design onto the foam to create the mould. Henk advised that you can just do the rough cut, making this cut finer than normally and then sand the mould by hand. This also makes the process much faster.
-
Fill the mould with epoxy to create your design.
What is exactly epoxy resin? I know epoxy is a type of resin but where does it come from? I found some information on this website. Epoxy is made from epoxide (base of the epoxy) and polyamine which is the hardening substance. When both are combined chemically they create a solid clear glass-like compound. When combined, the substance starts to harden very quickly and can be hard to manipulate even after fifteen to thirty minutes depending on the thickness. The resin will be mostly cured within 24 hours and completely hardened in 72 hours.
Epoxy resin will bond to any wood type and it also bonds very well with glass and aluminium. “Unfortunately, epoxy resin does not bond well with Teflon, polyethylene, polypropylene, nylon, or Mylar. It bonds poorly to polyvinyl chloride, acrylic and polycarbonate plastics.” Will this affect my design for individual assignment?
Why is epoxy resin so popular?
-
It creates a very strong bond
-
It is water-proof
Group assignment: creating test coupons
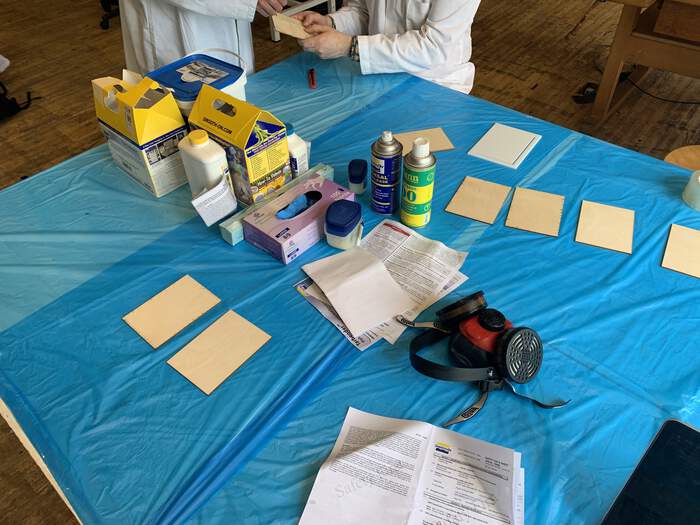
We will make some test pieces in todays group assignment, specially reading the datasheet and the safety sheets of the materials we will be using.
Safety first: we start reading the datasheet from the material. We will be using Tarbender. These are the materials we will be using, we have covered the table and open the windows for better ventilation.
-
We have to wear some long sleeve garments:
-
We have to wear disposable gloves + safety glass:
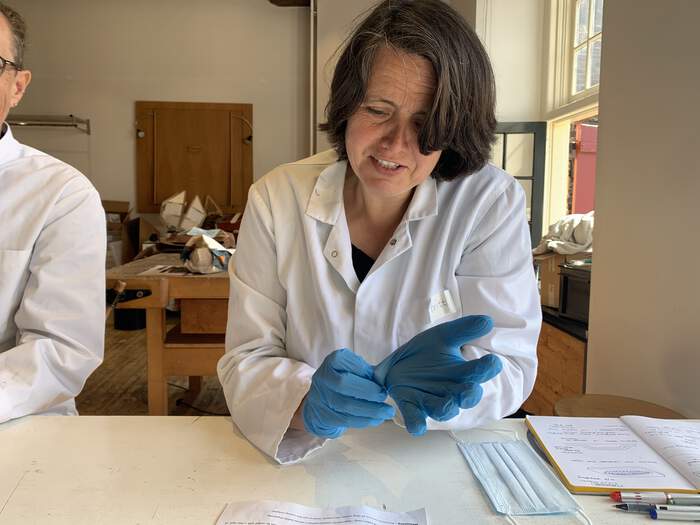
-
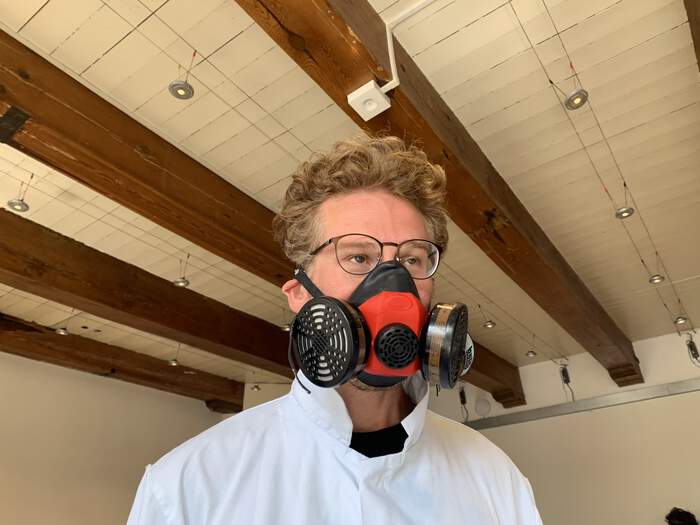
Ventilation – Use only in a well ventilated area and avoid breathing fumes. Wearing a NIOSH approved respirator is recommended when mixing and using components:
When mixing:
-
Stir or shake Part A and Part B thoroughly before dispensing.
-
Accurately measure 2A:1B by volume into a plastic, metal or wax-free mixing container.
-
Mix using a flat edge mixing stick for 2 minutes. Scrape the sides and bottom of the mixing container with the edge several times.
-
Pour contents into a new, clean mixing container and mix again for 2 minutes.
-
If using a drill mixer, use a variable speed mixer set to low rpm and mix for 2 minutes. Creating a vortex will introduce air.
-
Follow with hand mixing for 2 minutes.
-
A large mass concentration of epoxy will reduce pot life and may become too hot to handle. If concentrated mass of epoxy begins to get very hot, move outside to open air.
-
To extend working time, reduce mass by pouring mixture into a flat baking pan and pour onto bar top from there.
-
Do Not Vacuum – Subjecting mixture to vacuum will introduce air.
Surface preparation:
- Surface to be coated with liquid epoxy should be level in all directions. Surface must be free of dust, oils or other contaminants.
When pouring to coat flat surfaces:
-
Most bar tops, tabletops and other flat surfaces require 2 – 3 layers of Tarbender™ with a 4-hour cure time in between layers. You can apply as many ¼” (6.4mm) layers as needed.
-
*If you are using a porous surface you have to make a thinner first layer of 1.6mm first for sealing it (will no be using this option).
-
This is the option I will be using for the individual assignment: non-Porous Surfaces do not require a sealing coat. Mix and pour Tarbender™ as directed to 6.4 mm thickness. Look for bubbles and lightly pass propane torch over surface to dissipate. Let cure for 4 hours.
-
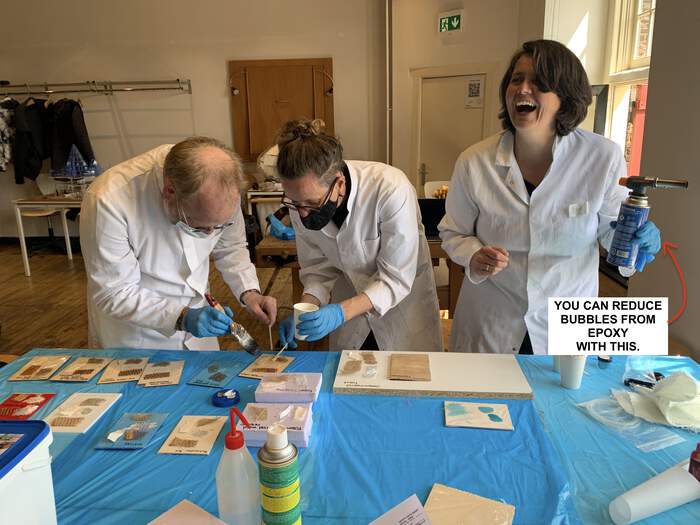
Dissipating Bubbles from Surface Using a Propane Torch - After Tarbender™ is poured, pass a propane torch (available at any hardware or DIY store) back and forth lightly over surface to dissipate bubbles. Be careful when handling the torch and do not get closer to the surface than 7.62 cm. If pouring multiple layers, use a propane torch to dissipate bubbles after pouring each layer.
-
If Encapsulating 3-D Objects – Apply a 1/16” (1.6 mm) coating to bar top as directed above. Dissipate bubbles with torch. Let cure for 4 hours. Place objects on top of cured layer. Mix a small amount of Tarbender™ and pour directly over and around objects to break surface tension. This will work for the tiles of my individual assignment.
-
If Encapsulating Paper, Cardboard, etc. – Laminate paper before encapsulating. You can also seal surface with white glue (such as Elmer’s Glue) mixed 4 parts glue to 1 part water). Allow to dry for 16 hours before encapsulating in Tarbender™. At one point we wanted to encapsulate the datasheet from Tarbender for our group assignment, not sure we can do this anymore (due to time constraints).
Brushing Tarbender™ Onto Surfaces:
-
Apply In Thin Layers - two thin layers of Tarbender™ are recommended for a smooth, uniform coating. Using chip brush, apply 1st thin layer to surface and let epoxy partially cure until “tacky hard”. Apply 2nd thin layer. Allow both layers to fully cure.
-
Adding Color – You can add UVO™ or IGNITE™ colorants or Cast Magic™ Effects Fillers. Pre-mix color or filler into Tarbender™ Part A thoroughly and then add Part B.
-
Adding New to Old - If too much time passes (72 hours or more) between applying layers of Tarbender™, delaminating may occur if you try to add more. For Best Results; lightly sand cured epoxy surface with 220 grit sand paper and wipe clean with denatured alcohol before mixing and applying new Tarbender™.
-
Releasing Tarbender™ From Surfaces – if you do not want Tarbender™ to adhere to a surface, apply two coats of Sonite Wax. Allow wax to dry 1 hour and buff before pouring epoxy.
-
Clean Up – 90% Isopropyl Alcohol will remove uncured Tarbender™ from most surfaces. It can also be used to clean the surface of cured Tarbender™ epoxy. Alcohol is flammable. Be careful with this.
-
Performance – Unpainted Tarbender™ will yellow after being exposed to outdoor UV light or excessive heat above 115°F/46°C for extended periods. Tarbender™ can be displayed outdoors after priming and painting with an aliphatic urethane clear coat (such as Axalta Imron 3.5 Plus High Gloss Polyurethane Topcoat www.axalta.com).
We also read the safety sheet. This material is highly toxic so we have to be careful when using it, it causes severe skin burns and eye damage if in contact. It is also harmful for aquatic life with long lasting effects. Avoid breathing dust/fume/gas/mist/vapors/spray. Wash with soap and water thoroughly after handling. Do not eat, drink or smoke when using this product. Contaminated work clothing should not be allowed out of the workplace. Wear protective gloves/protective clothing/eye protection/face protection
It is important to read the first aid measures:
-
Inhalation Remove source(s) of contamination and move victim to fresh air. If breathing has stopped, give artificial respiration, then oxygen if needed. Contact physician immediately.
-
Eye Contact: Flush eyes with plenty of water occasionally lifting the upper and lower eyelids. Check and remove any contact lenses if safe to do so. Continue to rinse for at least 15 minutes. If irritation develops, seek medical attention.
-
Skin Contact: In case of skin contact, wash thoroughly with soap and water. Continue to rinse for at least 15 minutes. Chemical burns must be treated promptly by a physician.
-
Ingestion: Do not induce vomiting unless instructed by a physician. Never give anything by mouth to an unconscious person. If material has been swallowed and the exposed person is conscious, give small quantities of water to drink. Stop if the exposed person feels sick as vomiting may be dangerous. if vomiting occurs, the head should be kept low so that vomit does not enter the lungs.
-
So Lucia and Loes did some cutting in the laser cutter to have some test pieces from wood and acrylic for our group assignment.
-
We first prepare the wooden boards with some different sticky layer so that the thing we put on top can still come of and we test out which one can work out better. These are the different releasing methods we will be testing:
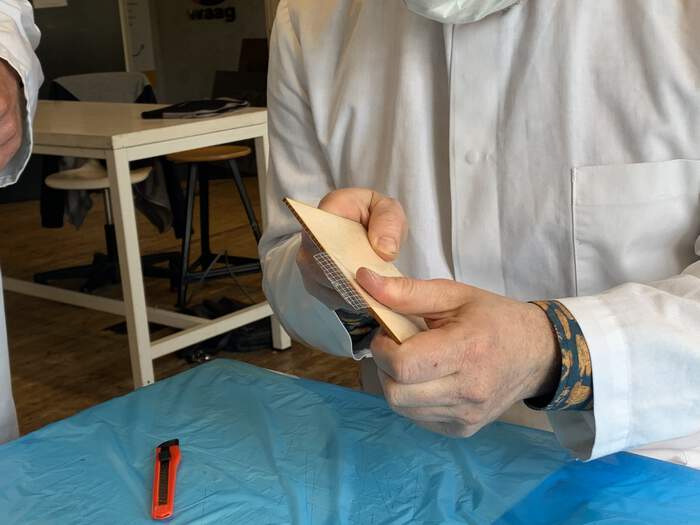
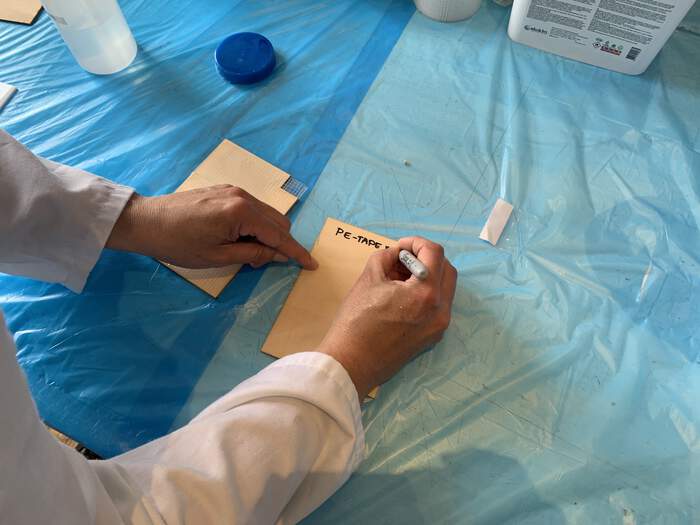
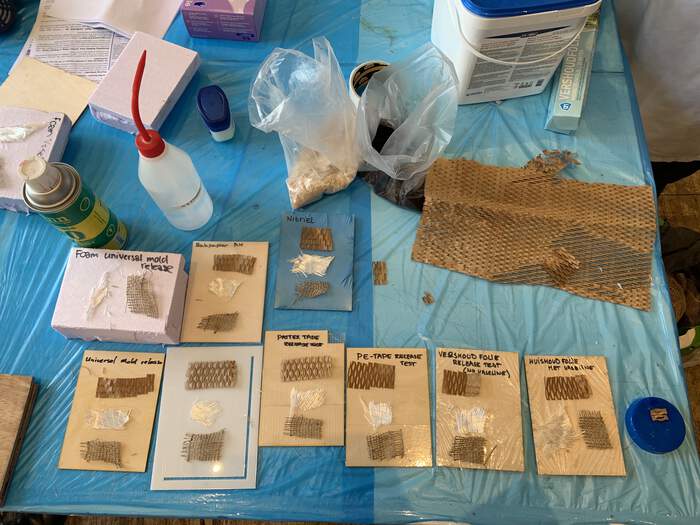
-
Here Erwin, Loes and Lucia are mixing the epoxy:

-
We then applied it to the test pieces:

-
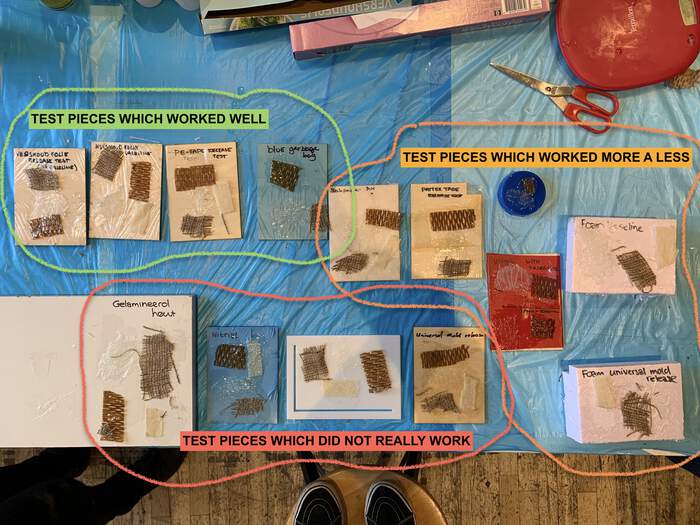
This was the final outcome:
-
I specially liked the mate effect of the baking paper:
-
I will also cut out some layers of cut-out hexagons to stick them together and simulate a smaller test mould for the tiles I will make in the individual assignment. I also added some carbon fibres to the mix to see how it would look like.
-
This is the final test:
Individual assignment: creating tiles
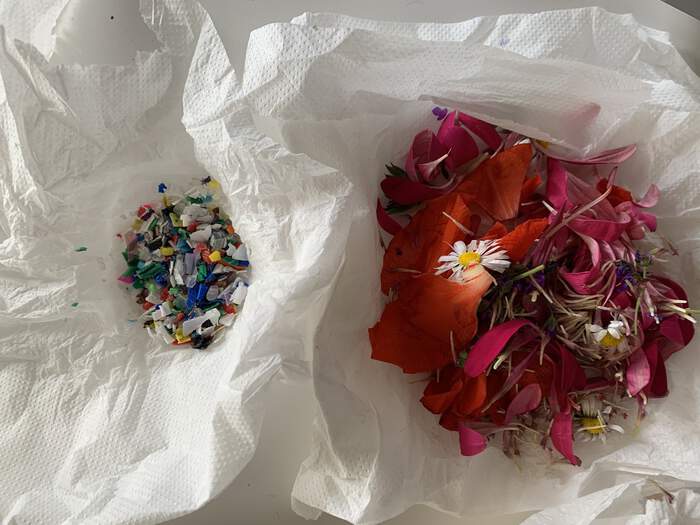
For quite a while I have had this idea of making a material made out of micro-plastics and resin. Ideally a more biodegradable version of the resin would be amazing, I will also try to incorporate these in the final result.
-
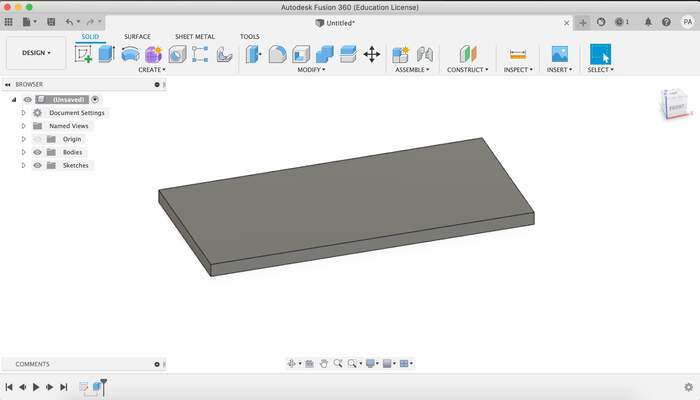
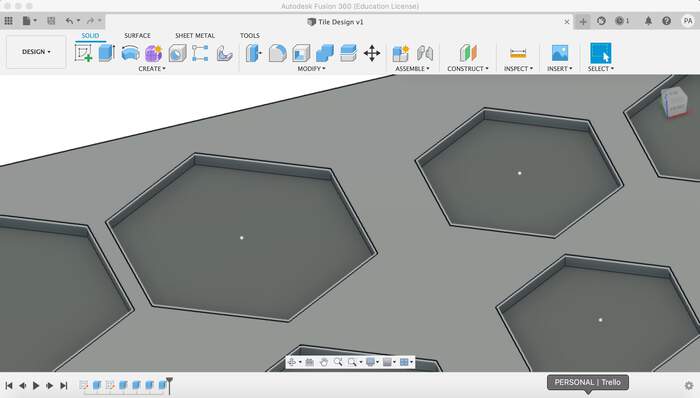
With this material idea I will make some tiles for the campervan. The foam size we are given is of 60cm x 125cm x 5cm thickness. I first draw the shape of the base in Fusion360:
-
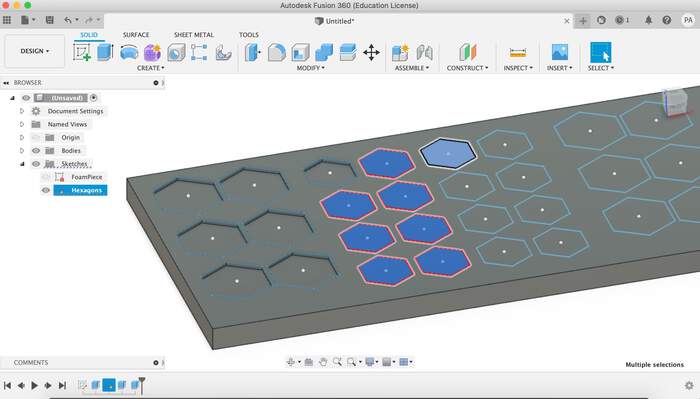
Then I start to make the tiles. I will make 2 types of hexagon tiles (one is bigger than the other). Both have a thickness of 8mm:
-
I created parameters for everything to avoid the problems I had with the moulding and casting week:

-
Saved the .stl to then open it in VCarvePro

-
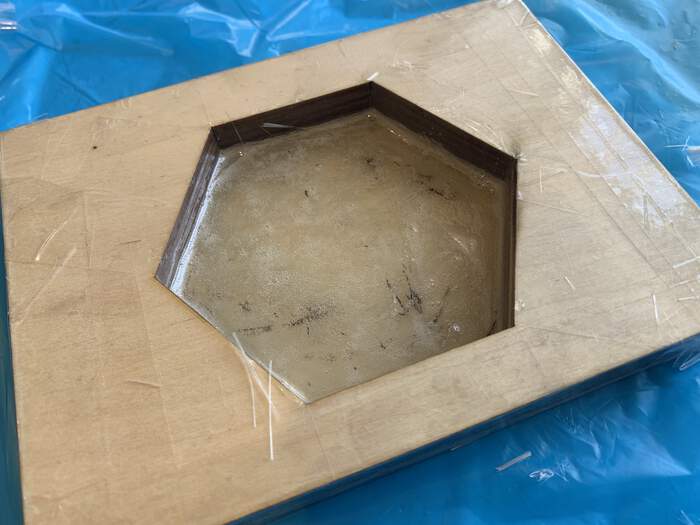
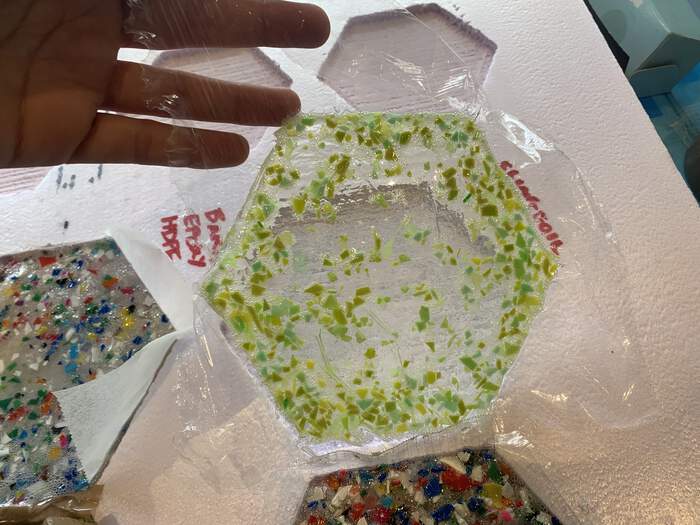
On Friday I did not have time to cut the whole thing on the ShopBot so Douwe and me did a small test to test both cling foil and vaseline when trying to take out the tile when it is already dry.
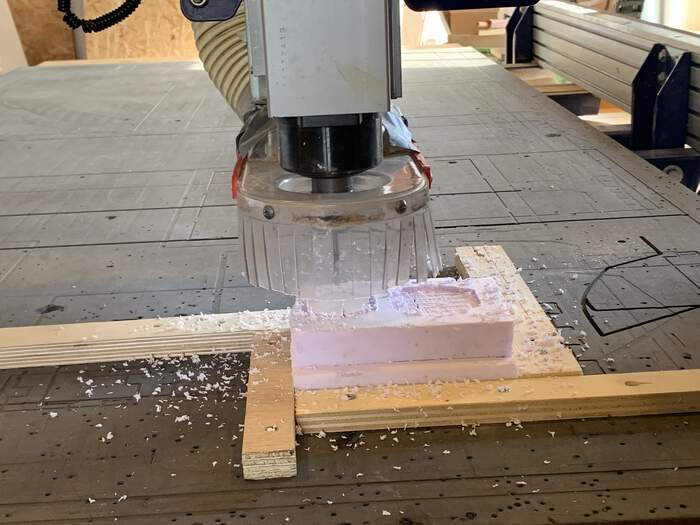
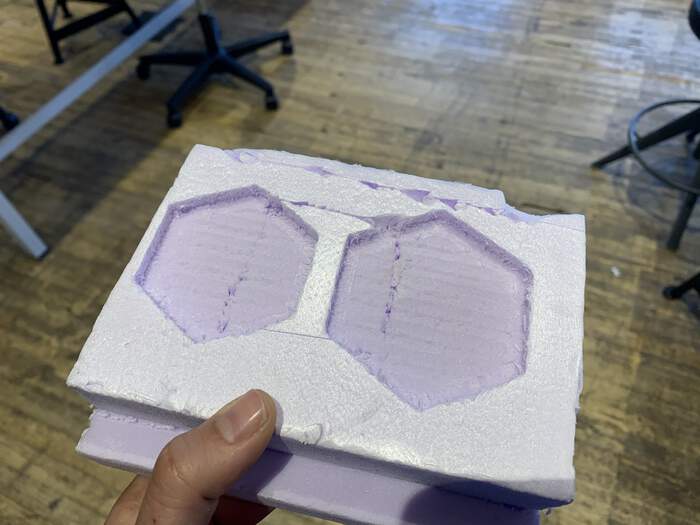
-
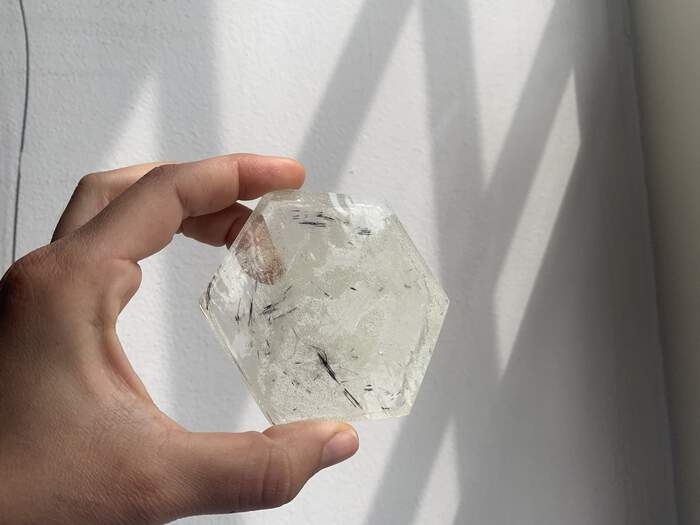
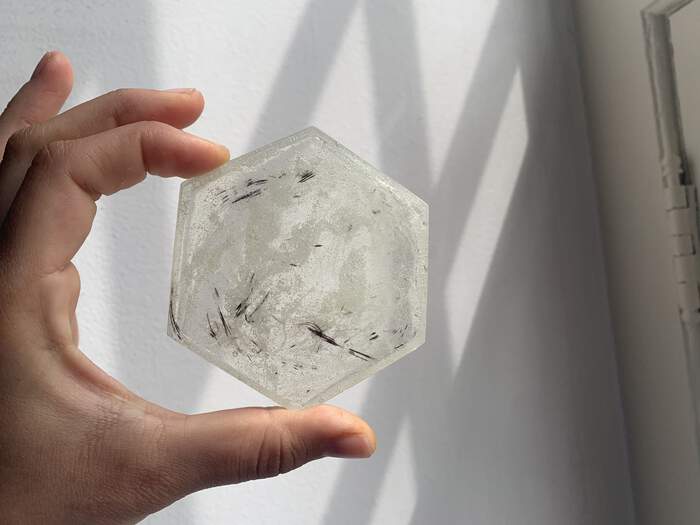
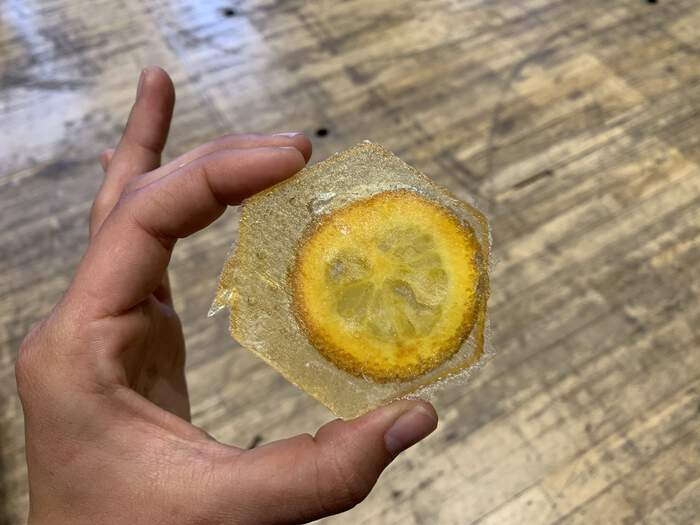
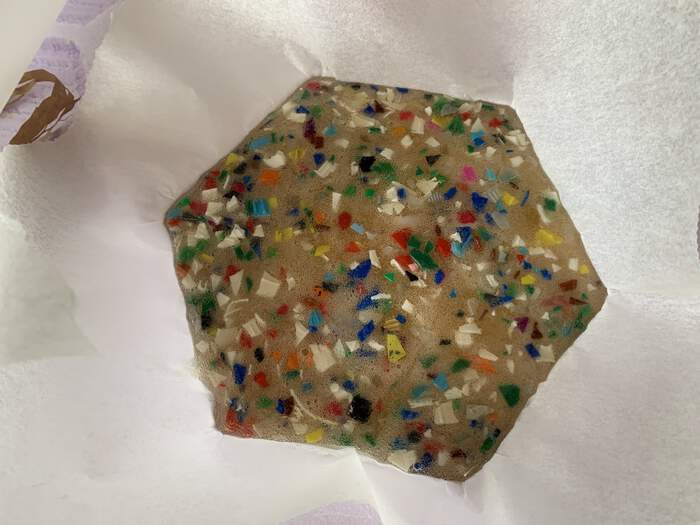
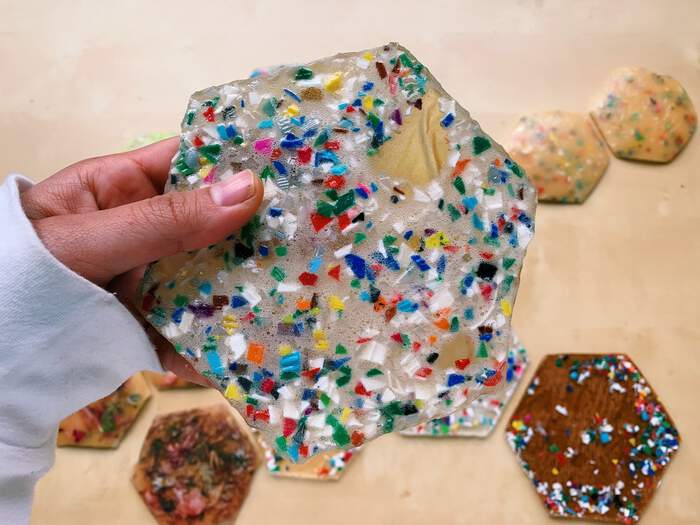
This was the final outcome of the epoxy tile:
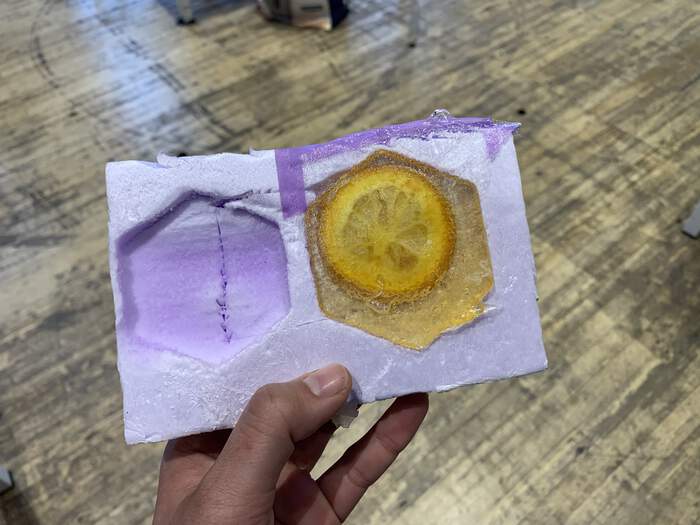
-
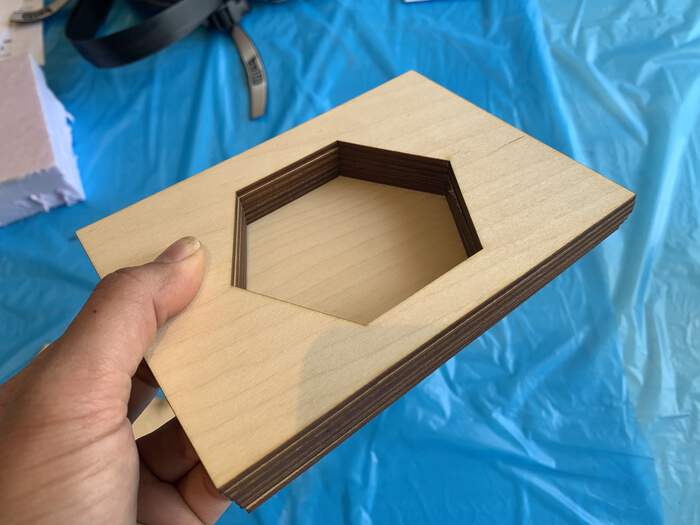
On Monday I milled the hexagon tile on the ShopBot, I first used double sided tape to attach foam board to sacrificial layer:
-
I then attached the foam board with some wooden sticks and screws:
-
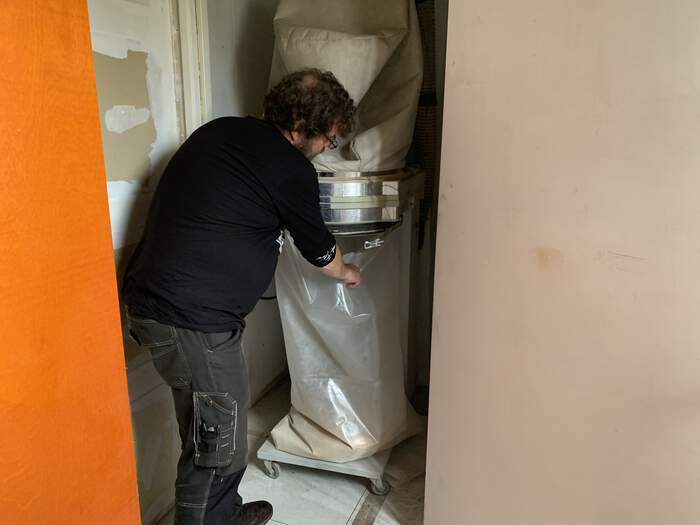
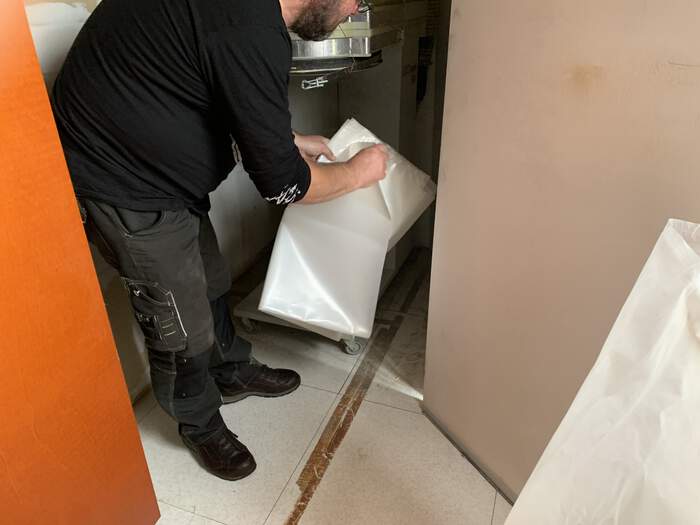
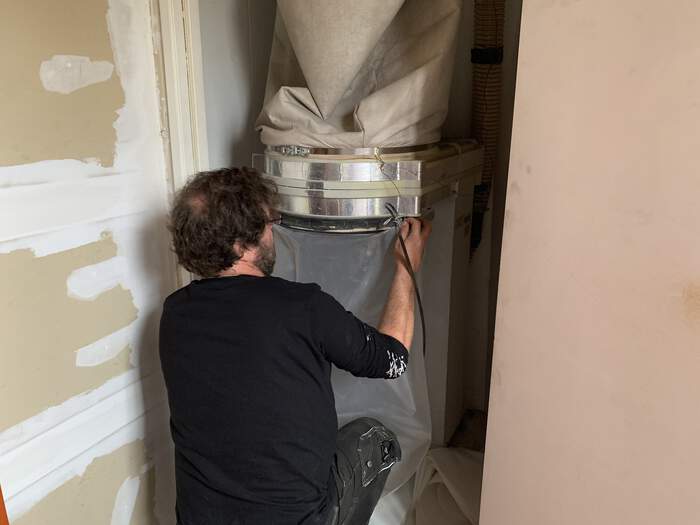
Henk showed me how to change the vacuum bag to collect foam pieces instead of woodchips:
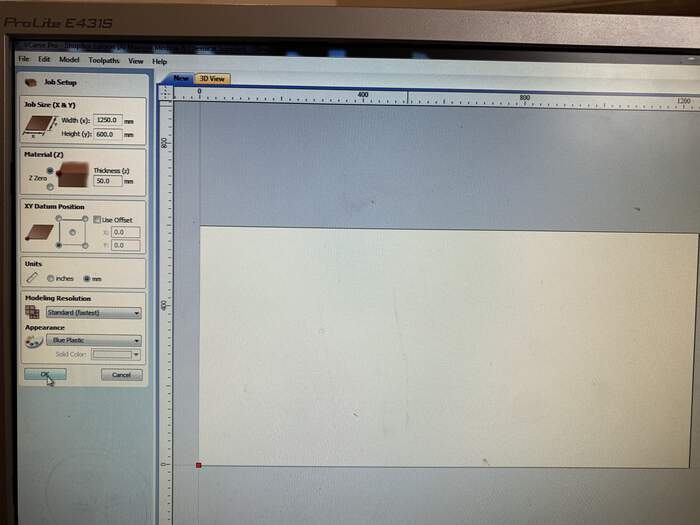
Opened my .STL file on VCarve Pro and adjusted the following settings:
-
The size of the foam piece:
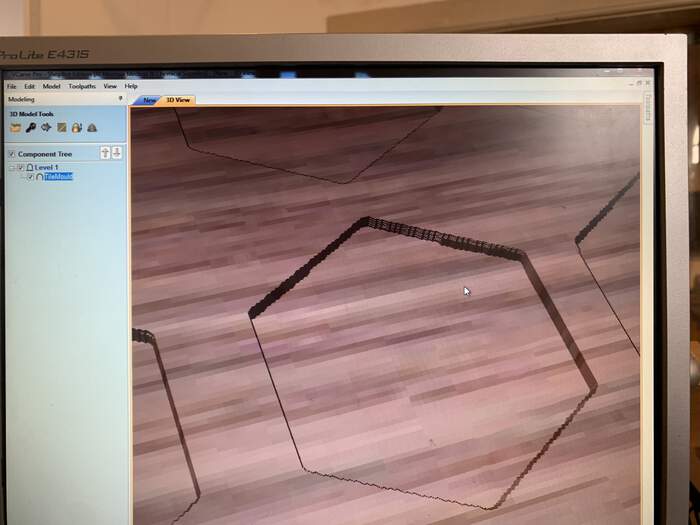
-
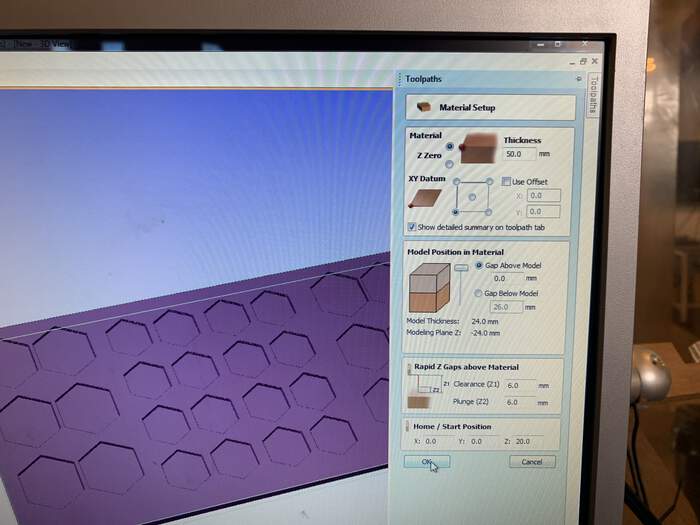
I import the 3D piece in VCarve Pro:

-
I then set up the material:
-
This is the milling bit I chose for the rough cut:
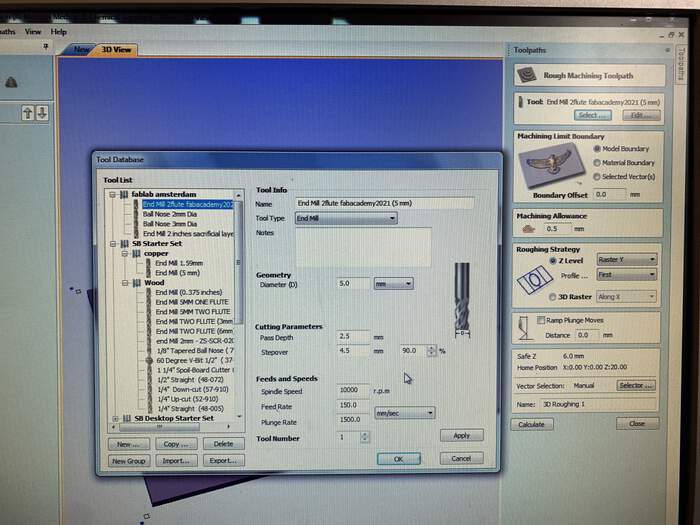
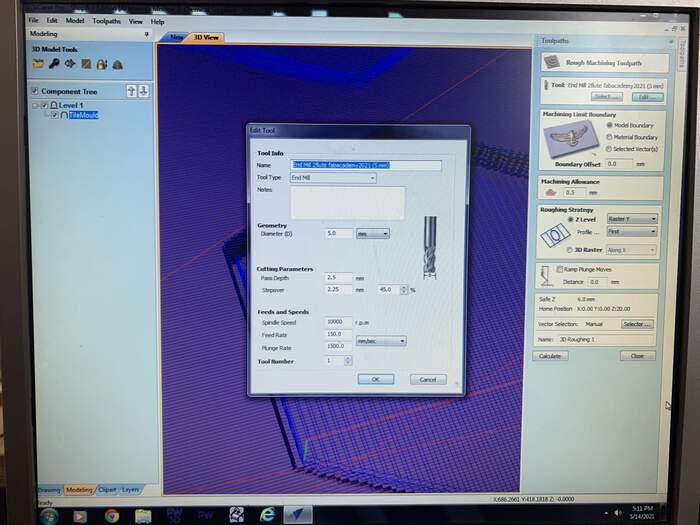
-
This is the milling bit I chose for the fine cut:

-
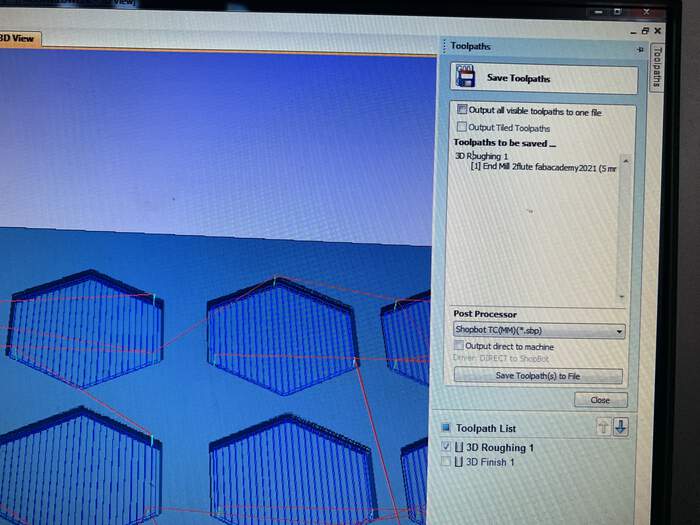
When I checked the toolpaths I saw that the fine cut took too much time:
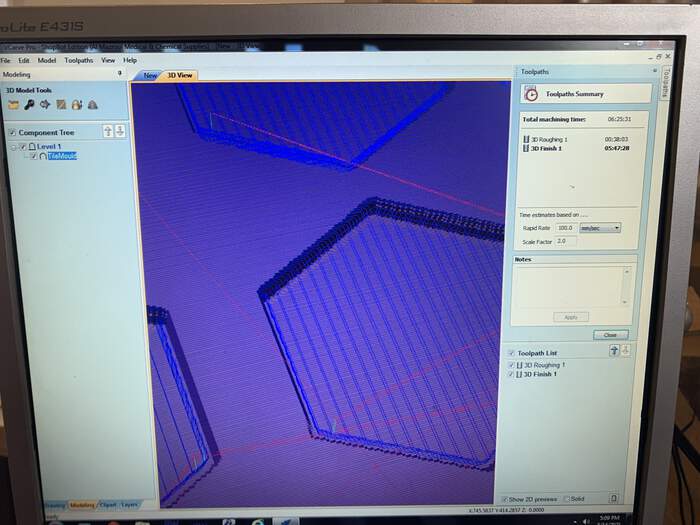
-
I then thought that maybe I should just do the rough cut (it just took one hour) and then sand the mould with the manual sanding tool. In the end I also adjusted the stepover to 80%(it goes quicker and I am going to sand it anyway).
-
I saved just the rough cut:
-
When I went to mill the shopbot it gave me an error, checking back my file I realised I had put a wrong parameter for the plunge rate!! I had an extra 0. DOUBLE CHECK EVERYTHING
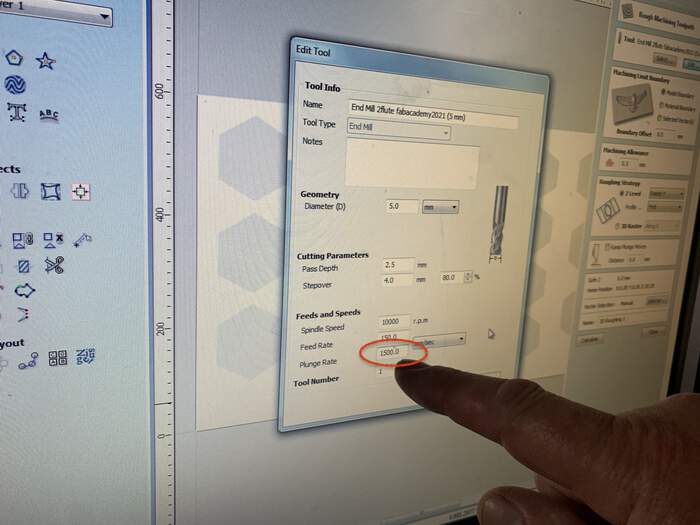
-
I milled the piece of foam with the Shopbot just making the rough cut:

-
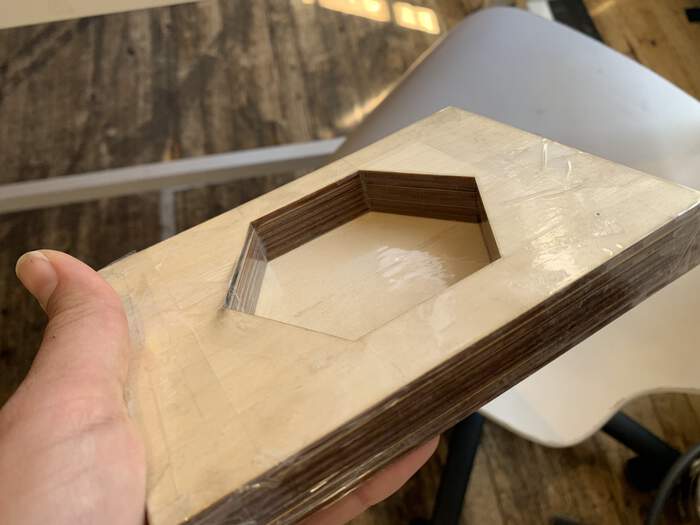
I then sanded the mould:
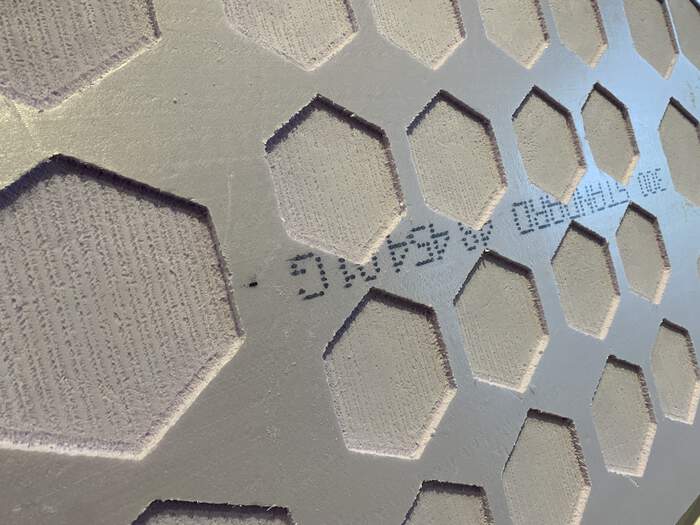
-
As I wanted to add micro-plastics to the design I contacted different precious plastic organisation in the netherlands to see if I could buy/ get some micro-plastics from them as they have a special machine called shredders which shred plastics into different small pieces. These are some of the companies I contacted: preciousplasticnl, polimeer, vanplestik, inezdezwart, broeii, communityplastics; they sell micro-plastics by kilo and sparklingplastic; which also sell micro-plastics by kilo. In the end I bought HDPE and PP from community plastics to test out different plastic material with epoxy.
Trying to make epoxy tiles
-
I would test out different ways to later remove the tile from the mould, these were as following:
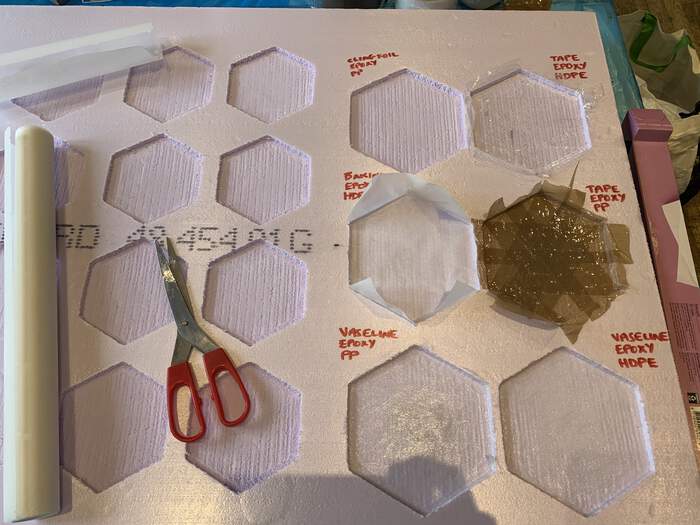
-
I mixed the epoxy mix with micro-plastics and pour it onto the mould doing different types as follows:
-
I tried to remove bubbles with a needle as the lighter did not really work. I did not use the torch afraid that the whole thing might burn out.

-
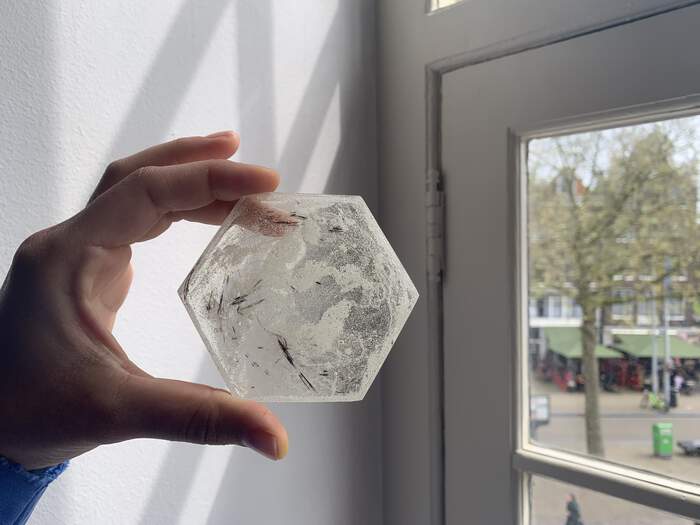
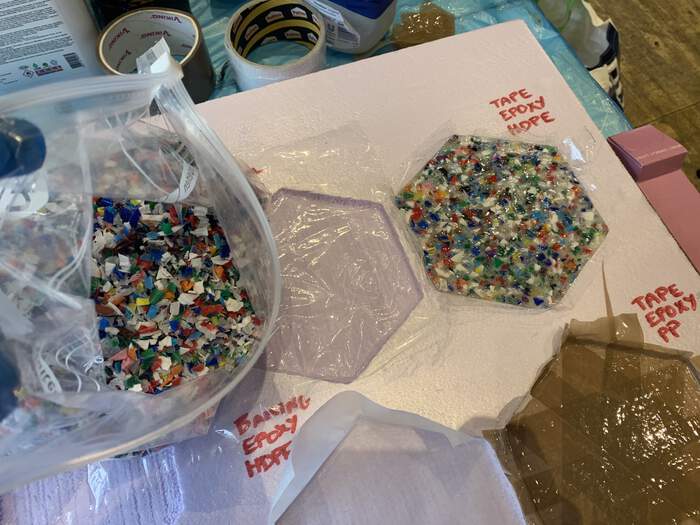
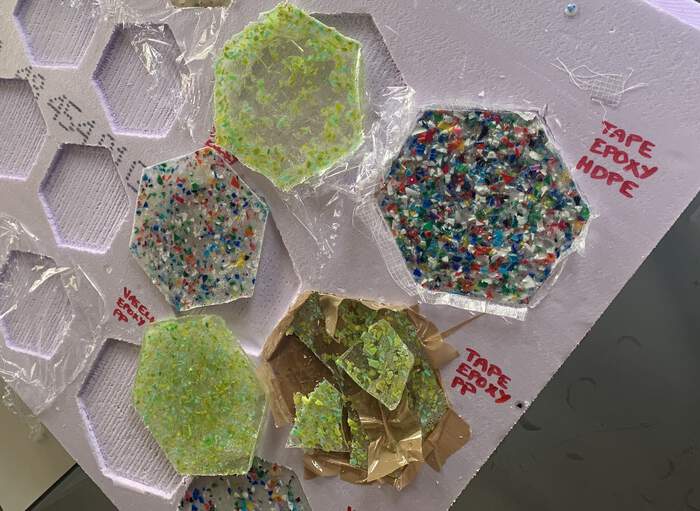
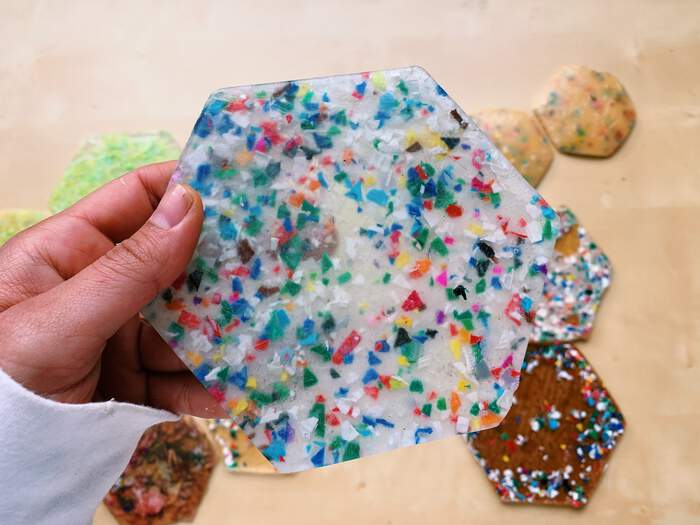
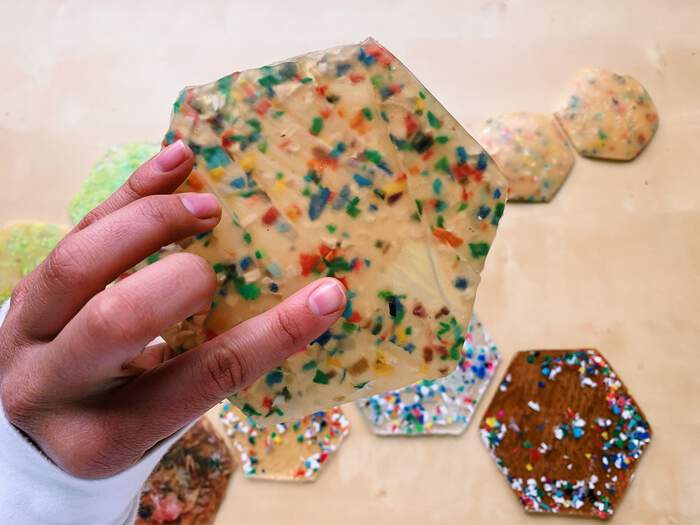
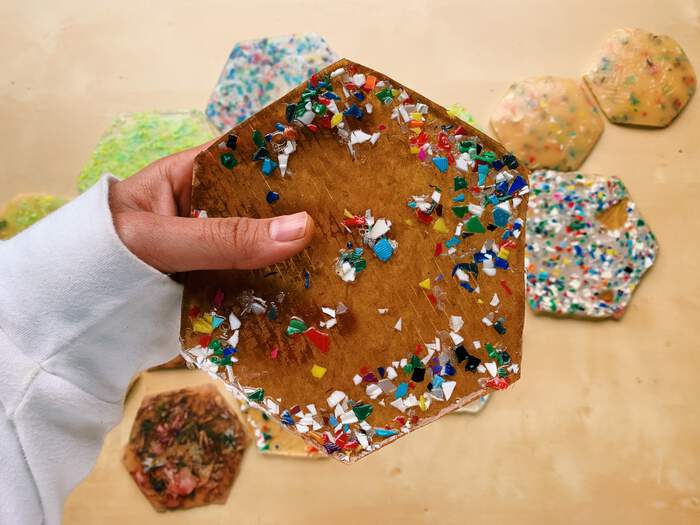
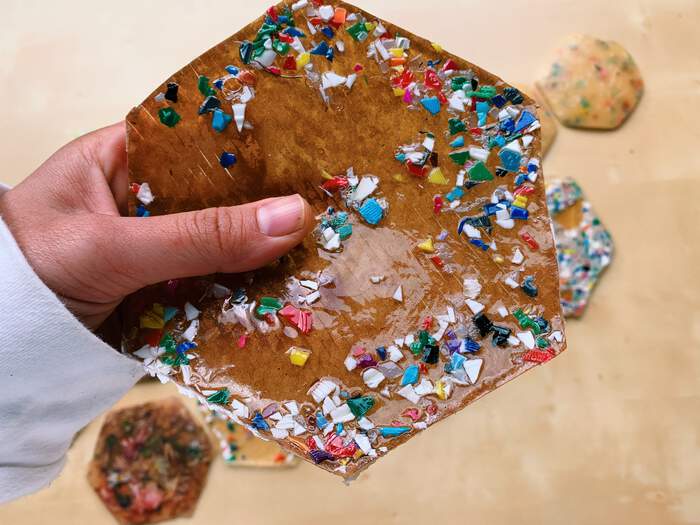
All the epoxy samples I tried:
-
Big tile: Epoxy + HDPE with tape
-
Big tile: Epoxy + PP with tape
-
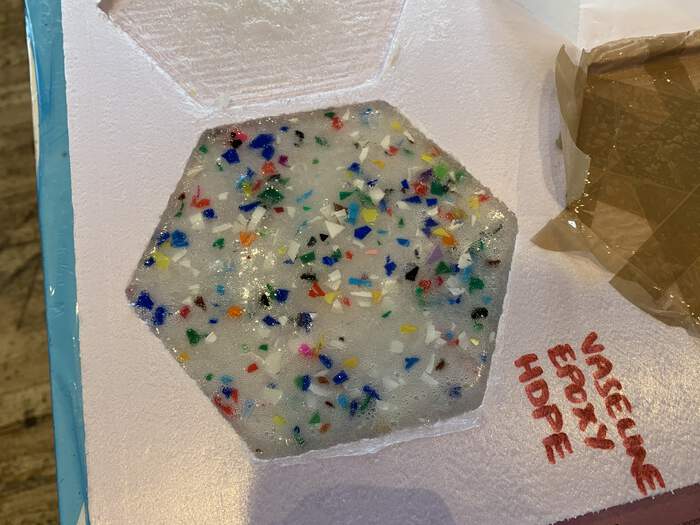
Big tile: Epoxy + HDPE with vaseline
-
Big tile: Epoxy + PP with vaseline
-
Big tile: Epoxy + HDPE with baking paper
-
Big tile: Epoxy + PP with baking paper
-
The next day:
-
My conclusions from the different realeasing methods are that cling foil comes out really easy but also does not really allow the epoxy to take the shape I wanted it to take, it also leaves stains.
-
1 broke when taking it out, it was the tape one. I don’t really recommend tape, both types were really hard to take out and I had to break the mould. The good thing about this is the shiny effect it leaves.
-
Vaseline outcome was okay, it also leaves some stains but they are not really that noticeable. The thing I did not like about vaseline is that it is REALLY messy. It takes ages to clean out.
-
Baking paper leaves a mate effect and it is the easiest to take out without breaking the mould.
Each tile has 70ml of epoxy.
Looking for epoxy alternatives:
I also intend to make some alternatives to epoxy as I want the design to be as sustainable as possible as I am reusing plastic pieces within this material it is a bit contradictory to use another harmful material(epoxy) within the design. From this article from the UVA: “Today’s resins are all based on petrochemical sources. Moreover, their production involves highly toxic ingredients, such as epichlorohydrin, bisphenol-A, melamine, formaldehyde, and phosgene. Such resins are not biodegradable, and cannot be burned safely, because their combustion releases many toxic components.”
I found this project on Instructables which shows how to make many different types of bioplastics.
The first one that looks that can fit my design is the tapioca one:
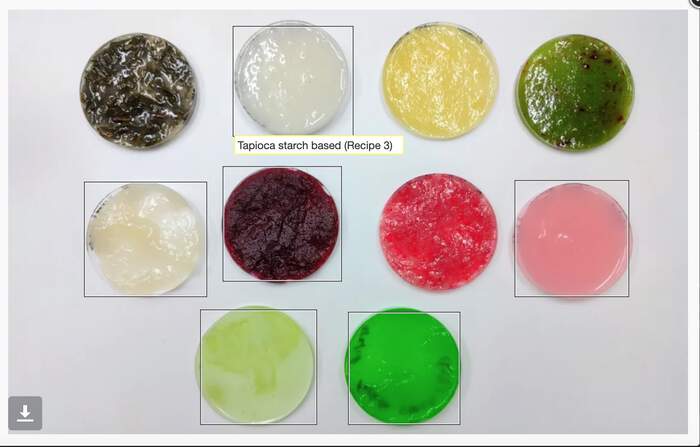
Recipe 3:
50mL Water
5mL Vinegar
5g Glycerol
6g Tapioca starch
The other one that also looks like it could fit (not really sure about the green colour but might look good) is the gelatine based one:
Recipe:

240 mL cold water
48g Gelatin (you can get the jelly powder from supermarket)
12g Glycerol (you can get it from pharmacy)
From previous weeks I loved the work from Lorena in her moulding and casting week so I contacted her to see if she had a bio-resin recipe I could use for this project. She kindly shared her findings with me (it is in Spanish), she shared with me a rigid bio-resin and a semi-rigid bio-resin. I will be using the rigid bio-resin recipe:
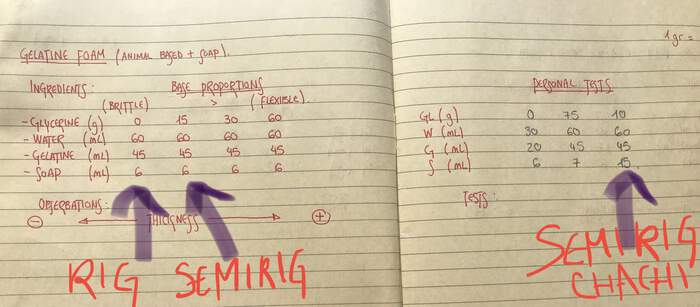
Esta es la receta son las recetas. Para la bioresina rigida los ingredientes son: agua, gelatina granulada (en amazon la podras encontrar mas facilmente) y jabon liquido (preferentemente liquido e incoloro (aunque si lo coges con un color, teñirá la bioresina del color del jabon. Eso depende del efecto que quieras conseguir))

Si quieres que la bioresina sea mas un poco mas flexible, es cuestion de ir echandole pequeñas proporciones de glicerina
She then shared the steps to create the gelatine:
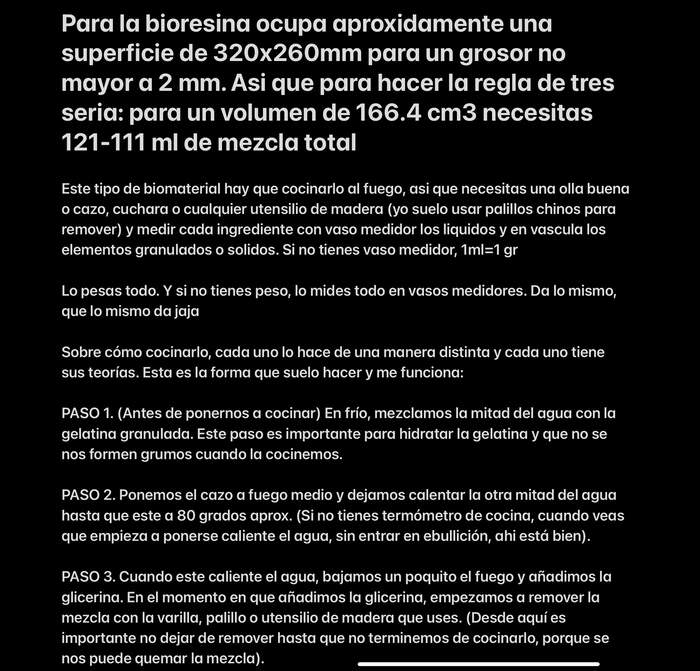
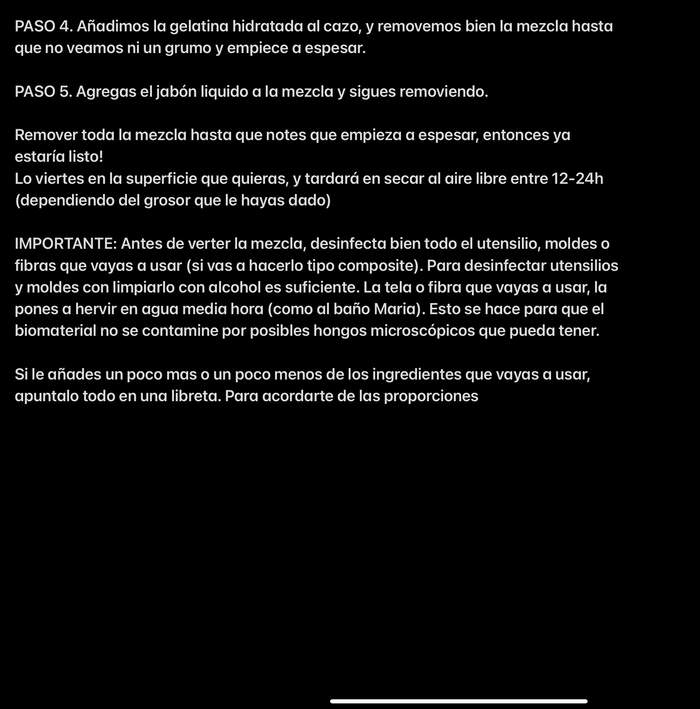
Estos son los pasos para medir las proporciones y como cocinar la receta. Este caso es para la receta semirigida. Pero si la quieres rigida, el paso 3 te lo saltas tranquilamente. :blush:

Nunca he probado a mezclar plastico con bioplastico. Pero puede ser muy interesante el resultado! Me vas diciendo. Si tienes alguna duda, no dudes en pregúntame :wink:. Y perdon por contestarme tan tarde :sweat_smile:, me llegan tarde las notificaciones de Matermost
Trying to make bio-resin tiles
-
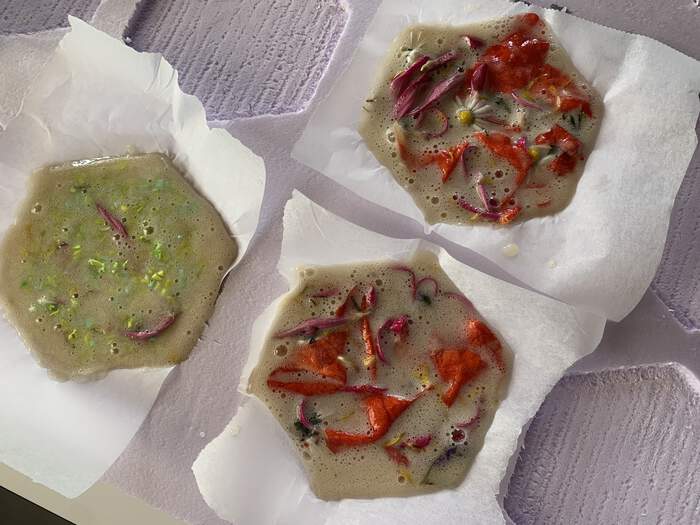
Today I will try out some recipes (one from Lorena, one Michelle showed me and one from the Textile Lab from den Waag). I will also incorporate flowers to the design:
-
The first recipe I did consisted of:
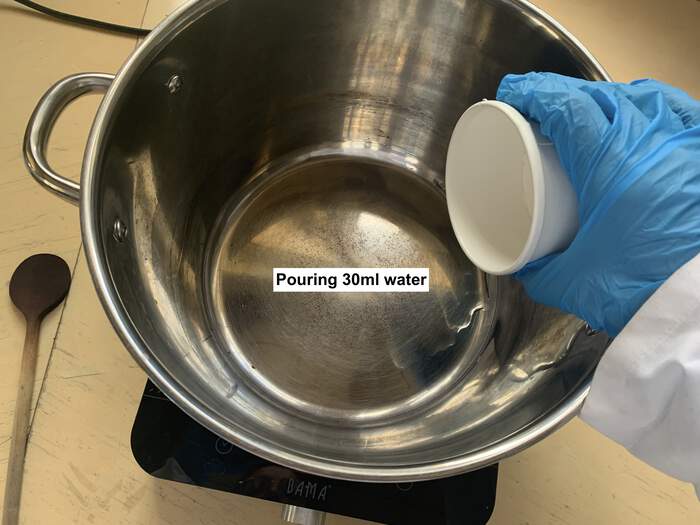
60ml water
45 ml granulated gelatine
6ml soap(without colour or it will dye the bio-resin)
-
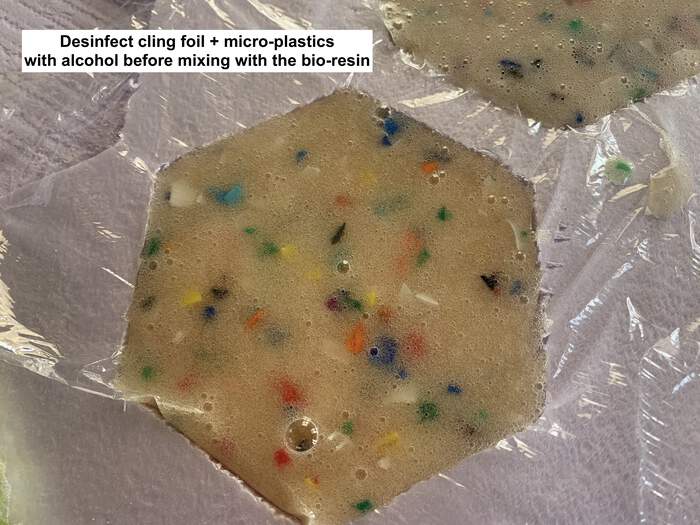
I did this amount x2 which allowed me to fill two of the small hexagon tiles with cling foil:
-
I will need:
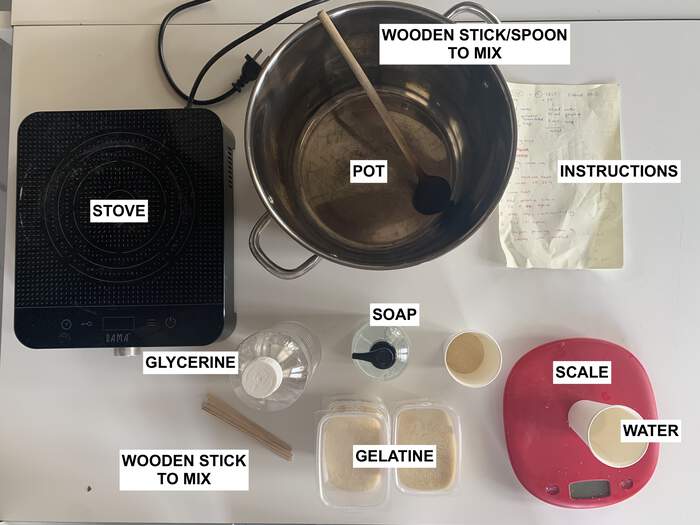
-
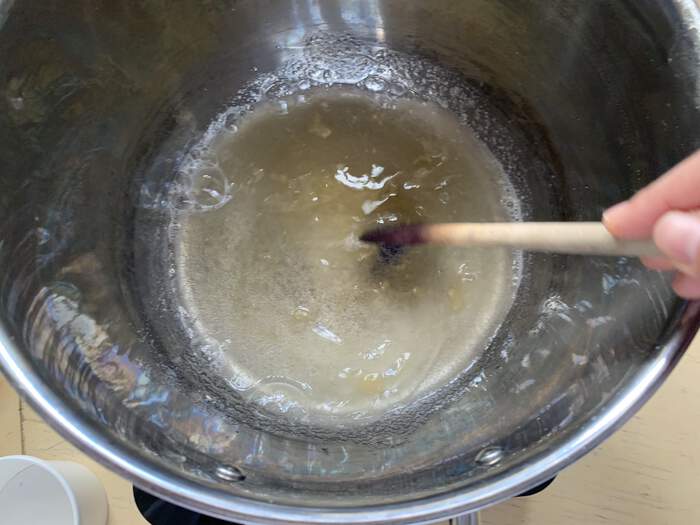
We first mix 1/2 of the water with the gelatine:
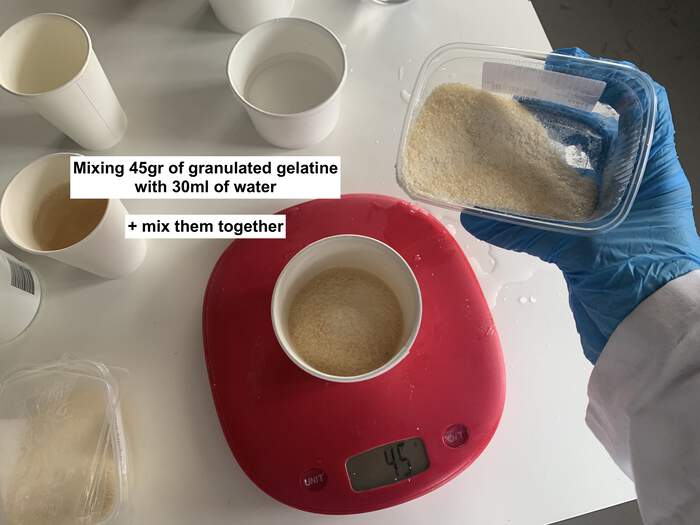
-
And also measure 6ml of soap to leave it prepared:
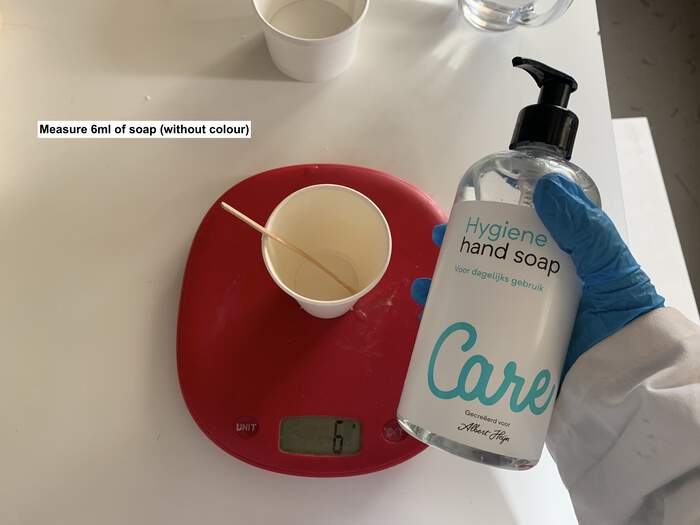
-
Remember to clean everything you are going to pour into or mix with with alcohol to remove microscopic fungi.
-
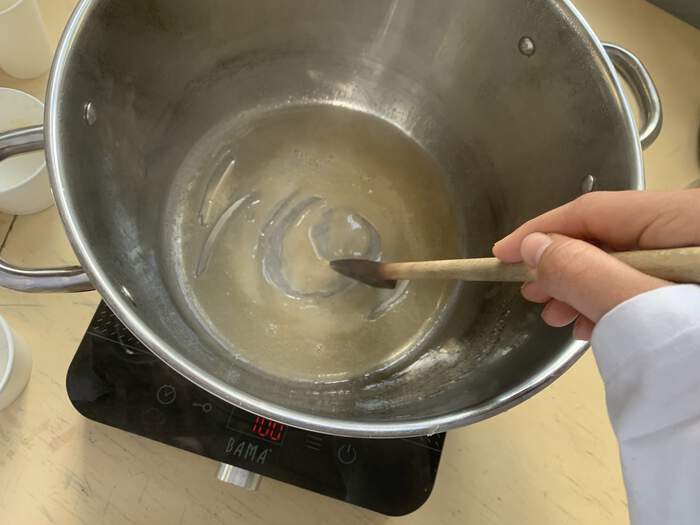
We then pour the other half of the water in the pot till it reaches 80 degrees celsius (when you see some heat forming)
-
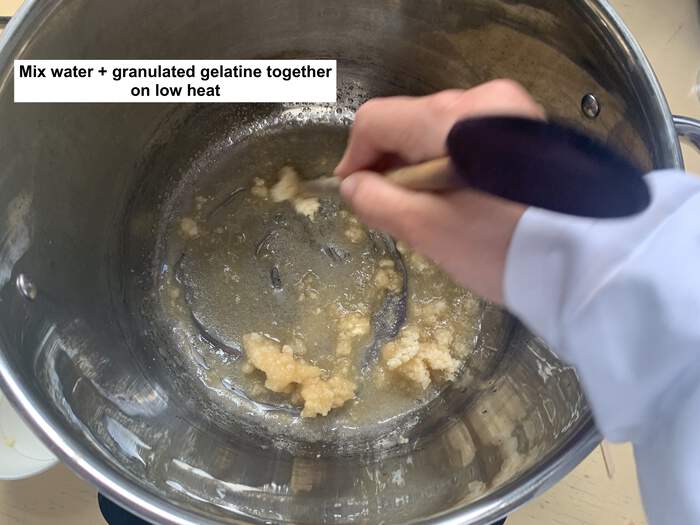
After this we will mix the granulated gelatine with water with the water and mix it till it thickens at low heat:
-
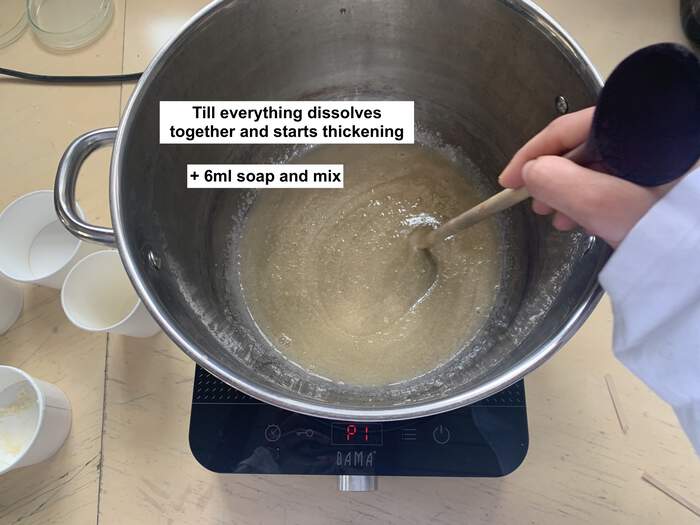
We then add the soap and keep mixing slowly (creates less bubbles)
-
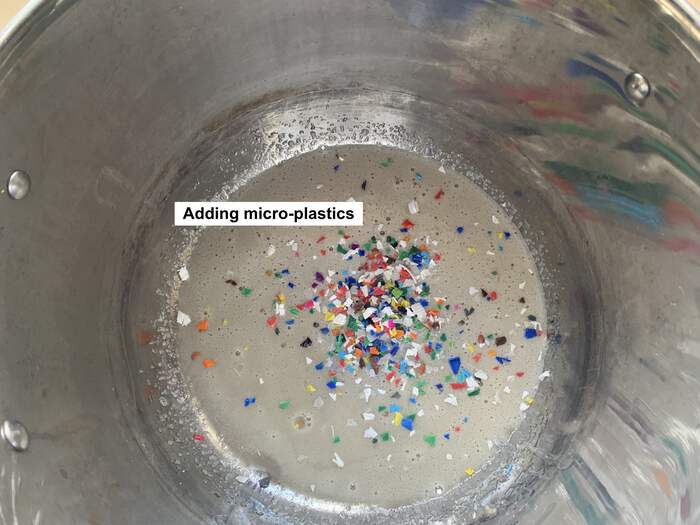
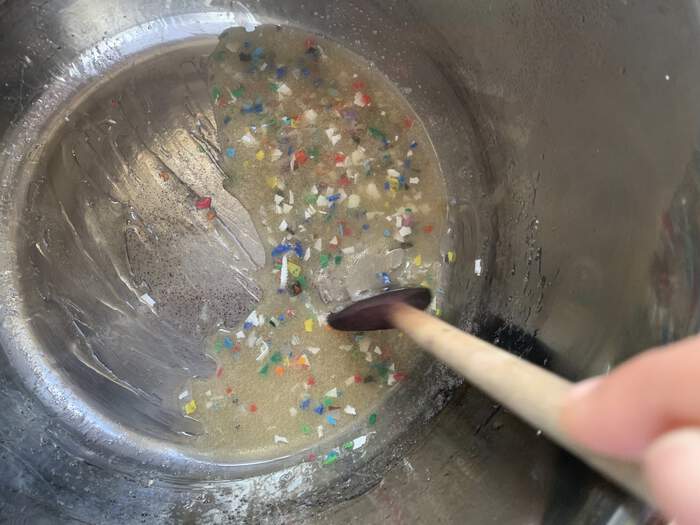
Add microplastics and mix with no heat:
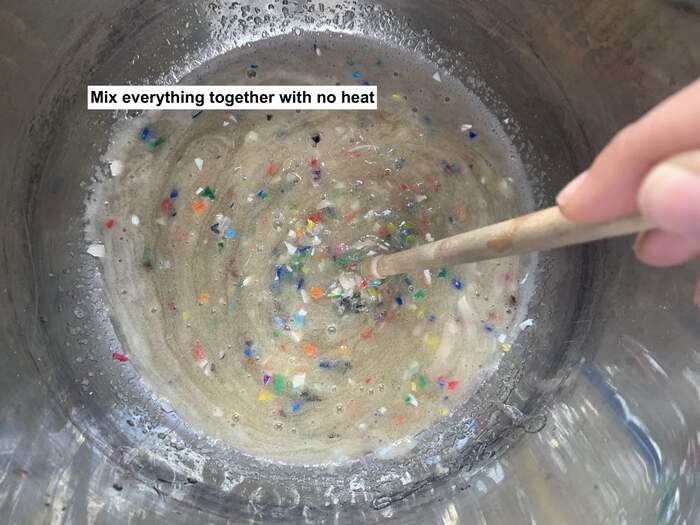
-
Pour it on baking paper:
-
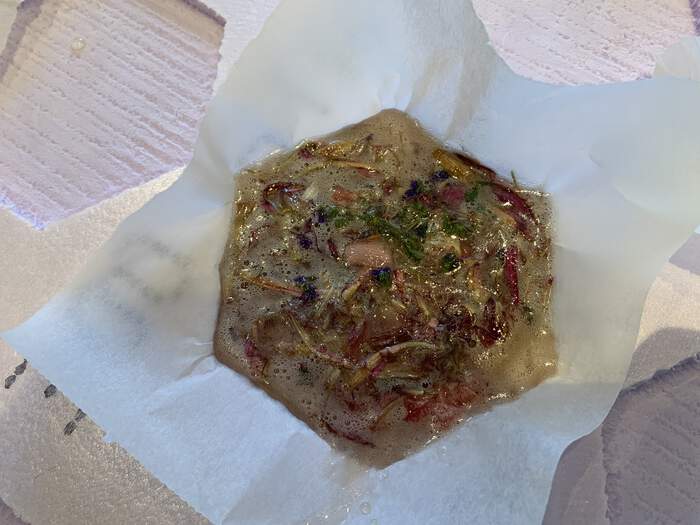
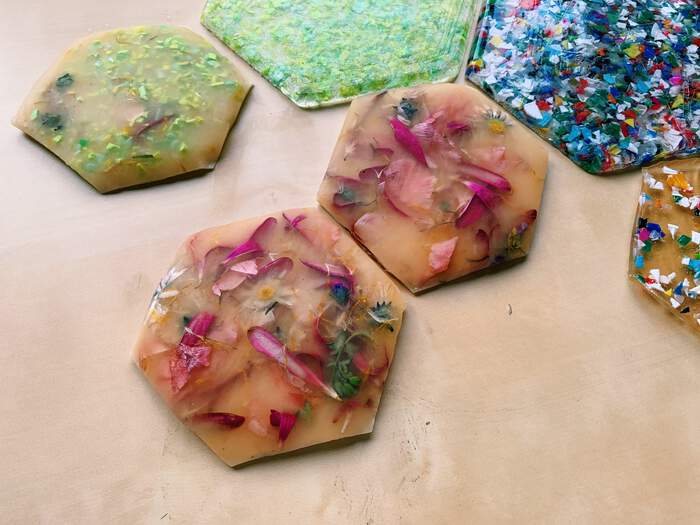
I then did another one but with flowers:
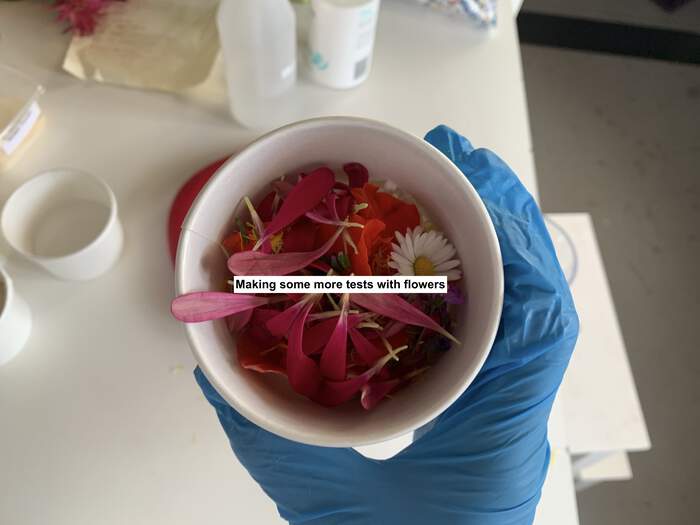
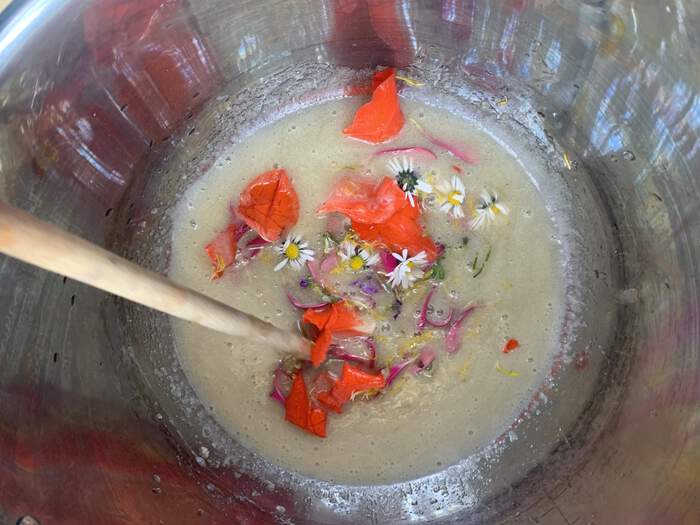
-
And also one with flowers and micro-plastics:
-
I then used a recipe Michelle showed me from her internship which was:
48 gr gelatine
8gr glycerine
240ml water
-
This was a recipe for bio-resin, I had understood that the glycerine made it quite flexible so I was not sure about the outcome of this but wanted to try anyway. You first mix all the ingredients at 60 degrees celsius:
-
Then you put the heat to 100 degrees, don’t stop mixing, starts to boil and keep stiring for 5-10 mins till it thickens. Stir slowly for less bubbles!!!!
-
I then found this recipe in the textile lab and decided to also try it out:
3gr glycerine
12gr gelatine powder
60ml water
Final outcome and conclusions:
-
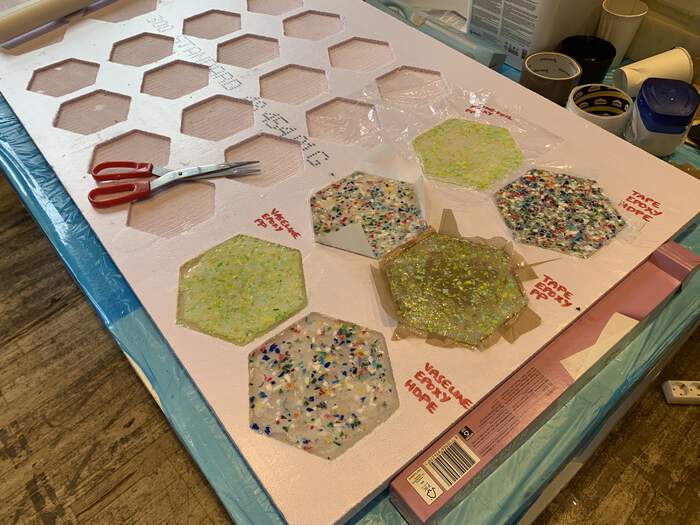
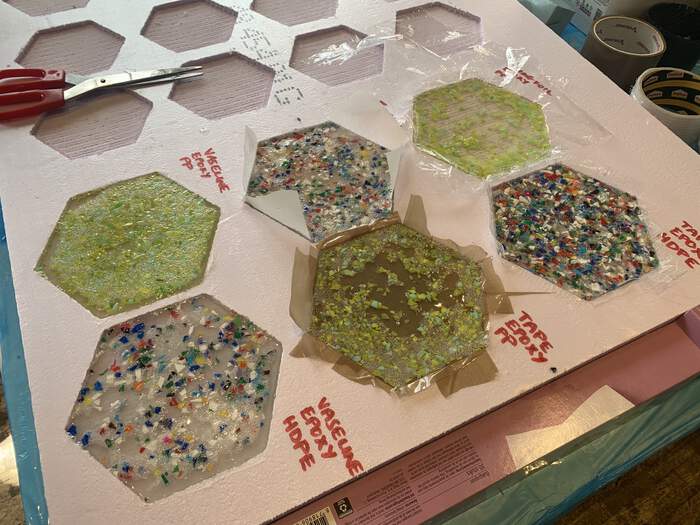
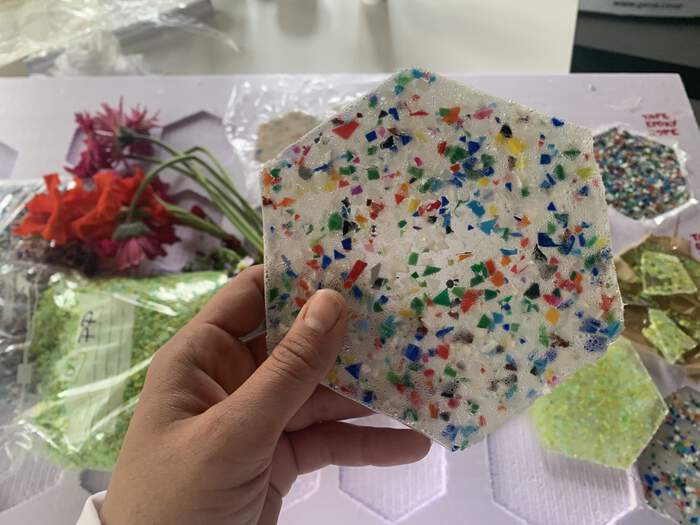
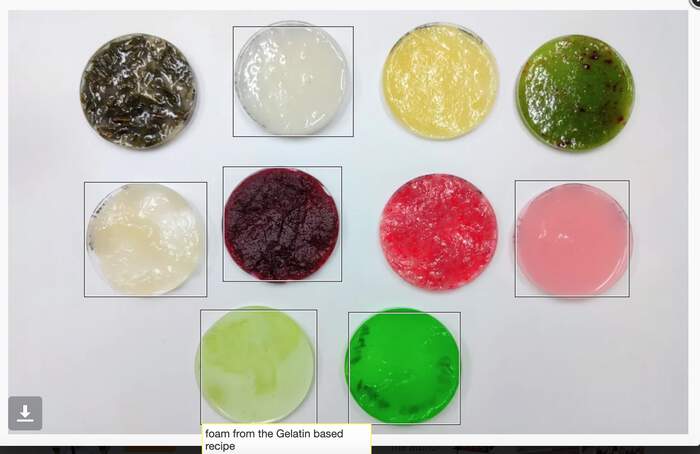
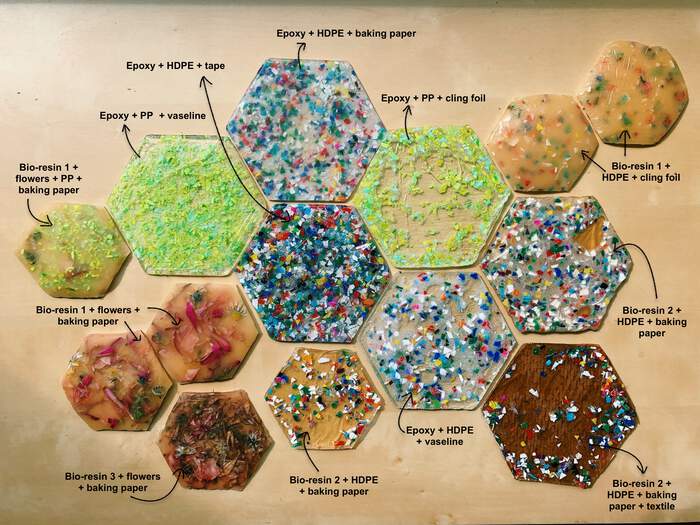
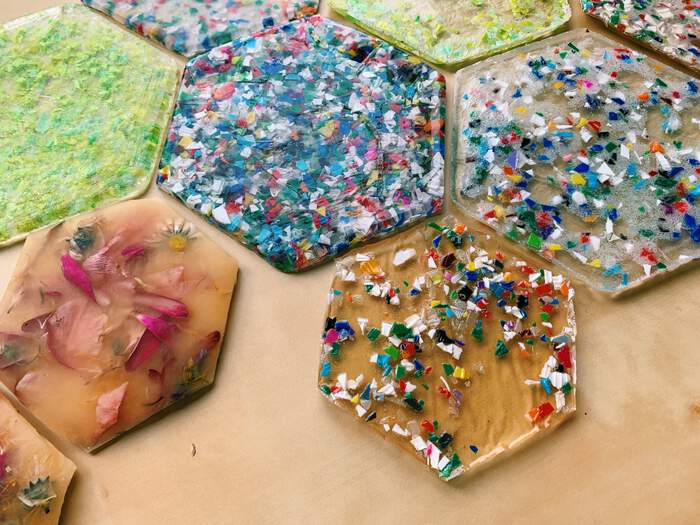
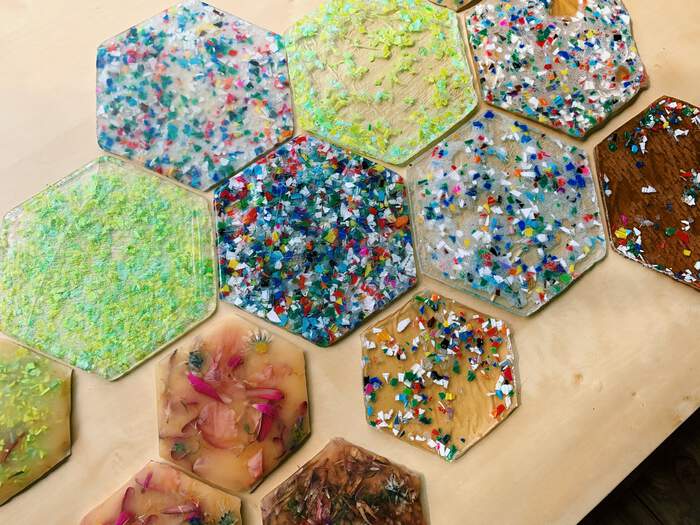
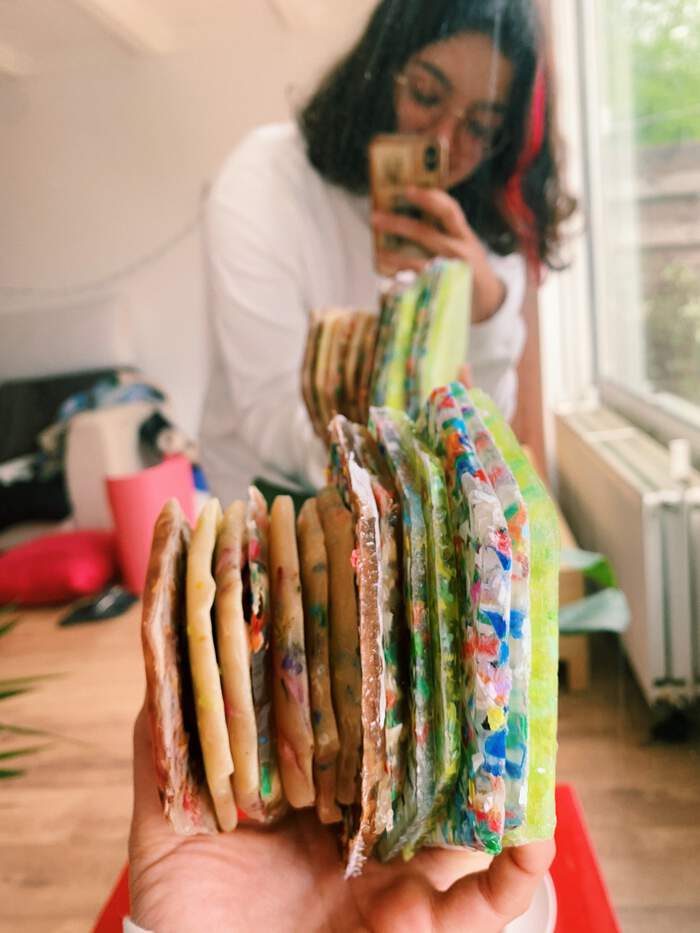
These are the final outcomes of all the tiles I tried out:
-
Big tile: Epoxy + HDPE with tape: it leaves the stains from the tape
-
Big tile: Epoxy + PP with tape: it broke!
-
Big tile: Epoxy + HDPE with vaseline: vaseline is so messy, I can’t really take it out. It also leaves stains.
-
Big tile: Epoxy + PP with vaseline: vaseline is so messy, I can’t really take it out. It also leaves stains.
-
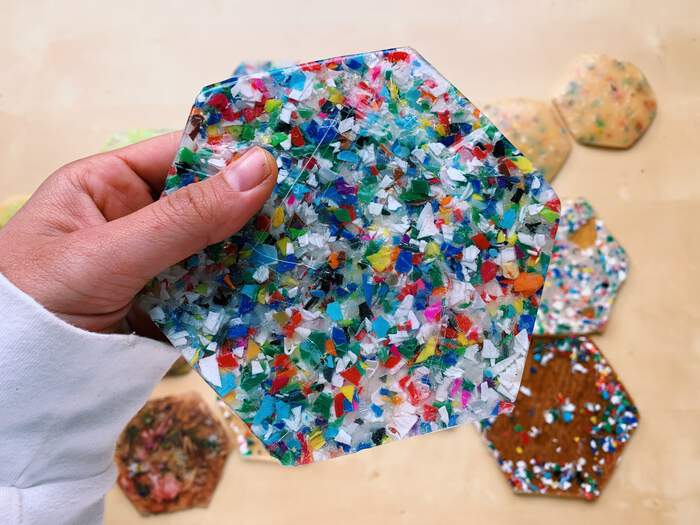
Big tile: Epoxy + HDPE with baking paper: leaves a mate effect on one side but I really like this releasing material
-
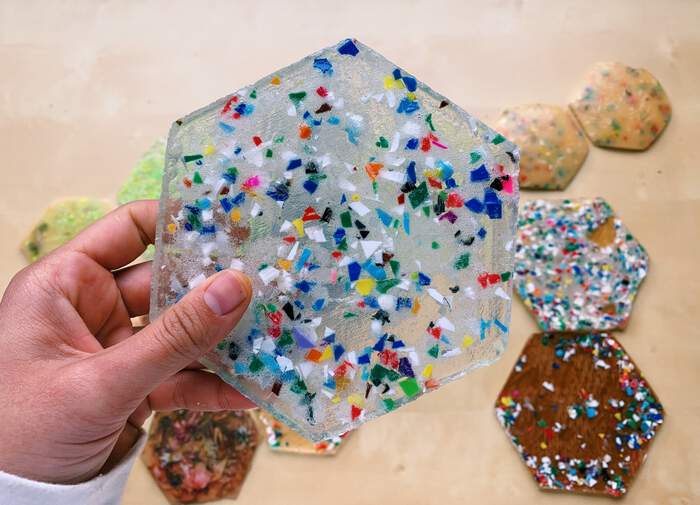
Big tile: Epoxy + PP with cling foil: this comes out easy but leaves horrible stains and does not really make the proper shape.
Best option for me using epoxy: Epoxy + HDPE + baking paper
-
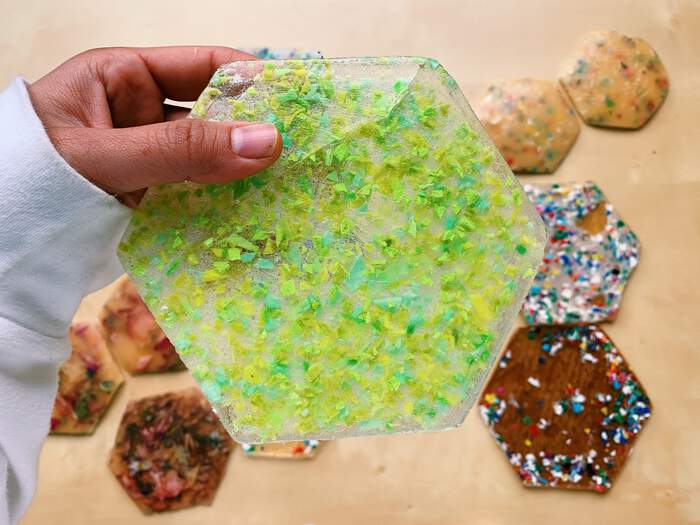
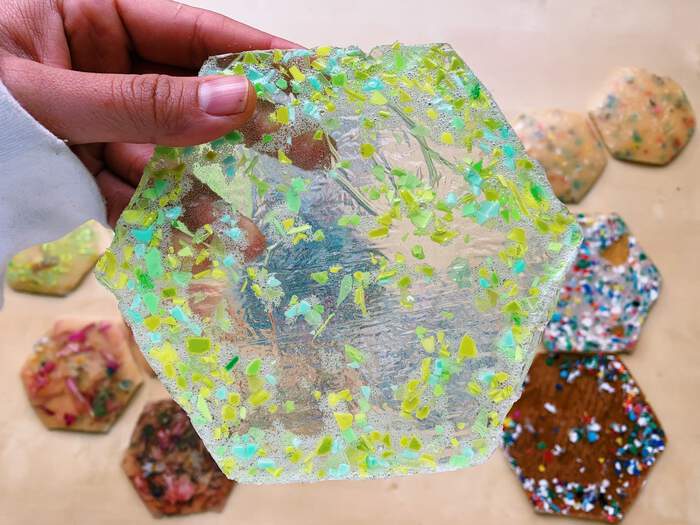
Small tile: Bio-resin 1 from Lorena + HDPE wtih cling foil: it gives out a yellowish colour (not the transparent outcome I was expecting) and also bio-resin shrinks which I had not thought about.
-
Small tile: Bio-resin 1 from Lorena + HDPE wtih cling foil it gives out a yellowish colour (not the transparent outcome I was expecting)
-
Small tile: Bio-resin 1 from Lorena PP + flowers wtih baking paper: it came out ok, quite flexible and also shrinked. The colour is not as transparent as I wanted it to be.
-
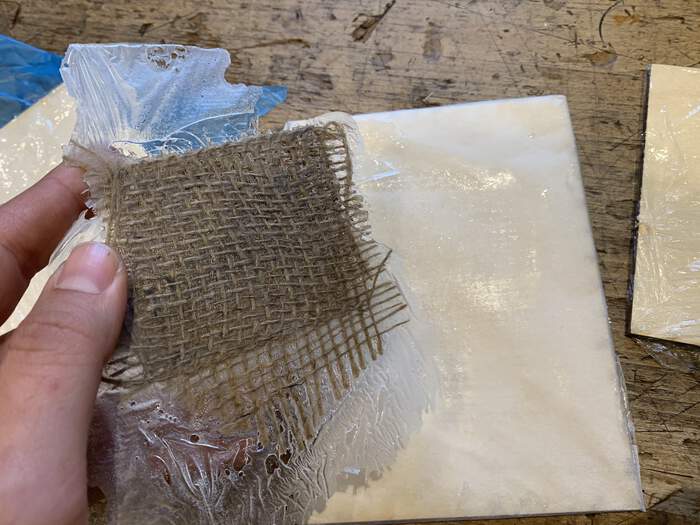
Big tile: Bio-resin 2 from Michelle + HDPE wtih baking paper: works out good, it still shrinks, also quite flexible but it is the sturdiest I have done.
-
Big tile: Bio-resin 2 from Michelle + HDPE with baking paper and textile: did not attach to the textile properly, I can’t pull out the textile from the bio-resin. It is also quite flexible (more than the one that has micro-plastics which actually has a more sturdy structure).
-
Small tile: Bio-resin 2 from Michelle + HDPE wtih baking paper: same effect as the big tile, maybe a bit more flexible because it has more micro-plastics?
-
Small tile: Bio-resin 3 from Textile Lab + flowers + baking paper: quite flexible, got the colours from the flowers because they weren’t dry.
Best option for me using bio-resin: Bio-resin 2 + HDPE (out quite a lot to make it more sturdy) + baking paper
Also I have been thinking will this bio-resin work as tiles? Or will it melt?
Henk also proposed to create a huge batch and then cut it out with the laser cutter to avoid the shrinkage on the sides of the tiles? bE CAREFUL when cutting materials to not create a toxic, dangerous mix silicon spray to release easily microplastics dont reallycreate a composite materials because of the gaps in between
After regional and global comments and a few days observing the tiles conclusion:
-
On the regional meeting they proposed that I could use silicone spray which works very good to remove the tiles from the mould.
-
They also proponsed that I could use silicone moulds to better release the tiles instead of sturdy ones.
-
Neil also adviced to look into Entropy Resins. This company of epoxy is more biobased and harms less the planet(but does not mean it does not have harmful materials within it I guess). It is the best option for biobased epoxy I have found, still not sure if it convinces me 100%. I have sent them an email to ask for advice for my final project.
-
He also advised me to look into materiom to look for resin recipes. I had already looked into this previously but had not really found the recipe I was looking for. Besides, I have been observing my resin tiles the last week and they have become mouldy!!! Maybe I did not clean the microplastics properly with alcohol? Also some have become really hard but also bent. I don’t think I can use this for my final project tiles. I also asked Michelle for the material properties which I have to read.
-
I also want to know if it is possible to dissolve the bioresin someway to get the microplastics out of it and not throw it like this to the bin.
-
After some weeks I also realised the bio-resin became hard as rock!!! Which was really impressive.
Files to this week’s assignments:
- This is the .stl file for the tile moulds | stlmould