Week 16
Wildcard week - Composite
Group assignment Wildcard week
Individual assignment Wildcard week
Group assignment
 - use different materials in combination with composite and find out how they react.
 - find out what material to use.
 - find a good release material
 - get more creative with material options
We created lots of samples as a group mostly to figure out what works best for the material around the epoxy to release.
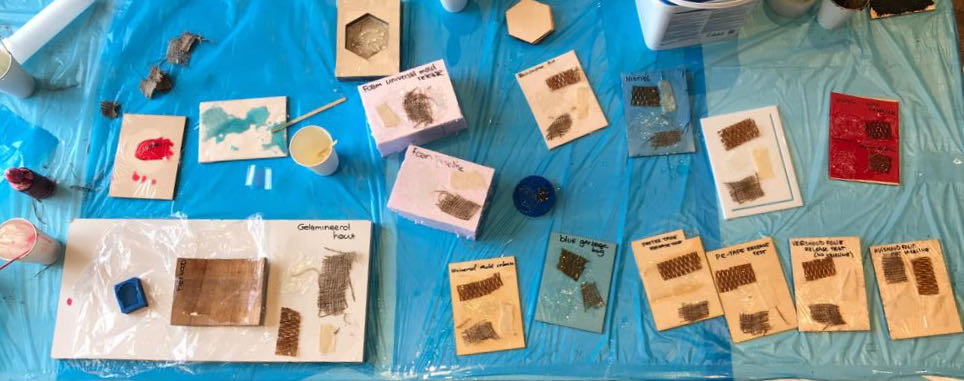
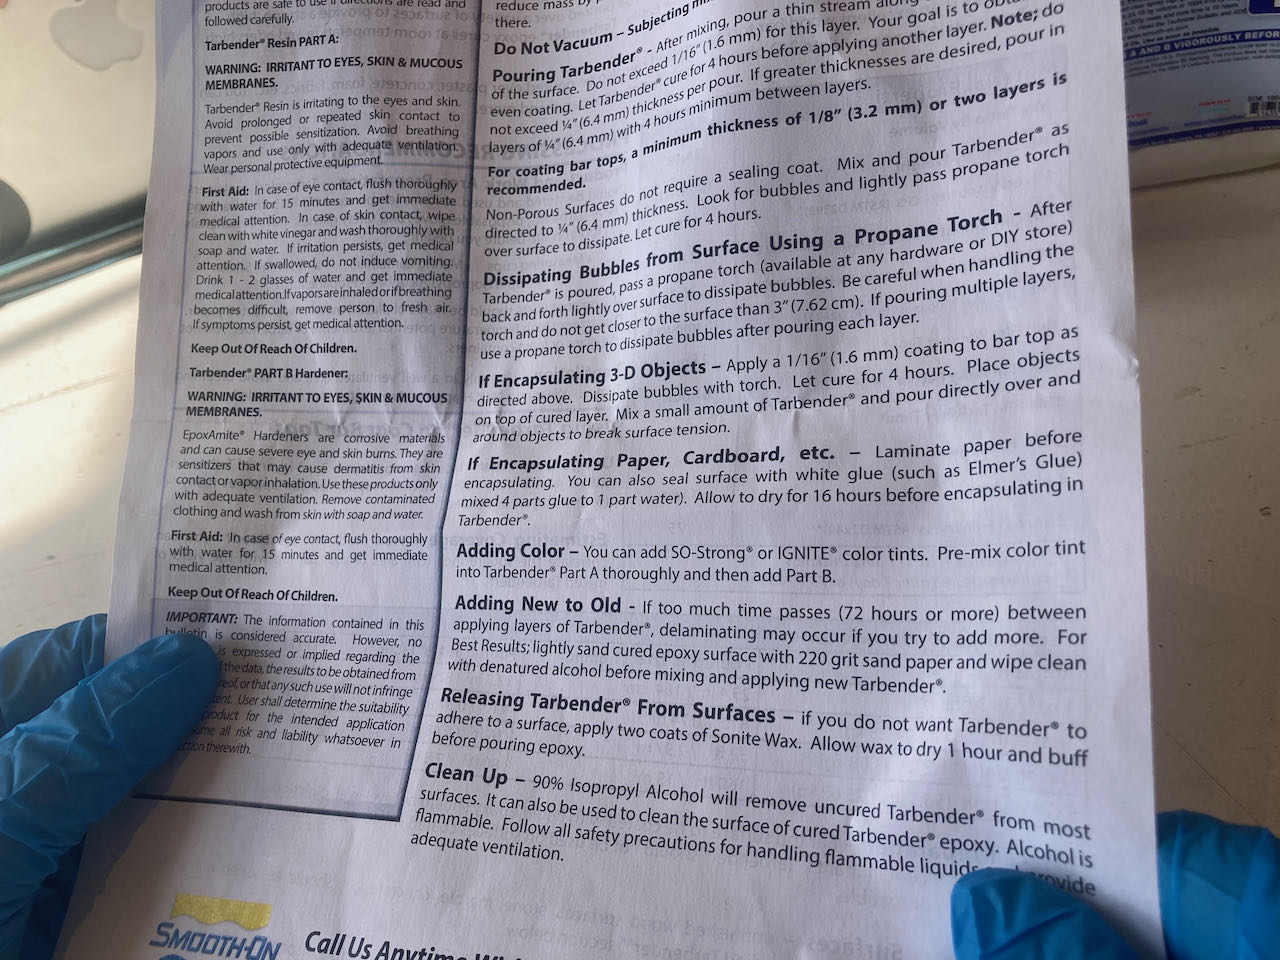
Lucia was so sweet to read the instructions out loud to us so we could talk about it as we prepared.
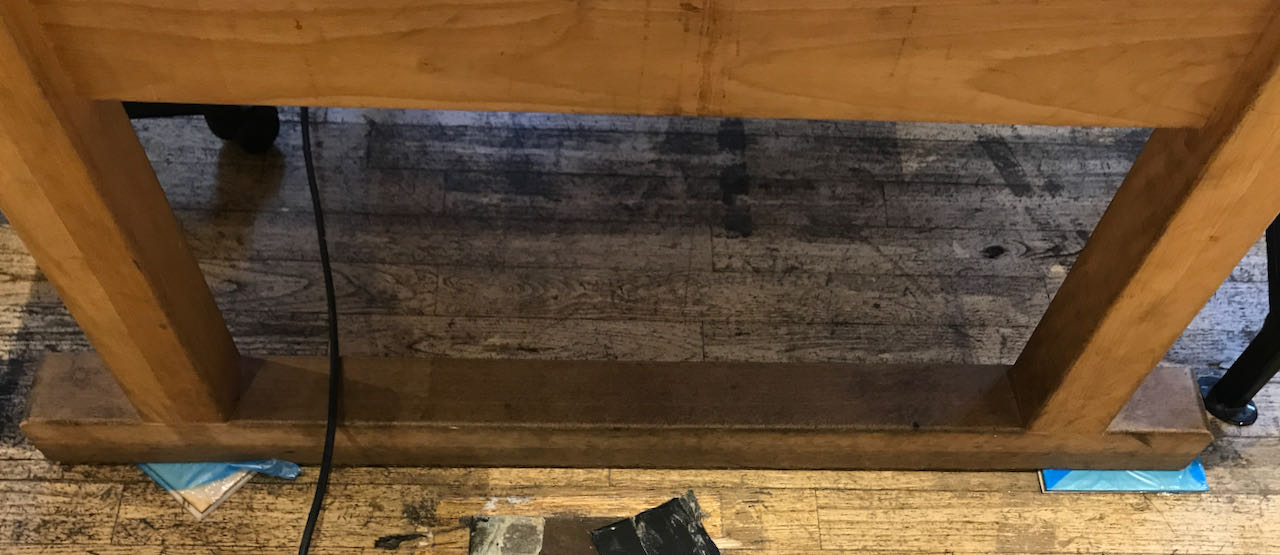
The best pressfit in the waag ended up being a very old table :)
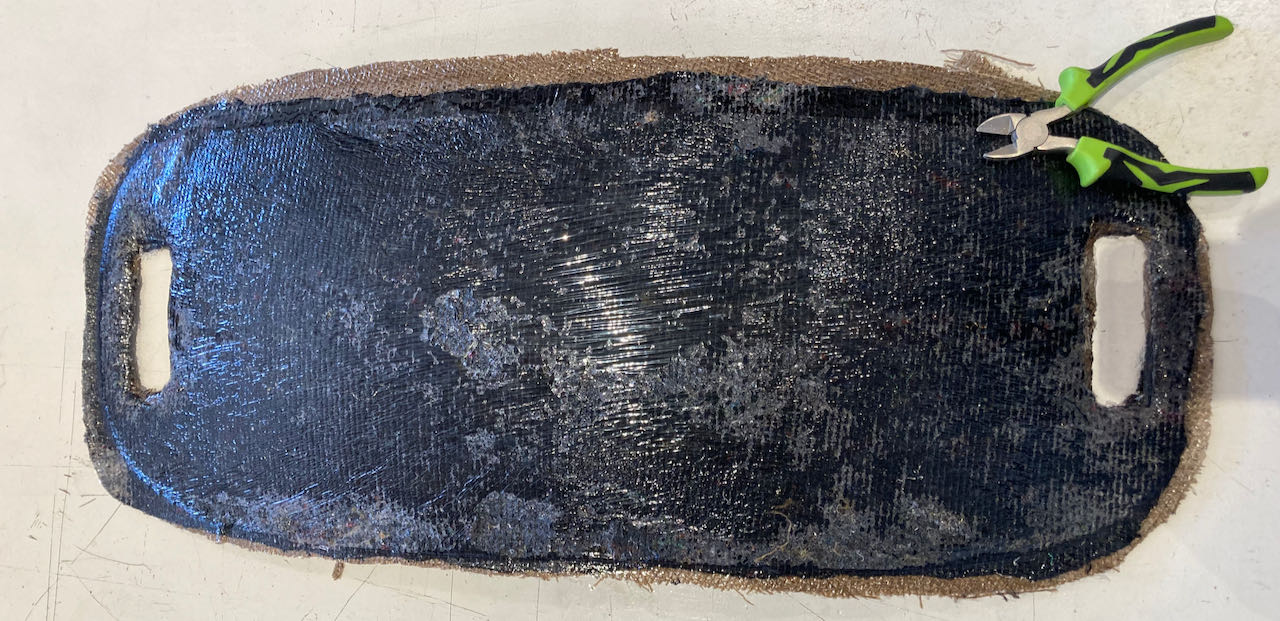
To my suprise epoxy is only seethrough when you use the right material around it, which baking paper it turns milky.
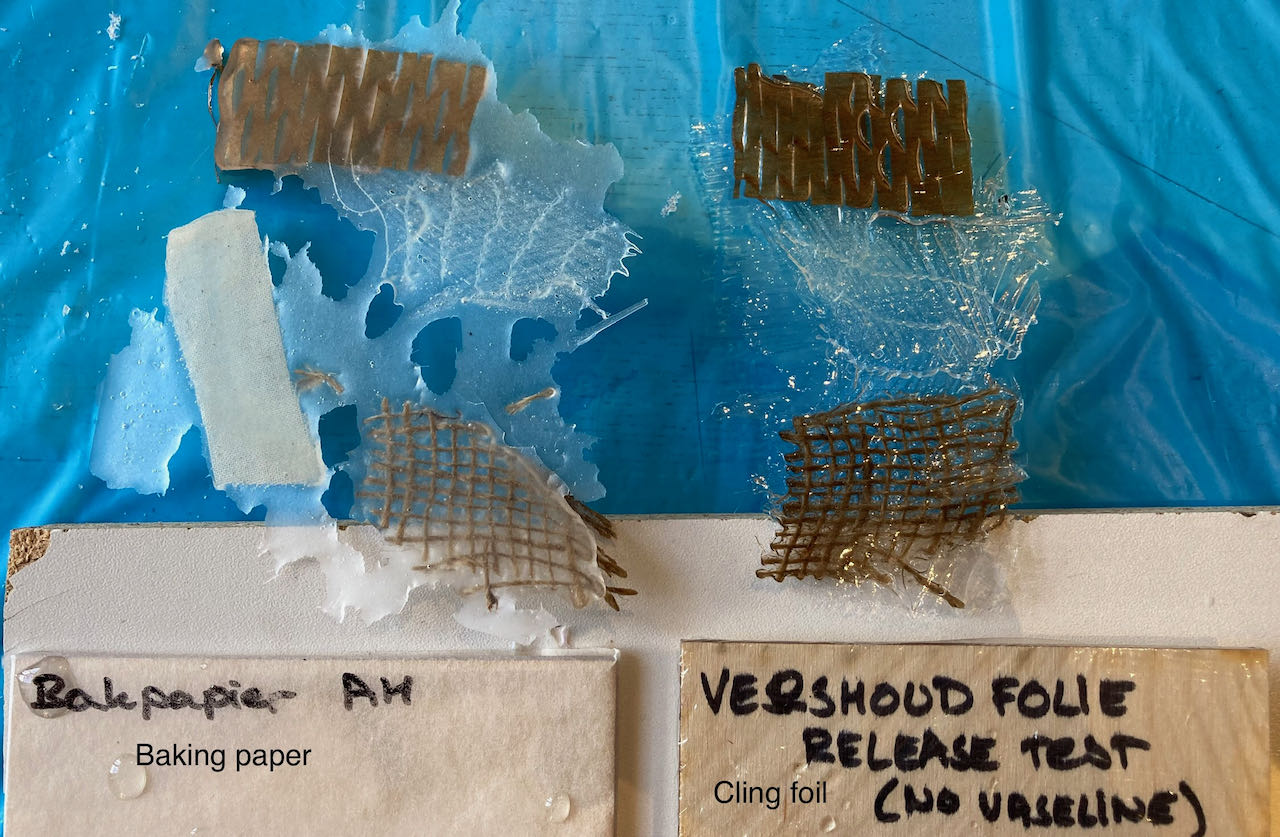
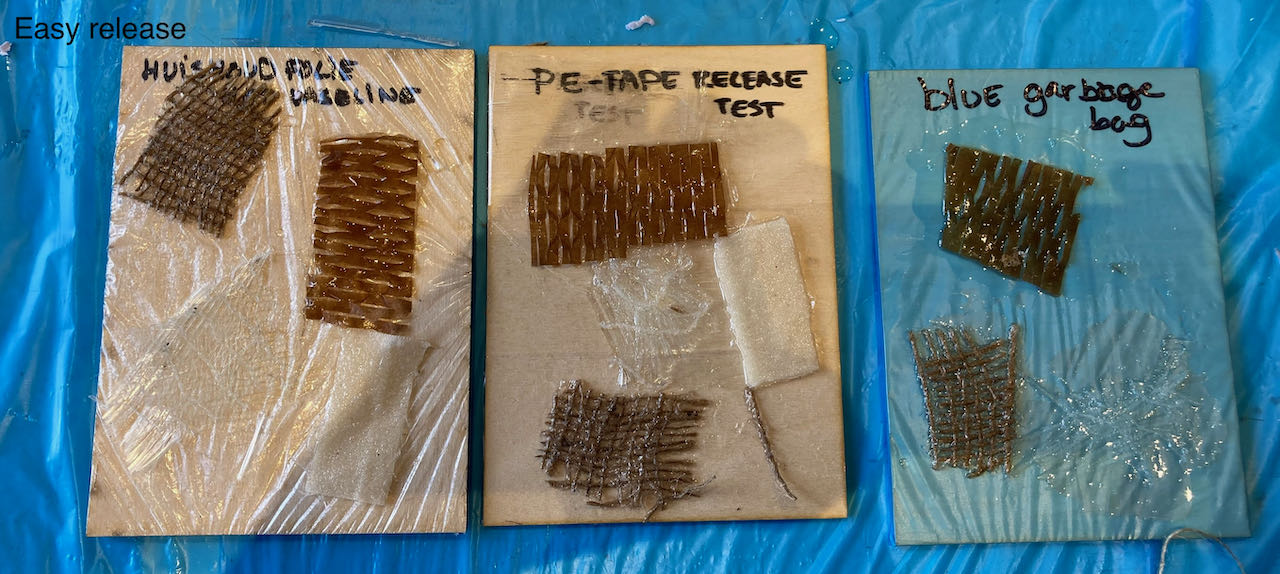
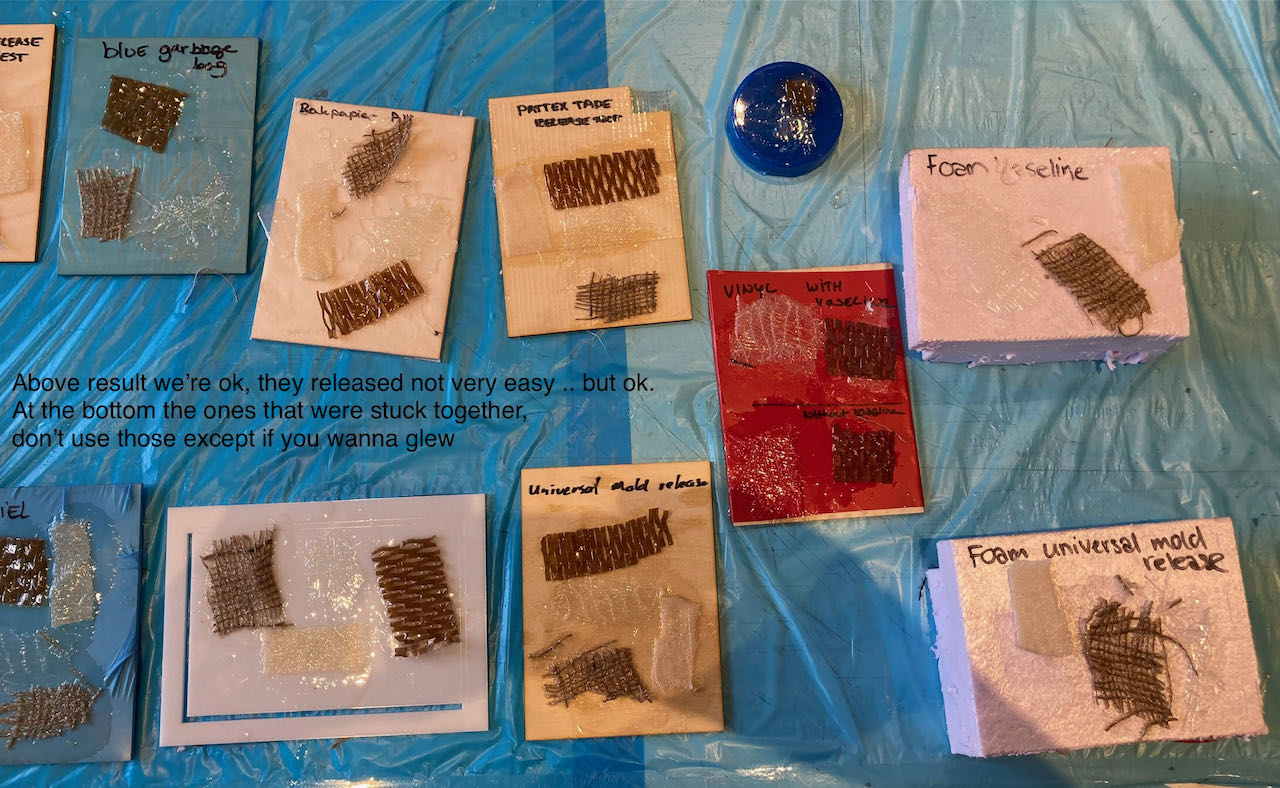
These materials let go op the epoxy easily:
and this group had more trouble - especially the lower line, those would not let go.
Individual assignment
- make a composite object
- wanna make something i can use
- search for usefull things that are hard and in moldable shapes.
- finish a good board even if it takes longer then one week.
Ideas
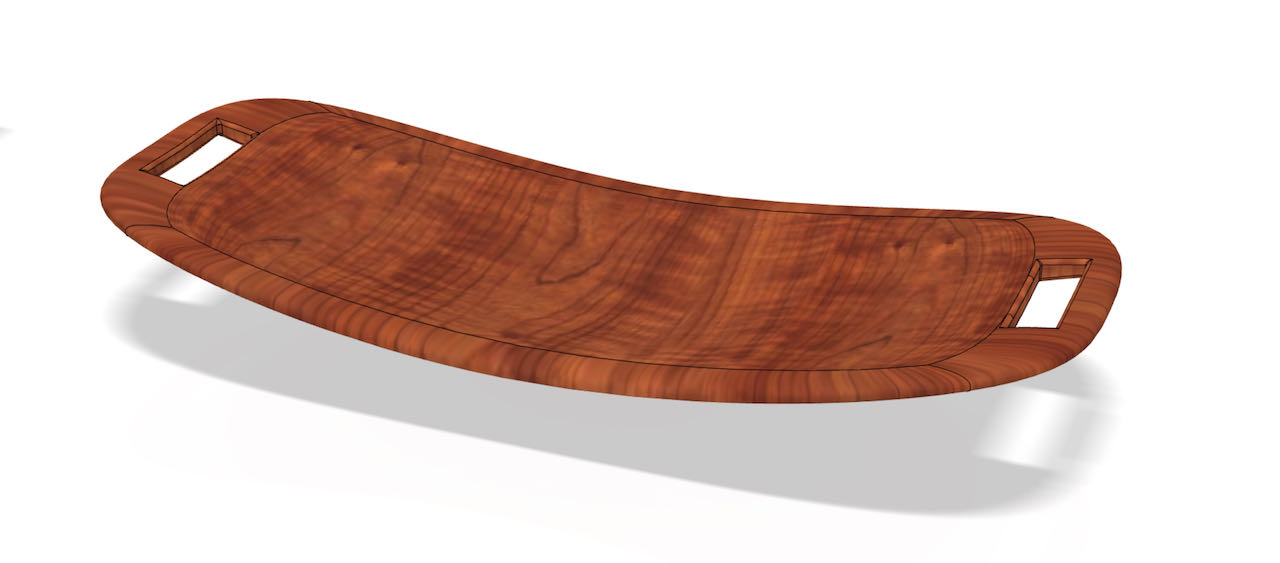
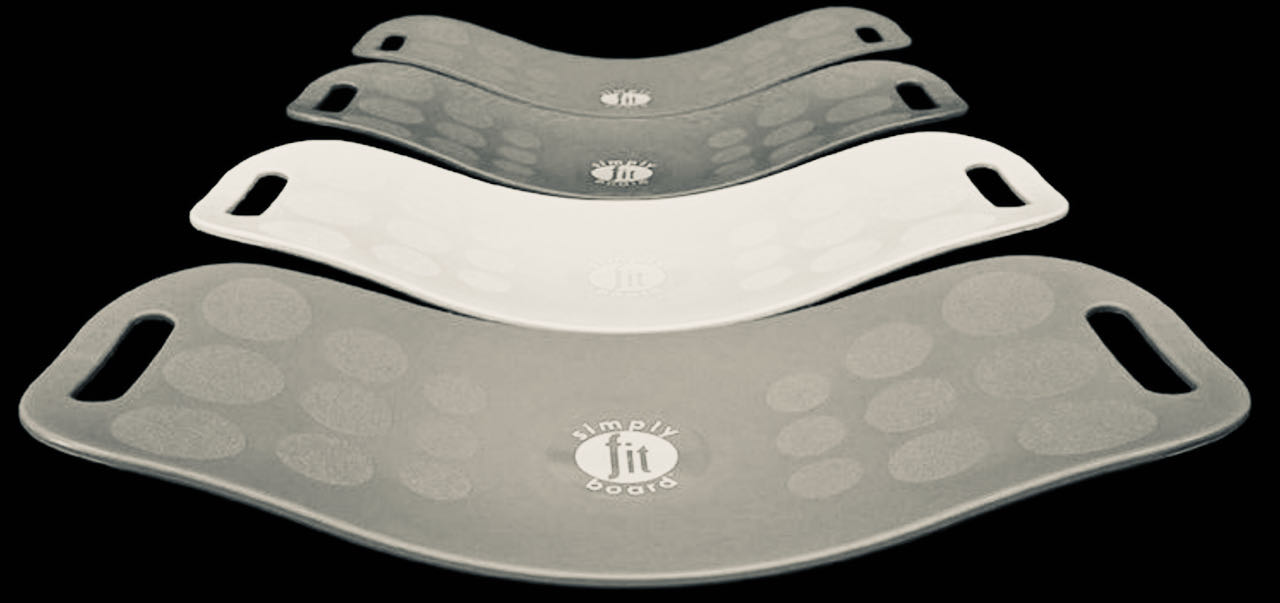
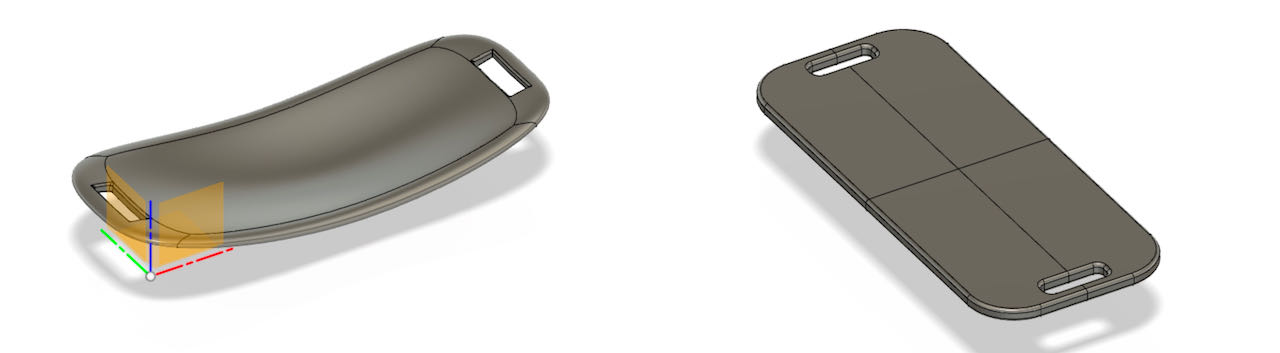
I moved from handkerchief standing upright as a lamp to spinning board and ended up with a wobble board, which you can use to exercise with, great balance practice.

Fushion
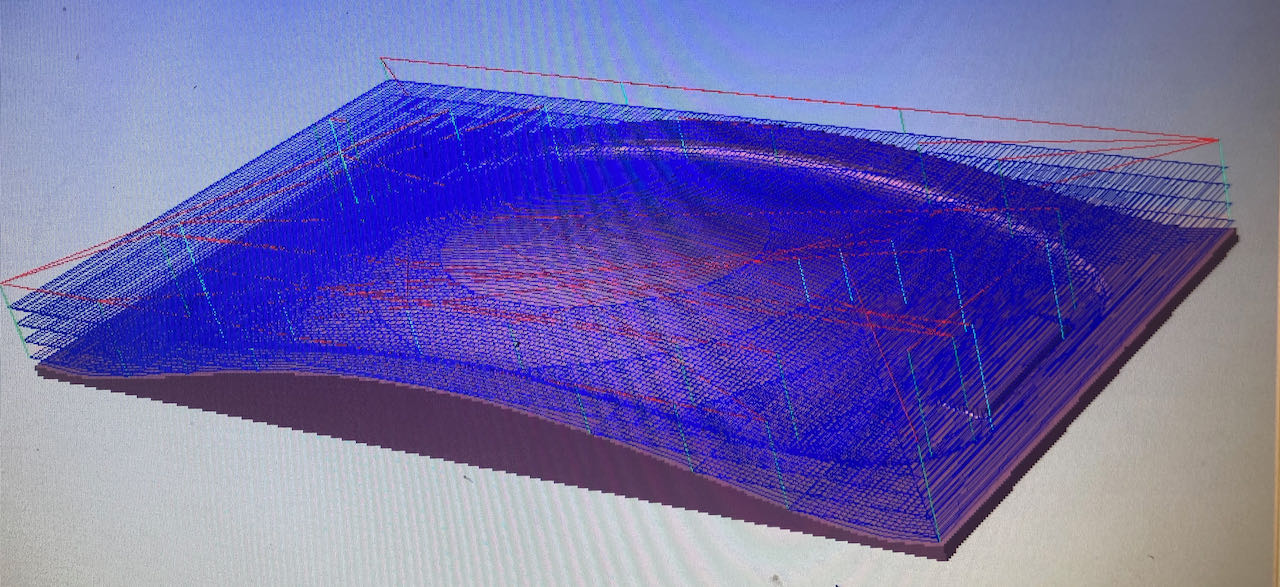
Making the wobble board in Fushion was fun, i could use different parts of fushion, had to work with forms to be able to make this thick round bended in all directions plate. Ofcourse i first tried to way i am familiar with, solids but got stuck fast and continued on the form route, which was very intuitief and “easy' to do.
When i finished my design i realized that i need a curved mold to be able to get my board out, took me a bit of time to realize how to do it. Using surfaces did the trick, was a bit of a struggle to get the line on the right height and especially around the corners but dragging in 3D helped to see what i was doing.
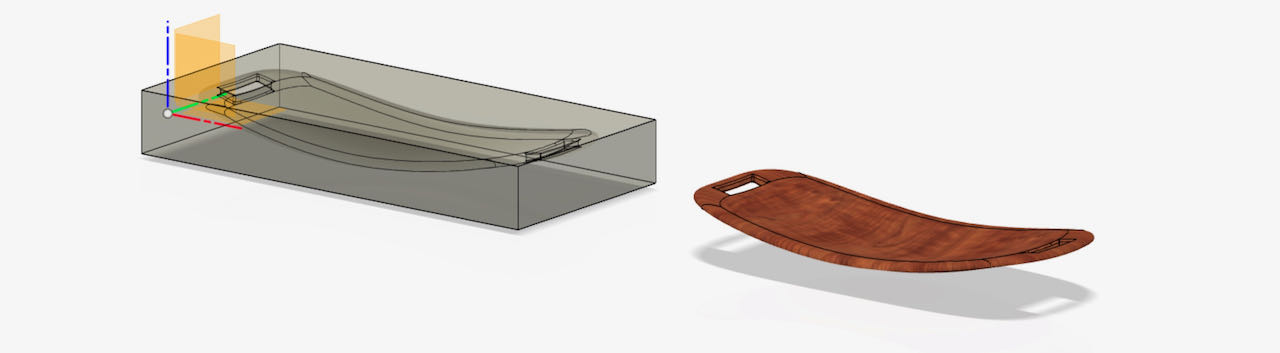
The first attempt was way to detailed with curves everywhere so decided to simplify the form and use less points.
At this point i was still thinking to use the flexible wood that Henk showed me at the lab so made a cut out of the parts of the boards that’s thick enough for the wood, since i was aiming to only lasercut it and keep it 2D instead of using more time on the Shopbot.
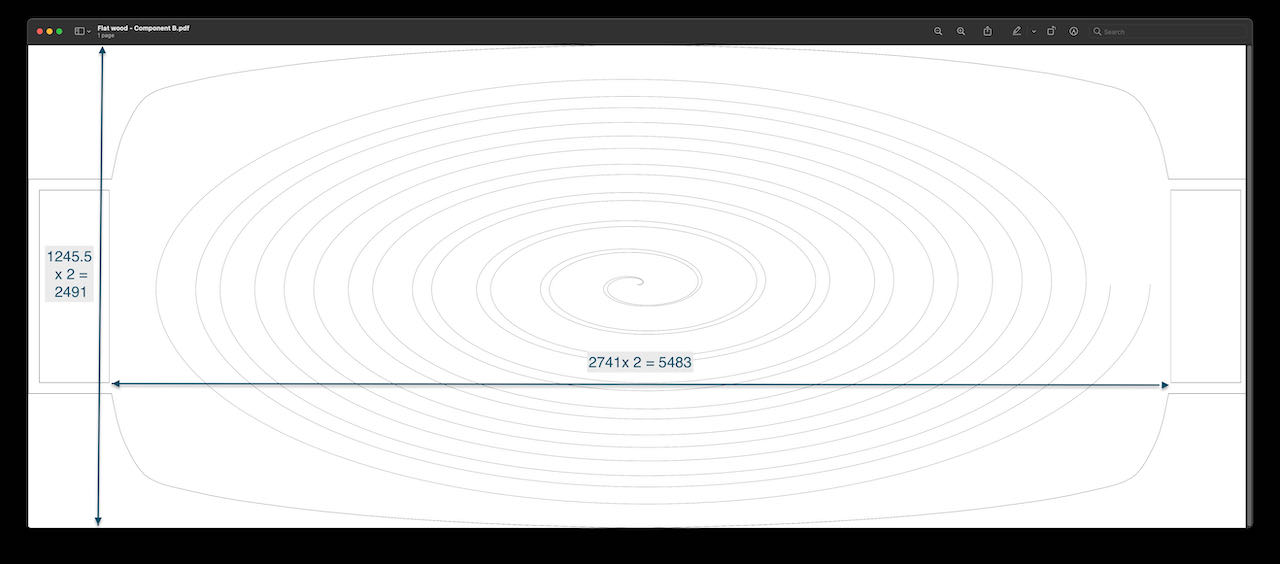
So now… how to flatten this curved in all directions shape…?
Blender
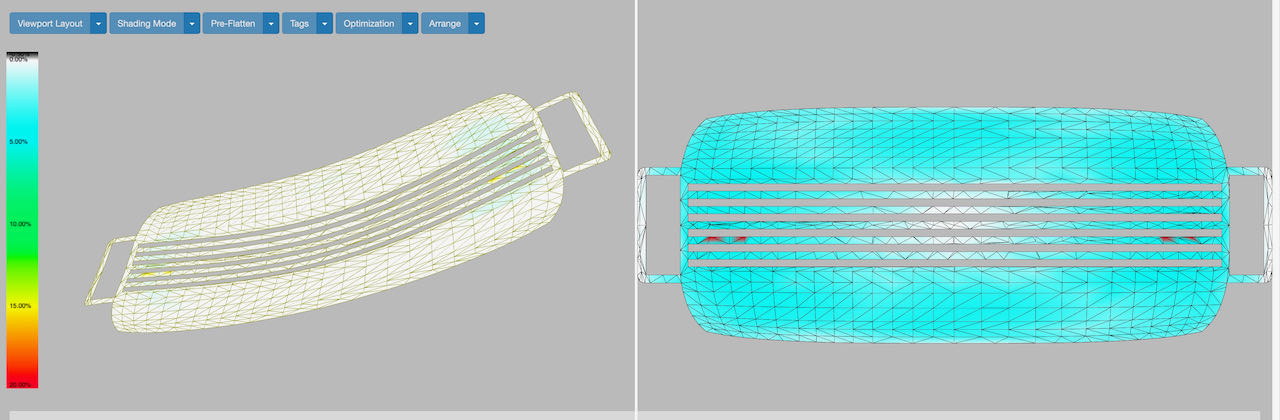
I remembered vaguely that Ferdi showed used a way to flatten Suzanne in Blender so searched for tutorials on how to flatten a surface in Blender and found this tutorial.
To be able to do this in Blender you need to use UV projection which seems more complicated then it is, the green screen is what’s in the NodeGroup.
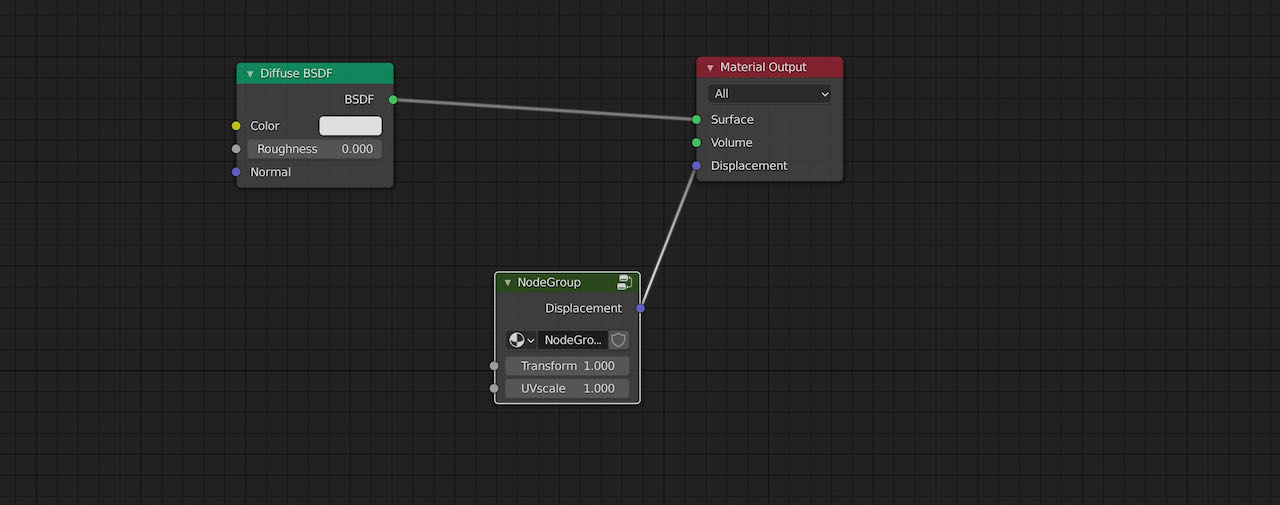
Hidden within the group.
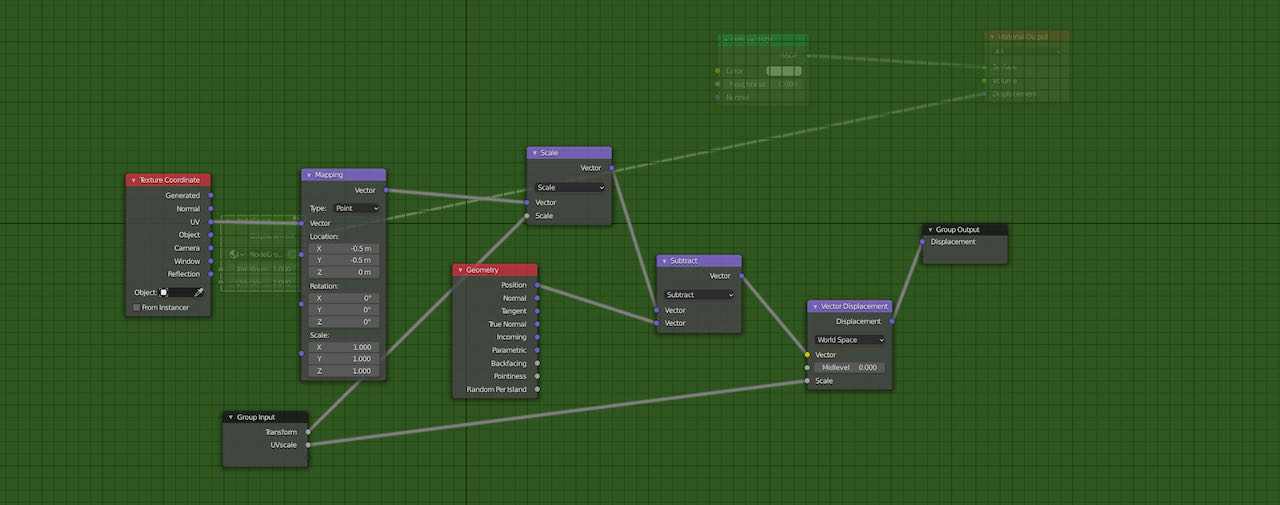
The vector view in Blender made my simple board look spectacular.
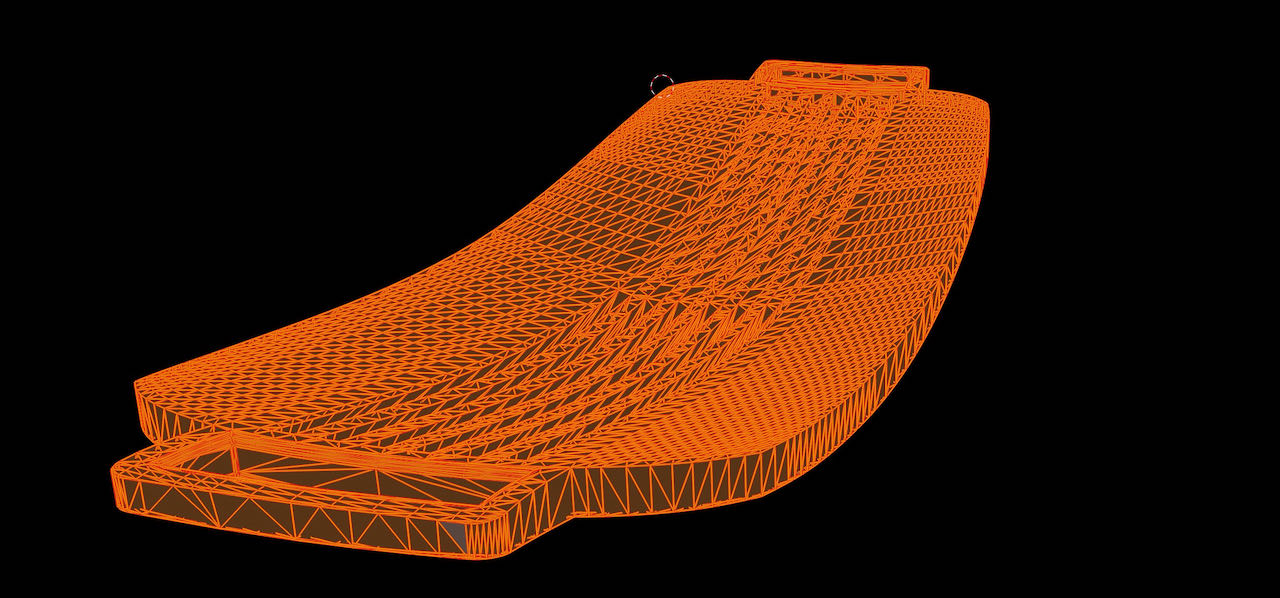
When trying the UV projection i got a result but it seemed to be still curved and when i would change the settings it would get all fragmented.
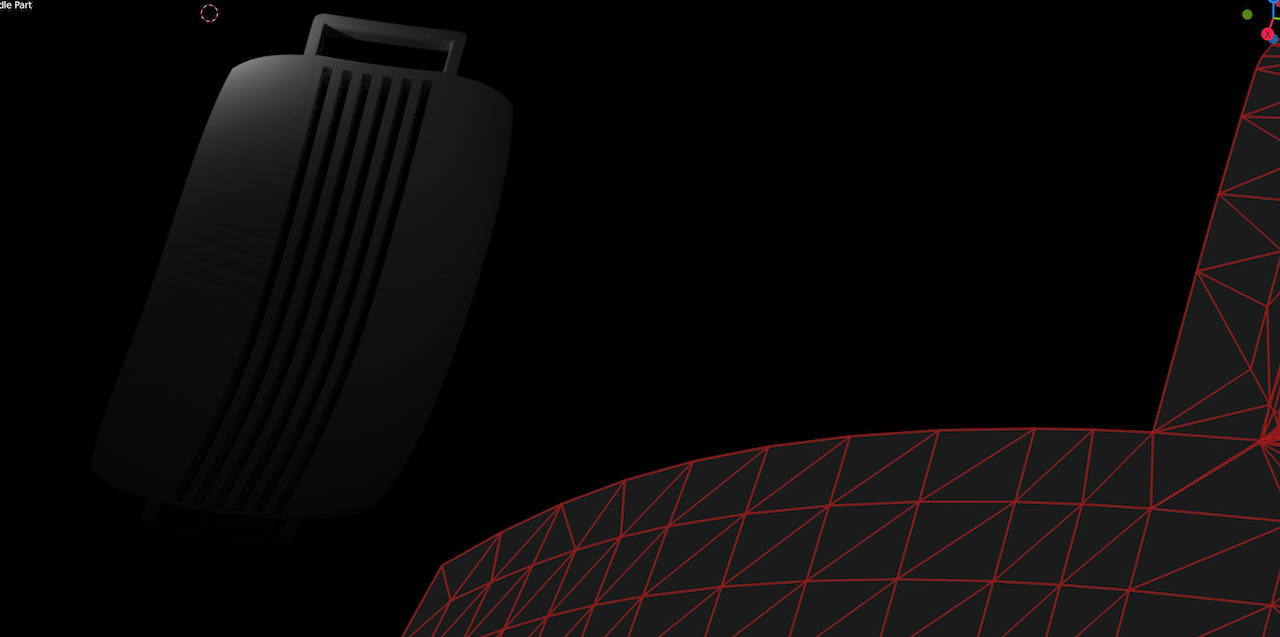
I almost got there but in the end got a bit stuck on how to export it and decided to take another route.
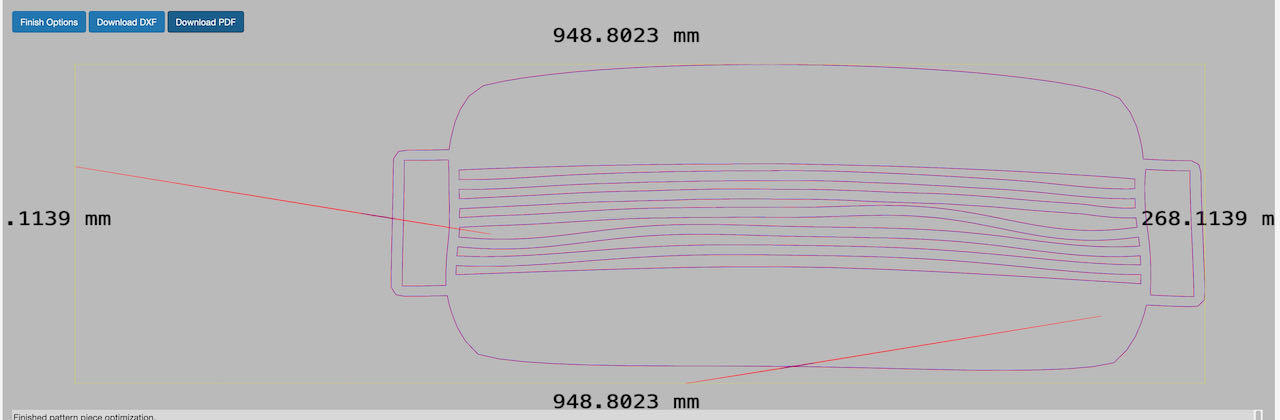
Exact Flat extension
One software that seems promising was Exact flat but that ended up being a disappointment, very inaccurate and messy results..
Here is the link to the software
FlatFab
It a bit outdated (2015) but just for the name only i would give it a try :)
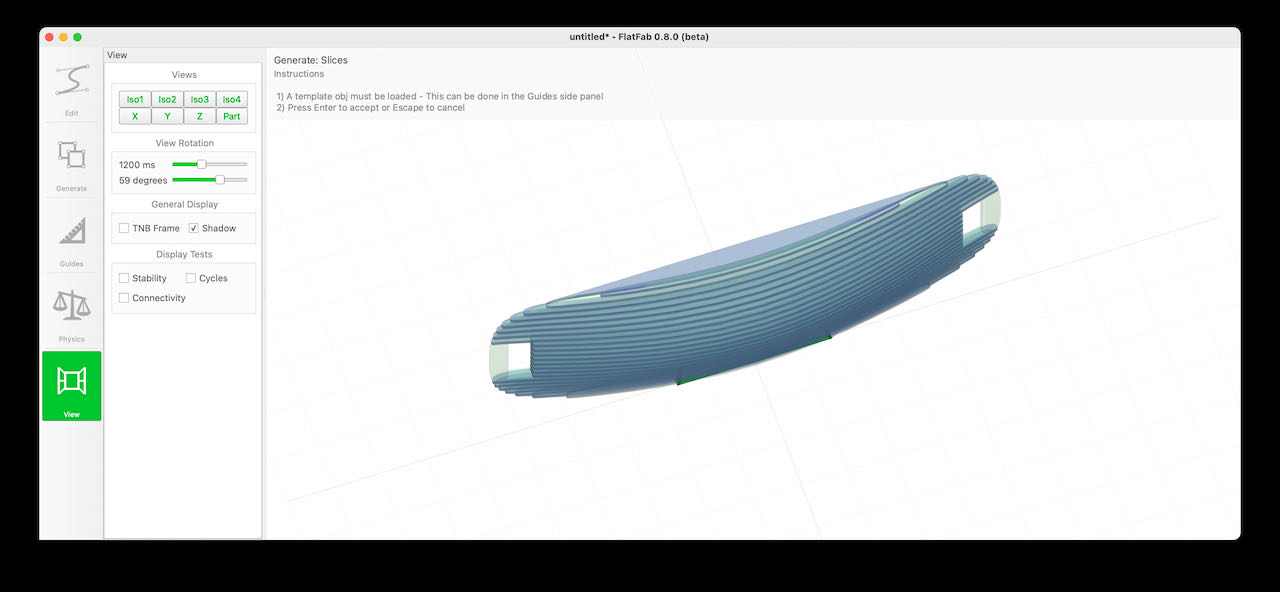
a bit limited although very userfriendly, here is the link to the software
Slicer for Fushion.
Finally at the Waag and ready to mill, since I had to wait a bit till it wasn’t turn I decided to take a look at another slicing option, this time fushions very own slicing tool, it’s not supported anymore but works just fine. Installing it from the site was easy, just locating it in fushion itself was a bit unconventional, Paula pointed out that you can find it by searching for it (duh) so I used the Find function in fushion. The software is self explanatory, very intuitive.
I will continue down this road the coming week to cut out the material which i will use for my wobble board (still investigating what material would be best)
download site for slicer for Fusion
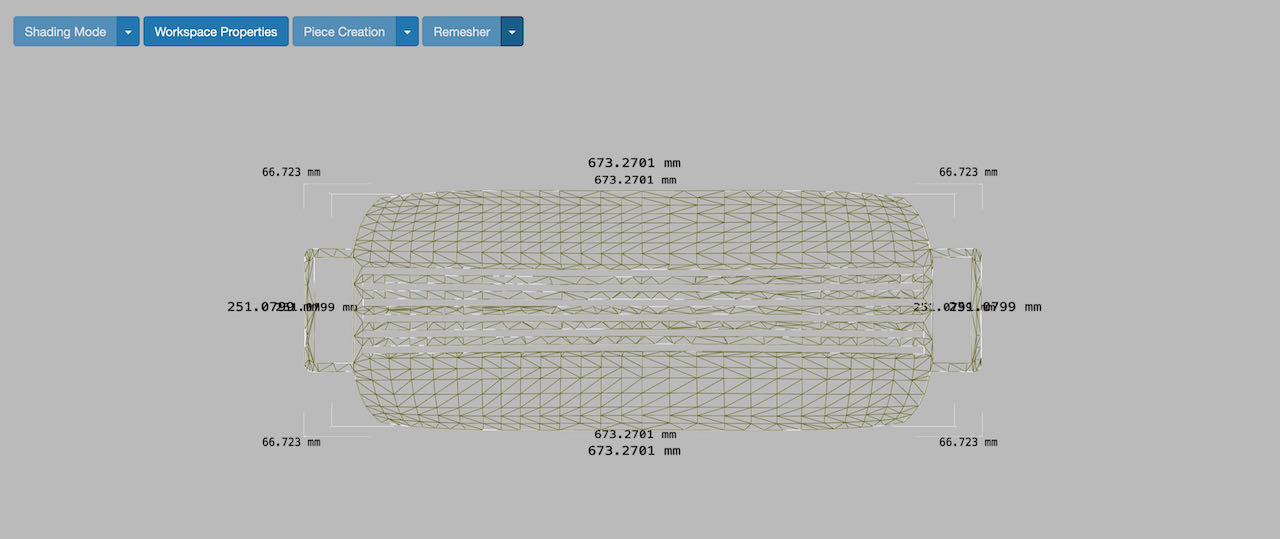
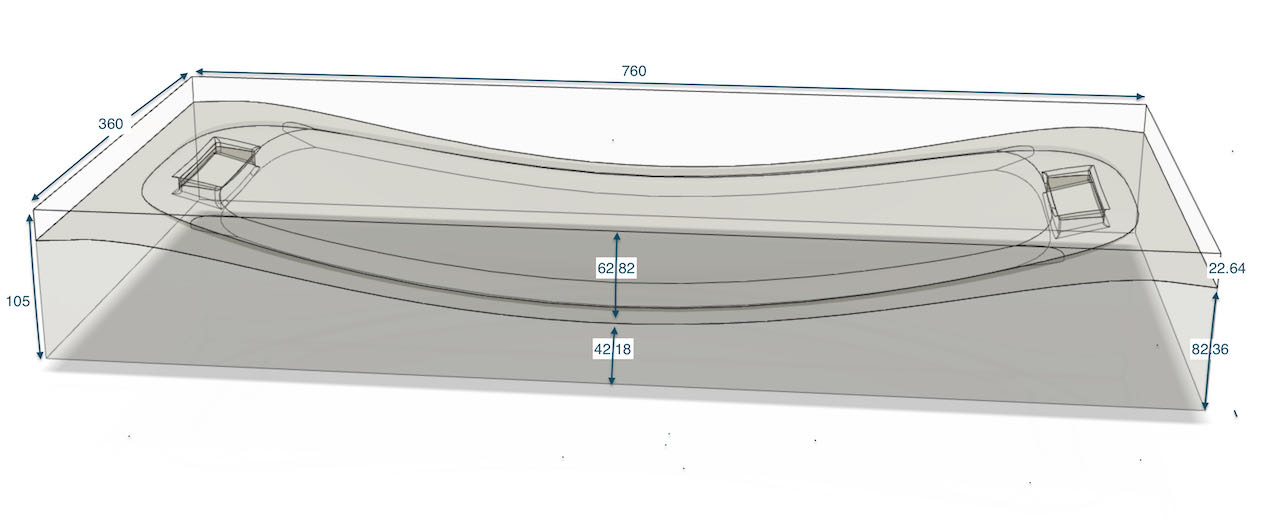
Sizes
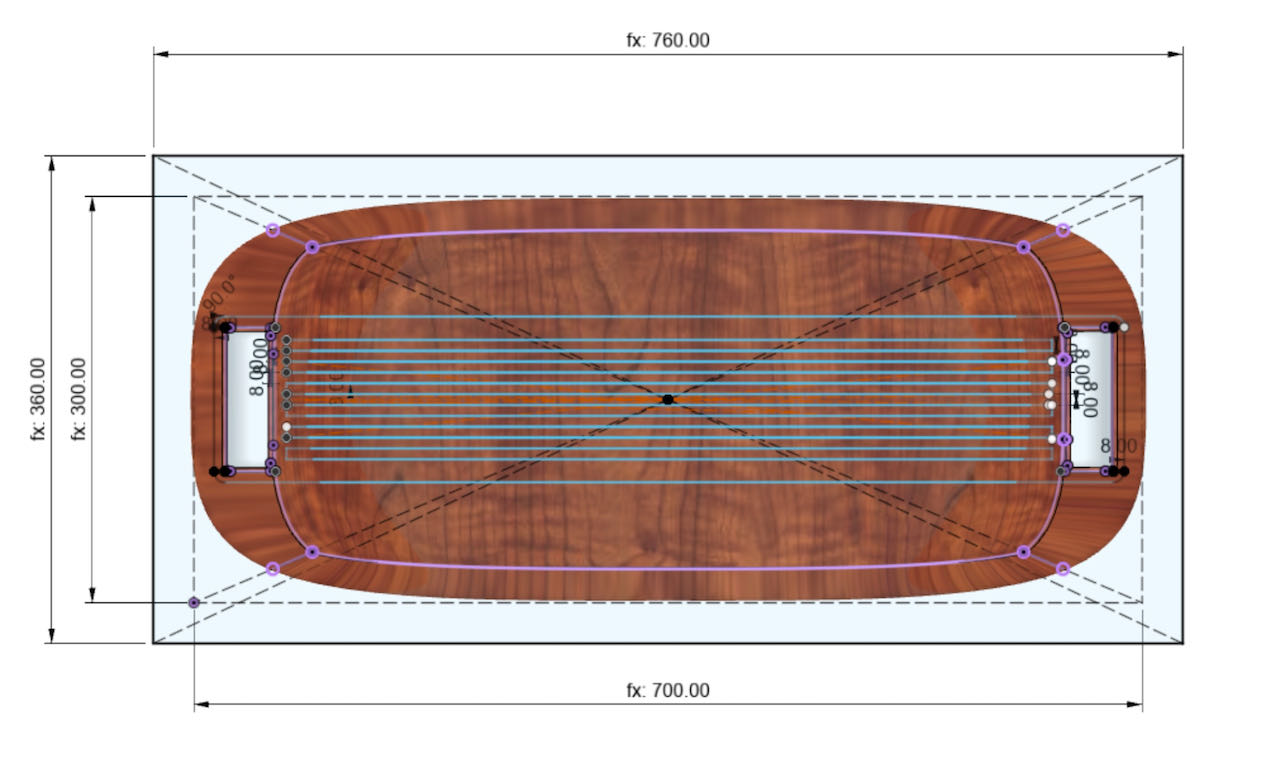
15mm thick on the thickest part, which is 7.8 of the plate plus 3 layers of jute on both sides? WHat material to use is still to be decided, at the moment thinking about carbon. Need to research a bit coming week.
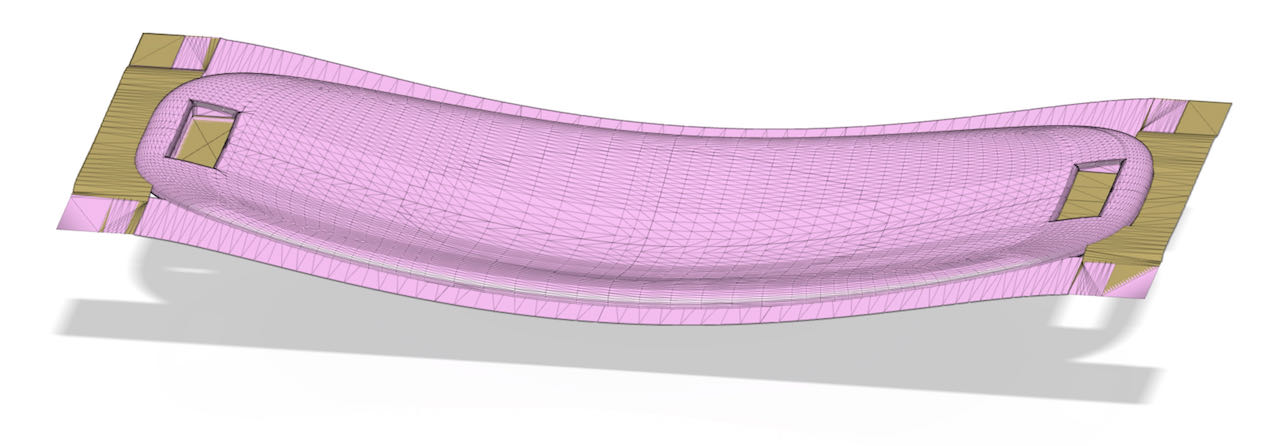
Something went wrong in the flatting process, it seams that the inlay is half the size.. decides to scale it up and try it out at the waag in cardboard first. Also when i have my mold i can just measure it to make live easier.
The foam it self is 60cm x 125cm and 5cm thick, so i will have to double up, little did i know how many problems this design would get me into.
Vcarve
- Open Vcarve software
- New file
- Fill in set dimensions, i ended up using the outsides of the box i created in Fushion.
- Import 3D model (STL file)
- Center to the model (in model size window) move it around a bit to make sure it fits inside the foam.
- Zero Plane position - a little under the red line so that the top layer is also milled off. Which is only done by the finishing toolpath.
when you press ok here you can’t go back anymore
Set dimensions and specifications of the milling bit i had to create since the 5mm bits are not long enough to get to the bottom of the mold without touching the sides with the collid and the fume extractor.
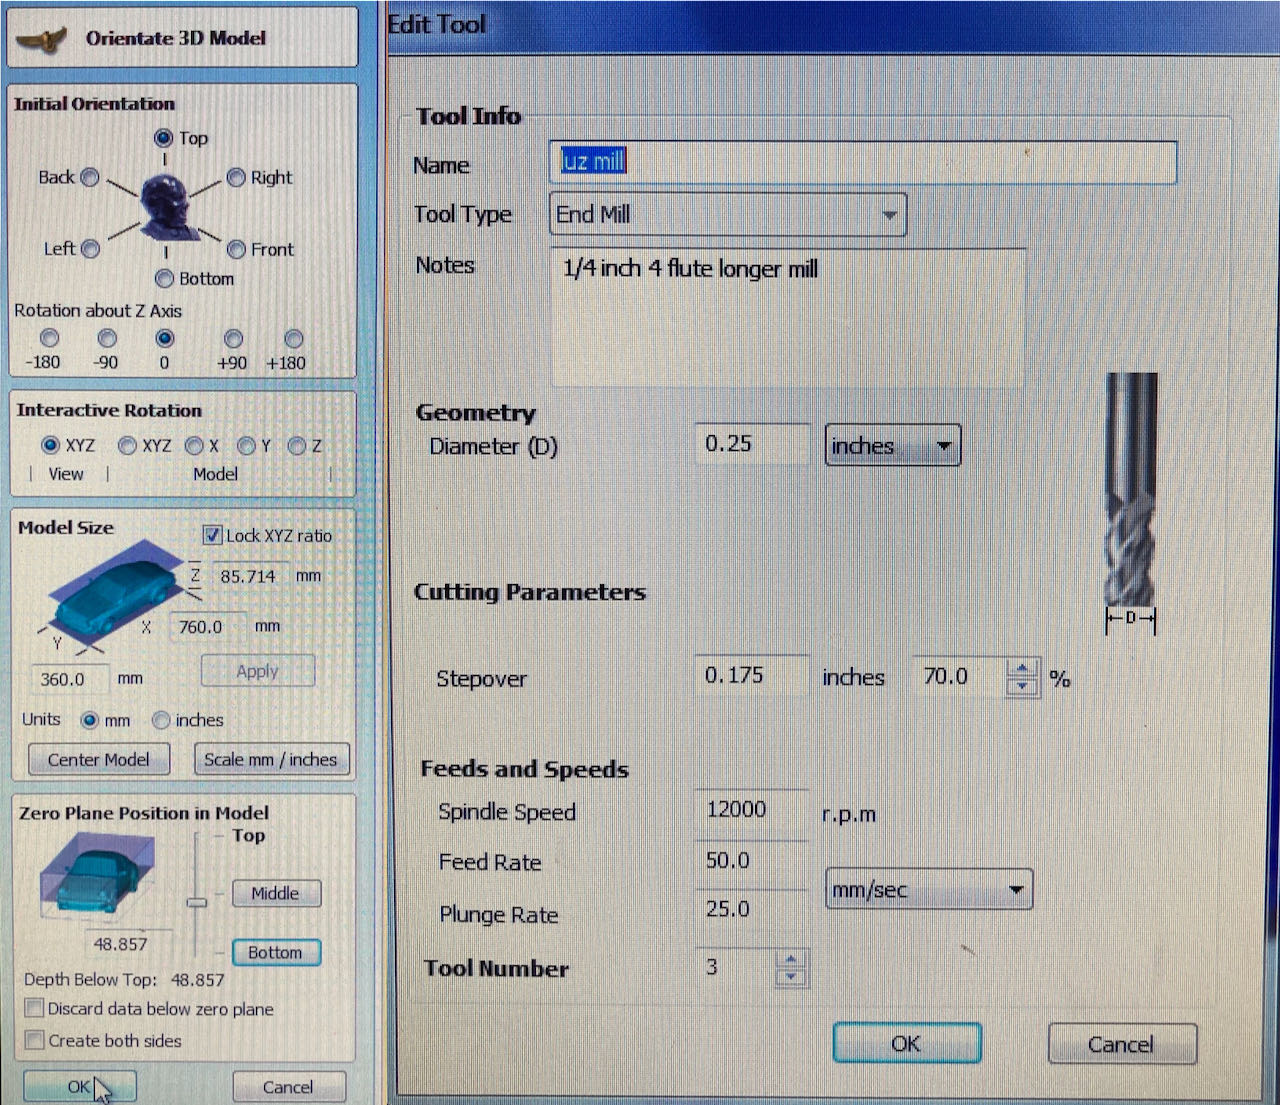
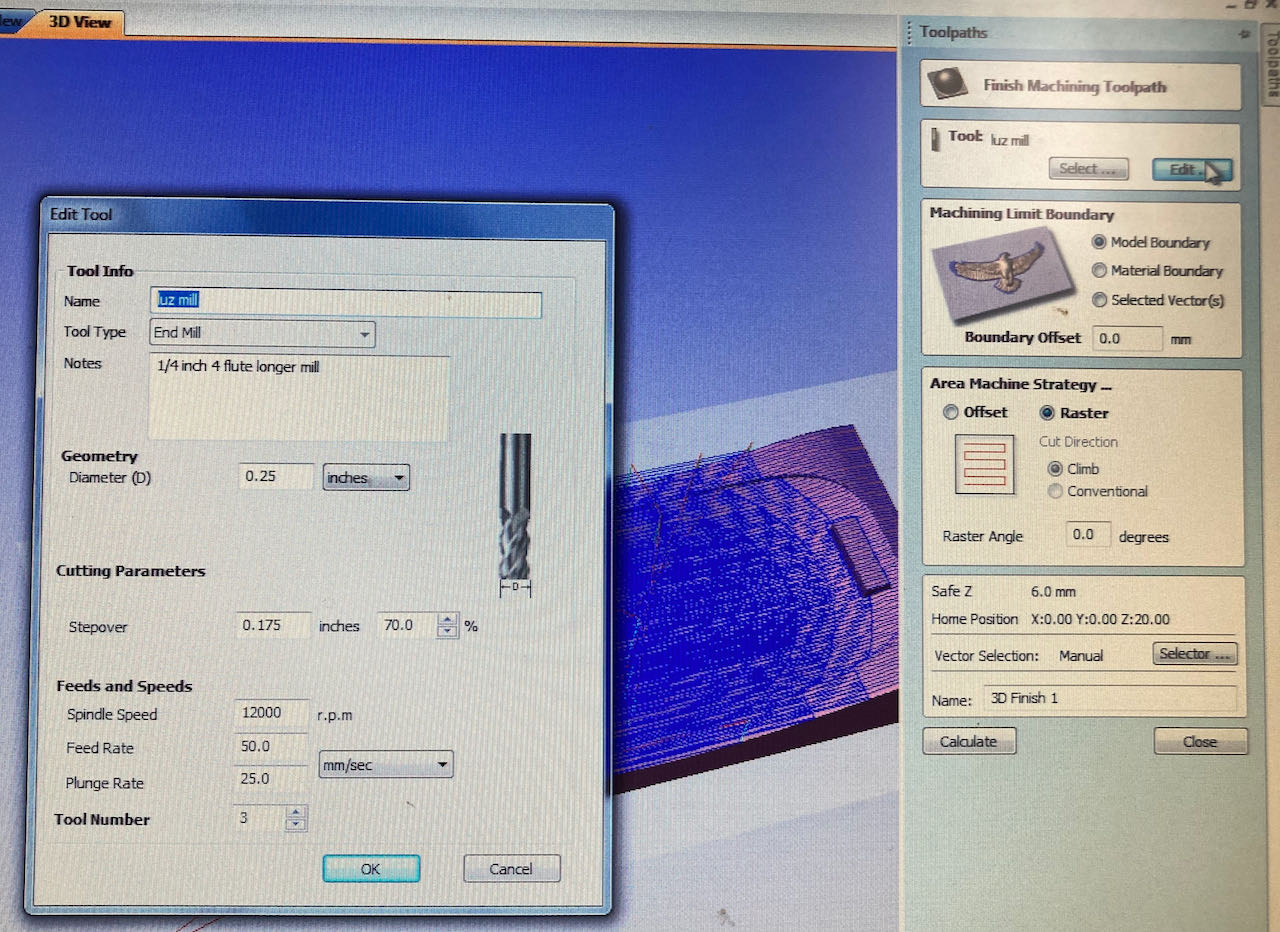
3D roughing toolpath
- Fill in your milling bit specifications
- I ended up using a 1/4inch 4flute mill due to the depth of my mold (8cm)
- Spindel speed 12000 & Feedrate 60mm/sec. (i found examples online where people would go to even 150mm/sec but want to avoid flying foam)
- also change the depth of the path to 0.5 Inch (1.2cm) consider it’s only foam that should be ok.
- the stepover i made very small (70%) since i wanna save time and will use a finishing path anyways.
- Machine limit boundries: material boundries
- Machine Allowance: 0.5mm allowance
- SafeZ 6mm now i know what this is, the mm it goes up to move to an other point
I ended up making a very rough 1st toolpath to save time and finish it off with a finer finishing toolpath.
The time management was one of the problems to tackle with my big wobble board.
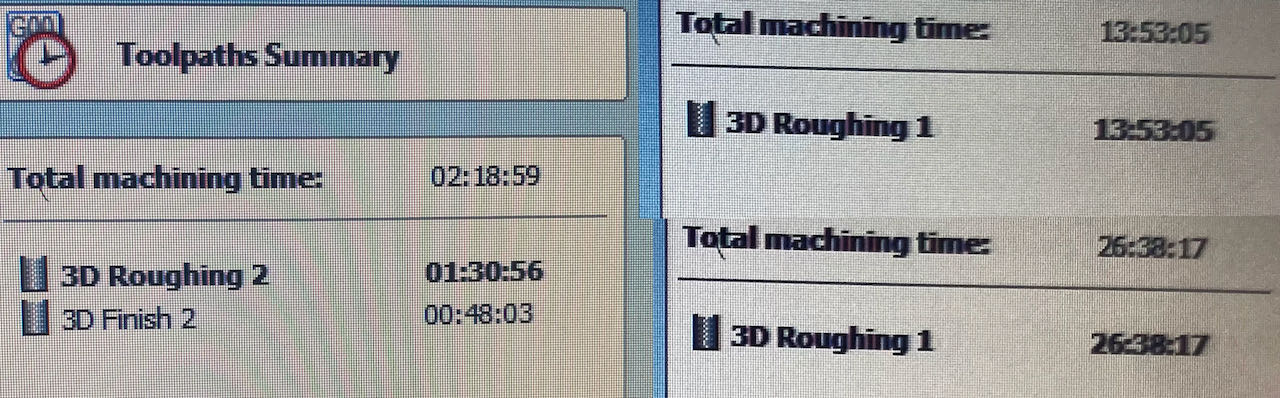
I ended up with a machine time of a little over 2 hours but i have a top and bottom mold, so will have to make the other one tomorrow since there are more people that need to mill.
Prepare the machine
- place your machinable foam which should be just slightly smaller then your design to avoid unneeded machine time.
- Place your block of foam with a bit of double sided tape and screw 4 pieces of wood around the foam on the sacrificial layer.
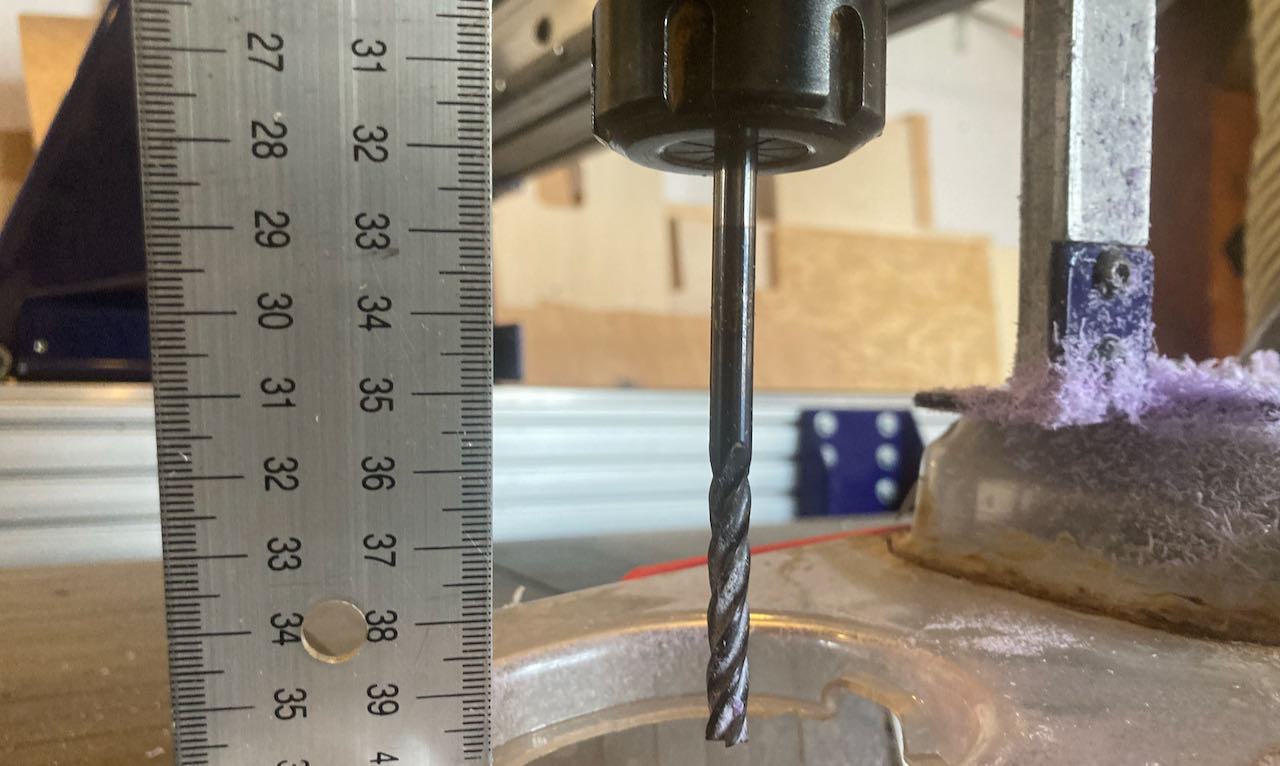
- Measure the milling bit width and length!! in my case very important.
- Put the collid in the nut
- Insert the mill in the nut - measure it, minimum 8 cm should stick out in my case.
- Lower the skirt by undoing the wing bit
- Put the nut in the spindle with 2 english key & wrench (one has the key from the machine attached to it)
- Clean the working space.
- Switch the machine on and the dust collector on.
Open Shopbot software
-
Check the direction off your material on the machine (think about the direction of your design)
-
XY home
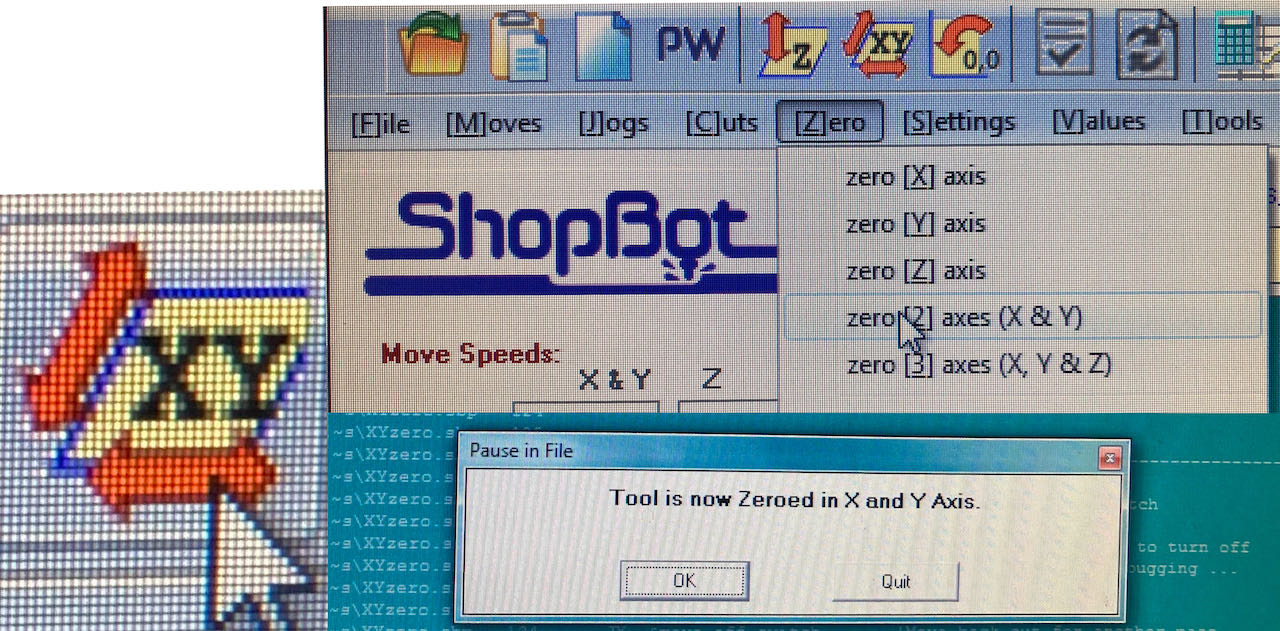
- the machine will make an alarm sound and moves to the origin of the machine, i think you can also just move it to the right place and zero the axis but i got used to this rythm.
- Adjust it with → ↑ ↓ ← to the exact corner of you block.
- If needed you can move Z down pg up - pg down to make it easier visually and to not bumb into the foam.
- Take a picture of the values just in case because the numbers got to zero after the next step.
- Go in the top menu to zero-zero-XY-axis
-
Press K for keyboard (if you wanna be sure that you set it right you can go to the little green screen and set the the x/y to zero and see where it moves to, if done right it doesn’t move)
-
Setting the Zaxis
- Move the arm with → ↑ ↓ ← to a position where you think the block will be the flattest, for sure not the corners.
- → ↑ ↓ ← and pg down - pg up are the single ones, not the one from the numeric.
- Put the metal small plate underneath the mill exactly in center of the mill, make sure there is no dust, tap it against the mill to check if the green dots reacts (otherwise it will keep on going down because it will not create a closed circuit)
- Z axis

- When confirming the first pop up screen the machine will sound an alarm and move the mill down to the metal plate, keep your hand on the space bar to pause in case it goes wrong.
- Confirm the second pop up and remove the alligator clip which is apparently how they call the little metal plate.
-
Press K for keyboard - with pg up move the mill a bit higher so you can remove the alligator.
-
Put the milling on with the key on the side.
-
Adjust the speed to what you’ve put in Vcarve.
-
open stl file
-
Pop up
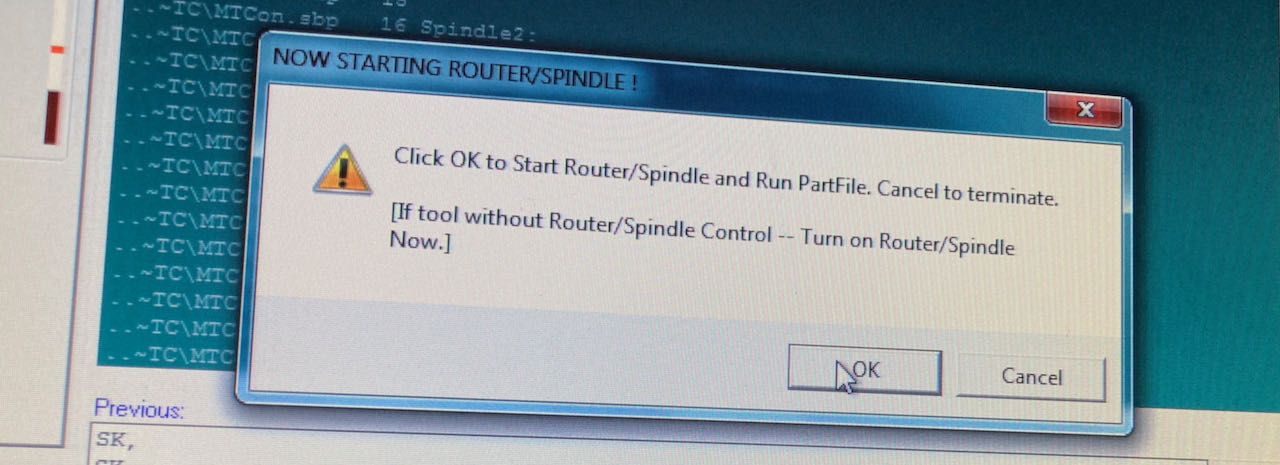
-
Ok and hands on the space bar - the machine will sound a alarm and start milling
When the machine started to go to it’s home position it made a sound since it was going through it’s “zero” because it wanted to go to the Z base point which was in the software decided to be 20mm.. Because of this the machine was milling a cm to deep, the whole design was a cm to deep, which ended up being a bit scary with the mill being just long enough to fit, i was lucky that it ended up just working out. Was very focused watching it together with Lucia with a finger on the spacebar to be able to stop any second.
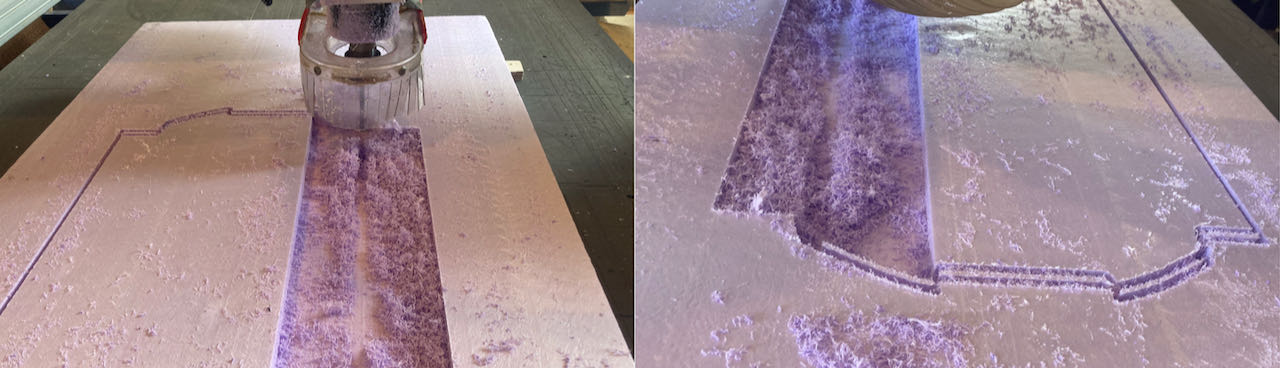

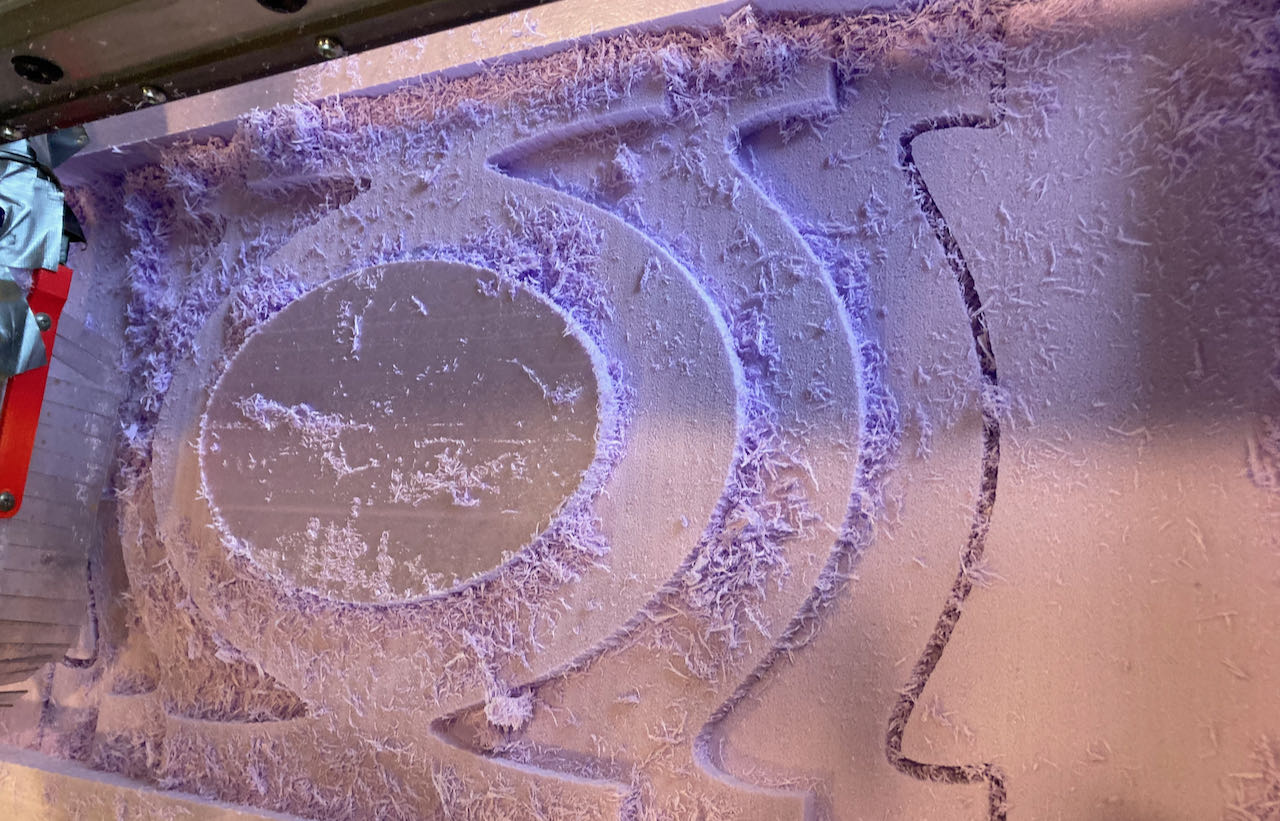
The low stepover created nice stripes of foam which got sucked away in a very entertaining matter.
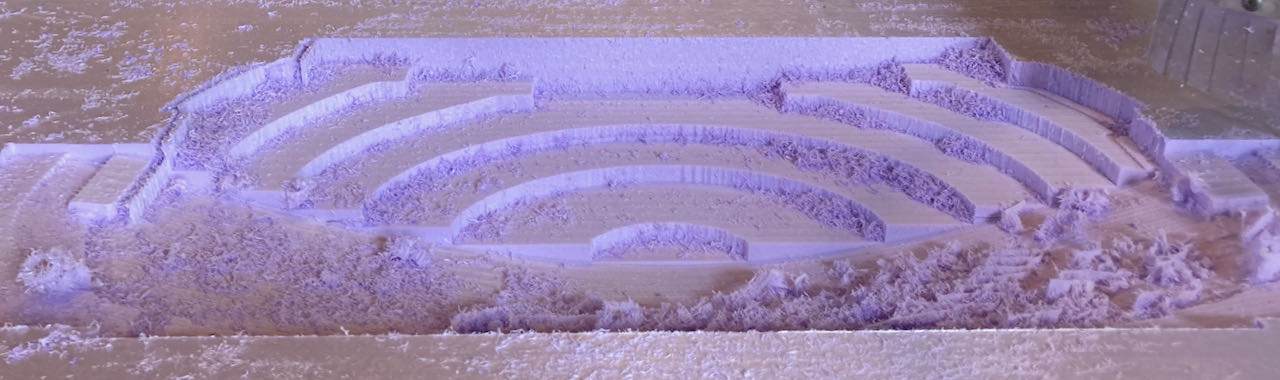
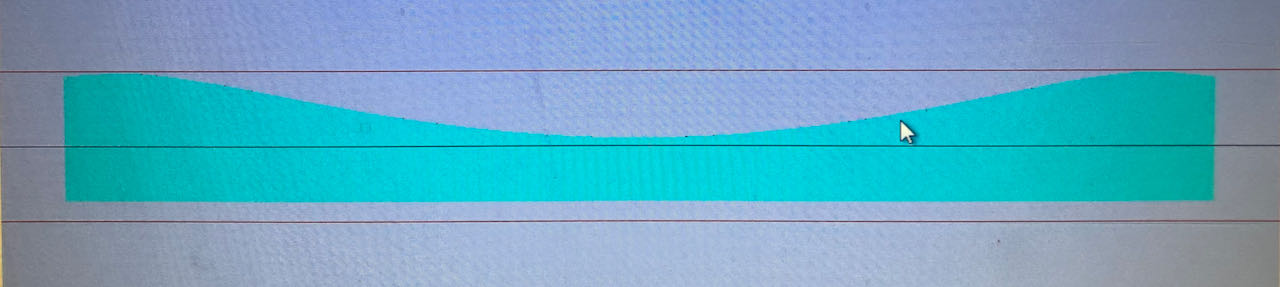
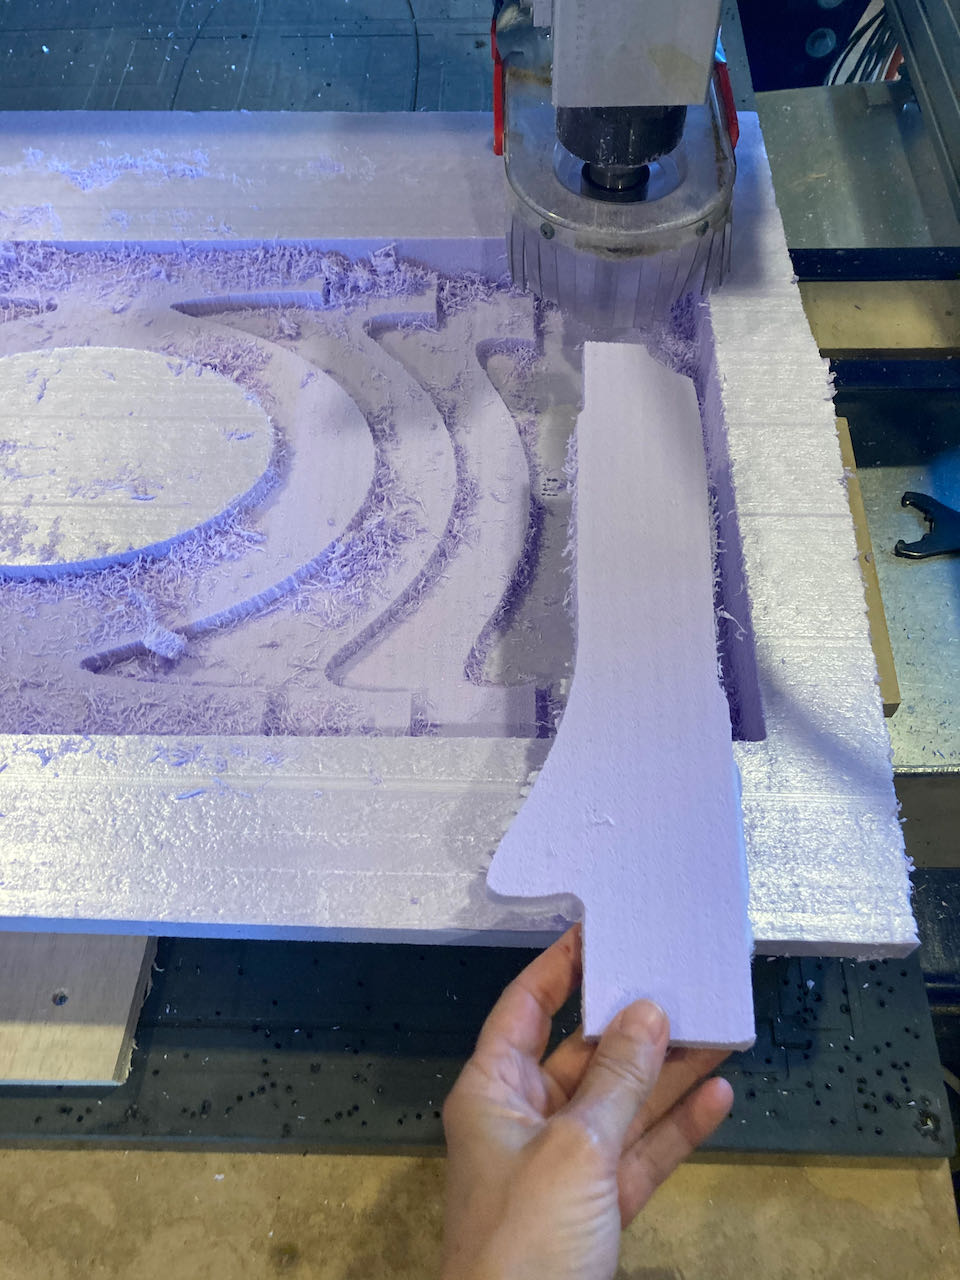
When the finishing toolpath started it looked like magic, going from this roman theater shape into a natural shape.
Milling the topmold
With the top mold i could use all the lessons that i learned.
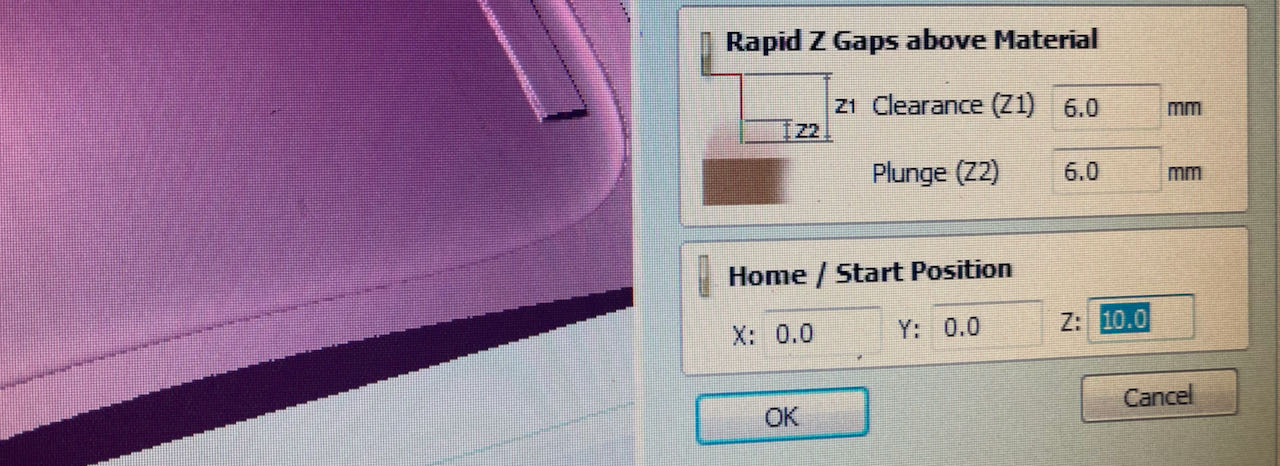
Withing the material dimension you can set the Home/start position and the Z gaps above material. Adjusting the Z to 10 instead of 20 did the trick that it would not go through it’s own zero point again.
Made the milling bit stick even a tiny bit more out to almost 9cm felt ok since i am only milling foam.
I also decided to rotate the design so that i could use the X axis more on the long lines.
One of the roughing layer was exactly on the depth where i glued the 2 boards together apparently not spreading the glue enough. When milling a whole section got loose when the machine did the outline.
Which resulted in the mill happily milling in the air.
really enjoyed seeing the blocked shapes transforming into this curved line.

the machine had a lot more room to manoeuver thanks to the adjustments i’ve made.
First cast
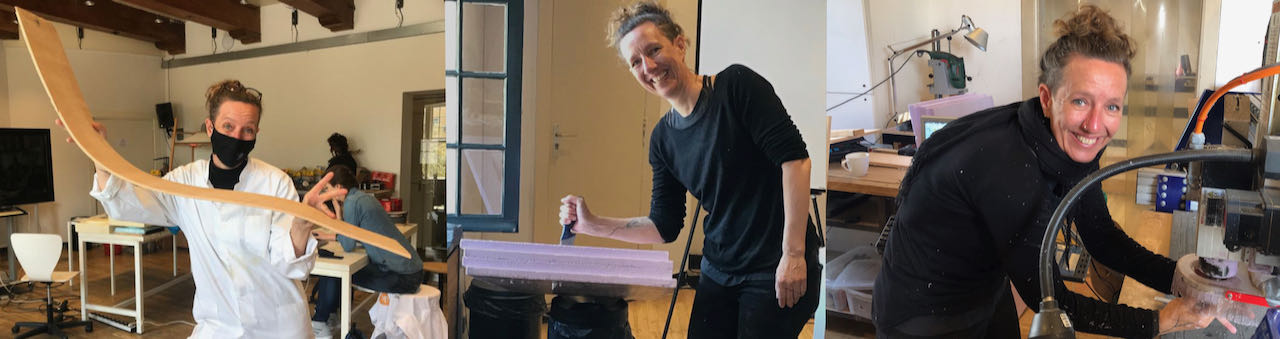
Decided to try to see if i could use the bottom mold with a vacuumbag also, it was already late in the day so had to rush to finish it but thankfully Lucia helped me.
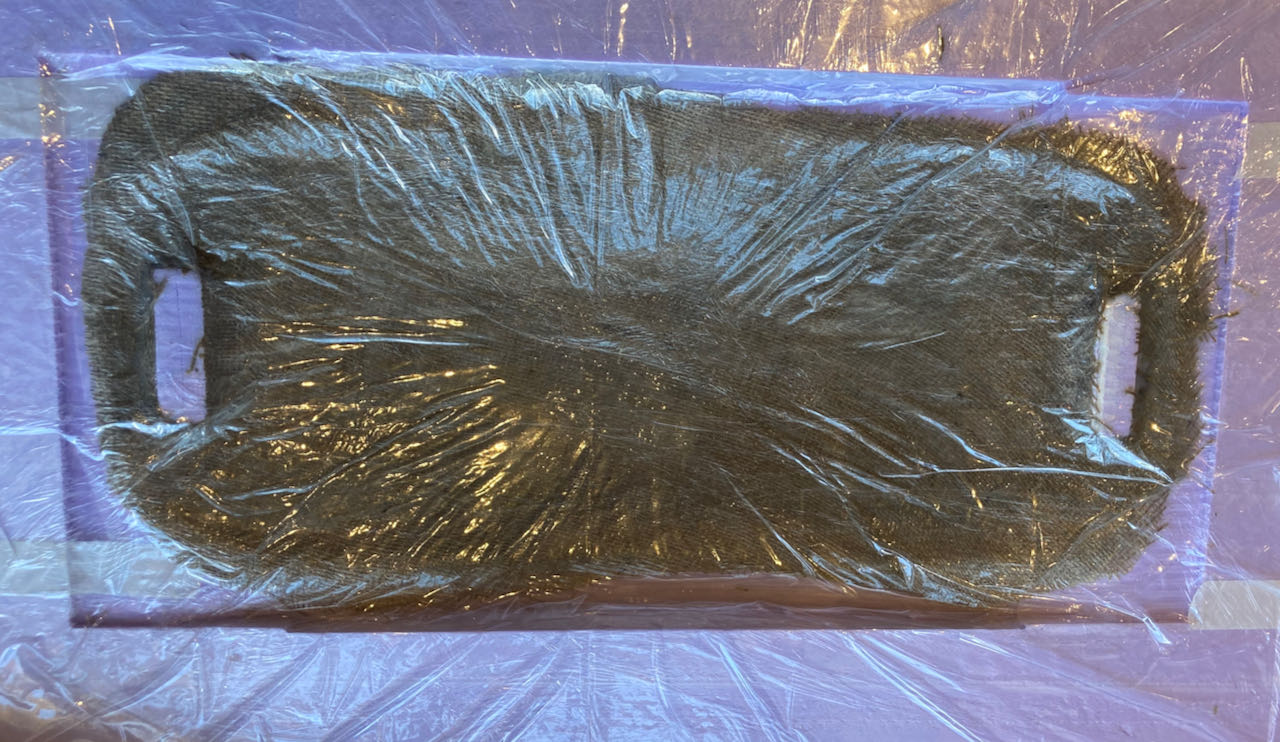
When i came back the next morning i noticed that i didn’t seal the bag properly so there was no vacuum .. so my wobble board ended up to wobbly and the epoxy didn’t spread out properly.
When i get the right material i will cast the “real” version.
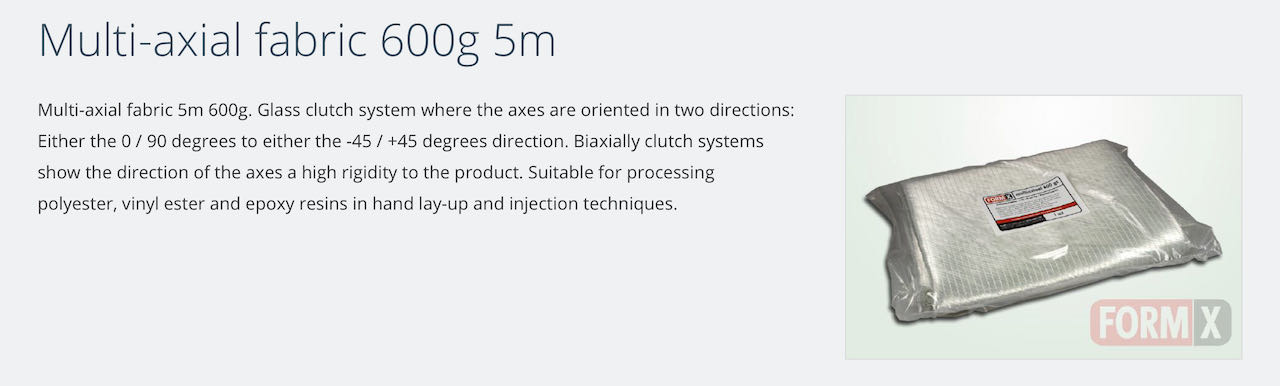
While researching i found several sites advising to use this multi-axial fabric if you want to have a strong non flexible composite.
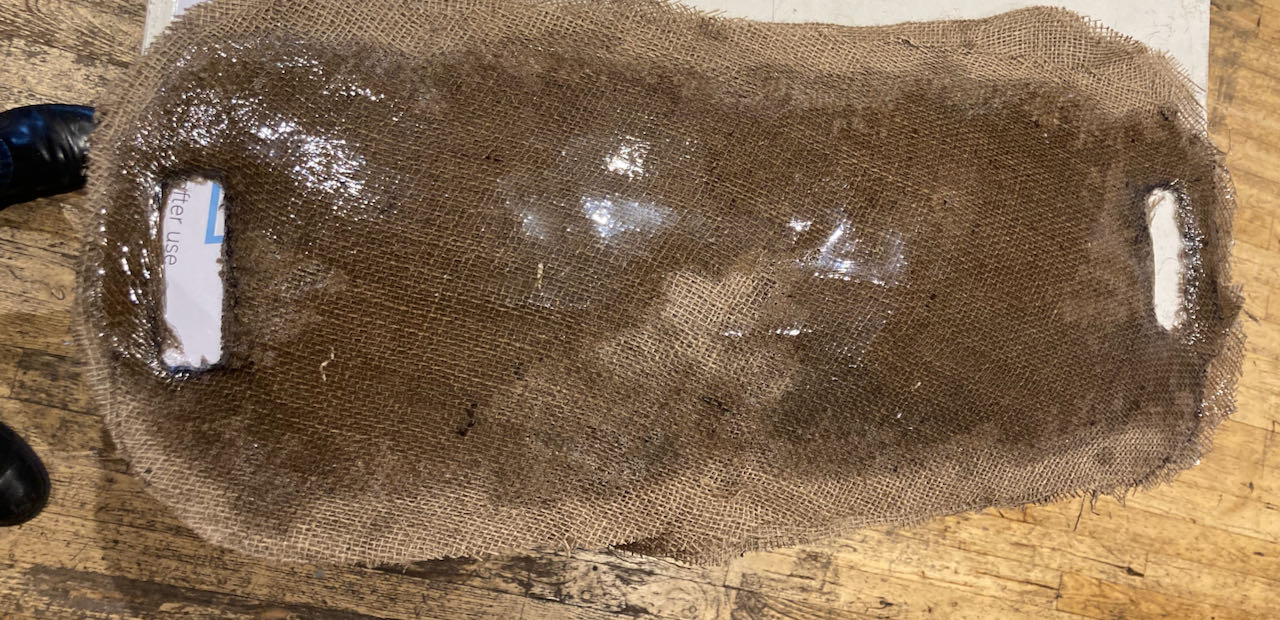
Decided instead of buying new expensive material to go for what is already in the Waag, which were blankets thats used in moving trucks to cover material to protect it. I am working in the theater for decades now and since day 1 we use these to protect parts of the set for getting scratched so it fits really well in my world.
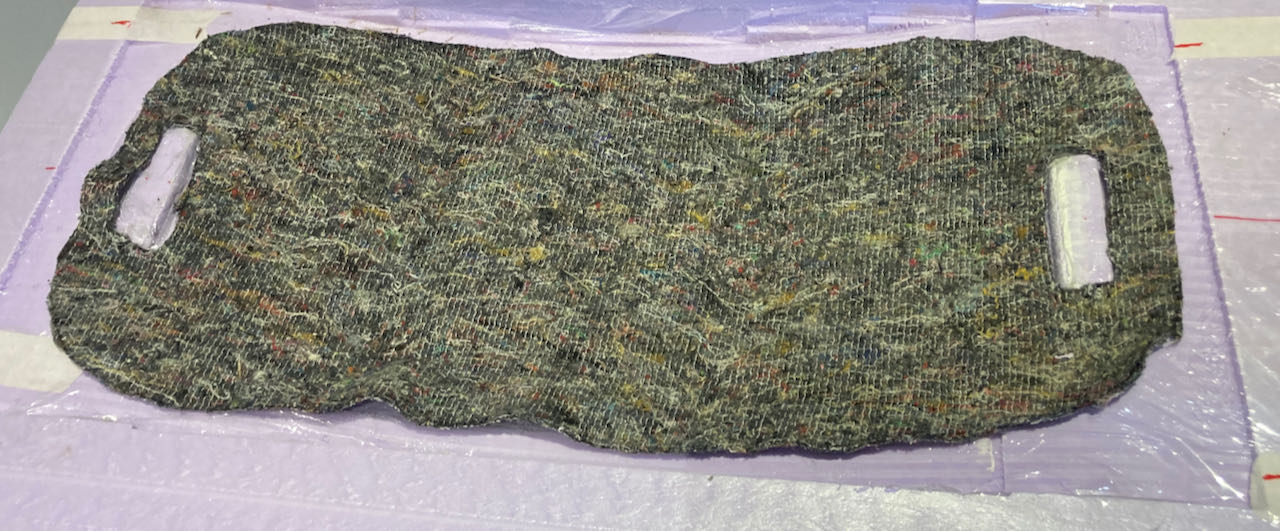
First one layer combined with the 4 layers of cloth that i already casted.
Tried to way my mold down with a extra layer of material placed in the mold but outside of the plastic to create enough pressure for the material to get a nice squeeze.
But decided to go for the serious force since the boxes were just not heavy enough.

after it came out i still had to cut the edges off a bit and uses the sanding machine of the Waag to cut off the edges (no pictures, needed both of my hands to keep me and my wobbleboard safe from harm)
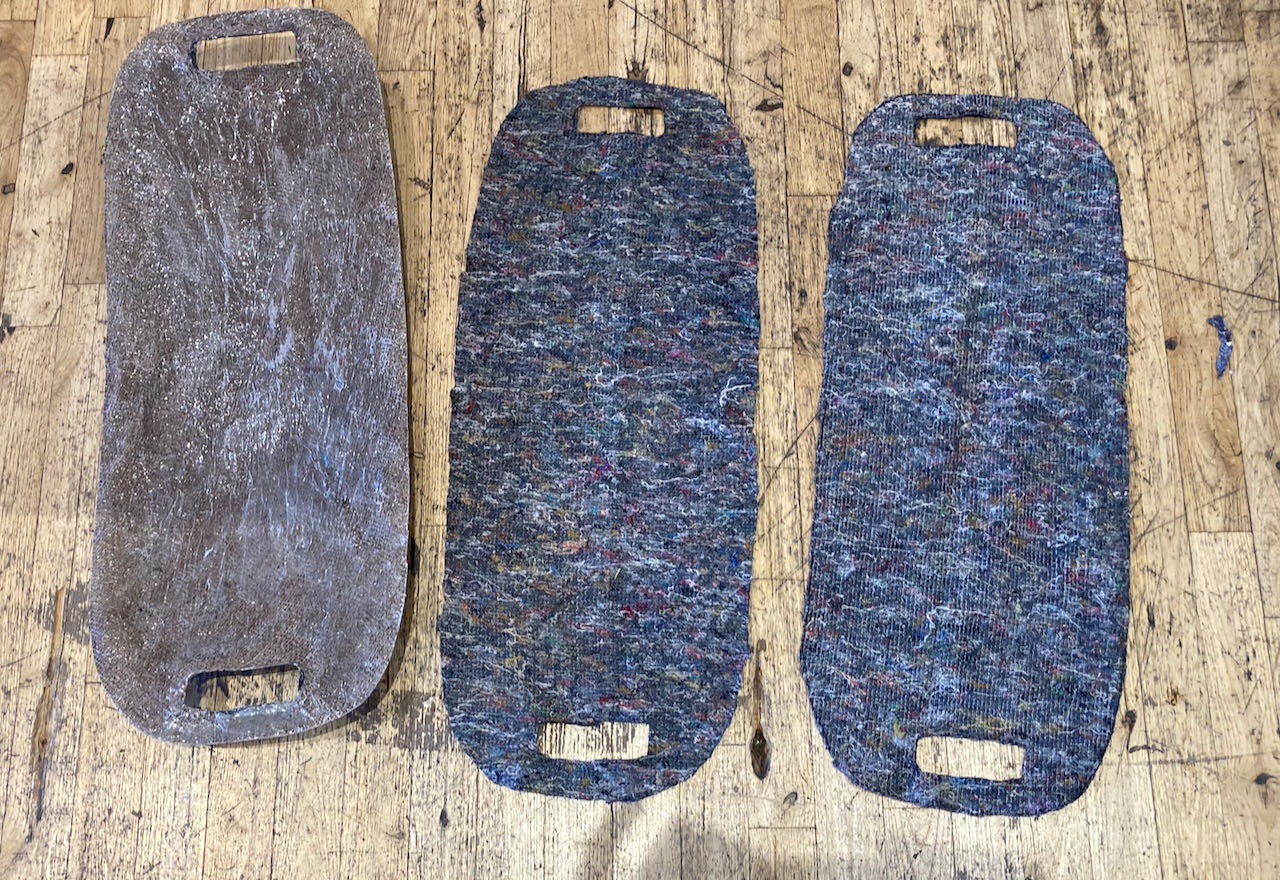
after casting also the second layer it was sturry enough to hold me and i was able to wobble my heart out.

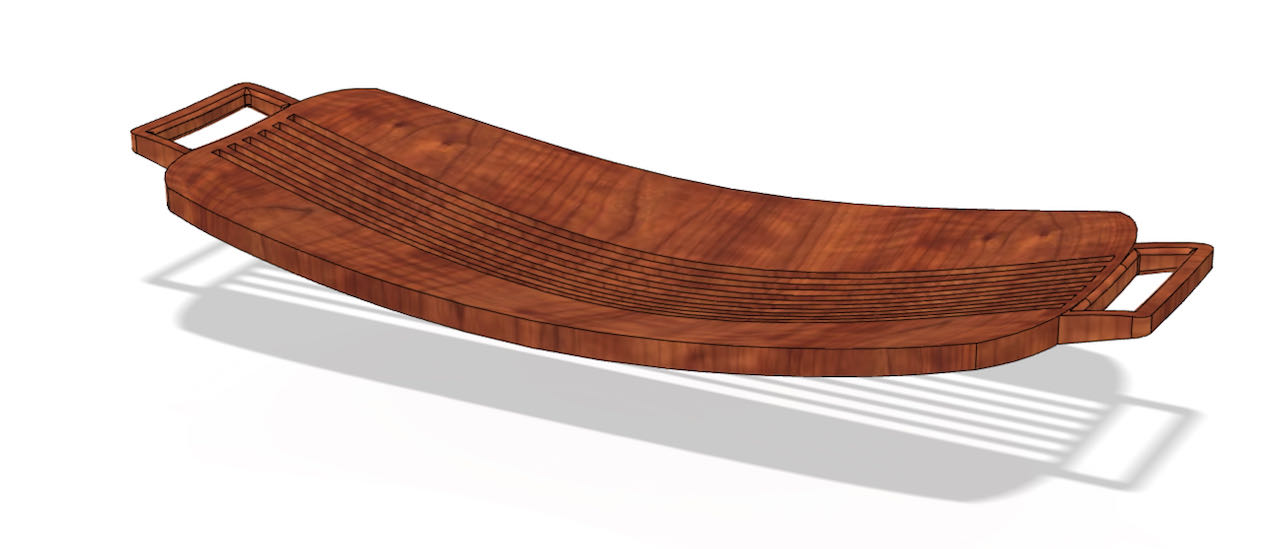
It now consists of 4 layers of jute placed with their lines skew on each other in the center and one blanket on each side.
- i really enjoyed this week, tried many software options and learned so much more in Fushion
 - next time find out the exact limitations of the machine, 10cm thick foam is just a bit to much for the Shopbot.
- find the right material to use for my composite wobble board.