Week 03
Computer - controlled cutting
Individual assignment: cut something on the vinyl cutter: design, laser cut, and document a parametric construction kit, accounting for the laser cutter kerf, which can be assembled in multiple ways and for extra credit include elements that aren’t flat. Group assignment: characterize your laser cutter’s focus, power, speed, rate, kerf, joint clearance and types
Vinylcutter
 - cut something on the vinyl cutter
 - different logo for the days of the week or maybe just my logo - keep it simple.
 - check the fab students before me and some basic searching
 - understand how a vinyl cutter works
A vinyl cutter is a type of computer-controlled machine. To cut out a design, a vector-based image must be created using vector drawing software. The cutter is capable of moving the blade on an X and Y axis over the material, cutting it into any shape imaginable. Since the vinyl material comes in long rolls, projects with significant length like banners or billboards can be easily cut as well.
The one major limitation with vinyl cutters is that they can only cut shapes from solid colours of vinyl, adhesive vinyl comes in a wide variety of colours and materials including gold and silver foil, vinyl that simulates frosted glass, holographic vinyl, reflective vinyl, thermal transfer material.
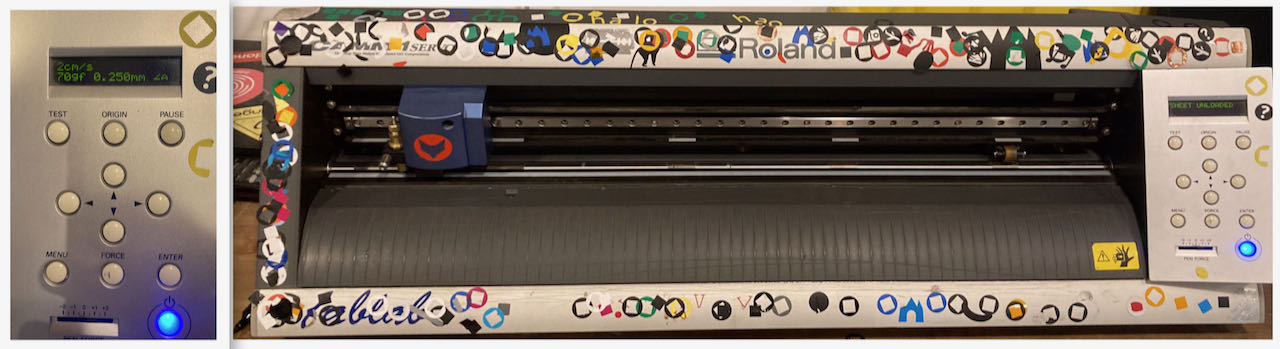
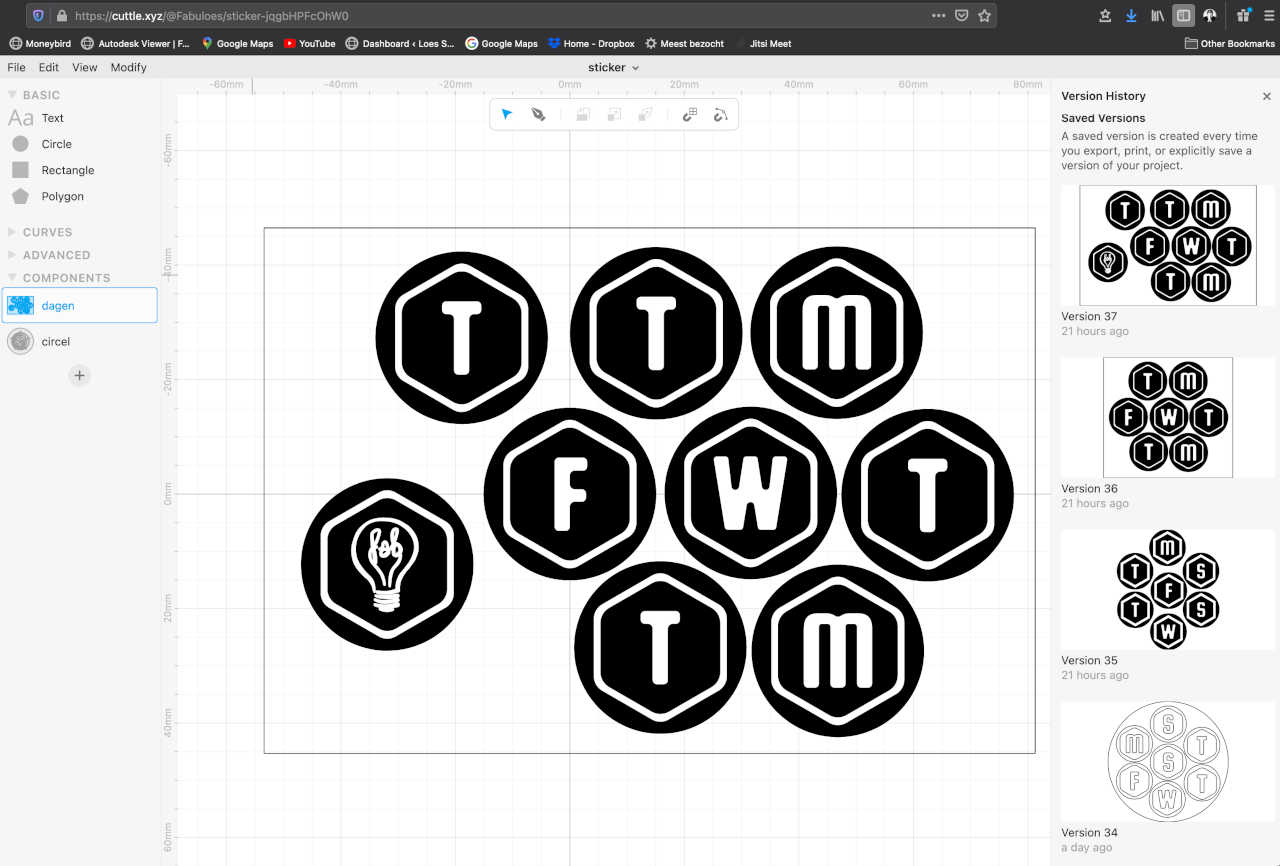
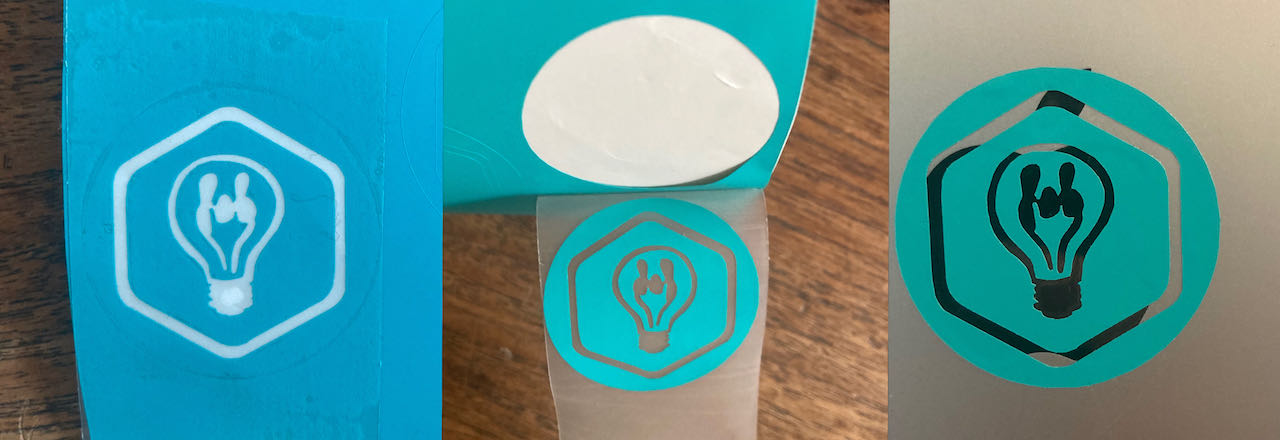
In the Waag we use a Roland GX-24 which is controlled by a laptop with internet connection so i could just store my files online and access them from there easily. I had a hard time decided what to make which took up to much time, so thats a good lesson for the upcoming weeks, don’t dwell to much on options, stick with one and go for it. In the end i decided to make some optional stickers for my final project to define the different boxes with the letters of the week.
I decided to use Cuttle for making this since i was using it also for my parametric design for the laser cutter. At first i didn’t notice that i was still working in inches .. you can imagine how big the letters turned out, thank god i looked at the size in mods before i printed but not so lucky after i calculated.
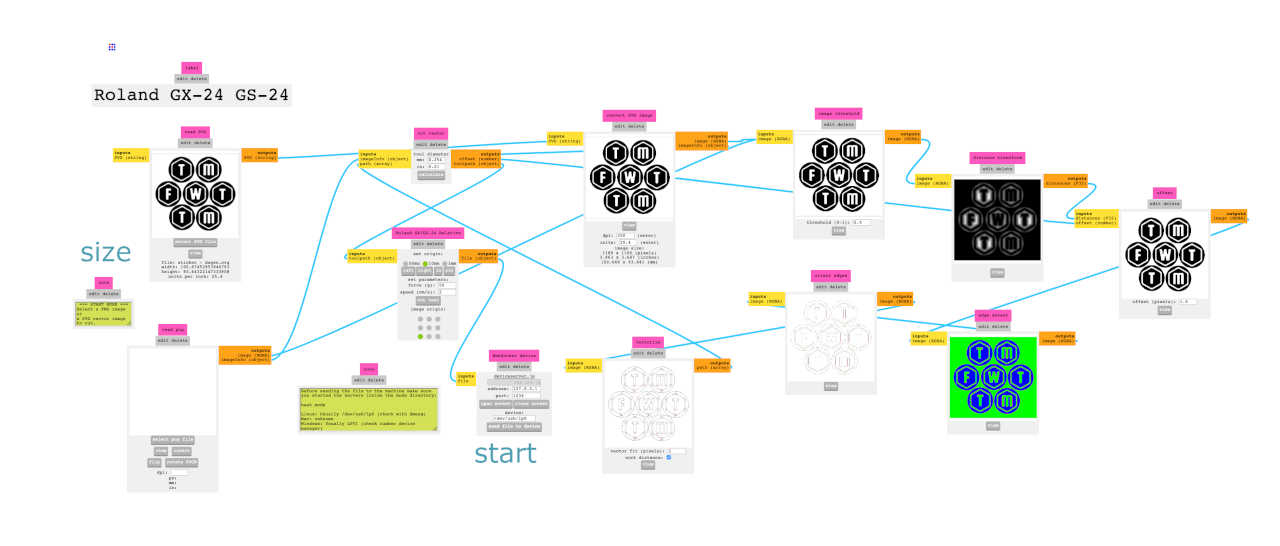
The mods site you enter by:
- right clicking on the box on the top left
- then programs/open program/Roland GX-GS 24 vinyl cutters - cut
You arrive at the window where its all visualized what happens, not so much to alternate here except for size, as far as i understood.
Mods versus drivers Mods talk directly to the machine without a driver in between.
If you open Terminal you can ‘talk’ to the machine in terminal:
ls /dev/usb/lp0
    echo PD
This would bring the pin down and adding number would move it.
After checking the size the second time i loaded the vinyl in the roll at the back by lifting the handle and adjusting the rolls to the desired position (on the white marks). Pressed the test button to check the knife and settings which was already perfect for this vinyl.
The settings i used:
- Force 55 and Speed 2.
Didn’t have time to play around with different setting since the machine time was limited due to Covid and travel problems due to snow - so thats on the todo list for coming weeks
So i asked the MOD to calculate so that the file was ready to go and the cutting began, took some time since i also had a bit of curves and so on in there (added my tiny logo later on)
Weeding of the stickers was easier then i thought, mainly because i had simple figures and they were attached together, for the next time i would try to connect even more to be able to keep the original layout easier, although i must say clear tape was my best friend.
Lasercutter
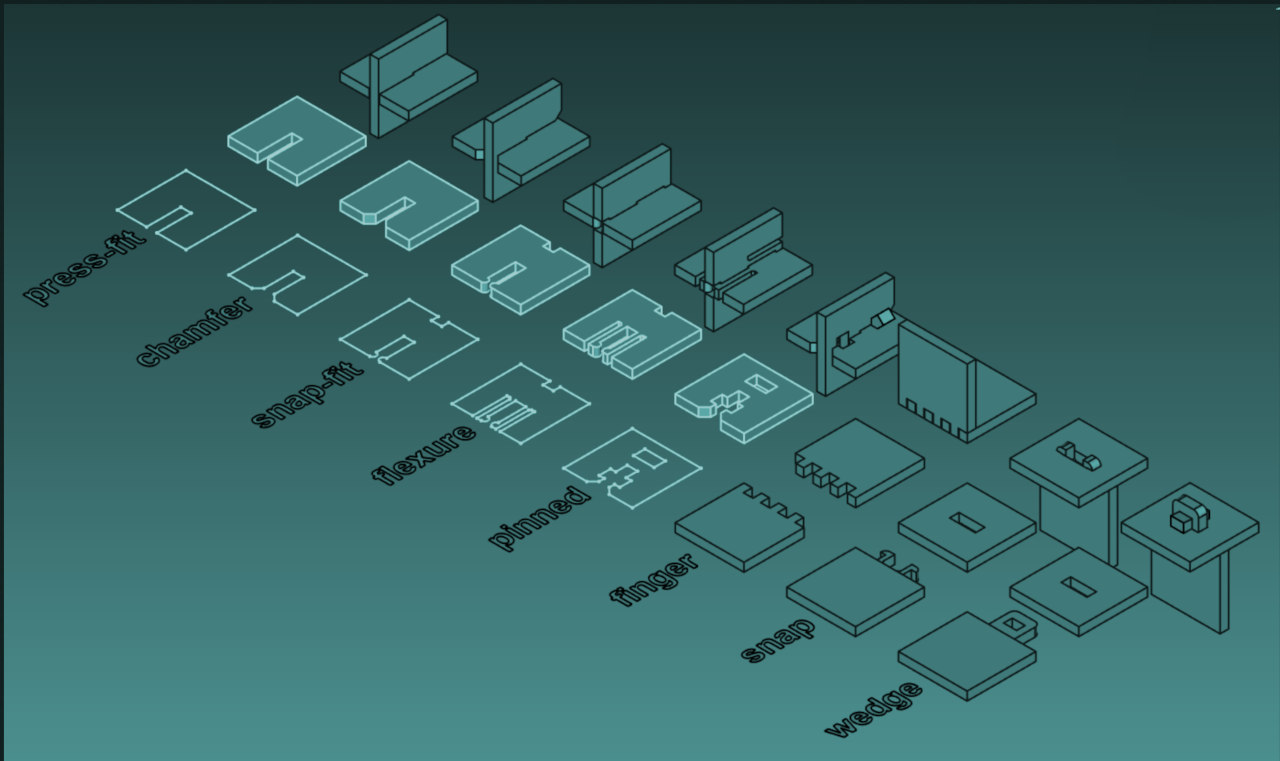
- design, laser cut, and document a parametric construction kit accounting for the laser cutter kerf, which can be assembled in multiple ways and for extra credit include elements that aren’t flat
- different logo for the days of the week or maybe just my logo
- check the fabstudents before me and some basic searching.
- understand how a vinyl cutter works.
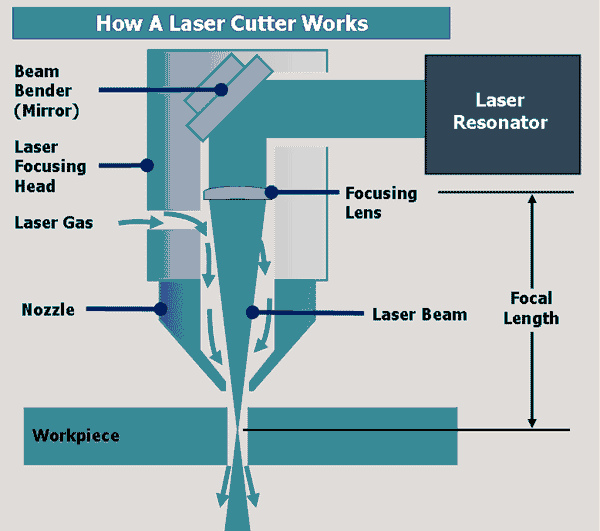
Laser cutting is a technology that uses a laser to slice materials. While typically used for industrial manufacturing applications, it is beginning to be used by schools, small businesses, and hobbyists. Laser cutting works by directing the output of a high-power laser most commonly through optics. The laser optics and CNC (computer numerical control) are used to direct the material or the laser beam generated. A commercial laser for cutting materials uses a motion control system to follow a CNC or G-code of the pattern to be cut onto the material. The focused laser beam is directed at the material, which then either melts, burns, vaporizes away, or is blown away by a jet of gas, leaving an edge with a high-quality surface finish.
CO2 laser is most common.
The material will either burning, melting, evaporating or pass
Airflow is an important factor in laser cutting
Instead of getting used ot different drivers every time you use a different cutter it’s easier to use a mod instead of printer drivers.
*NEVER TURN YOUR BACK TO YOUR LASER CUTTER
I found a good explanation of lasercutting on line
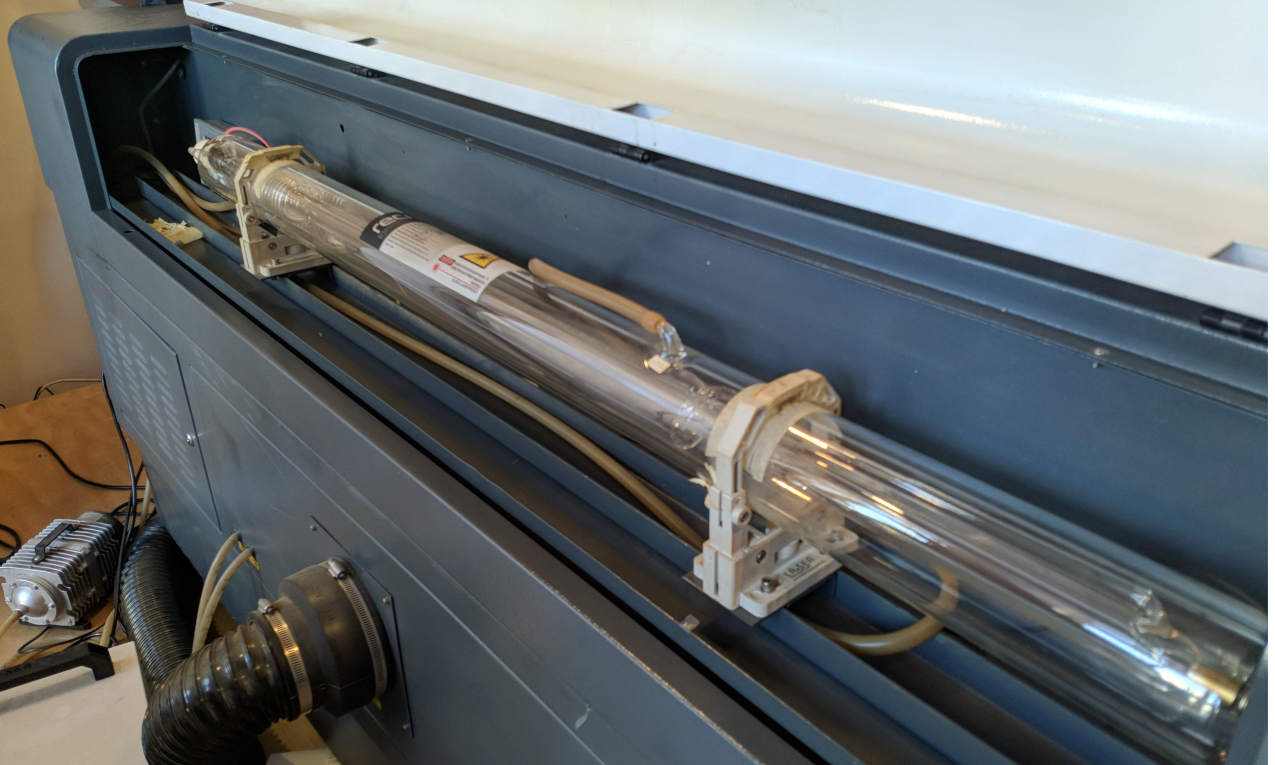
At the Waag there is a BRM CO2 laser which cuts wood, acrylic and textiles but not metal nor PVC, the last is a no go on all lasercutters.
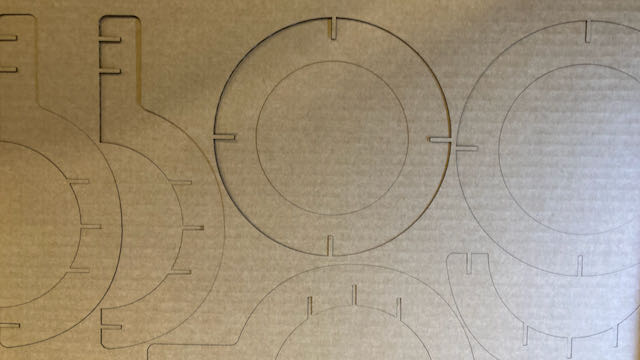
First you load your file in to Lightburn (see below) I started with one circle and 1 connector to see if they matched.. which they didnt so i had to adjust my design with adding the kerf calculations. Kerf is the section on both sides of the drawing lines that also gets taken away by the laser, for this material and focus point it was 0.17mm. in my case it actually resulted in me making the cuts in 2x 0.17 smaller to get a snug fit.
back to the machine, so first switch the key, then make sure the power is on and only then you can switch the left knob to on.
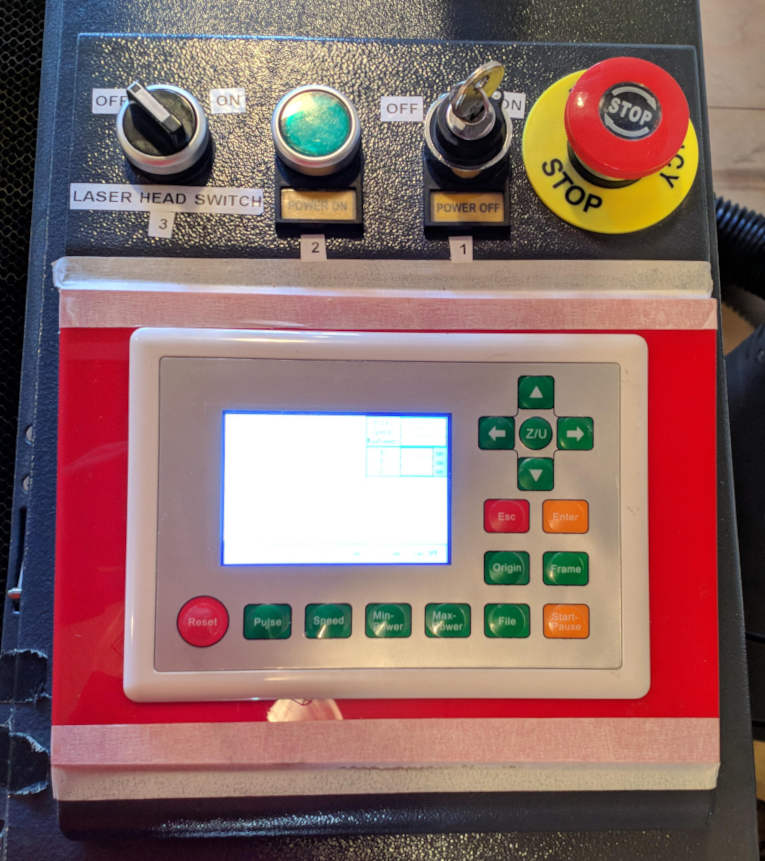
after you’ve switch the machine on don’t forget to switch on the ventilation.
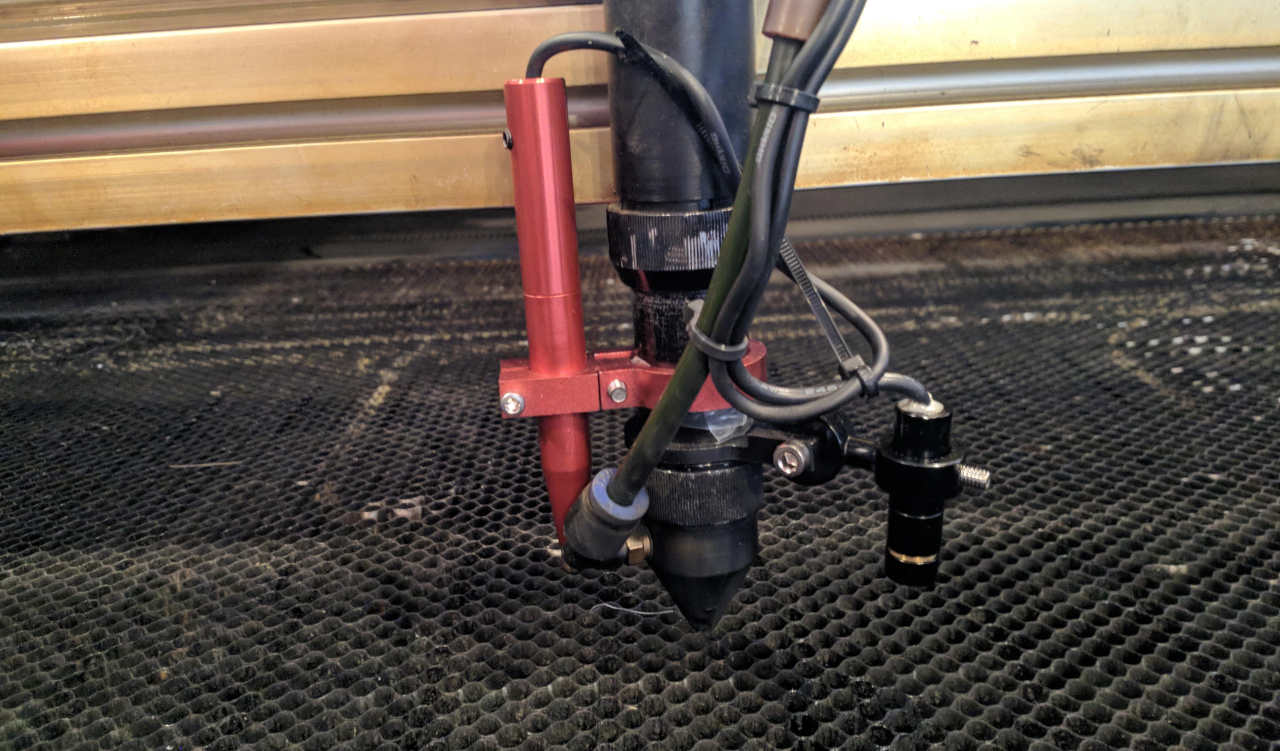
on the pen there are
- a little red light on the arm to show where the laser is pointed
- air blower
- laser nozzle (within this there is a mirror and a lens) on the top there is the ring to loosen so you can change the focus
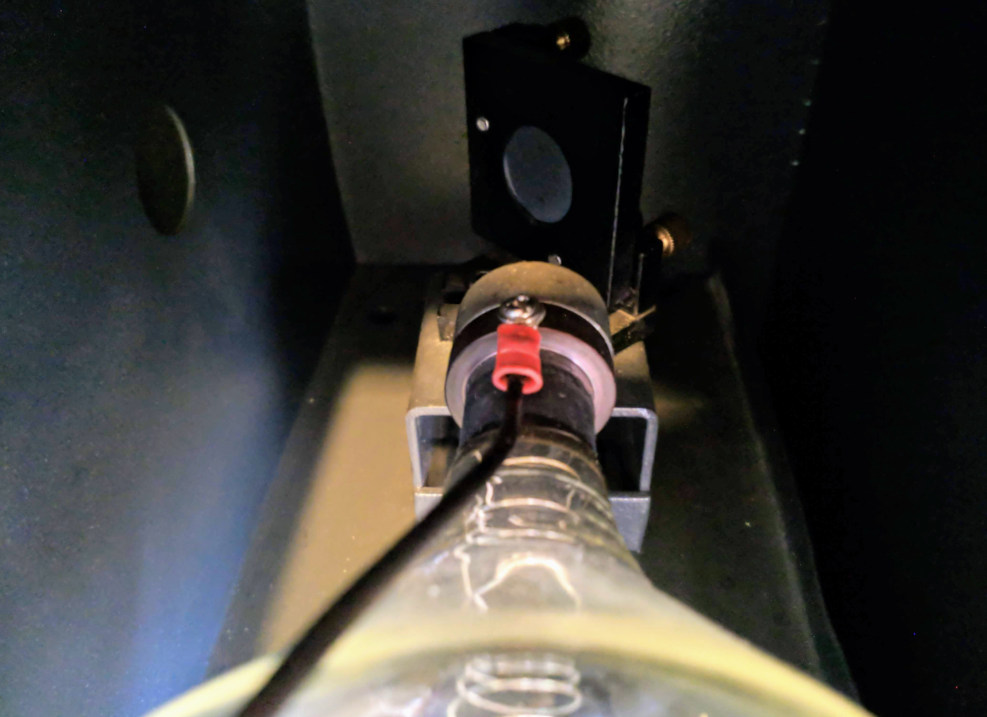
In this machine there are 4 mirrors to guide the laser to the lens (the 4th one being in the pen). Since light can’t bend around the corner this is the only way to get the been to the nozzle.
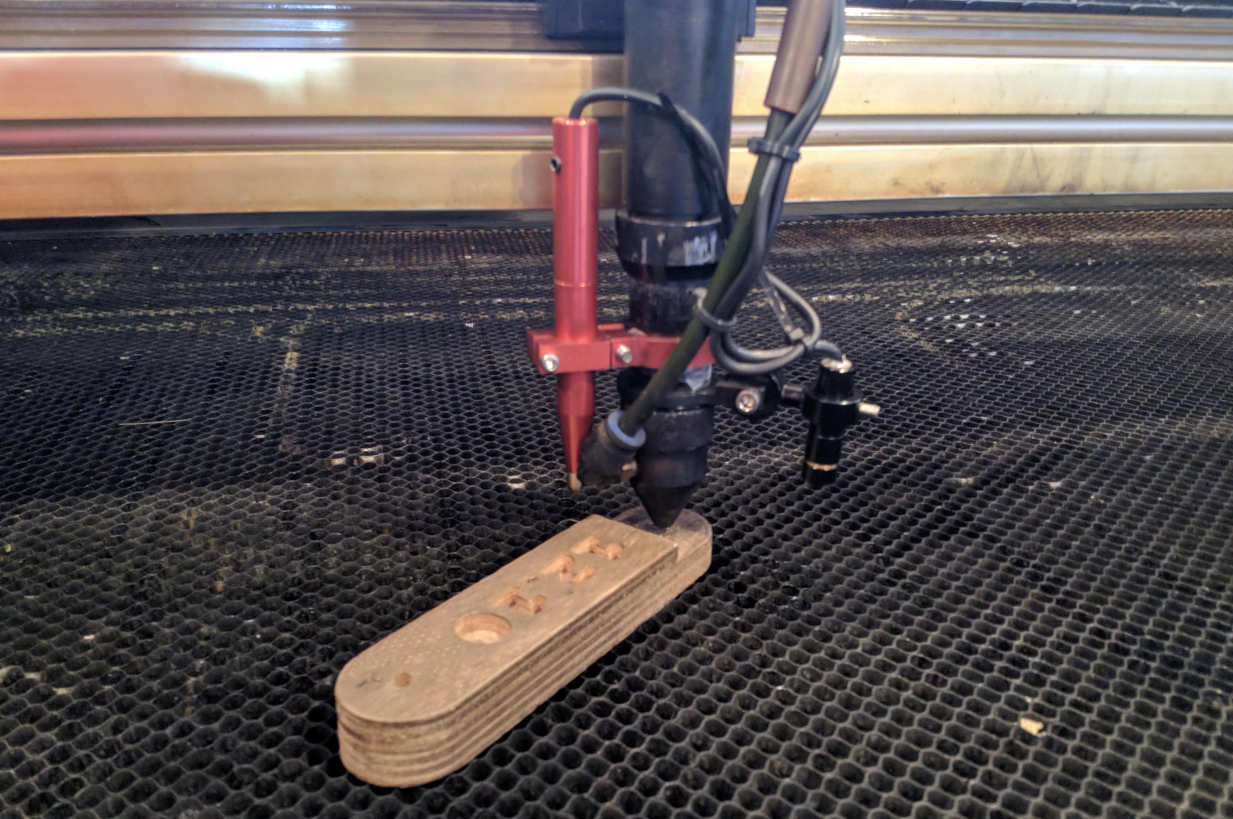
Before you can start with a new thickness of material you will have to focus the laser on the distance since the beam of a laser is shaped like a glass hour. You want the material to be on the point where the beam is most narrow. Also you can set a starting point with Lightburn and let let the machine run a test frame, both of these things are very importing since you do want to laser on the material.
Here are some print examples made by the group that was there on the first day, luckily enough there are some great examples plates from different material hanging next to the machine.
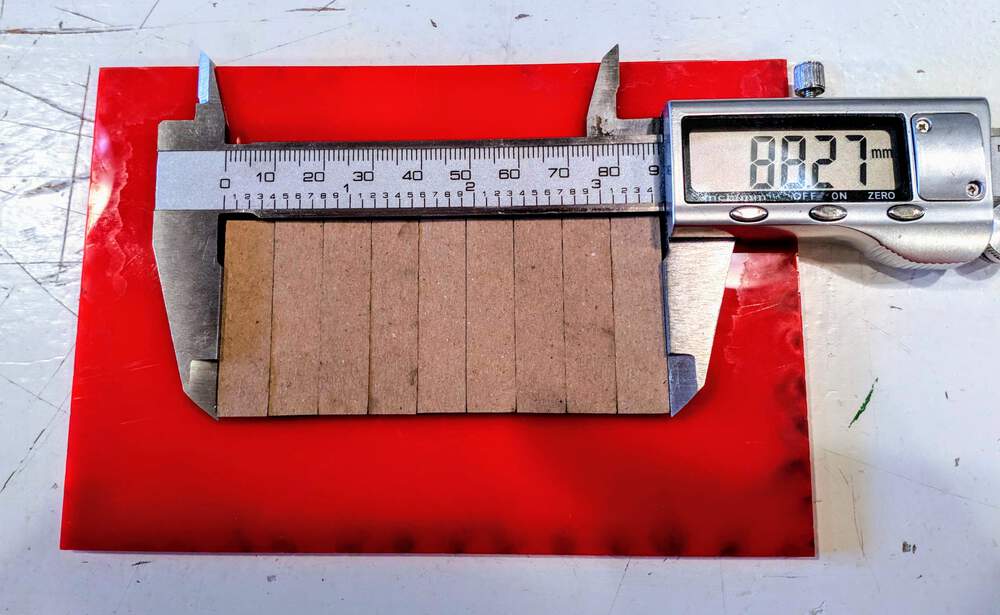
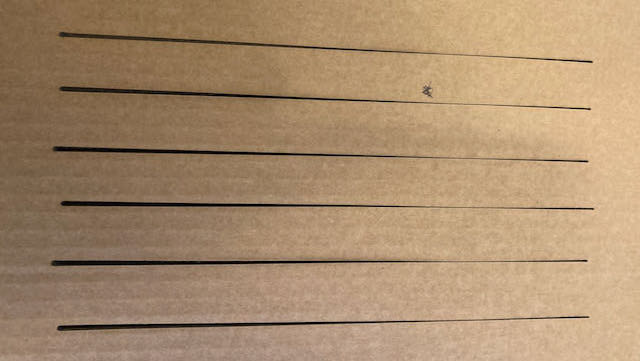
Understood from the documentation of Nadieh for the group assignment how you have calculate the kerf (section thats burned away by the laser) not by just measering one kerf but actually making for instance 10 lines on a certain distance so you have a more reliable result. It’s very hard to measure one kerf exactly right but when you have like they dit a piece of 90 mm and you cut 10 lines in it and it ends up being 88.27 mm you can just divide it by 10 and you have the kerf. With cardboard it actually is kind of nice to ignore the kerf to make it nice and tight but with other more sturry material you really have to calculate it in your design.
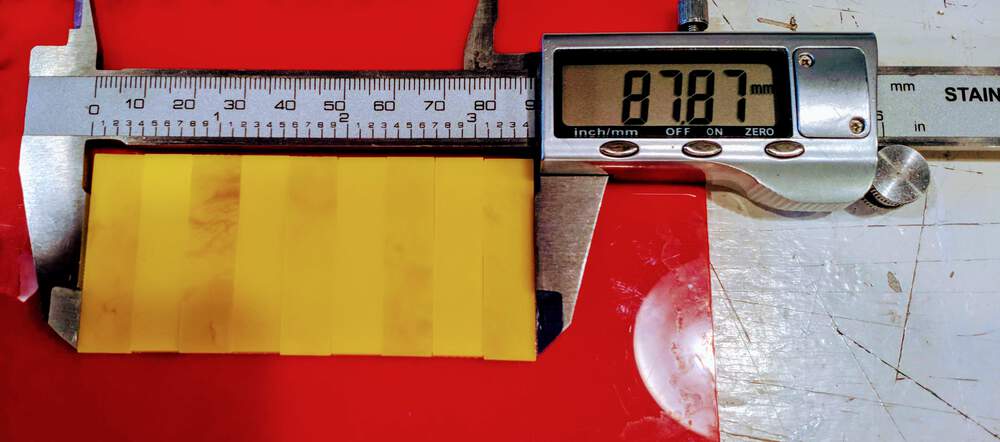
They also did the test with acryl
During the day i was a the Waag to actually lasercut my design i learned a lot from my fellow students what really helped me was their workflow lists so that i would not forget things for instance this one from Nadieh:
Workflow for the lasercutter:
- Place material on the laser bed, possibly holding it down with weights
- Align the z-axis of the laser head (if it’s new material) with the wood aligner
- Open the design in LightBurn on the connected PC
- Set-up the lines with the speed and power settings that you think are needed
- Do a Frame to check that the full area that the design needs is available and free of weights
- Close the lid, gently
- Turn the laser on with the left-most switch on the machine above the controller
- Start the air ventilation machine
- Press Start
- Stay with the machine until it’s finished!
- After it’s done, turn the laser off (with that same switch to turn it on)
- Wait a little to let the air ventilation do its thing
- Turn off the air ventilation
- Open the lid
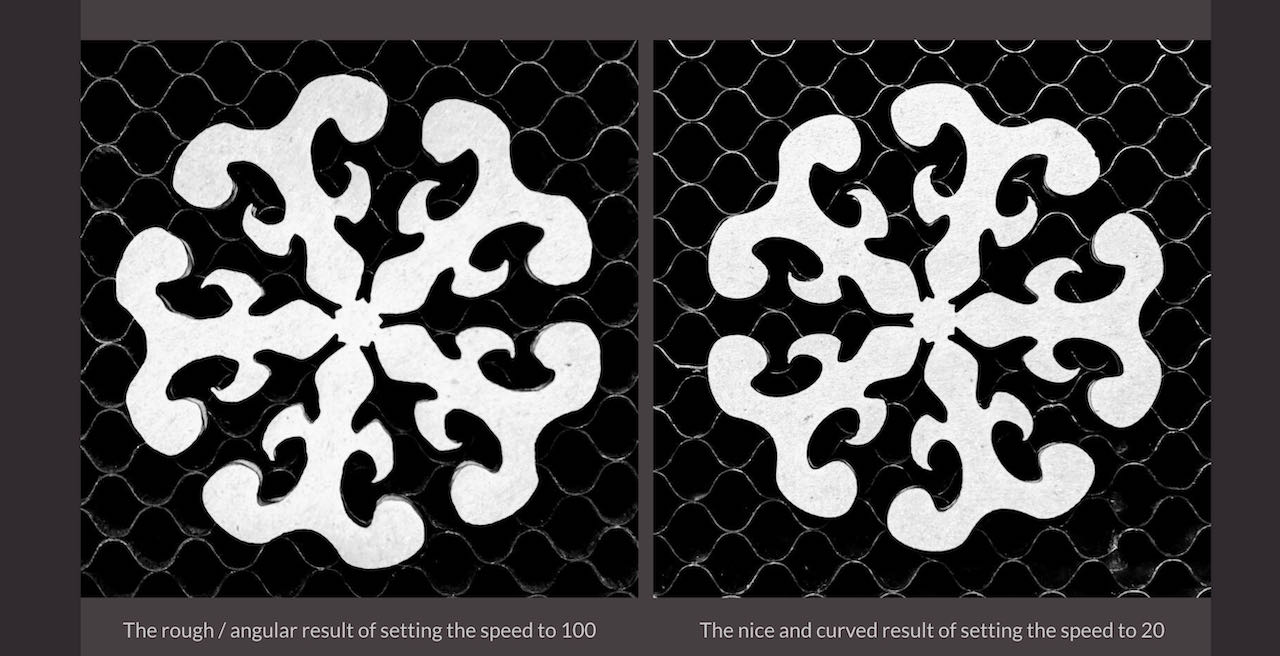
Another thing to keep in account with the lasercutter is the speed, the slower the speed the more it tends to be smooth. Again the very elaborated documentation of Nadieh was very helpfull, here a very clear image that actually explains it all, except that i will have to mention that lower the speed you can only do till 10.. lower then that it doesn’t work anymore. Also be aware that tha slower you go the more you have the risk of burning, so always do a test run.
Did a little test together with Nadieh to figure out how it works with the focus point, layed the cardboard skew in the machine with the focuspoint in the center and it turned out to be as we expected that the beams gets wider as it gets further away from the focus points either way. After using Deepnest to gather all my images nice and snug. I did my first try out of the whole thing. This ended up being nicely fitting but just visually not working as imagined. Got a nice suggestion from Ferdi that to check this you can also use a piece of foam instead of cardboard.
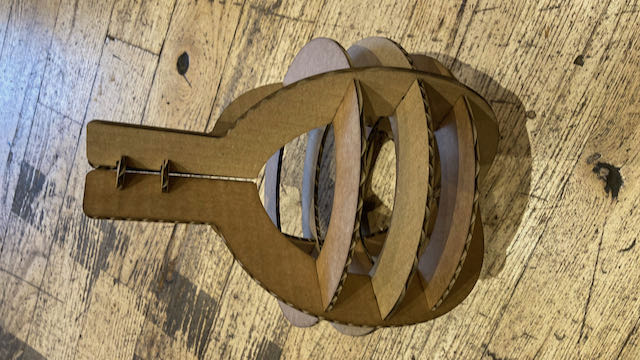
Changed the drawing a bit in cuttle, nested it again and cut the second version. Stupidly enough i accidentally took 2 plates of cardboard which resulted in a bit more smoke and made me realize i could have used lower power considering it almost cut through the bottom plate also
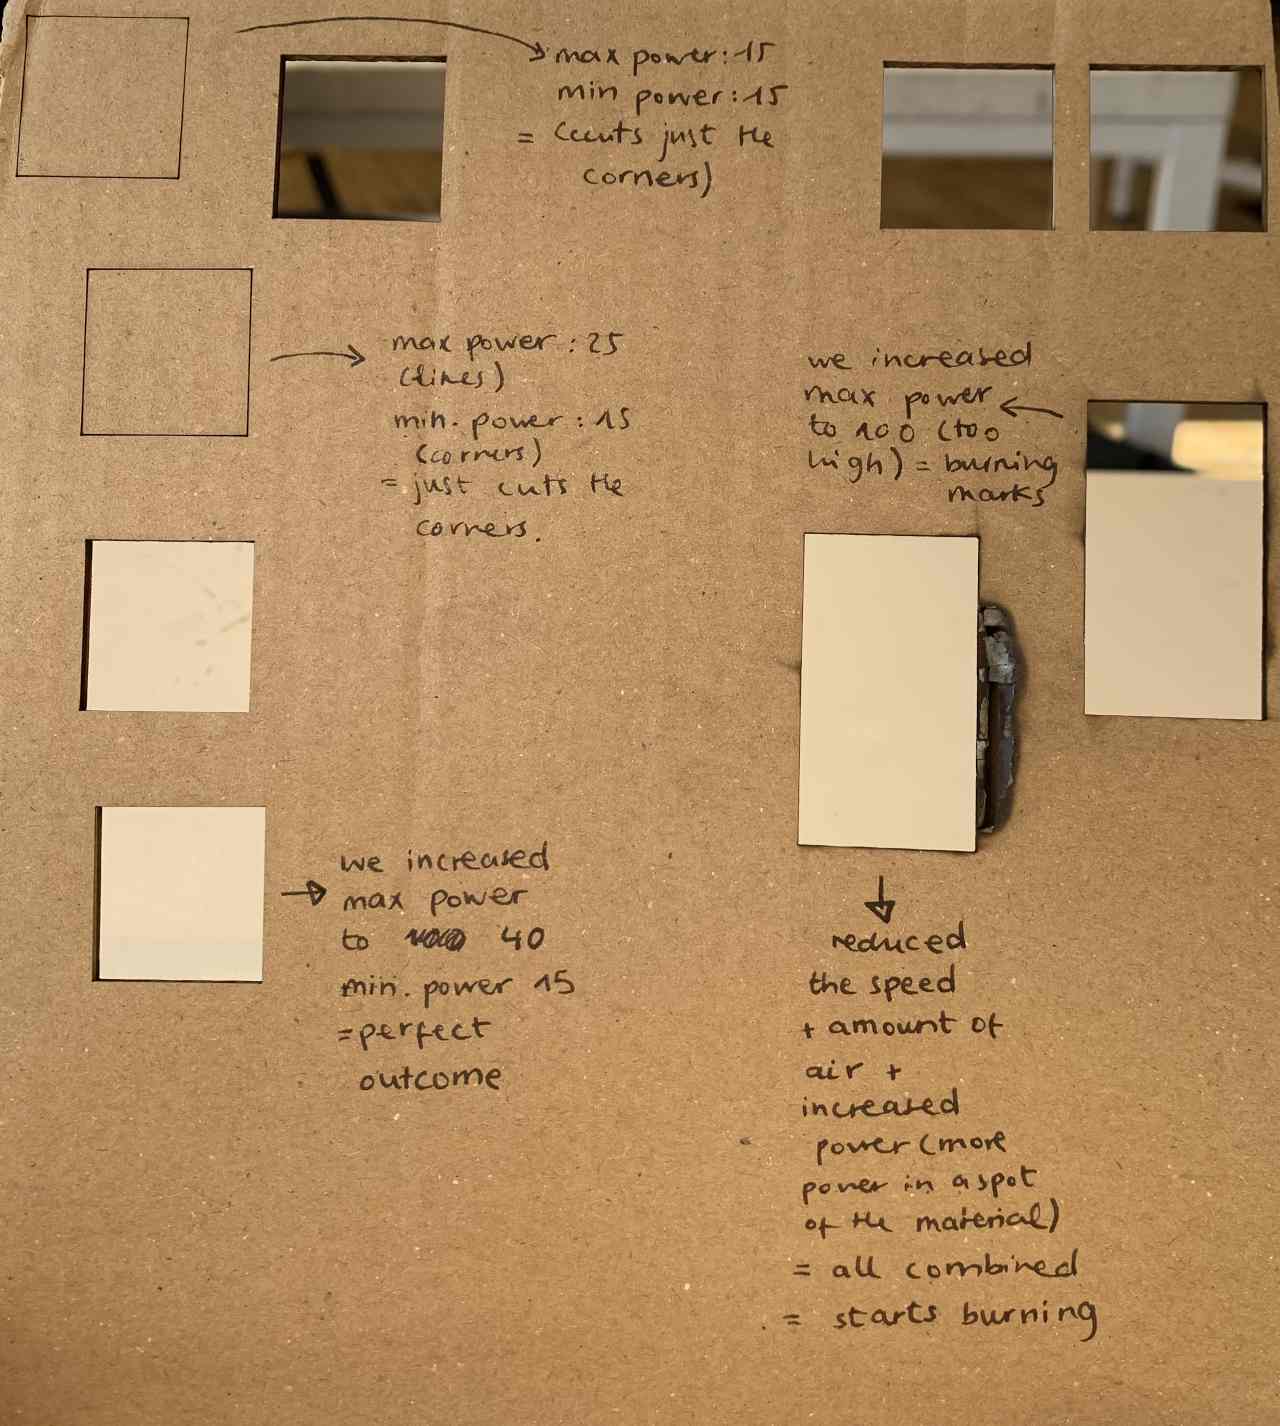
The settings i tried during this process are
| try outs | Speed | Pwr MAX | Pwr MIN |
|---|---|---|---|
| 1st try | 90 | 50 | 15 |
| 2nd try | 70 | 50 | 15 |
| best try | 70 | 40 | 15 |
The lower the speed the better, because it stays more accurate.
Minimum power is where you make sure that it also cuts away the corner, if that fails, put the min speed up a bit.
Maximum power is to be able to cut the amount that you need/want.
Software
Lightburn
The software we use in the waag is called Lightburn - watched a few tutorials to get more comfortable with the software.
some things to remember:
Escape ends current action - twice it brings you to selection mode
Hold space-bar + left-click & drag drag view
Ctrl + Minus key Zoom out
Ctrl + Equals key (plus key) Zoom in
Shift + arrow moves in large steps
Ctrl + arrow moves in small steps
Ctrl + Shift + Arrow align along that edge
Ctrl + Shift + H horizontal mirror`
Ctrl + Shift + V vertical mirror`
Imported graphics are placed in the center of the view by default, or if dragged into view, wherever they are dropped.
Hold shift when importing to place them according to their original file.
Hold ctrl when importing to use arc-fit simplification on the importing file.
-
 keeps the original shape - so unlock
 -
 is your friend. Also look at the order of cutting, check Optimize Cut Path
 -
Interval and DPI are the same thing just different way of asking.
-
layers hold your mode, the way the cutter looks at your document (for instance image, fill, line)
The outline of your image tells you in which layers you are, make sure they are in vectors not raster, if not use trace image to create vectors (to adjust how much use treshold)
Cuttle
Online software cuttle Spend 2 days this week learning with the help of some tutorials and a very supportive message board to figure out Cuttle and also just figuring out what i want to create for the individual project this week..
Cuttle is a very easy to learn interface, a bit in between everything, visual enough to guide you but lots of code to help.
Some things to remember:
Simply drag shapes in.
Shift + drag holds aspect ratio
Option + drag makes the handles independent when using vectors
Double click to edit objects
Command + drag to change to origin of the object
I had a bit of issues with changing of the origin, it seems to only be possible when there are no restrains or calculations on the object.
Rotational repeat can be assigned to a whole group.
The video i made of my versions was to big and saves as a mov so had to install ffmpeg quickly and use this code to transform it:
ffmpeg -i learningcuttle.mov -vcodec h264 -acodec mp2 learningcuttle.mp4
It was a real trial and error experience, started out with a polygon, which i had no idea on how it was drawn.. which is probably different in every software, i do miss the opportunities from Fushion when you can choose what kind of calculated polygon you get. Created this polygon below which i never even printed, time flies…
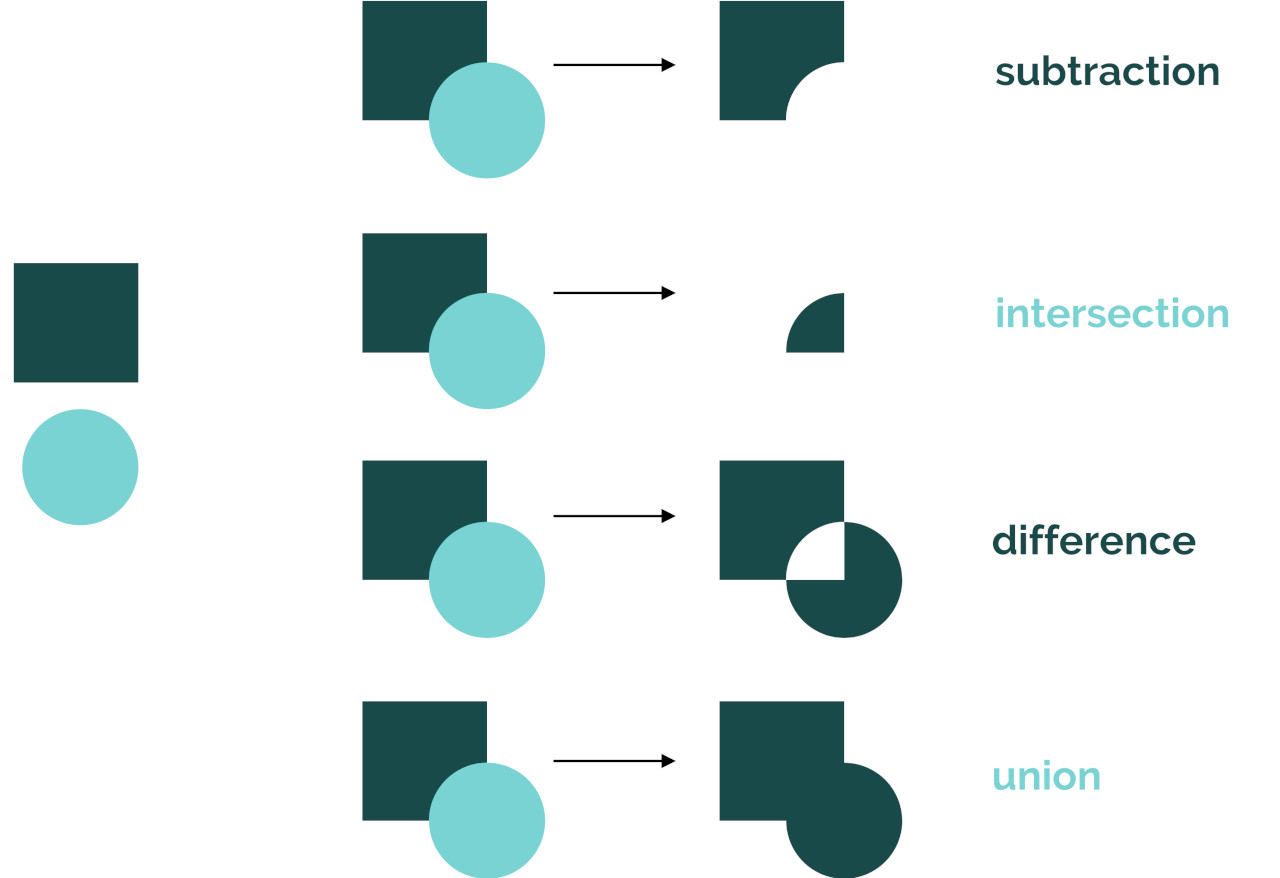
And oh my god Boolean.. i realized i forgot everything from my graphic education.. back to basic so it took me some time to create anything. Below a small reminder for myself.
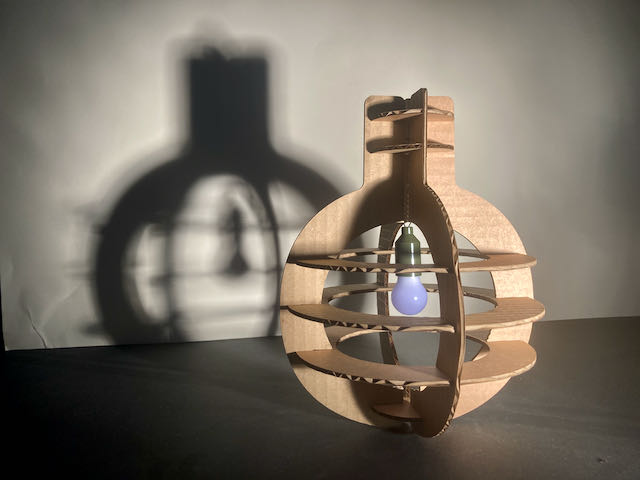
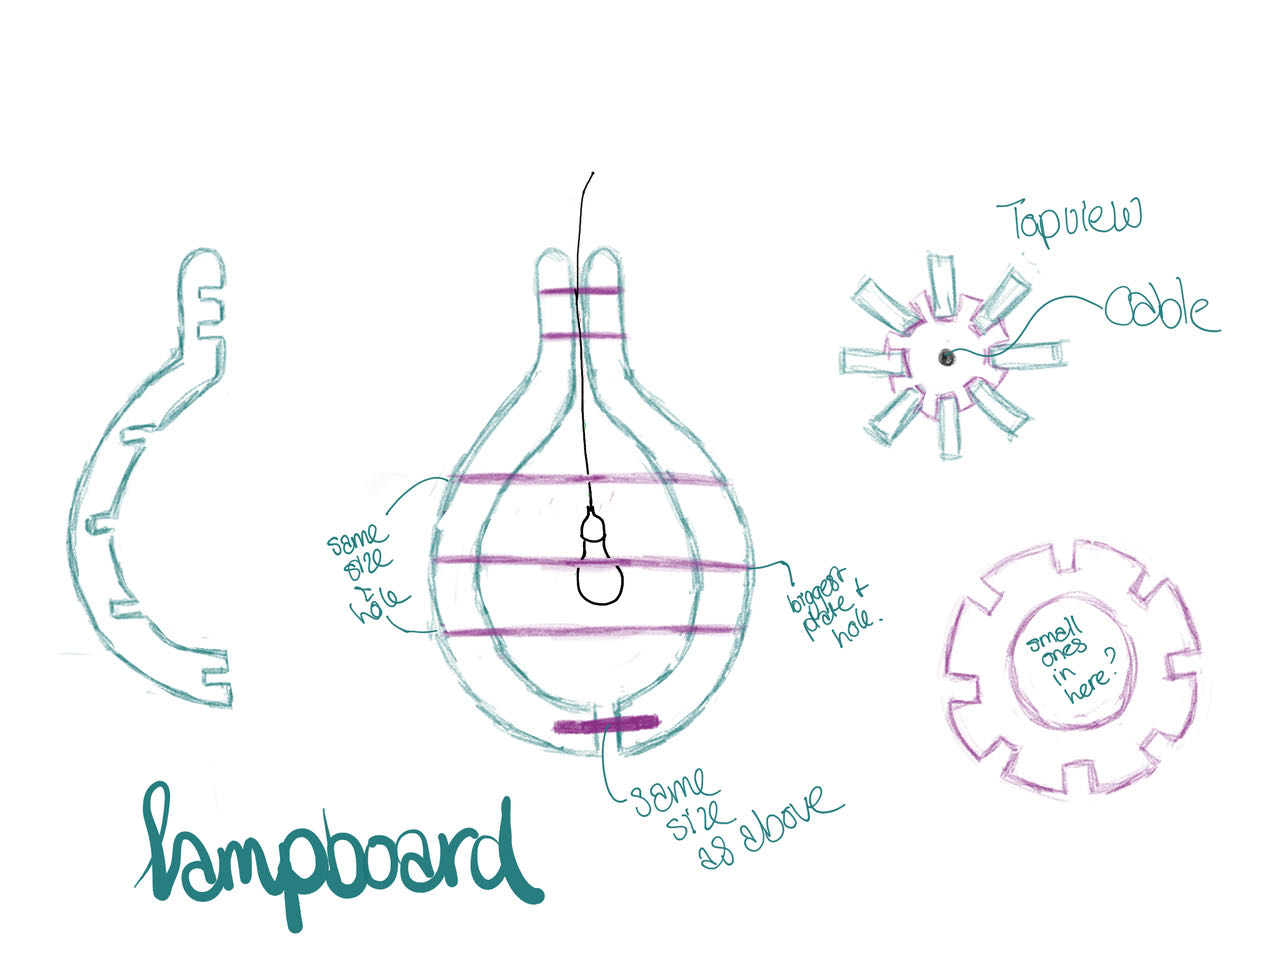
Learning to work with parametric designs is a matter of being strict with yourself and stick with it. One other thing that i now know that polygons are a real pain in the ass when it comes to figuring out on their exact measurements. After reading on the assignment page that a simply box is simply not good enough i went back to the drawing ipad and came up with anther idea inspired by these cardboard hunting trophy you can hang on the wall i want to make a lampboard.
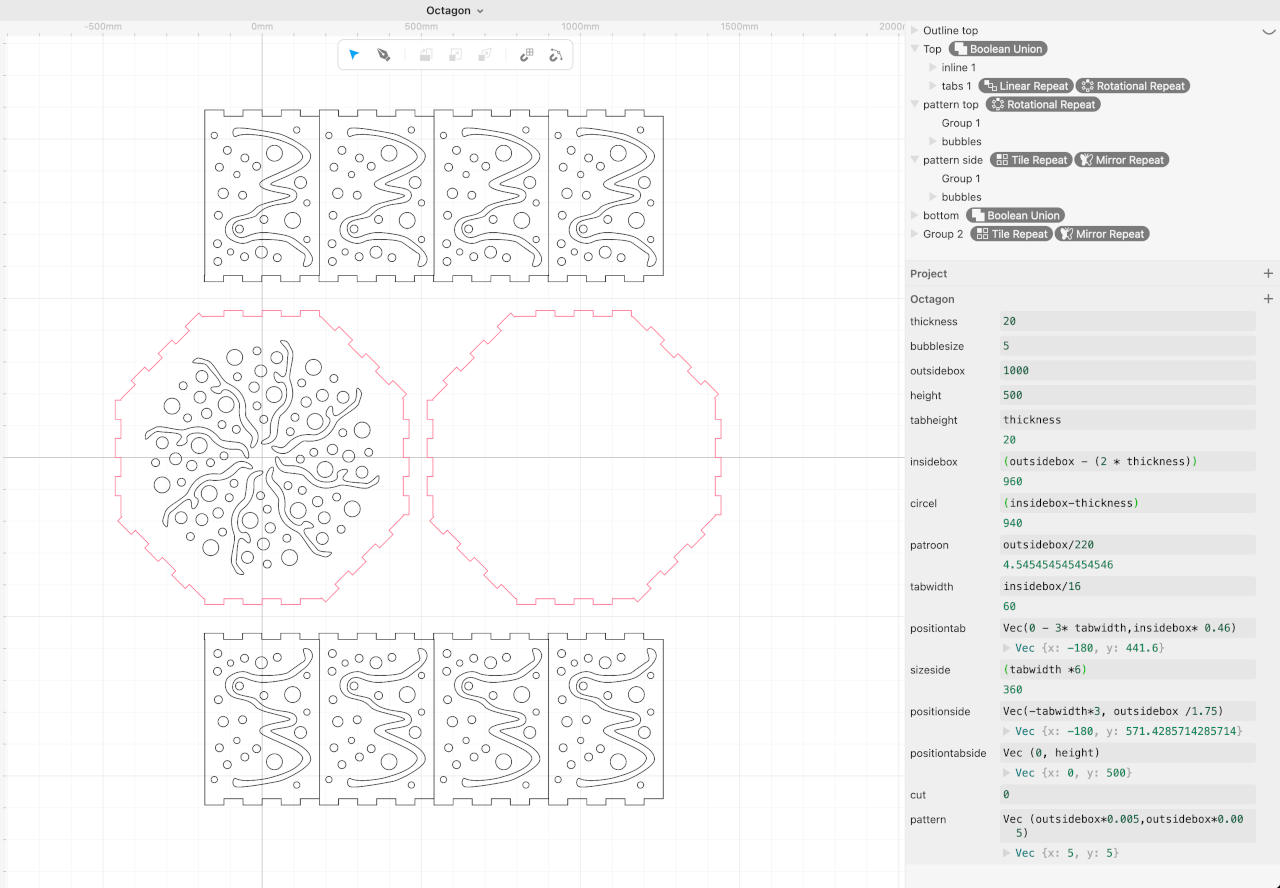
Which started really smooth, until i got stuck with trying to make a good half slice of the lightbulb. Also here trial and error was the best way to get my through. In cuttle the way to go is to use a lot of groups inside groups so you can give specific assignments to the different object/groups.
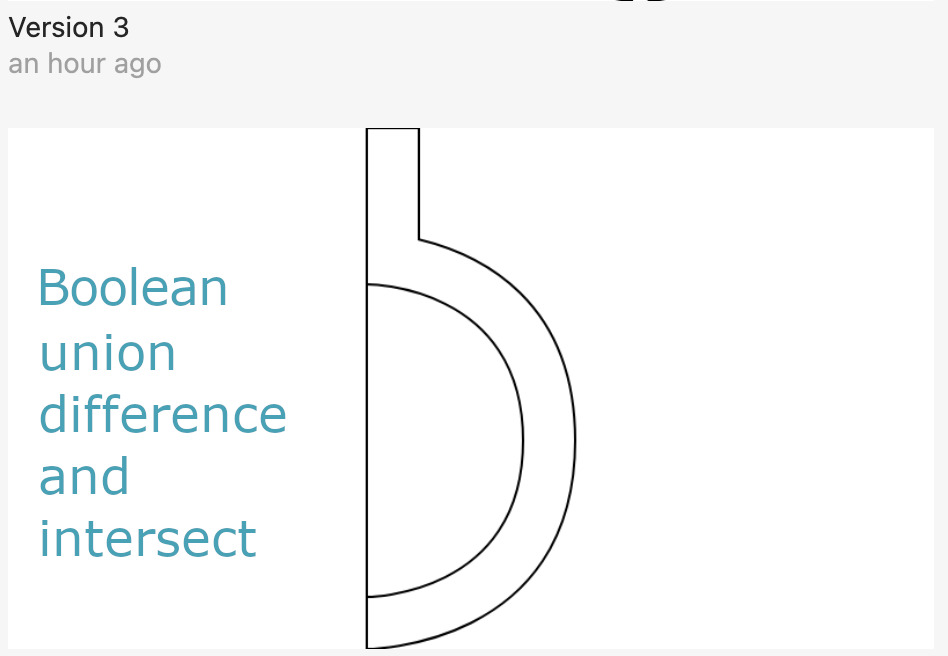
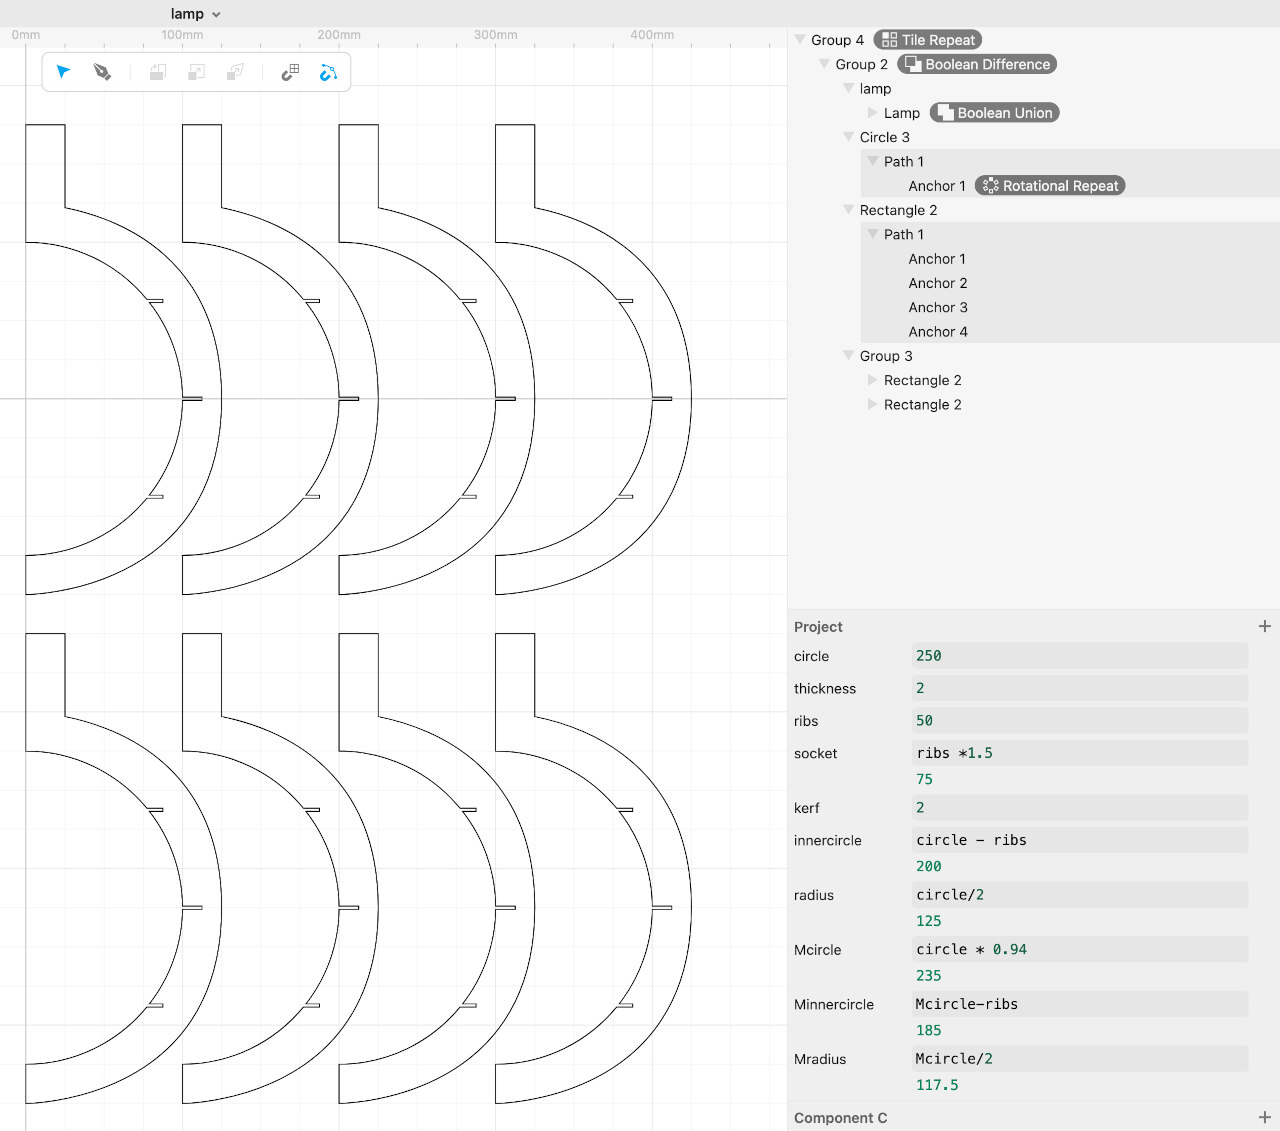
Ofcourse another problem found my path.. i really should have paid more attention in math class.. ended up using Pythagoras to figure out the position of the 1/4 horizontal circle.
Deepnest
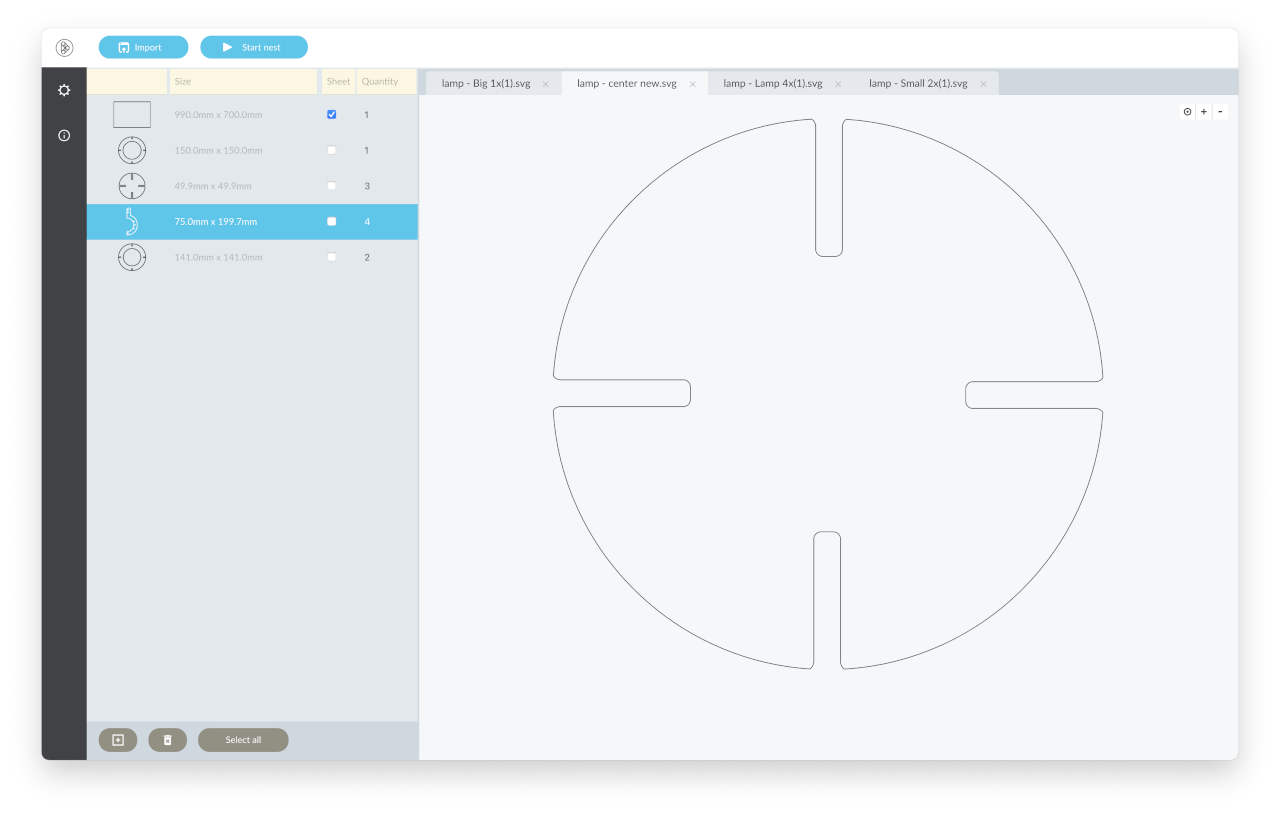
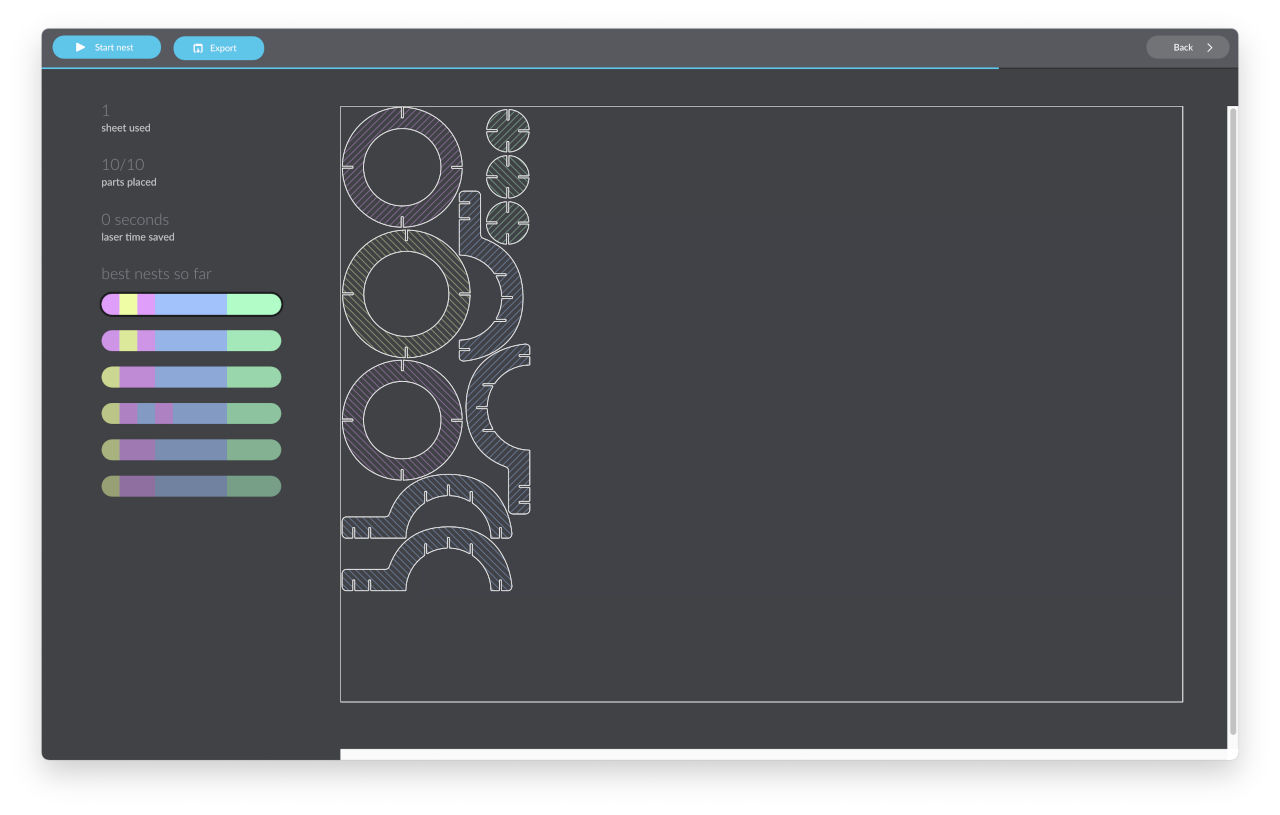
After creating all the different svg files in Cuttle i decided to instead of puzzling myself to let the computer puzzle for me using deepnest. The software asks you to make a sheet of the size of the material you are gonna use and for the rest is very intuitief.
Inktscape
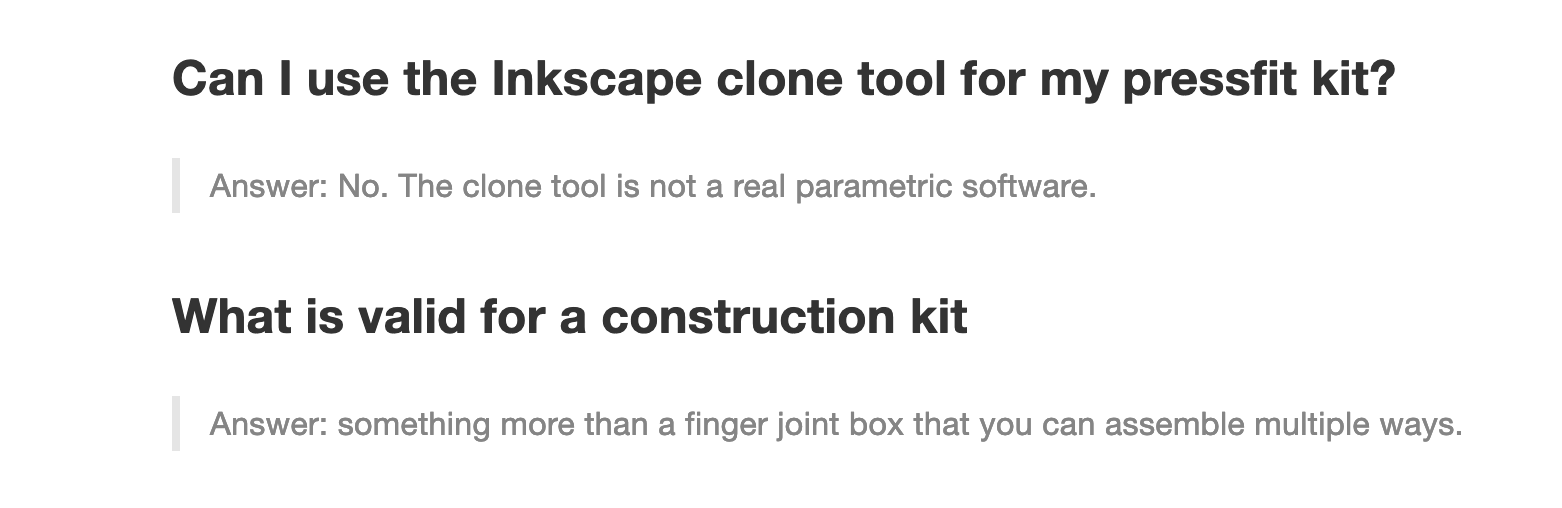
I’ve downloaded inkscape from this site It reminded me again of CorelDraw.. and what i missed most was a clean parametric way of drawing, if only i"ve read the assignment instructions earlier then i wouldn’t have even tried. Reading this also made me step up my game.. since till now I’ve indeed been busy with a simple parametric box in Cuttle (see above).
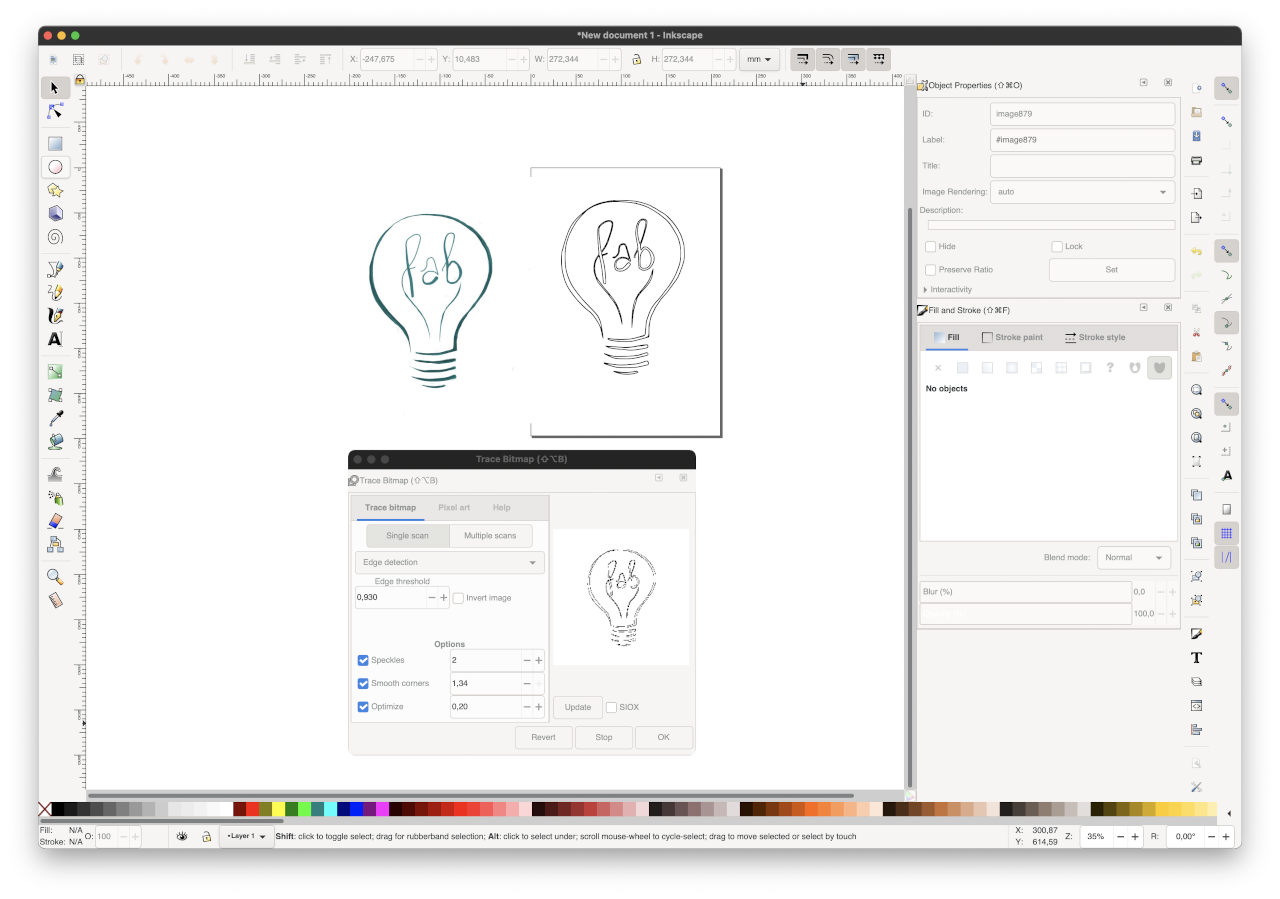
But i can use it for my vinylcutter assignment, so i tried a bit of trace mapping with my fablogo to understand how that works, seems understandable how to make it and what settings do what, in inktscape there are 3 ways to trace:
- Brightness Cutoff which uses the sum of the colors to determine black or white.
- Edge detection was very handig for my logo since it gave it a smooth tracing
- Color Quantinization finds where colors, brightness or contrast changes, an odd or even number of output colors decides black or white.
Group assignment
Due to snow in the Netherlands in combination with covid restrictions i could not make it to Amsterdam on the days of the group assigments but luckily enough i have friendly sharing fellowstudents. So i understood the procedure and felt comfortable enough to start working with the machines on the day i could finally make it to Amsterdam.
Git
When i tried to push my files to Gitlab i got an error from terminal, which has probably something to do with upgrading my mac yesterday.
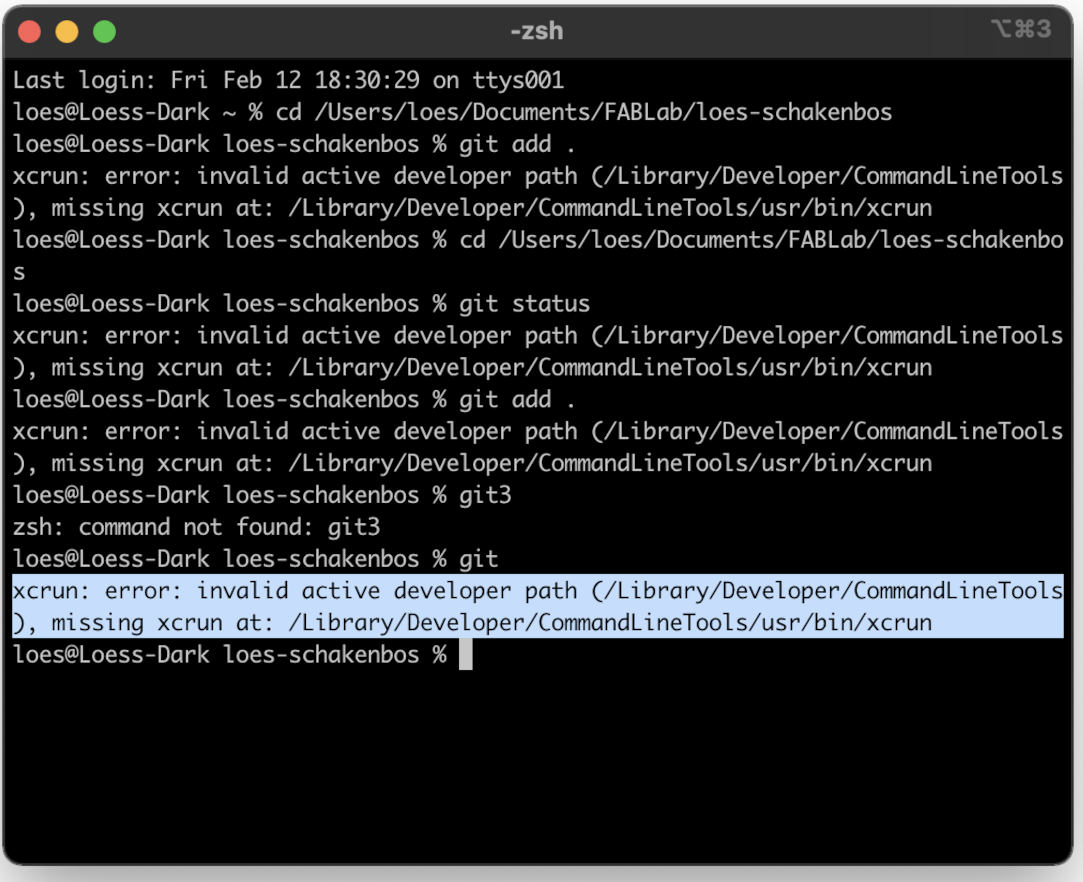 But nothing a quick google can’t fix (i hope) so i installed xcode amd continues withing 5 minutes
xcode-select --install
- fun week, made it hard for myself by choosing this object, but loved the learning possibilities, back to math lessons
 - next time think maybe talk to the fellow student a bit more, i was really doing something so different which in this case was maybe not so practical.
- check Pythagoras and all this good old friends out again.
Files
Components in SVG files from the Lampboard
Links
create your own QR code got the image but ended up not using it
clipart library downloaded the little icons i use from there.
vector halftone maker (good one for the future, not so parametric but oh so much fun)
mods instead of drivers