Mohit Ahuja's Fabacademy 2021
Computer Controlled Cutting
Group Project
This week's group project was to check the properties of the laser cutter, its kerf value and cutting speed and power values for different materials. Here is the link to the results of our findings:
Link to the group project
Individual Project
Laser Cutting is arguably one of the most useful manufacturing process that Fablabs possess. It is capable of engraving or cutting various different types of materials which depends upon the wavelength and power of the laser. Laser cutters are available in different wavelength, power levels and bed sizes for different applications. The ones that are seen most often in the market are:
- Fiber Laser
- CO2 Laser
- Diode Laser
Exploring flexing parts.
For my personal project, I wanted to make something that shows flexibility. I am fascinated by the technique of kerf bending. I was also inspired by the projects related to kerf bending that Suhas sir showed us. One project in particular, done by past fabacademy student Vaibhav Saxena, was particularly interesting to me.
So I wanted to try and make my own flexing kerf bending shapes. So I did a few experiments. My goal was to create a pattern that looks like a number. The goal was to create a series of such numbers and create a flexing keypad. So I fired up Rhino and started designing.
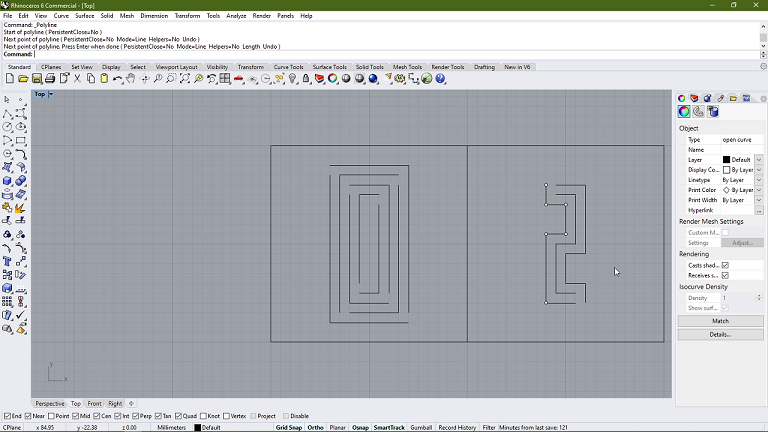
I started with designing the number 1. I did not look at any reference for this, and sort of went with my gut on this one. I though that I will make concentric rectangles until it becomes a straight line for the number 1, and every alternate corner in the shape would be broken up so that the rectangle also stays attached to the main body. This is how it looked after I finished the design.
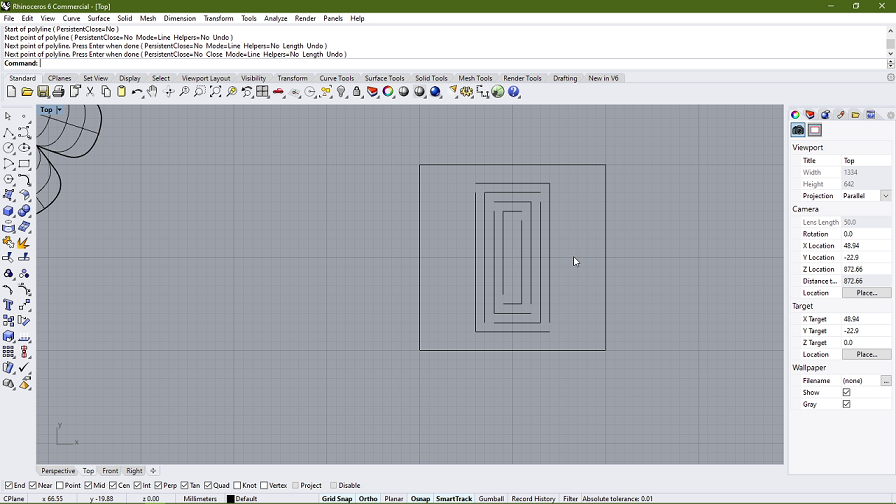
After that I designed some other numbers too:
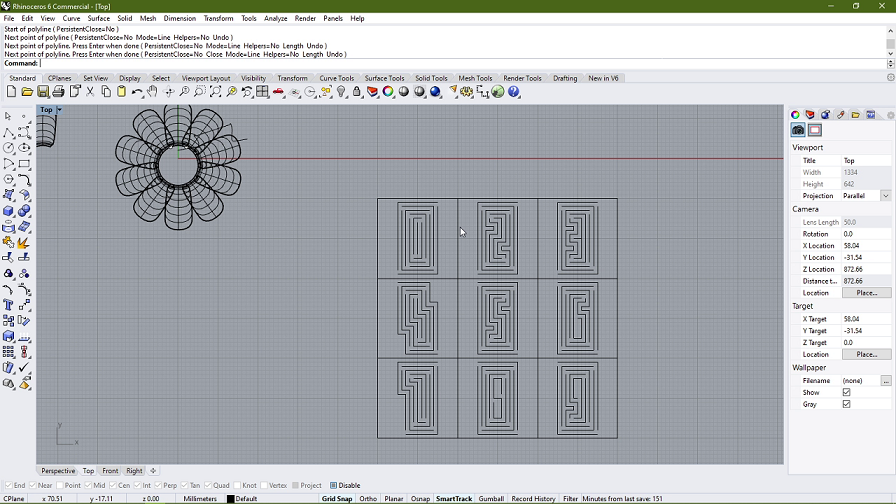
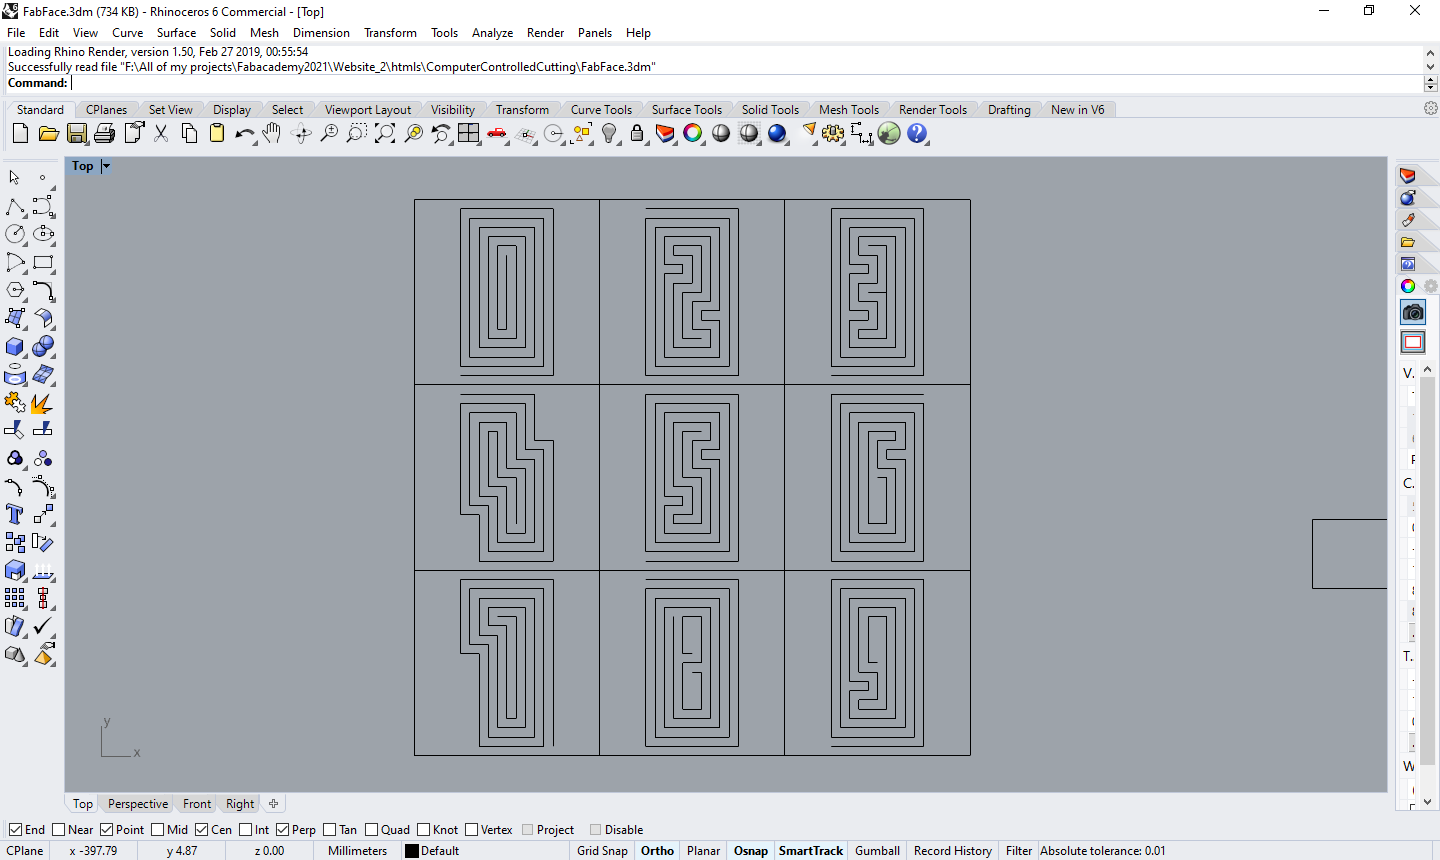
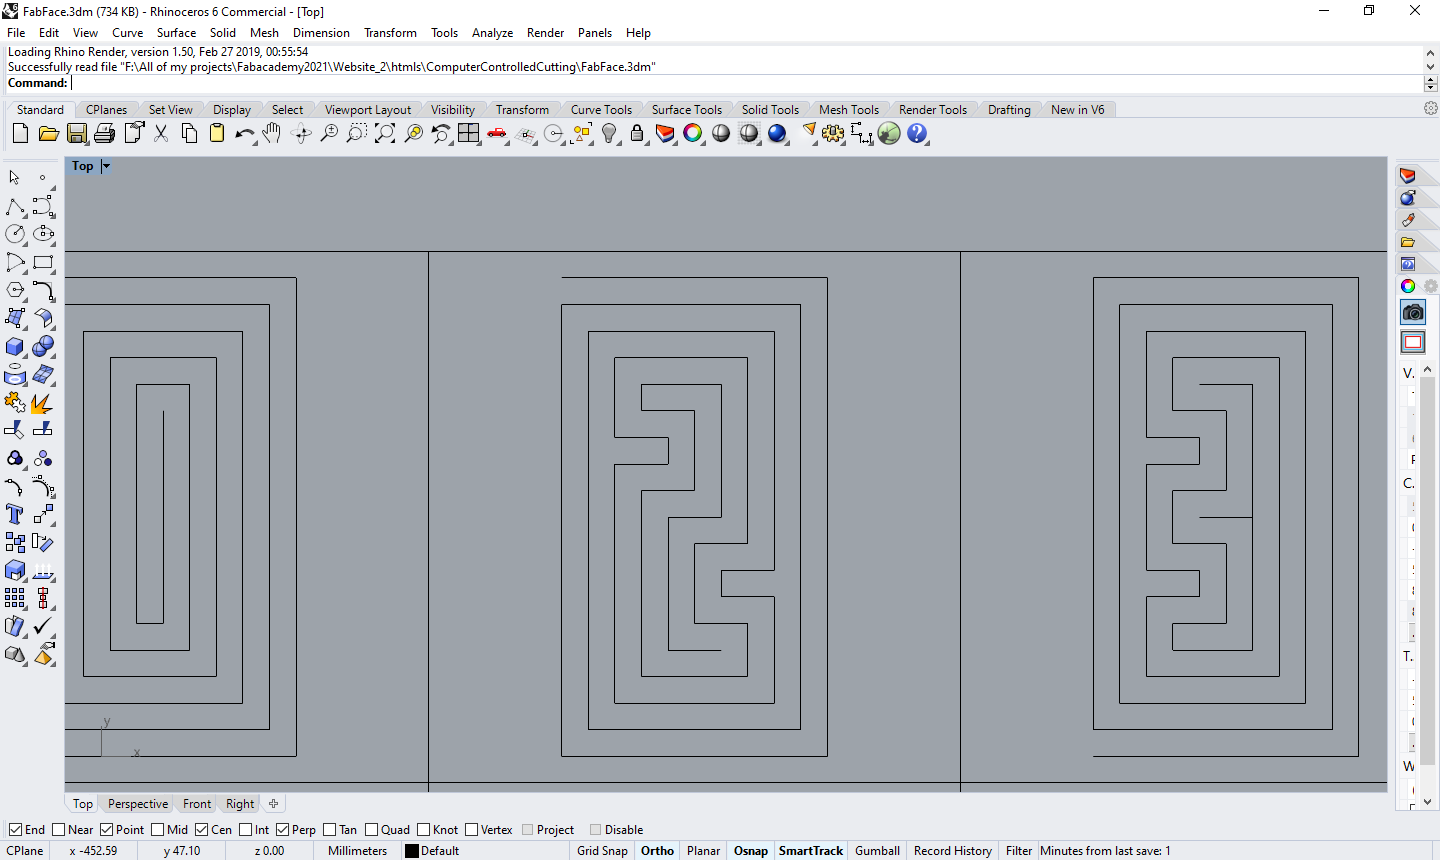
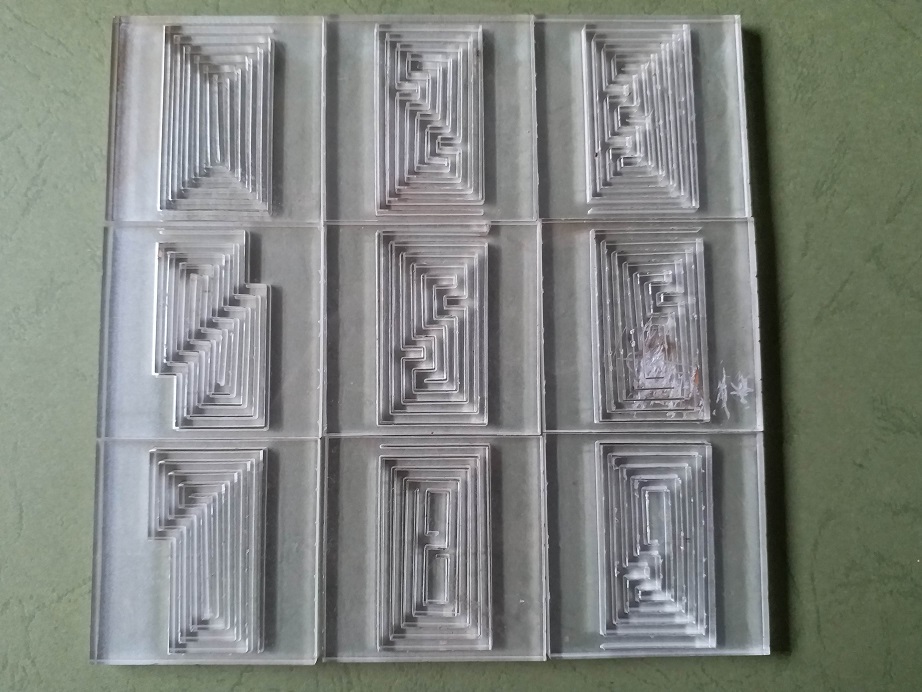
And in the end this is what the whole keypad looks like:
Link to the DXF file for cutting the part.
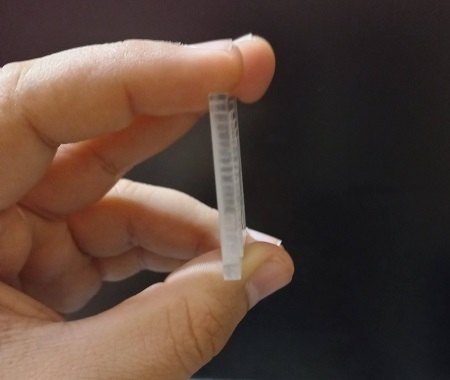
To see if the design works, I proceeded to print one of the numbers of the keypad, the number one. After it was done printing, I checked the flexibility, and found that the part was not very flexible, instead, it was quite stiff and it eventually broke after playing around with it for a little while:
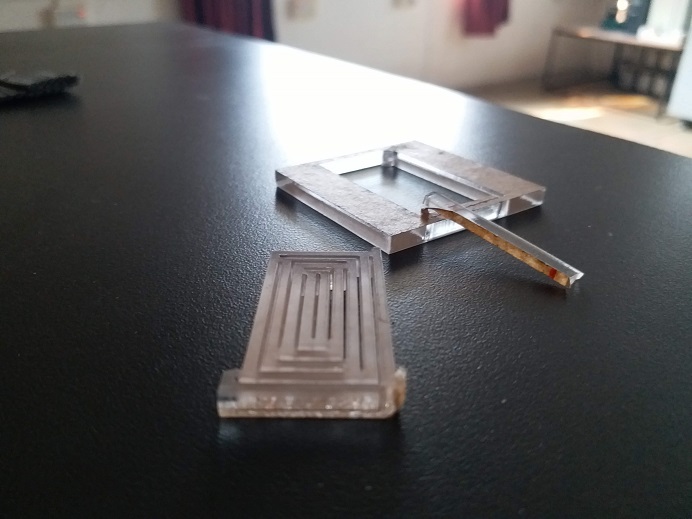
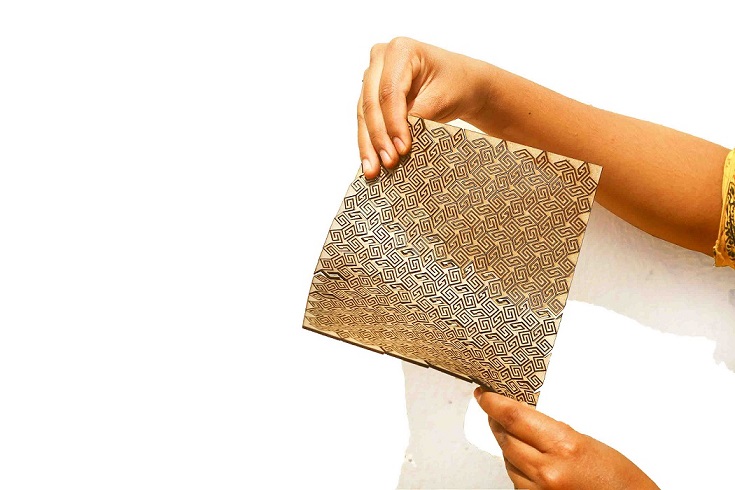
This was not desirable, as I wanted to make a part that could be repeatedly and reliably used. So I went ahead and looked at the kerf bending pattern designed by Vaibhav. I realised that the shape that he had used was basically a spiral. This makes sense because while designing patterns for kerf bending, all we are doing is to make the pattern in such a way that it becomes longer and longer. And we know the longer an object becomes, the more flexibility it starts showing. Especially in materials such as wood, plastics and metals. So I decided to give it a try and redesigned my numbers starting with the number 1. This is what the final set of numbers looked like:
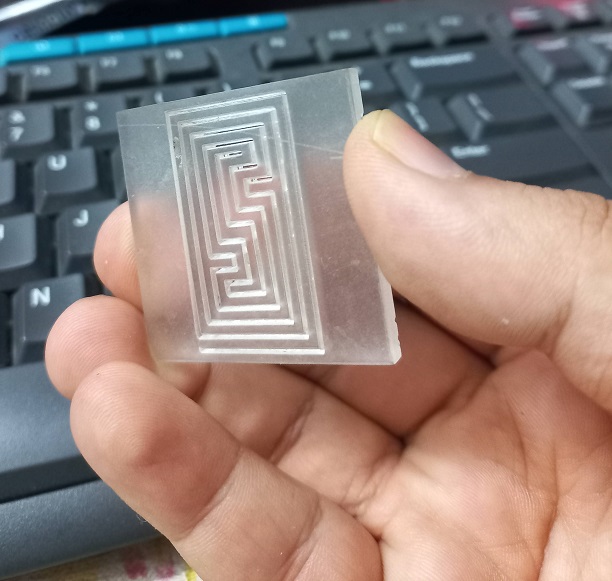
Here is a closeup shot of one of the numbers to show that it is indeed a spiral:
Link to the DXF File of the Spiral Shaped Number Keypad.
This one turned out to be perfect. The flexibility was very good and it didn't break even after flexing it for quite a bit.
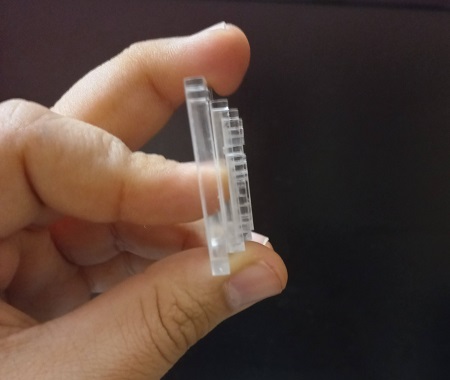
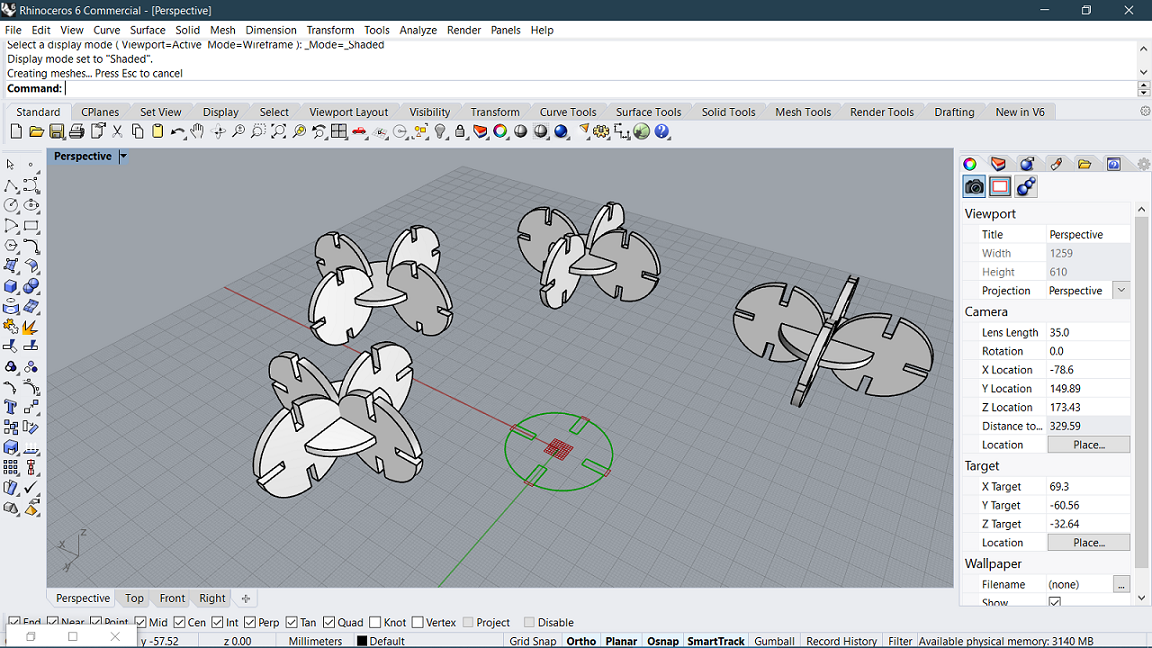
Once this worked out well, I decided to do all the numbers of the keypad, which looked like this:
After that, I extended this idea to make a mask for my face. But before I did that, I created a sample by making a piece for my nose.
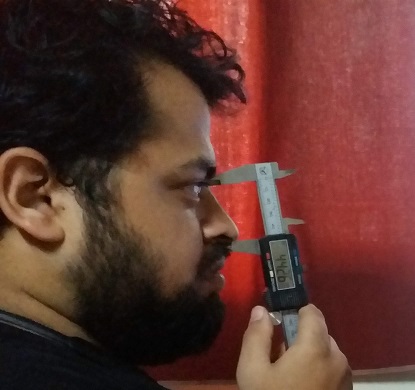
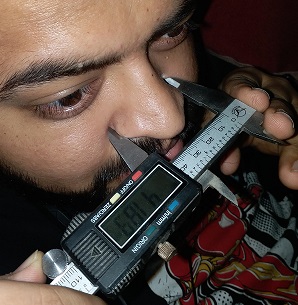
First of all, I took measurements of my nose.
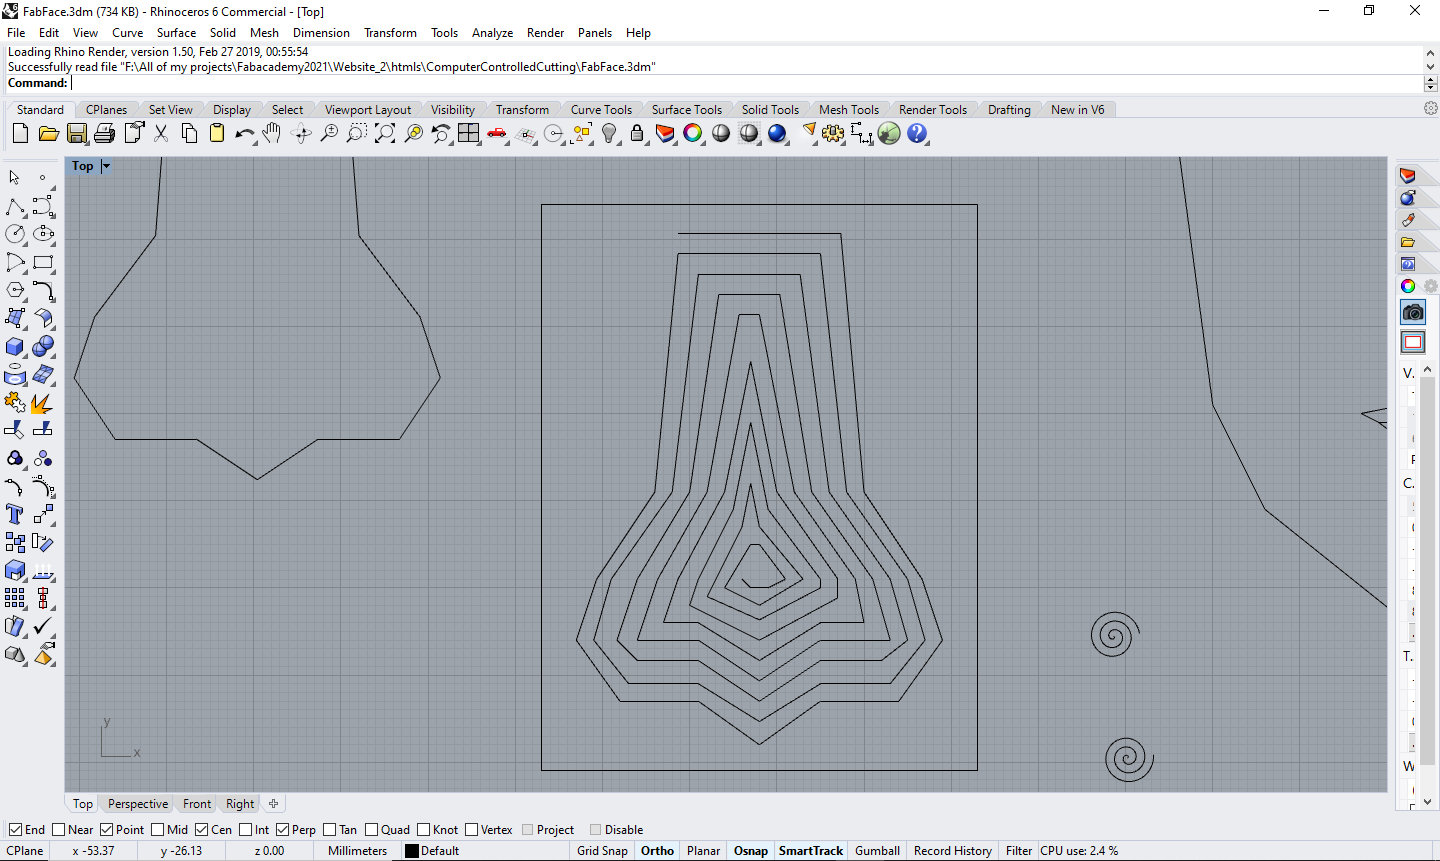
After that, I traced the nose in Rhino and created a spiral manually.
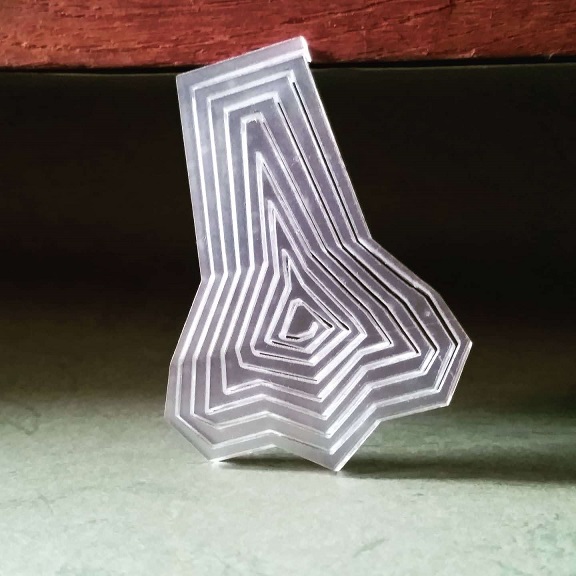
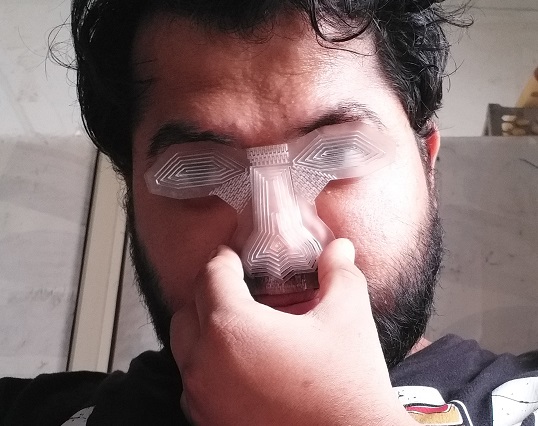
After I did that, I lasercut the nose and this is how it turned out:
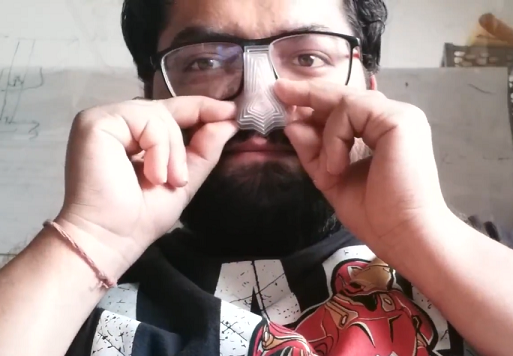
Then I tried it on, and it worked exactly as expected. The fitting was pretty good.
DXF file for the nose
I then modified the design further to add a pair of eyes, and i also wanted the mask to fit around my face in a better way, so I tried to add some corners around my eyes and nose.
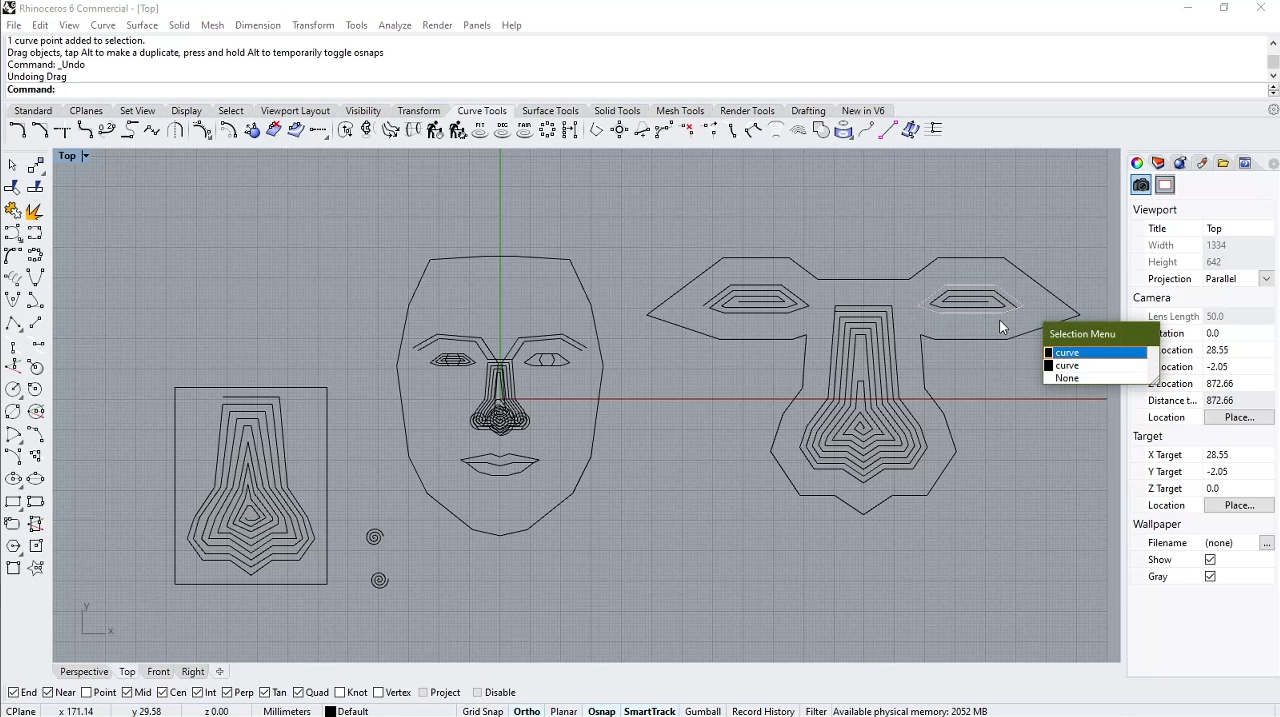
I did not measure the dimensions of my eyes this time, Instead, I took the picture of a male model and applied the measurements of my nose and mouth to my design, and used the model to figure out the distance between the eyes and nose. This is how the design looked like:
DXF file of the mask
This was not such a raging success, so I decided to abandon this concept here. On top of that, I'd have to come up wth the algorithm to convert non linear shapes into spirals parametrically, which I had never done before. Infact I was going to try to make a parametric design for the first time.
Making a Parametric Design
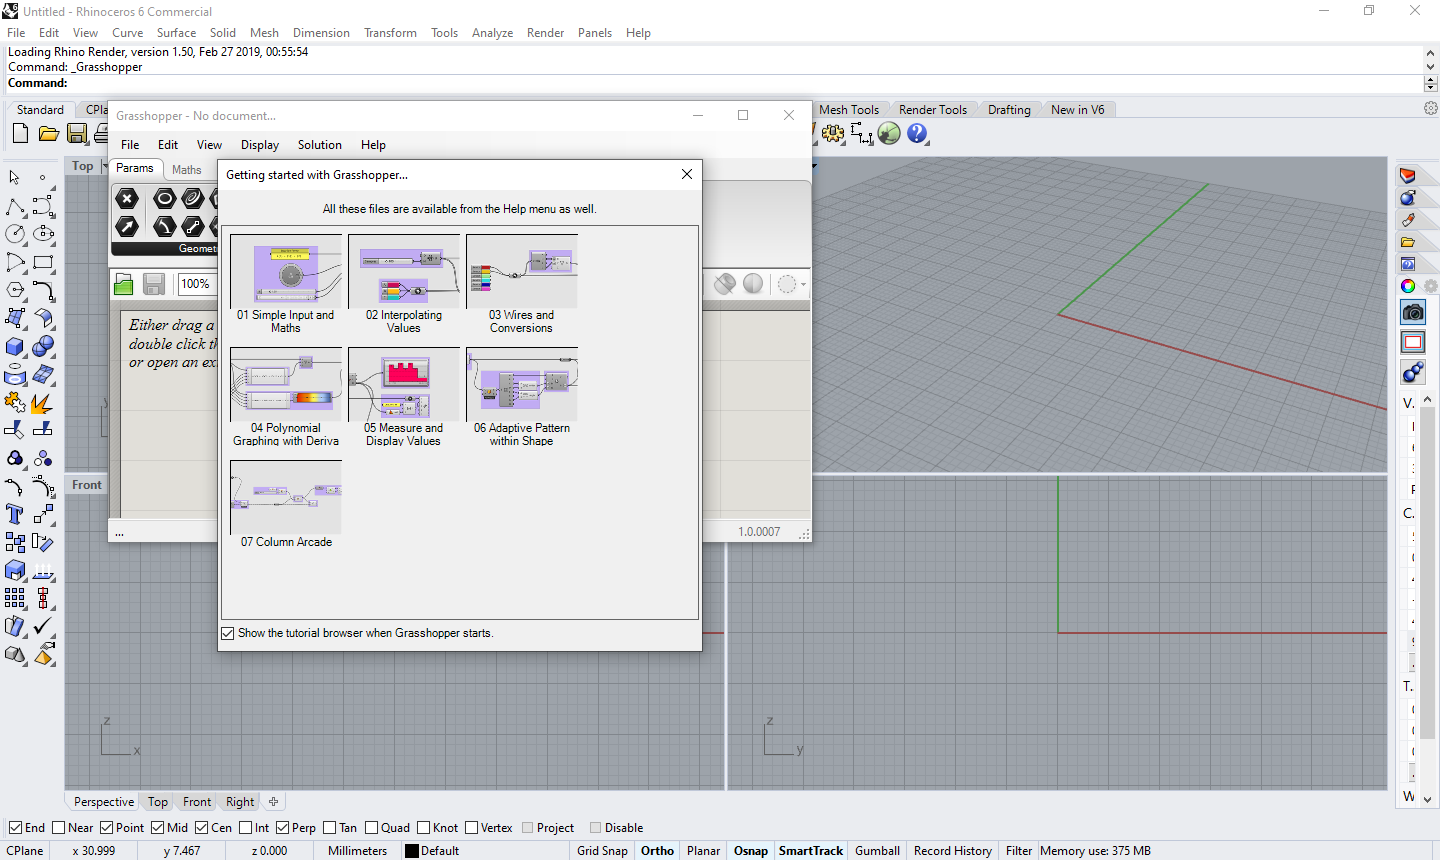
For this portion of the assignment, I decided used Grasshopper in Rhino. It is a tool that is built into Rhino 6, which is capable of making parametric models by connecting blocks and changing parameters.
As for my project, I have always wanted to create a visual tool to demonstrate chemical bonds. Now I am aware that there are ball and stick models that are readily available and vey effective in teaching chemical bonds.
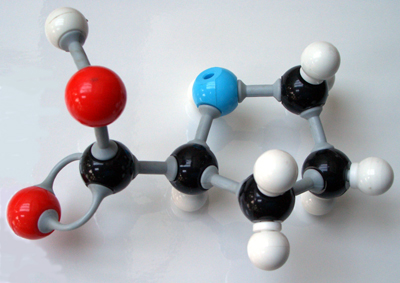
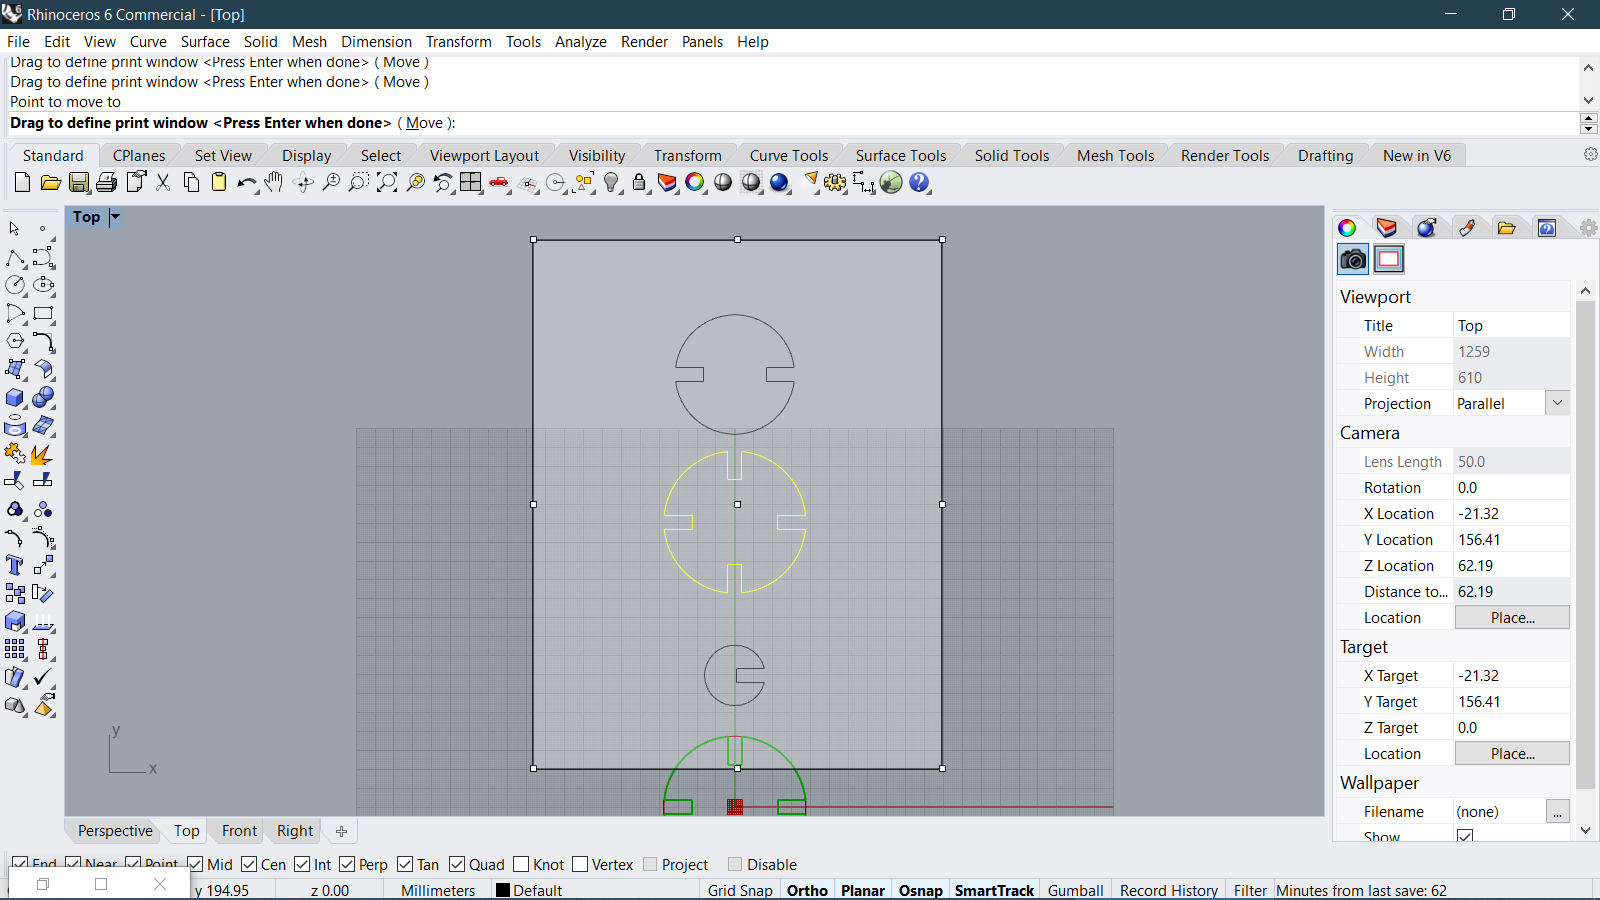
But I wanted to create something cost effective and also customizable. I always imagined a slotted disc style model. So I decided to make a parametric model that can create a slotted disc. The radius of the disc will be proportional to the atomic radii of an atom, and will have a number of slots based on the commonly occuring valency of that element. It is a simple enough design to make for a first time Grasshopper user.
I started by manually making some discs and seeing how they look slotted together. I also wanted to see how much depth I should keep for the slots.
After I was happy with the way everything looked, I decided to start making the parametric model. I started by making a circle and 4 rectangles with the dimensions of the slots that I wanted. And then I subtracted the rectangles from the circle. Here is how the parametric model looks like:
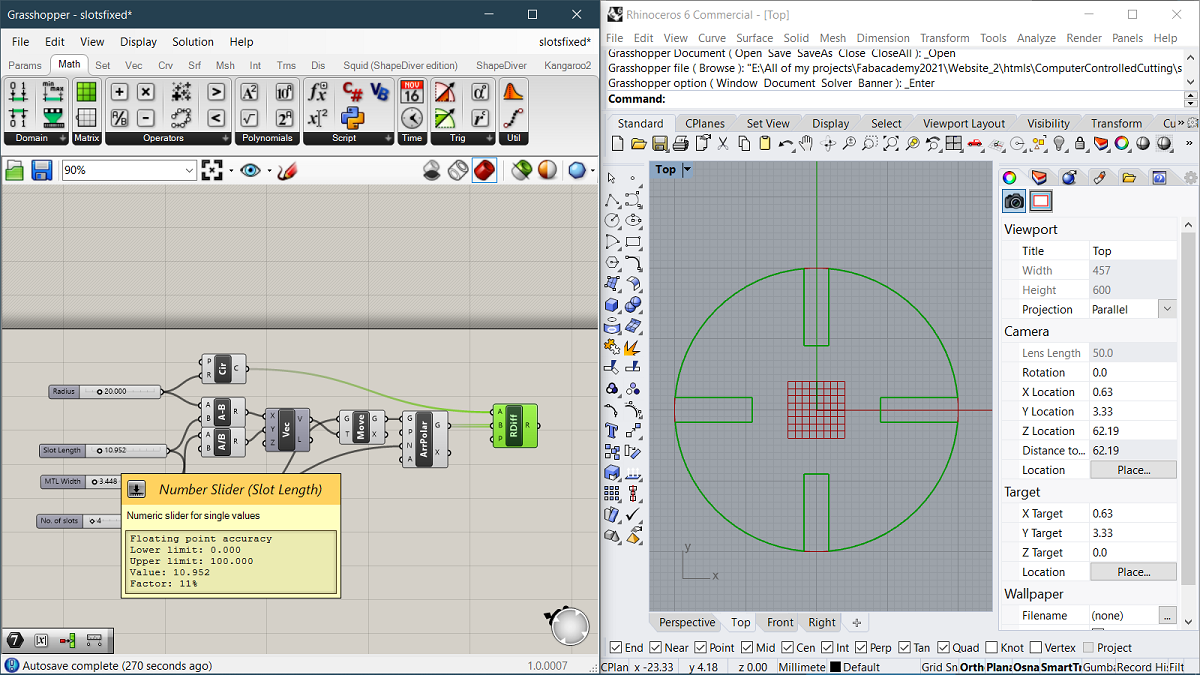
After that, I used number sliders to act like an interface for the parametric model, so that any user can simply use it to adjust the values according to the atom they want to print.
Parametric model for Grasshopper.
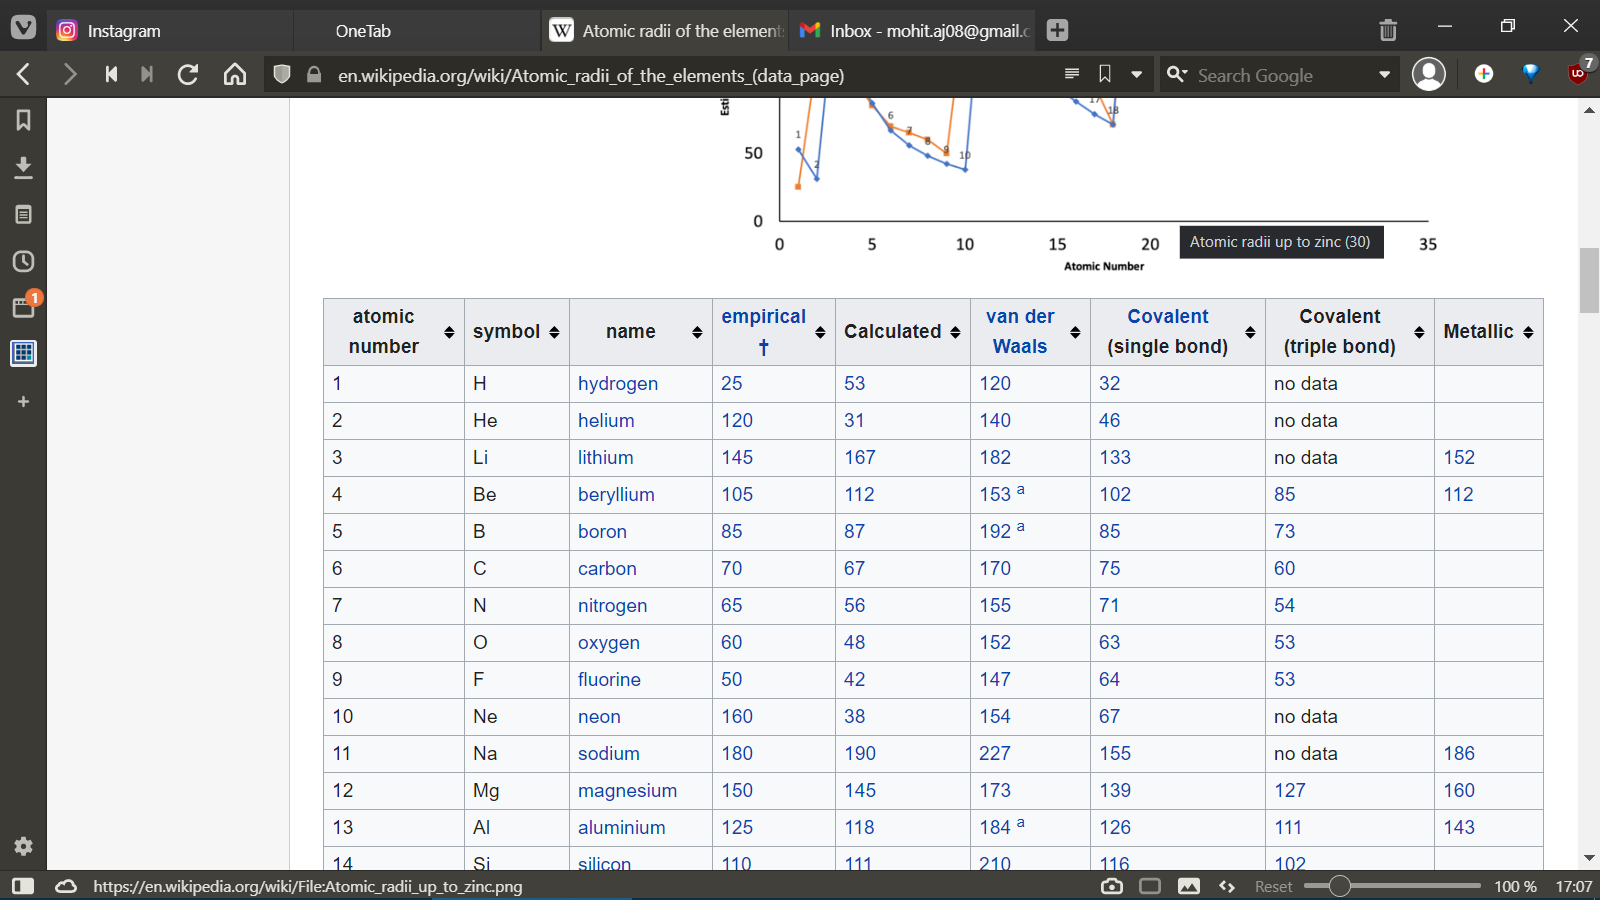
I referenced the wikipedia page showing the atomic radii of the atoms in different measurements. For making this example, I decided to go with the most common elements in organic chemistry, Carbon, Hydrogen and Oxygen.
I then input the parameters into the parametric program to generate the necessary shapes for Hydrogen, Oxygen and Carbon.
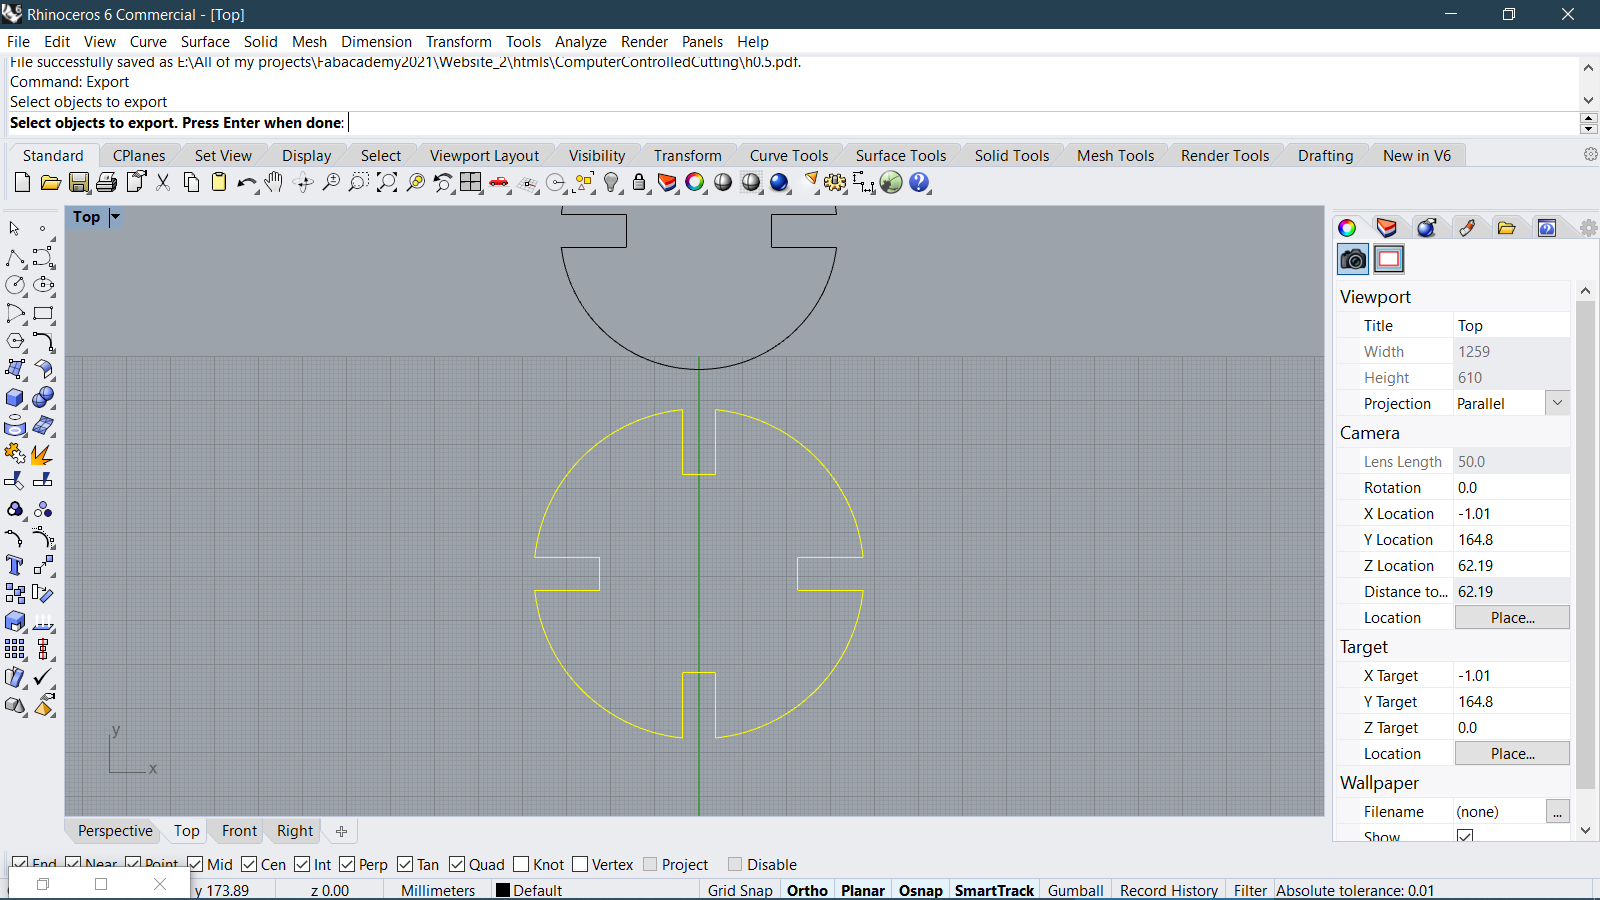
After that, I exported the design in the form of a pdf which could be used with RDWorks to cut it out using cardboard.
Pdfs for individual atoms:
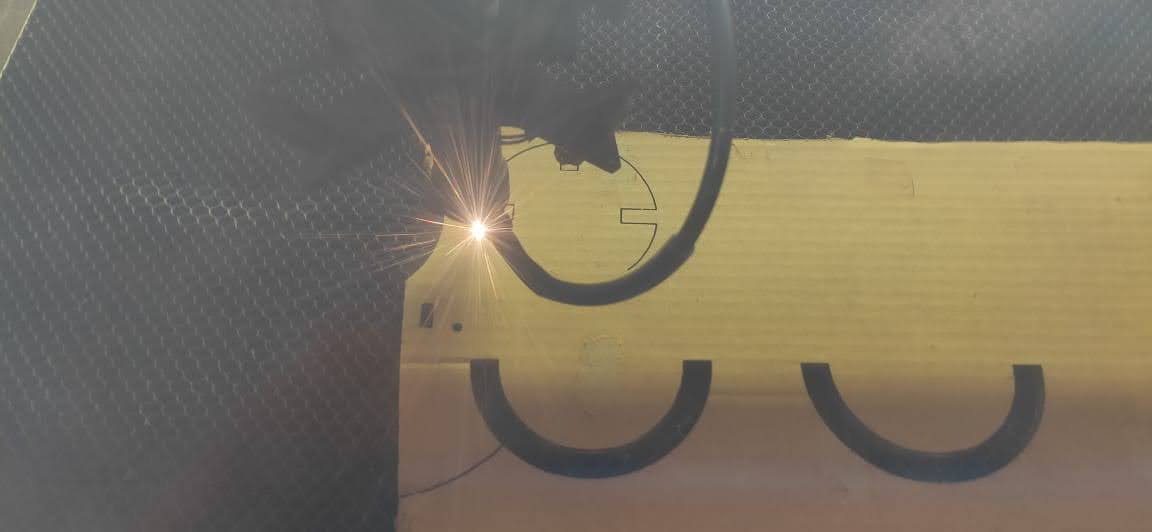
Lasercutting
In RDWorks, I proceeded to select the parameters for cutting cardboard that we had discovered in the Group project, and then sent the file for cutting. After that I exported the file to the lasercutter. Then I leveled the laser cutting bed to cut the cardboard:
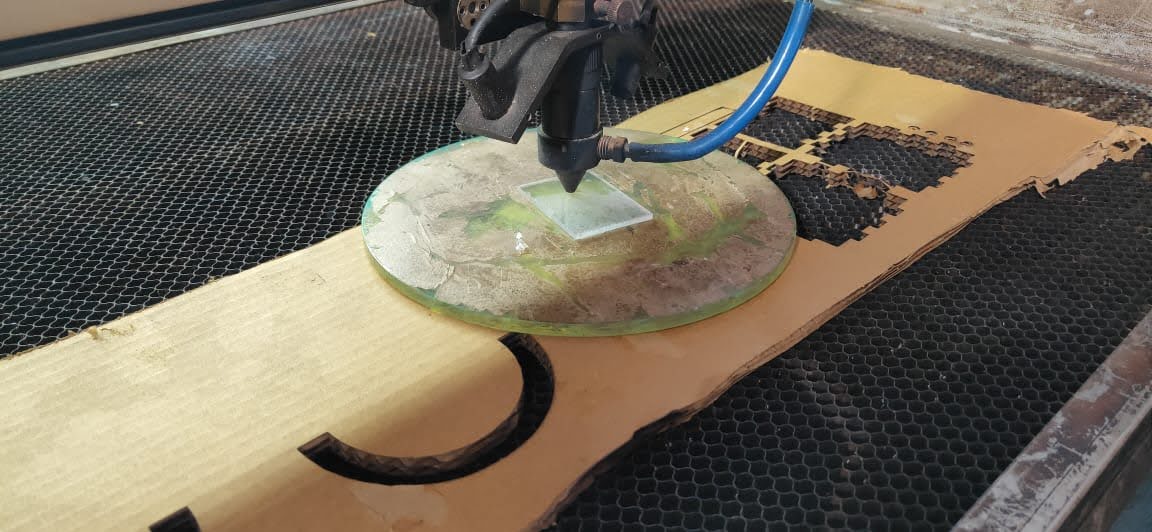
After doing that, I placed the cardboard, and tested if the model will fit inside my workpiece by checking if the rectangular frame of the model fits in the piece or not. Once it did, I gave the command to run the machine.
This was the result of the cutting:
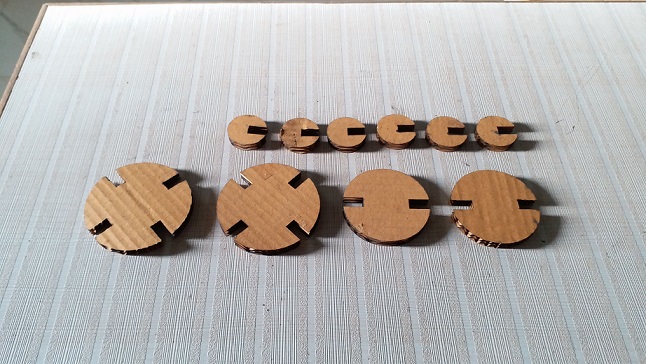
It came out nice and clean and I was able to assemble the generated parts with ease. These are some molecular structures that I made using this system.
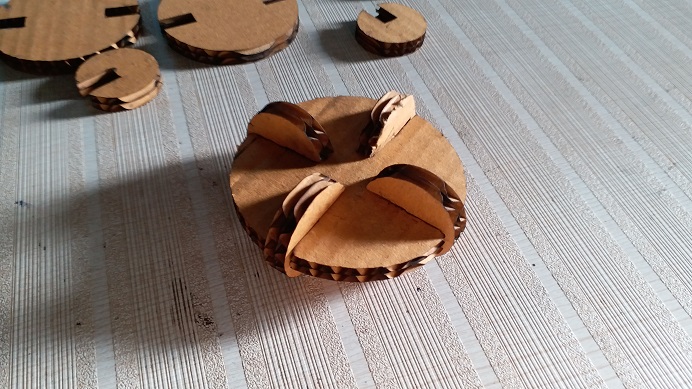
Methane - CH4
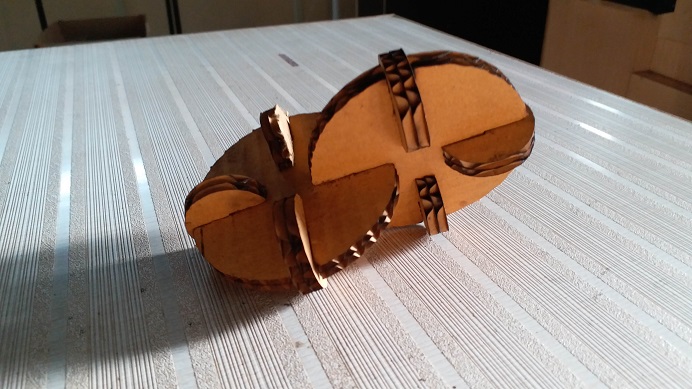
Ethane - C2H6
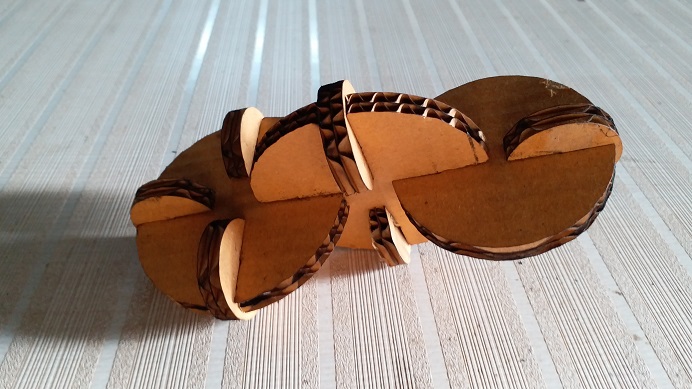
Ethanol - C2H5OH
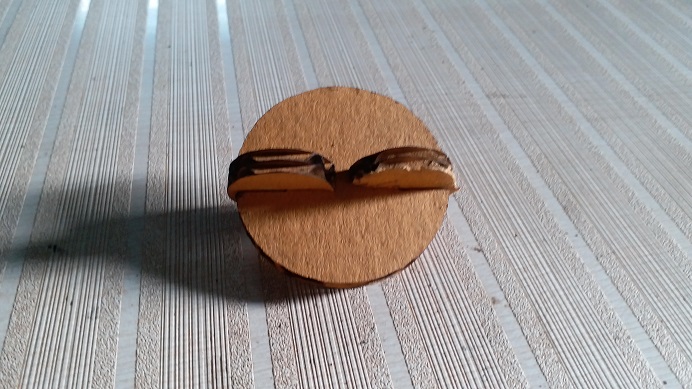
Water - H2O
Similarly, more such elements could be created using this parametric model.
Final Thoughts/Improvements on Laser cutting
The final model that I came up with is very simple but it has some flaws ofcourse. For instance, the shapes produced in this model are such that they only allow us to demonstrate single bonds between elements. To demonstrate more complex double and triple bonds, we may have to change the design of the model completely.
With the flexing parts, I want to try making more complex shapes with the technique to explore what it is capable of. I had an idea to make 3D furniture using this technique. I'll try it out in the future.
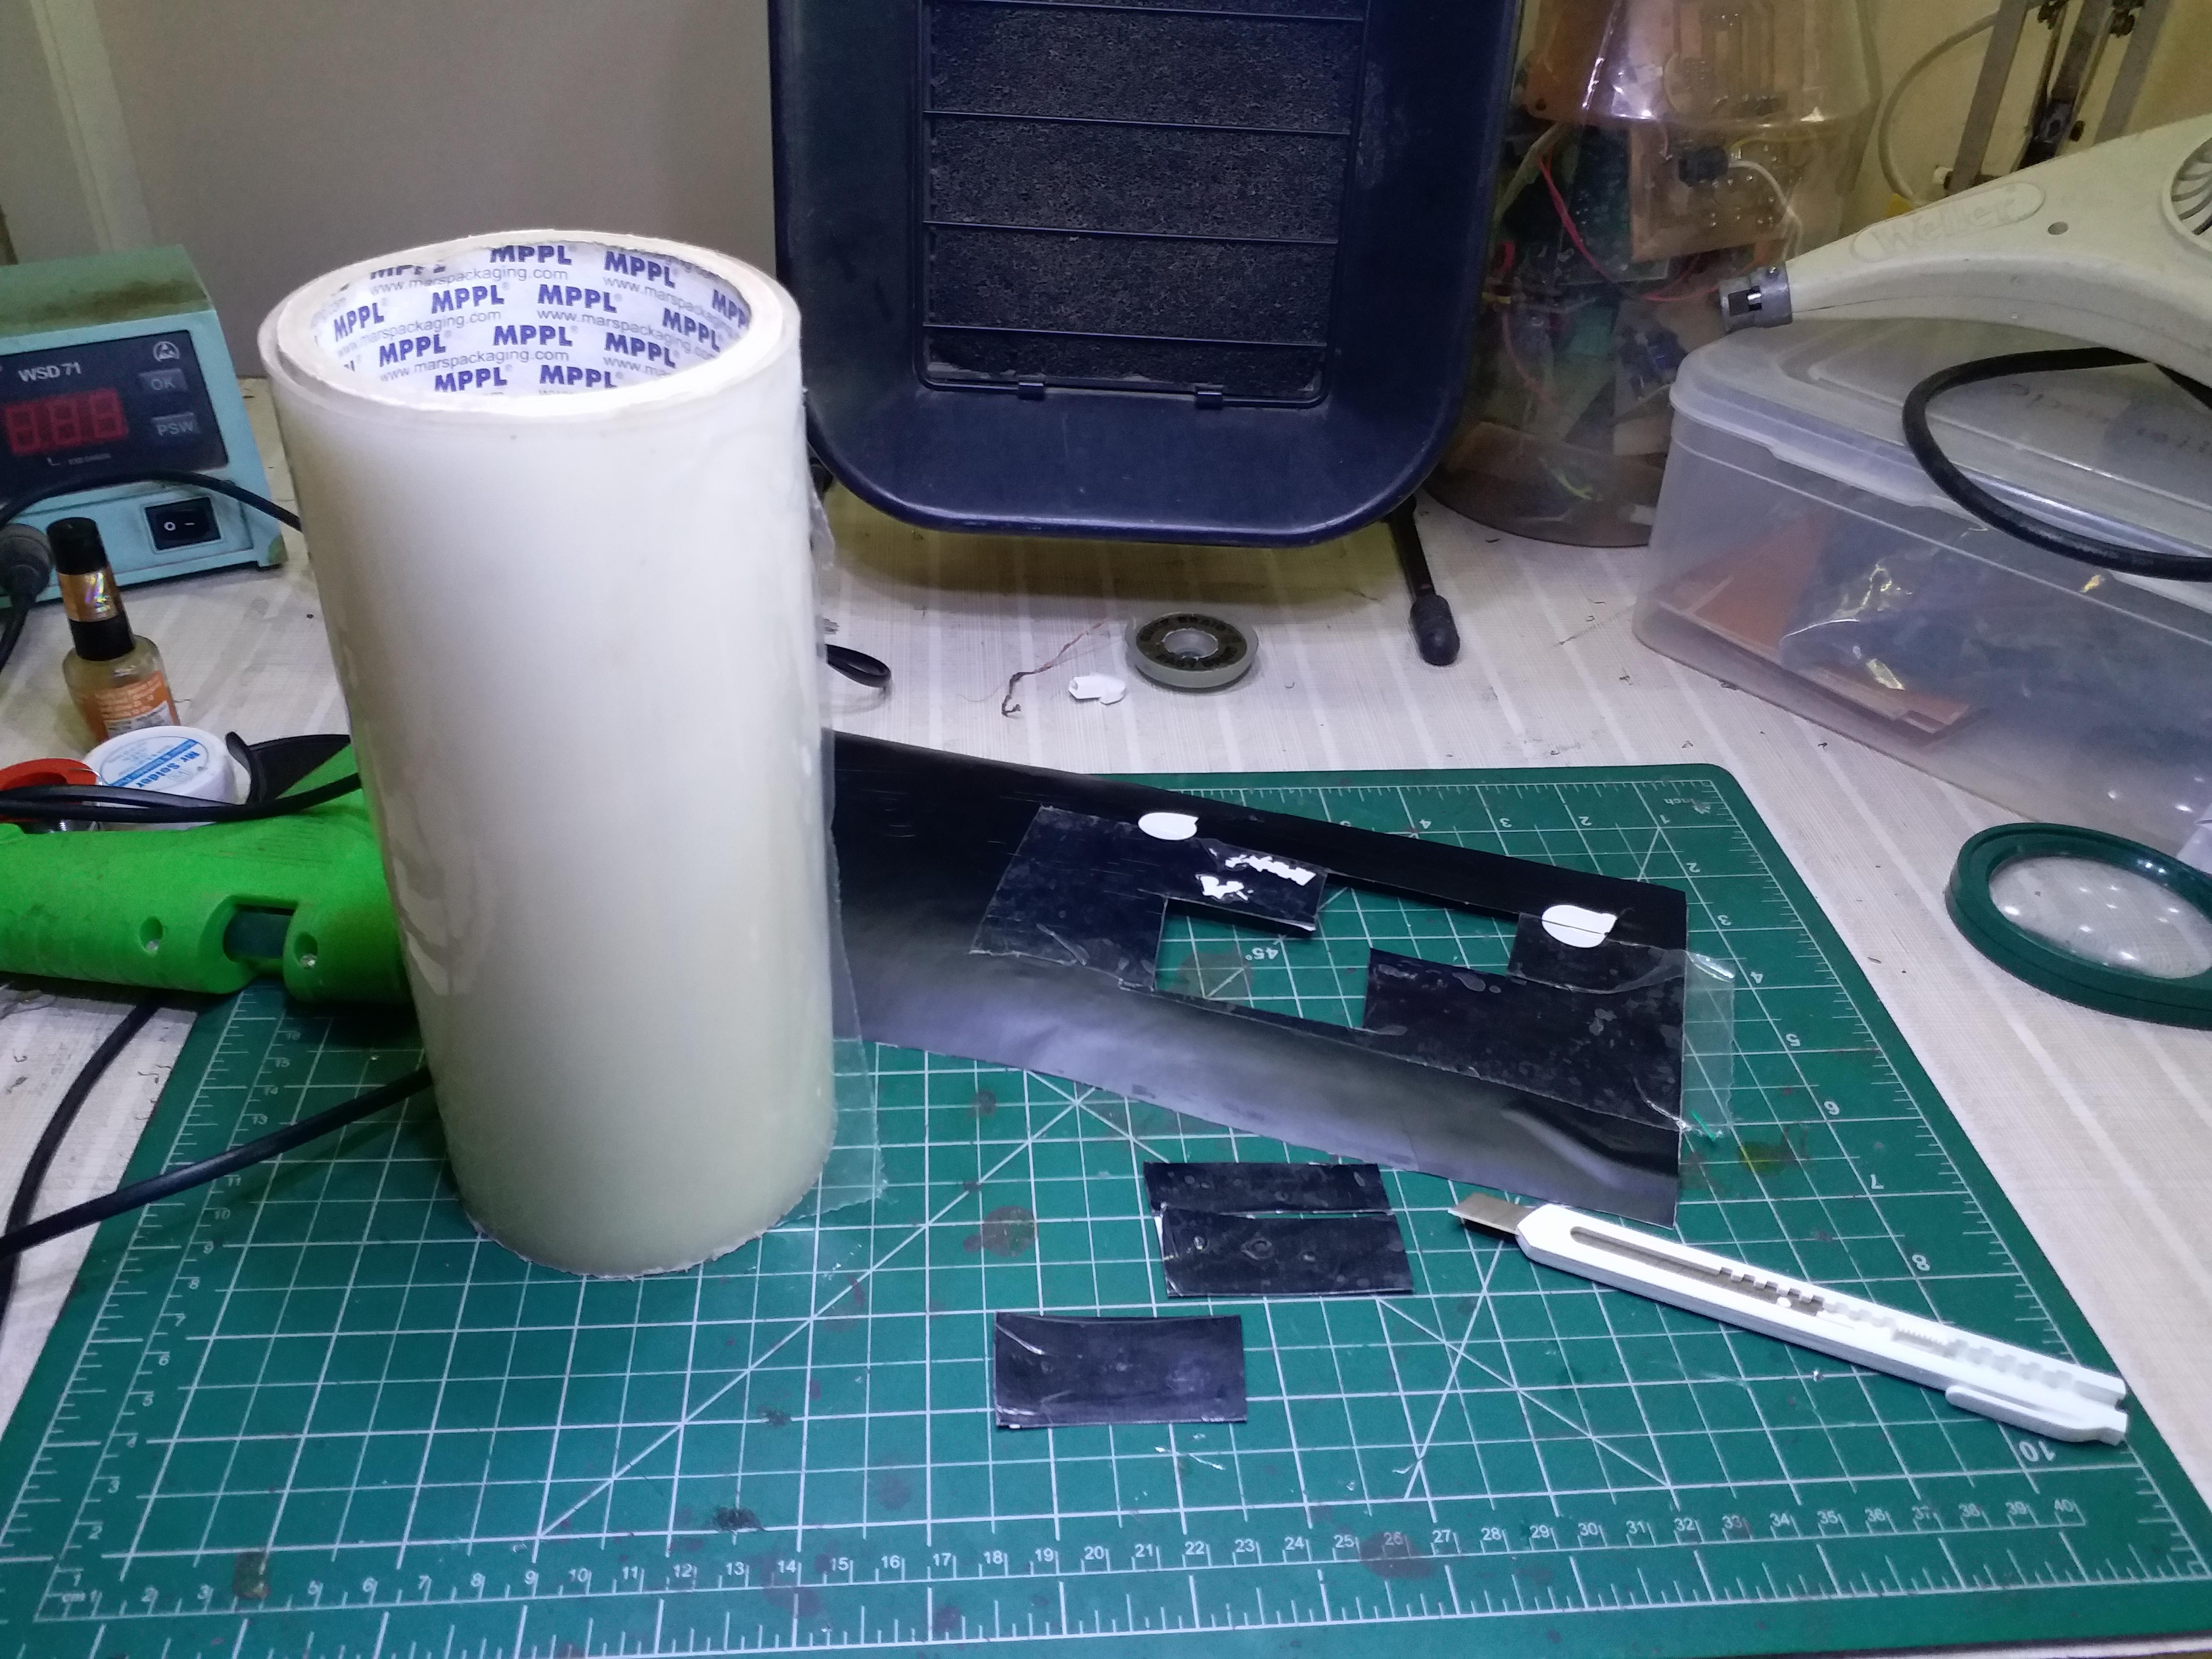
Vinyl Cutting
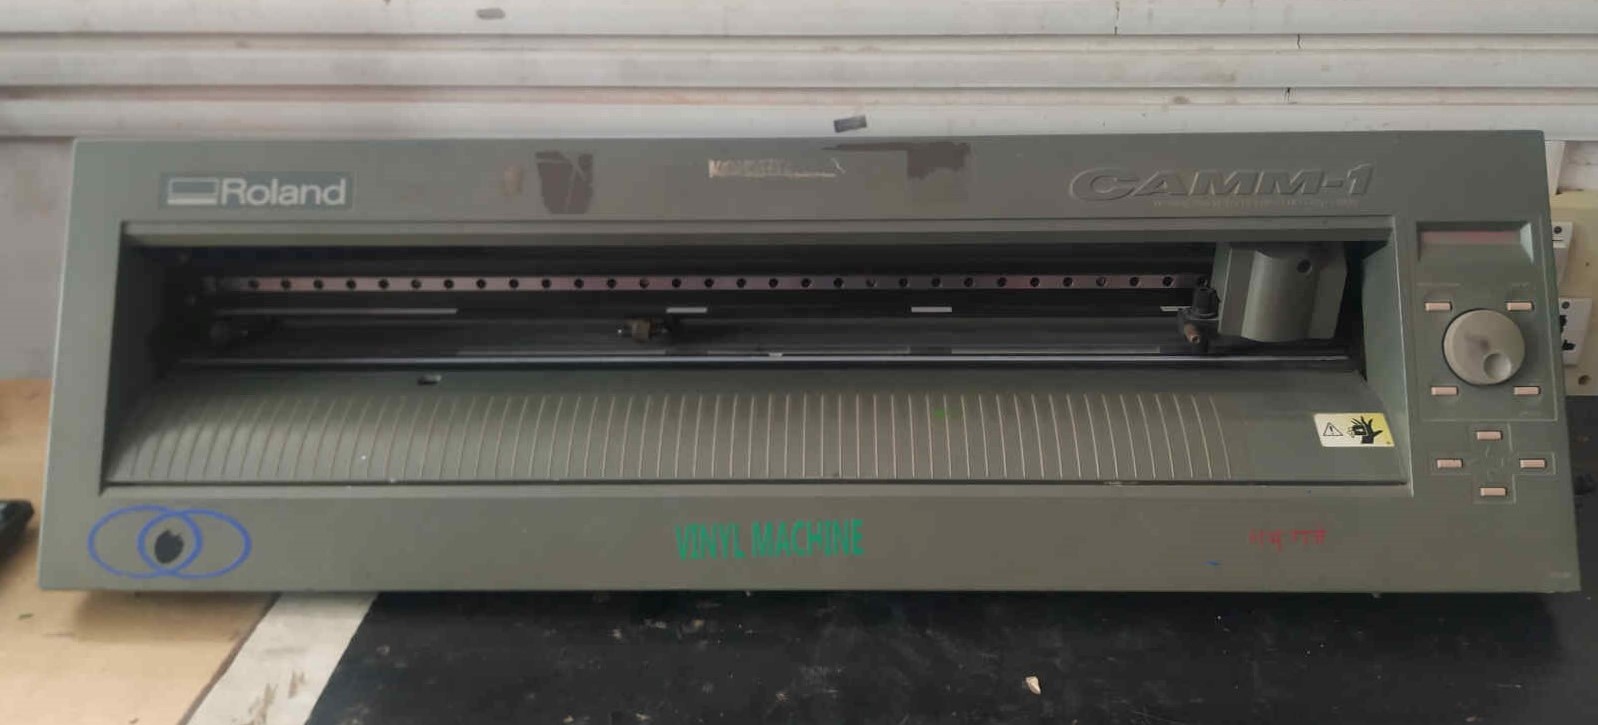

For this part of the assignment, I tried two different things. I wanted to try a simple design with continuous flow in the shape, and one with a lot of different shapes.
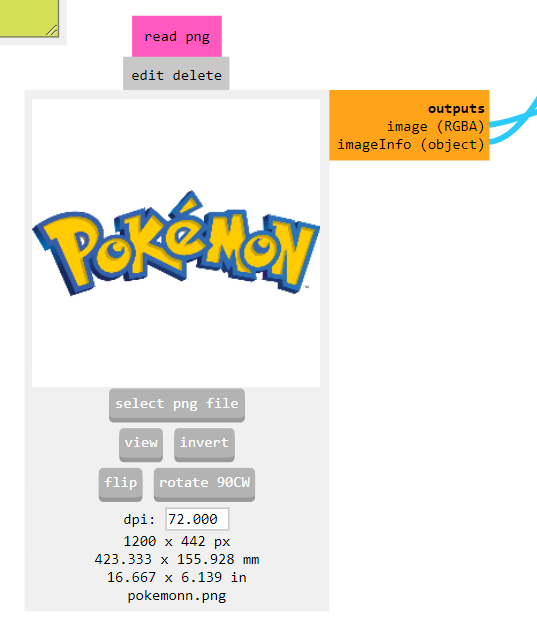
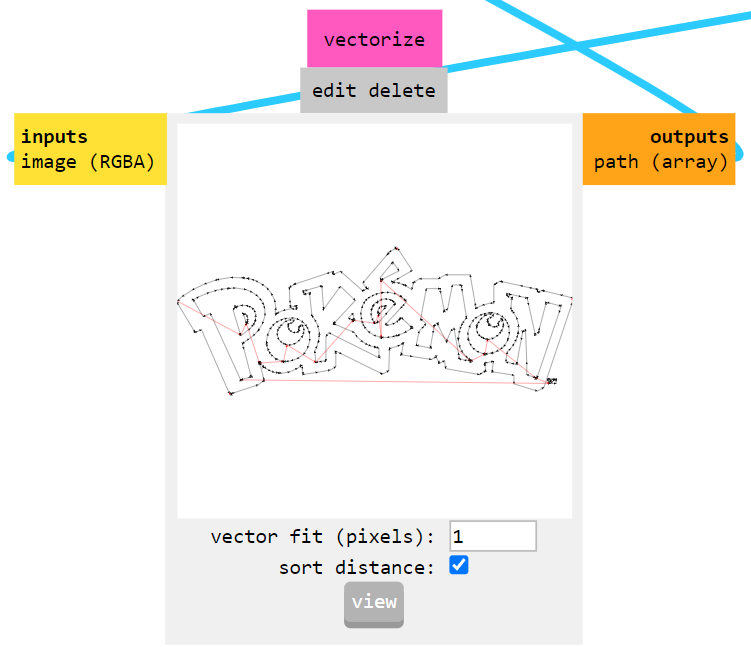
For the first one, I went with the classic pokemon logo, one of my favourite cartoons as a kid.

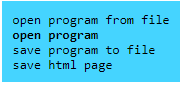
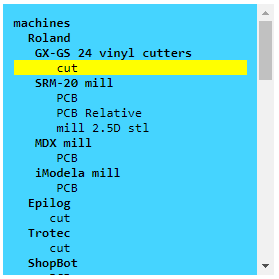
I opened up mods on the lab's computer and followed these steps to generate the files for cutting the vinyl sheet.