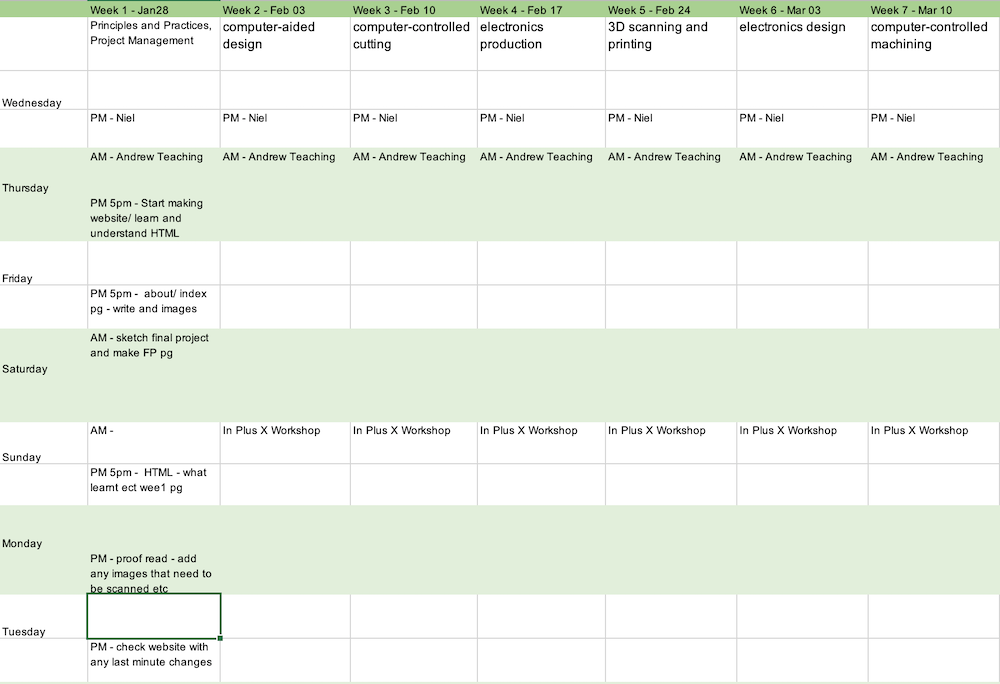
During FabAcademy I am working full time job so I have to be very specific and organised with my time over the next 5 months. I have made a spread sheet so I can keep track of my routine with FabAcademy and work. Every Thursday morning Andrew who is my instructor will discuss and talk over anything I need to know for the weeks assignment.
Link to Git tutorial and SHH-Key
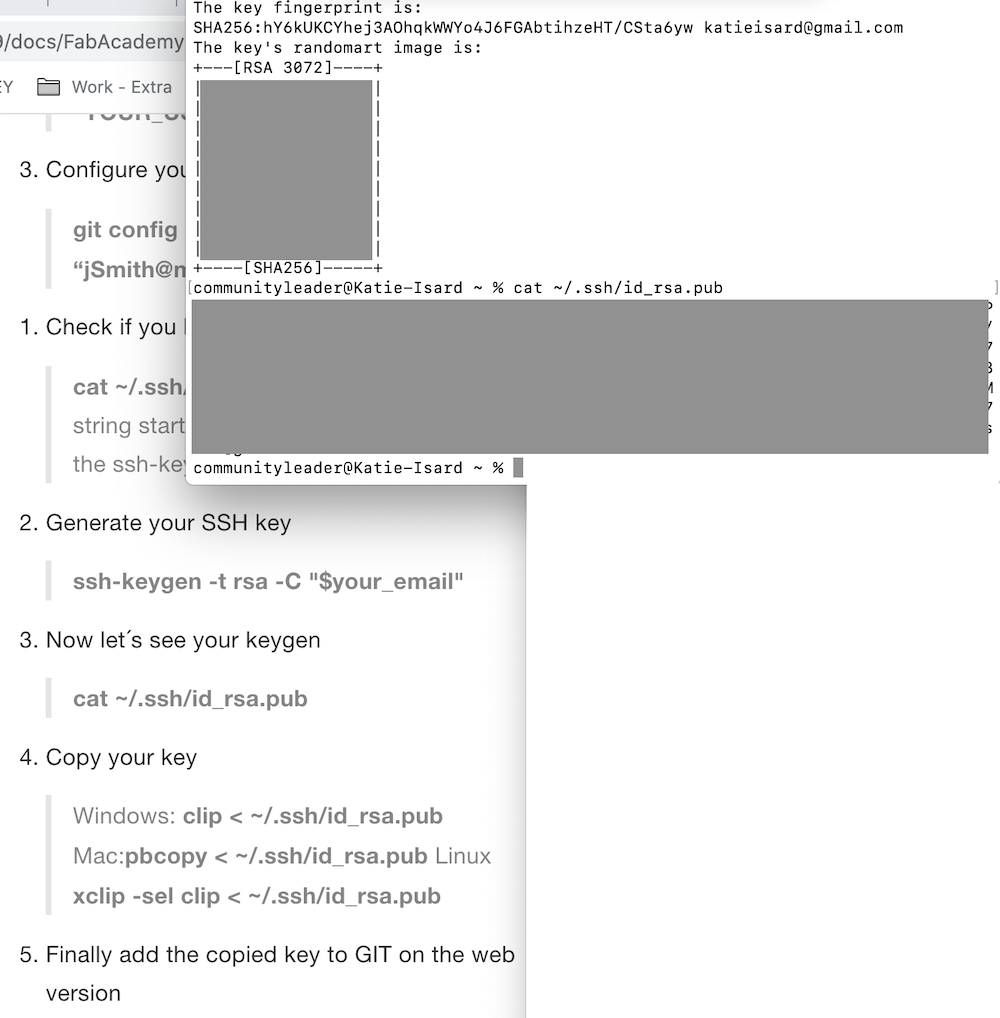
I started with reading the Git tutorial which is linked above, as a Mac user I just used terminal which is already installed on my laptop. After this I needed to make my SSH-key which is like a password to your computer and one works for that computer that you have made it on.
I then had to copy that think and paste it in my GitLab bio so that they are all connected and I can send my information to my GitLab.
Once I had done my SSH-Key it was time to start my website I still had no idea what I was getting myself into. So far it was a lot of letters put together, a website I had no idea how to edit and works I didn't understand such as push, commit, add, status and a lot of git.(Fun fact Git is named after the man who designed it not from his name but because he was a git - just made me laugh!).
Andrew the next day before even starting on my website described how everything worked and connected together. All this of was very new to me as I had never even made a drag and drop website, but I thought I would just jump straight in and make it from scratch with no template. I decide to go for this direction as I would learn a lot more but also I could see myself getting confused or frustrated from not being able to navigate my way around a premade one like a template.
Also from the start I thought I would make my own little cheetsheet so I could easily find and remember what I got wrong or didn't understand straight away. I will keep adding to this as I go so that by the end I have a archive of information which I refer to all the way through this journey and beyond.

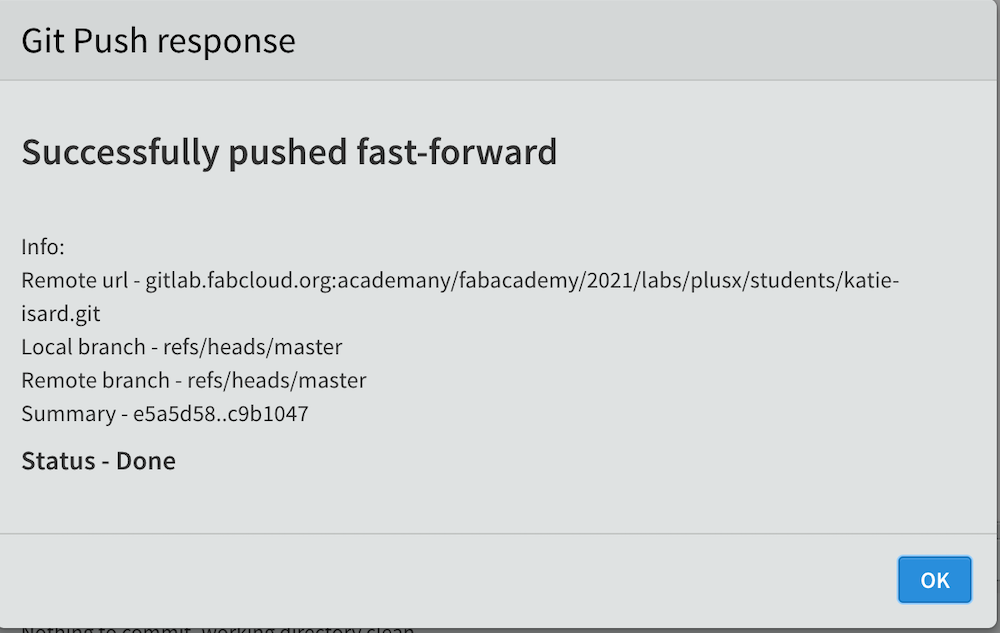
I started by using Brackets where I did my first push, my tutor was then using Atom which was easier to use so I moved to using that. (see image below for my first push)
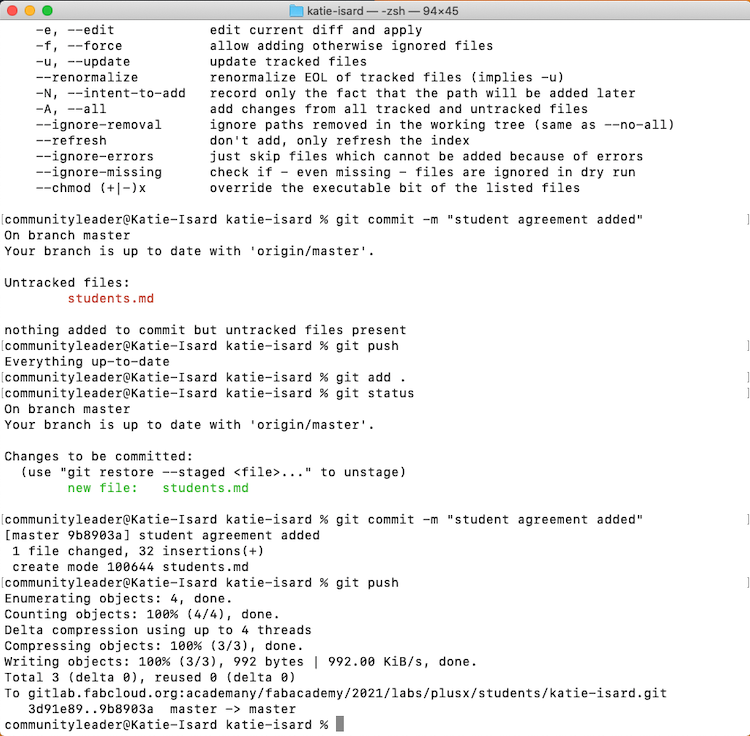
I started with the FabAcademy Student Agreement which I copied and pasted from the website made a link in my folder in Atom and added it there. I then used termial to send it across to my website and there it was, I felt so proud of myself for my second push! (see image below)
I had to first start with making a home page or index which it is called in the tech world I found out. In atom you have to open up a 'new file' in the side bar under your folder which you have made for all parts of the webiste mine is just called 'katie-isard'. Making sure I put .html after so that atom knew what server I would be using. This was the simple bit as my student agreement I hadn't added to my website yet.
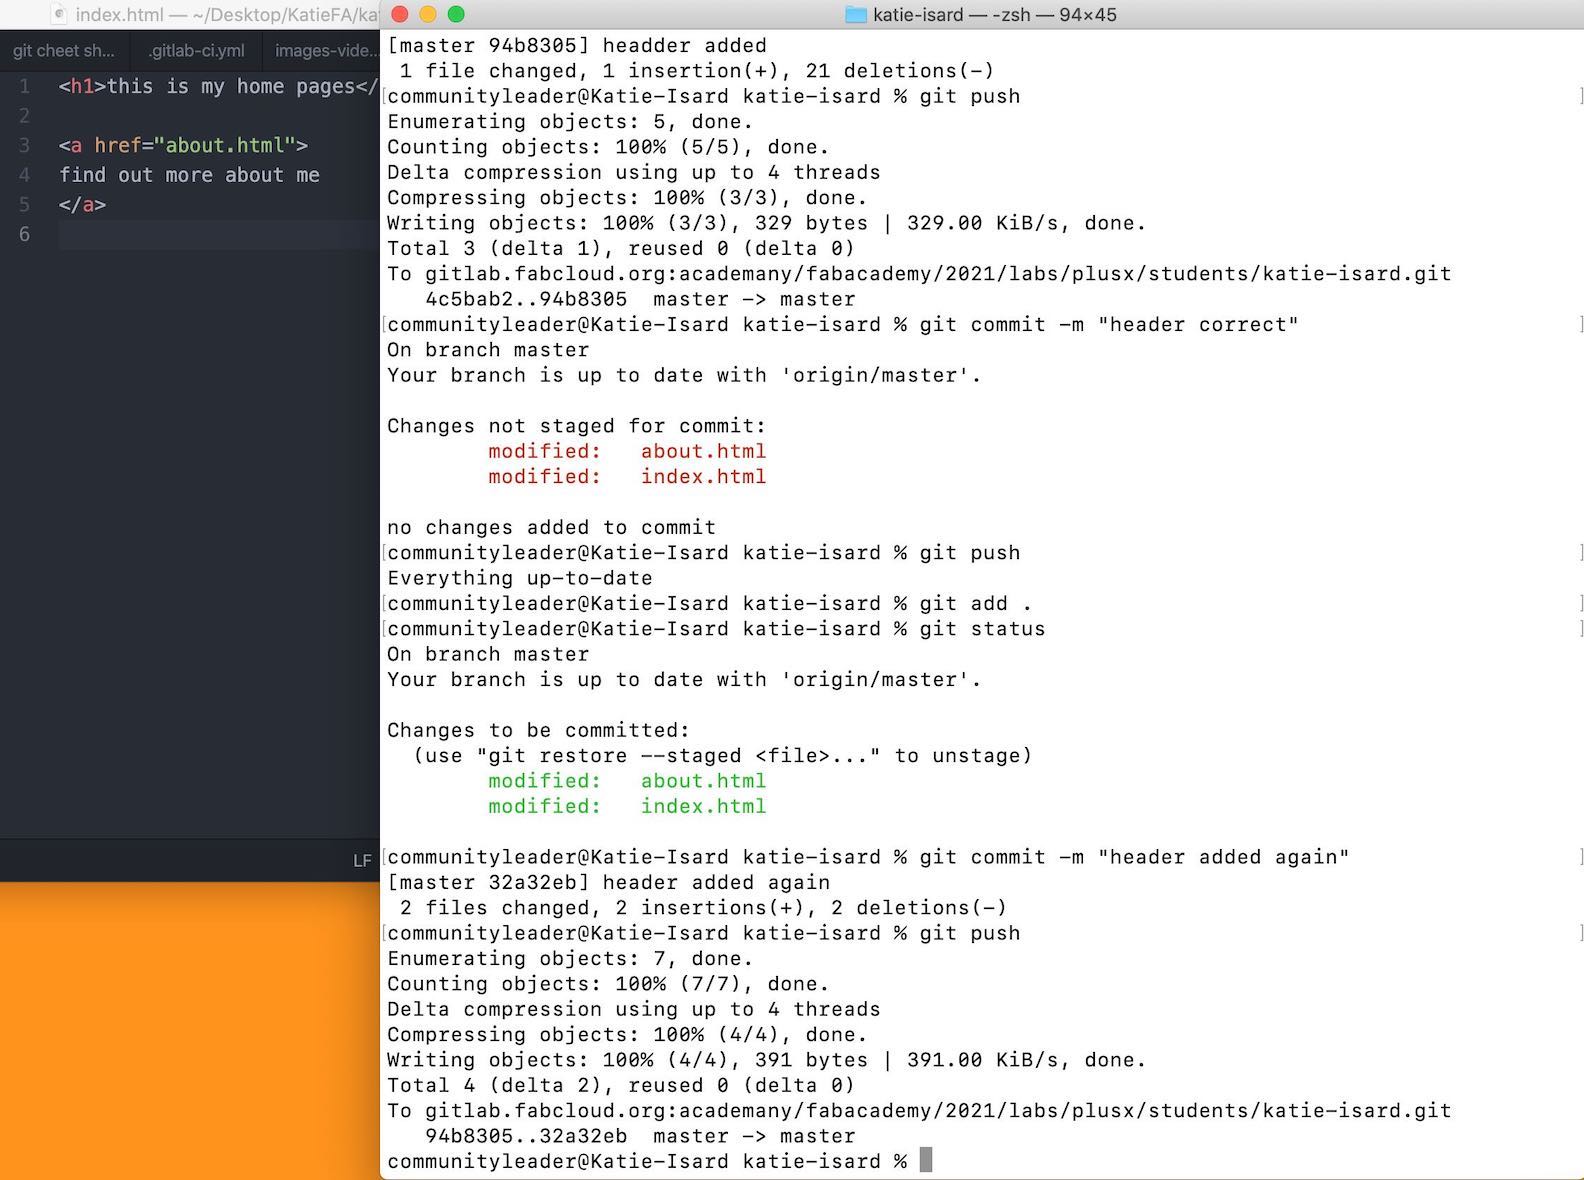
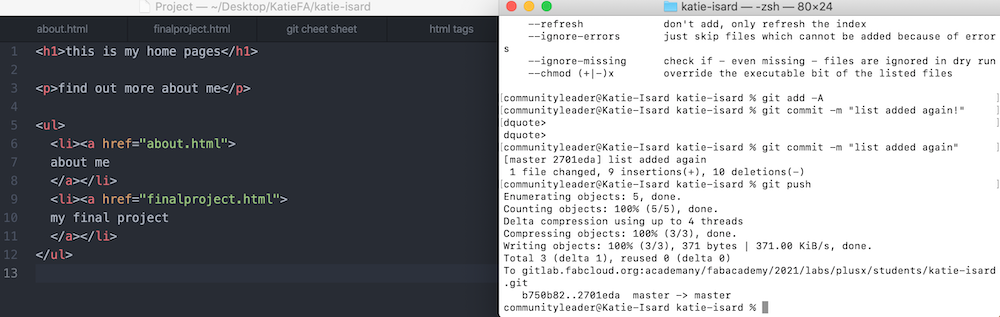
This 'new file' I called index.html which I then clicked onto and started making a list. I did this by using the < ul > which means 'unorderd list', I then put on a seperate line < a >, this allows me to add a link like 'about.html', this page about me, I did this exactually the same way as I made the 'index.html'. By doing this it means that when you go to my website they are linked to those pages which will open up in a new page (all very exciting!) I then went to termianl and entered the steps seen on the image below. This pushed it to my website, but sadly it didn't quite work first time. So I went back a few steps and saw I had done the commit wrong so I did that again and put in the comments 'link added again'. I then pressed enter went to my website and refreshed - it worked!
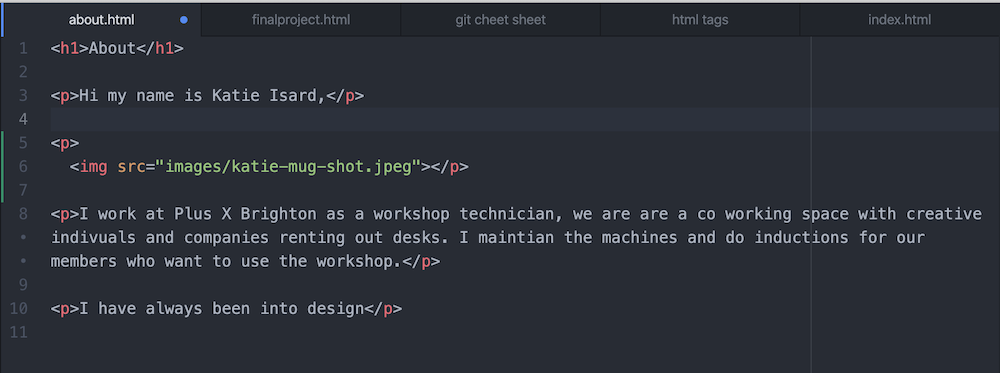
The first image I added was to my about page as I had added the text I wanted learn to add an image. The image was a mug shot of me so that when you open that page you can see who I am straight away. This was actually very simple because atom kinda does it for you, you just have to type img which then comes up with all the fields you need to add. Before this you do have to add it to your folder with a simple name lower case letters - will never forget that. When I first added it I didn't realise how large it was going to me on the screen (was a little big haha) this is when I learnt to put in width and height so that it changes size. Again this was rather simple and was a great achievment!
The main areas that I struggled with was the typeing as I am dyslexic so words are not my first all the time especially spelling. Using terminal was really fun and after I got used to typing the correct commands it was great! Also that you can use the aross to go back through old cammands - I think this the most.
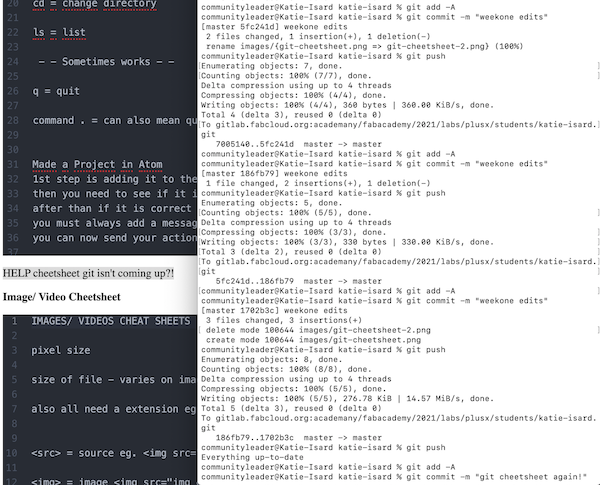
I did struggle when I was trying to update an image that I had changed but for some reason it wasn't accepting it as a new image. I had many tried and I just ended up deleting the whole image from my folder and starting again with a whole new name. If this happens again I now know to do this but I will also ask my instructor if he has any advise.
Having never touched anything like this before I have learnt so so much and am so surpriced at how easy and quickly I have picked it up. My first website it very simple with no css in it yet but thought I wanted to learn everything so would start simple and gradually get more complited as the weeks go. I think the reason I have enjoyed making a website is because it is very methodical, you either get it wrong or you don't. You then can see what the issue was because terminal tells you, it also comes straight up infront of you visually in a website and the instant gratification you recieve is very pleasing in my opition.
 - - HTML TAGS - -
    <tag>content</tag> = need these two brackets, always need to be closed and always need to be balanced
    <a> = ancor (must close)
    </a> = closing a ancor
    <h> = header
    <src> = source eg. <img src="">
    <img> = image <img src="" width="" height="">
    width ="500" height="600" = You can add specific measurements to change the dimensions of the image (see above for tag)
    <href> = hyper link
    <p> = paragraph (must close)
    </p> = closing a paragraph

     - - FORMATTING ELEMENTS - -

    <b> - Bold text
    <strong> - Important text
    <i> - Italic text
    <em> - Emphasized text
    <mark> - Marked text
    <small> - Smaller text
    <del> - Deleted text
    <ins> - Inserted text
    <sub> - Subscript text
    <sup> - Superscript text
I used this HTML Escape / Unescape Website link to change my tags so that you can see them.
 - - GIT COMMANDS - -
    git add -A = stages all changes
    git add . = AVOID - be careful! - All files that haven't been added (this can be large once)
    git add -u = stages modifications and deletions, without new files
    git commit -m = "what ive done" = committing the changes to the reps
    git status = shows what has happened in git (showing deleted files)
    git commit = this is you committing it to the 'staging' area before sending it to your website (this will stop you from adding too large images and videos)
    git help = shows all
    git diff = lets you view what WILL been committed
    git log = see a log of all changes

     - - MERGING - -
     - this is with multiple ppl changing the sight or if you do it in different places
    git pull = bringing back what has happened on the site
    git fetch = tells you what has been done so you know

     - - GENERSL COMMANDS  - -
    man ls = manual for commands
    cd = change directory
    ls = list
    du = checking size of a file
    du -sh * =
    du -sh * | sort -n = this is putting your files in size order

     - - SOMETIMES WORKS - -
    q = quit
    command . = can also mean quit
 - - IMAGES/ VIDEOS CHEAT SHEETS - -

    pixel size
    size of file - varies on image
    also all need a extension eg .png .jpeg .mp4
    < src > = source eg. < img src="" >
    < img > = image < img src="" width="" height="" >
    width="500" height="600" = You can add specific measurements to change the dimensions of the image (see above for inside a tag)