Computer-Controlled Machining
Hello and welcome to this amazing week of FabAcademy! During this week I had to face one of the machines that I've always loved to learn how to use, but for some reasons, I've never properly reached its full potential. Thanks to my colleague and FabLab technician Javier Collado I learnt the basics of the machine, thanks to fellow student Mauro we learnt some good practices for the group Assignment. And Finally, I used this assignment as an excuse to build a project deck chair with a concept that I really wanted to prove since way before FabAcademy started. Do you want to join me in this super exciting assignment? Let's go!
Chapter One: Group Assignment, The scariest machine of the lab
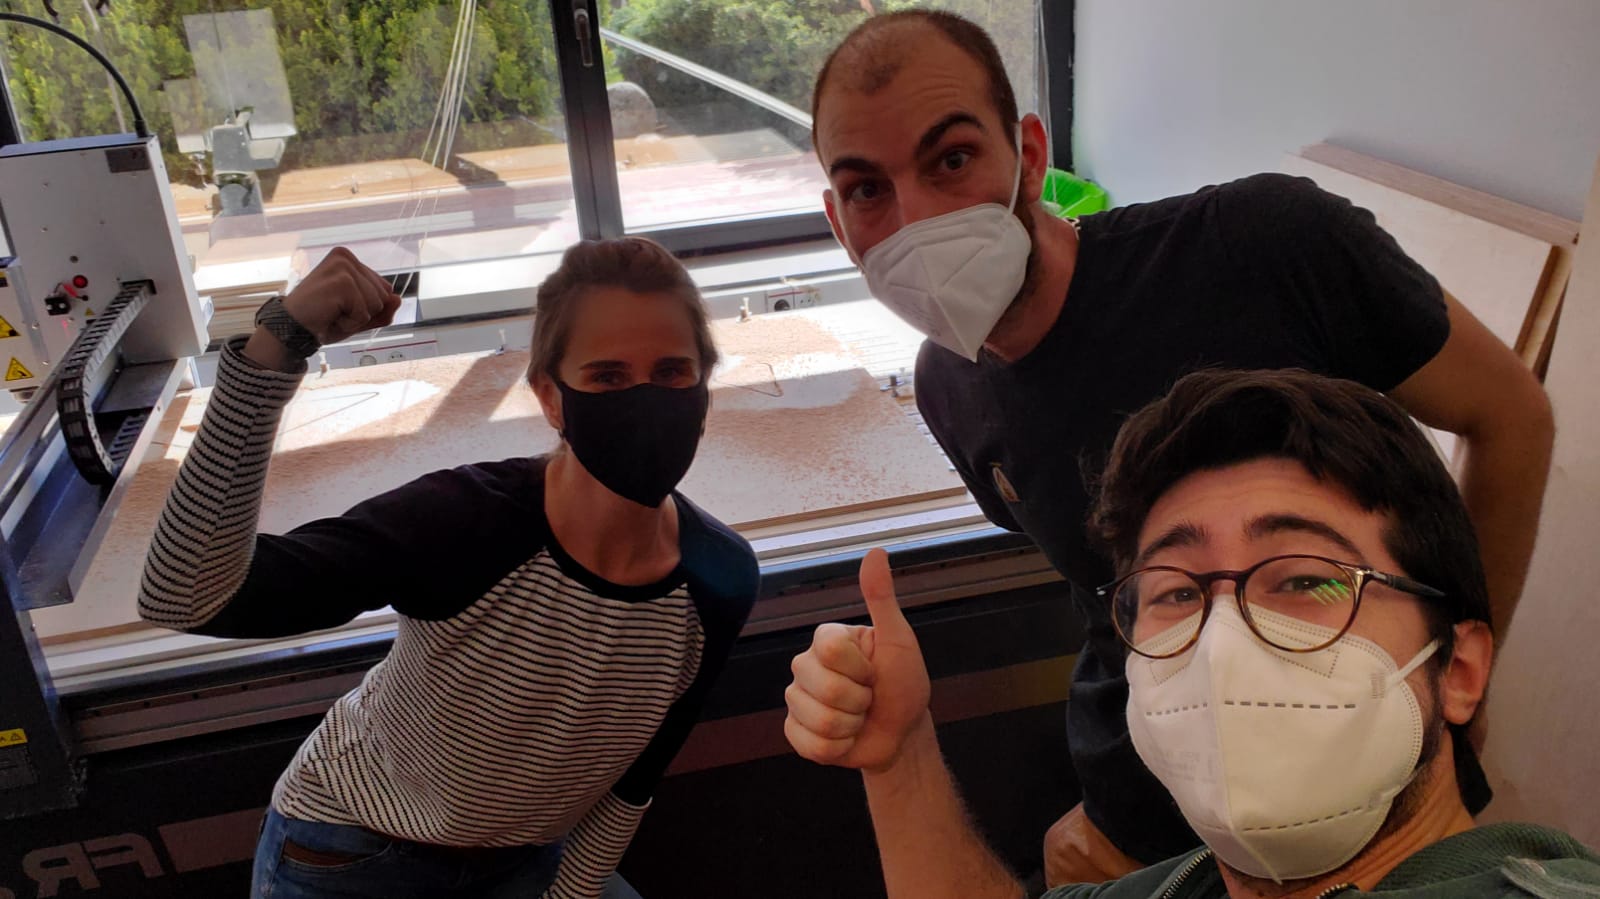
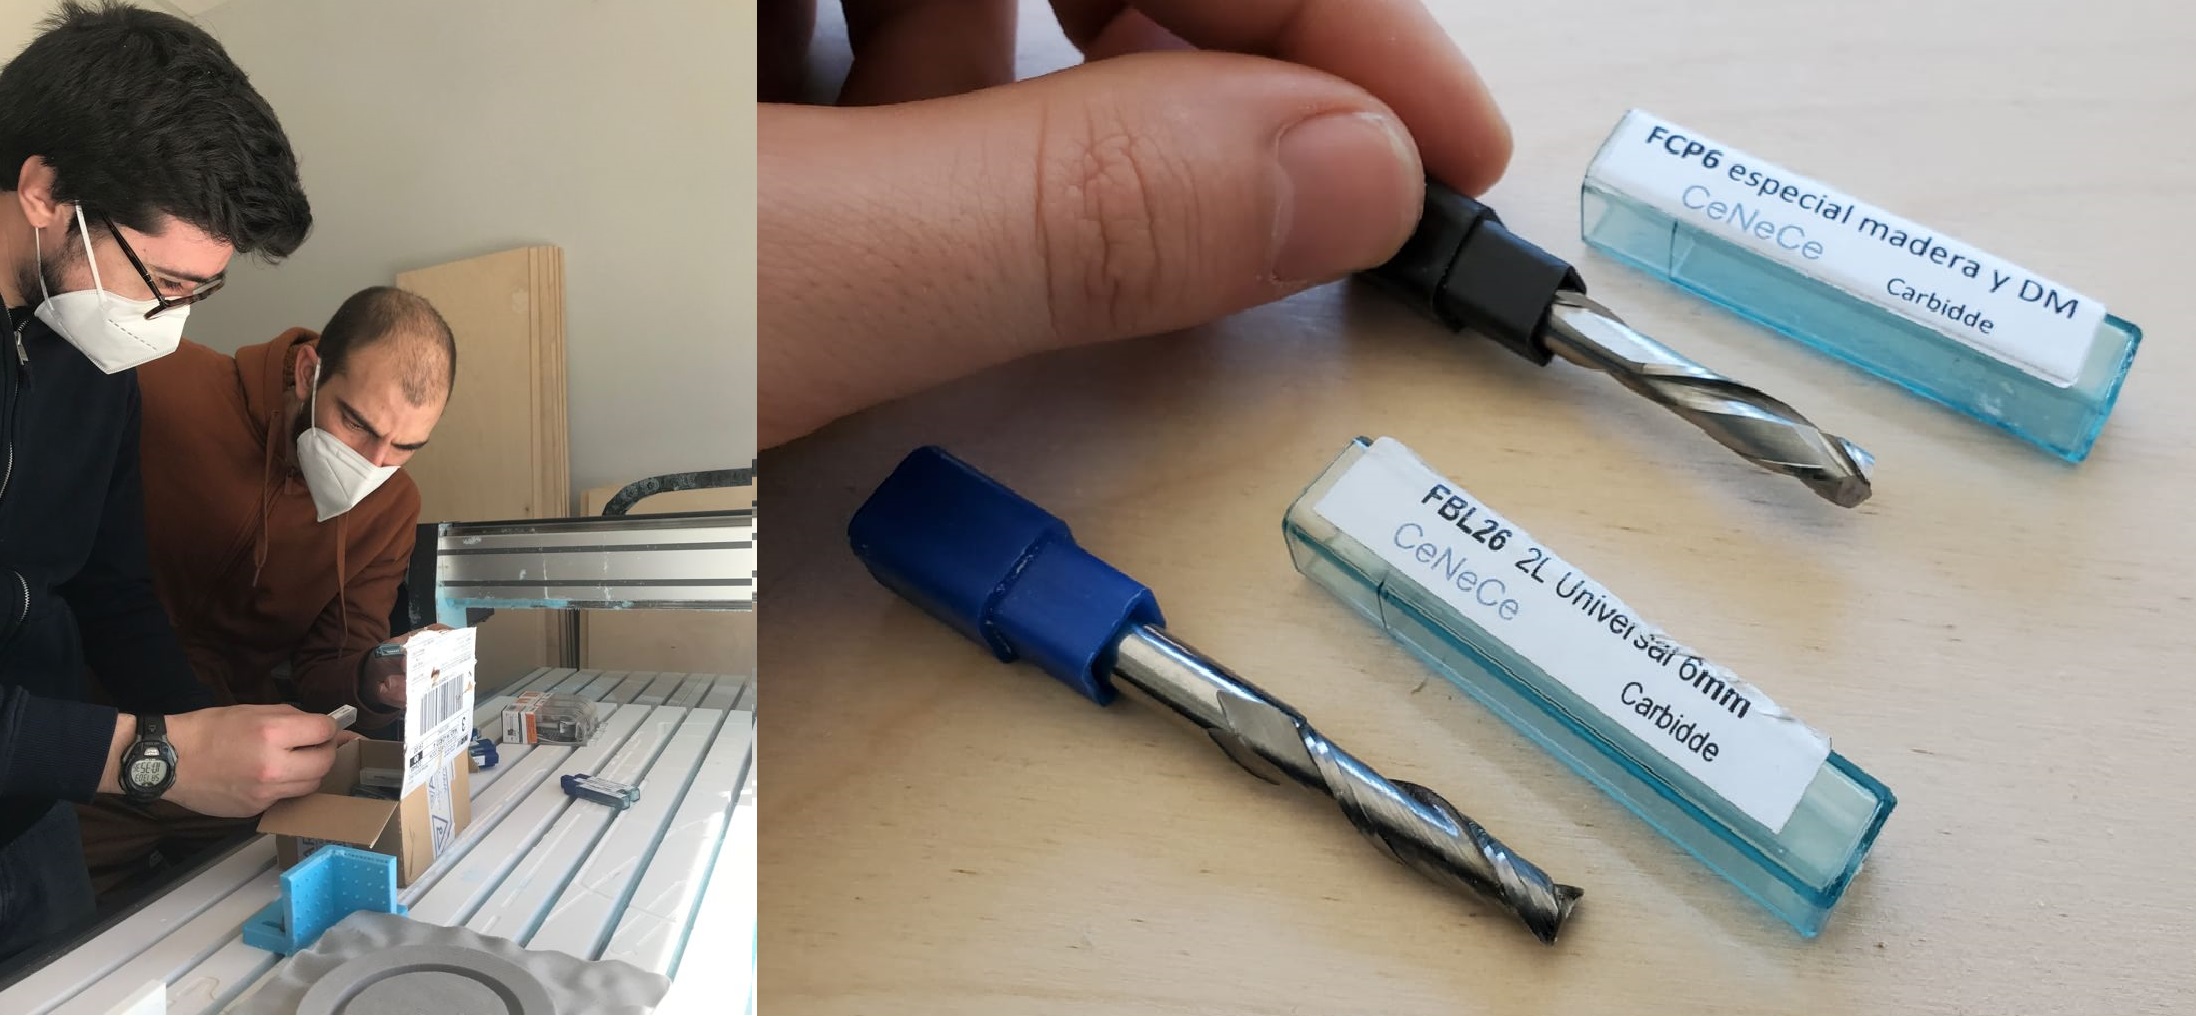
(First of all, I have to thank a lot of people in this assignment. Mickael and Lorena (pictured above) have been with me in the FabLab on Saturday and Sunday, and they helped me a lot with the setup of the machine. We also got amazing milling tips from Mauro and the quality of the results has improved a lot on each operation)
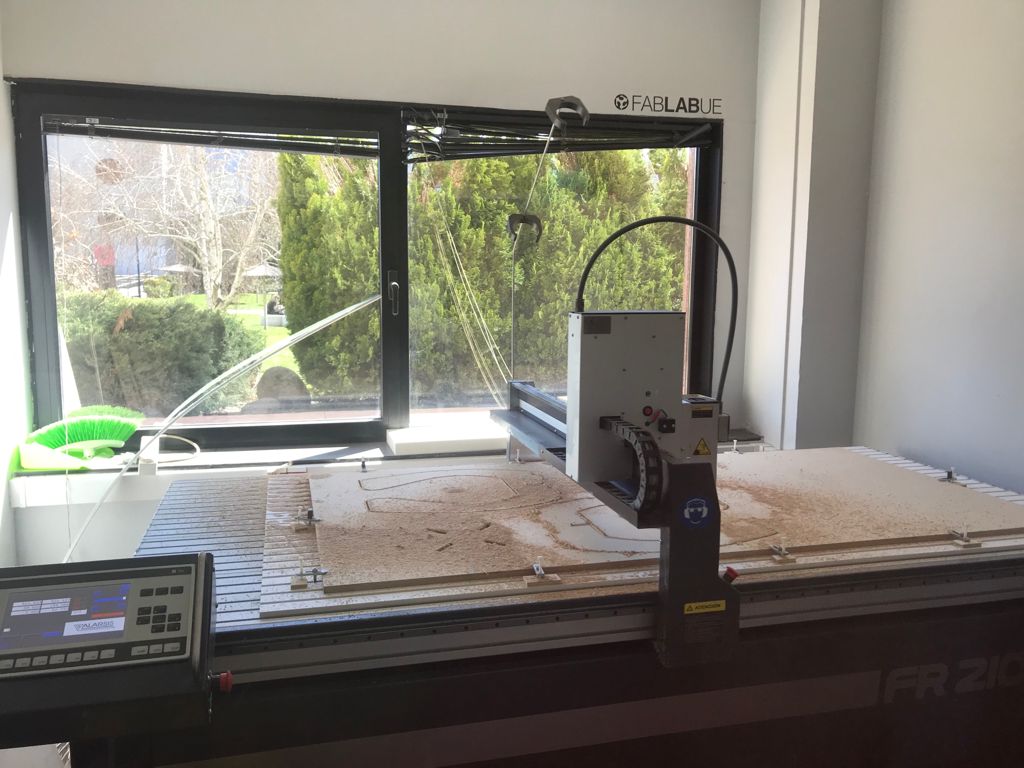
We will be working with the Alarsis FR 210. This Spanish-designed and Spanish-built machine (From Murcia) has a 1.1 kW electric spindle with ceramic bearings, a 2 x 1 meters work surface with a Forex sacrificial board (no vacuum power here, the pieces are fixed with clamps) and works with a special RhinoCAM post processor that was programmed for us by Alarsis
Once you have clamped the piece to the board, it's time to do the zeroes. The XY zero is set with a laser. The Z zero is set with a probe. The X, Y and Z zeroes set on the machine have to be coincident with the ones that you have set on the computer. It really makes no difference if you make your Z zero on the bed or at the top of your material, but the zero in the software and the zero on the mill have to be set in the same plane, as if you set the z zero in the material on the computer and then you set the z zero on the bed in the machine, you could wreck the endmill tip inside the bed. The milling machine can kill itself, so be careful with that. Once the zeroes are set, you can start milling. It's the same with the tool selection, you select the endmill in the rhinoCAM menu, and then you have to make sure that the endmill mounted on the spindle is the one you selected in the CAM tool, otherwise you have to change it and Z zero again. In order to create the code, we use rhinoceros + rhinocam, so as I was new to it, I had to get used to the thing...
I've never liked Rhinoceros. It's very powerful and great for architects, but as an engineer, I could not track, let alone modify, the feature order (there's grasshopper for that, I know, but it's so complicated to use, and so hard to master...) so I've never been a fan of that software. I'm only starting to like Rhinoceros now. However, the discovery of this assignment has been its CNC special module. RhinoCAM is awesome. Once you know the basics, it's so intuitive to play with! It has automatic dog bone and t-bone generation and it has a great way to update the tool library and add new endmills. However, you have to deal with the Rhino environment to position the part, select the lines, scale the model if necessary...
This was a huge problem because I design in CATIA. As I told before, I've never used rhino before facing this machine. When the machine came to the lab (it was ordered by Germán, the previous coordinator, but it arrived when he was already gone and I was in charge) It scared the crap out of me. First of all, because it was dangerous. Second, because my Rhino knowledge was next to nothing. And third, because most of the milling jobs here come from Architecture students, therefore, they want 3D milling. So the first thing we did was a masterclass from FabLab technician Javi Collado, prior to this assignments, just to check what this machine can and can't do.
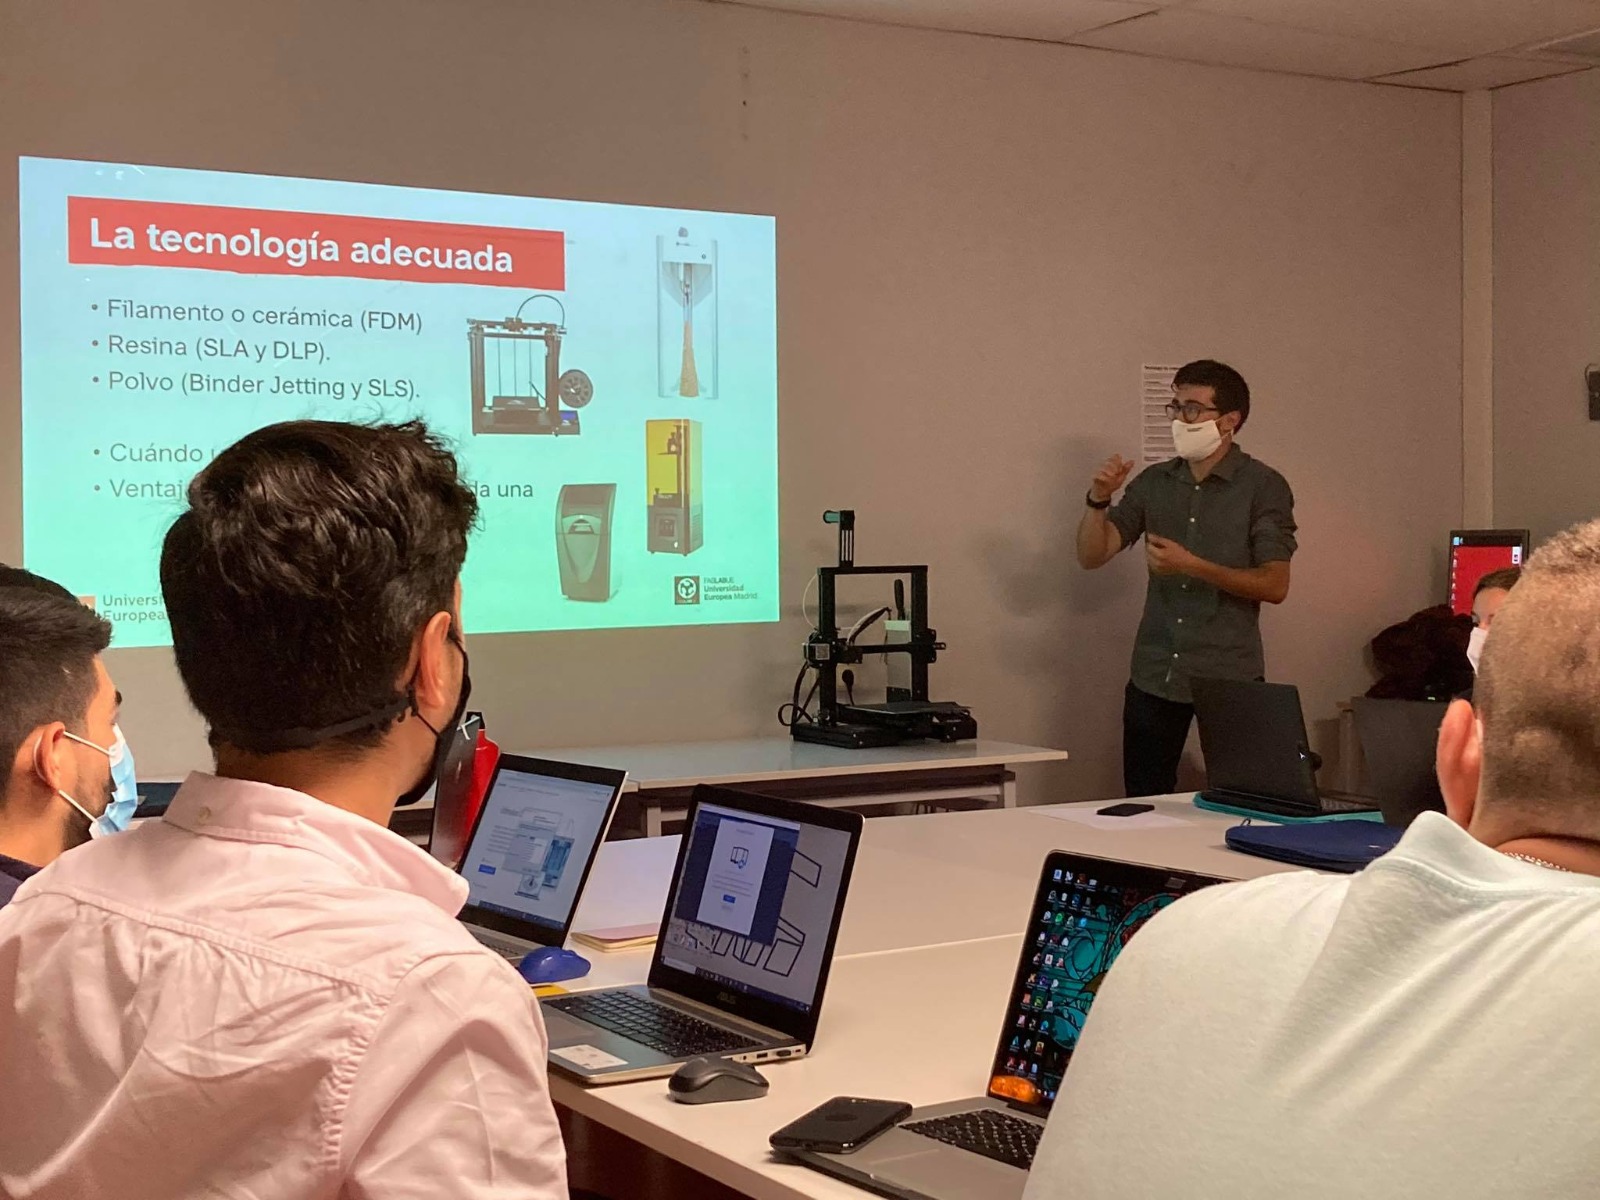
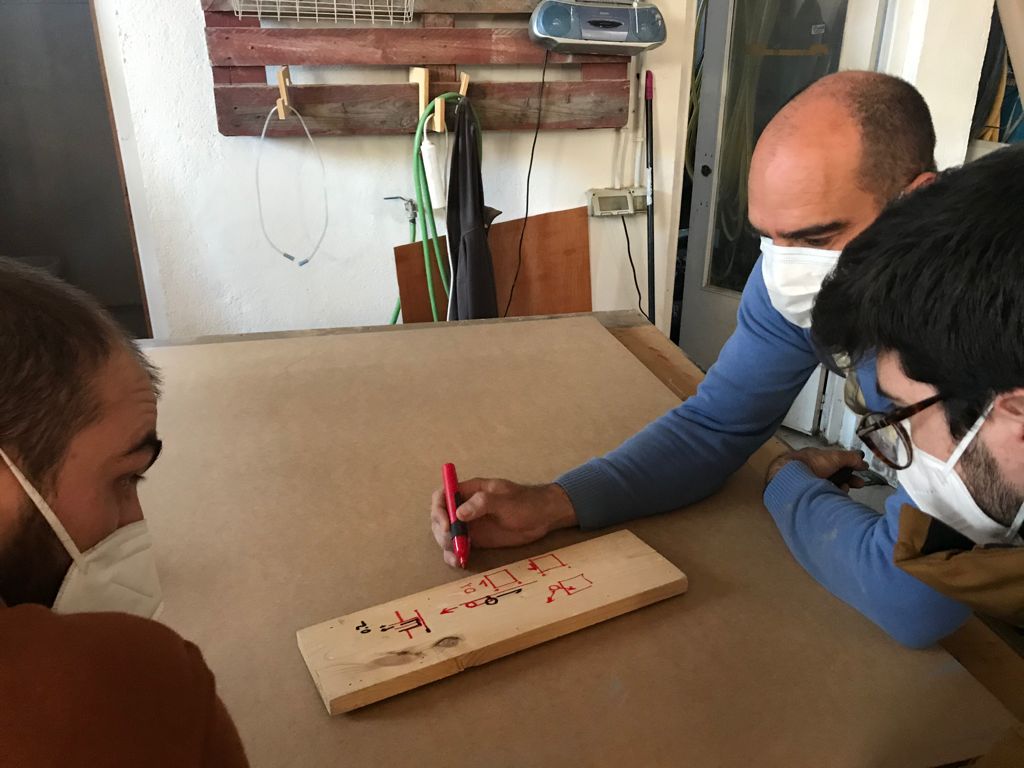
We also give all of the students that want to use the FabLab a risk prevention course in which we go through all the machines, and we emphasize a lot in the CNC mill and its risks, and we also tell them never go inside the room where the CNC is (it's enclosed in a separated room of the FabLab) if the machine is milling. In this FabLab, the CNC is only used by the technicians, never by the students. Each technician has his or her own safety equipment, with special masks, ear protection and glasses. If anyone is curious about how we do those lessons or how I look as a teacher, here is the pic.
This week we also run through what endmills we had, and we saw which ones were the most suitable for the jobs we were going to run, 2D cut of the wood. We found the Alarsis CeNeCe FCP6 so great, as it has the flutes in two different directions. This gives the birch plywood a much finer finish, as the surface of the wood does not splinter when it's cut. Mauro told us that a flat endmill can also be very useful and give a nice finish with no splinters, but we still have to try that.
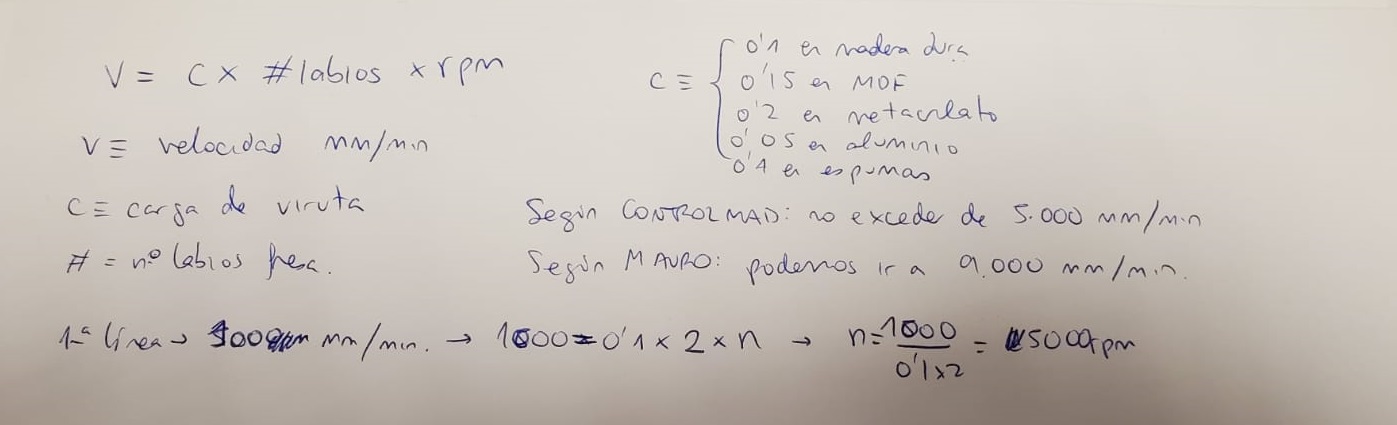
We also checked the formula and tried different speeds. Mauro told us to take the formula and forget it and just test and try different cutting speeds and spindle revs and adjust it based on the noise of the machine and the looks of the chips. However, we found that with the FCP6 and the formula, only one minor adjustment had to be made. At 15.000 rpms on the spindle, the formula says that we should mill at 3000 mm/min. Best results were achieved at 3.500 mm/min. So we found the formula a nice starting point, and then adjust from there.
In order to try to reach the full potential of our FR210 and get a better finish, Fellow FabAcademy student Mauro Herrero gave us a real masterclass! We learnt a lot about climb and conventional milling, different endmill shapes, speeds and techniques
Chapter 2: Formula Deck Chair
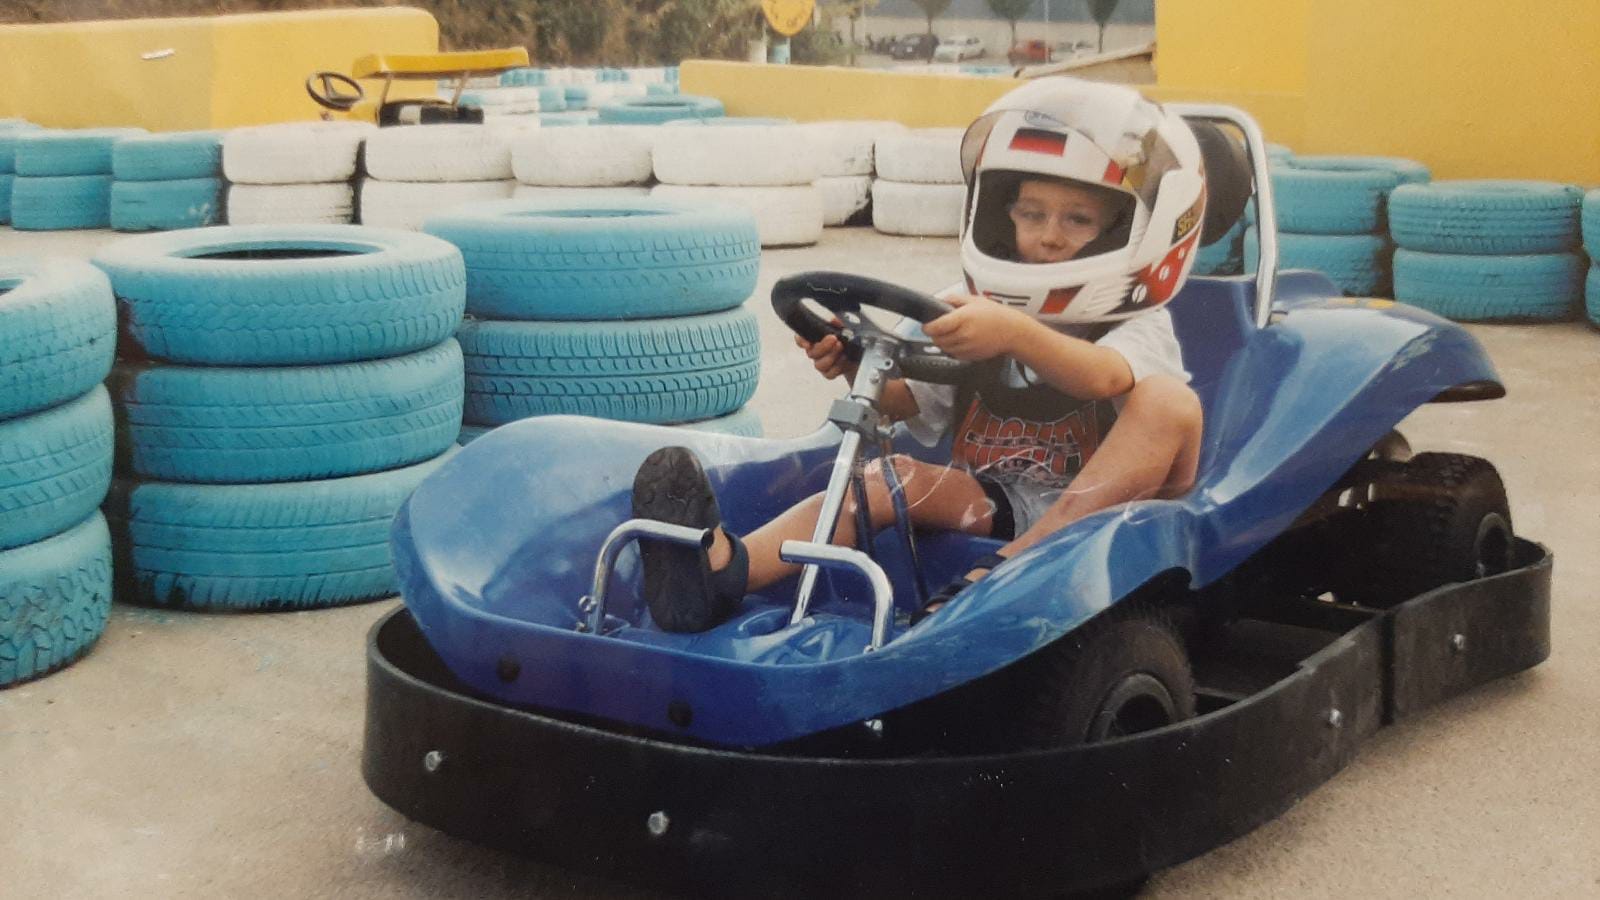
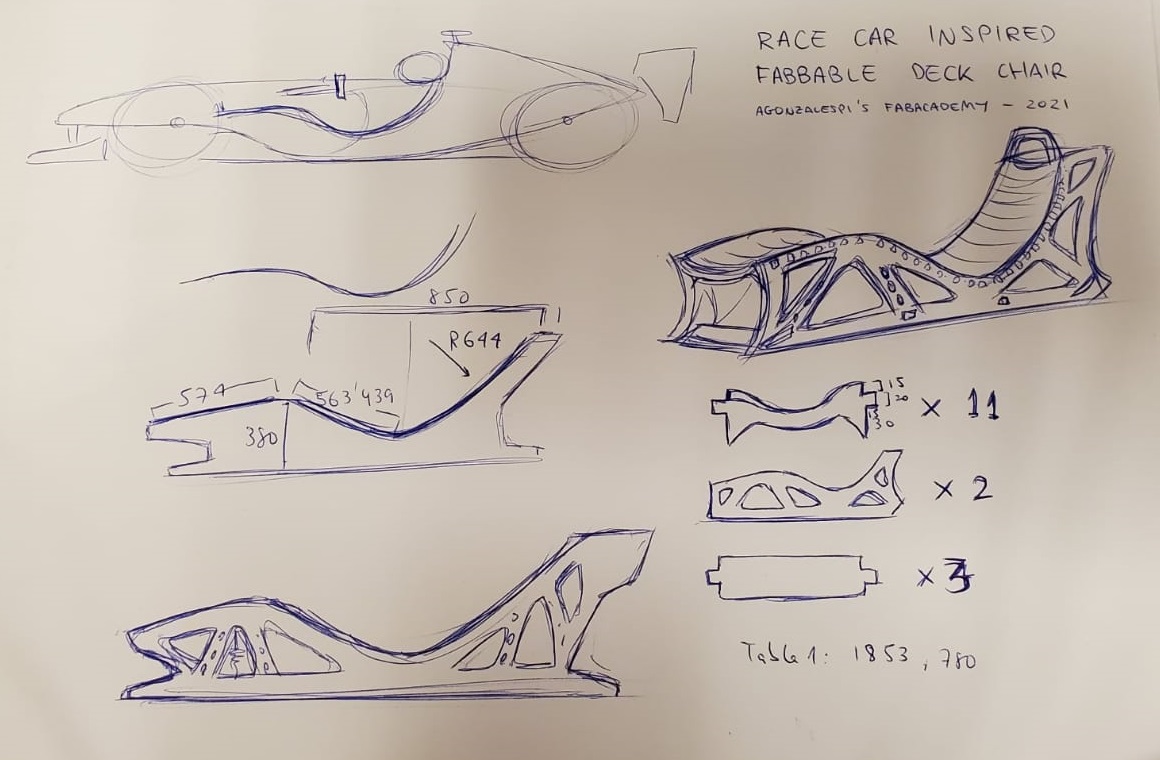
Just in case you don't know already, I'm a petrolhead. My grandfather loved cars, and even if my father was never as passionate, with my house always filled of old car books and magazines that my grandpa used to buy, veins are filled with high-octane gasoline and I've always been a Motorsport fan. On top of my family taking me regularly to my local racetrack, which I absolutely love, I grew up watching Fernando Alonso becoming Formula One Champion on TV, which fueled even more my passion for racing. I'm now rebuilding an old BMW as a racecar in a shed with my friends, so now you have the context of how this deck chair came to life And yes, this is me. So you can see what I mean.
If you ever sat on a single-seater race car, you know this, but if you don't here's the key of the seating position: The driver's bottom sits as close of the tarmac as possible, with the legs up to reach the pedal. I've always found this position super comfortable, and almost nobody makes rocking chairs, deck chairs or sofas with this shape. I've always wanted to design and make my own Formula-inspired deck chair, way before I started FabAcademy, and this was the perfect opportunity. I had this design in my mind for so long... So I took a pen and a paper, and set to work.
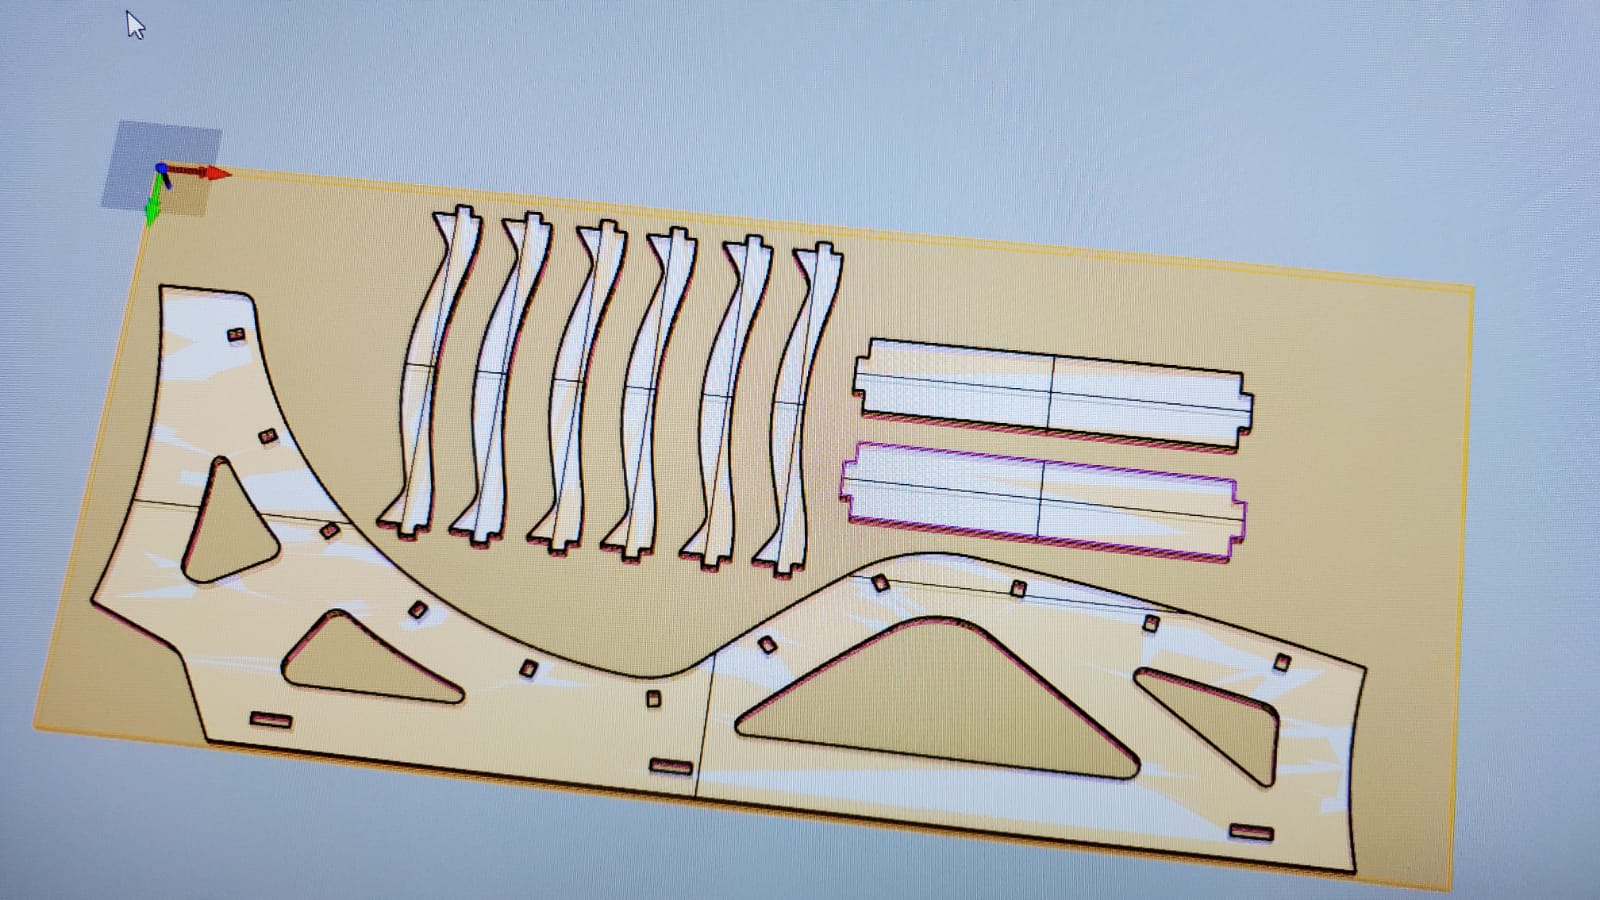
In order to export the CATIA design to Rhinoceros, I saved the CATIA .catPart file as an STP and opened it on Rhino. I was amazed at how easy was to set up and modify the STP on Rhinoceros. The way to move and arrange the parts on the stock, duplicate them, select the correct lines I wanted to mill, it was easy and simple. I created the box stock of my plywood board, and simulated the job. It was perfect. We were ready to mill.
We clamped the board on the sacrificial bed, and we set our zeroes. Every machine has its own way to do it, but fellow FabAcademy student Mickael from FabLab Cuenca did a very comprehensive report on how to do it on this machine when he came here, so I recommend to have a look at his own assignment.
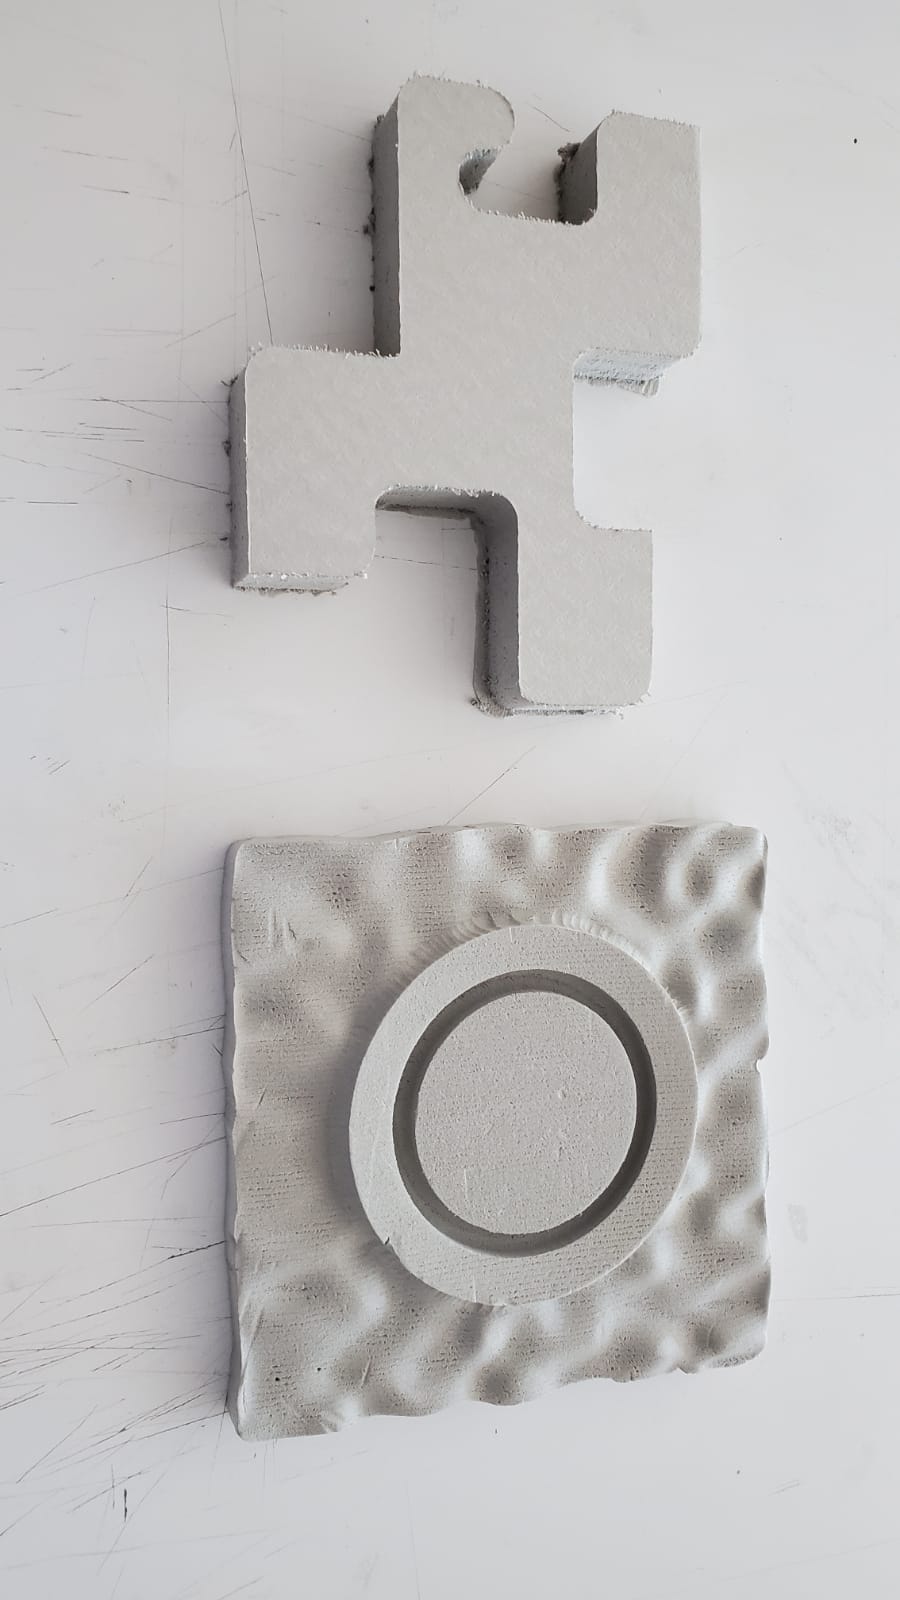
The next lesson that we learnt here was Check where you measure your Z zero. In my case, the wood was warped and we zeroed in the center, so there were points in which the mill did not cut all the way through, so after the first test, we needed to do a lot of finishing by hand.
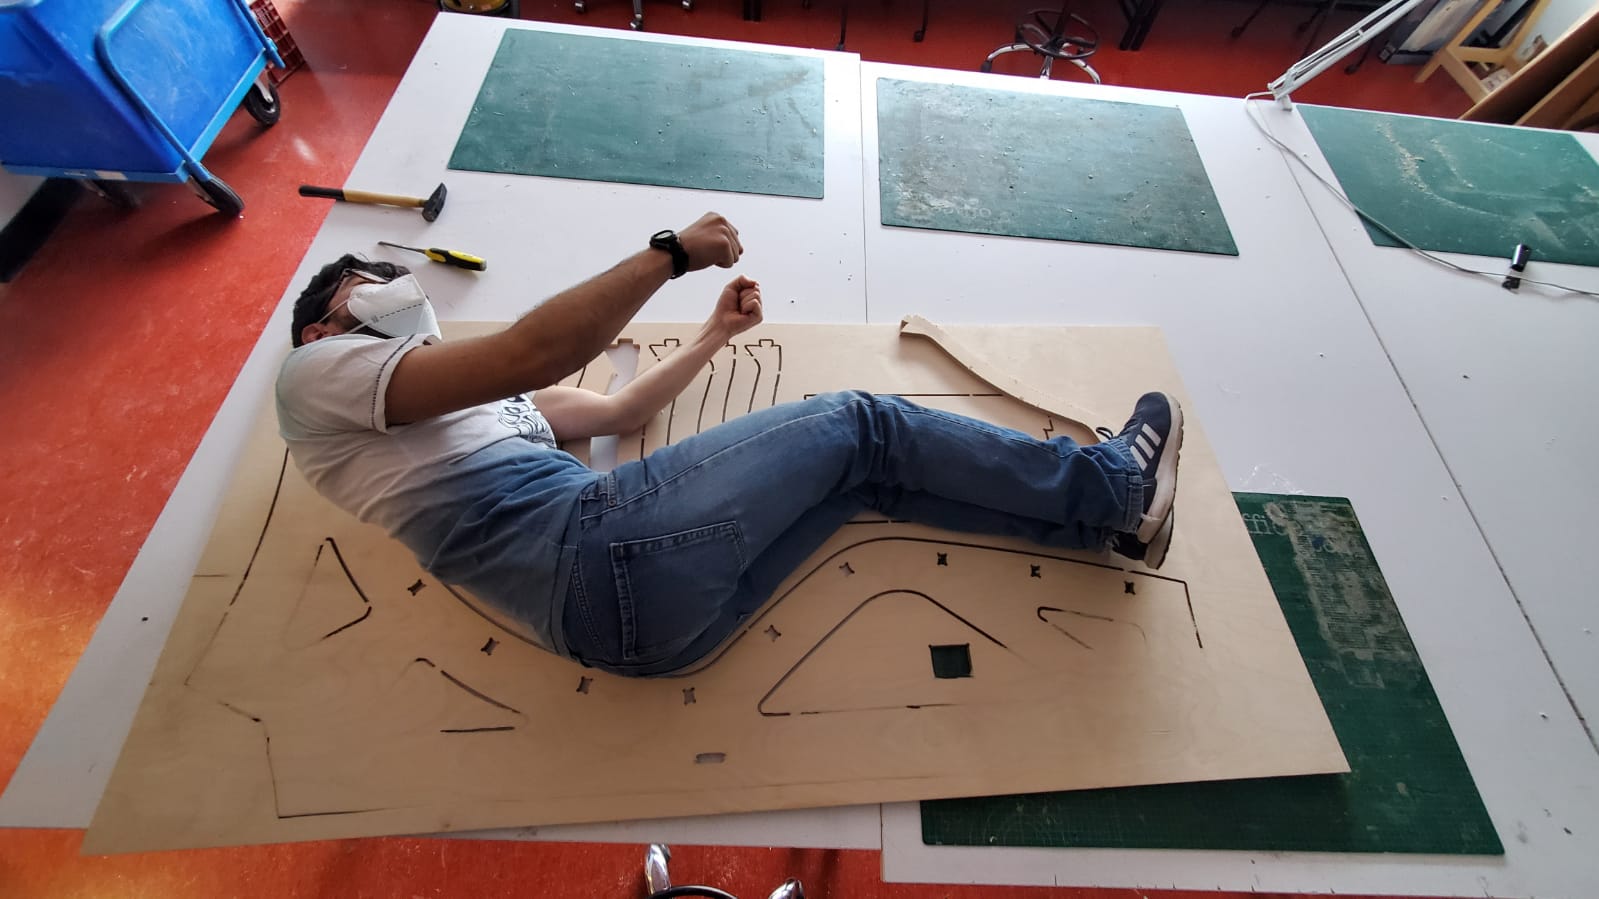
Even if a piece came with a little error (see chapter 4), the deck chair came out very nicely! All the dogbones fit. The press-fit is not tight, yet not too loose. We were able to put it together and it holds its weight. Will it hold also ours?
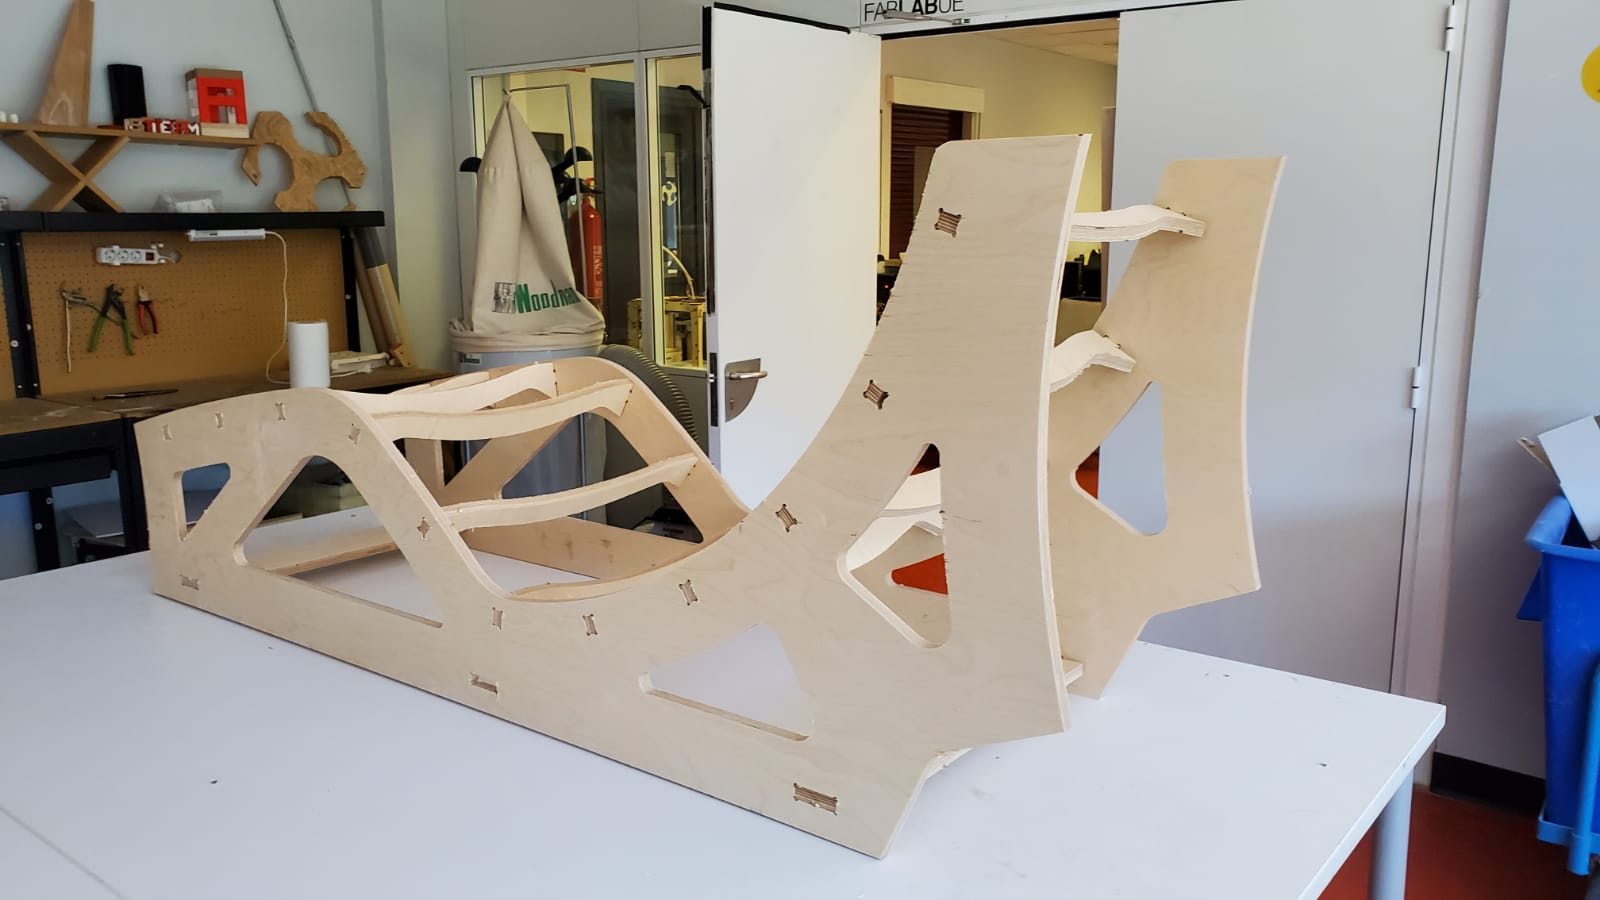
So we repeated the pieces that failed and we were ready to test-fit the ergonomics of the deck chair
You can get the original file for milling this chair in your lab HERE.
You can get the STL file for milling this chair in your lab HERE.
You can get the SVG file for milling this chair in your lab HERE.
Chapter 3: Ergonomic test
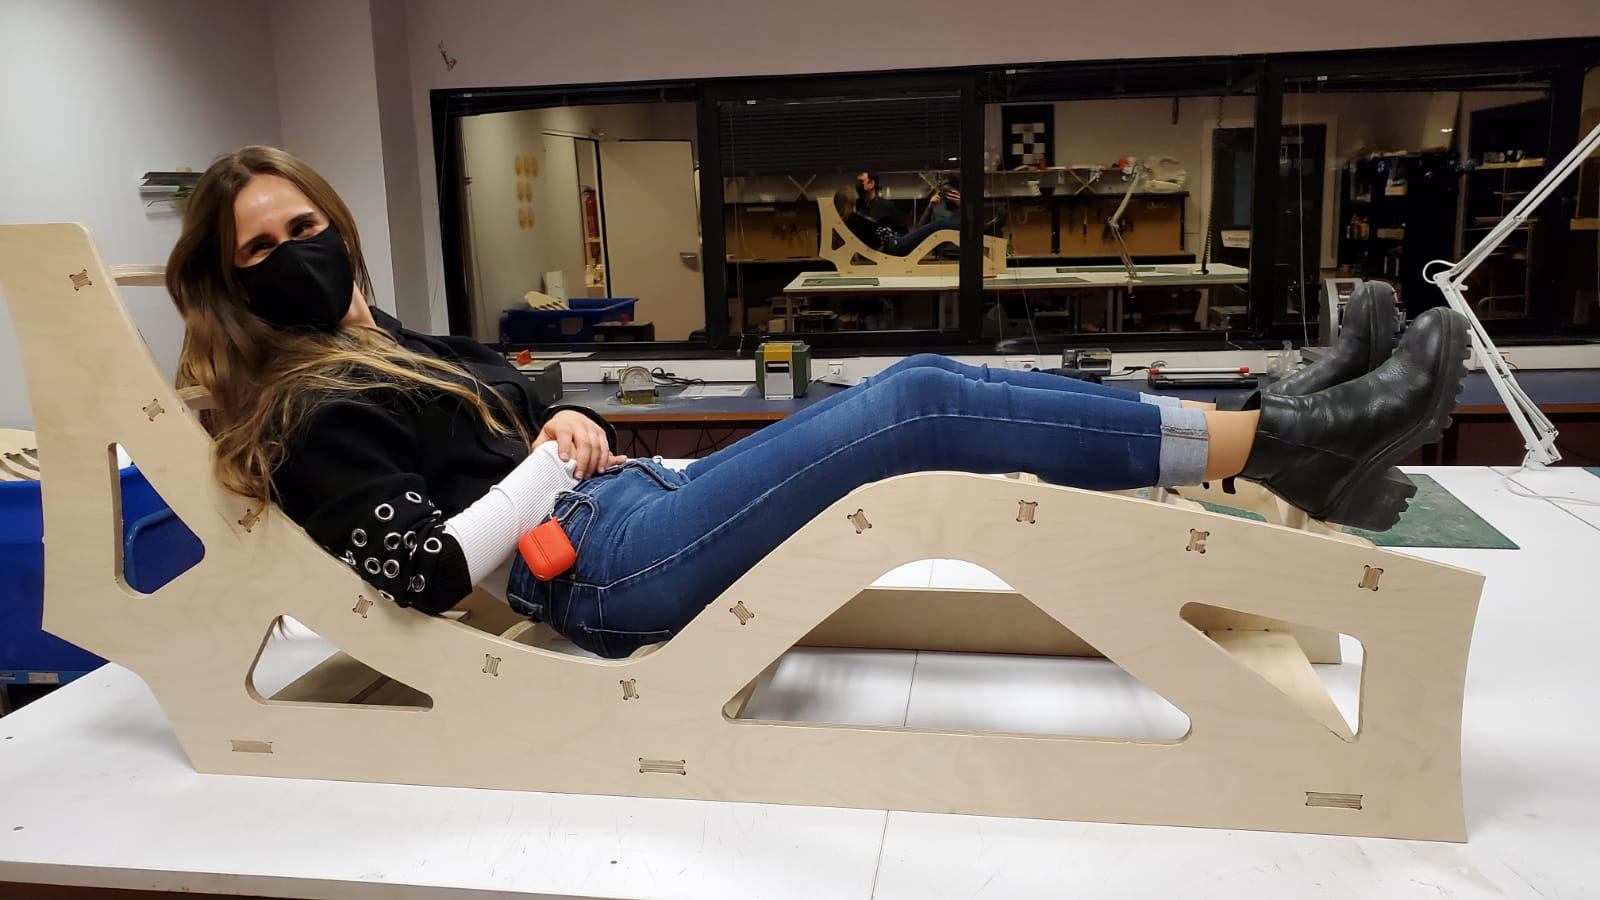
Lorena was the lightest person who had enough confident on my design to dare to test it. She liked it, even though she was not too convinced because it has too little ribs/beams, so she found she needed more lumbar support. I was planning on giving it some more comfort with the addition of tight ropes between the beams, but I haven't done it yet.

I found she's right, but the position is spot on! It really feels like the position of a single-seater race car!. This particular example will be given to fellow F1 fan and FabAcademy graduated Adrián Torres as a way to thank him for the time he's dedicating to keeping FabAcademy growing, the Global Open Times and all the effort he puts and the nice help and advice that he gives us to improve on our assignments.
However, it was not all happiness, as the machine also fails sometimes...
Chapter 4: Never trust the machine
So for the last part of the assignment I want to document a machine error. The biggest error was mine, as I pressed play on the file and went to a meeting while I left in charge junior technician Emma to give it a look. According to her report, the machine was cutting as usual, and then it arrived to the point marked with the arrow, where it started to perform weird shapes, then it turned the spindle off, jammed, lifted, turned off the spindle and went straight to cut the wood with the spindle off, made a lot of noise and stopped. She immediately called me, I rushed to the lab and found that error message in the screen.

The machine did not respond to any input so I had to restart it. The other thing that this machine does and I absoutely hate is that when it restarts it homes all axis. No problems there. But it homes all the axis at the same time, so if the endmill is buried in the material, it will move X and Y very quickly, so it can rip the tip of the mill. I will contact Alarsis for a software update, giving them a machine report. However, after this problem, the endmill was not broken or bent, and the machine is still working no problems at all
So this was all for this week! I can't wait to have a little bit more time alone with the machine to experiment with it, and can't wait also for the molding and casting assignment to try to do test it to the limits with the 3D milling on RhinoCAM. See you next week!