BACK TO HOME PAGE
Week3
Computer Control Cutting
Group Assignment:
characterize your lasercutter's focus, power, speed, rate, kerf, joint clearance and types
Laser Cutter Procedures:
According to the directions, the cutting line strokes were set to 0.001 inches. The other vectors, however, are set to engrave with respect to their greyscale hue for 0.001 cm. Then, in the paper properties, we set the page size to 32x20 inches and the rasterization resolution to 600 dpi to convert our SVG file to PDF.
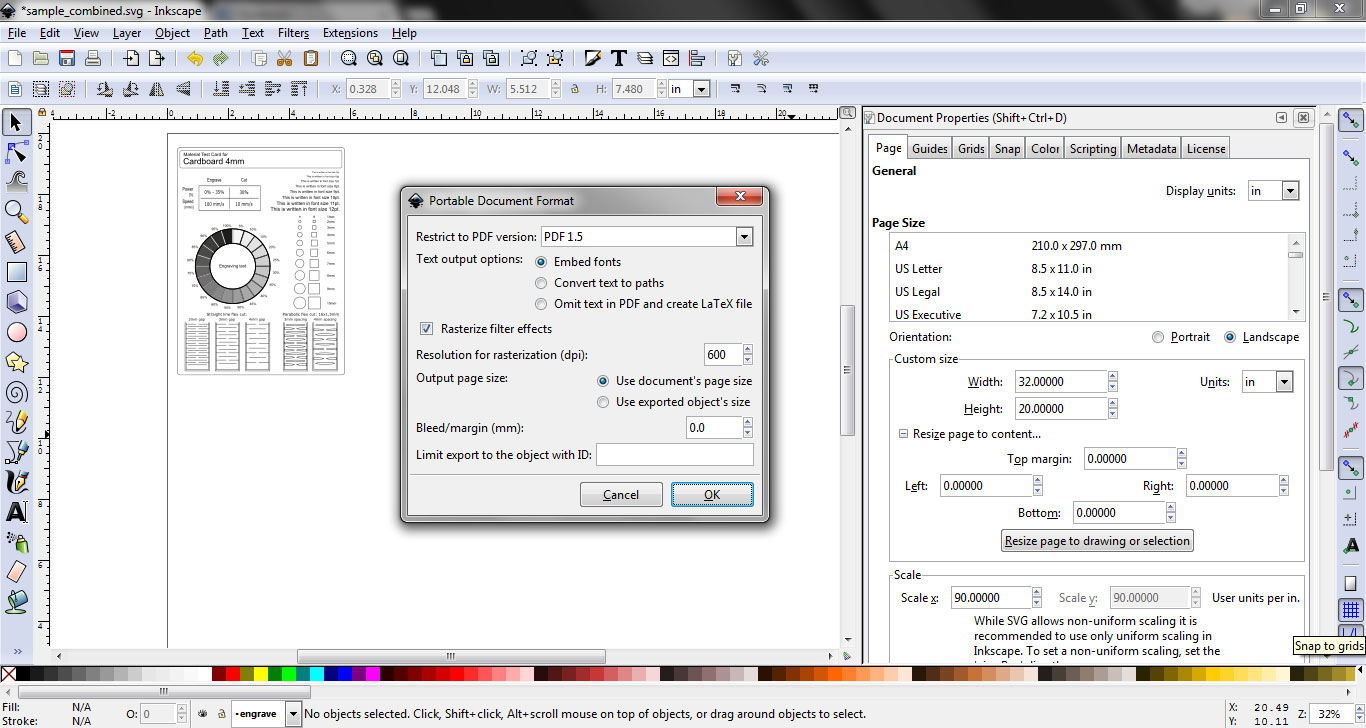
creating an svg file and converting it to pdf
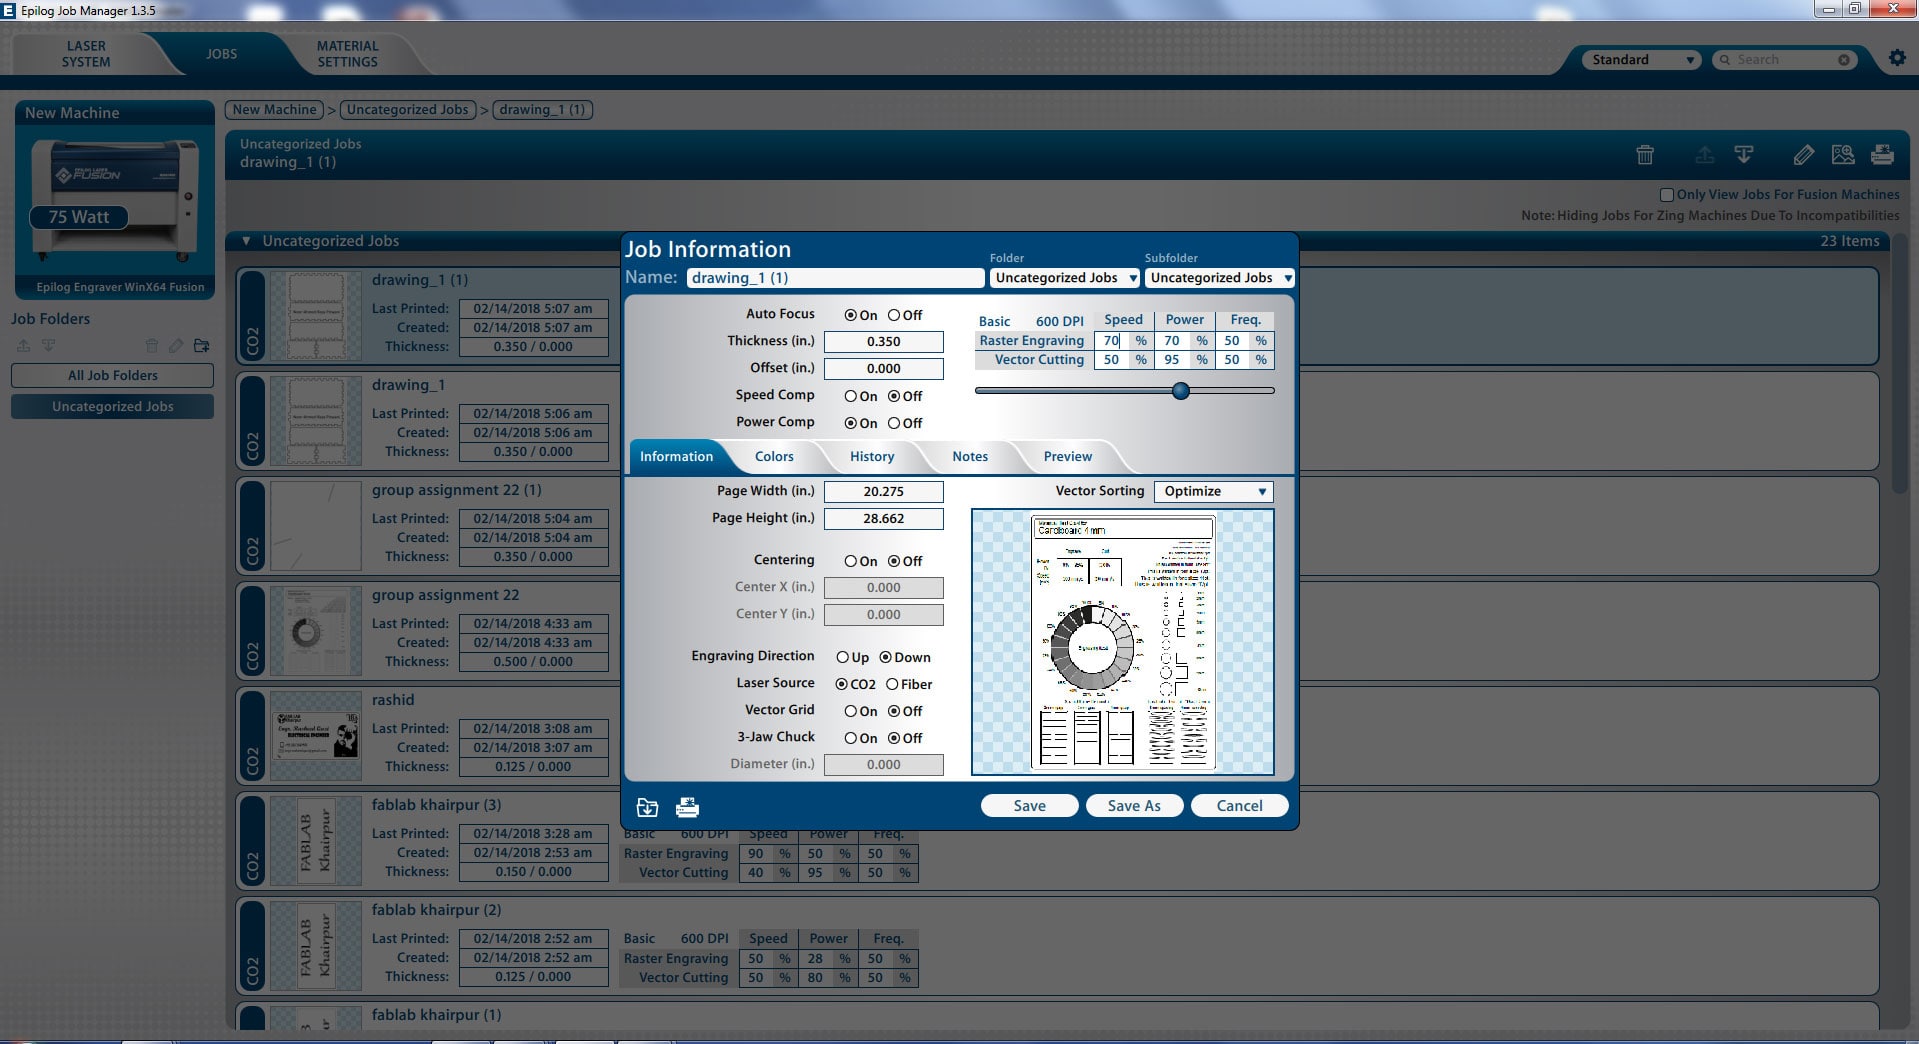
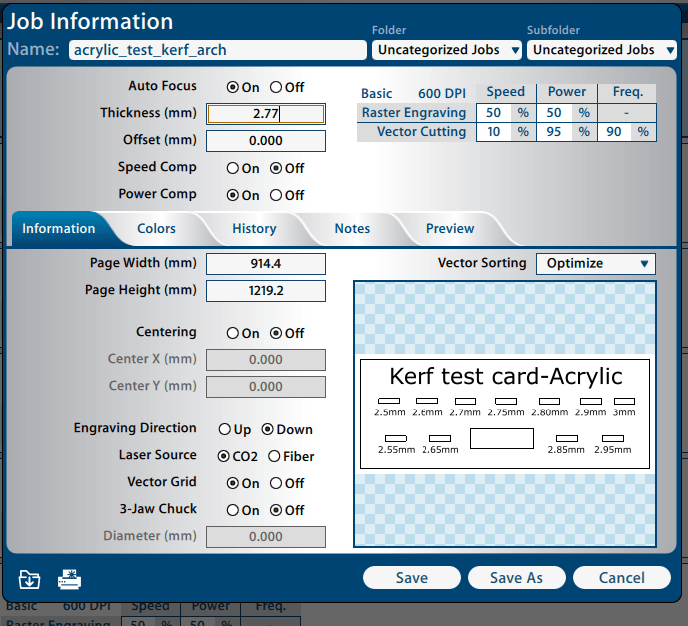
Job information in Epilog Job Manager
After choosing the location, press "Save," and the new details will be saved in the job. To move the job to the laser cutting system, click "Print" (top left corner in Epilog Job Manager).
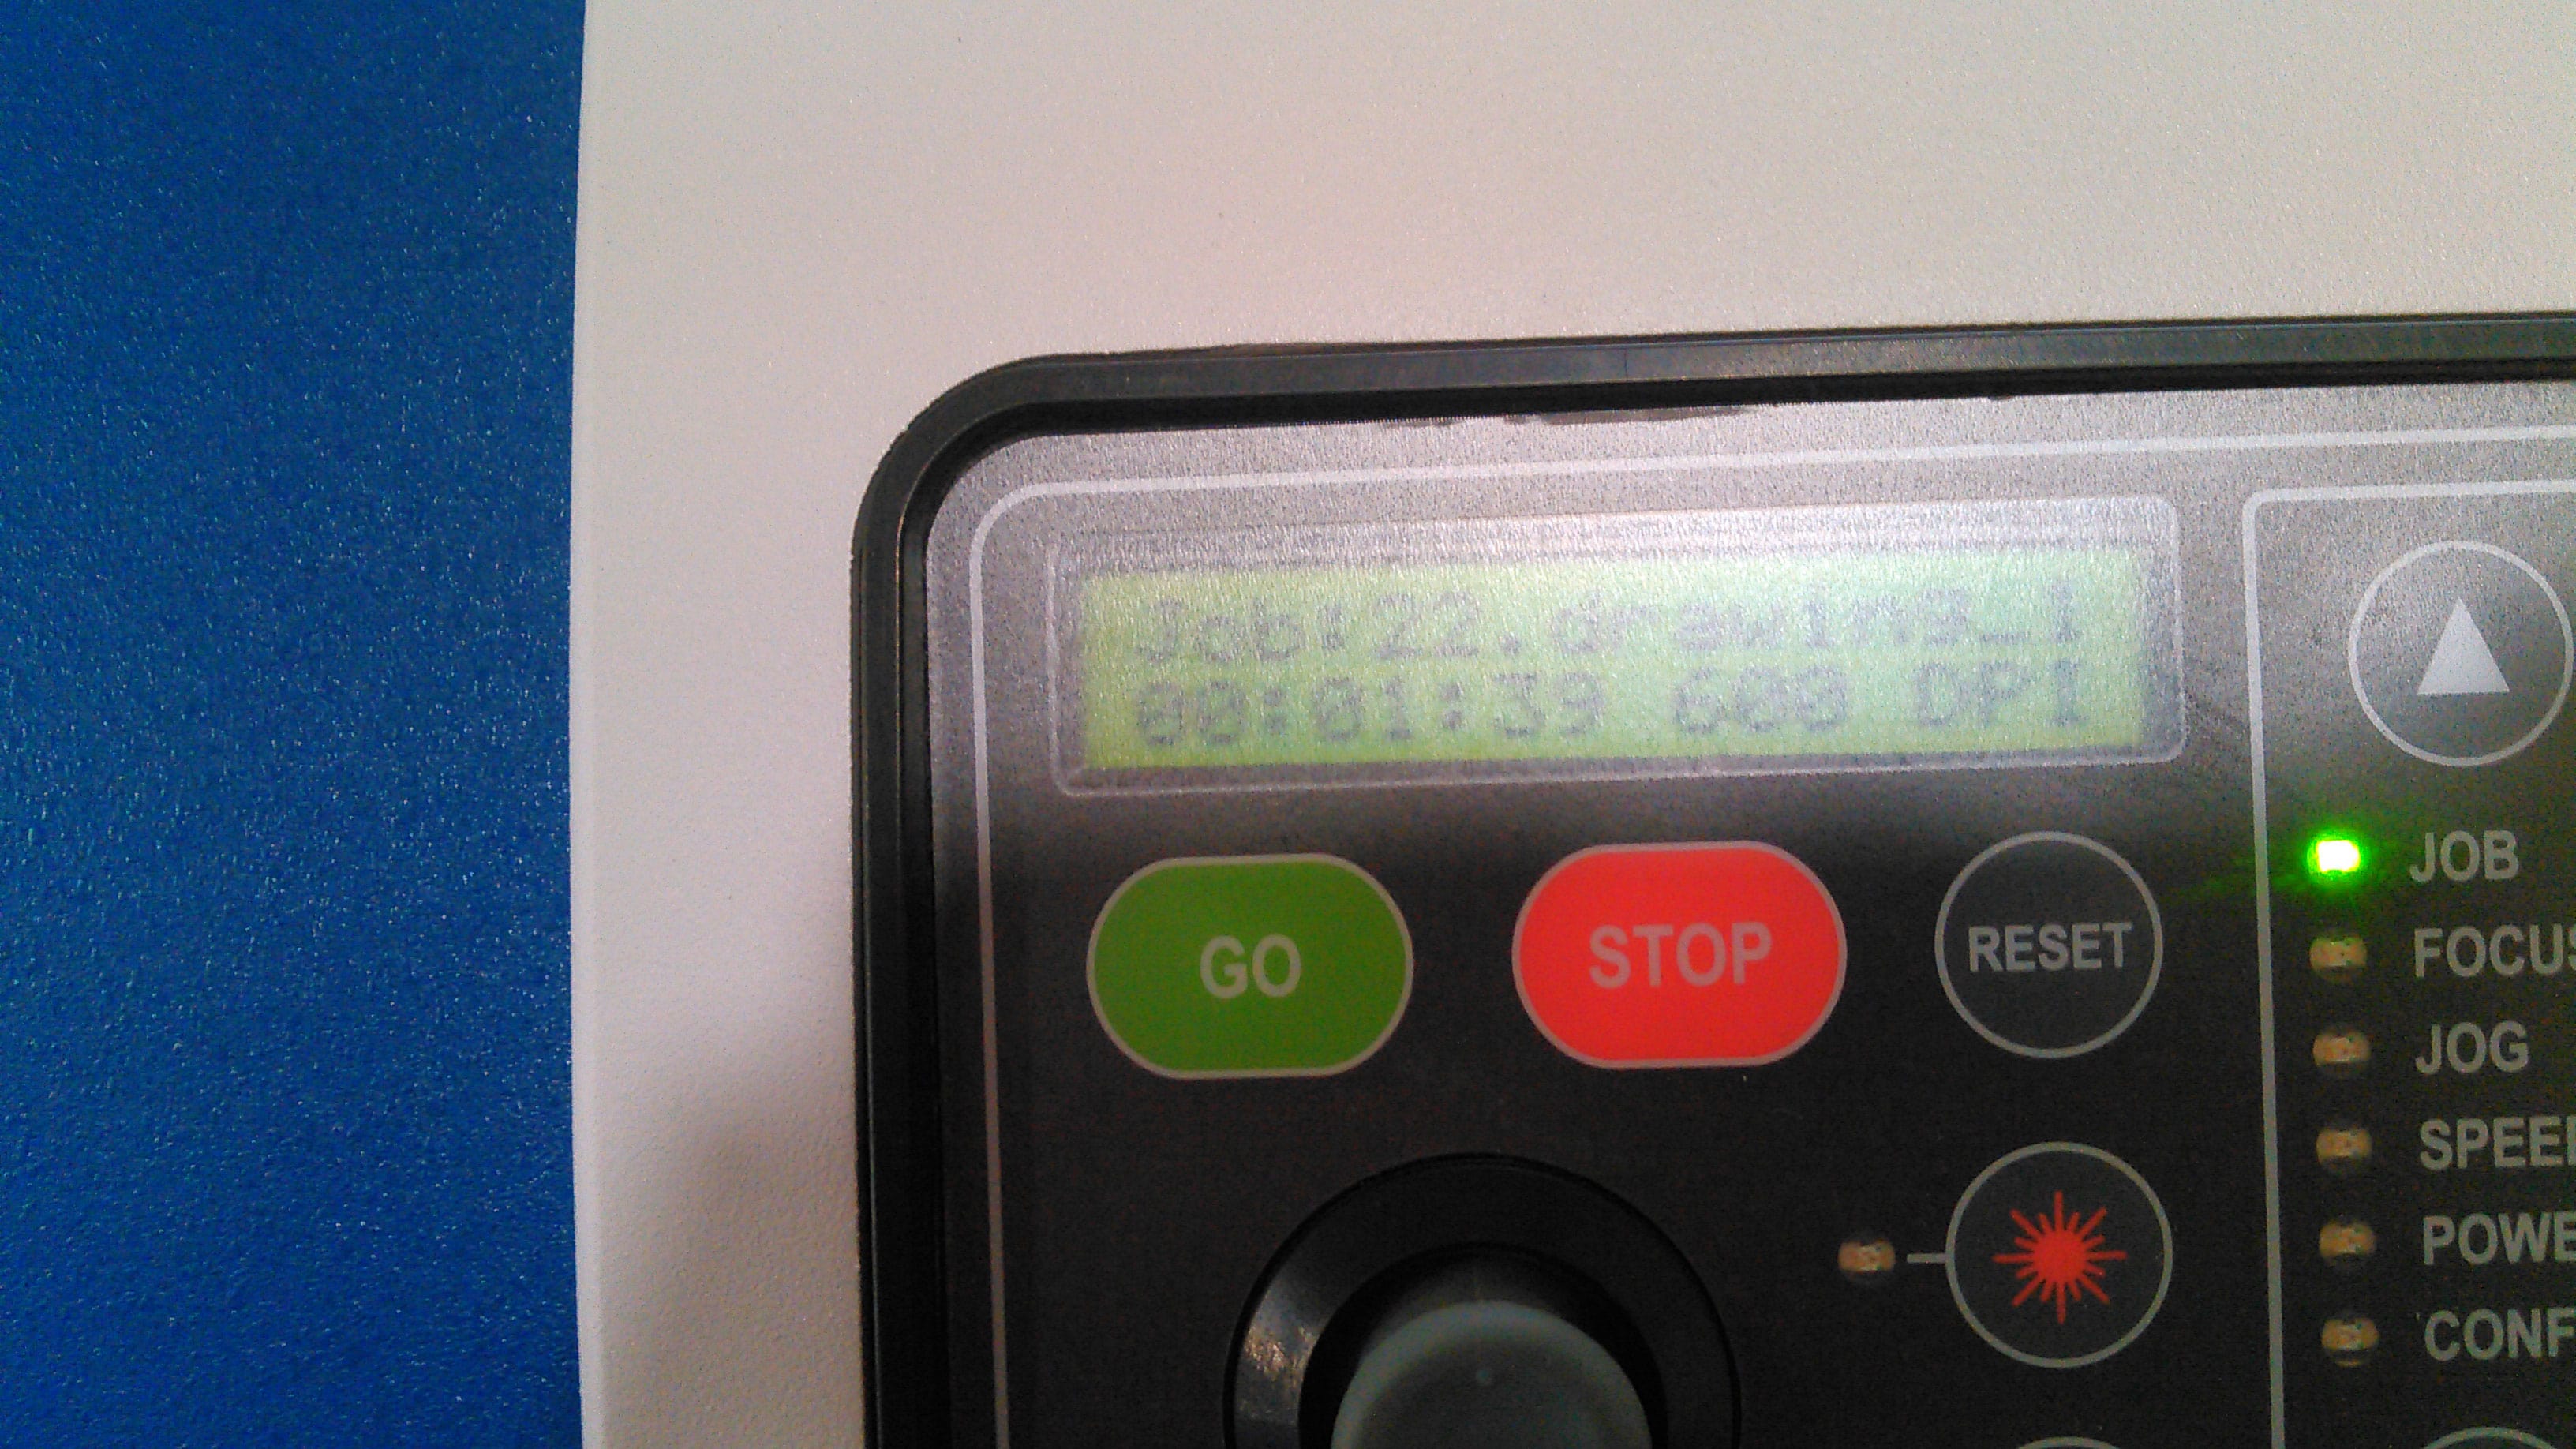
Display of job information on Laser Cutting Machine panel
From this group assignment we learn that after all process and operation laser cutting machine is based on 2 things laser power and speed. We have to set the exact ratio of power and speed for engrave and cut which is based on material thickness and material type. More power with slow speed can burn the material and fast speed with low power can engrave but it maybe lighter enough to do job again.
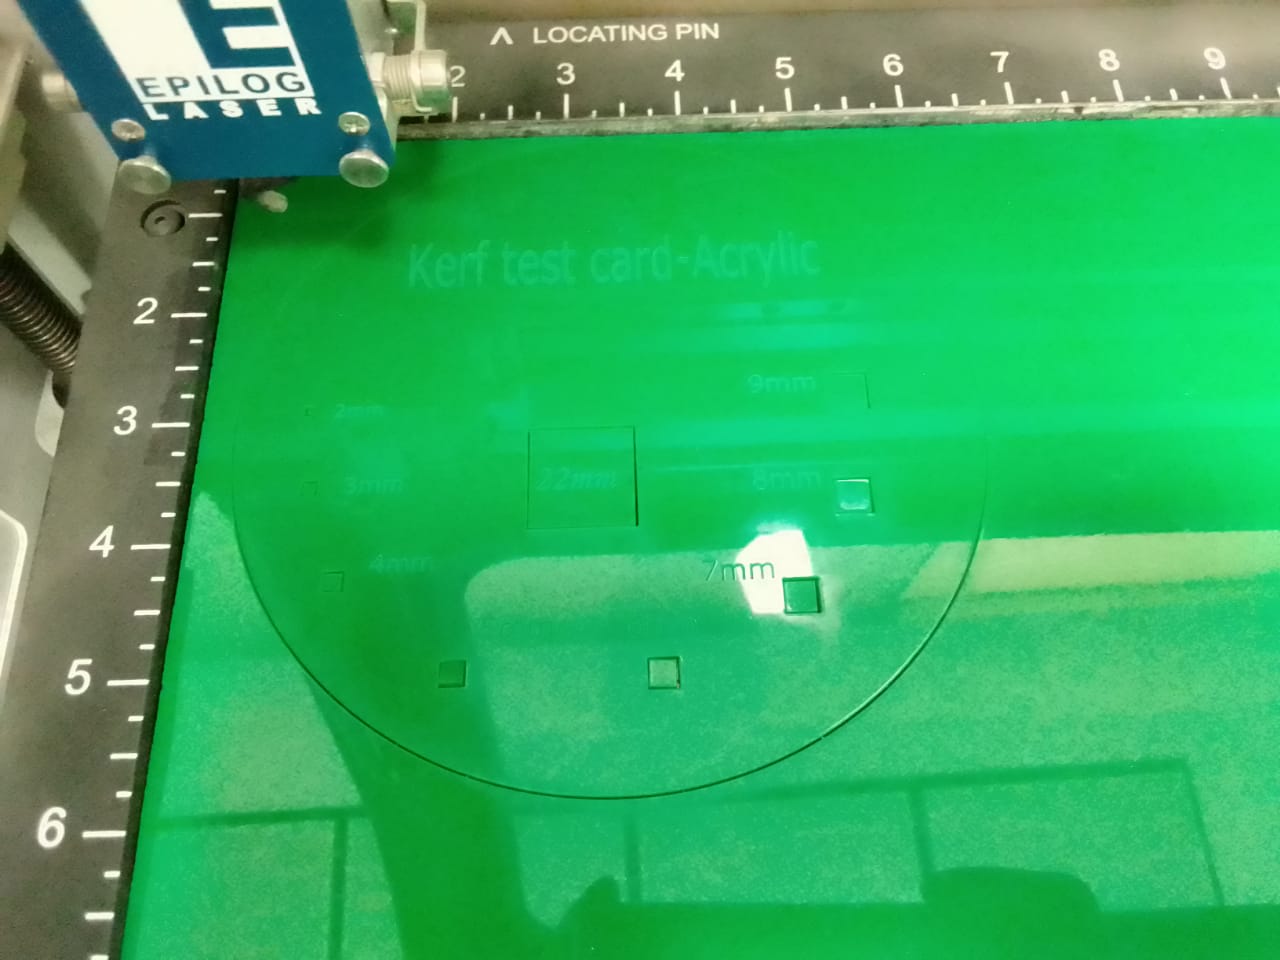
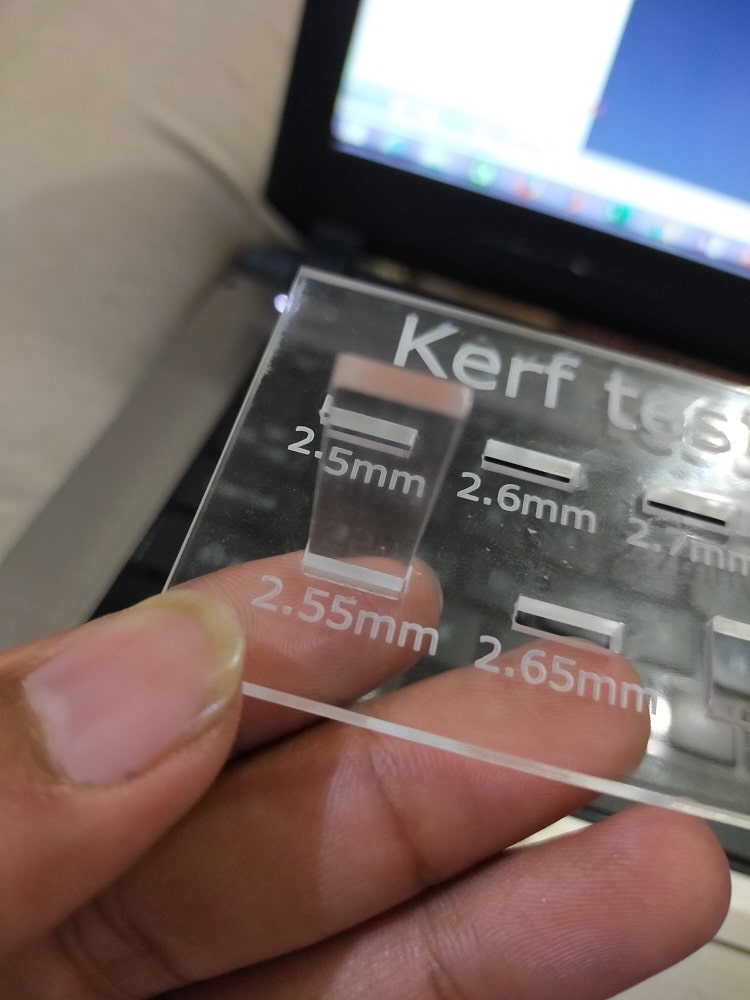
KERF TEST
Kerf is the width/thickness of a cut made by the cutting tool as it cuts through different material such as wood, cardboard, acrylic, etc. The material removed during cutting. It is important to know the kerf so that the pointer of the cutting process (laser, water jet, etc.) can be slightly offset to allow for it.

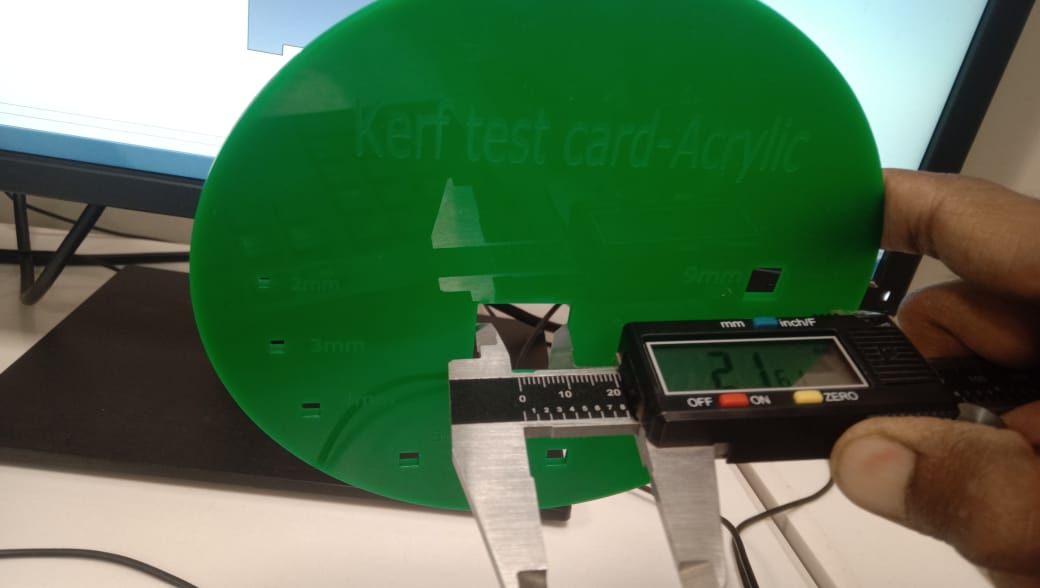
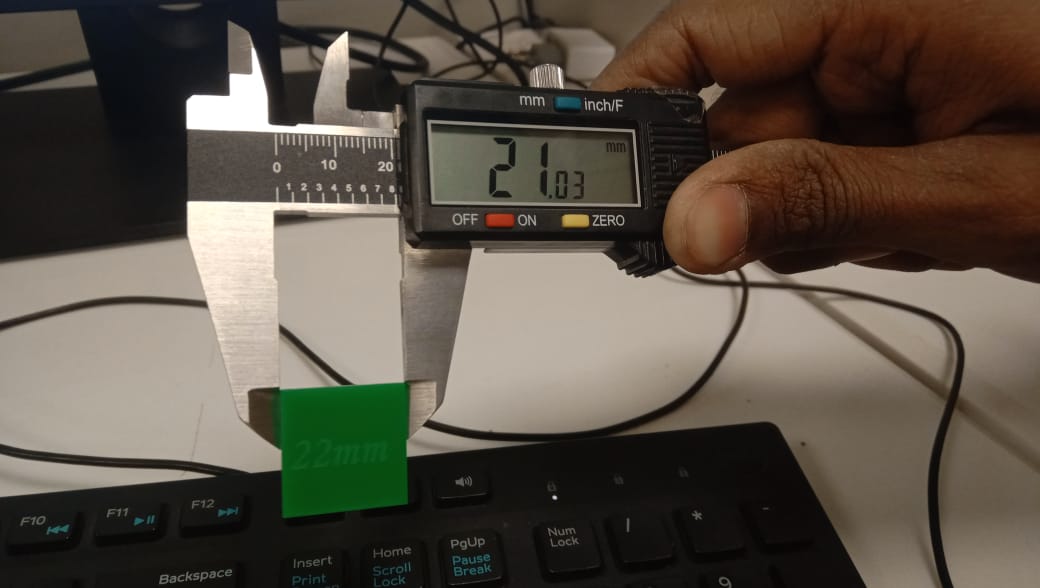
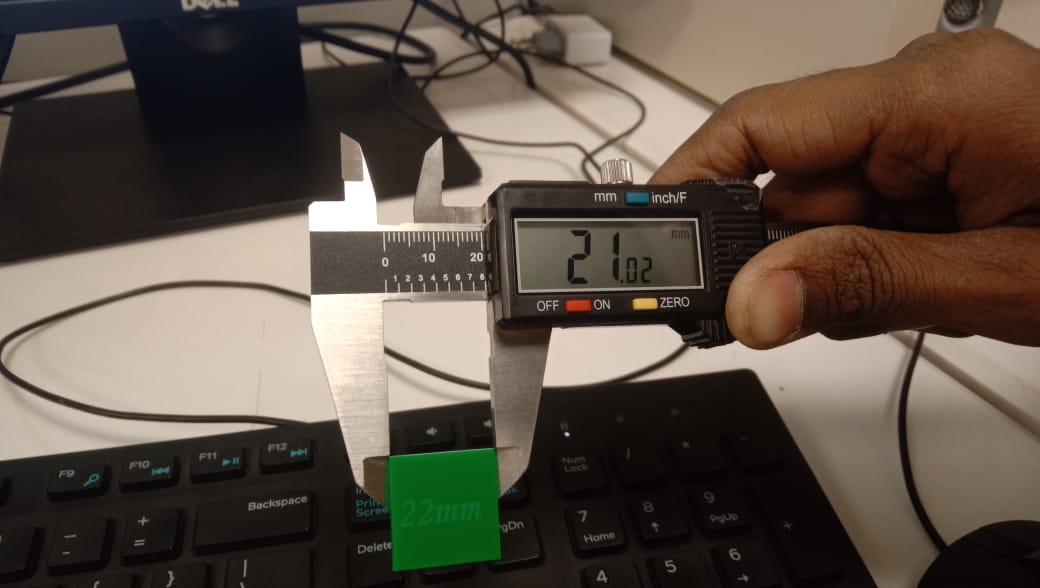
The result of the 22mm box is 21.61. In this case, the kerf error is equal to 0.41.
Measurement of the inner side box, with an error of 0.97.
The thickness should be defined when designing the file to be laser cut.
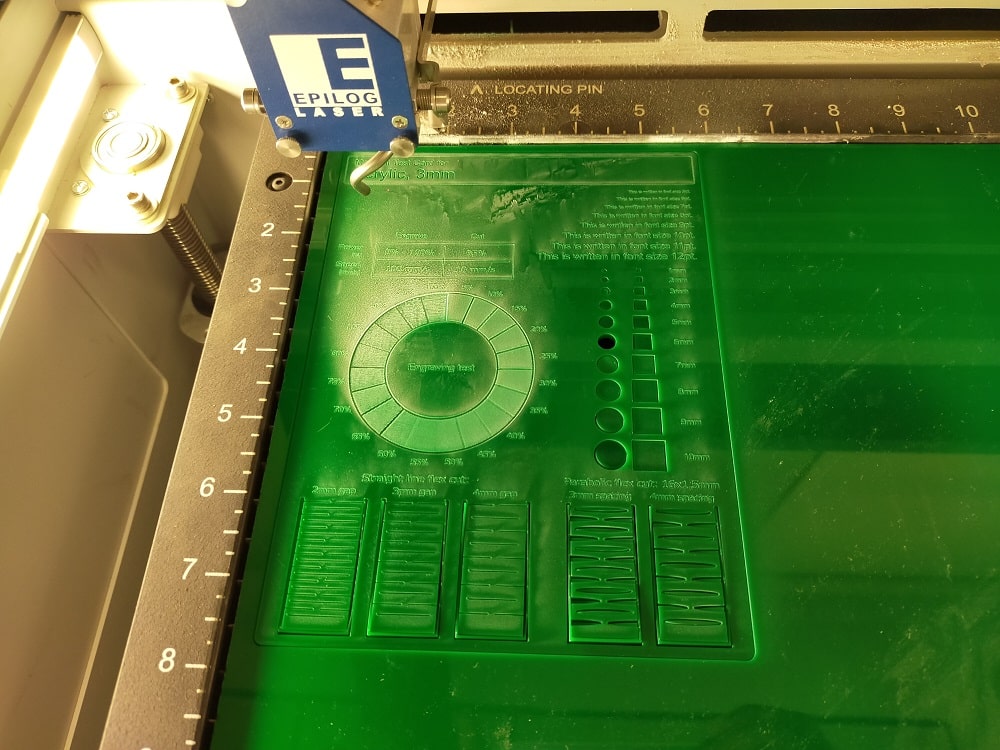
RESULT:
Individual Assignment:
1) Cut something on the vinylcutter design and lasercut.
2) Document a parametric construction kit,accounting for
the lasercutter kerf,which can be assembled in multiple
ways,
and for extra credit include elements that aren't flat
First,I go through the week3 of previous student arcive and then I start my work from solid work software.I have learned solid work software from the help of youtube tutorials and ask some problems from my local instructor beacuse I did not idea about this software so in the start I have face too many problems to learn this software but I have learned too many commands from this software. When I start the work at this software so I had bored from this software but when I focus this software then I get interest from this software and I have known that is a amazing software.
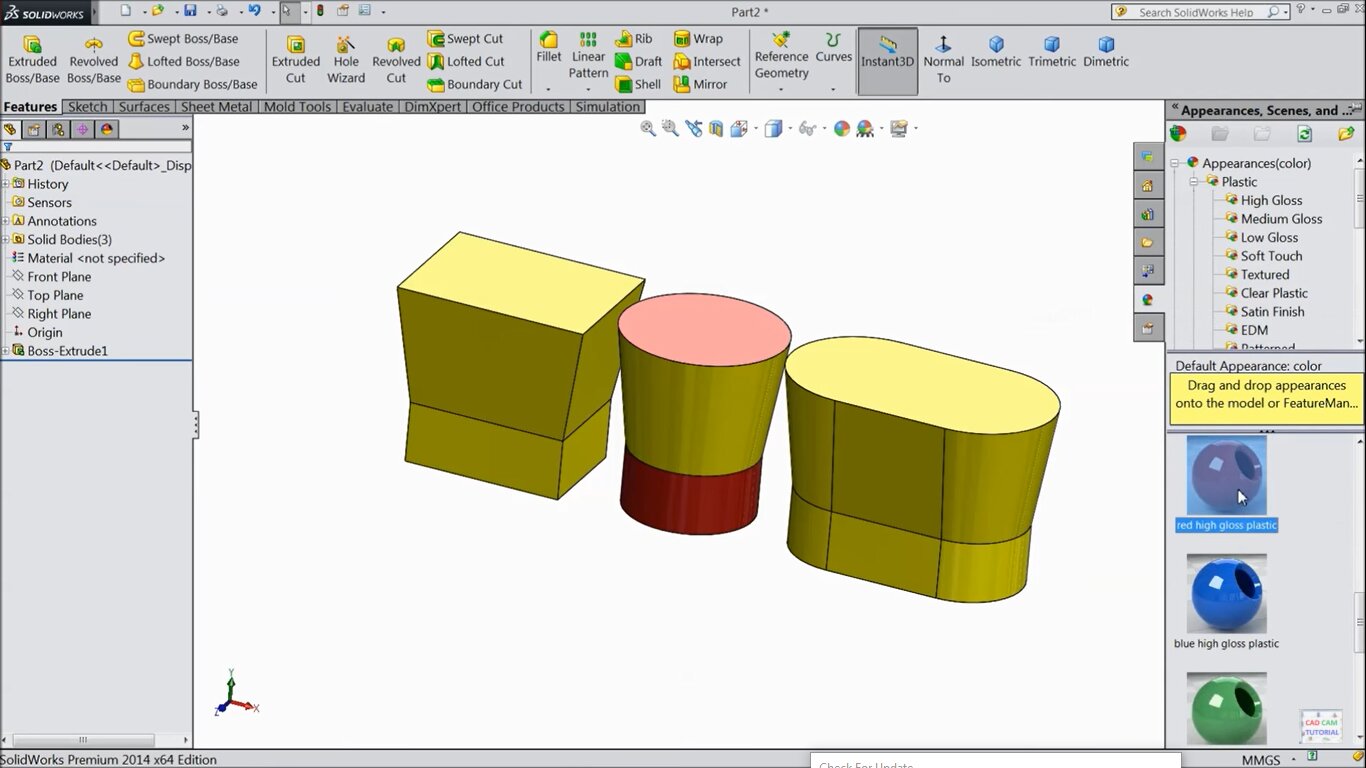
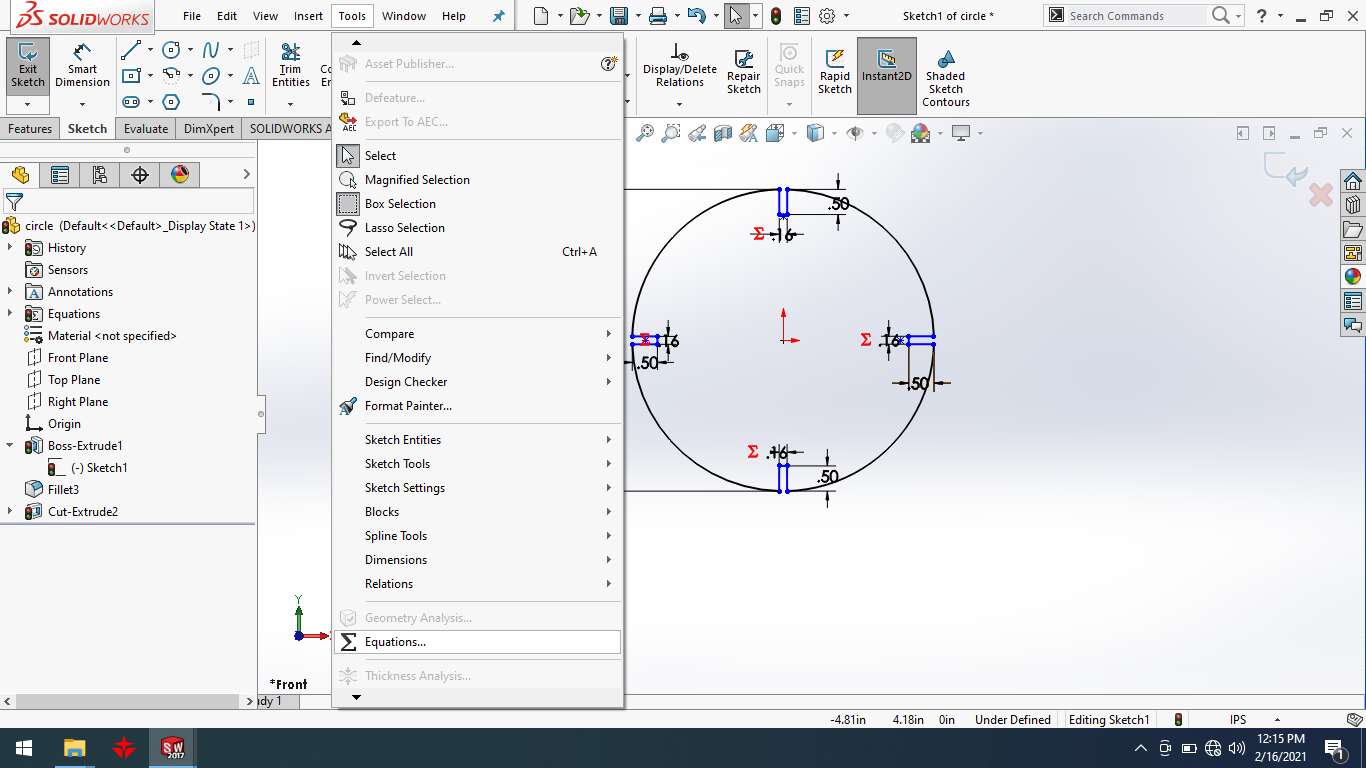
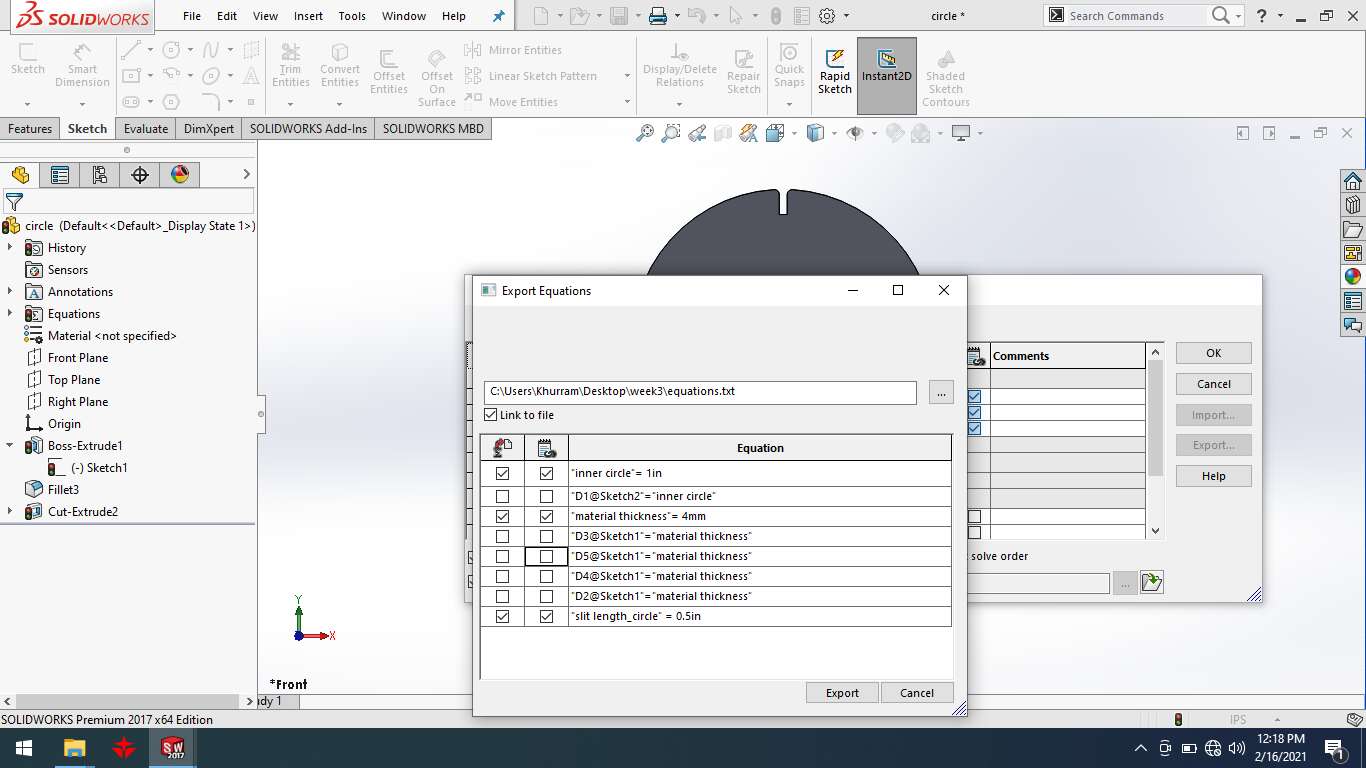
1) I was learning software from "CAD CAM" youtube channel. I have learned to give the value of a part in a form of global variable and to make equations b/w these parts
In this image i was trying to make a wood slot for construction kit and press fit diagram that is a hanging lamp
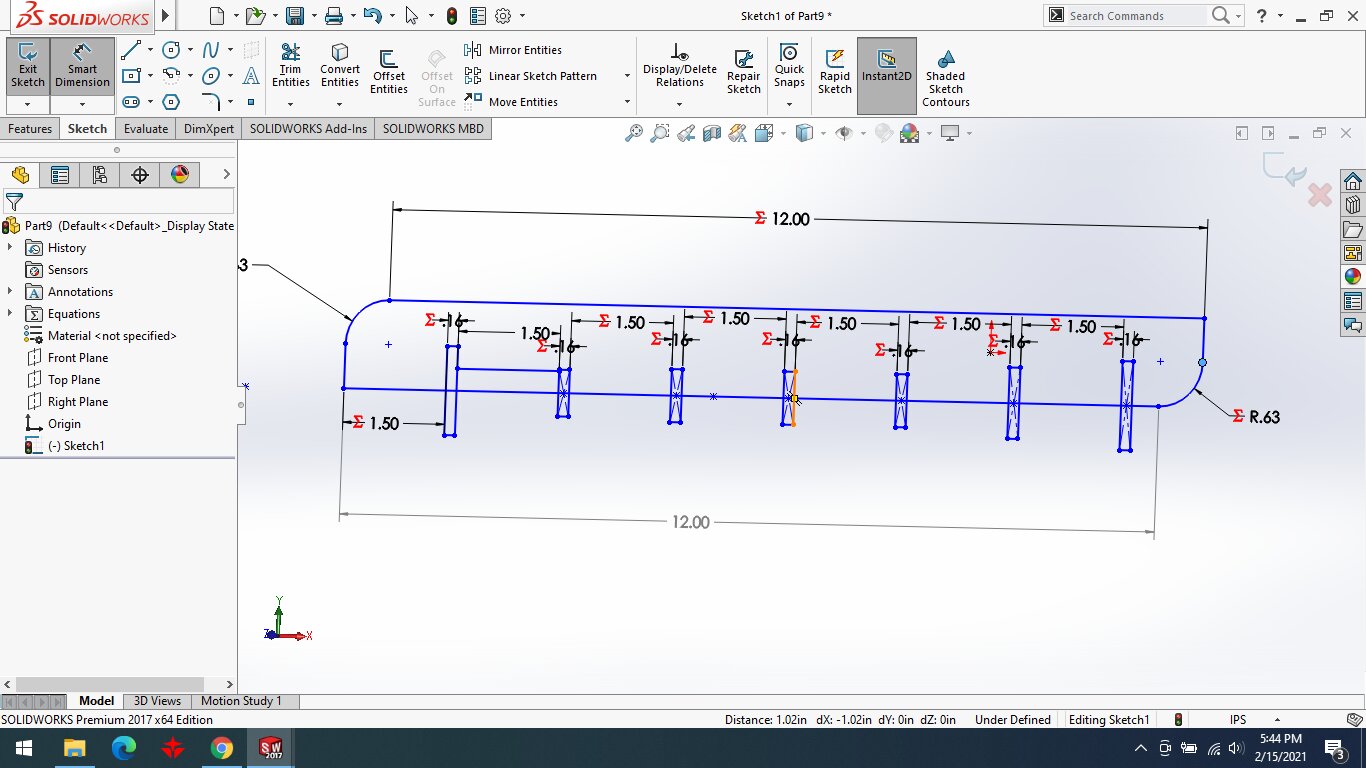
Compelete 3d part of lamp slot
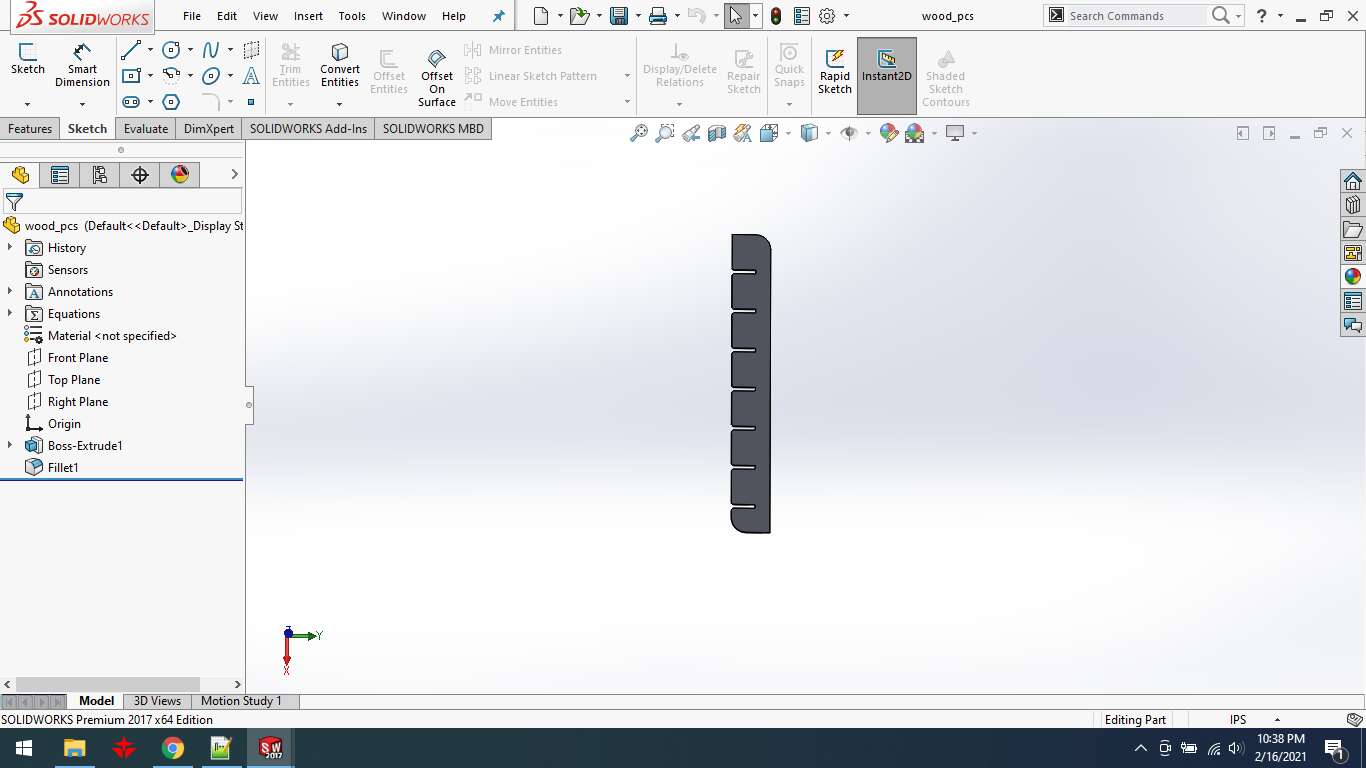
I was making a second part of my construction kit that is circle diagram from the help of global variable equation.
I have compeleted second part of construction kit that is circle diagram.

first,I learned about the parametric equations and then I was giving the global values of my construction kit to make equations.
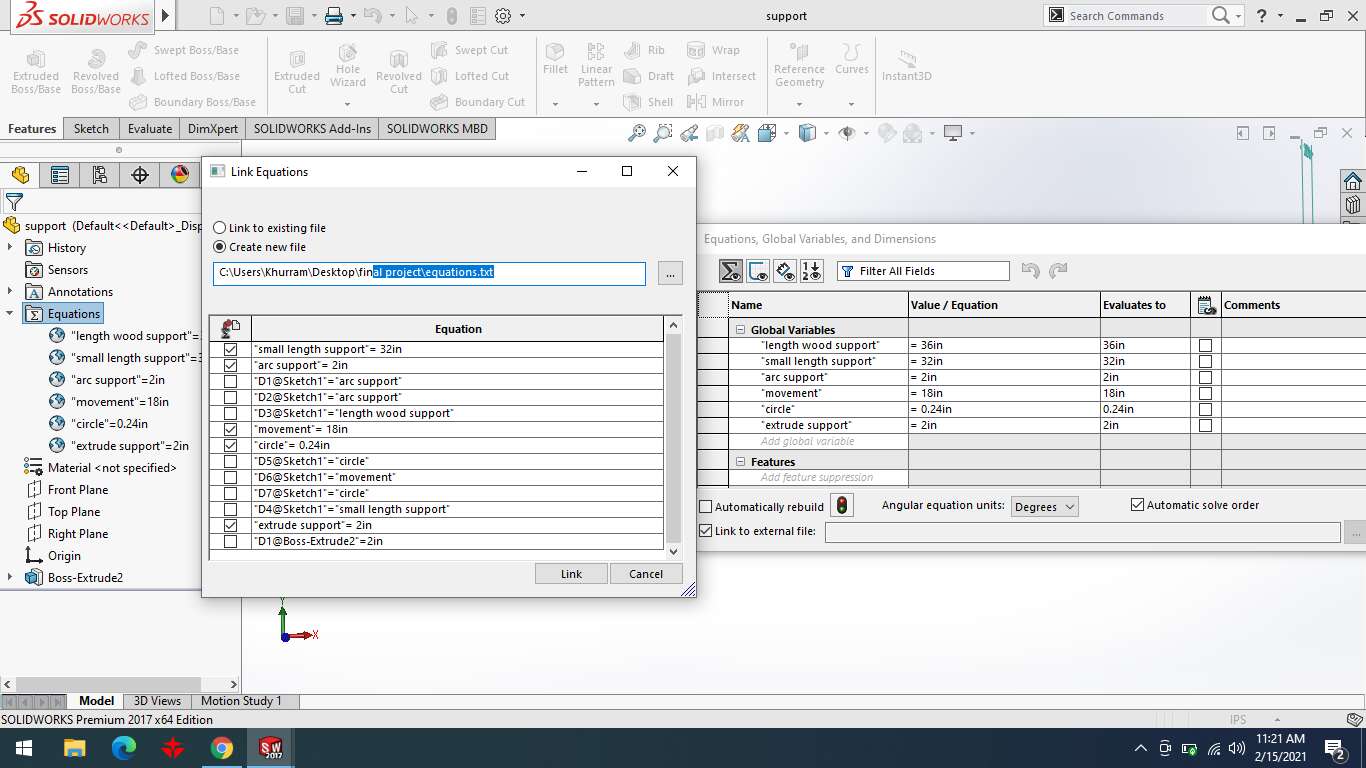
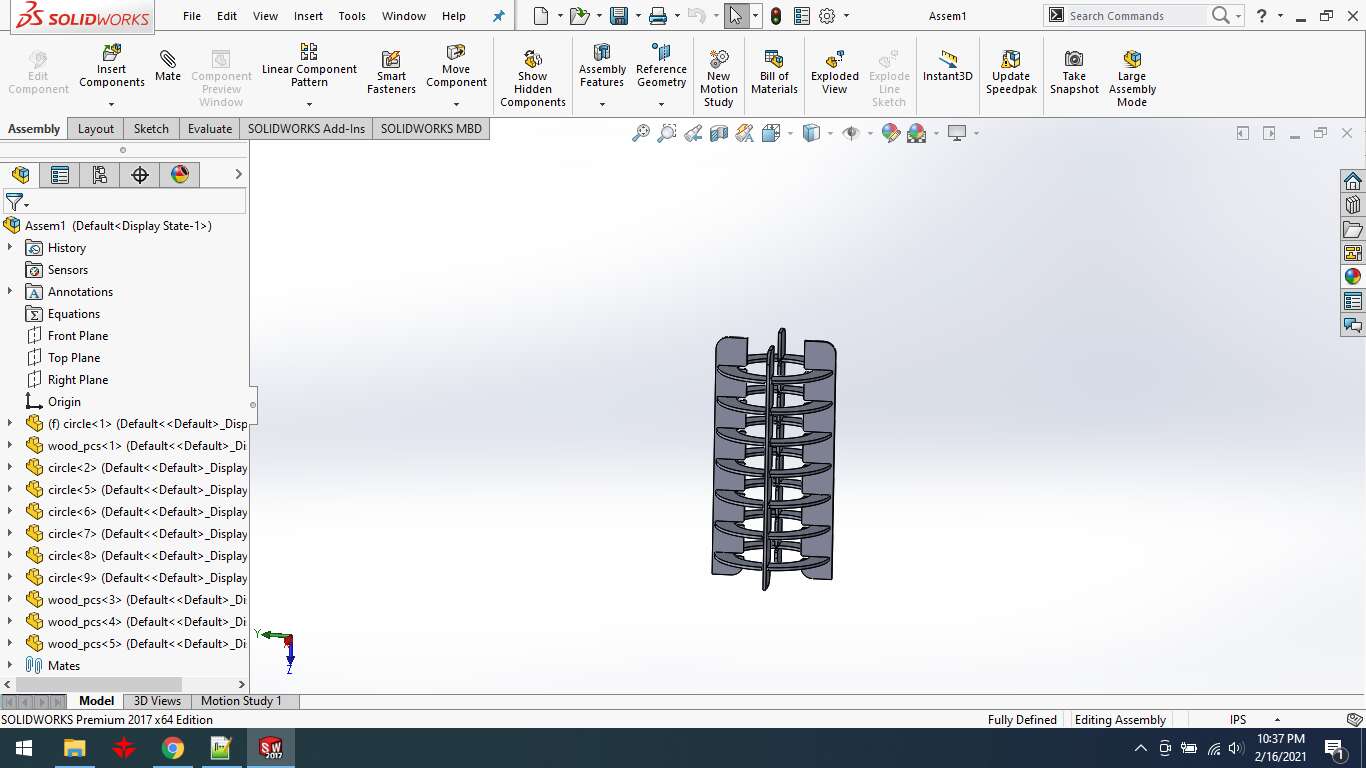
I was making link b/w the parts of hanging lamp.

in this picture, I show my lamp was assembled from the help of equations.
Final Result:
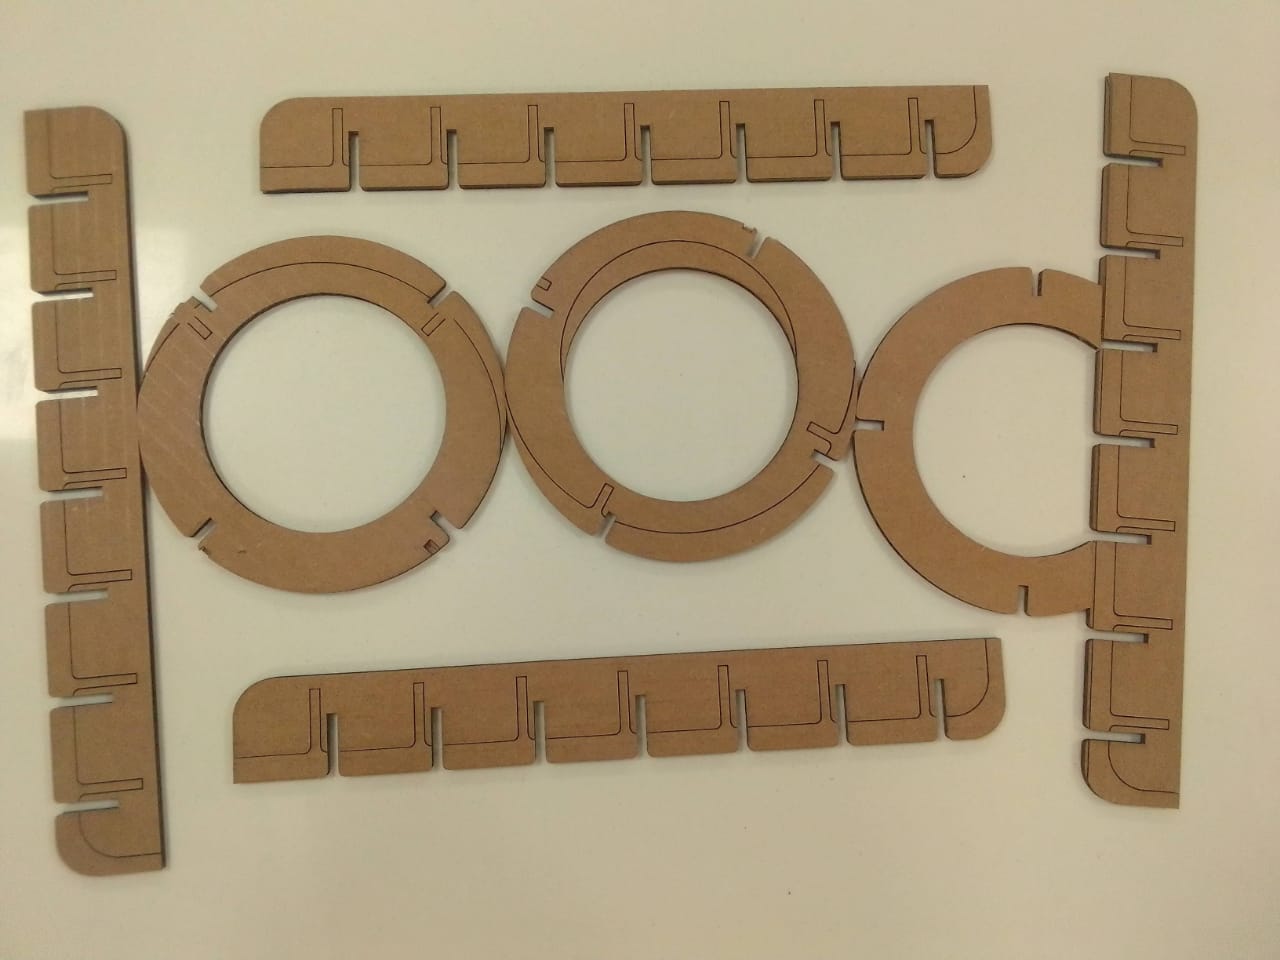
All of these parts are seen in this image after I sent the file to the laser cutter.
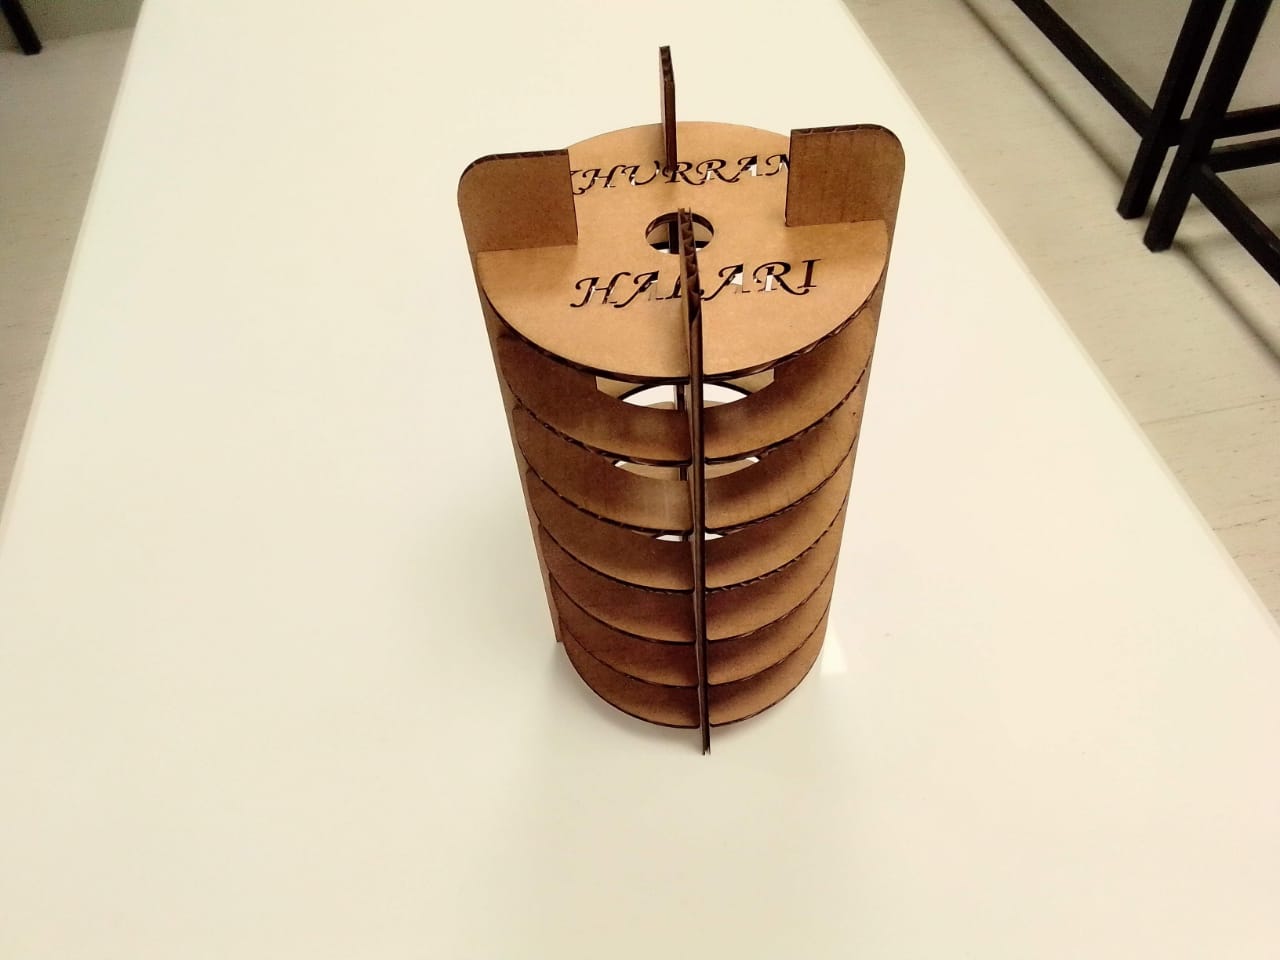
After that I have merge the all parts.
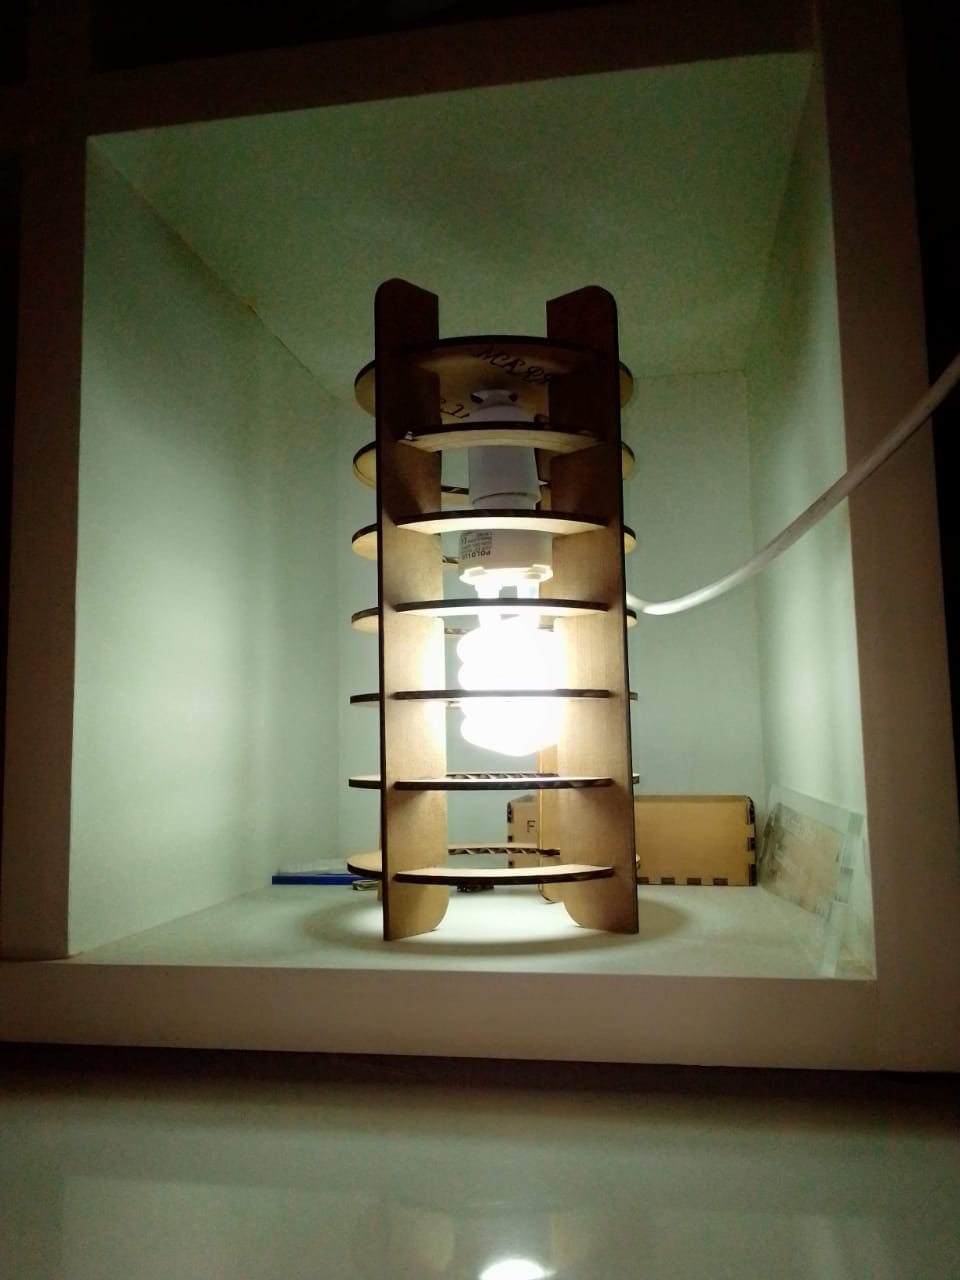
Final outcome.

VINYL CUTTING:
Machine use:
Software use:
First, I draw a logo for my fablab Khairpur using the inkscape software.

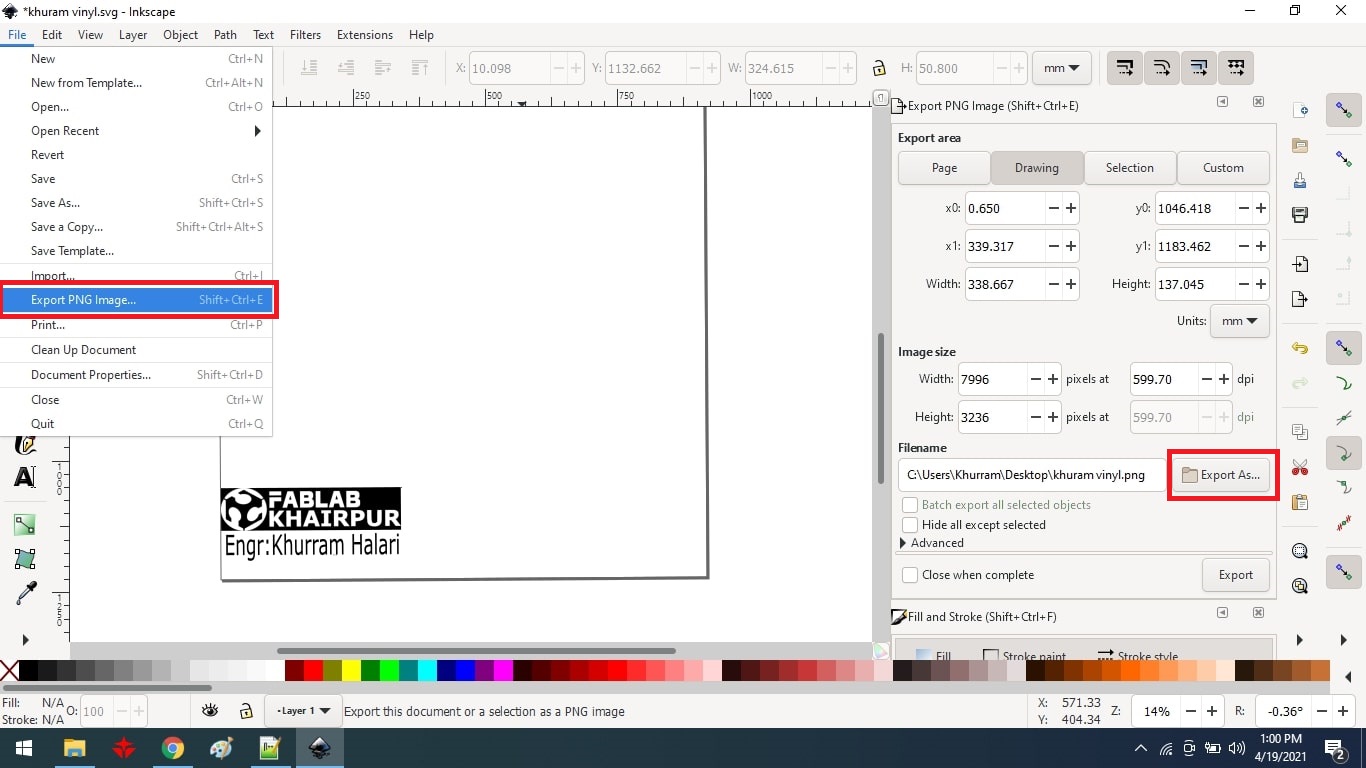
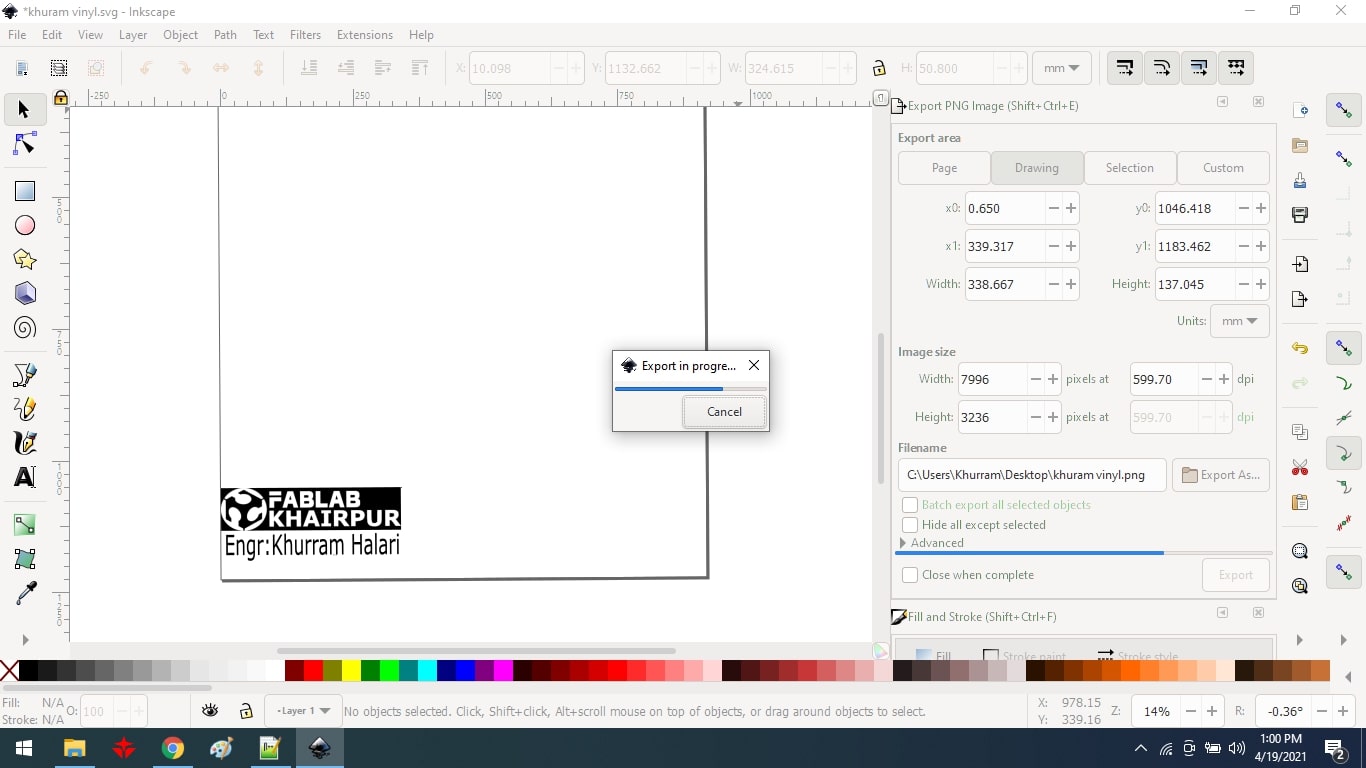
Export into png file.
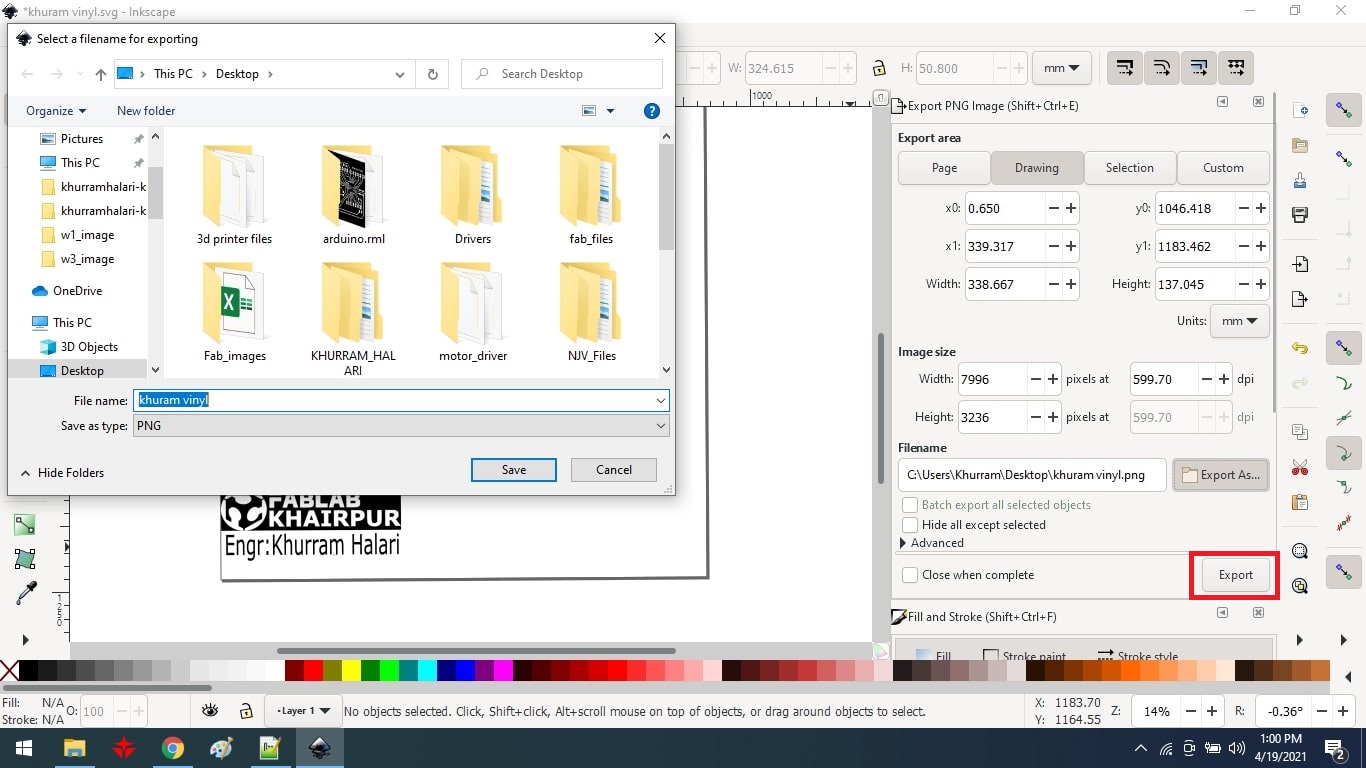
Save the file and then select the export option.
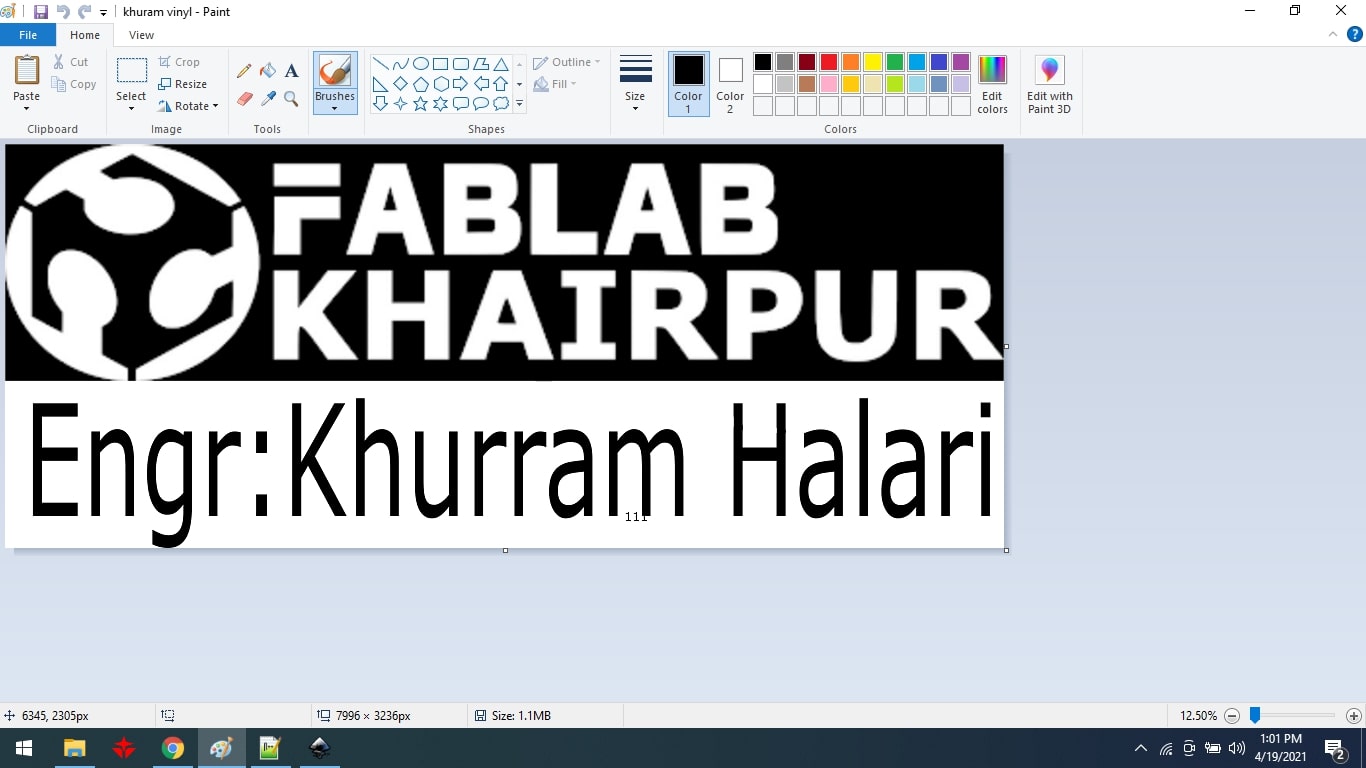
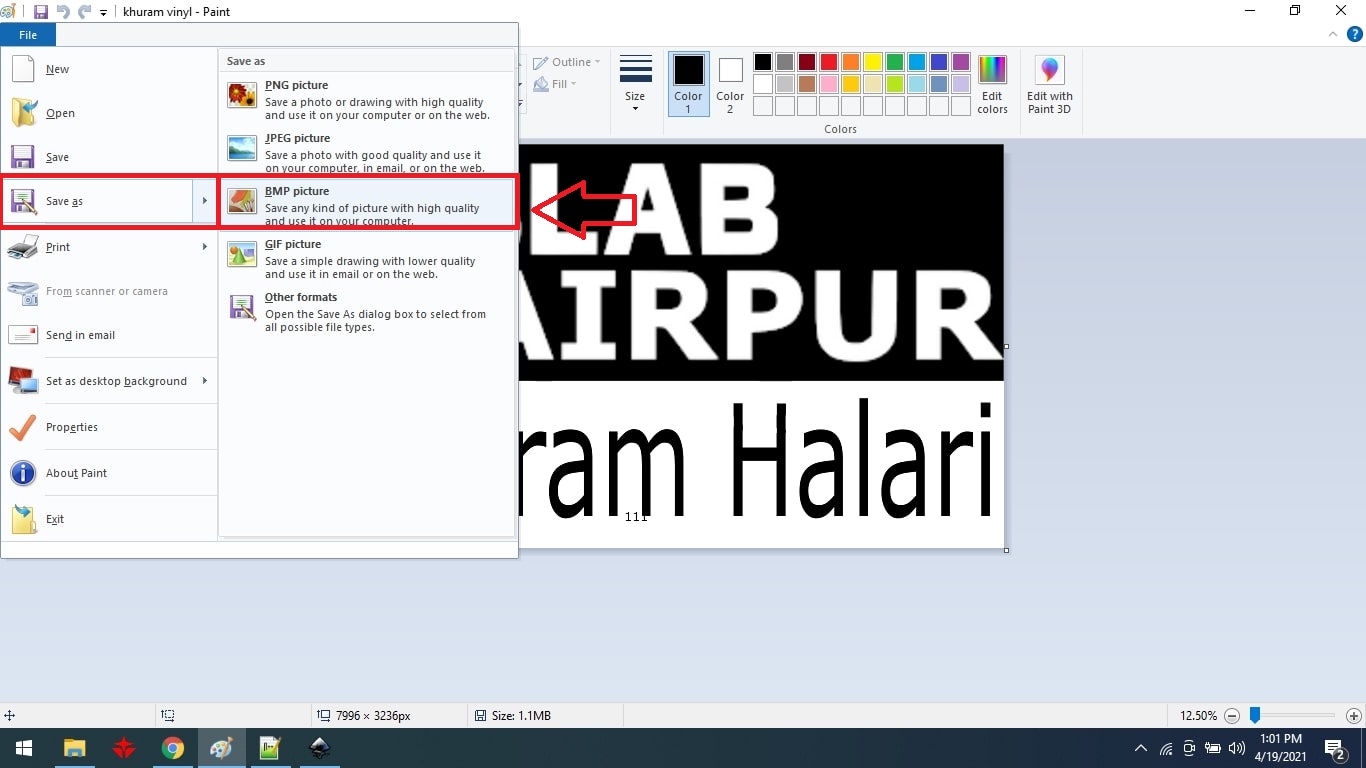
Drag and drop a png file into Paint and save it as a BMP file.
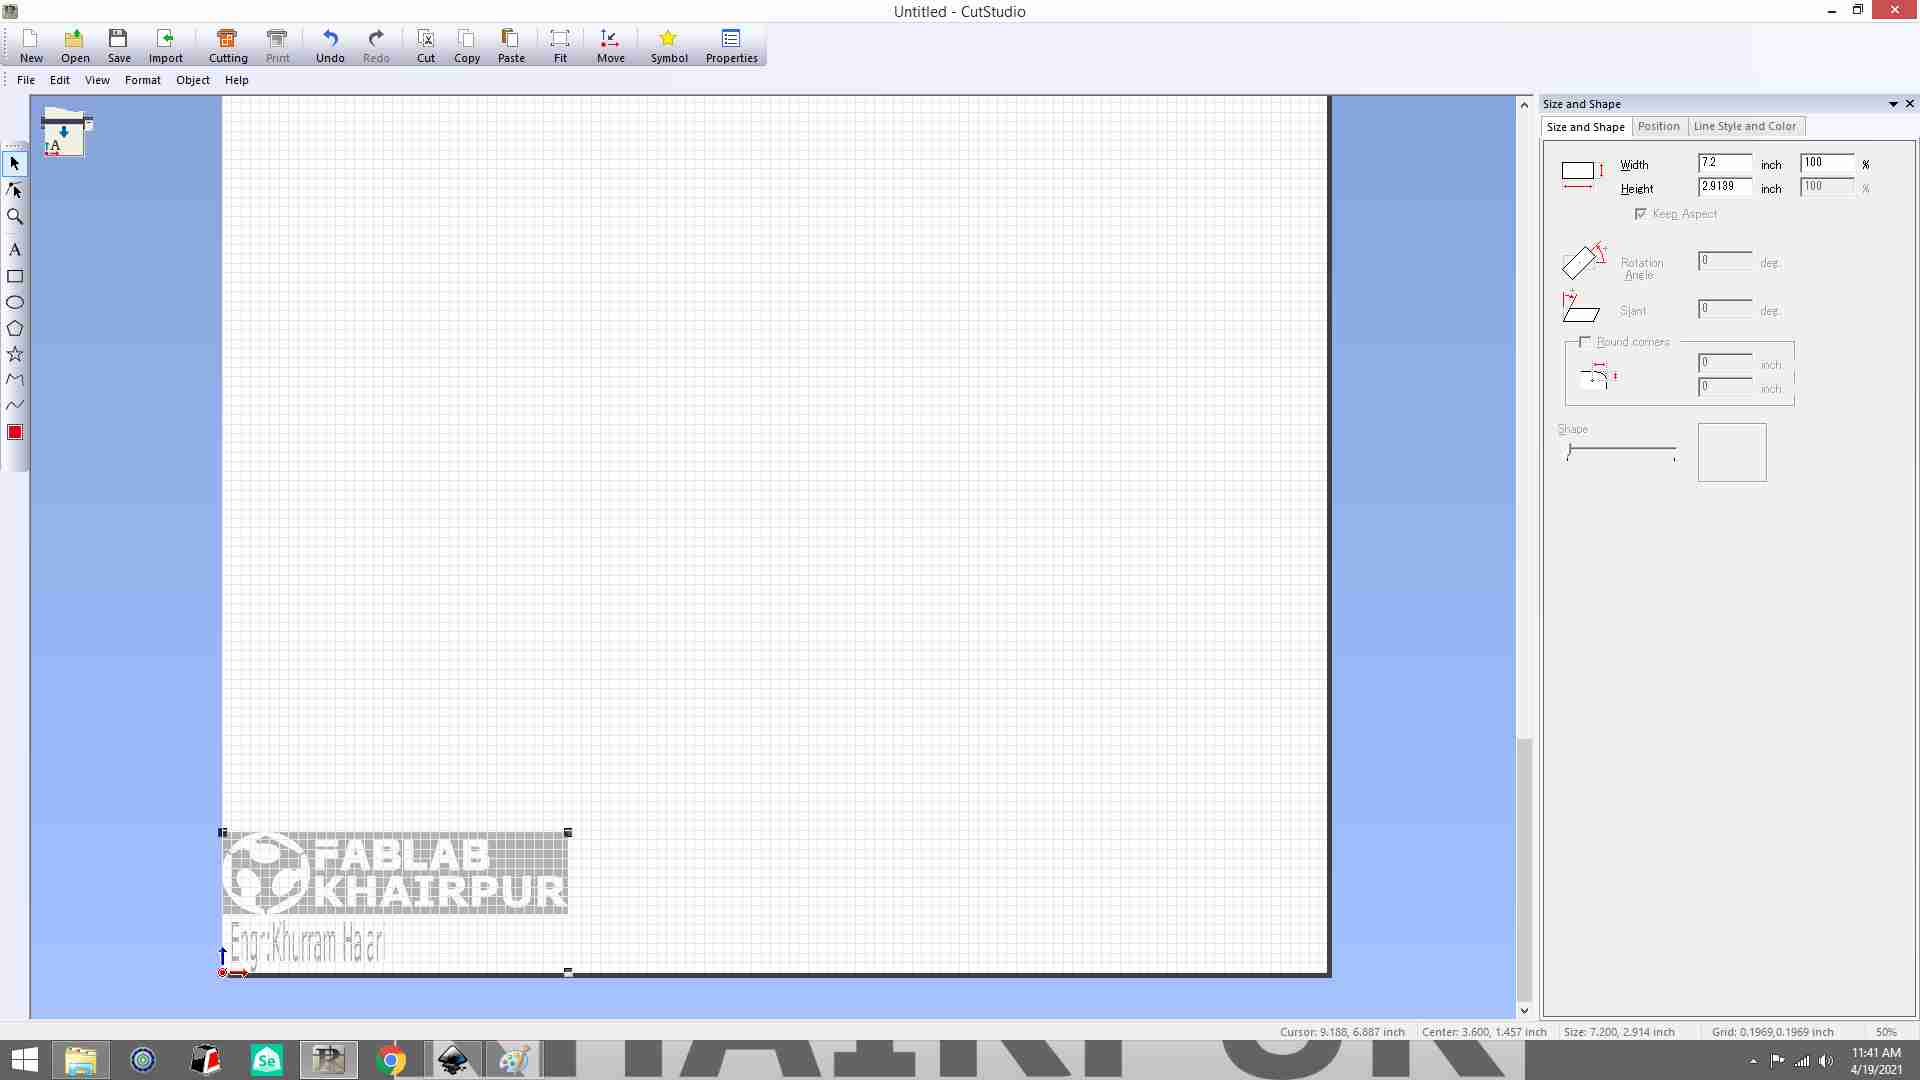
Cut Studio:
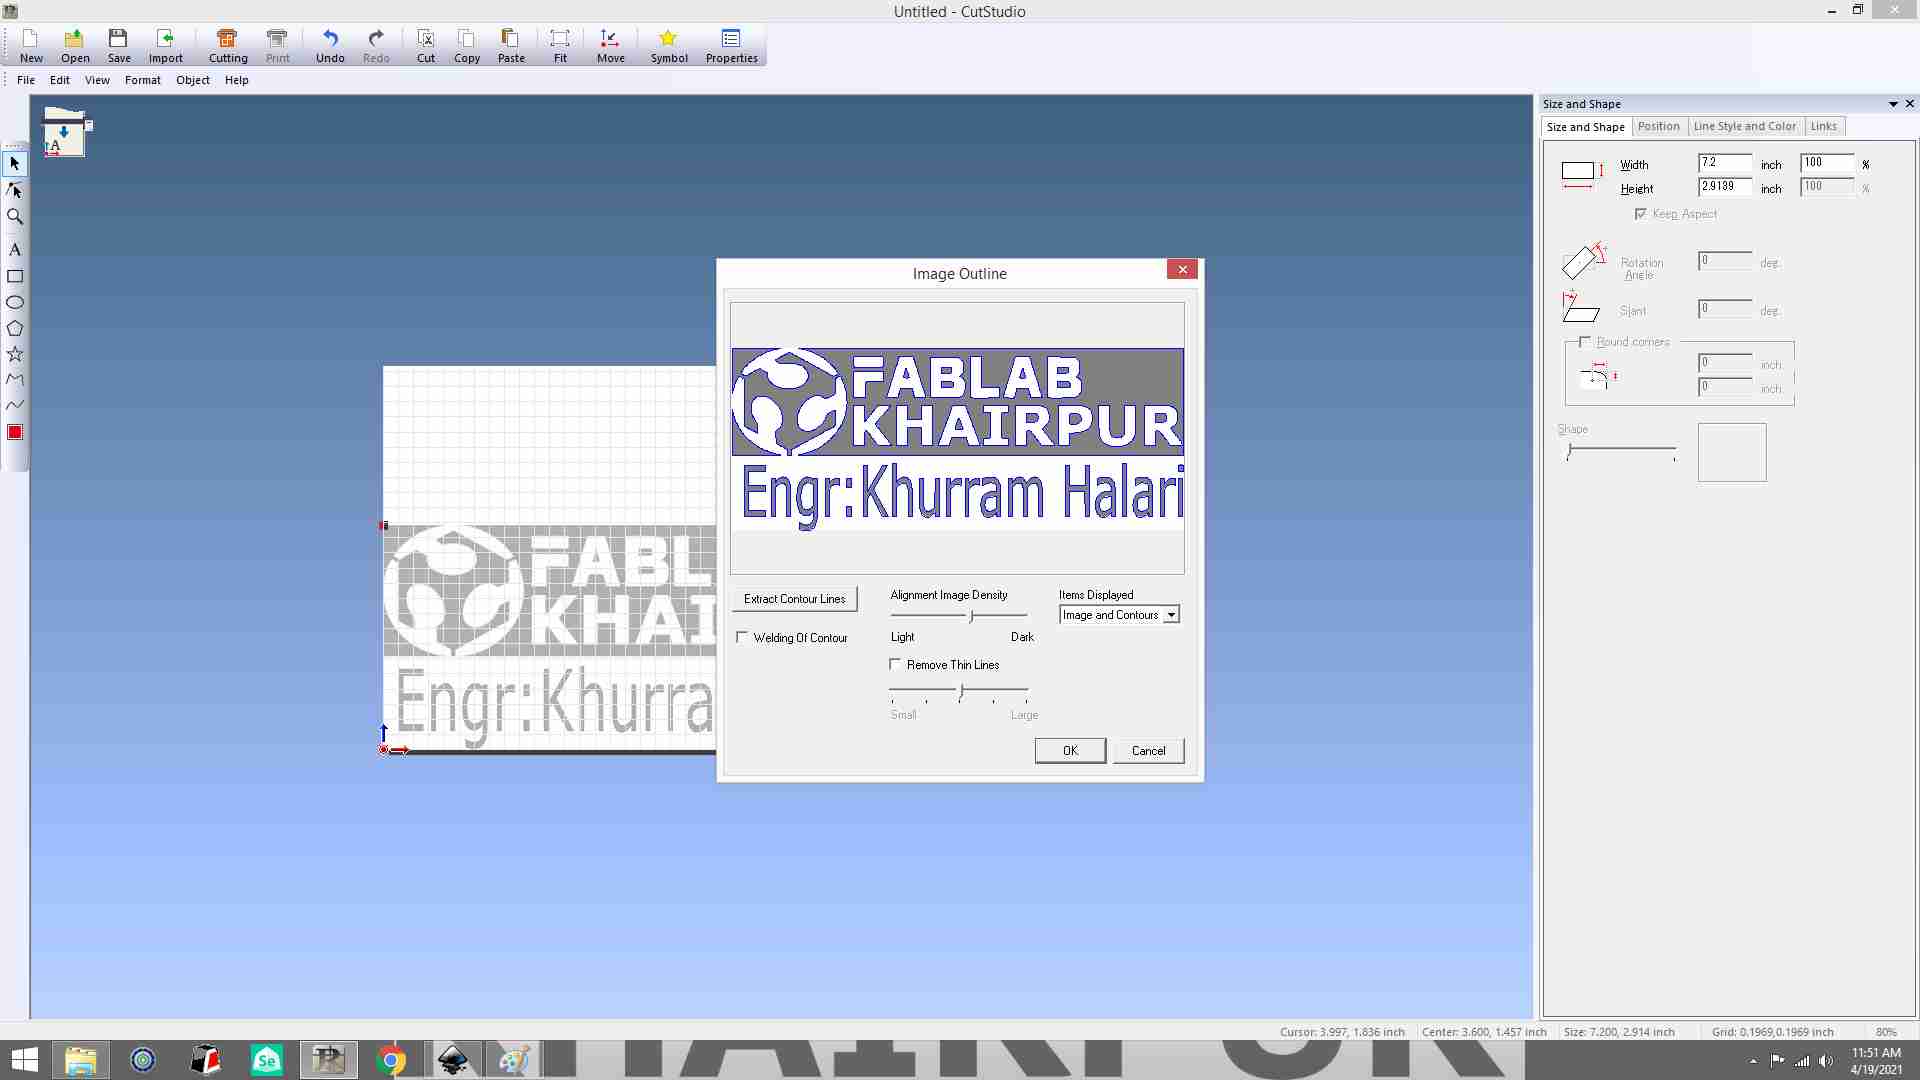
I first dragged the image onto the cut studio software and adjusted the scale because when I dragged the image onto the cut studio software, it displayed as a very large image then remove contour lines by right-clicking on the image, going to the image outline, and selecting extract contour line.
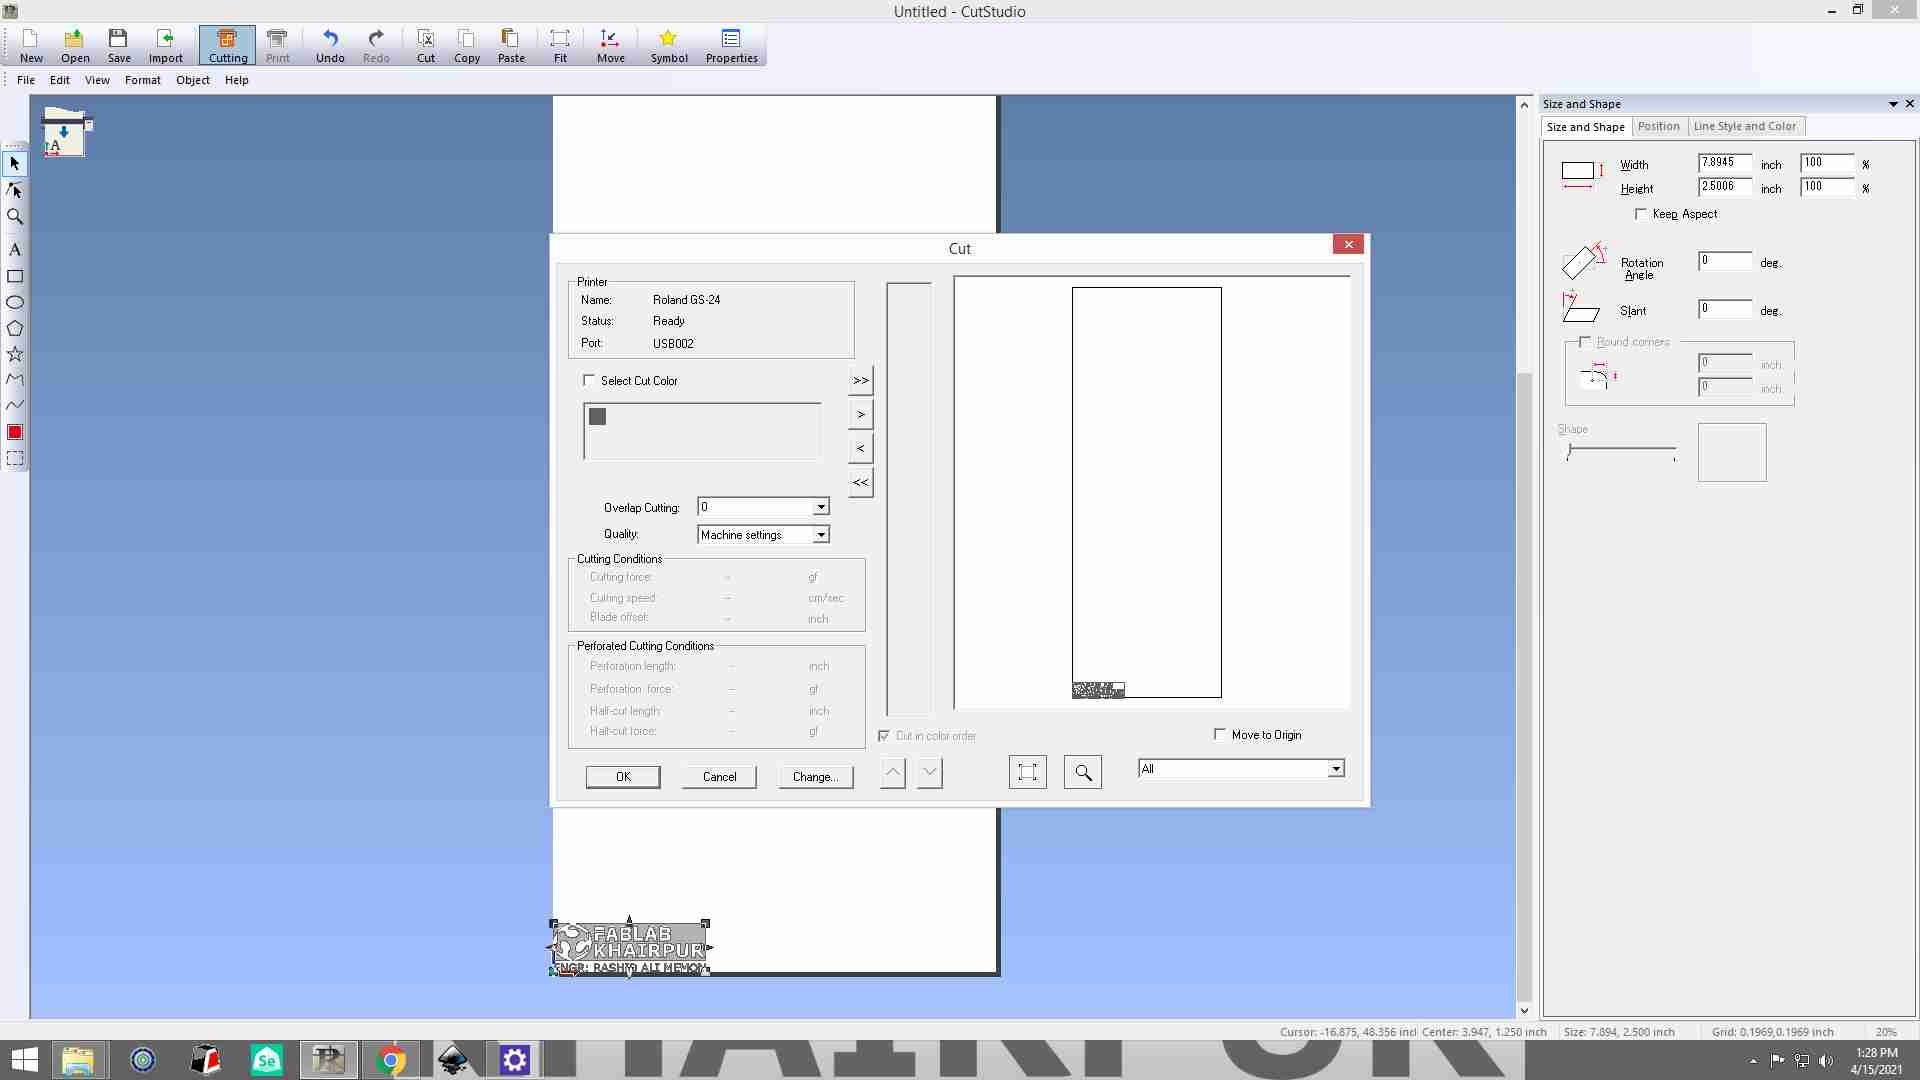
click on cut then then click on change in order to get width and length from machine
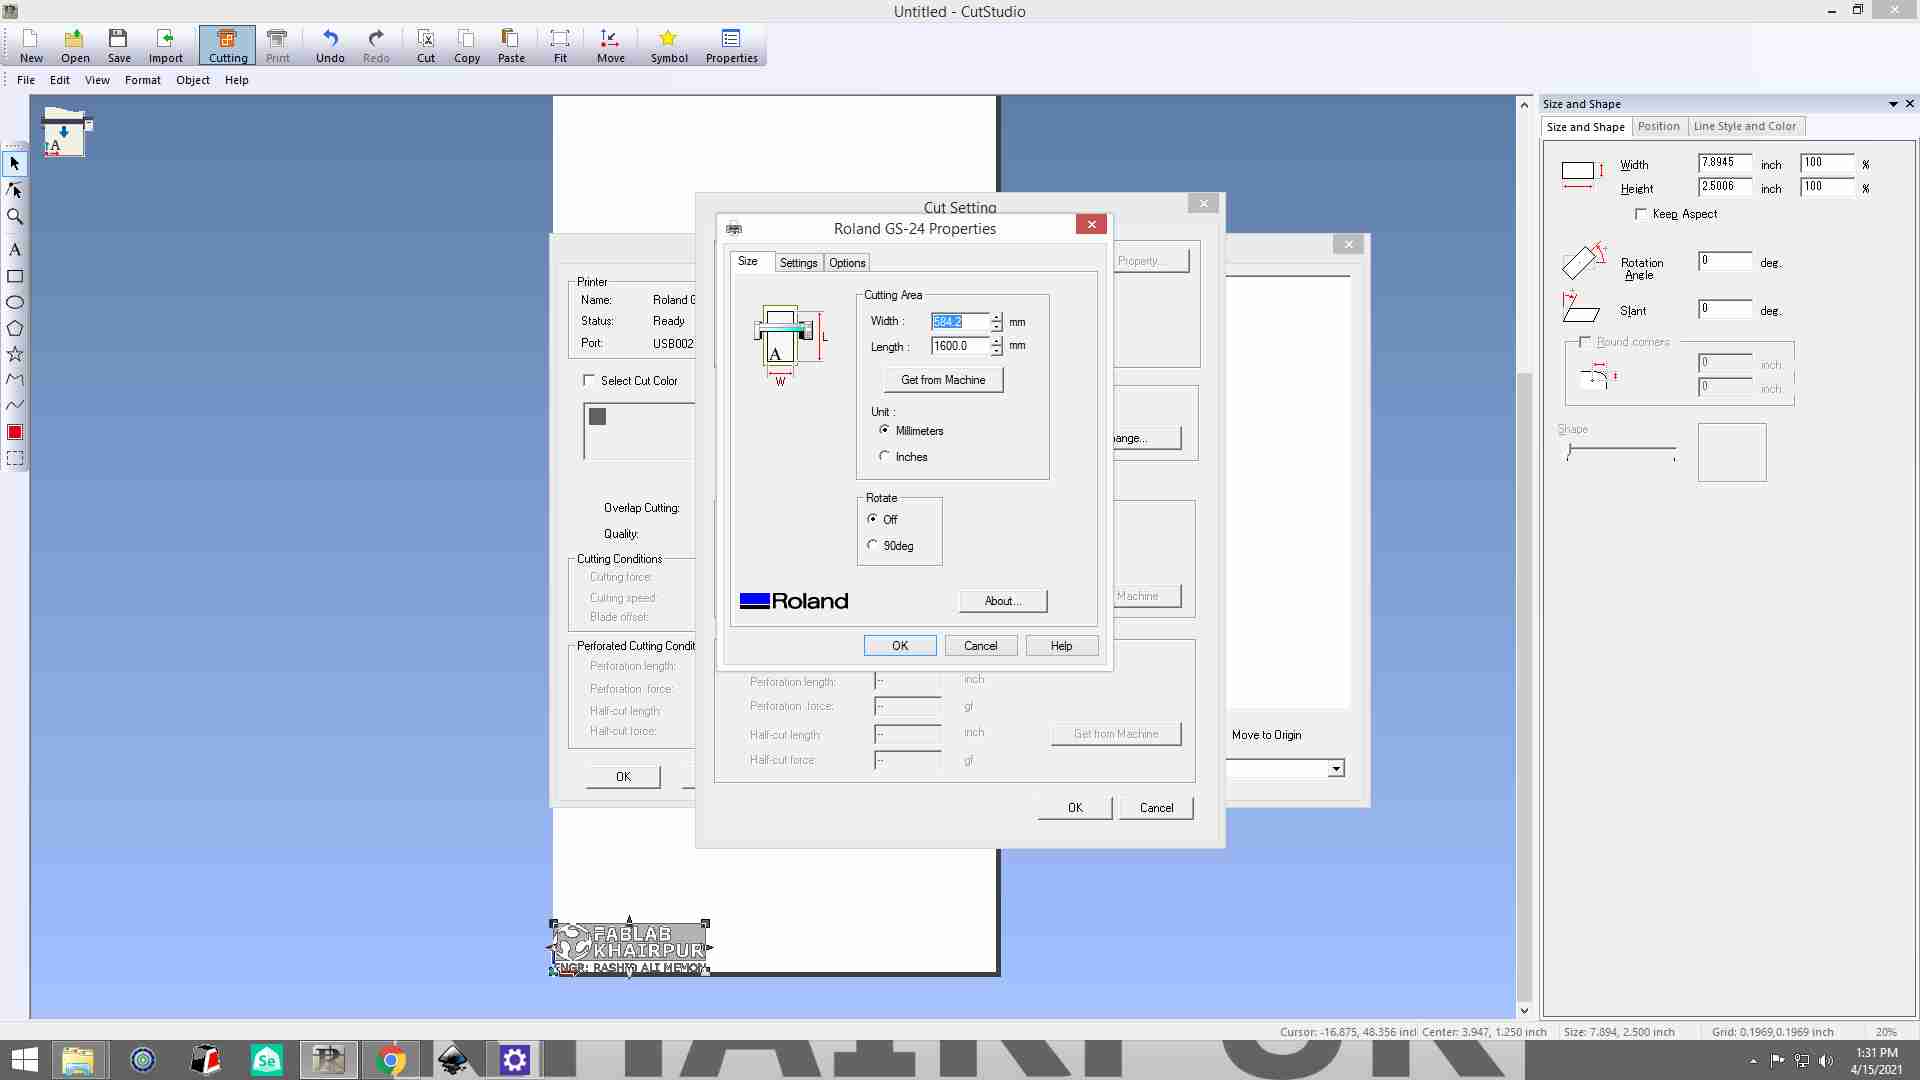
Select get from machine and then click ok it will show you the size of your sheet in your software

Removed some unwanted part
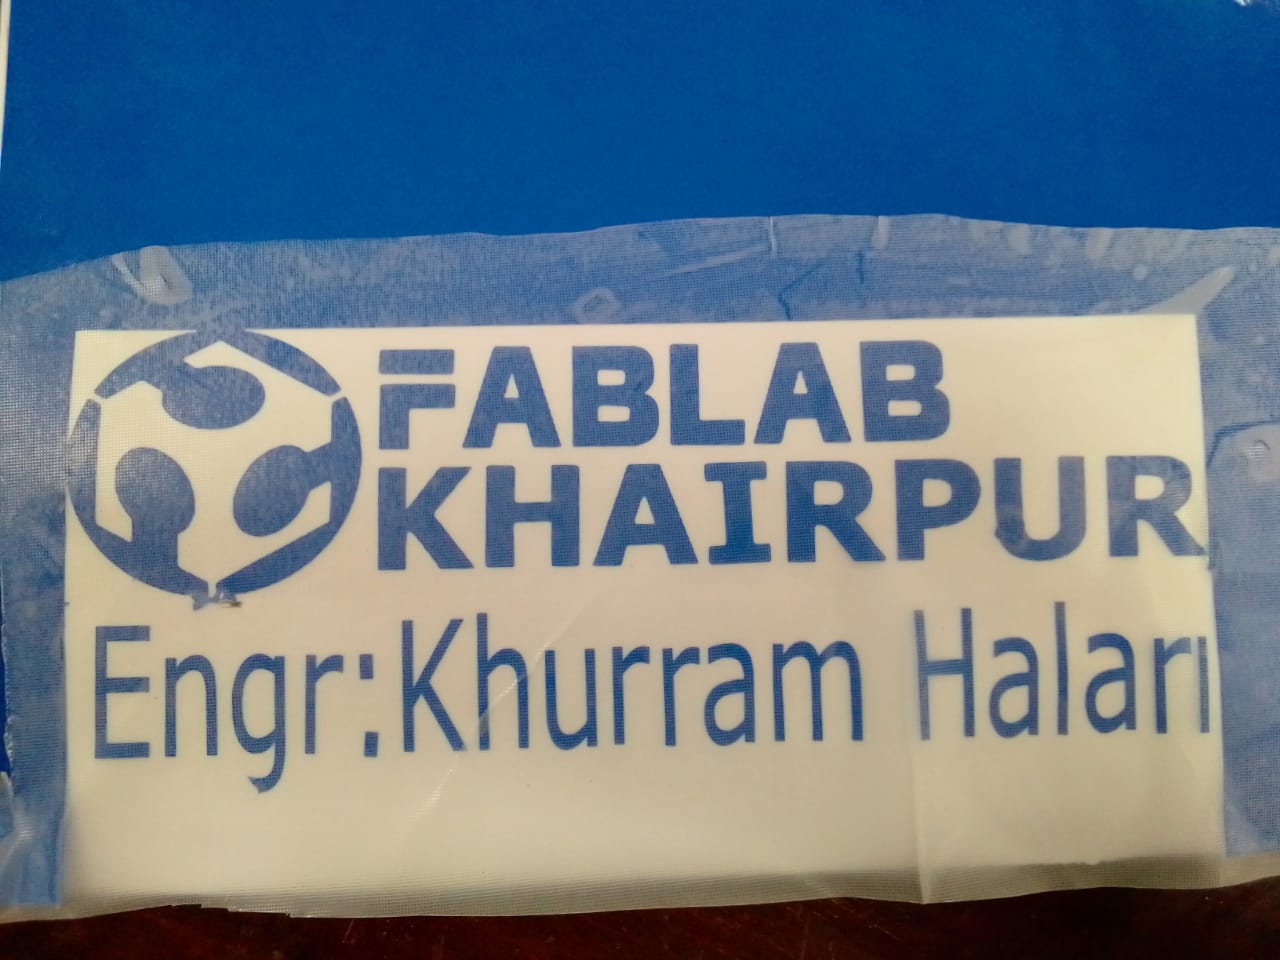
Final result
here is the command for files upload
"Click here"to download all files of this week