1. Principles and Practices
In the first week of Fab Academy I worked on defining my final project idea and started getting used to the documentation process that I will utilize throughout the remainder of the program. I also began to familiarize myself with some of the tools that Neil demonstrated in the lecture on version control and process manaagement. I look forward to improving my skills with these softwares to further optimize my labor
Learning GitLab

While I have used GitHub many times for various purposes throughout my life, prior to the first week of Fab Academy I had never used GitLab. Therefore, in order to familiarize with the software, I watched several helpful tutorials from Raghav Pai until I felt confident in my ability to use the platform as efficiently as possible. In these videos, Raghav detailed several of the most frequently-used processes on the platform, most of which share similarities to those offered on GitHub. However, while I have downloaded code from GitHub many times and edited it to fit my specific needs, I had never forked or committed a repository before the first week of Fab. Pai's tutorials described this process in a concise, but sufficiently-detailed manner and I was able to commiit my site with ease. I'm sure there is stiil much to learn about the platform, but the basis of knowledge that these tutorials provided me will truly prove invaluable throughout the program in providing a rough, but effective means of utiliziing this powerful tool. I've included some screenshots of some of the most important features of GitLab that I learend about during the first week of Fab Academy.
Finding the branches page was a monumental discovery becuase this page allows me to seamlessly swap between different versions of my site. Having multiple branches of my site gives me far more latitude to take risks when developing new features on my site, as I do not have to be worried about destroying my actual site when committing to the other branches, though I will certailny still be mindful of how much data my other branches consume prior to committiing.

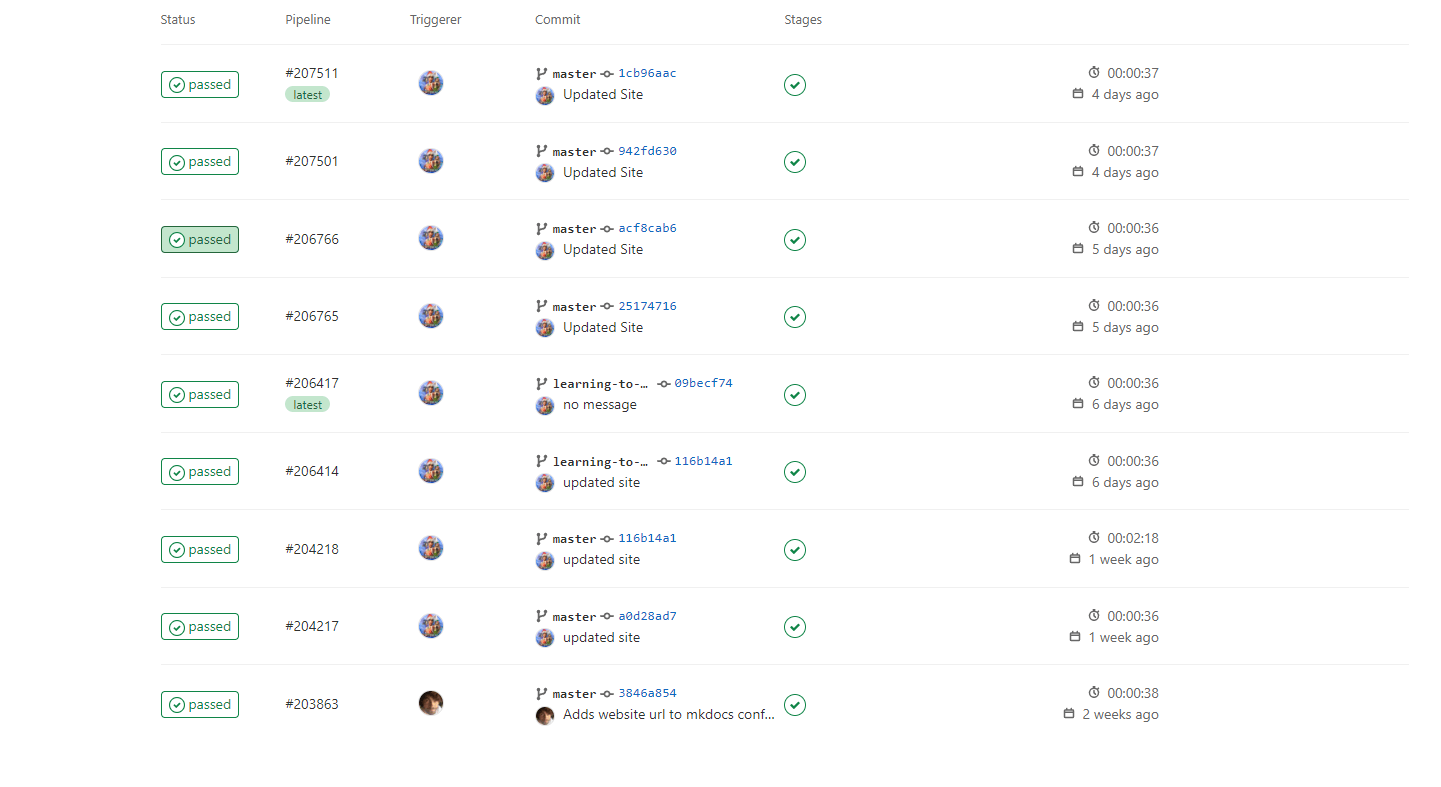
Learaning to use the Pipeline in GitLab was incredibly helpful, as it offers a clear view of the history of my site that is very easy to interact with. In the pipeline, I can see when changes were made, who committed the change, and what was changed. In the event that I commit something that I do not like in the future, the pipeline will make it incredibly simple to revert the change.
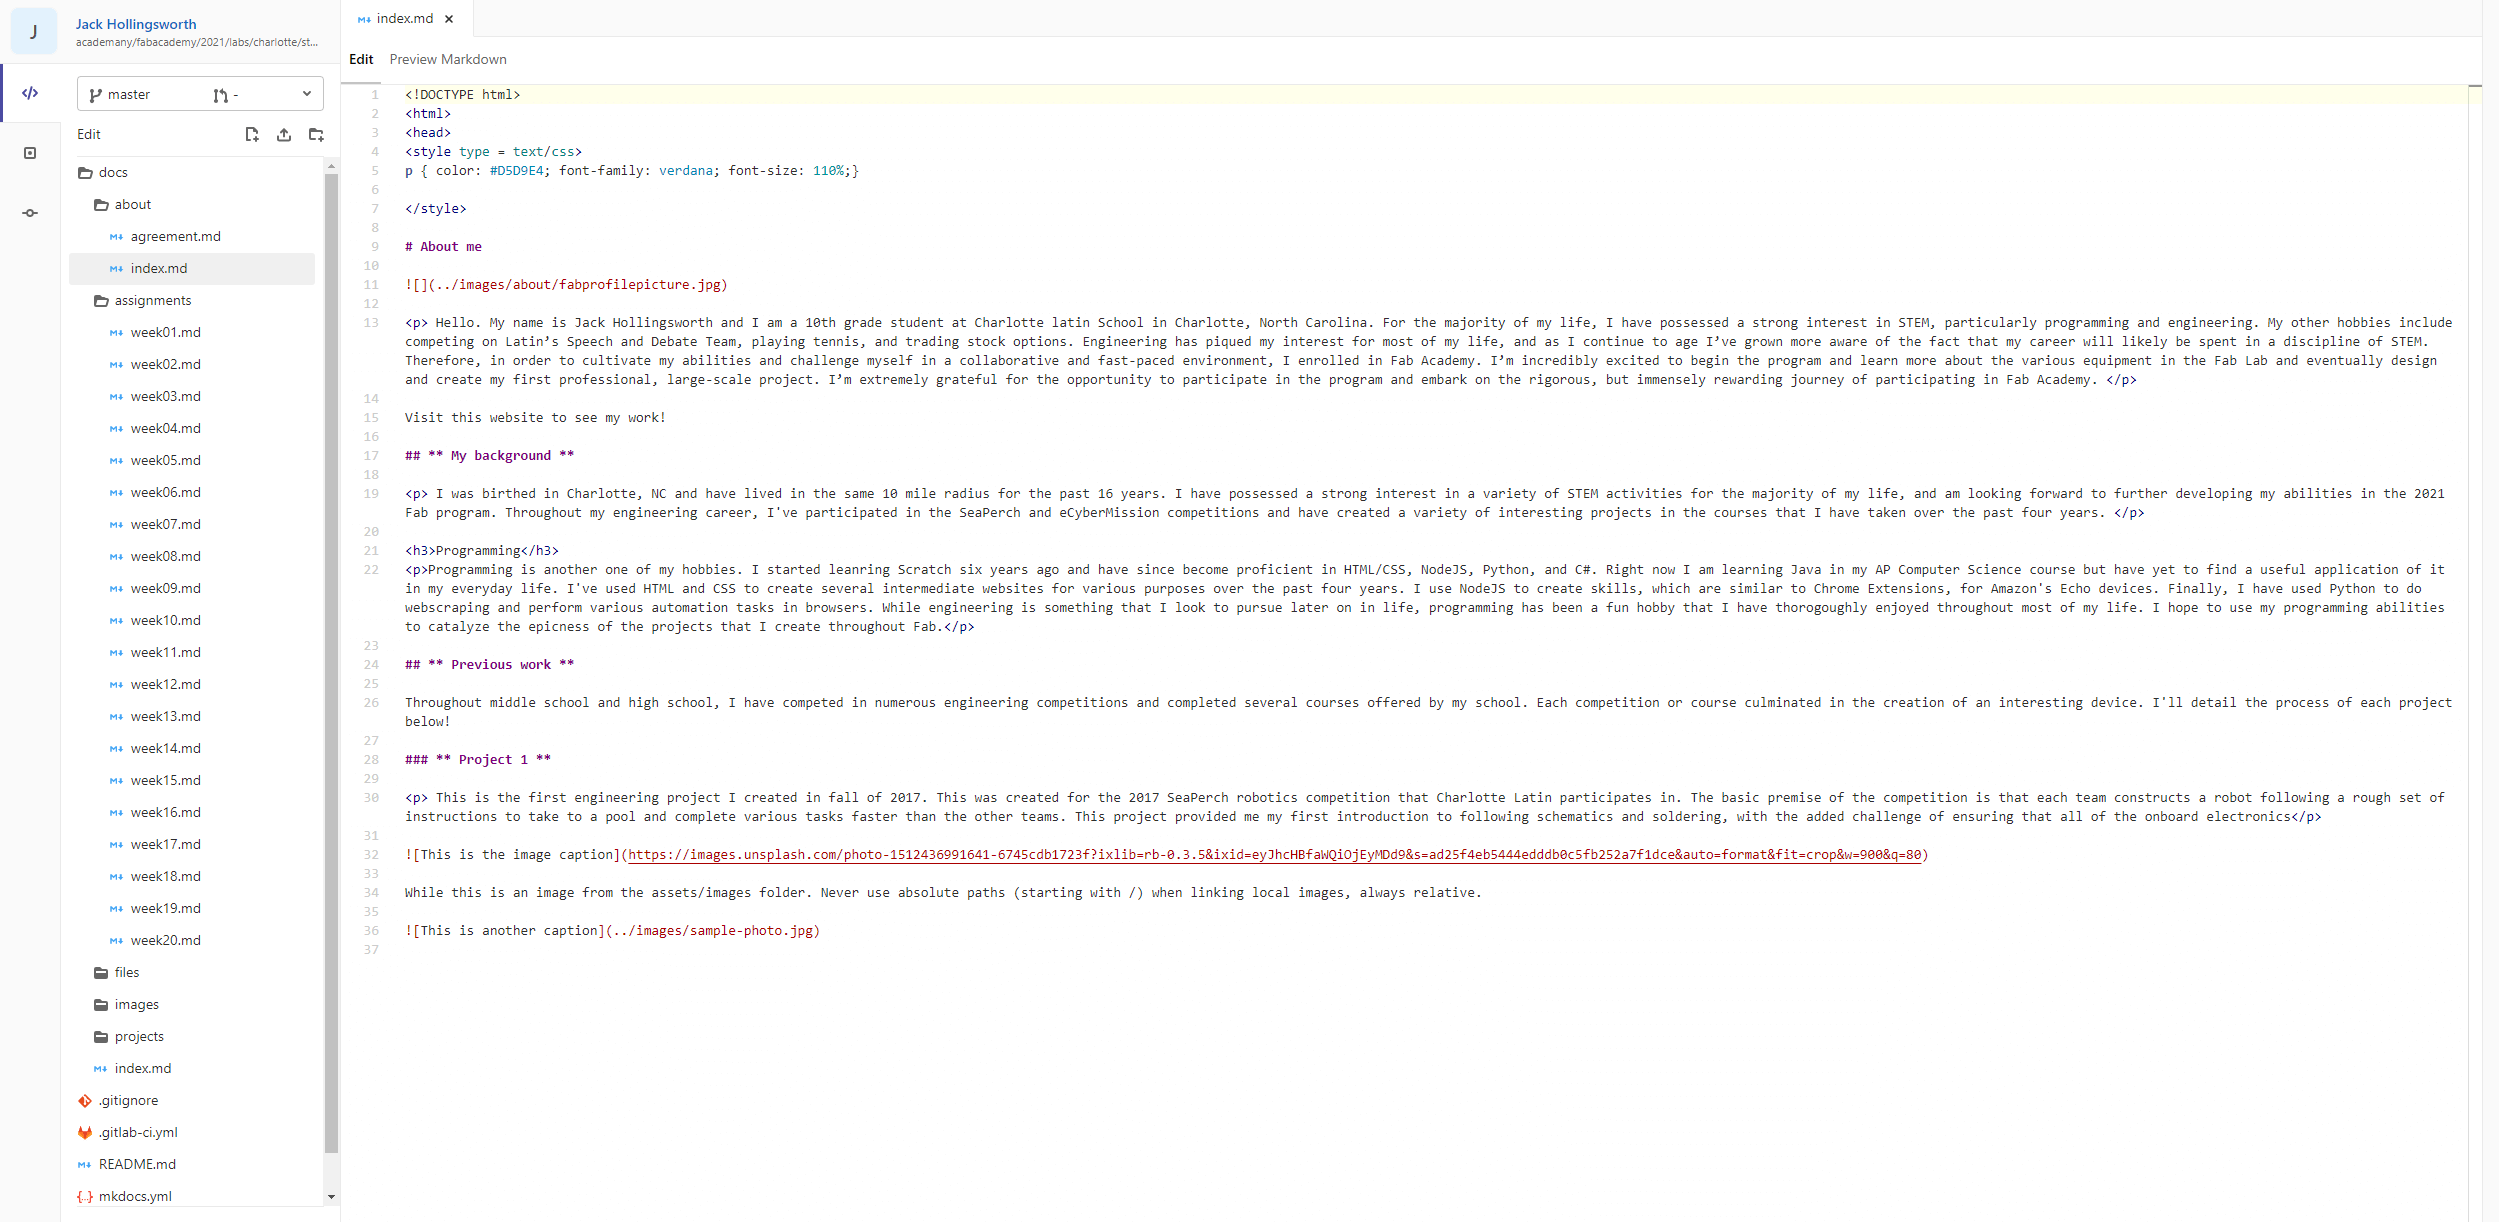
The web IDE was the final feature that I found potential usefulness in. For example, if I am on a school computer and cloning my GitLab repo to the device does not make sense, I can simply log onto the GitLab Web IDE to perform edits to my site remotely.
Installing mkdocs

Before I could begin editing my site, I needed to install and configure mkdocs on my devices. I first decided to configure the software on my PC because I already had all of the other tools installed from previous work. These softwares included Python, pip, and Git. Installing mkdocs was incredibly time-consuming, especially since I pioneered the installation alongside a team of two fellow students, Graham Smith and Teddy Warner. We encountered a plethora of issues throughout the process, primarily due to a lack of a clear workflow on how to utilize the software. Several notable issues included copying SSH keys after generating them via the Windows Command Prompt. The majority of commands that were available online did not work for certain reasons, so I created an amalgamation of certain commands that I designed to run in Powershell rather than through the command prompt. Eventually, after tirelessly laboring for many hours we finally managed to set up the software and began editing our sites locally in our favorite text editors rather than on the hideous GitLab editor. Configuring mkdocs was certainly worth the time commitment, because now that I have the software installed on several laptops as well as my PC I can edit my site from anywhere. After installilng mkdocs, I began to change some of the lines of code within the 'mkdocs.yml' page which allowed me to edit the theme of the site as well as the default font. I decided to use a custom color for most of the site, with the hex code #D5D9E.
Final Project Inspiration
Coming up with the idea for my final project was not a task that I took lightly. I wanted to select something that satisfied several criteria that I created prior to the start of the program. These included feasibility, cost, and usefulness. Prior to the first week of Fab I brainstormed several ideas and initially decided on creating a fully-fledged immersive racing simulator; however, the finer details of this project did not seem feasible once I conssidered the project in greater detail later on. Originally, I planned on creating a racing similar to this one sold by Aston Martin which costs roughly $78,000. However, after considering the project’s many components and the sheer size of something that is meant to seat a human, I decided that I wanted to create something slightly smaller that also does not attempt to cut costs as drastically as this original idea would have required. I also wanted to do something that involved more software than hardware as I generally consider myself to be more skilled at designing software than hardware. Therefore, I instead decided to create a suitcase that follows its user utilizing a combination of ultrasonic obstacle avoidance and the communication of GPS data via Bluetooth.
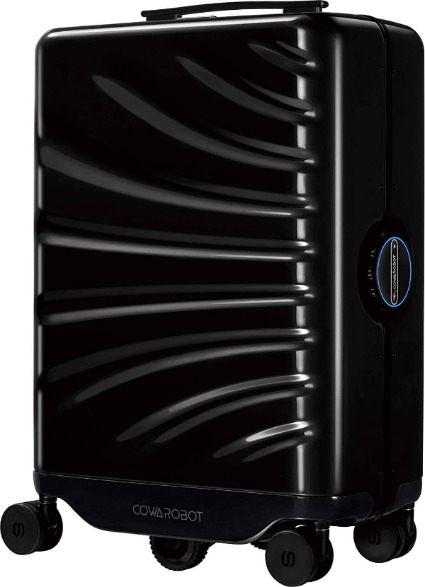
This image was originally incredibly large iin terms of its filesize for something so small and bland. To downsize the image, I utilized Adobe Photoshop Express, which is a free tool available onliine.
Several renditions of this product have been created, both in suitcase and cooler form, though only one is truly available to the general public at a semi-reasonable price, this being the Cowarobot “Auto-Follow” suitcase. The product is listed on Amazon for $659.99, and boasts a rating of just three stars at the time of the writing of this introduction. Listed below are the notable features of the Cowarobot, per the product’s Amazon page.
- Hands-free control - Automatically stays close and matches your pace. Just simply grab the handle and turn ROVER SPEED to manual mode.
- Smart obstacle avoidance - Maneuvers around obstacles and people to get right back on track quickly.
- Intelligent tracking - Cowarobot knows where you are and sends alerts when you are more than 6 feet away.
- A travel robot built for a lifetime adventure - Cowarobot uses only the highest quality materials and components from top suppliers.
- Easy access for charging all your mobile devices - Cowarobot comes with a 92Wh battery which allows you to be on the go for up to 12 miles, or to fully charge up to 8 mobile phones.
- Bring your Cowarobot on board - Yes, the Cowarobot battery pack complies with the UN 38.3, UL and FCC standards. The capacity of the battery is also in accordance with FAA regulations (up to 100Wh per battery). But you may be required to remove the battery from the case as you go through security checks.
- Operating environment - The smart suitcase can only follow automatically in the indoor environment.
Unless I have extra time available, I am going to omit several of the least useful features of the Cowarobot. Firstly, I will not include a 3-year-warranty alongside my project because that would obviously be anti-competitive in the event that I decide to sell my product in the future. Next, I likely will not include the USB ports in my device, as I want the electronics to be semi-difficult to access once the robot is complete, and I want the battery duration to be as long as possible, and providing a charging port would obviously detract from this goal. I will be exploring potential options for powering the internal electronics in the future as I have never created a mobile Arduino device that used multiple sensors and motors and needed to be powered for extended durations of time. Finally, I likely will not offer the ability to set the follow distance of the robot unless I have lots of spare time to write the logic for variable tracking distances.
Another similar creation is Hacker Shack’s “Follow-Me Cooler” which uses an Arduino and GPS tracking over Bluetooth but does not feature obstacle avoidance, which is certainly a crucial feature as my goal for this product is for it to be able to successfully navigate through an airport without assistance. Despite the lack of this feature, the robot does feature an interesting electronic housing which is situated incredibly close to the ground. This feature will prove incredibly useful in lowering the center of gravity of the suitcase as well as providing a seamless separation between the (hopefully) voluminous interior of the suitcase and the brains behind my magnum opus. The appearance of my suitcase will differ greatly from the “Follow-Me Cooler” as it will be a single body rather than the multi-part composure of Hacker Shack’s creation.
Important Links
Learning SourceTree
Following Neil's brief introduction of various version control softwares in the January 27 video, I decided to familiarize myself with Sourcetree as it seemed to be the most user-friendly. Seeing that I had just begun to use GitLab the week before, I concluded that Sourcetree would probably work best for what I needed at the moment. I initially attempted to setup the software with Pagaent and PuTTYGen, but after numerous failed attempts I realized that cloning my repository with HTTPS and cloning it into Sourcetree was vastly easier as it did not require the verification of an SSH key. In order to assist my fellow Latin students, I provided a brief workflow that detailed the process that I followed in configuring Sourcetree. Said workflow can be viewed below.
Using HTML & CSS With Markdown
I wrote several snippets of HTML code during week 1 to increase the aesthetic appeal of my site. I will continue to use these headers and parameters throughout the program as they provide a stunning contrast to the dark background of my site.
These are several parameters that I wrote for my text that I plan on utilizing throughout the entirety of my site for the sake of continuity.
p { color: #D5D9E4; font-family: verdana; font-size: 110%; font-weight: normal}
h1 {color: #D5D9E4; font-family: verdana; font-size: 360%; font-weight: 900}
h2 {color: #D5D9E4; font-family: verdana; font-size: 200%; font-weight: bold}
Here is some HTML that I wrote to align images to the right and left sides of blocks of text. I plan on creating more robust alignment tools later on but these will suffice for the foreseeable future.
 Right Align - <img src="LINK" style="float:right" width="190" height="84" />

Left Align - <img src="LINK" style="float:right" width="190" height="84" />