Computer Controlled Machining
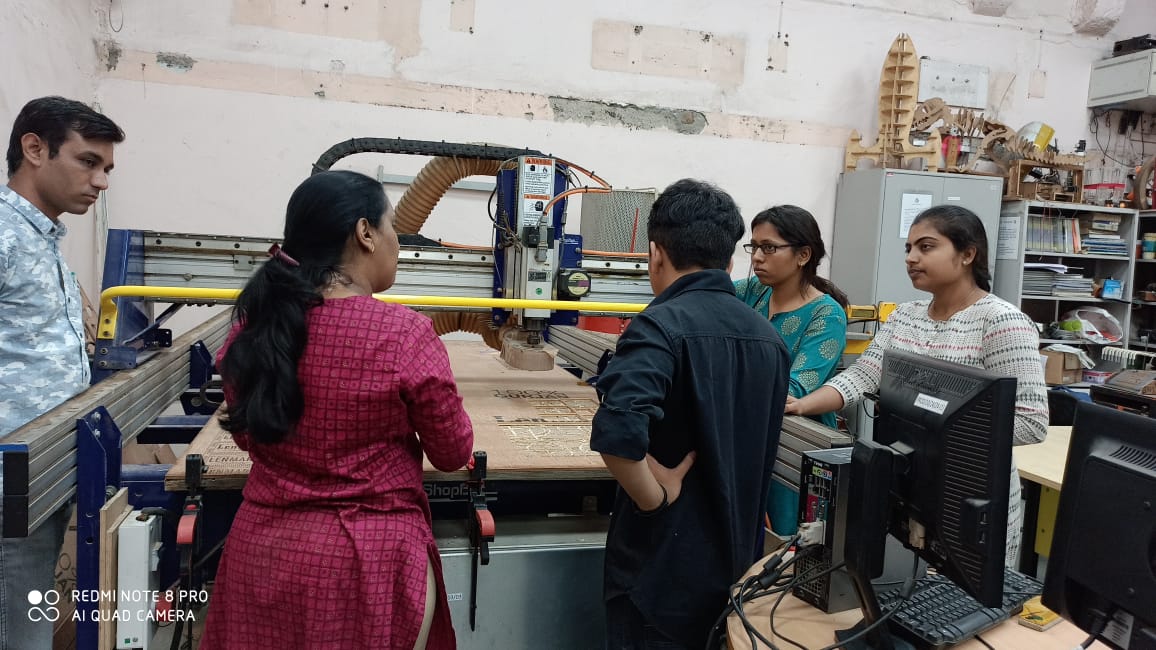
In this week we have to make something big.In this week we have to use Shopbot machine for our assignment.In Vigyan Ashram we don't have shopbot machine so we need to cut our assignment in COEP FABLAB ,PUNE.On wednesday Neil gave lecture on Shopbot.In lecture he told about different types of machine.Also he told about safety rules which you have to follow during assignment.On thursday we went to COEP ,Pune.Our local instructor Apkesha Ma'am gave lecture on shopbot.She discussed our group assignment.Also she gave demo of shopbot.
Please refer group assignment here:
Group Assignment:Test runout, alignment, speeds, feeds, and toolpaths for your machine.
Individual Assignment: Make (design+mill+assemble) something big.
Group Assignment:
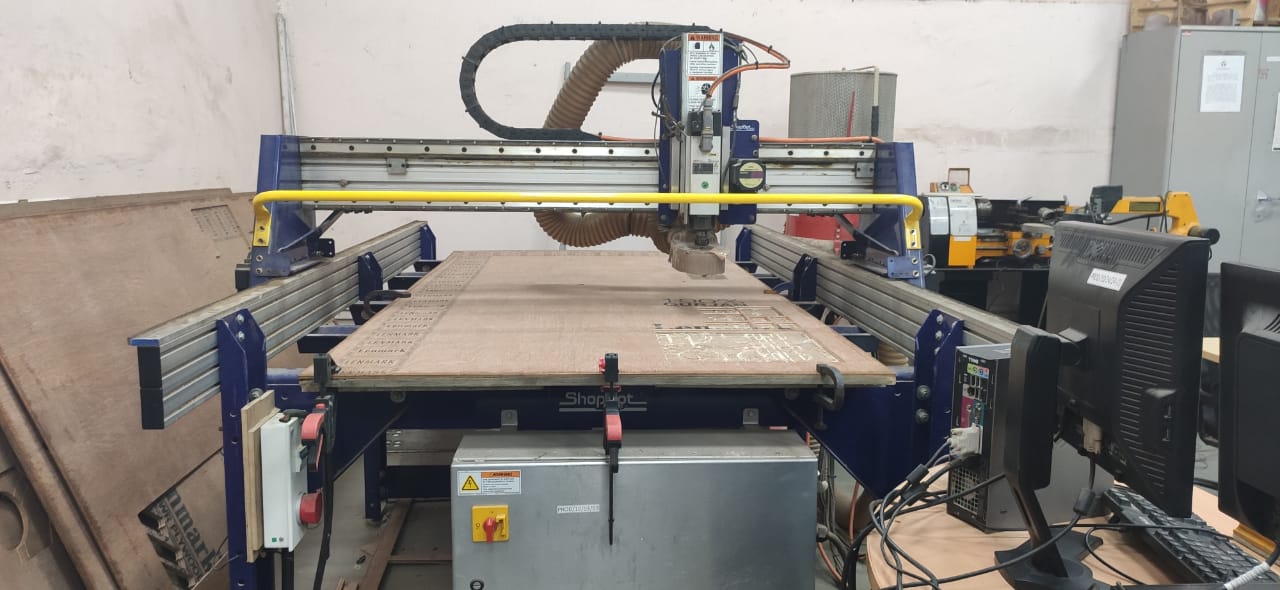
Shopbot
In group assignment we have test some machine parameters like speed ,kerf,toolpath and alignment.First our instructor Apkesha Ma'am brief about shopbot machine,which softwares are required to generate toolpath and to control the machine.
Overview of machine
After that she explained about softwares and specifications about machine.She gave demo of machine.How to start machine ,how to generate toolpath,how to set origin ,this all things are explained by her.
Clamping
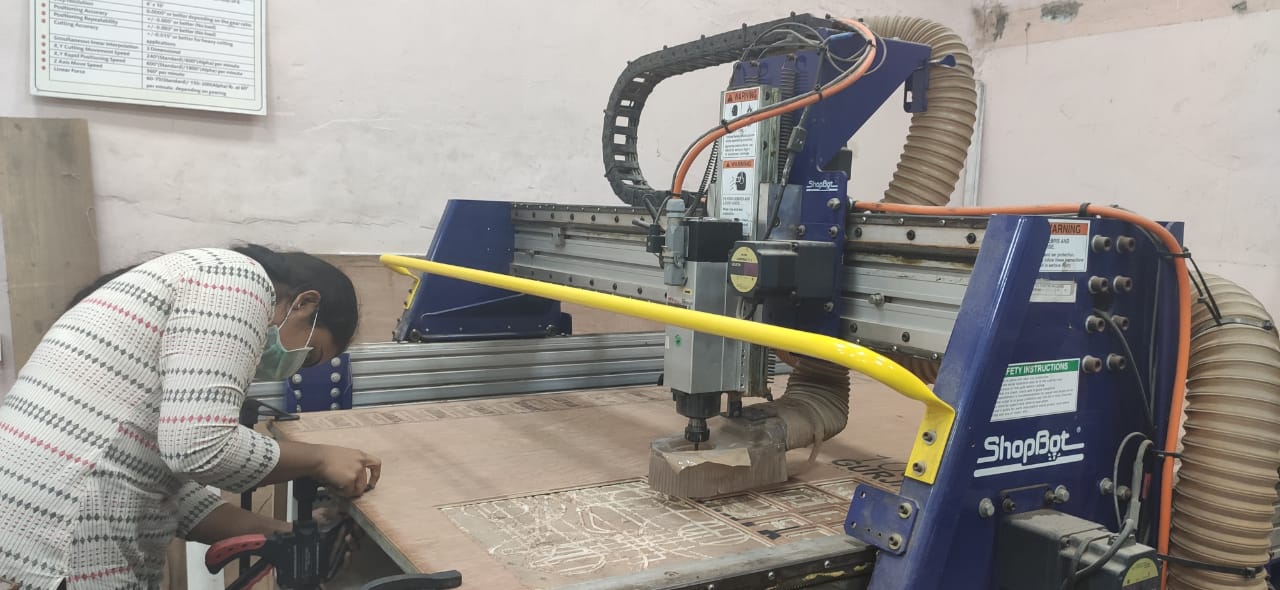
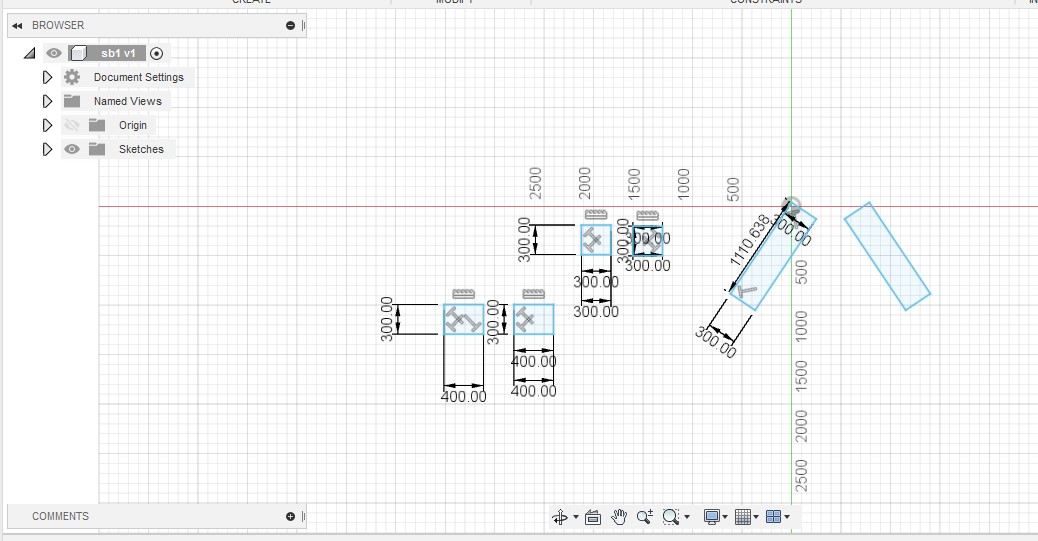
So after this we made small design to do group assignment.In this we made one rectangle with different width of notch in it.This is because we will get to know kerf of our machine.How much extra we have to add in our design.Also we have made design of hexagon ,triangle.We have tested which part you have to cut inside and which part you have to cut outside.Once design completed we move towards machine and its software.Partworks is a software ,which required to generate toolpath and to generate gcode and that file given to machine another SHOPBOT software is used.

Design making
After cutting we calculated kerf of our test part.We have taken material thikness 8mm .We got the kerf of 0.5mm.So we have to add clearance of 0.5mm in our design.If we dont add kerf to our design it will not fit properly.We have to file that part using filer.
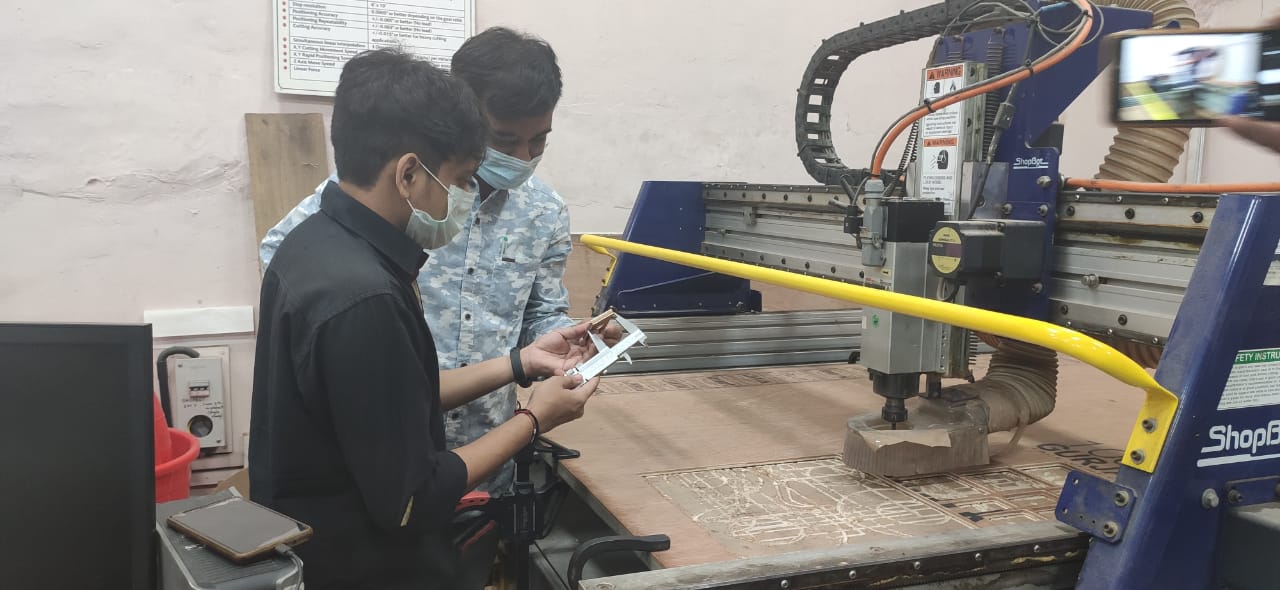
kerf measurement
Specification Of Shopbot:
Shopbot is a 2.5D machine ,which means we can cut our design in X,Y and Z direction.The ShopBot PRS Alpha is a CNC machine that allows users to cut, drill, carve.
Table Cutting Dimensions: 69 inches x 96 inches.
Table Area: 6624 square inches = 46 square feet.
Table Thickness: 0.75" Plywood Bottom Layer, 0.75" MDF Top Layer
Jog Spindle : 30”(760mm) per second
Toolpath:220V 20A for Controls/ Router (Spindle amperage requirements vary on horsepower and voltage)
Software Basic : PartWorks for making toolpaths and sending Gcode machine used Shopbot 3.
Step Resolution .0004” (0.010mm)
X and Y Axis Drive System :Rack and Pinion
Z Axis Drive System:Rack and Pinion
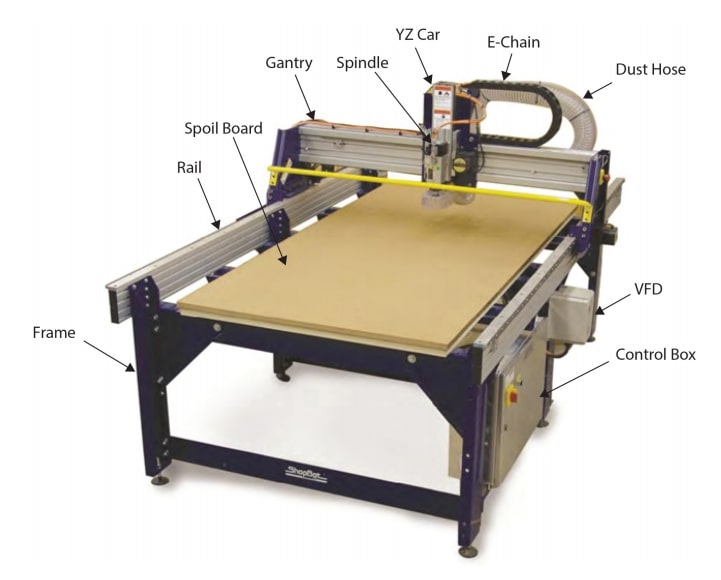
PRSalpha
Key parameters for shopbot:
1. Plunge rate - It is also known as stepdown, it is the distance in the z direction per pass that a cutting tool is plunged into the material.
2. Spindle Speed - rotational speed of the cutting tool in revolutions per min
3. Step Over - the maximum distance in the x/y direction that a cutting tool will engage with uncut material
4. Feed Rate - Surface speed at the center of the rotating tool
Individual Assignment:
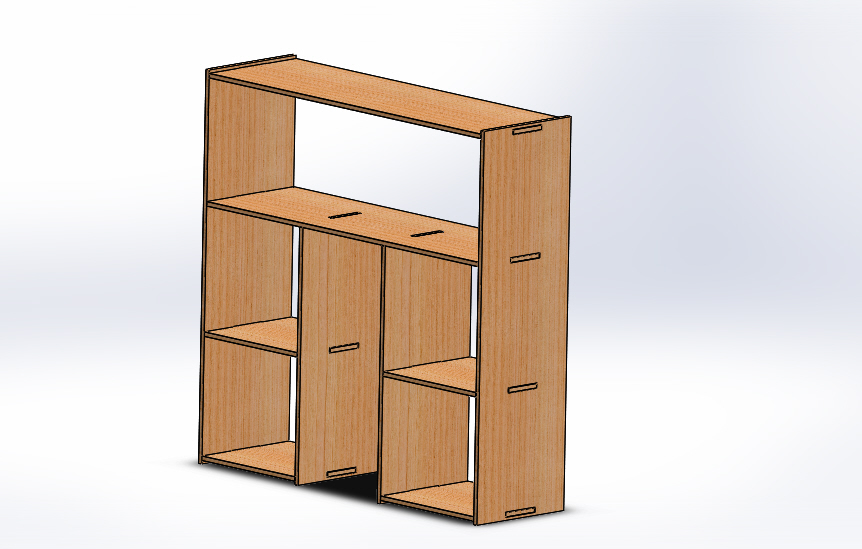
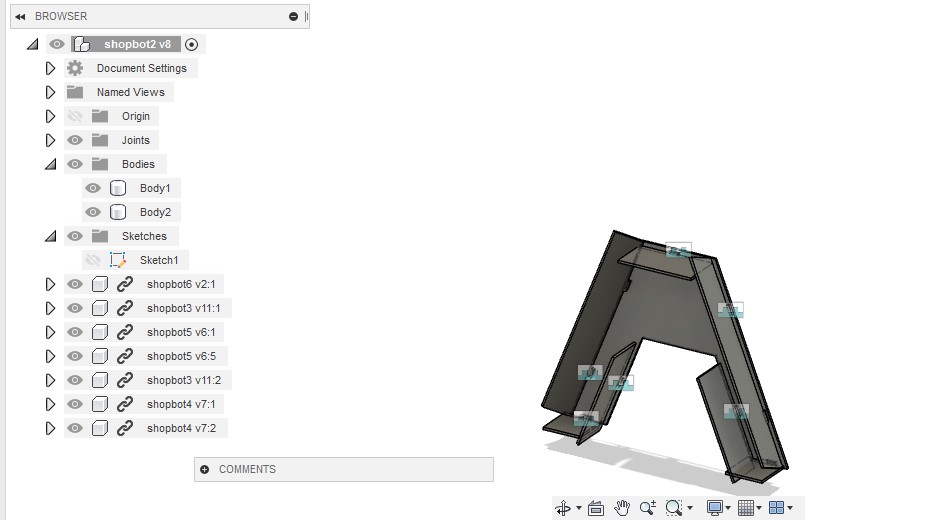
For individual assignment I decided to make something useful.So I decided to make book shelf which can be used in home.I started desinging of my idea in fusion 360.I like fusion 360 because its interface is easy.Its easy to understand.I tried 2 or 3 designs but its not working how I want.So I changed my design.I work very hard on this design.
I drawn 3"x3" sqaure and as per my requirement I made notches in it.Because we need to insert side profile into it.For notches I have taken dimension as its length 50mm and its width is 12.5mm .Because material thickness is 12mm .We have added 0.5mm kerf.
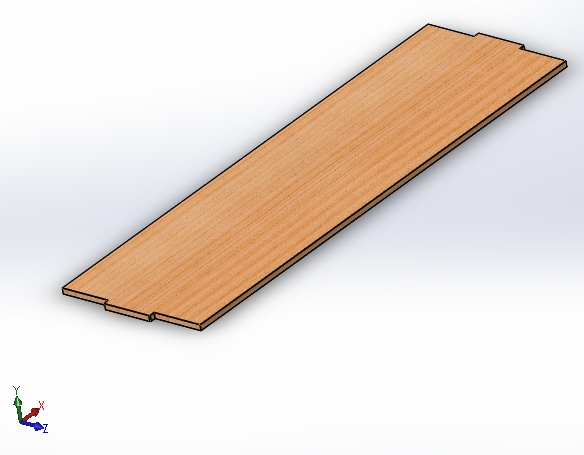
Next we need to make side profiles .So I made this middle profile which will make two parts in our design.I extruded that part.
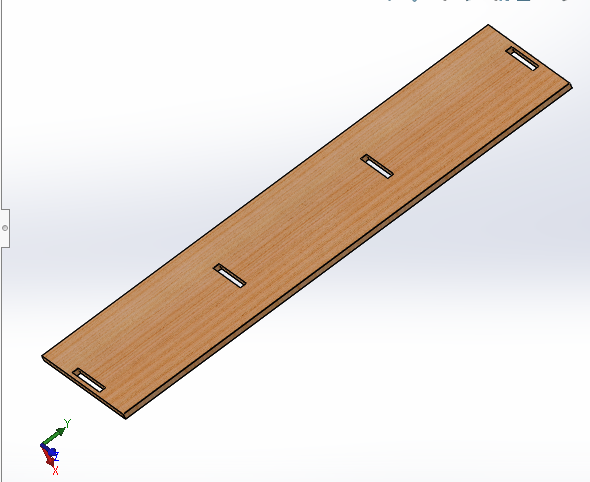
At bottom side we required two profiles ,so I made that as per our notch dimenstion.
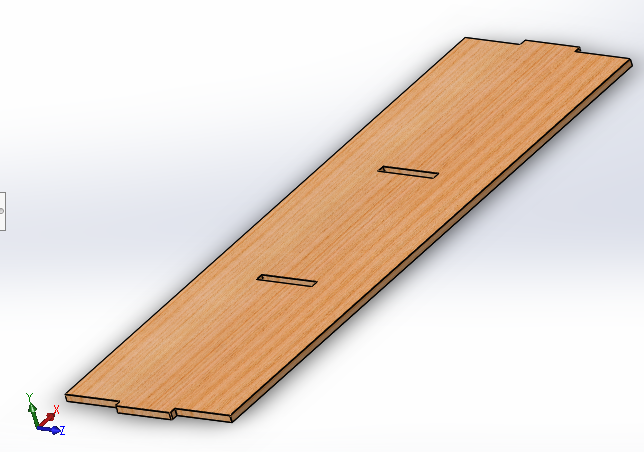
Now we required middle two profile ,so I made that.Exact dimensions are most important in designing.
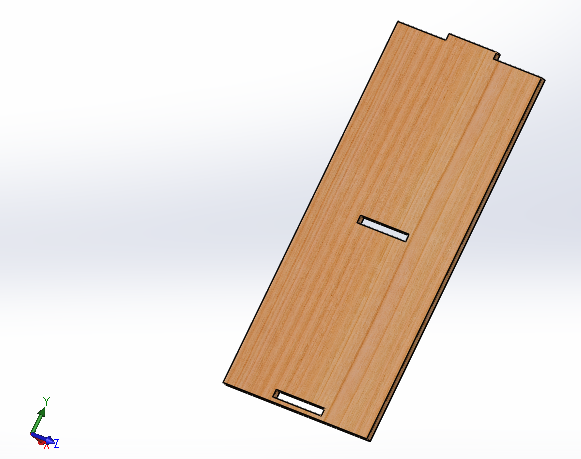
In this design I have made two side profiles ,which is required for support.After designing I extruded it using extrude command.
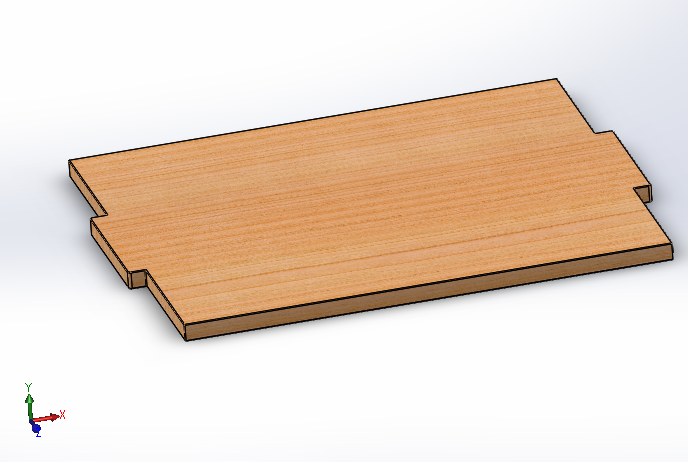
This is also another part of my design .I made each part separately.
After completion of all design I assembled it using assembly command.In assembly we have joint option .We have to select two profile which you have to joint togehter.This is final assembled object,which can be used as book shelf.
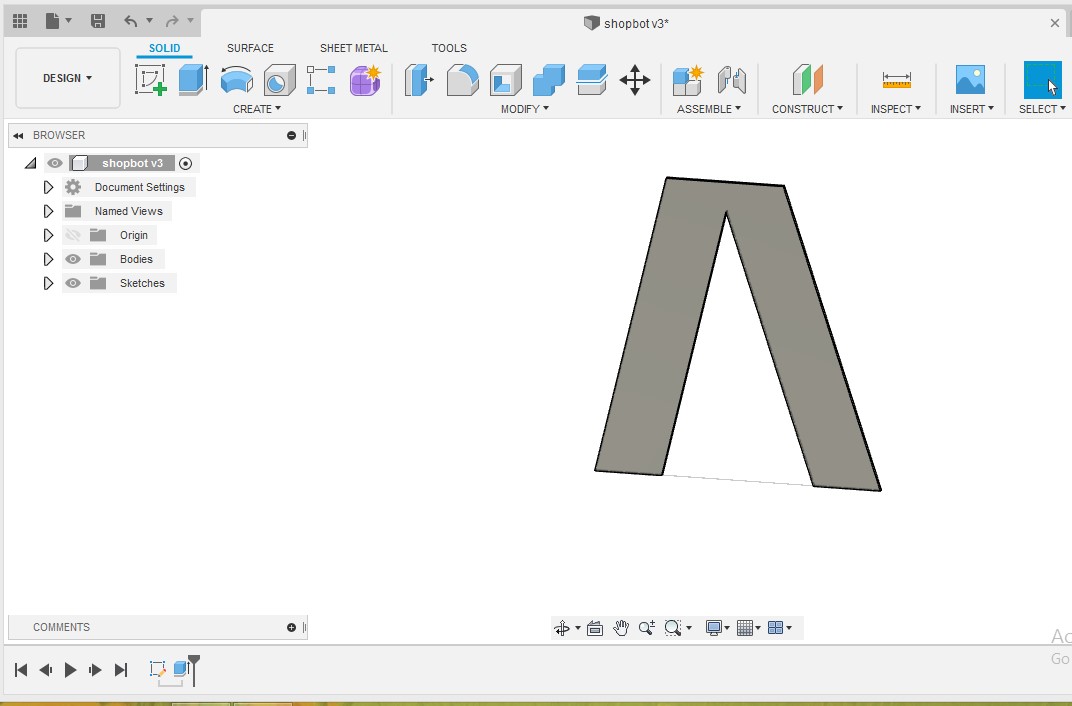
I tried another design also which is V shape.But I get failed in this design .So I made another design which is fine now.
|
|
This are some images of my first design.Also I have assembled it.But its not looking good.So I changed my design.
|
|
Toolpath Generation:
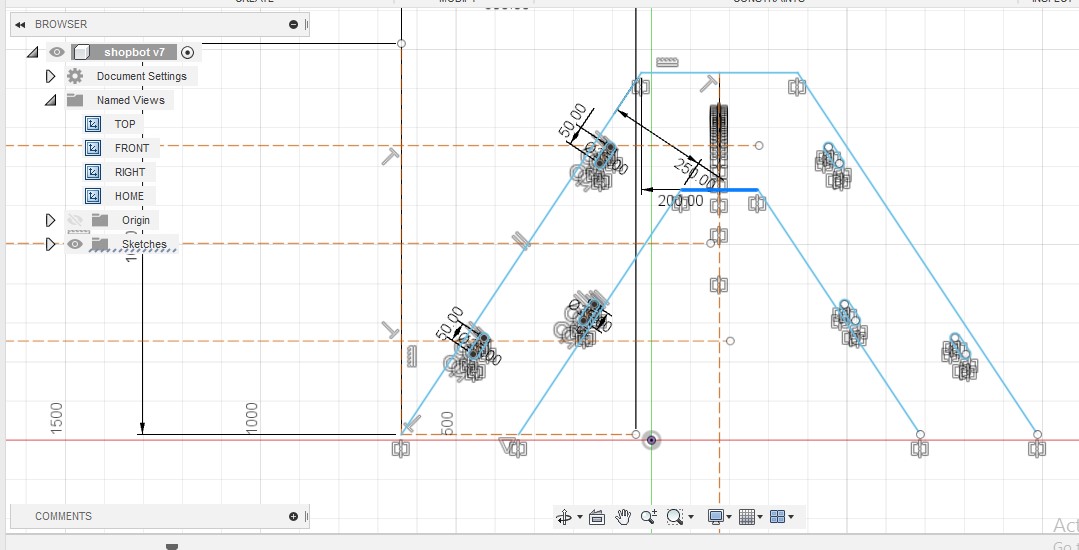
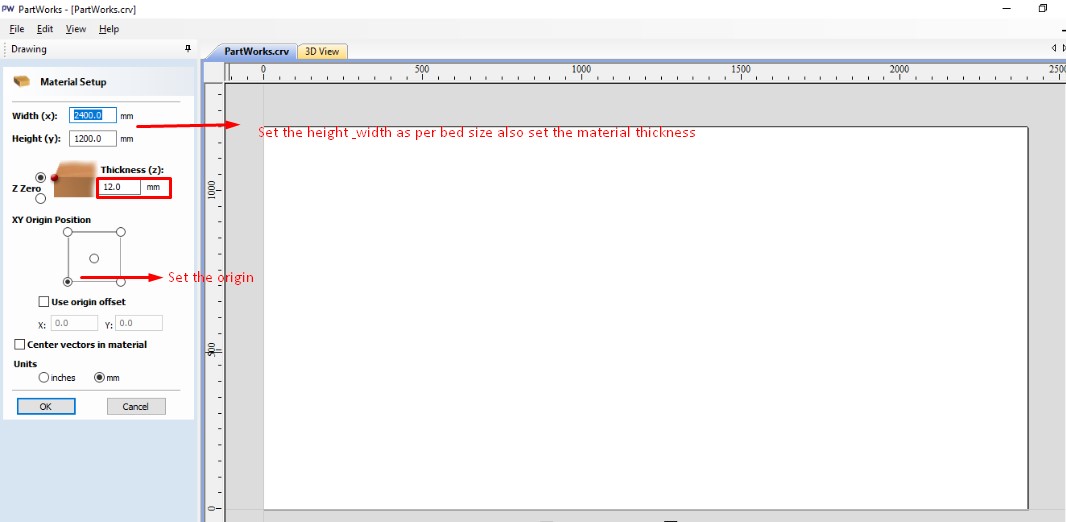
As I decided to make book shelf ,I made design.And I saved all files in DXF format.Because for toolpath generation I need dxf files.I have used Partworks software for toolpath generation.
Below first figure shows the window of partworks and set the width and height.Also select the material thickness.Select the origin.
Import the dxf file one by one .

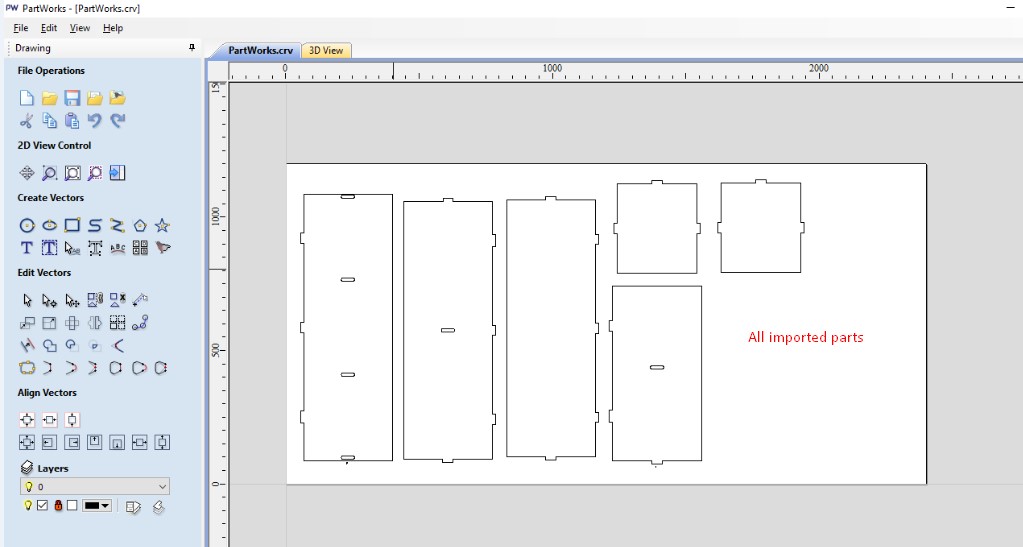
These are all design parts.As my design is too large it is not possible to fit in same file ,so I made other file for remaining parts.
Select the join vector tool and join inside vector separately.
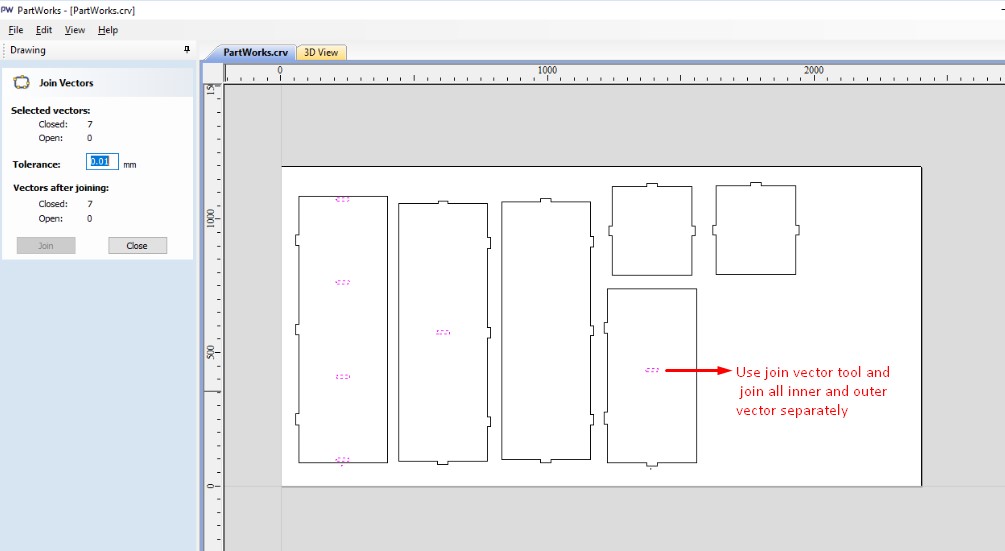
Also do it for outer profile.

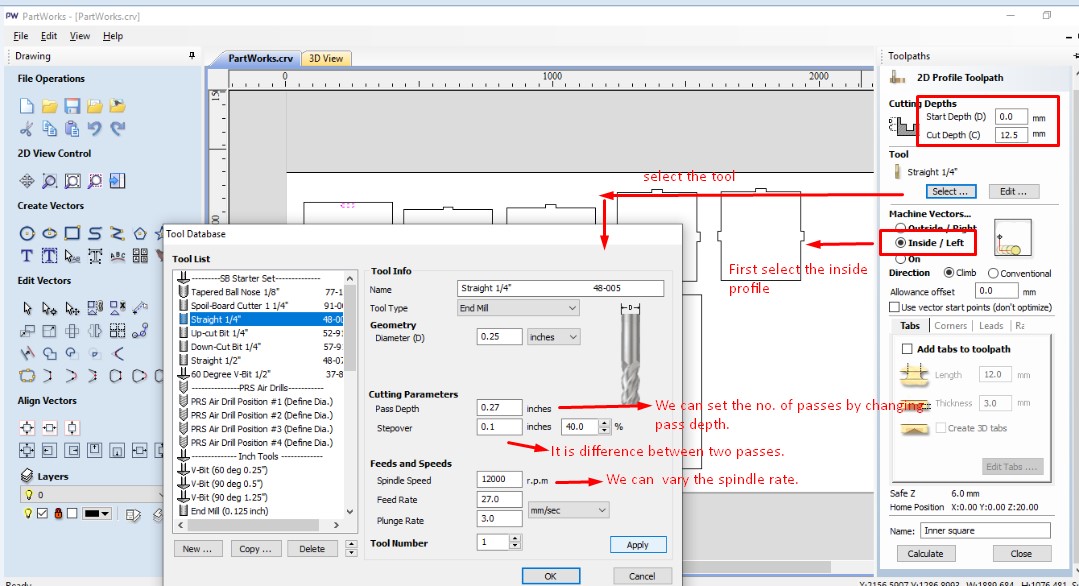
Now select the tool and do the setting as shown in figure.
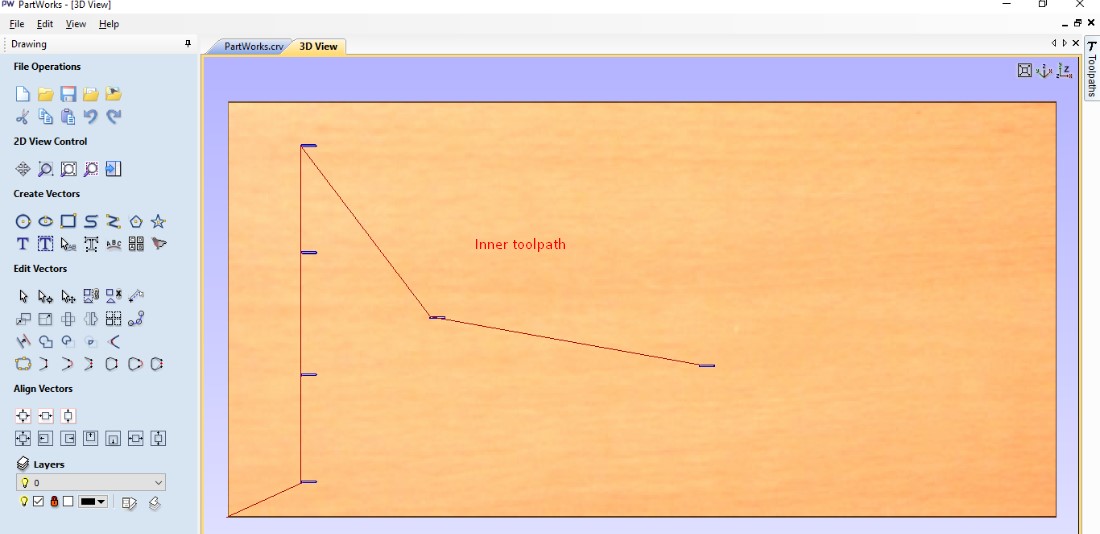
This is the inner toolpath.
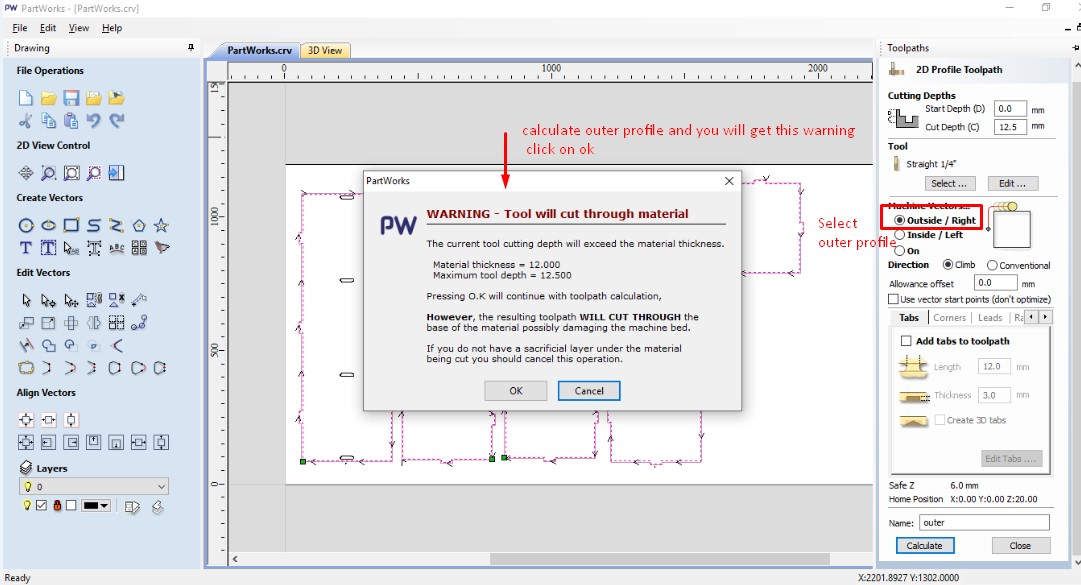
Now do the same procedure for outer cut.Select all parameters.When you click on calculate you will get warning window ,click on ok .
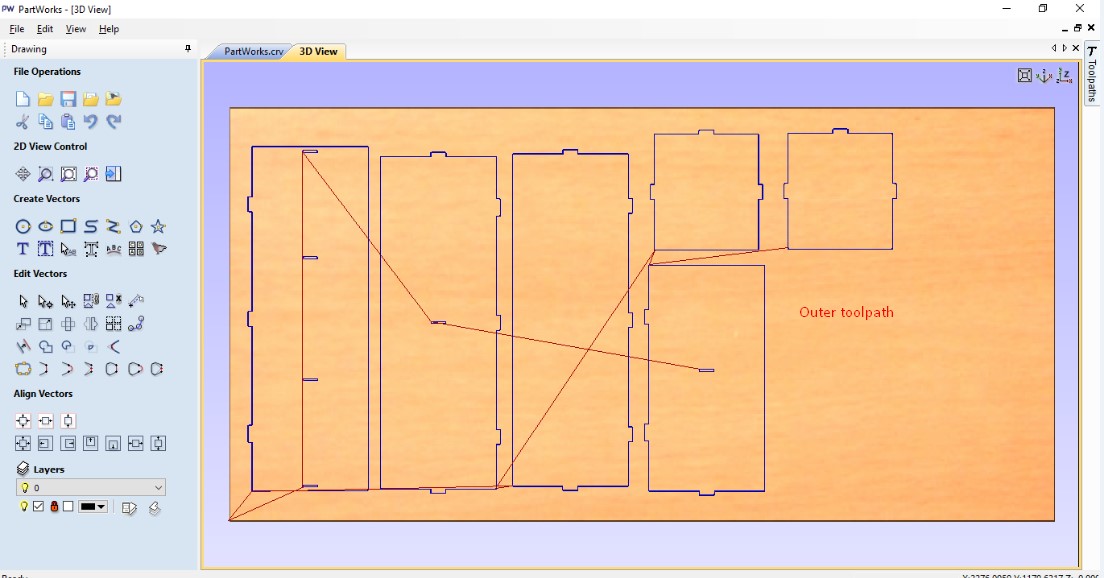
This is outer toolpath.
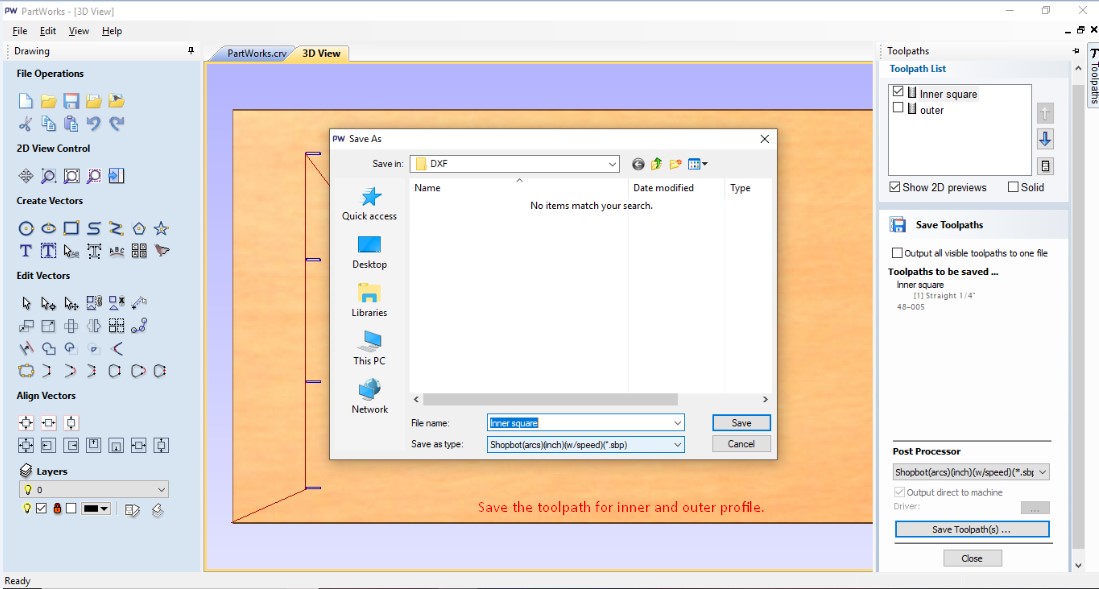
Save the inner toolpath
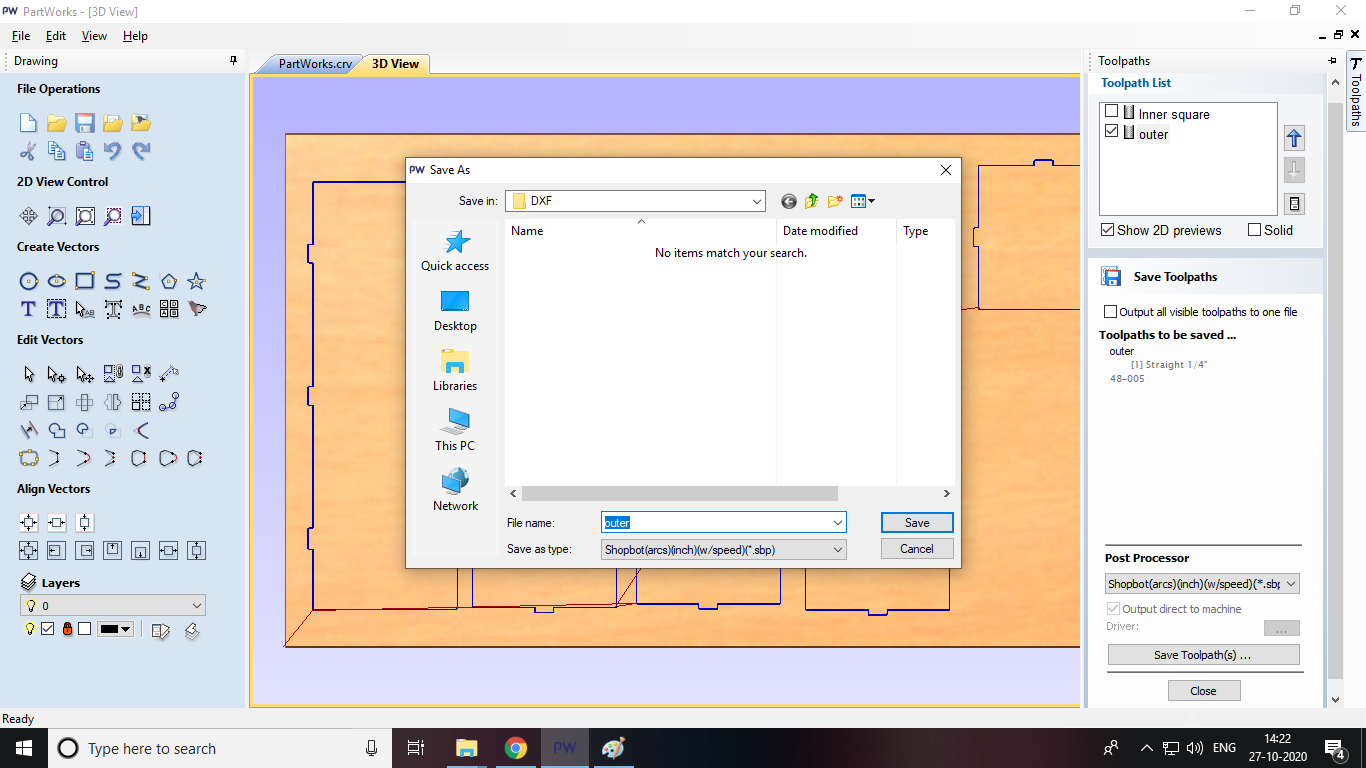
Save the outer toolpath as .sbp file
Cutting:
Because of this pandemic situation we couldn't complete this assignment on time.Our local instructor helped us for this assignment.Our instructor Apeksha Ma'am helped lot for assignment.Because of lockdown we couldn't go to COEP college,Pune but Ma'am helped us for machining part.
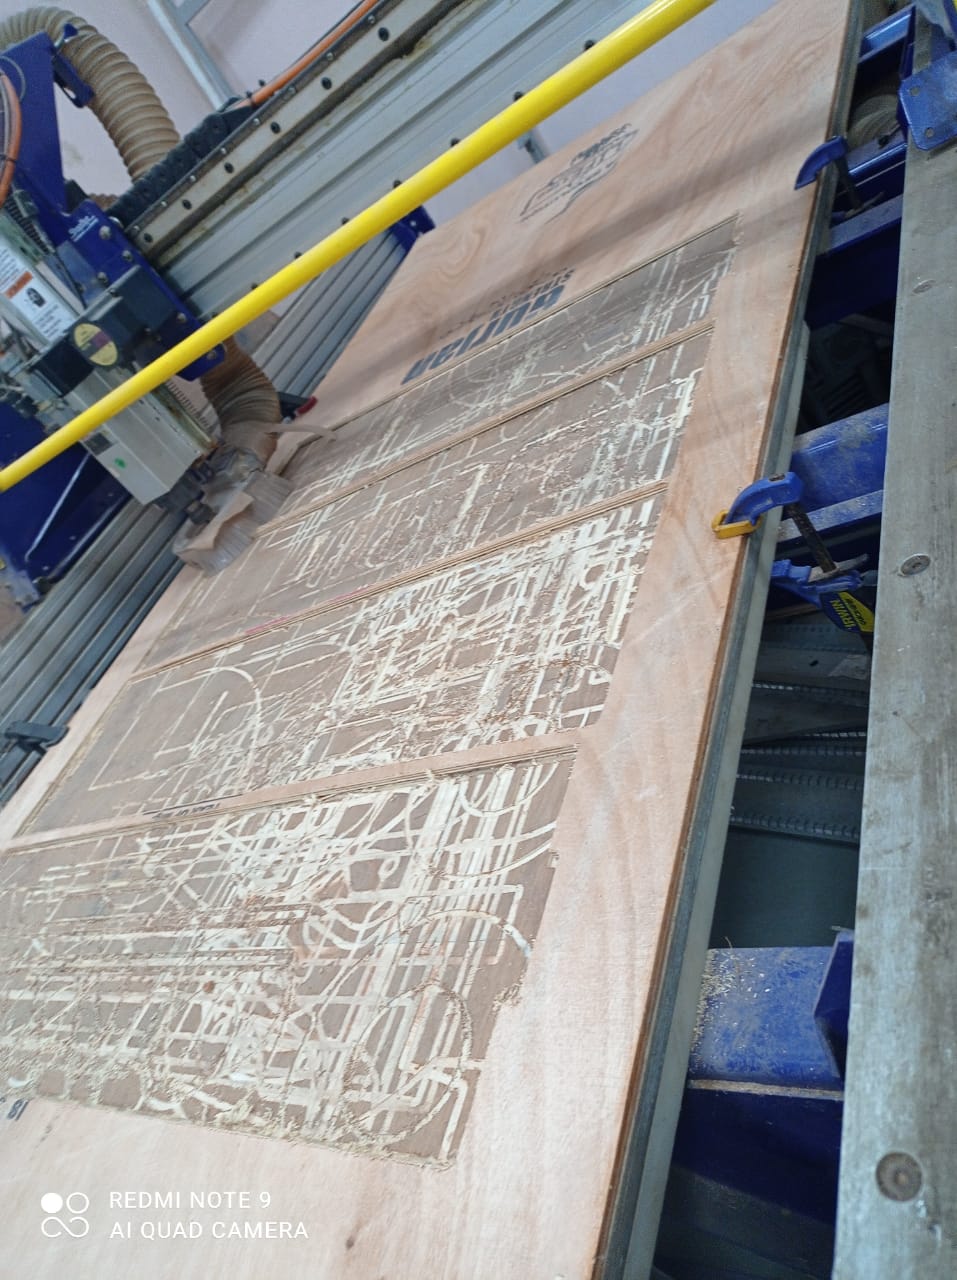
These are the cutted parts.
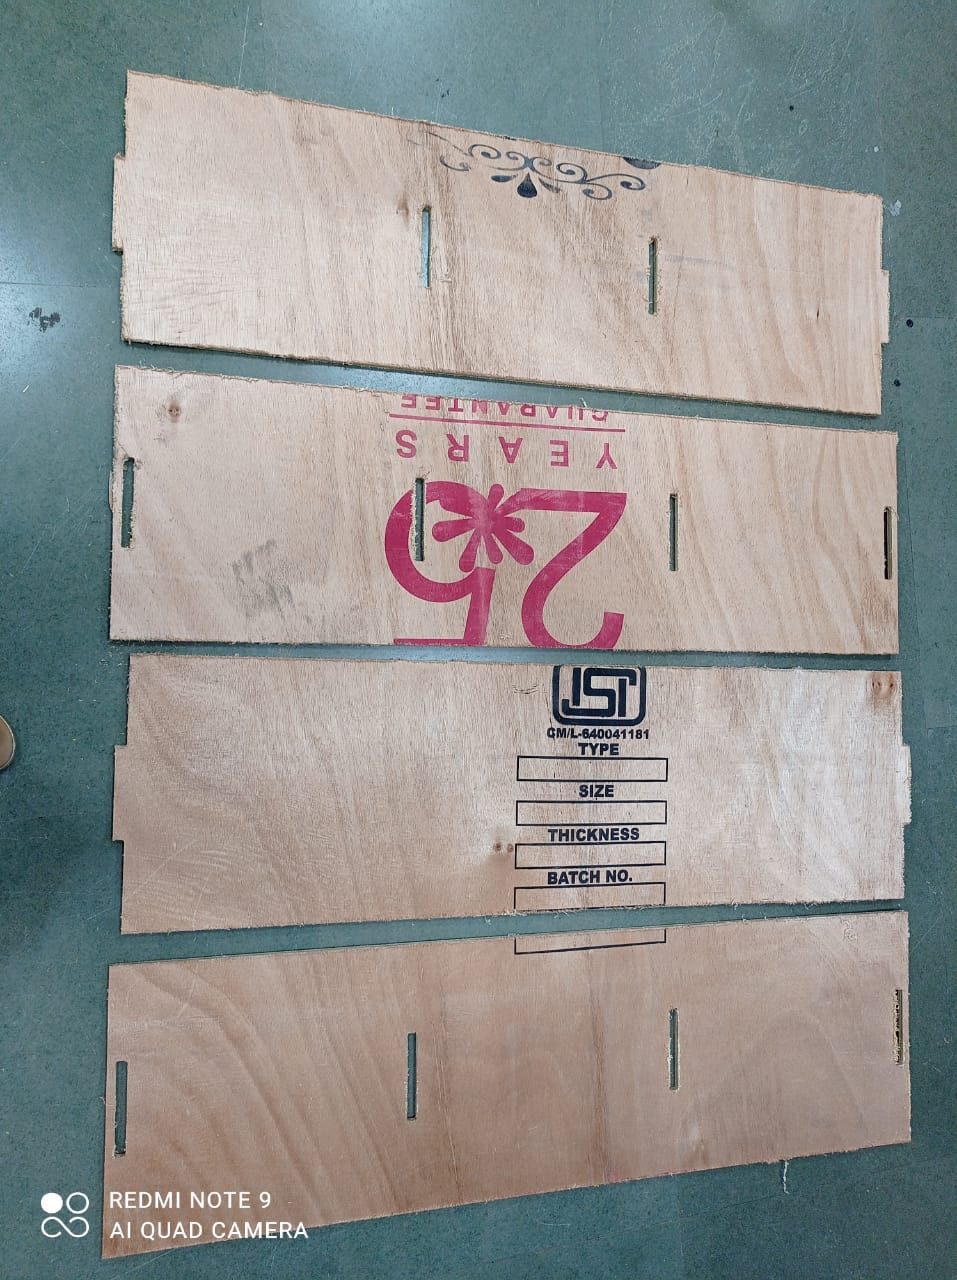
After cutting all parts,We assembled the whole parts.As I made book shelf,it looks the same.
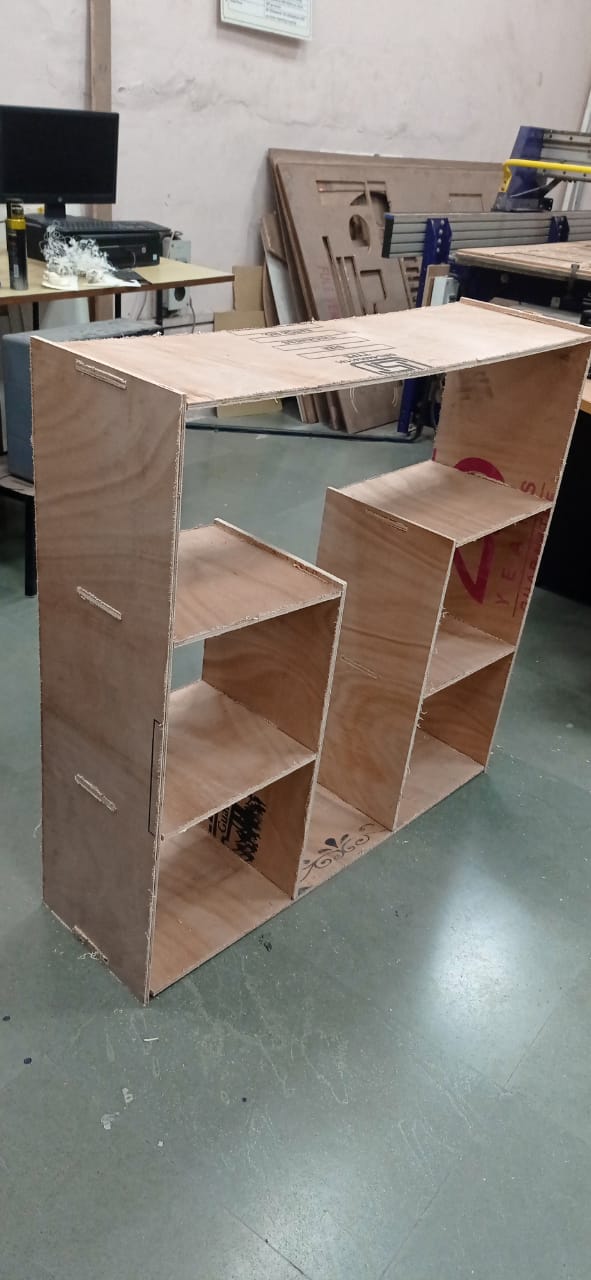
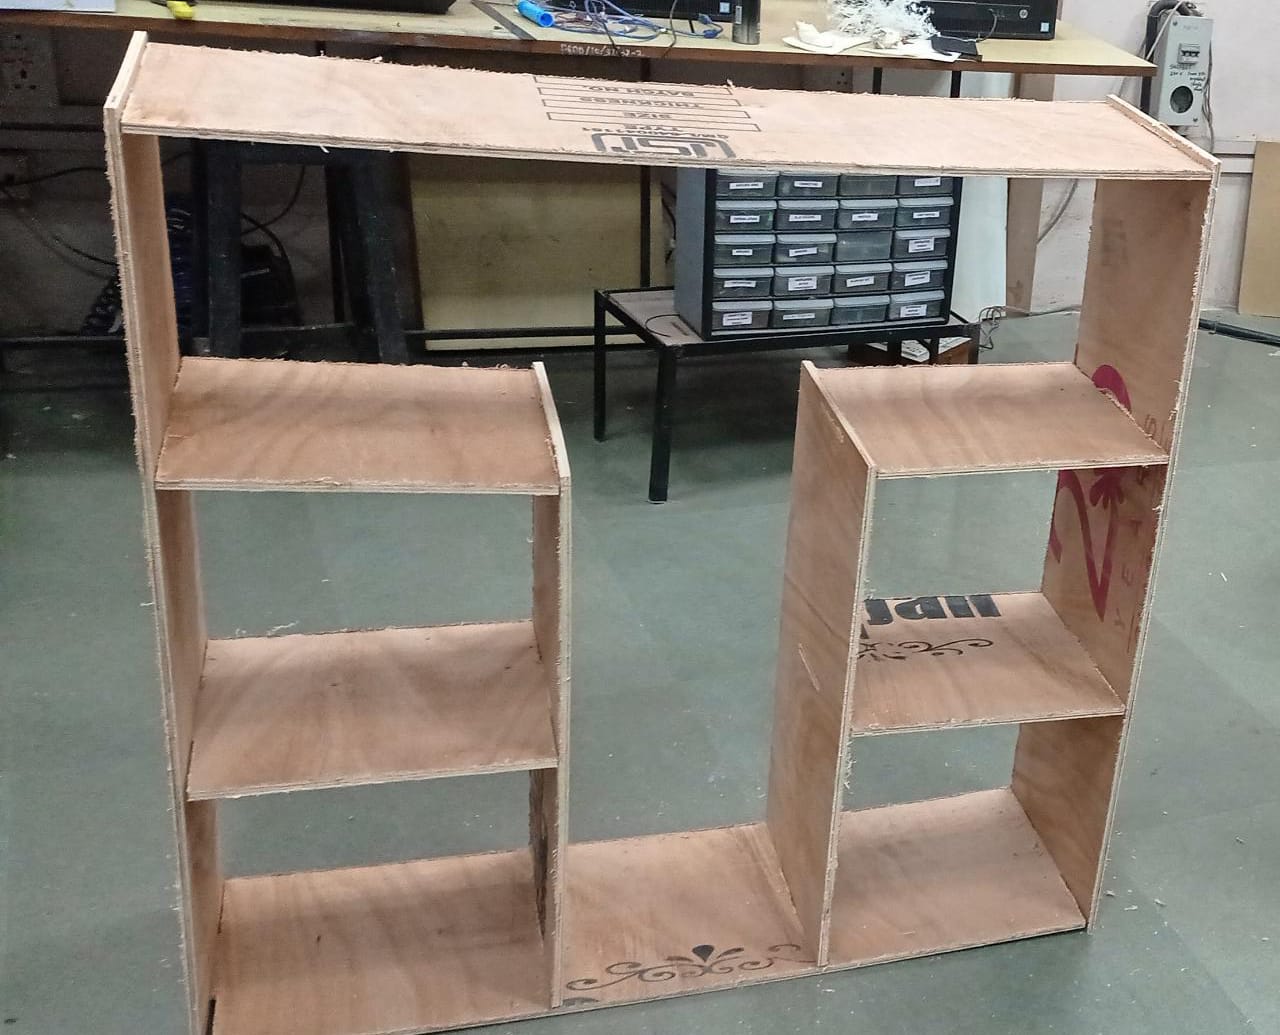
Finally I completed this assignment.
