Group Assignment:
review the safety data sheets for each of your molding and casting materials,
then make and compare test casts with each of them
In this week we have study about the Safety tools for the moldeing and Casting, in our Lab there are deffernt type of material but we have choose two materails for the Molding we select The MOLDMAX-60, and for the Casting SMOOTH CAST-305
Molding Material MOLD MAX-60 :
Mold Max™ 60 is a Shore 60A tin catalyzed silicone mold rubber formulated for applications requiring high heat resistance (up to 560°F/294°C). It features a low mixed viscosity and cured rubber exhibits very low linear shrinkage. Parts A & B are mixed 100A & 3B by weight. Pot life is 40 minutes and cure time is 24 hours. Applications include making foundry patterns, flat pattern reproductions and casting low-melt metal alloys such as tin and pewter.for more details HERE.
Features: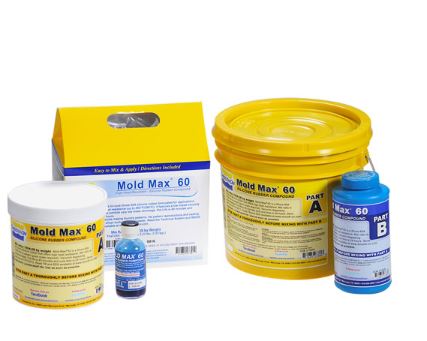
Hazard(s) Identification :
Classification of the substance or mixture:Not a hazardous substance or mixture according to United States Occupational Safety and Administration (OSHA) Hazard Communication Standard (29 CFR 1910.1200), the Canadian Workplace Hazardous Materials Information System (WHMIS) and Regulation (EC) No 1272/2008 and subsequent amendments.
GHS Label elements, including precautionary statements:Description of first aid measures :
Inhalation:Remove source(s) of contamination and move victim to fresh air. If breathing has stopped, give artificial respiration, then oxygen if needed. Contact physician immediately.
Eye Contact: Flush eyes with plenty of water. If irritation persists, seek medical attention.
Skin Contact: In case of skin contact, wash thoroughly with soap and water.
Ingestion : Do not induce vomiting unless instructed by a physician. Never give anything by mouth to an unconscious person.
Most important symptoms and effects, both acute and delayed None known. After first aid, get appropriate in-plant, paramedic, or community medical support.Toxicological Information:
Instructions :
Important: you must weigh Part A & B components using a gram scale to be successful with Mold Max™ 60, for more details HERE.Because no two applications are quite the same, a small test application to determine suitability for your project is recommended if performance of this material is in question.
Preparation :Materials should be stored and used in at room temperature (73°F/23°C). These products have a limited shelf life and should be used as soon as possible. Wear safety glasses, long sleeves and rubber gloves to minimize contamination risk. Rubber may be inhibited by sulfur base clays resulting in tackiness at the pattern interface or a total lack of cure throughout the mold. If compatibility between the rubber and the surface is a concern, a small-scale test is recommended. Apply a small amount of rubber onto a non-critical area of the pattern. Inhibition has occurred if the rubber is gummy or uncured after the recommended cure time has passed.
Applying A Sealer / Release Agent :To prevent inhibition, a “barrier coat” of clear acrylic lacquer sprayed directly onto the pattern is usually effective. Allow to thoroughly dry. Although not usually necessary, a release agent will make demolding easier when casting into or over most surfaces. Ease Release™ 200 is a proven release agent for making molds with silicone rubber and for releasing new silicone from cured silicone. Mann Ease Release™ products are available from Smooth-On or your Smooth-On distributor. IMPORTANT: To ensure thorough coverage, lightly brush the release agent with a soft brush over all surfaces of the model. Follow with light mist coating and let dry for 30 minutes.
Measuring & Mixing:Before you begin, pre-mix Part A (base) thoroughly to re-disperse fillers that may have settled. Using a gram scale, dispense required amounts of parts A and B into a mixing container and mix for 3 minutes. Scrape the sides and bottom of the container several times. After mixing parts A and B, vacuum degassing is recommended to eliminate any entrapped air. Vacuum material for 2-3 minutes (29 inches of mercury), making sure that you leave enough room in container for product expansion.
Pouring / Curing / Post Curing :For best results, pour your mixture in a single spot at the lowest point of the containment field. Let the rubber seek its level up and over the model. A uniform flow will help minimize entrapped air. The liquid rubber should level off at least 1/2” (1.3 cm) over the highest point of the model surface. Allow the mold to cure overnight (at least 24 hours) at room temperature (73°F/23°C) before demolding. Post curing the mold an additional 4 - 5 hours at 125°F (51°C) will eliminate any residual moisture and alcohol that is a by-product of the condensation reaction. This water and alcohol can inhibit the cure of some casting resins. Allow mold to cool to room temperature before using. Do not cure rubber where temperature is less than 65°F /18°C.
Decreasing demold time with Accel-T™ Silicone Cure Accelerator:Important: Thoroughly Pre-mix Accel T™ with Part B before adding Part A.Be aware that the working time is drastically reduced with the addition of Accel T™. Also, library life of cured rubber is reduced in proportion to the amount of Accel-T™ added.
Using The Mold :New silicone rubber molds exhibit natural release characteristics. Depending on what is being cast into the mold, mold lubricity may be depleted over time and parts will begin to stick. No release agent is necessary when casting wax or gypsum. Applying a release agent such as Ease Release™ 200 (available from Smooth-On) prior to casting polyurethane, polyester and epoxy resins is recommended to maximize mold life. Visit Smooth-On’s FAQ section at www.smooth-on.com for information on a powder coating technique that will yield a dry matte finish to cured castings.
Mold Performance & Storage :The physical life of the mold depends on how you use it (materials cast, frequency, etc.). Casting abrasive materials such as concrete can quickly erode mold detail, while casting non-abrasive materials (wax) will not affect mold detail. Before storing, the mold should be cleaned with a soap solution and wiped fully dry. Two part (or more) molds should be assembled. Molds should be stored on a level surface in a cool, dry environment.
Casting Material SMOOTH CAST-305 :
Introduction
The Smooth-Cast® 300 Series of liquid plastics are ultra-low viscosity casting resins that yield castings that are bright white and virtually bubble free. Vacuum degassing is not necessary. They offer the convenience of a 1A:1B by volume or 100A:90B by weight mix ratio. The differences between them are pot life and demold time.
These resins readily accept fillers (such as URE-FIL® 3 from Smooth-On) and can be colored with SO-Strong® or Ignite® color tints (Smooth-Cast® 325 series accepts pigments better than the Smooth Cast® 300 series). Fully cured castings are tough, durable, machinable and paintable. They resist moisture and mild solvents. Applications for Smooth-Cast® 300 Series Liquid Plastics include reproducing small to medium size sculptures, making prototype models, special effect props and decorative jewelry, for more deatils HERE.

Instructions :
Safety : Materials should be stored and used in a warm environment (73° F / 23° C). These products have a limited shelf life and should be used as soon as possible. All liquid urethanes are moisture sensitive and will absorb atmospheric moisture. Mixing tools and containers should be clean and made of metal, glass or plastic. Mixing should be done in a well-ventilated area. Wear safety glasses, long sleeves and rubber gloves to minimize contamination risk.
Applying A Release Agent : A release agent is necessary to facilitate demolding when casting into or over most surfaces. Use a release agent made specifically for mold making (Universal® Mold Release or Mann’s Ease Release® 200 available from Smooth-On or your Smooth-On distributor). A liberal coat of release agent should be applied onto all surfaces that will contact the plastic.
IMPORTANT: To ensure thorough coverage, apply release and brush with a soft brush over all surfaces. Follow with a light mist coating and let the release agent dry for 30 minutes. Smooth-On silicone rubber molds usually do not require a release agent unless casting silicone into the mold. Applying a release agent will prolong the life of the mold.
IMPORTANT: Shelf life of product is reduced after opening. Remaining product should be used as soon as possible. Immediately replacing the lids on both containers after dispensing product will help prolong the shelf life of the unused product. XTEND-IT® Dry Gas Blanket (available from Smooth-On) will significantly prolong the shelf life of unused liquid urethane products.
Measuring and Mixing : Liquid urethanes are moisture sensitive and will absorb atmospheric moisture. Mixing tools and containers should be clean and made of metal, glass or plastic. Materials should be stored and used in a warm environment (73°F/23°C).
Stir or shake both Part A & Part B thoroughly before dispensing: After dispensing equal amounts of Parts A and B into mixing container (100A:90B by weight) and mix thoroughly. Stir deliberately making sure that you scrape the sides and bottom of the mixing container several times. Be careful not to splash low viscosity material out of the container.
Pouring : Pour your mixture in a single spot at the lowest point of the containment field and let the mixture seek its level. This will help minimize air entrapment.
For Best Results : Best results are obtained using a pressure casting technique. After pouring the mixed compound, the entire casting assembly (mold, dam structure, etc.) is placed in a pressure chamber and subjected to 60 PSI (4.2 kg/cm2) air pressure for the full cure time of the material.
Curing Important: Use this product with at least room size ventilation or in proximity to a forced outlet air vent and do not inhale/breath fumes. Fumes, which may be visible with a significant mass concentration, will quickly dissipate with adequate ventilation. Castings with significant mass may be hot to the touch and irritate skin immediately following cure. Let casting cool to room temperature before handling.
Demold time of the finished casting depends on mass and mold configuration. Low mass or thin-walled castings will take longer to cure than castings with higher mass concentration. Smooth-Cast® 305 will cure in 30 - 40 minutes (Smooth-Cast® 300 in 7 -10 minutes and Smooth-Cast® 310 in 2 - 4 hours) depending on mass and mold configuration.
Post Cure : Castings will reach “full cure” faster and achieve maximum physical properties if post cured. Allow material to cure for recommended Cure Time at room temperature followed by 4 - 6 hours at 150°F/65°C. Allow casting to come to room temperature before handling.
Performance : Cured castings are rigid and durable. They resist moisture, moderate heat, solvents, dilute acids and can be machined, primed/ painted or bonded to other surfaces (any release agent must be removed). If machining cured material, wear dust mask or other apparatus to prevent inhalation of residual particles. Castings can be displayed outdoors after priming and painting. Unpainted castings will yellow over time - more quickly when exposed to ultra-violet light,for more details HERE.
Assignment:
design a mold around the stock and tooling that you'll be using,
mill it (rough cut + (at least) three-axis finish cut),and use it to cast parts then make and compare test casts with each of them
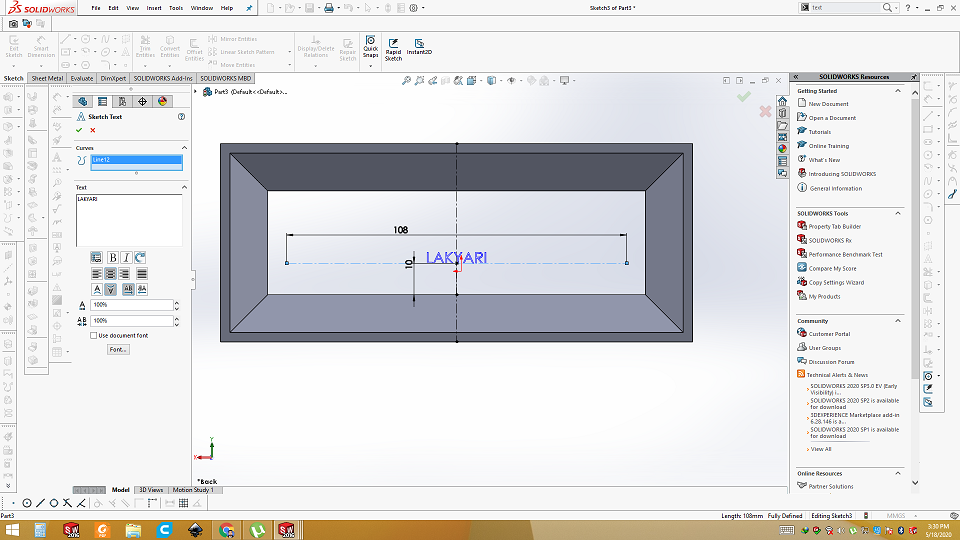
In this week i am planning to make mold for chain of my surname, in which i will cast both plastic and metal. I am making 3D design of the key chain, then process it and mill on the wex. After that then make flexible mold by pouring Mold Max 60 and then casting the original material.
3D desiging in Solid works
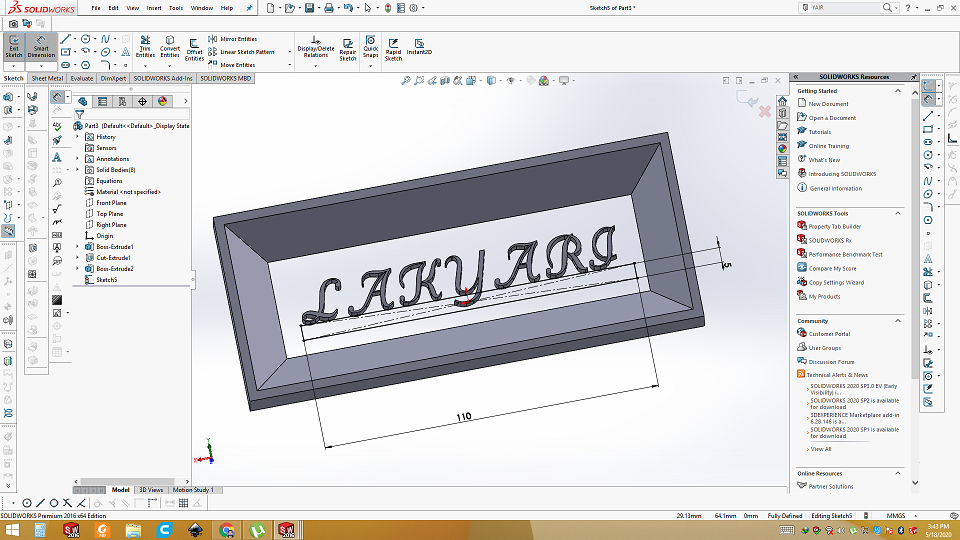
Start the designing in solid works. First of all make outer walls.
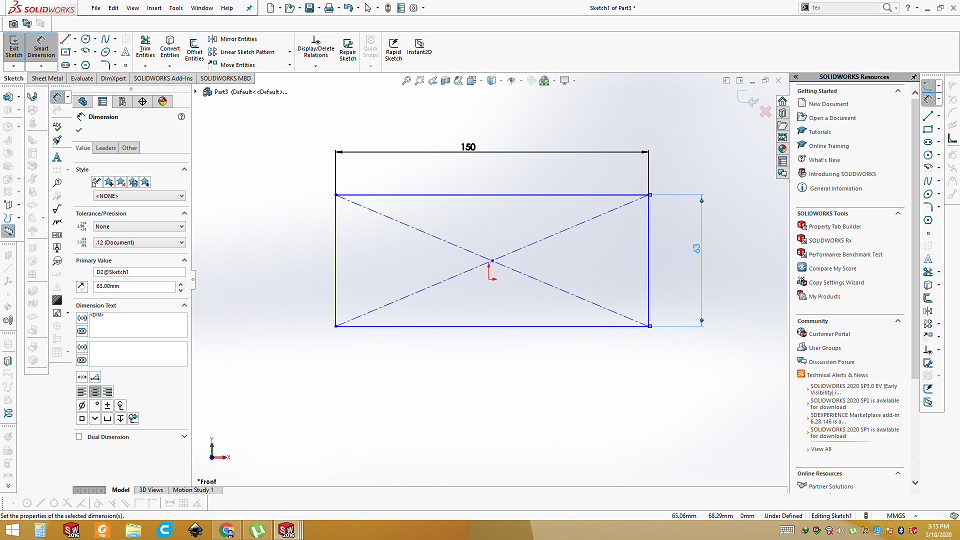
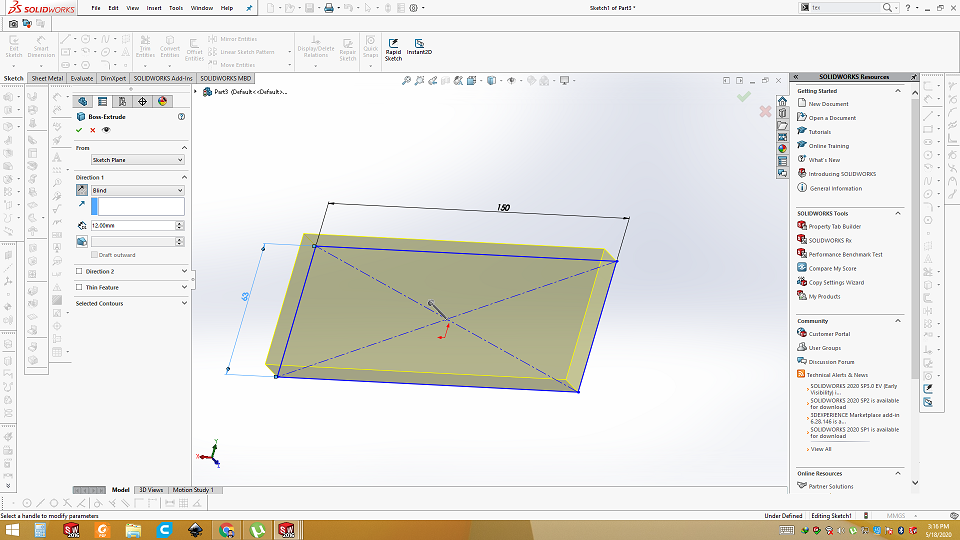
Box with wall inclinde inside with 45 degree

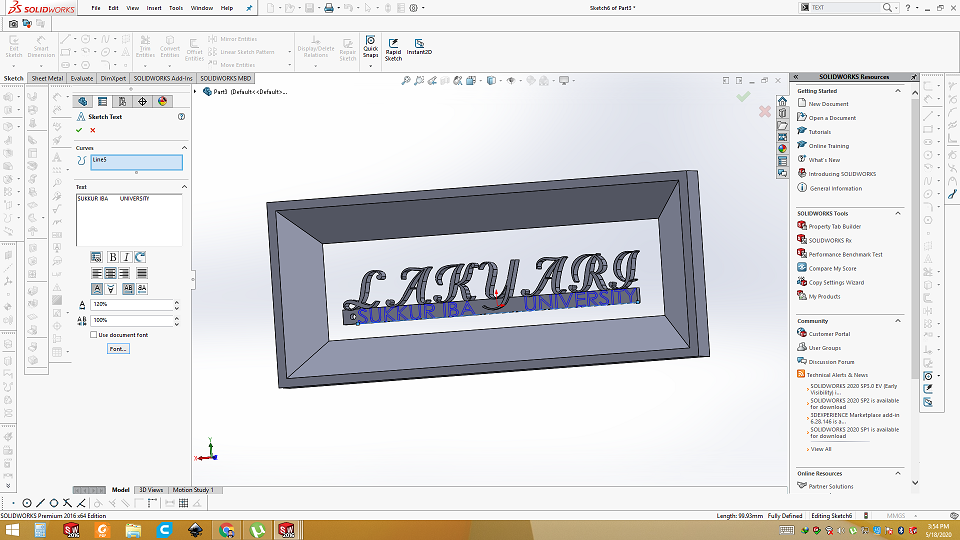
Sketch the name
Extrude the letters

Build the base plate
Extrude the base plat so it can connect with all the lettes
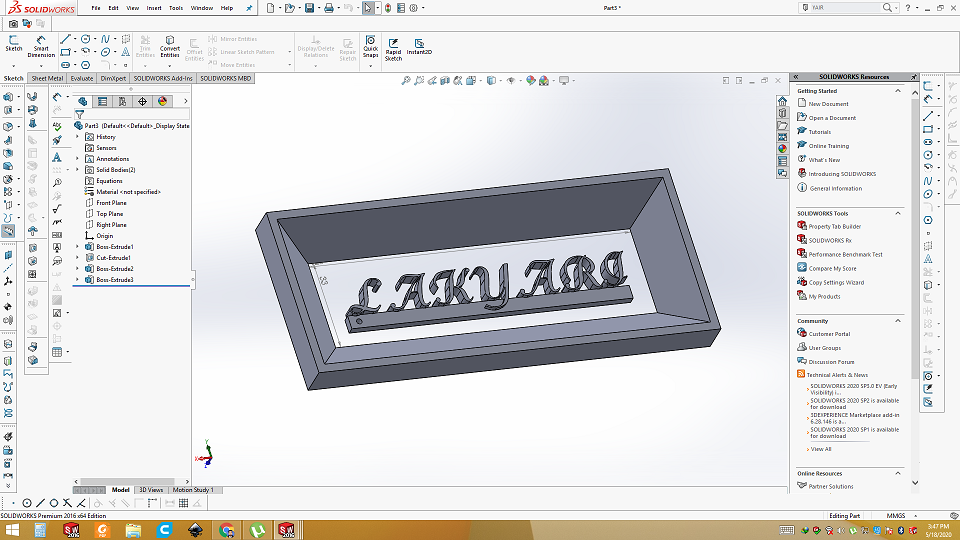
Extrude on base plat
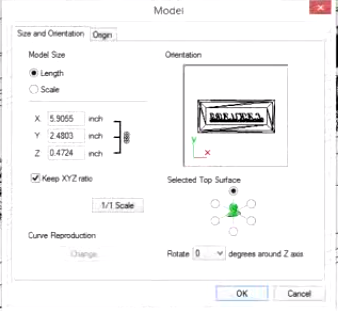
Now design is ready. Save it as .STL. Then open Modela player 4.
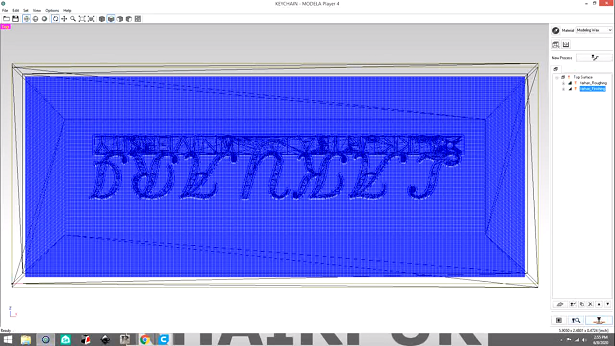
Generating .PRN file using Modela player 4
Solidwork design is saved in .stl formate. SRM 20 need .prn file for making 3D mold. Modela player 4 is used to make .prn file from .stl file. Video.
Difference between roughing and finishing in machining
A roughing operation is used to remove large amounts of material rapidly and to produce a part geometry close to the desired shape. A finishing operation follows roughing and is used to achieve the final geometry and surface finish. So using modela first we generate roughing tool path then we generate finishing tool path. In the same order, we gave those file to machine for miling.
Following steps will help you in using Modela player 4 to make .prn file from stl.
- Open .stl file in Modela Player 4
- Select the machine that you have in your Lab
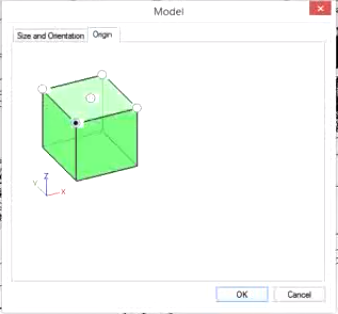
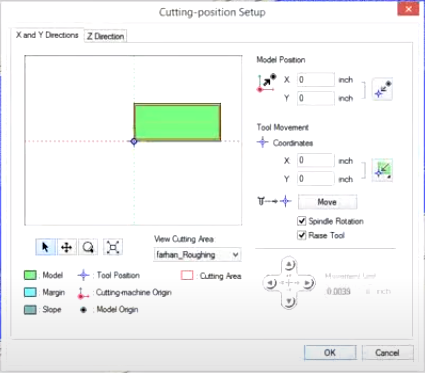
- Set the Origin
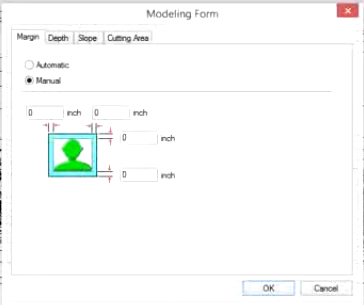
- Set the margin from boundary walls by selecting Manualoption
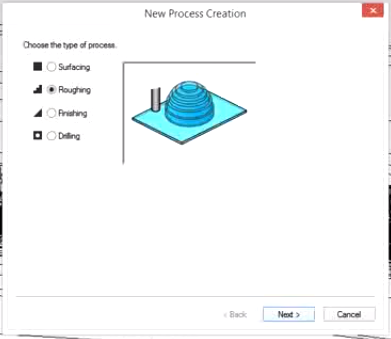
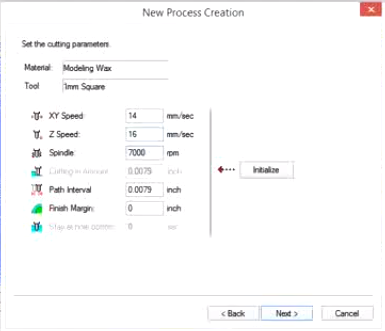
- Start a new process, named Roughing
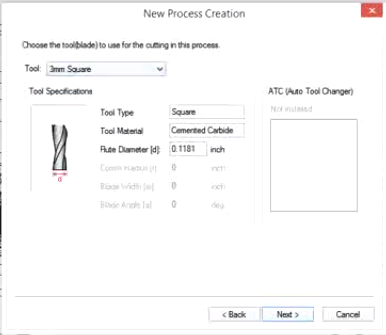
- Select the tool width, 3mm(for roughing)
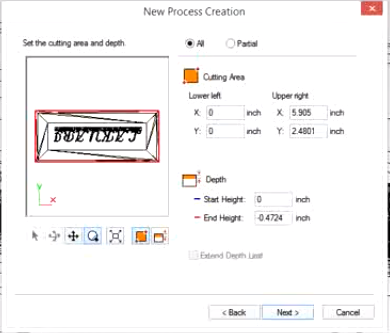
- Set the cutting area by choosing the "Partial" option
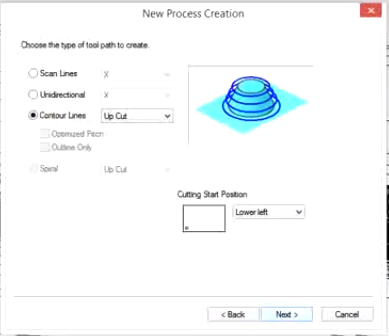
- Set the "Contour Lines" to Up Cut
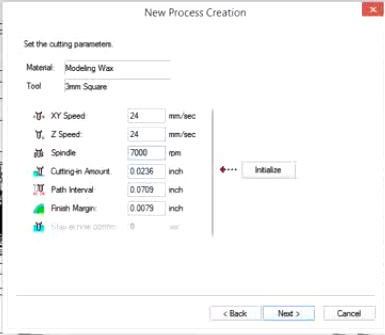
- Set the "XY Speed" to 24mm/sec
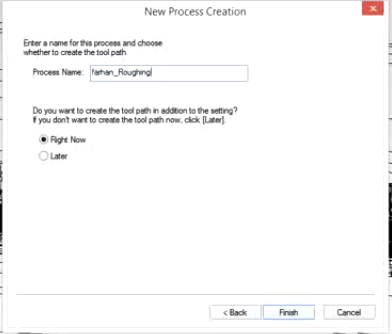
- Rename the process accordingly and press the Finish button
- Once completed, you can view the toolpath as well by clicking on the button at bottom right
- Similiarly add another process for Finishing. But change the tool size to 1mm, Scan lines to X+Y and XY speed to 14mm/sec
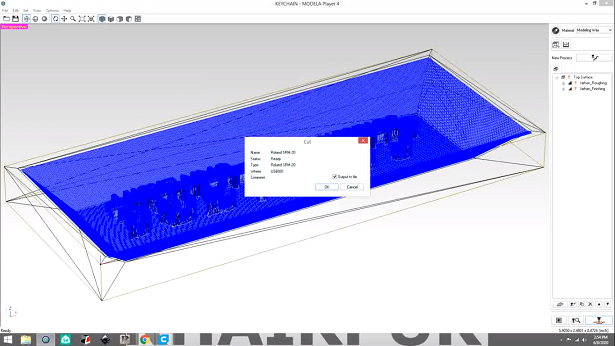
- Finally press the "Cut" button, now here you may either give the file directly to machine or you can save them as .prn files for later use.
Open the Modela
Open .stl file in Modela Player 4. Select the machine that you have in your Lab. I choose SRM20. Click on Set and choose model. New window will pop up. Click on orign and Set the orign.
Open modeling form
Set the margin from boundary walls by selecting Manualoption
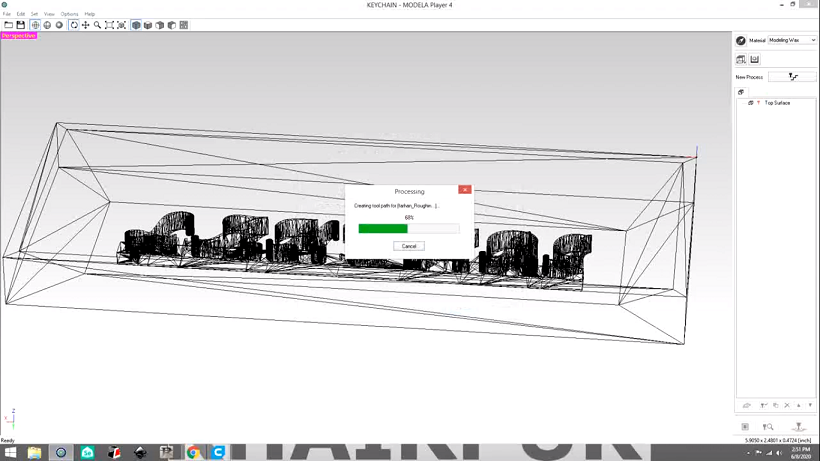
Roughing
Go to set and click on new process. There are two tool paths. One is roughing and second is finishing. We start with Roughing. Select the roughing type. Select the tool width 3mm for roughing. Set the cutting area by choosing the "Partial" option. Set the "Contour Lines" to Up Cut. Set the "XY Speed" to 24mm/sec. Name the process and press the finish button.

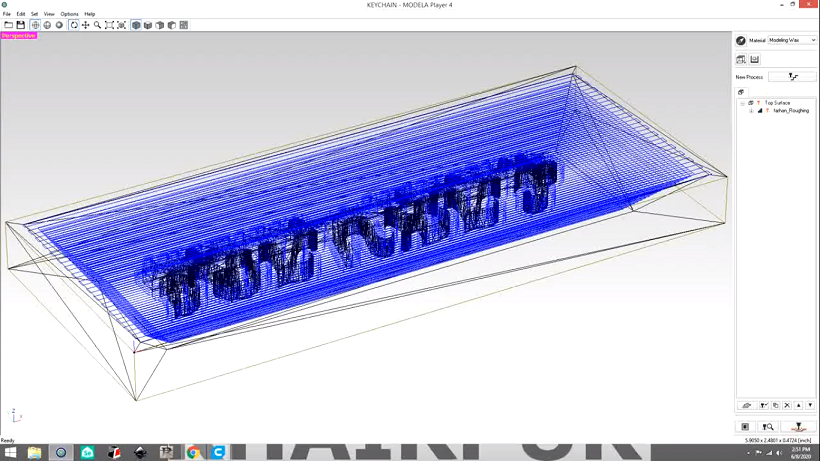
Tool path of Roughing
you can view the toolpath by clicking on the button at bottom right
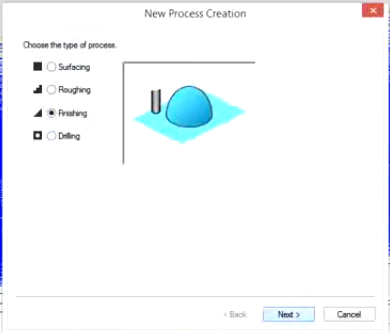
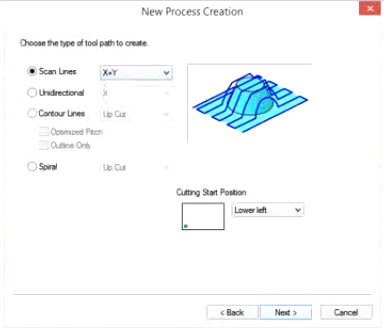
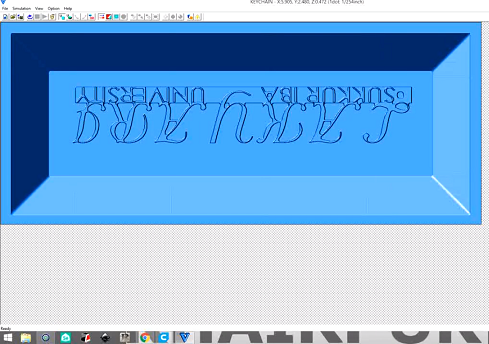
Finishing
After roughing, create tool path for finishing. Repeat the same steps. Only change the tool size to 1mm, scan lines to X+Y and XY speed to 14mm/sec.


Save it/directly run to machine
Finally press the "Cut" button, now here you may either give the file directly to machine or you can save them as .prn files for later use.
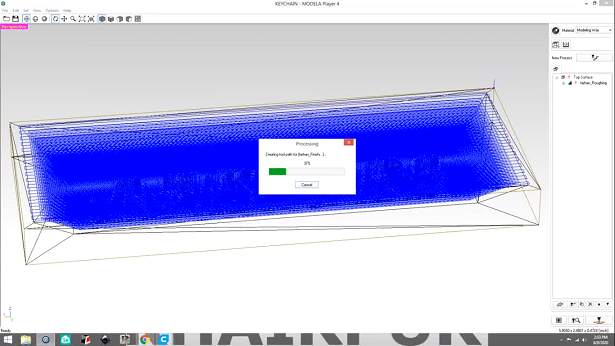
Simulation results
you can view the toolpath and simulation by clicking on the button at bottom right
Step by step video of above steps
You can also get help from the video embedded below.
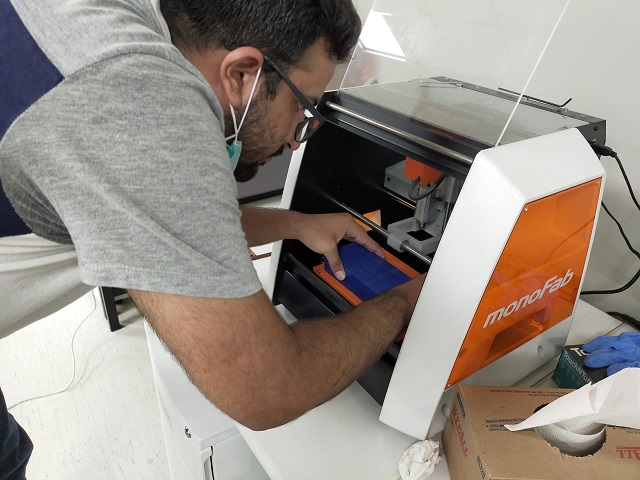
Milling the mold
After generating .prn files of rough and finishing, place the mold brick into SRM 20. Set the X,Y and Z axis. Then first give the rough.prn file.
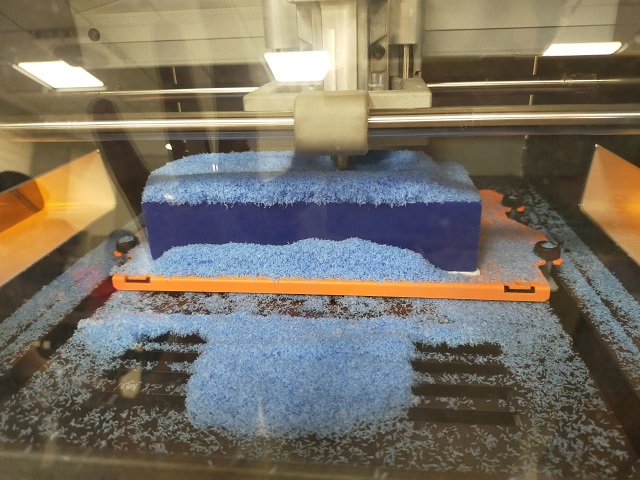
Result After roughing
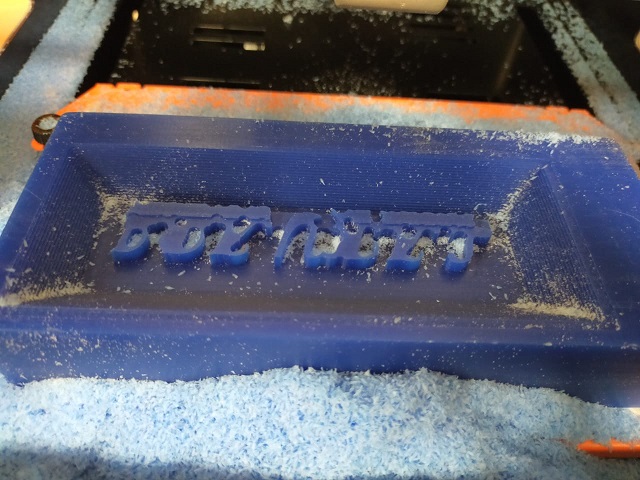
After roughing, give the SRM 20 the finishing.prn file.
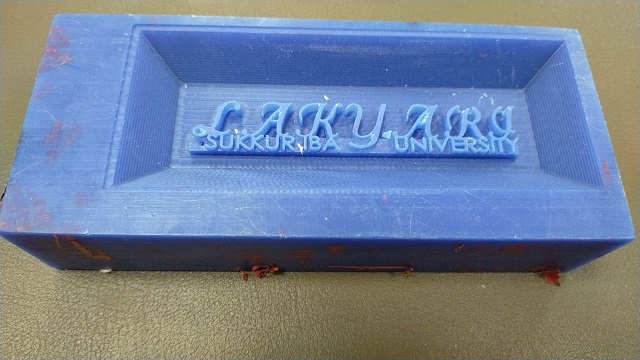
Result After Finishing
Measuring the material for mold
To know the exact amount of material needed to make mold we first put water in the hard mold and measure the water that come in the mold. By doing this we get to know the idea of total material that is needed to make flexible mold. Always make 20-30% extra material of water weight or you can refer to datasheet of material for gravity density for exact measurement of water to that material.
Making flexible negative mold
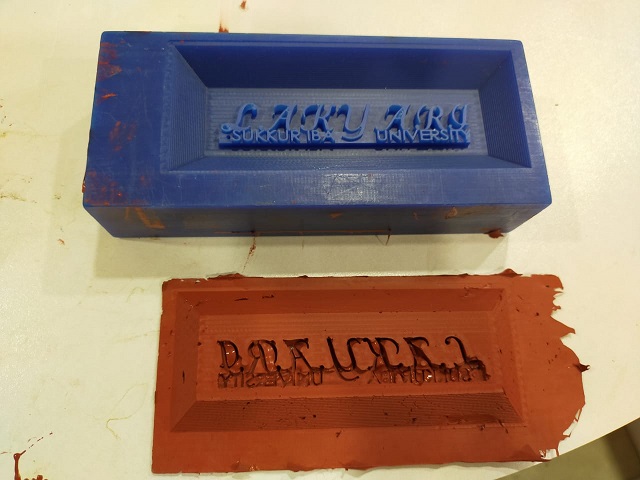
After making hard positive mold, we need to make negative flexible mold. I choose to make flexible mold with MOLD MAX 60. It is high heat resistant. It can be used for metal casting as well as for other materials too. My idea is to make one mold and cast two different material(metal and plastic). For Mold max 60 ratio of A and B part is 100:3 ratio. First Mix part and then pour into glass and mearsure it. Then put part B with 100:3 ratio. Stir it for around 5-6 mints. Then pour into the Hard mold. According to datasheet of Mold max 60, it take around 24 hours to become solid. I left it for complete day. On next day i take it out gently. Got the good result.
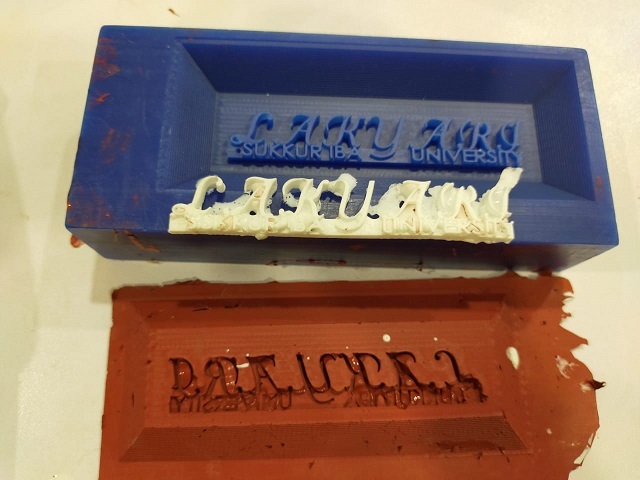
hard and soft mold
Metal Casting
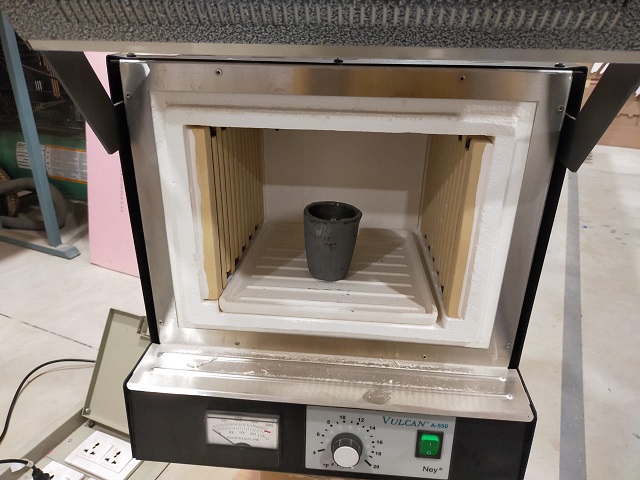
After making mold, it is time to cast the metal. The material we are using for metal casting is Bismuth. It has low melting point(271.4 C). First we need to heat the material using furnace.
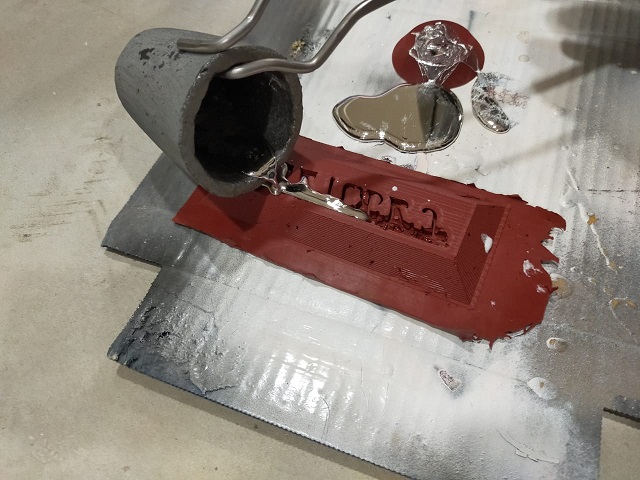
Pour into flexible mold
Carefully take out the material from furnace and cast into flexible mold.
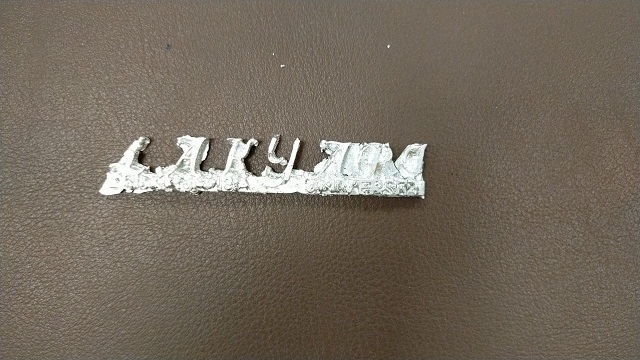
Final result of Metal casting
plastic casting
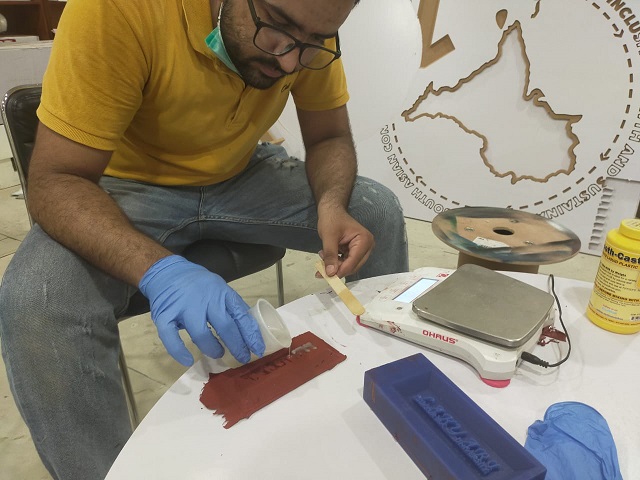
For plastic casting I am using Smooth-cast 350. The ratio of Part A and B is 1:1. Measure the material and mix both material for 1 mint.
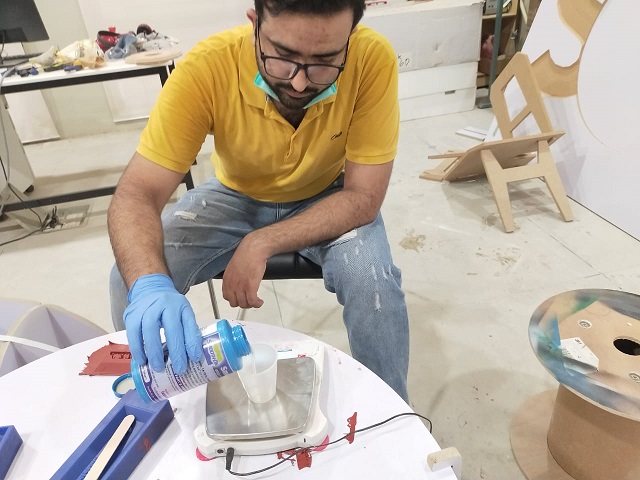
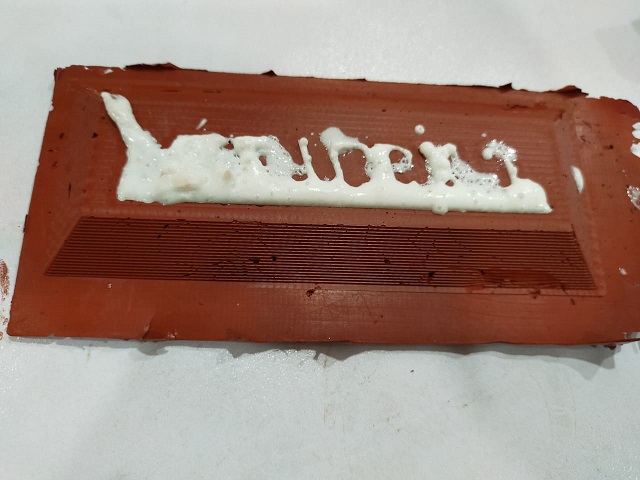
Pour into mold
Carefully pour it into the flexible mold wait for 10-12 mints to get solid.
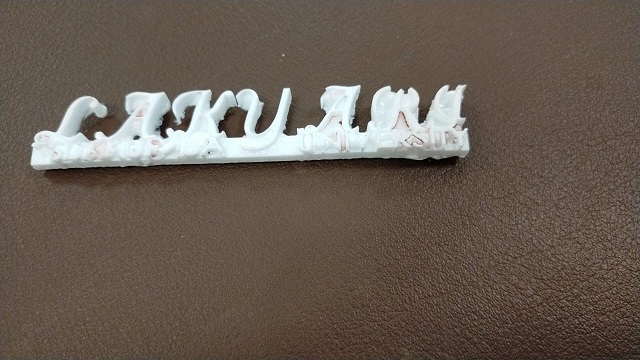
Final result
Carefully take out the plastic from mold.
Hard mold(Positive mold)>> Soft mold(Negative Mold) >> Final Cast
Download all files from here

This work is licensed under a Creative Commons Attribution-NonCommercial-ShareAlike 4.0 International License.