The control of my Braille printer is done using Gcode instruction sequences. GRBL is a practical tool that allows to interpret the Gcode and to drive a Braille printer very simply.
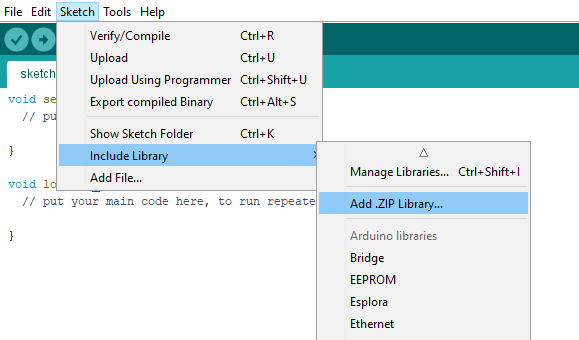
To do this, I downloaded the latest .zip version of GRBL from github and unpacked the grbl-master folder. and I included GRBL in the Arduino libraries as well as mounting this figure.
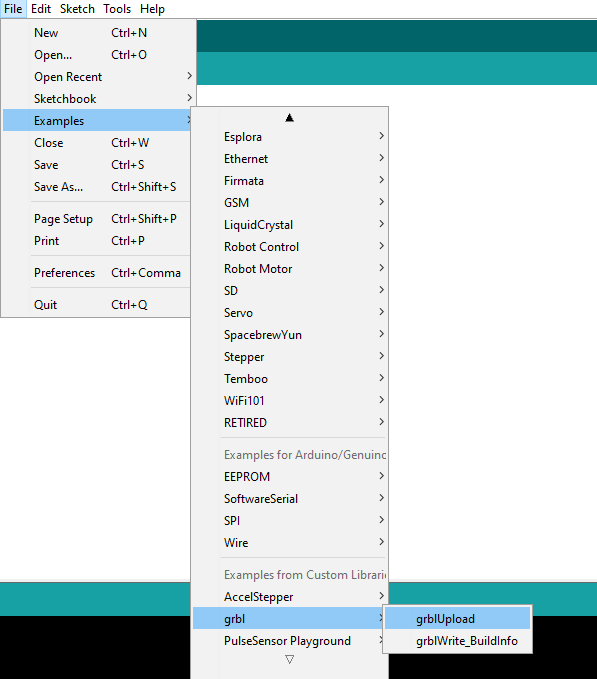
Then I implemented GRBL on my board as shown in the figure below.
Then the arduino ide serial monitor. At the first time I didn't see the mrssage that indicate that the grbl is successufly uploaded but after I noticed that I didn't change the baudrate to 115200.Then I need to adapt grbl to my machine. So I type "$$" and a list of commands should appear as shown here .
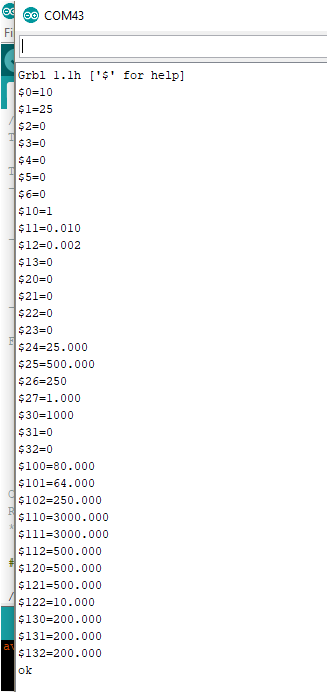
The most important part to change is the steps/mm. Steps/mm needs to be calculated and the easiest way of doing it is by using prusas reprap calulator.
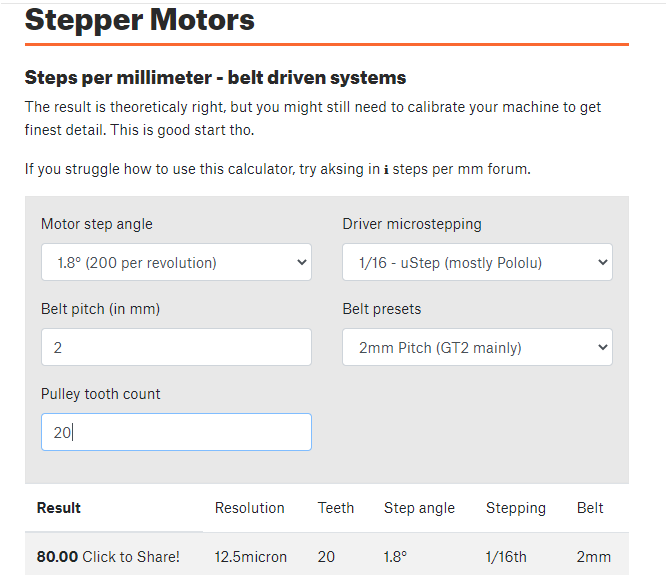
$100, $101: the number of steps per mm for the x and y axes.
$110, $111 and $120, $121 : define respectively the speed in mm/min and the acceleration in mm/sec².
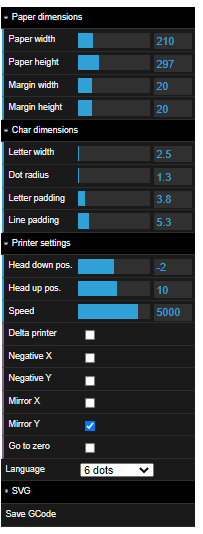
To generate the Gcode for the machine ,I use the Braille Rap UI on GitHub that is a dedicated webpage enables to compute the required gcode to move the pen holder to emboss the input text. I set up the parameters as shown in the figure below:
The concept of Braille printing is that you print mirror impressions of Braille characters from right to left, so that after printing, you can read the words in Braille embossed from left to right on the backside of the paper.
Type the text you wish to print in Braille in the text box. I printed ‘hello world’. You will see its corresponding braille script below the text box. Select the ‘Save the gcode’ option and save the file at a desired location.
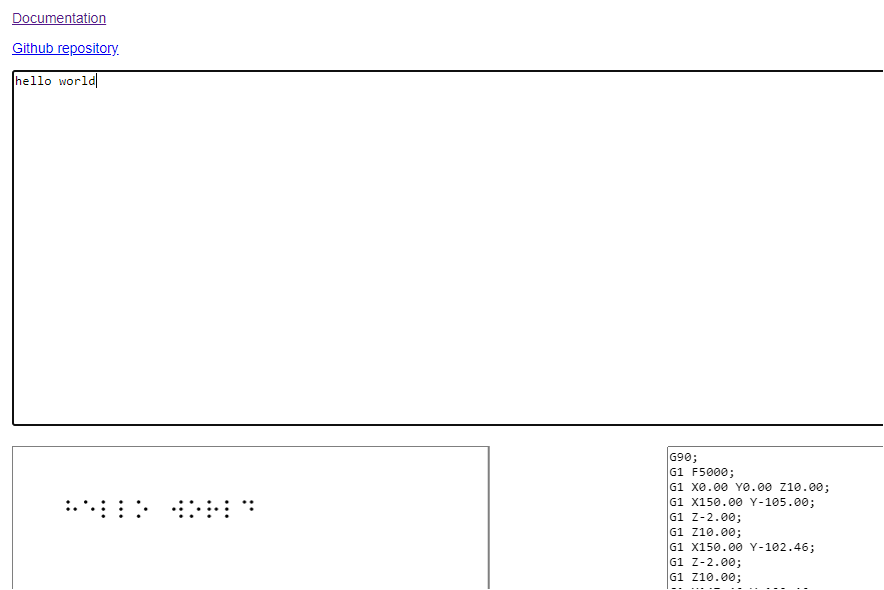
After generating the g code it's time to modify it since it is configured for a machine with spindel, to do this I changed the Z10.00 to M8 G1 G4 P0.4 and Z-2.00 to M9 So that the solenoid can make a hole remaining 0.4 second and then return to its initial state.
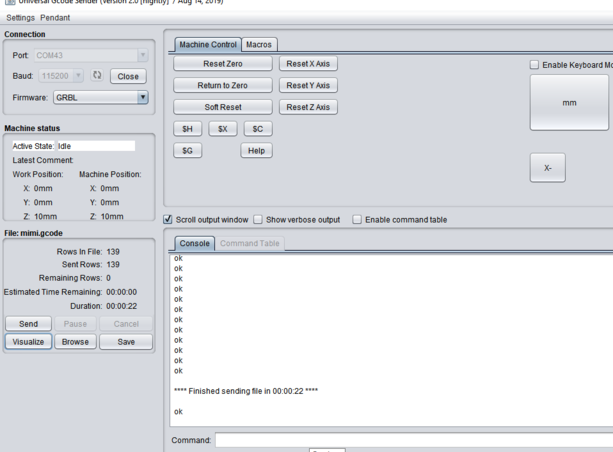
After doing these steps the gcode is ready. There are many software to send G code to my machine like Universal GCode Sender, bCNC, Chilipeppr etc.. Universal GCode Sender is one of the easiest to handle, so this is the one I chose for this task.You can download it here. Iunziped the folder and ran the .jar file to launch the program (note that you must have Java installed on your computer to run a .jar file).
At this level we can start the tests, just write the port used by my card, set the baudrate to 115200 and set the Gcode.