3D scanning and printing
Group assignment:
- Test the design rules for your printer(s)
- Document your work and explain what are the limits of your printer(s) (in a group or individually)
Individual Assignment:
- Design and 3D print an object (small, few cm3, limited by printer time) that could not be easily made subtractively
- 3D scan an object, try to prepare it for printing (and optionally print it)
Group assignment.
Individual assignment:
The objective.
Design an object that can only be manufactured using additive manufacturing
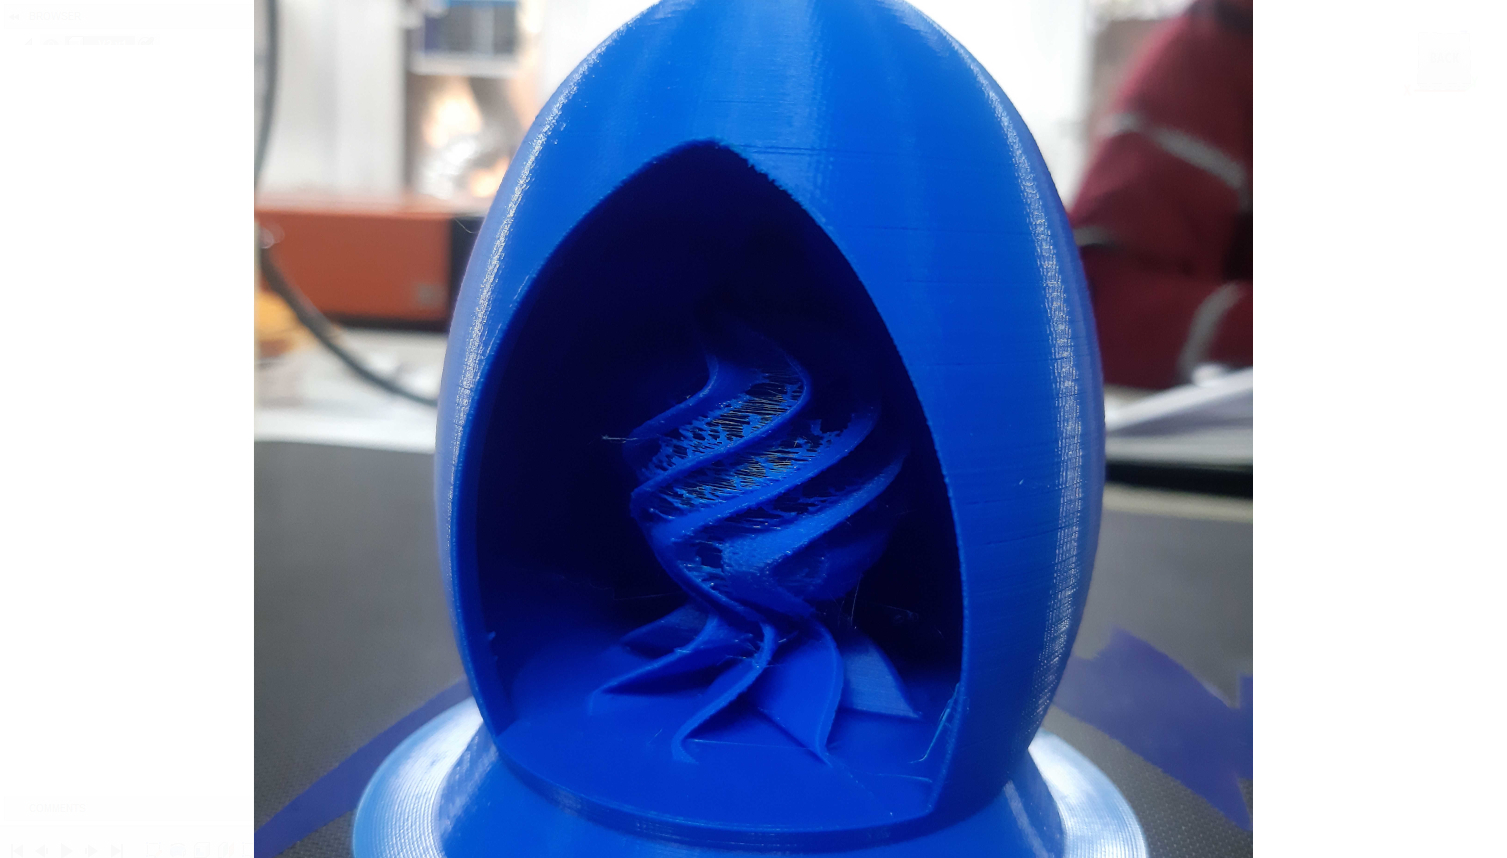
So at first, I started with sketching an idea in my notebook, I started to think about the object I was going to draw, then I saw an old Christmas tree on the way home.
So I said to myself why not. Christmas tree will be a great idea for the cad design.
I started to sketch.
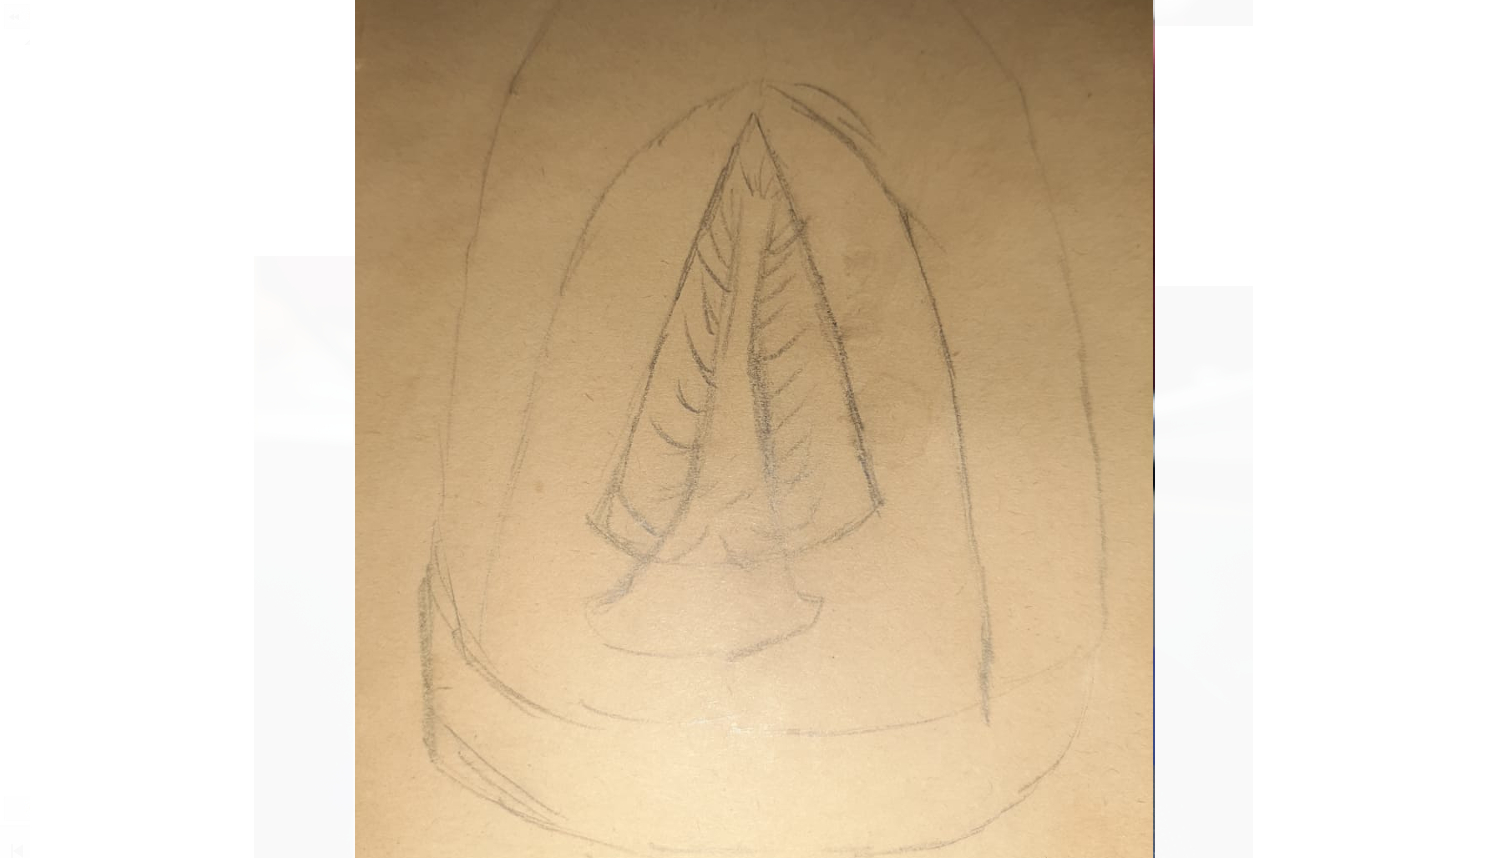
And that was the idea I started with.
Note
I draw this pic on my way home so be merciful.
So now it’s time to implement in fusion 360.
First the main body.
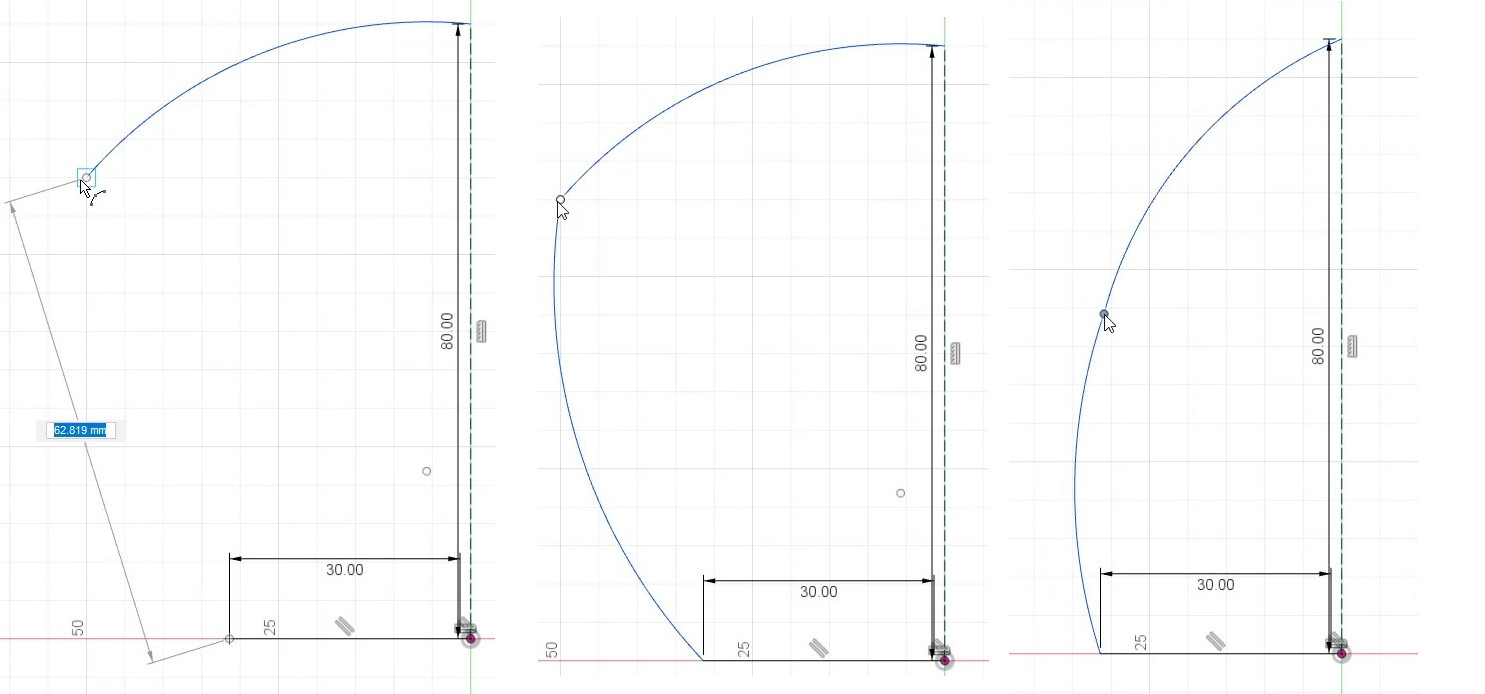
Note
when you use “arc” you can simply modify the line by dragging the main arc points.
- last step now is to “FINISH SKETCH”.
- now I will use “Revolve” basically, you use this tool to revolve any 2d sketch around an axis which gives you the ability to create complex shapes.

Note
make sure that the main lines in your sketch are solid rather than construction lines or your plane won’t “Revolve” the way you want.
- the next tool I will use is “Shell” to make any Body hollow.
So I make the “shell” thickness 8 mm and after that, I change it to 3 mm.
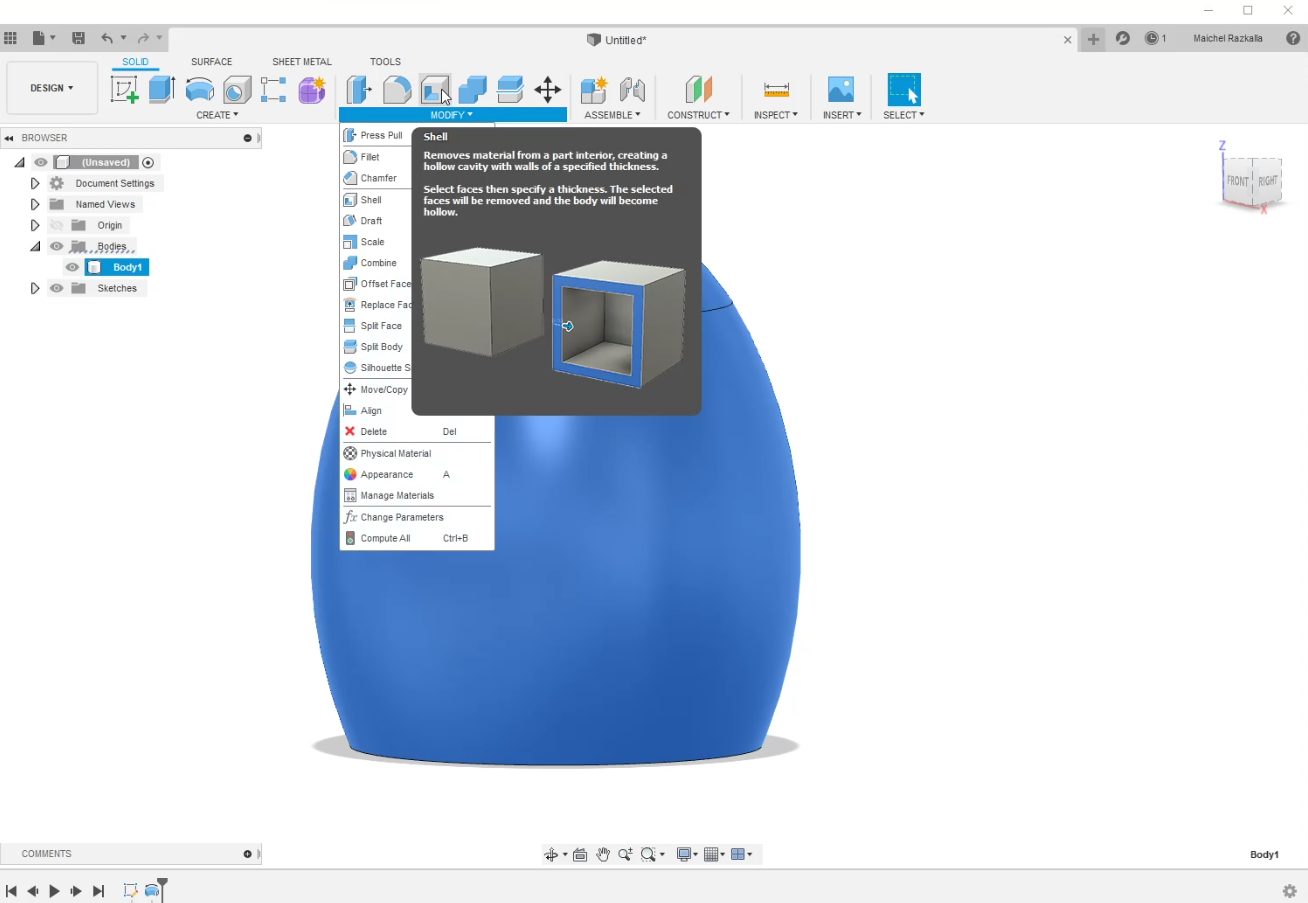
Note
You can change anything in your design using “Fusion History Capture”
- next tool I will use it will be “Offset Plane” use it when you try to make Sketch in specific places at the body.
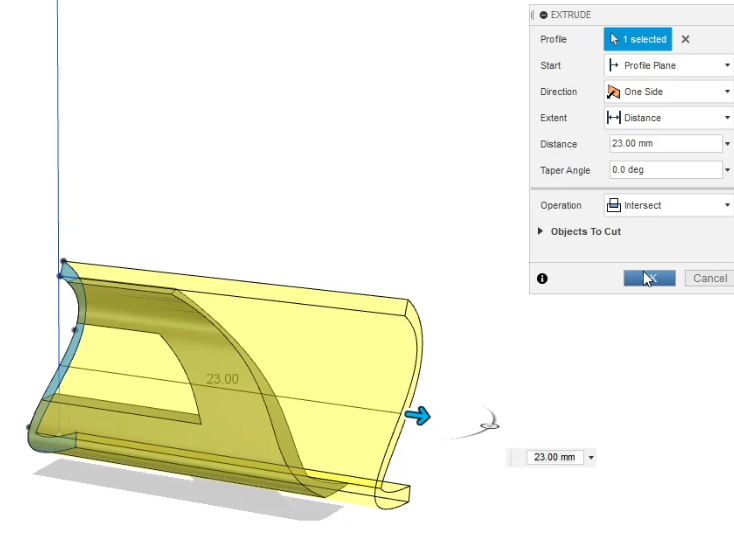
- next step is to use “Extrude” you can use this tool not just to add to your body you can cut and more, as you can see I have extruded To make a base for the shell/housing before I cut a hole at the front body.
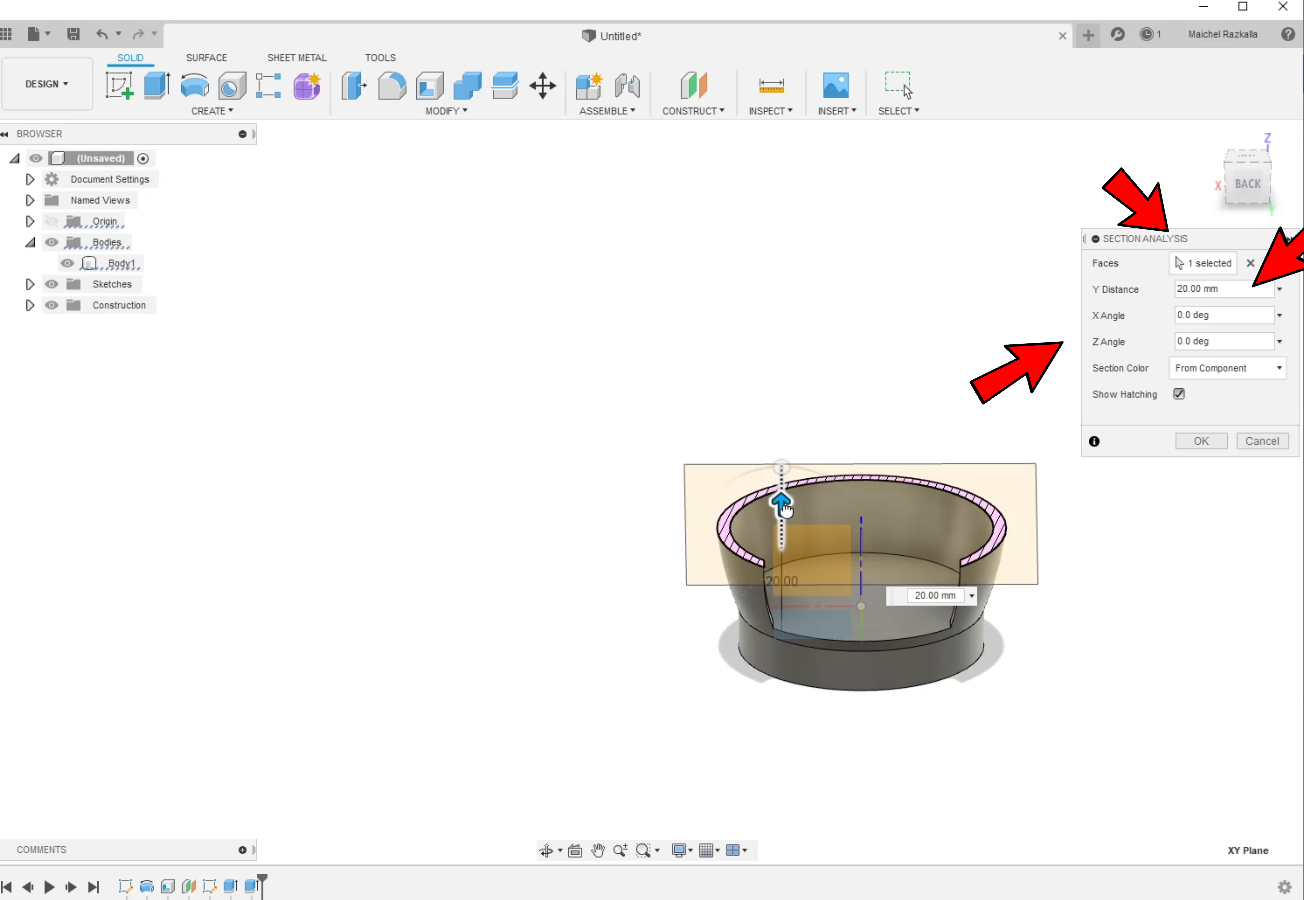
- so now I have to draw the tree inside the main body, but I need to hide a big part of the design so I can draw with freedom of movement, so I will use “Section Analysis”
The main body

First, you need to select the face you want to make “Section Analysis” on it, now you need to change the “Y Distance” and if you want to make “Section Analysis” with angle you can change “X angle” and “Y angle” but in my case, I don't need it.
My failures.
So the next section will be my failures to draw the tree, I will explain the tools I have used and why that was a failure.
in the beginning, I start with try to use "Coil" tool to create like a round tube centralized at the top like Christmas tree but it didn't work like I was planning to.
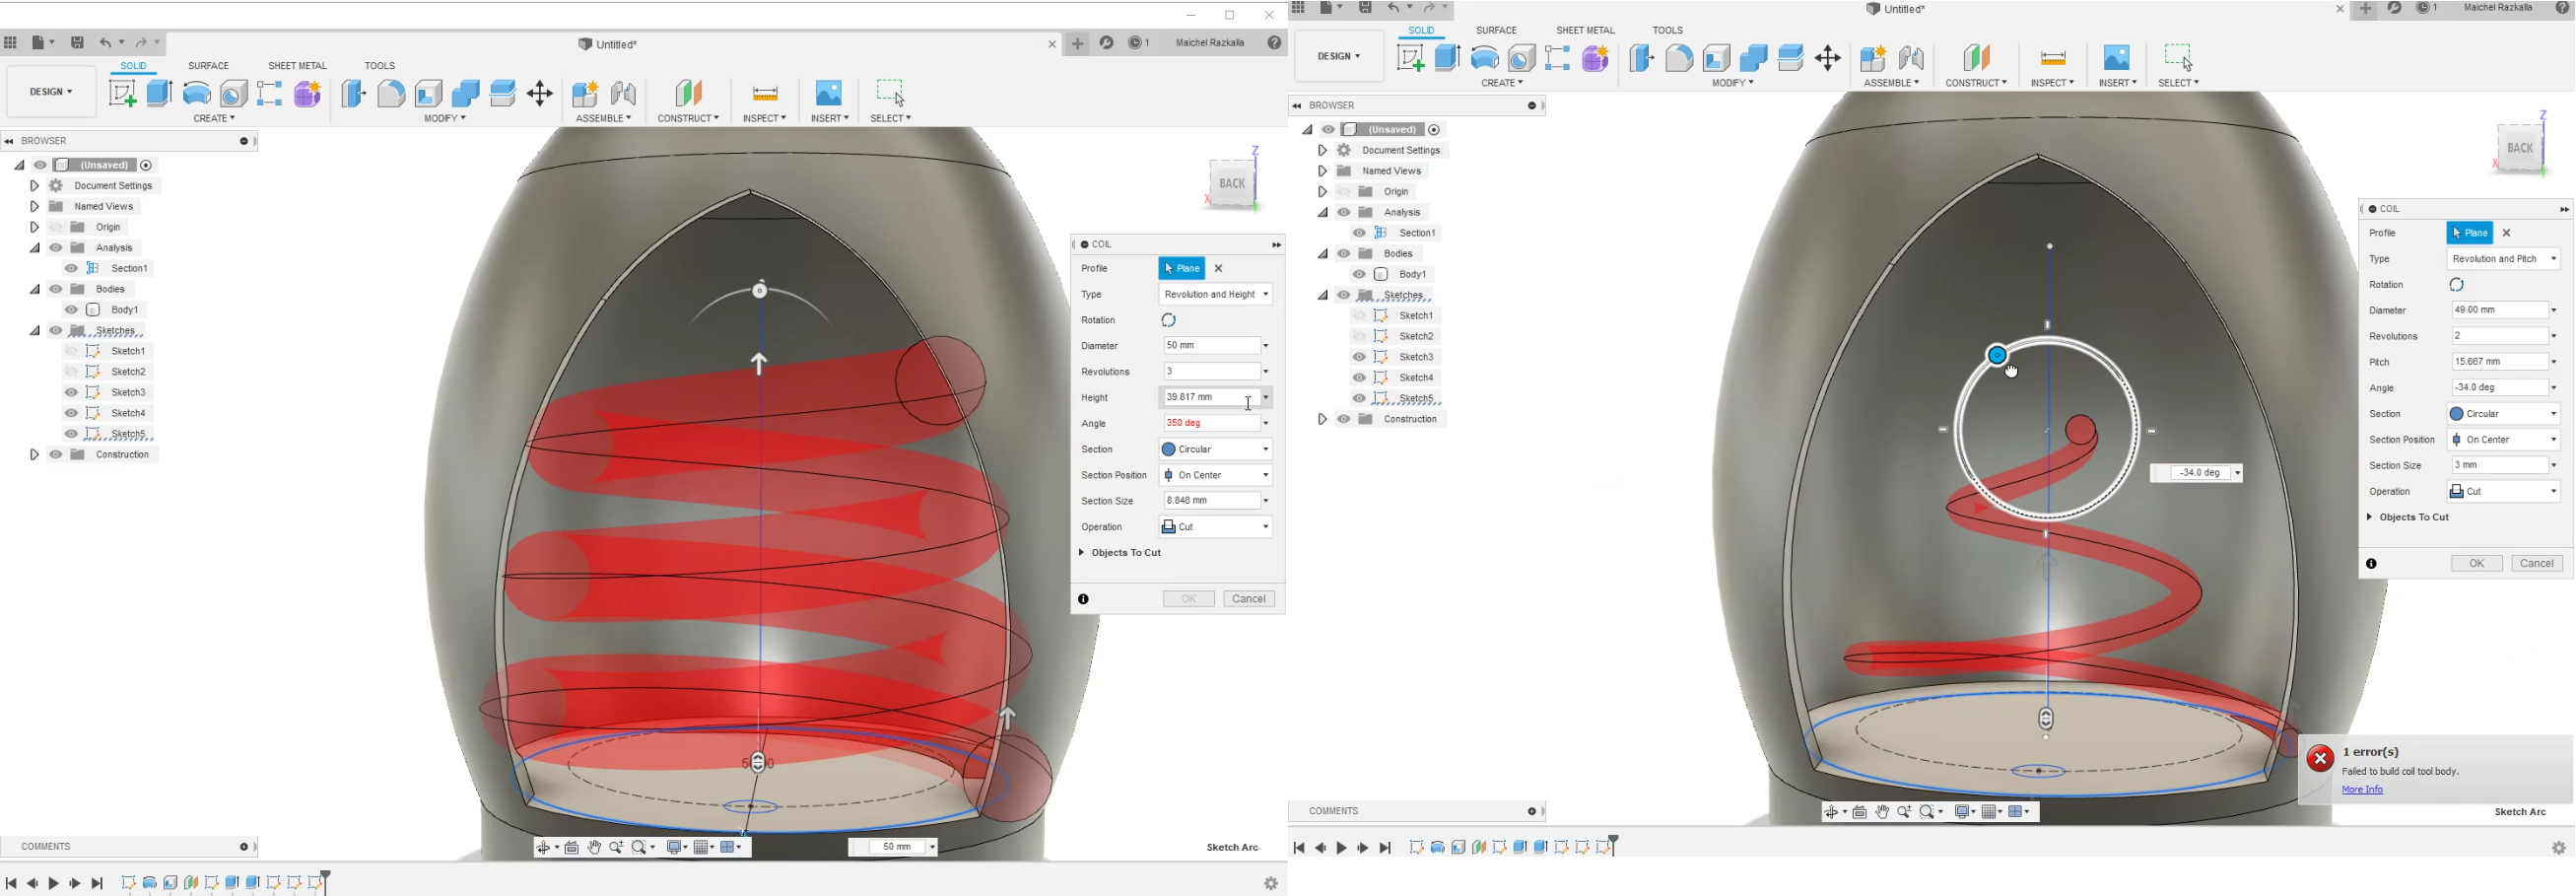
Maybe I work if I add more “revolutions” to the coil, but I didn't like how It will look like at the end.
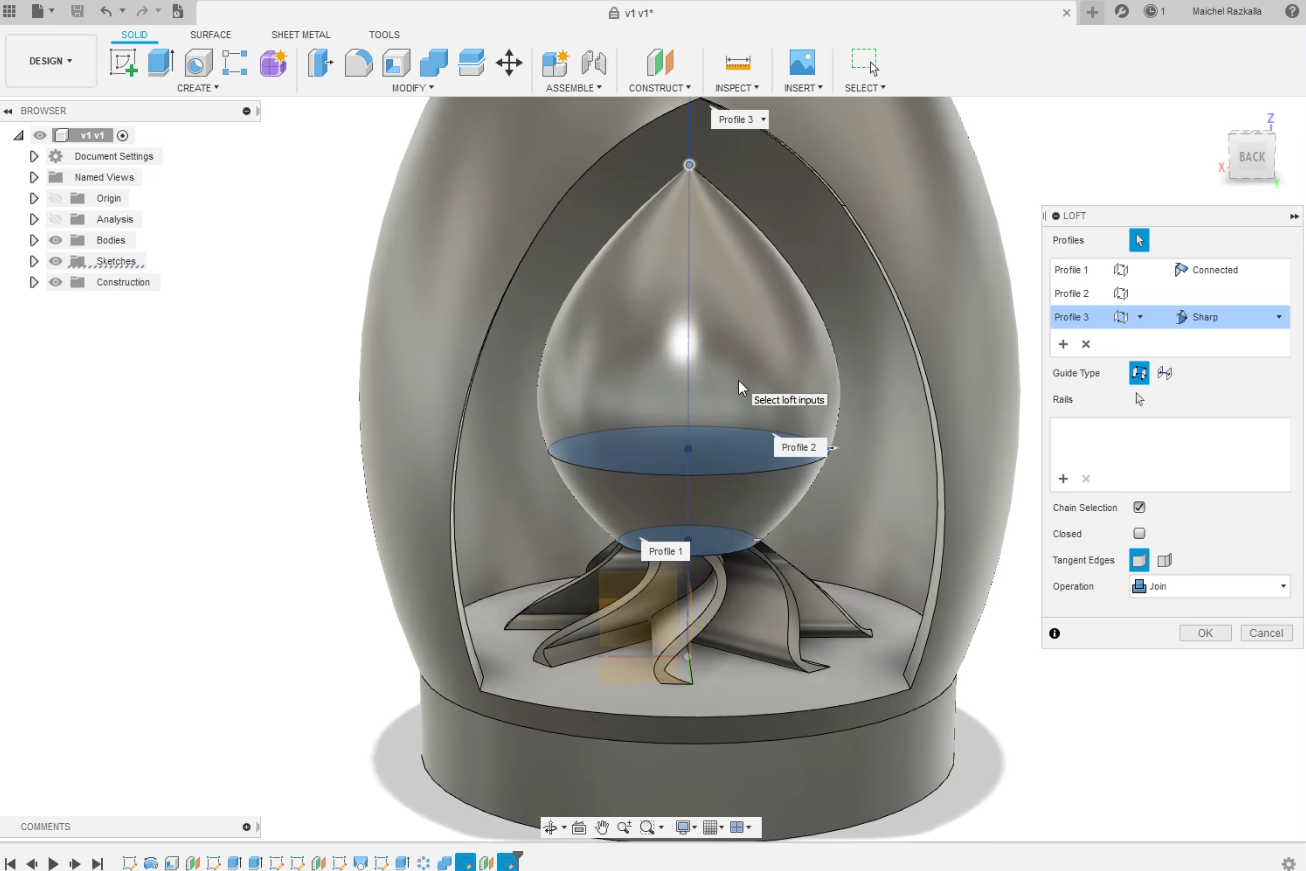
- next I use “Loft” tool so you can use it to connect with two sketches or more as you can see.
Christmas tree base.
So now I need to try another way to complete my design, I started with creating sketch at the bottom of the body and make “offset plane” and draw another circle
- next I use “Loft” tool so you can use it to connect with two sketches or more as you can see.

- next I created a new “sketch” and use “arc” tool to make some curves.
- I used “Offset” tool to create another line.
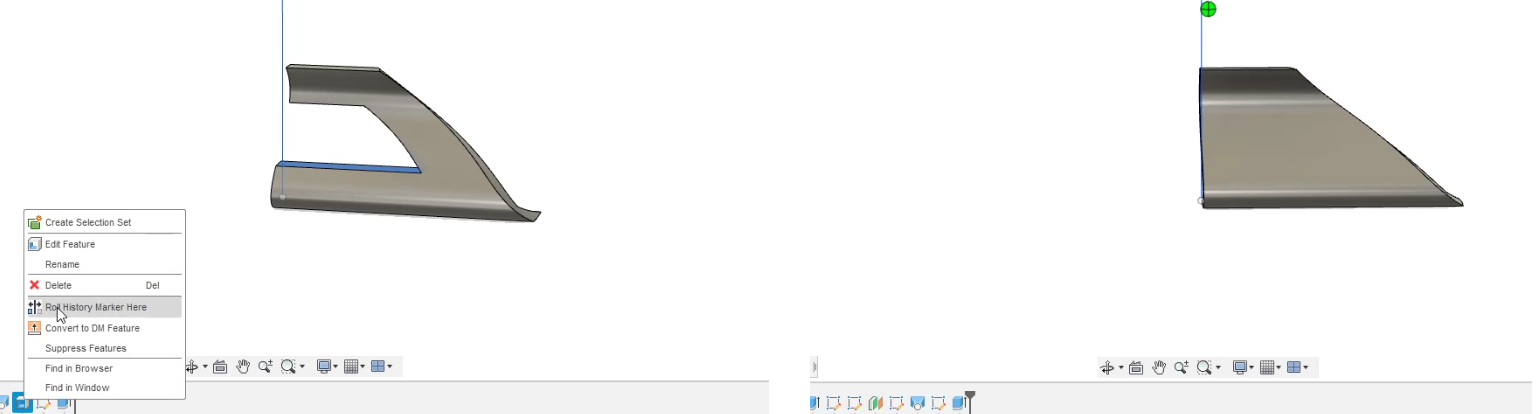
it will remove every except the Extruded part.
So I realized that the shell made the part look weird so I deleted the shell from the timeline.
- now I will use the “circular pattern” to create a pattern with the same body.
- now I need to use “Combine” tool to merge all the body I have created at the last step.

So now we have finished the tree base.
It’s time to create the top part of the tree.
- so of course after creating new sketch I draw a simple rectangle and make the tree shape and used the “Revolve” tool to make body from the sketch.
Christmas tree top part.
- so now I will try to make the tree like the tree base, so I started with creating multiple sketched every one with different circle sizes
so when I use “loft” tool it will give me shape like a tree. - now I will make the same steps as I did with the tree base, I will draw an “arc” and use the “Offset” same as before.
so after a lot to tweeks that's the final shape
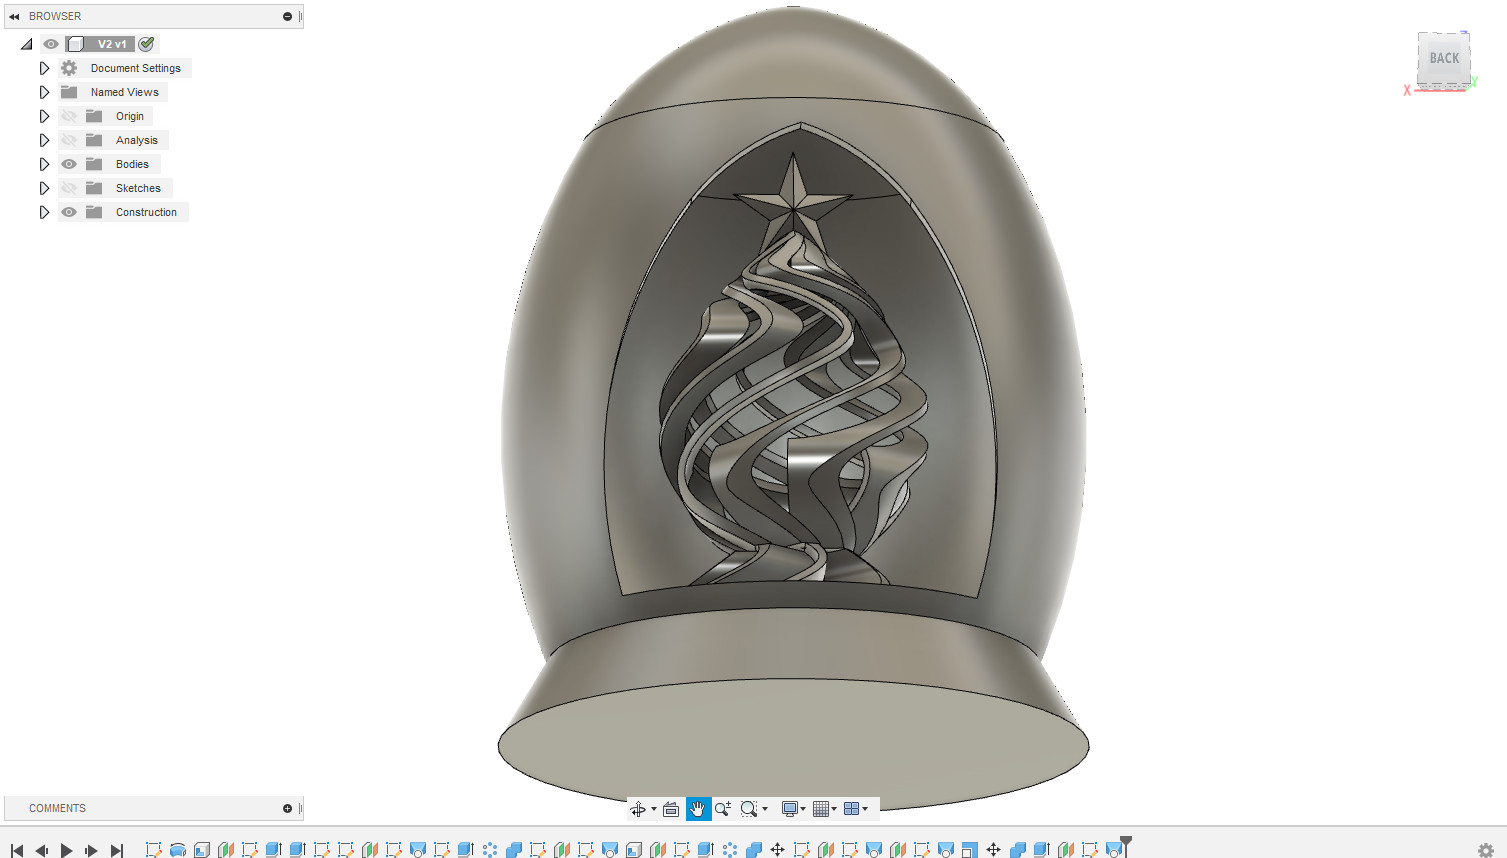
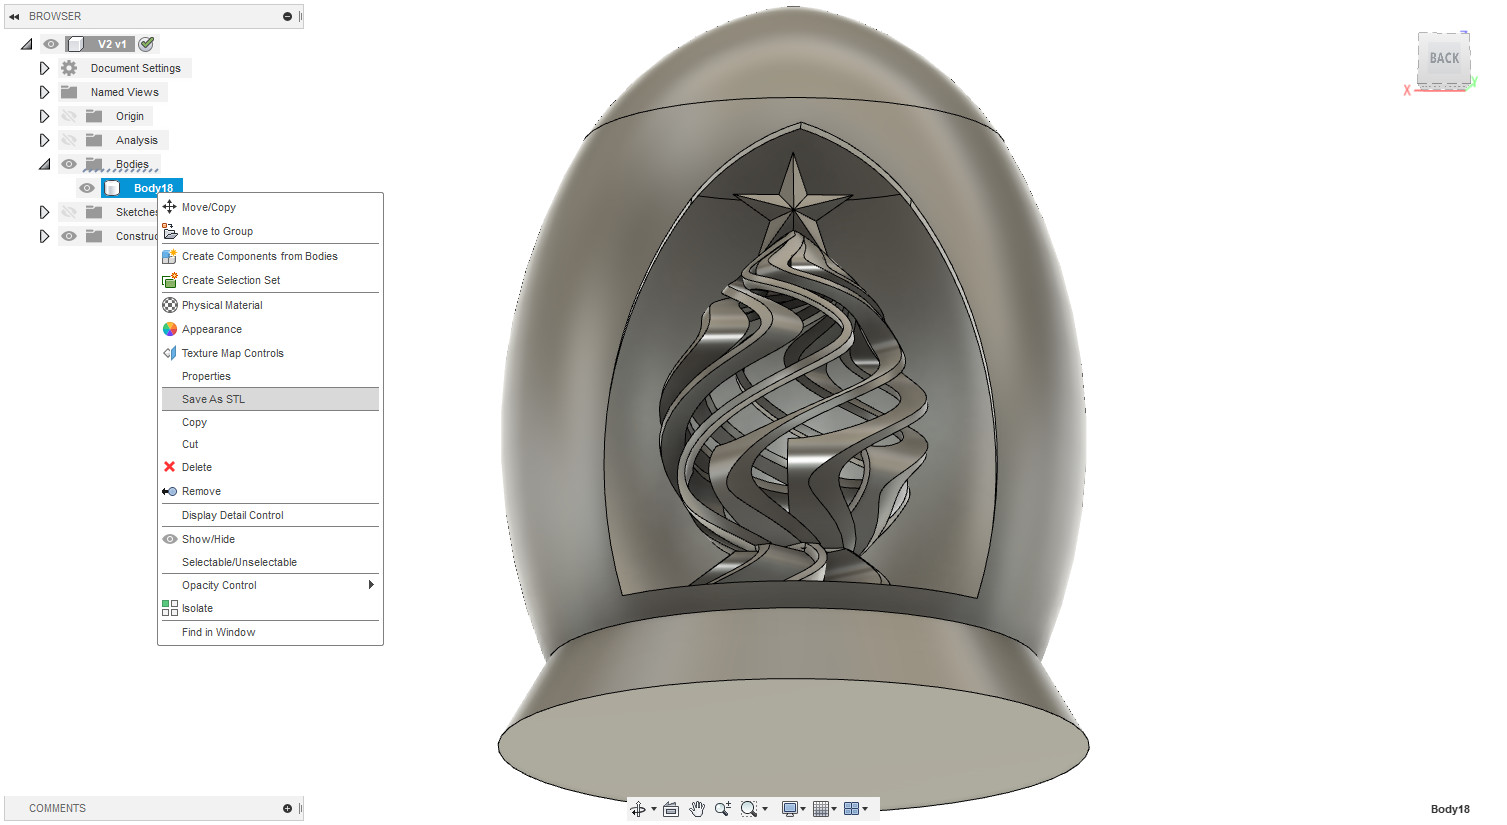
The last step is to export the STL file so we can print it, Now we are ready for 3D Printing.
why my part needs additive manufacturing?
first, before answering this quatchen I need to explain first what is the deficit between the "Additive manufacturing" & "Subtractive Manufacturing".
Additive manufacturing operates by adding layers of material together to make an object. Traditional manufacturing methods, by contrast, are subtractive in nature. Subtractive manufacturing involves removing parts of a block of material in order to create the desired shape. so now why my part manufactured by additive manufacturing because in my case if I will use Subtractive manufacturing I will need a high quality 4 axes machine and the cost will be very hight and I will not get all the details that additive manufacturing would provide.
3D Printing.
So when I designed this part one of my categories is to complex enough so I can see the capability of the 3d printer, I will use "CURA" as a 3D slicer so I can convert the STL to G-code the 3d printer can understand.
What I know is I will use Prusa I3 mk2 so first I need to set the machine configuration, now to set the printer configuration from Settings > Printer > Add printer ...
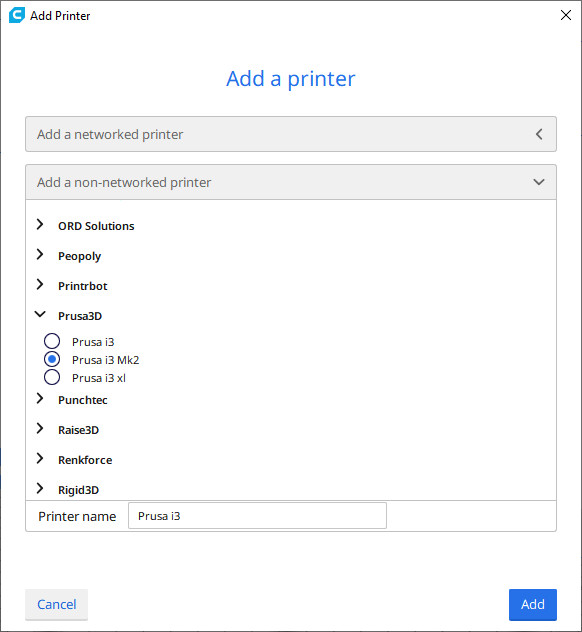
Now to select Prusa i3 MK2 from the options, now we are ready to slice the 3D model .
So first I will print the printer without support to test the 3d printer limitations, next layer hight I set it to 0.2 mm to be fast last the infill I make the infill a little bet high 60% because the layer thickness was too small, now to set the printing filament temperature and I set it by the material default temperature.
.png
)
At last, the part has been finished after 6 hours printing, it was great but it has a small problem the was a 3d printer oozing every ware inside the part besides that everything looks fantastic.

So after a little bit of searching, I four this great website that explains most of the 3d printer problems and I found out that the oozing mostly caused because the temperature was a little bit high, but it will be a wast if I decided to print the part again so I will test my theory at the final project printed parts.
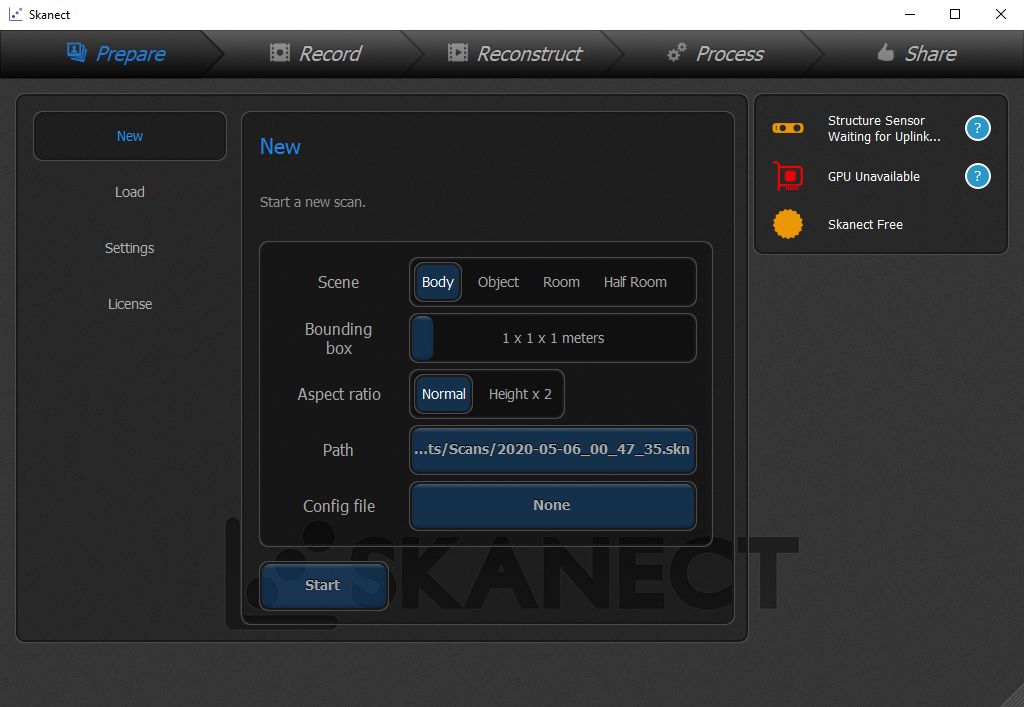
3D Scanning.
As a start I had this idea to scan my arm and import the mesh file to fusion and make a body with the sculpting tool, so I decided to use Xbox Kinect 3d scanner so first, I trayed to use the windows 10 3d scan but for some reason, it didn't recognize it and I stayed to my self ok I will try to use another program, and my second try was with skanect and the first problem was that the program didn't recognize Kinect again, after searching I fixed this problem by installing Kinect Driver.
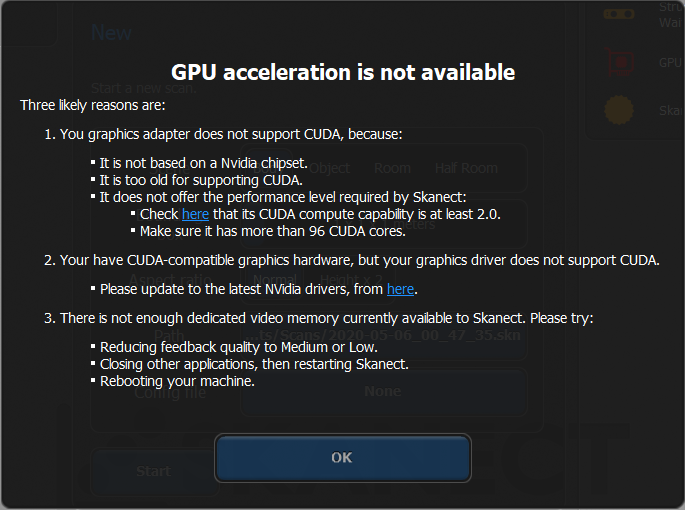
The problem was the GPU the Program need a GPU based on an Nvidia chipset, and my laptop has an AMD GPU so now we are in coronavirus quarantine and the lab is closed temporarily, and when I was searching for a solution I found that Kinect isn't that accurate and for arm scan, I will need a more accurate scanner and this a problem for another day, for now, I need to found an easy way to scan objects at home.
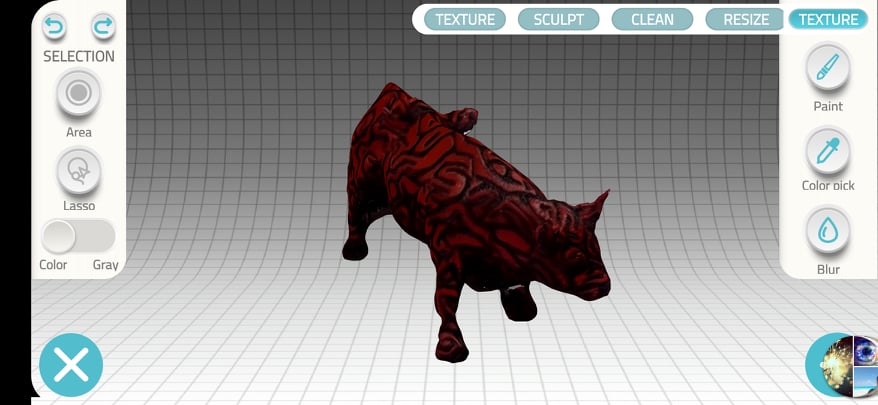
I remembered something from professor Neil lecture there was an app that gives me the capability of scanning 3d objects with only printing paper with something smaller to QR code, the application name was "Glone ", the program was very easy to use and I really recommend everyone to try it.
So I decided to scan a dual colour printed bull so I can see how match of details the program could get and compare it with the original file, scanning time so I was having an issue so I printed A3 paper put it was a little bit small but the result was good and I was able to rescan the damaged parts of the model.
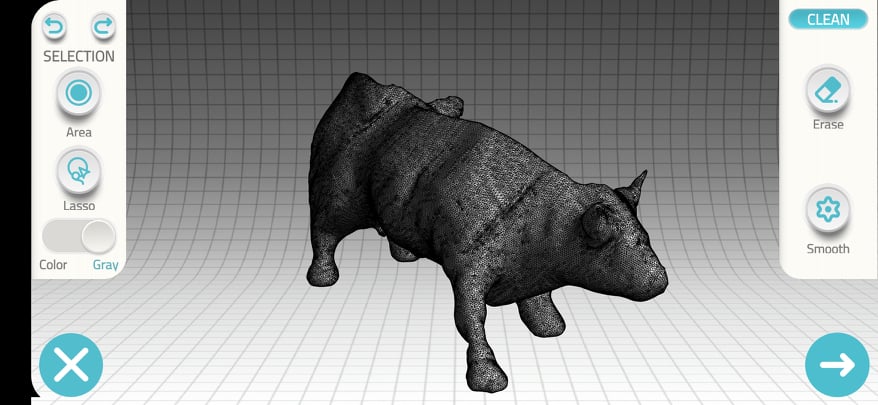
but the sad thing that I have to pay so I can get the STL file, but I have the capability to share the 3d file with "