9. embedded programming
Arduino and platformio
Aims
So my Aims for this week assignment is to refresh what I know from Arduino by making some sketch boards. Also I want to try microPython for programming ESP chips. Then I would like to try use platformio to program some AVR chips
Group assignment
For this Group assignment we have to compare different workflow and performance of programming Microchips. For this reason I will try to do a simple blink in different platform and compare their difference.
Arduino
I started with very simple blink with sending digital high and low signal to a specific pin. then I tried the fade by using analog pin of the Arduino. Also I need to add that Arduino is full ecosystem that provide Arduino boards, Arduino programming language(base on wiring), library(AVR), and IDE. For instance we can use Arduino library on platformio platform without using Arduino IDE or boards.
For the circuit I have used an Arduino uno a LED and 2 jumper cables. I have connect the ground of the board to the cathode of the LED and the Anode to the pin number 2 on Arduino uno board. I definitely needed to add a resister in between but since I do not have any intention to leave this LED running I avoid this complication.
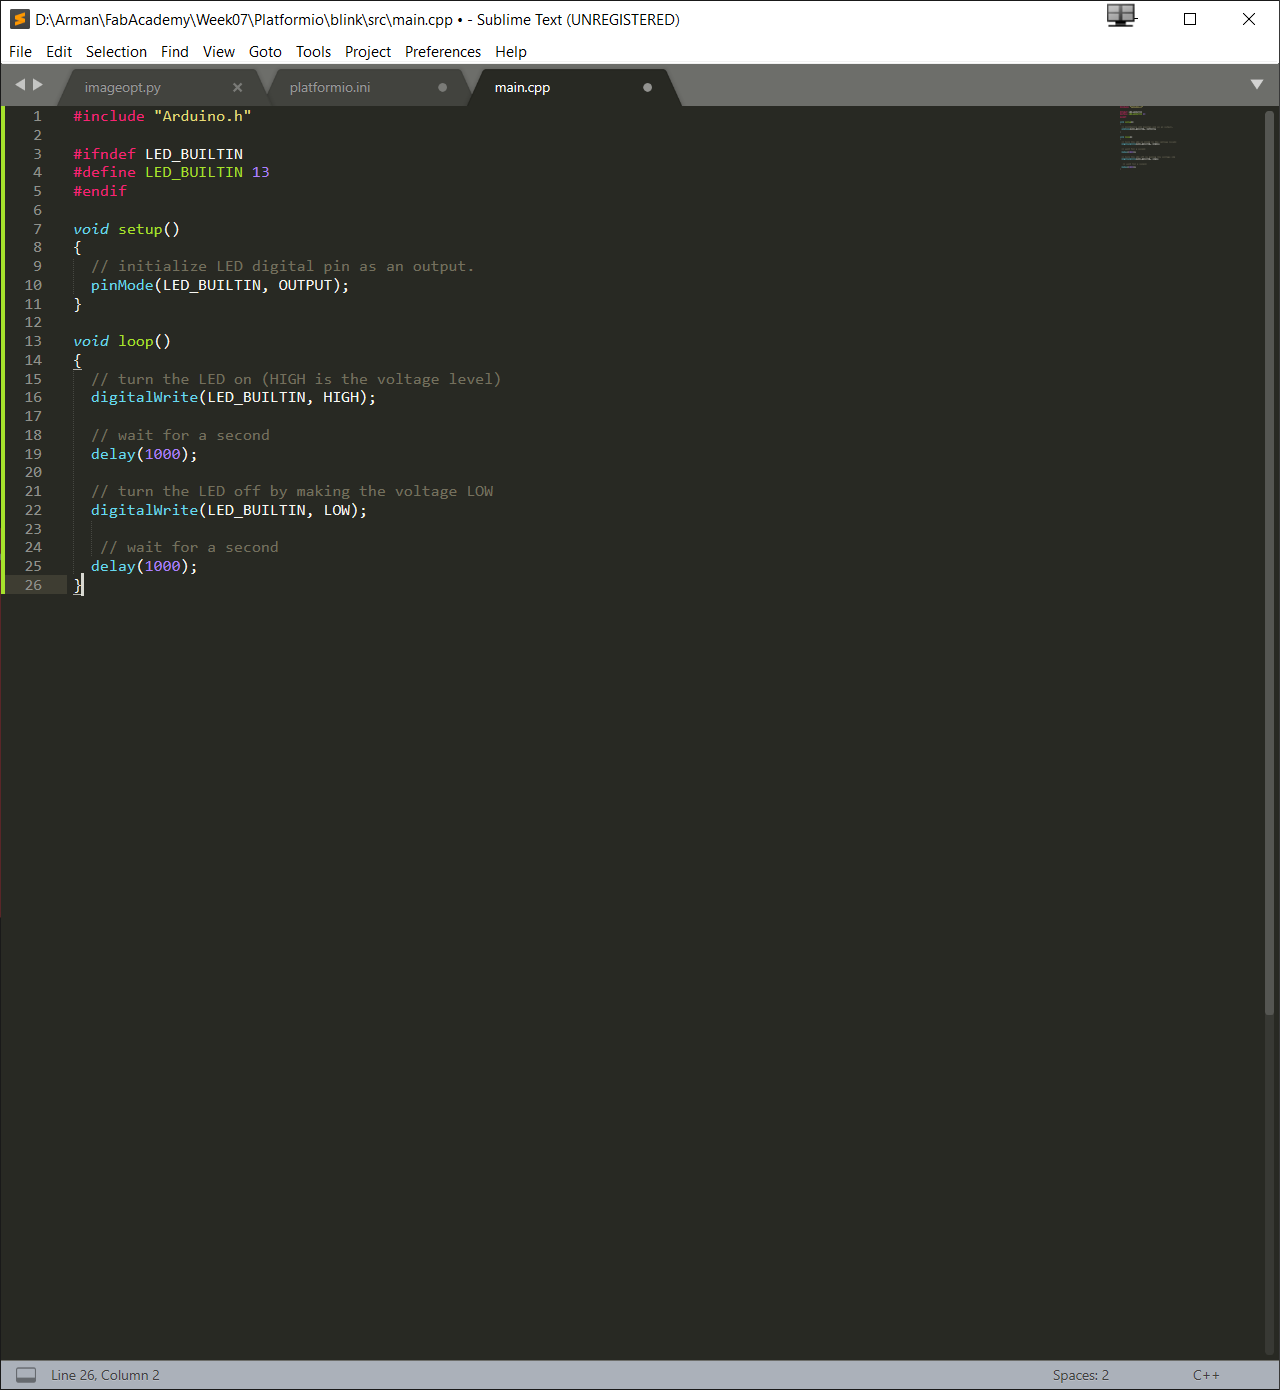
Arduino code has very simple structure. But it can get very complex. the general format consist of a void setup and void loop. void setup will run once to prepare the processor for running the void loop endlessly. whatever value, library, building instruction that you need for this script you need to add before setup loop. Also you can define functions with output or without out put. please check this docs for more information. As you can see at the top of the script, I have define a global variable named led_pin and assign number 2 (pin number) to it. Later in the setup void I set this pin as output. In the void loop I am using digitalWrite function of arduino library to pull up and pull down the signal to the led_pin. With a delay between each action It seems that I am constantly turning it off and on. woollaahh, it is blinking!
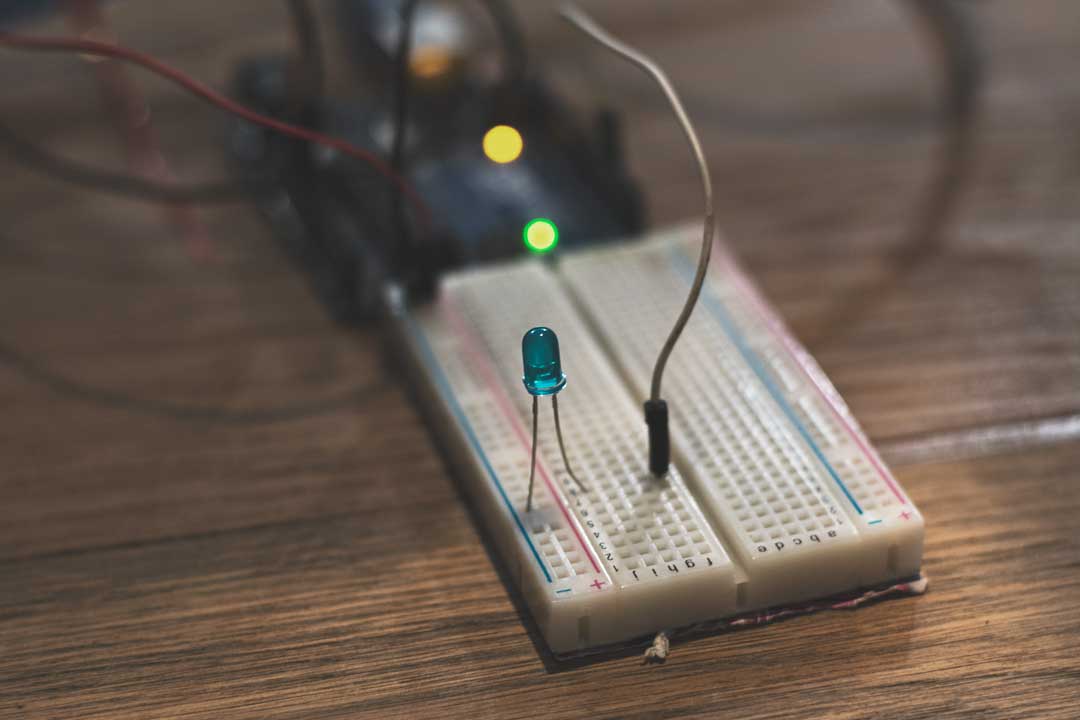
Fig01- circuit for led
Arduino blink code
int led_pin = 2;

void setup() {

  pinMode(led_pin, OUTPUT);

}

void loop() {
  int d = 50;
  d = d + 200;
  digitalWrite(led_pin, HIGH);
  delay(d);
  digitalWrite(led_pin, LOW);
  delay(d);
  if (d >= 1000) {
    d = -d;
  }

}
For the fade the approach is a bit different. Fade is a progressive action. It means each time that you turning on the LED it should have more brightness then before. So for this action we need to constantly change a value by a fraction. Since we are using arduino uno and its uses an ATmega328P which is a 8-bit processor. Thus the largest number that our processor can understand is 256. So in the script I defined a variable v with the highest value and the c a value that I am going to reduce or add to the v. Because we are using the analog pin we do not need to set the pin mode at the beginning of the code. In fact we can remove the whole void setup section. In the loop I am clamping the value of the v between 255 and 0 and changing it by value of c. It worth mention that the pin number 6 that I have used for this action is not an analog pin but it has a capability to remap the pulses to the ranges which eventually rendering the same result(PWM).
Fade code
int v = 255;
int c = 20;

void loop() {
  analogWrite(6, v);
  if (v <=255){
    v = v-c;
    }
  if (v<= 0){
    c = -c;
    }
}
after just for fun, I made a circuit for controlling a DC motor. We go through motors in output devices much more deeper. Here basically I am just turning the motor on and off nothing more.
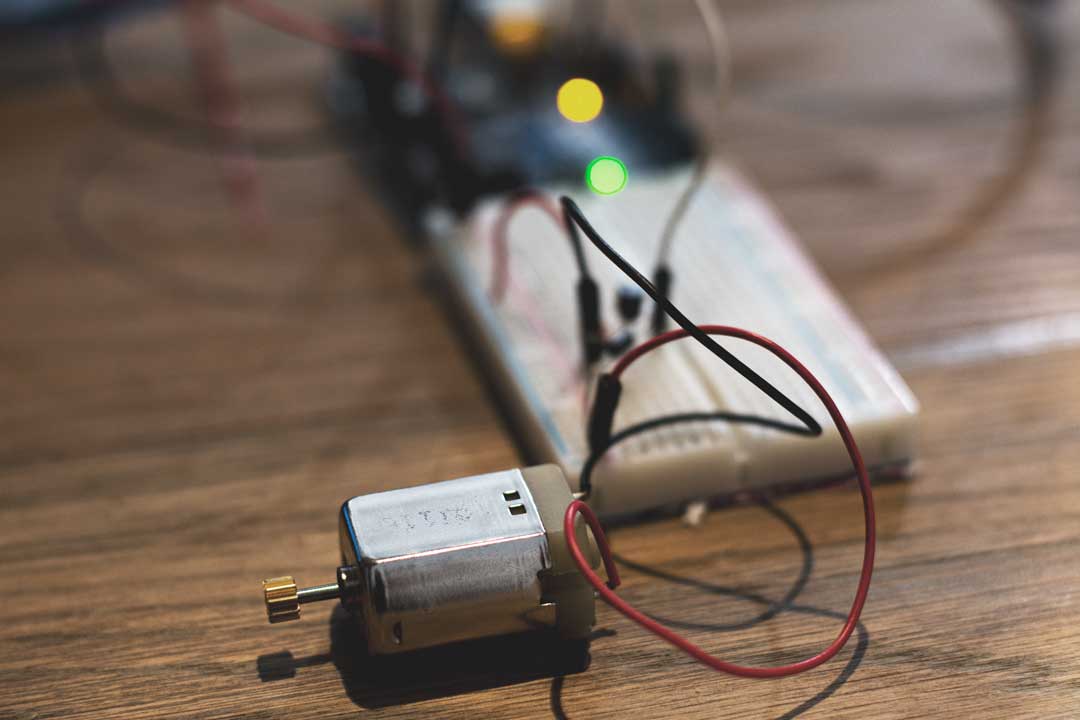
Fig02- circuit for DC
void setup() {
  pinMode(7,OUTPUT);
}

void loop() {
  digitalWrite(7,HIGH);
  delay(10000);
  digitalWrite(7,LOW);
  delay(10000);
}
PS: I hate jumper cables!!
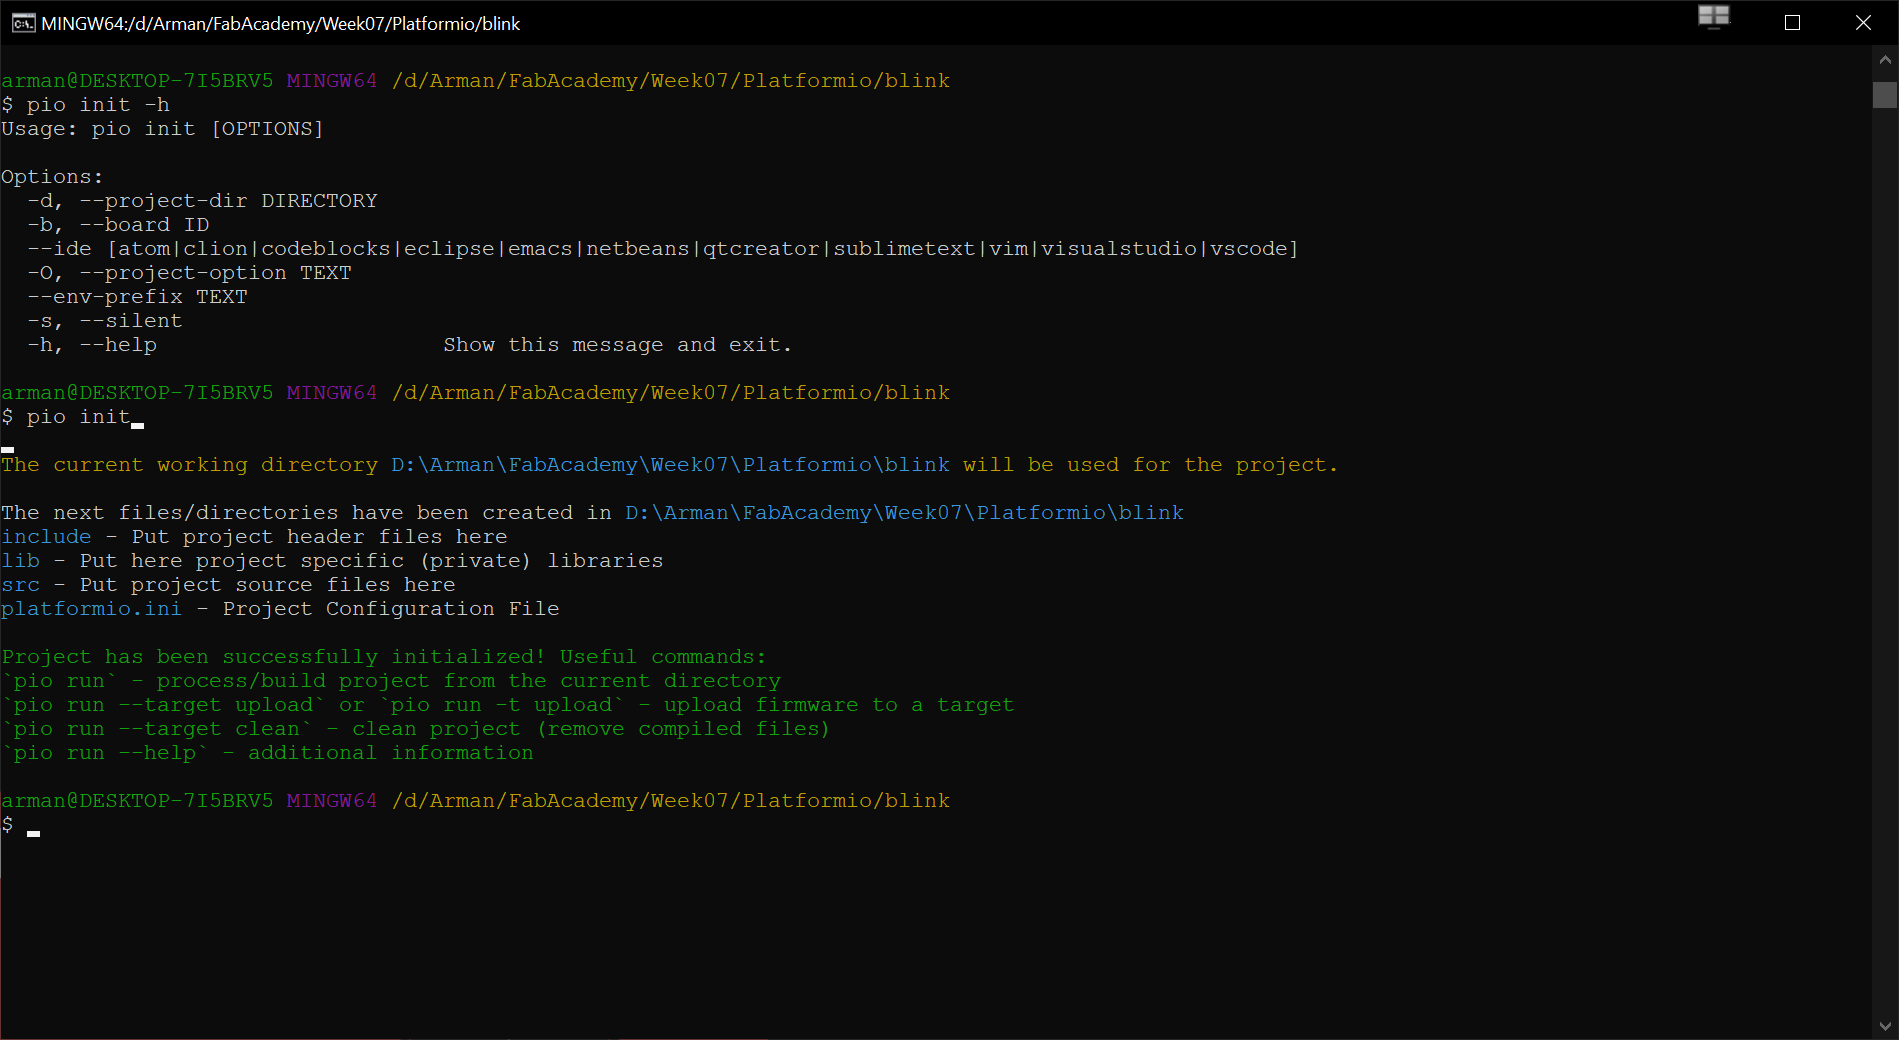
platformio
platformio is a more universal platform (compare to Arduino) which covers most of the dev-boards and Microchips. For more information check their website.
Instllation
To install the platformio First you need to have Python installed. Then easily it would be installed by
pip install -U platformio
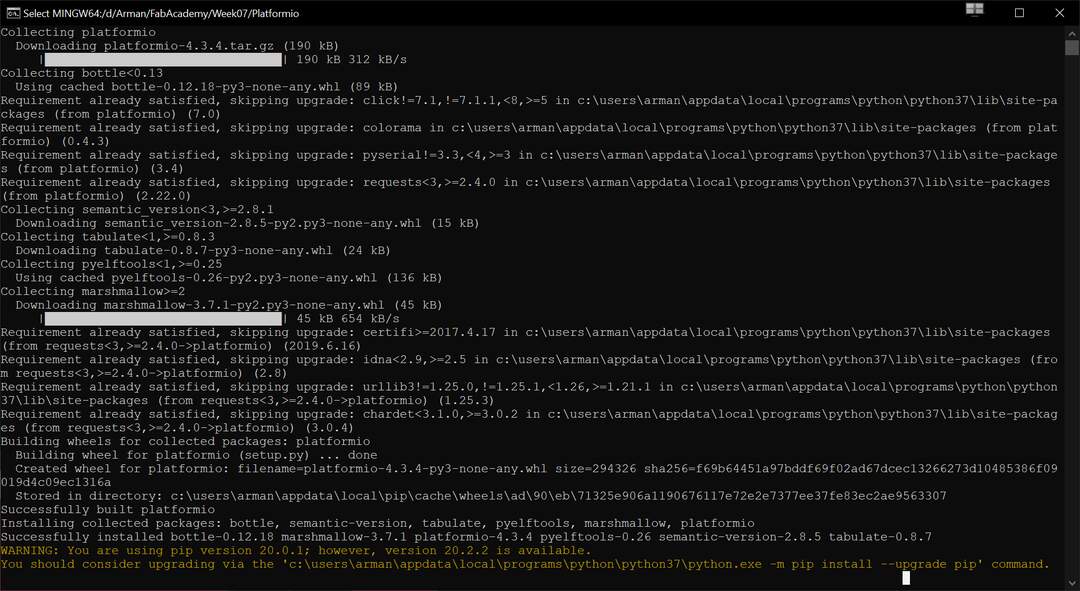
after having it installed run the following to make sure that it has been added to the path and it is accessible through the command line
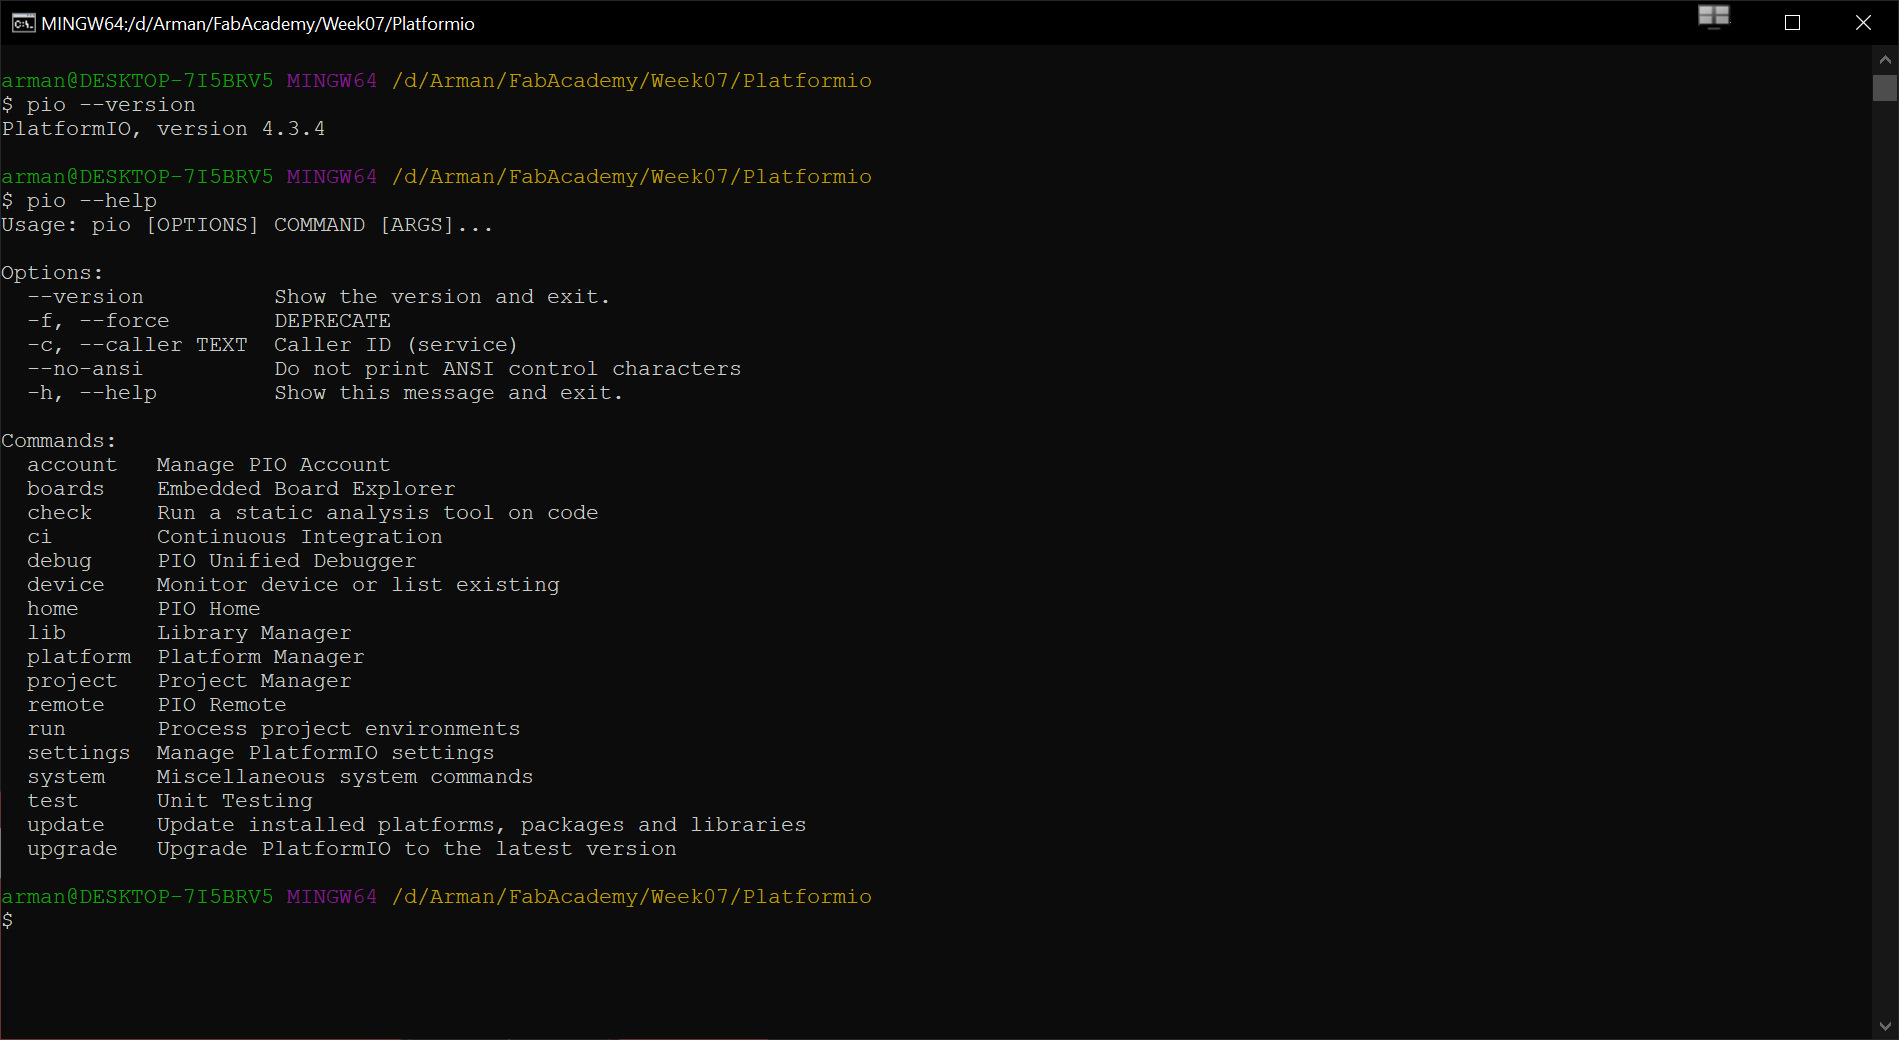
pio --version
if everything was fine and you could see the version you have successfully installed the platformio. for further help or installation on other OS follow up their installation guide.
you can use
pio --help
to see the available command that you can call.
platformio does not have a GUI and all the functions are accessible through the command line. to start a new project
pio project init
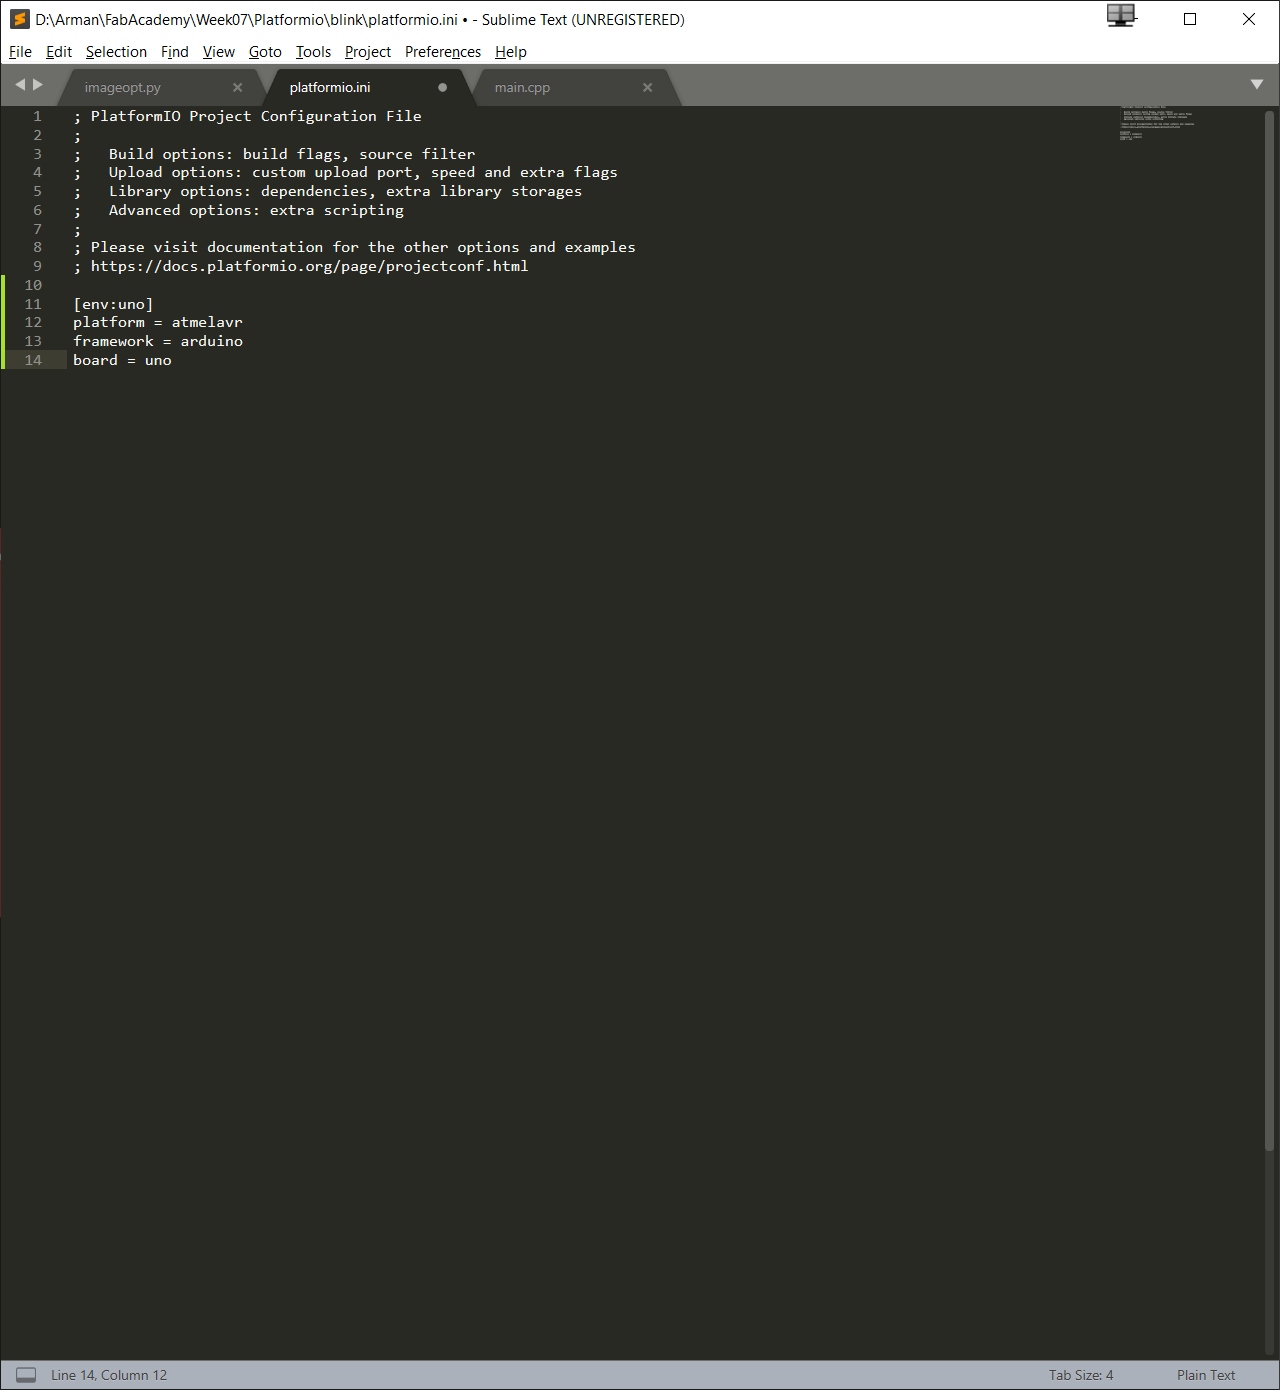
the very first thing that you should do is to define for which board you are developing and add them to your config file. you can see the environment that has been defined by running the following.
pio project config
by running this in directory the platformio will generate a set of files and folder which should look like this structure.
 PROJECT
- platformio.ini
|-- src
|   main.cpp
|   main.h
|   ...
|-- lib
|   Input
|   |-- input.cpp
|   |-- input.h
|   Output
|   |-- output.cpp
|   |-- output.h
|   ...
|-- boards
|   board_definition.json
platformio.ini is the file were we set the configuration for compiling the project.
to Compile the code you have to just pass
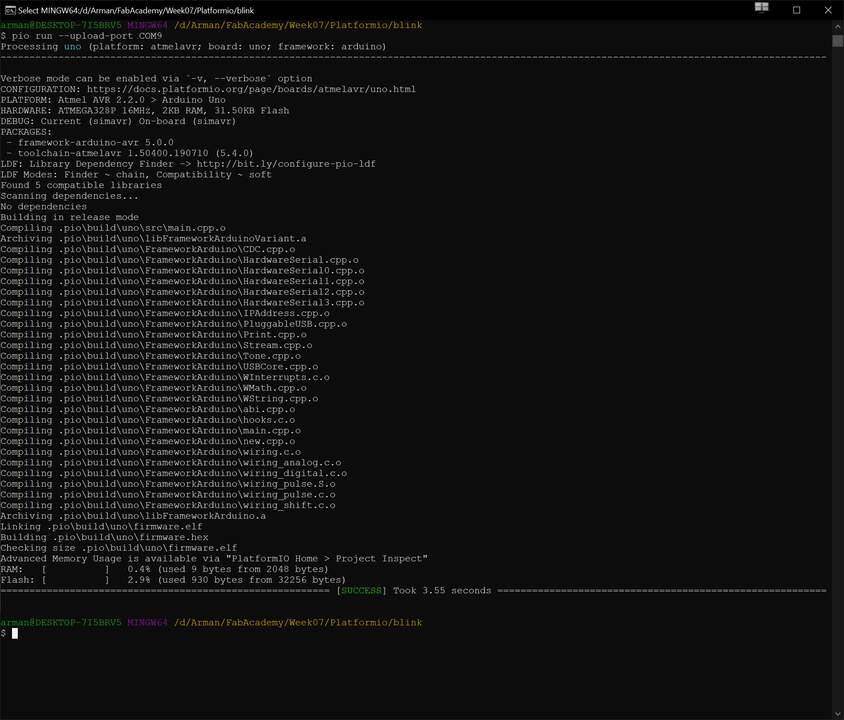
pio run
in the command line.
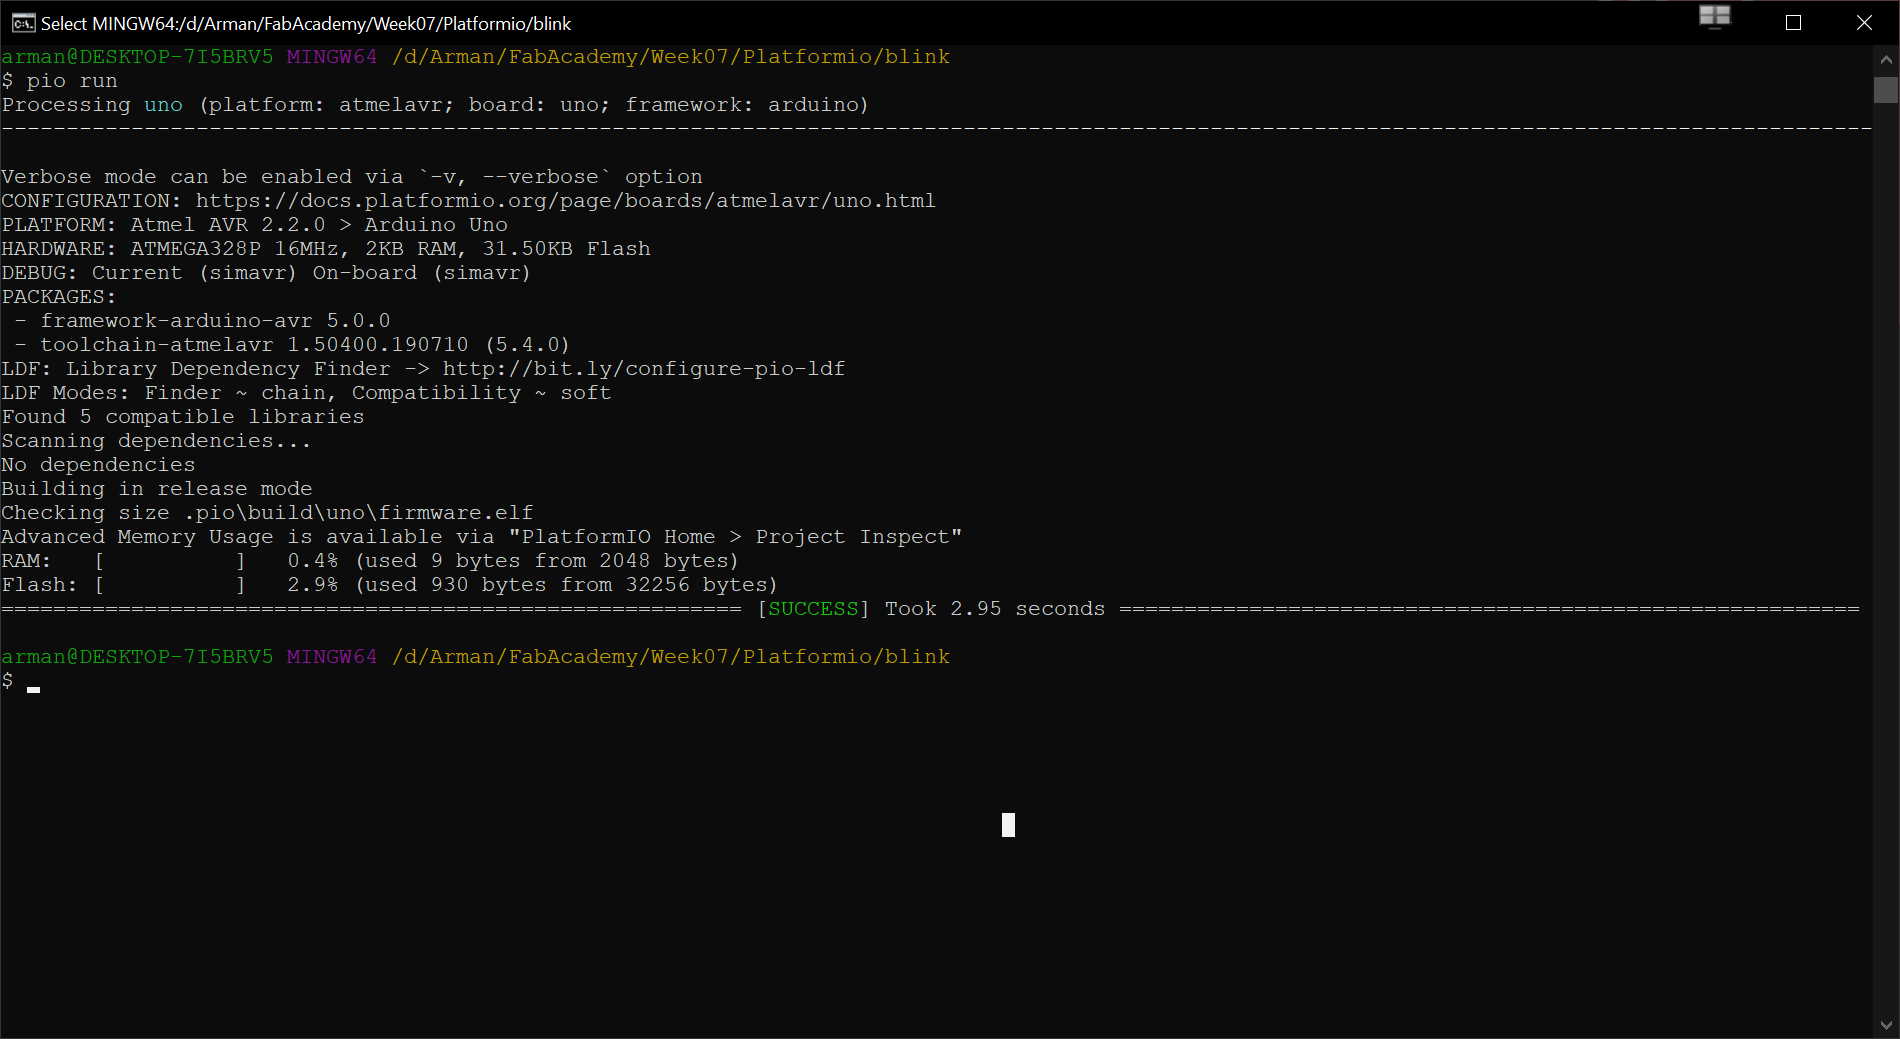
if everything went well and you did not get any errors you can go further and flash you board.
pio run -t upload
microPython
MicroPython is a full python compiler which allow us to program the Microchips with python language. to install it you have to go to this link.
after downloading the firmware I flash my esp8266 dev-board with the help of esptool which is a open source interface to flash the esp chips.
For install the microPython firmware we need a tool to communicate with the board. esptool is a python base toolchain which allow us to program and config ESP board. In order to install the esptool we can use pip with the following cmd command.
pip install esptool
after the installation is finished we can check the esptool available command by typing the –help command.
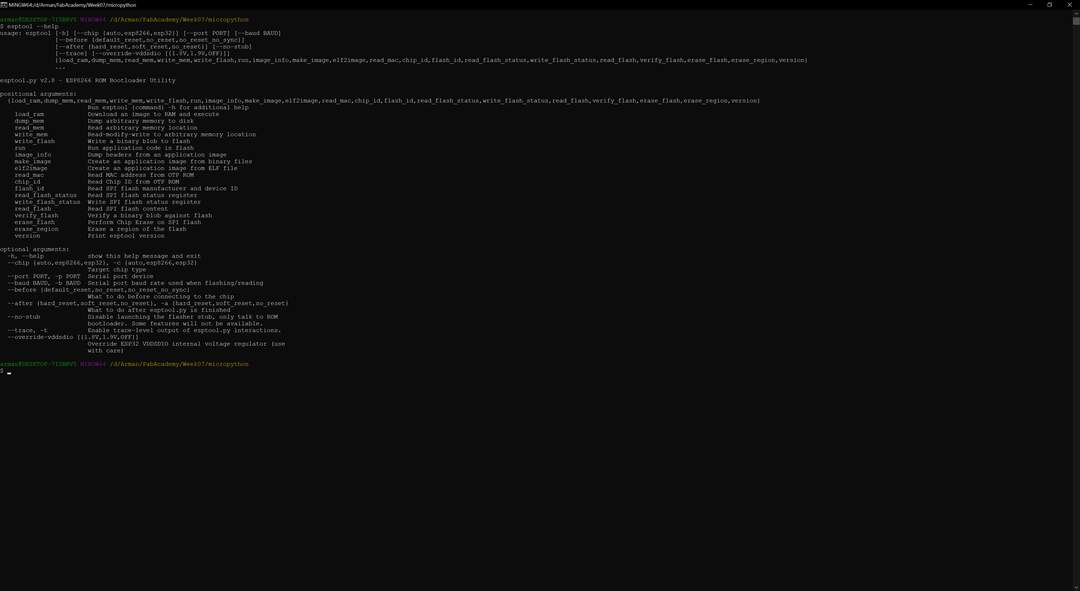
esptool --help
After the esptool installation we can connect our esp tool to the computer and check the assigned port to it. in my case I am using esp8266 dev-Board. In the device management you can find out the port(windows OS). Then with the following command you can erase the flash memory of the chip.
esptool -p COM7 -b 115200 erase_flash

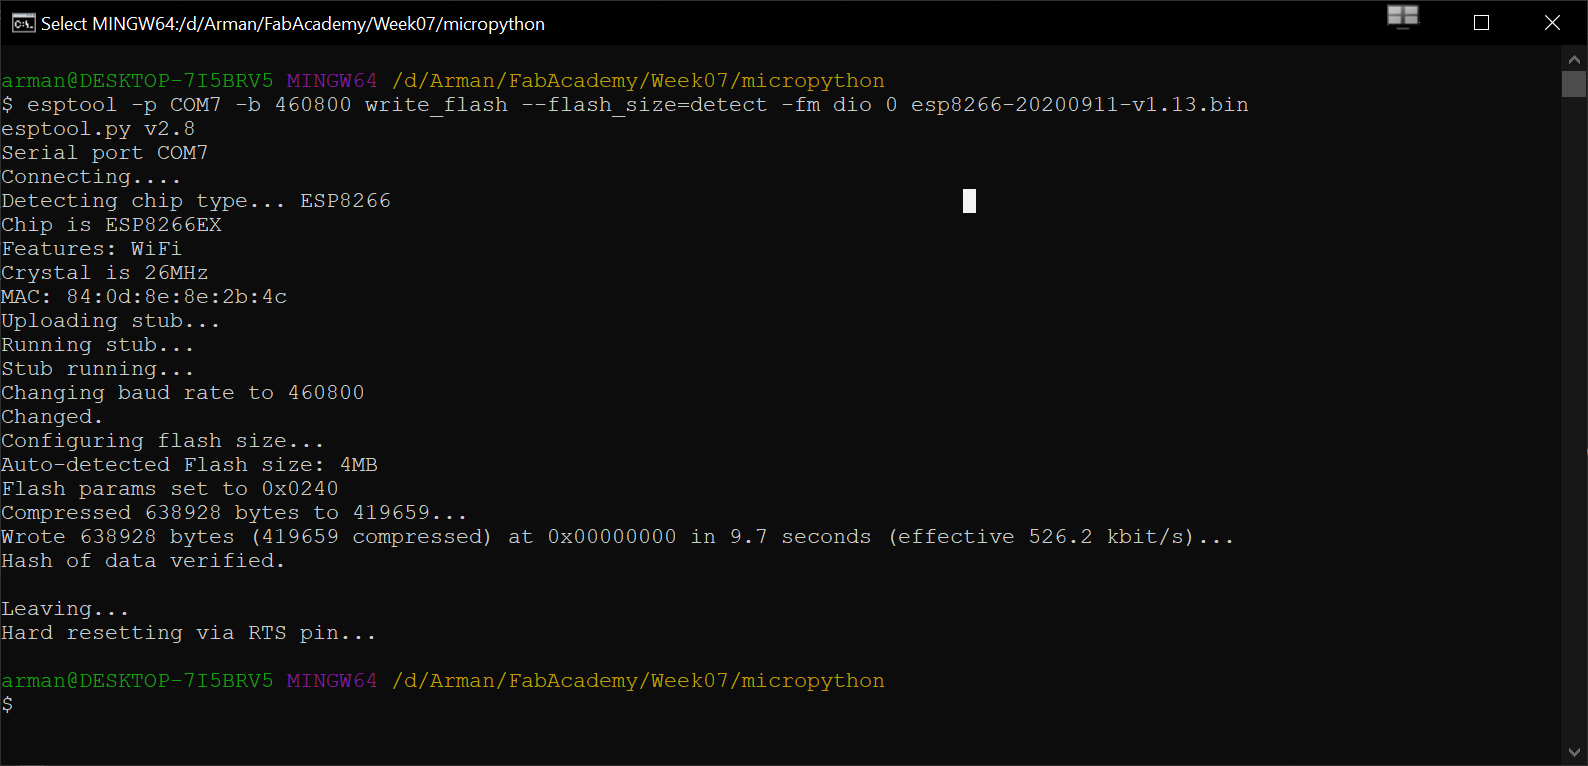
Now that the board is clean and ready we can write the firmware on it. You can find the binary file of the each specific chip on their website. Here I have the last-version of the microPython for esp8266.
esptool -p COM7 -b 460800 write_flash --flash_size=detect -fm dio 0 esp8266-20200911-v1.13.bin
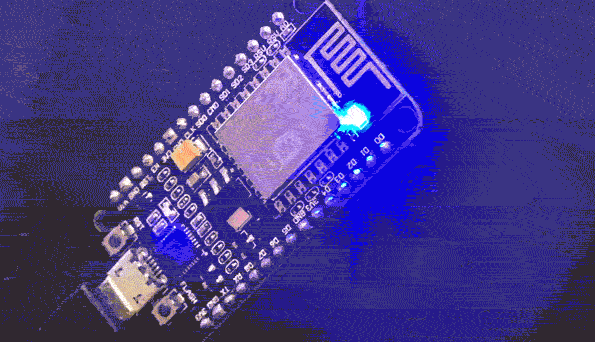
then I wrote a simple blink code to test the IO of esp8266.
from machine import Pin
import time

while True:
    p0 = Pin(2,Pin.OUT)
    p0.on()
    time.sleep_ms(500)
    p0.off()
    time.sleep_ms(500)
    pass
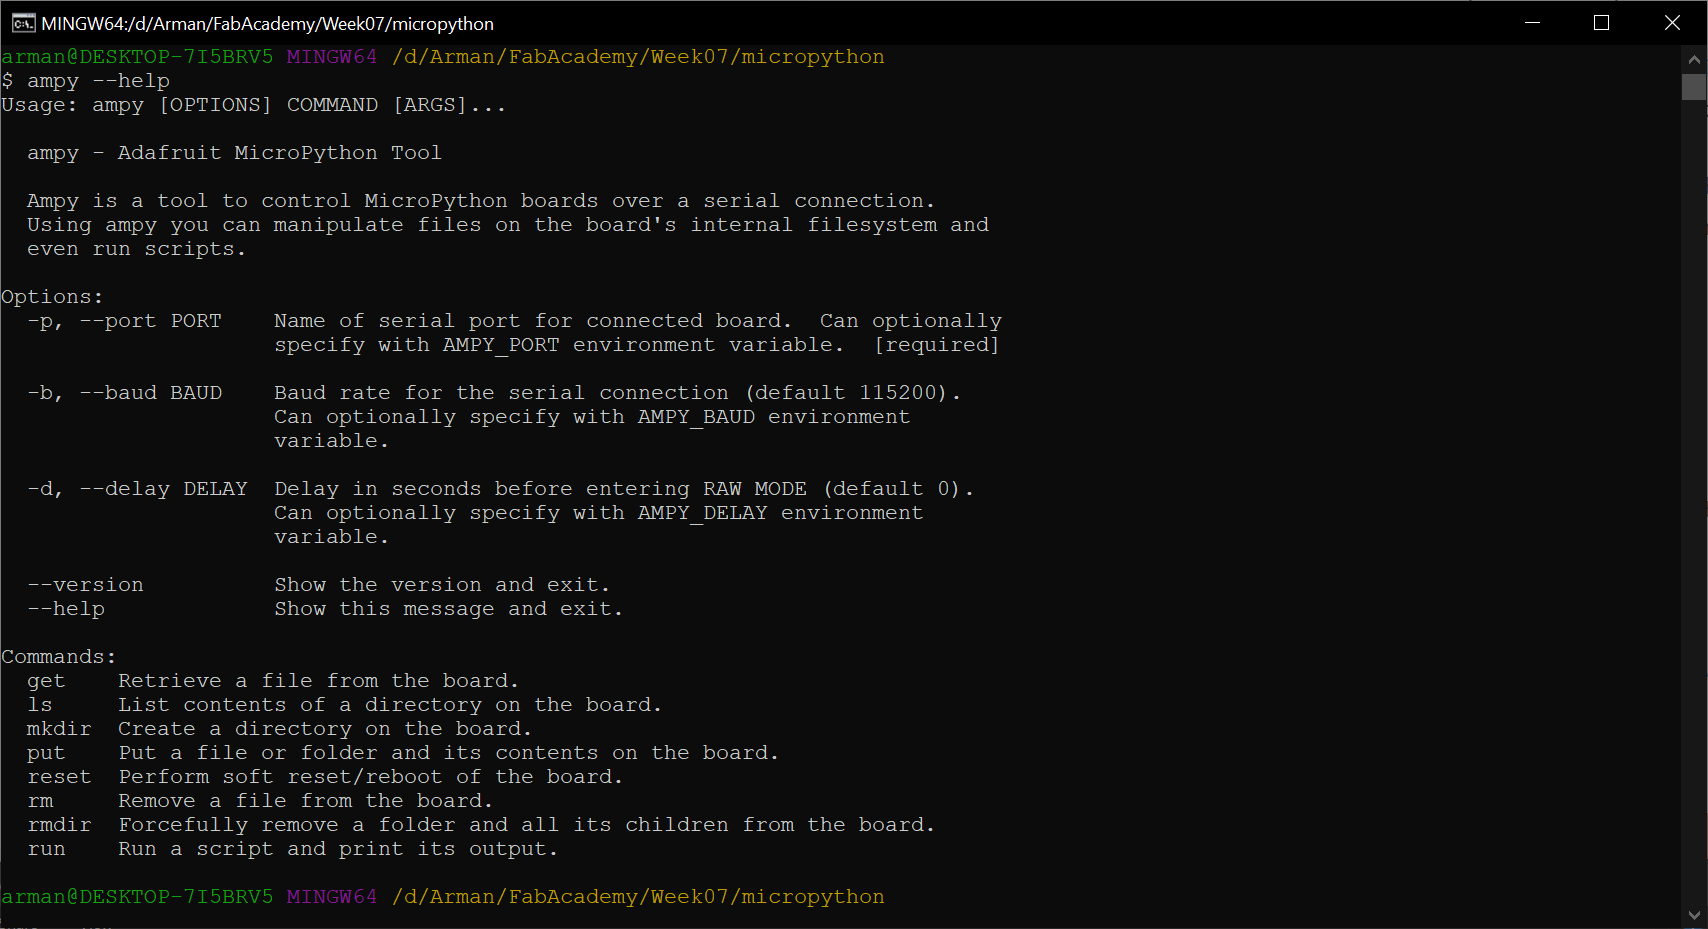
To send and run the file on board we need a tool to talk with microPython on our board. ampy is a python library developed by adafruit to this tasks. You can read , modify , delete , manage directory or many other system management for microPython. For more information you can check their website. As you can find in the link, to install this library we can pass the following command. Keep in mind that you have to be in administration mode to install it properly.
pip install adafruit-ampy
to check if its installed and added to the path you can type:
ampy --version
or
ampy -h
Now we can use put command to send the blink.py into our board.
ampy -p COM7 -b 115200 put blink.py
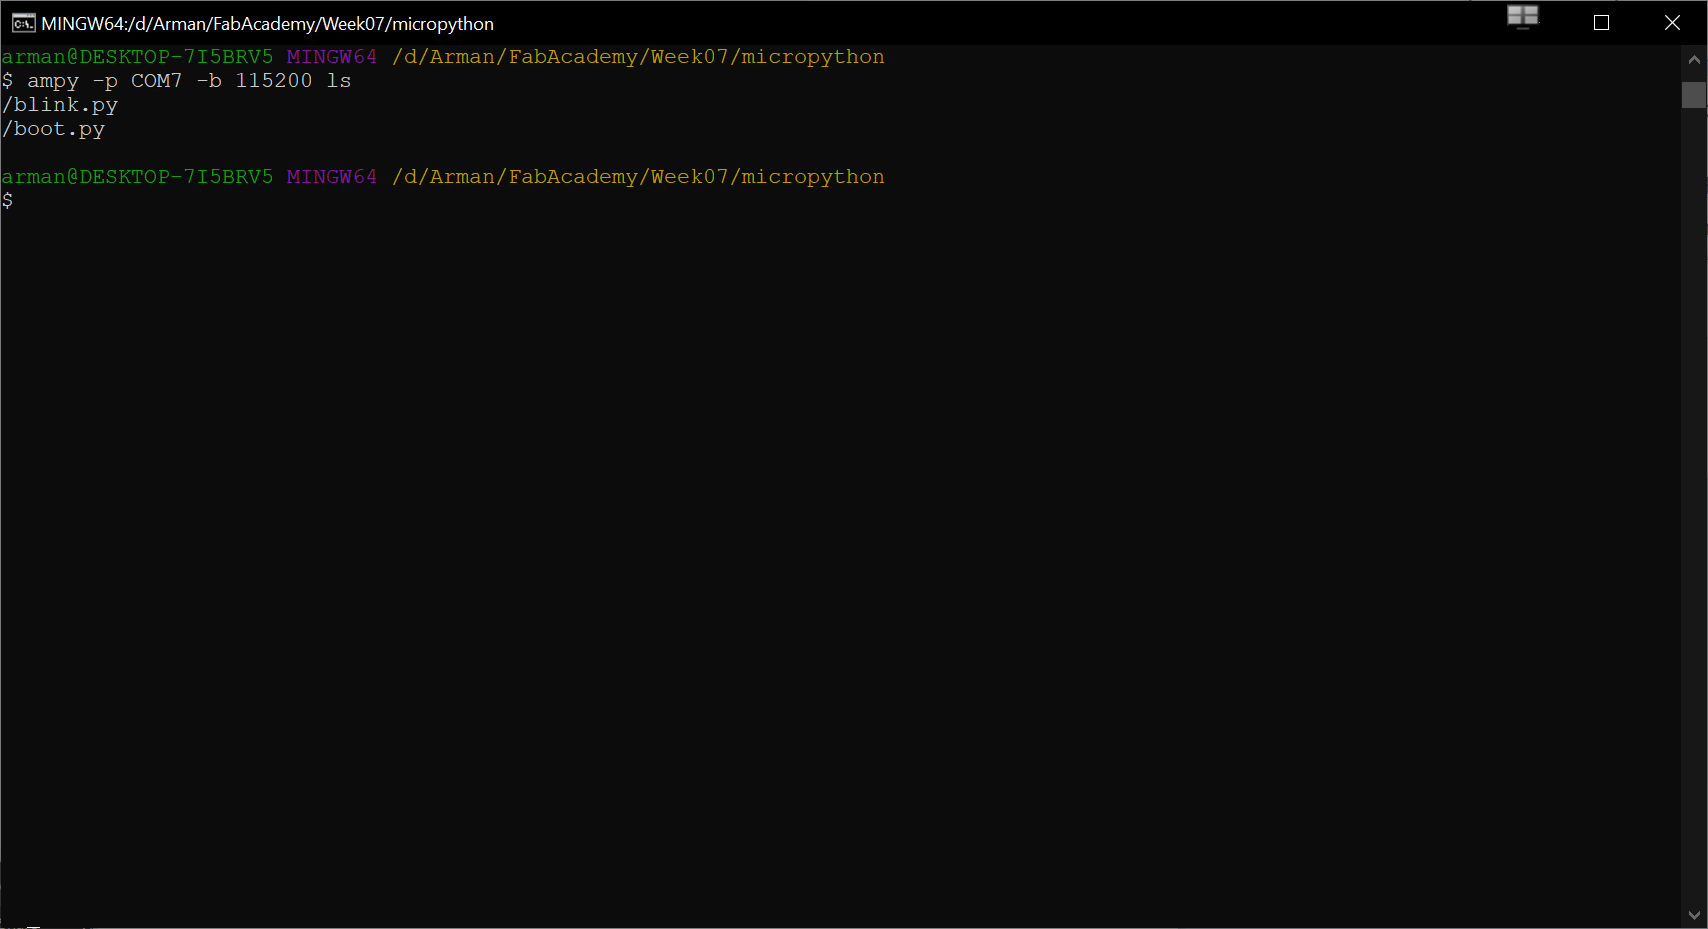
we can check the directory of our board system by:
ampy -p COM7 -b 115200 ls
keep in mind most of the system command such as mkdir, rm,rmdir,… is working Here.
for running the script you just need to send:
ampy -p COM7 -b 115200 run blink.py
Conclusion
After trying all of this available tool. I think Arduino platform is the best for various cases but for more perfectional works that require more organize library management platformio can work better. microPython also is a good tool for working with higher memory chips but they cannot be use in many chips. Also keep in mind that not all the python libraries are available for the microPython. I personally like microPython since it is a growing community that tries to make embedded programming accessible for everyone.
Microcontroller Datasheet
I have check the datasheet of two following microcontroller. Datasheets usually are very long extensive document for any industrial produced component. Usually this document is the reference for software developers to extend and use these products. Since I am not developing firmware or library to interface with this electronic, I will not go deep in to the architecture of these processor. But the main output that I can get from this data sheet is the working voltage for this microcontroller and the energy consumption of them. the most important one is the pin out mapping from the footprint and the capabilities of each pins which is a direct data that we need for design and programming these chips.
Attiny3216
Attiny3216 is the new AVR component series with a 32KB flash size. It is coming with different packaging. The one that we have in inventory is 20-pin SOIC but there is also 20-Pin VQFN.
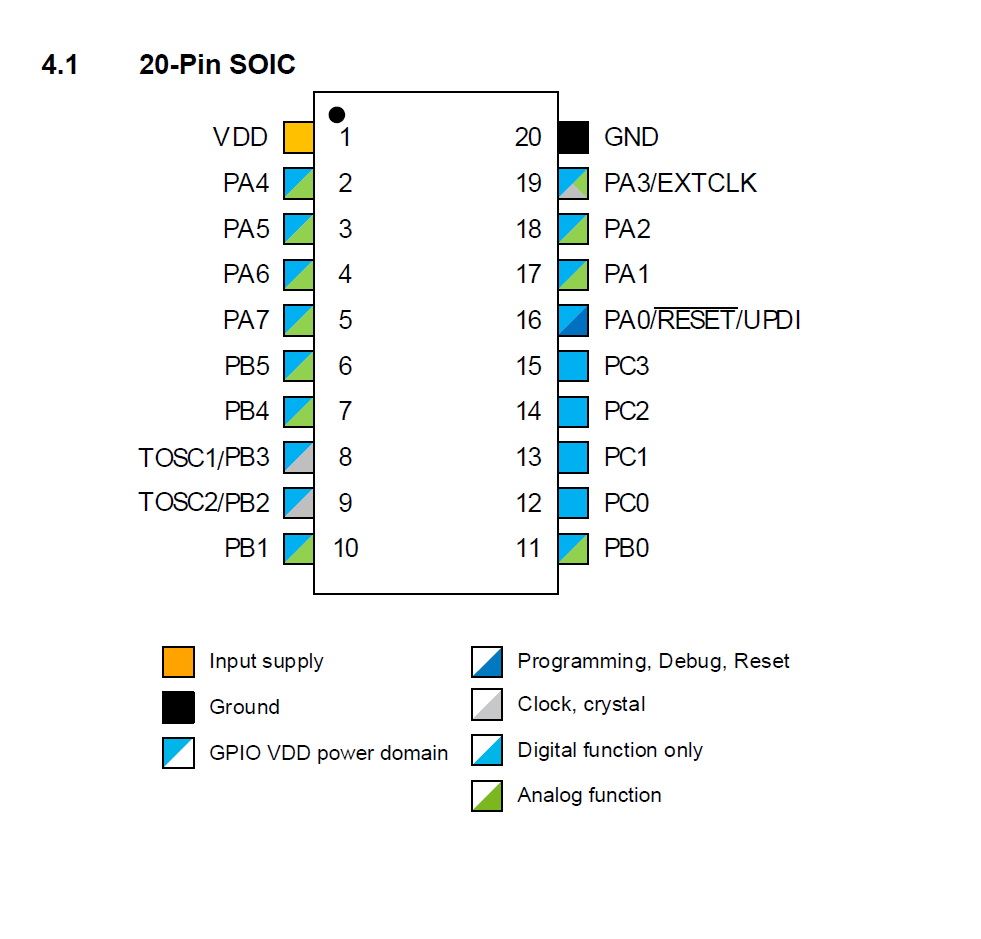
Fig01- The illustration of the SOIC packaging with the pin out config
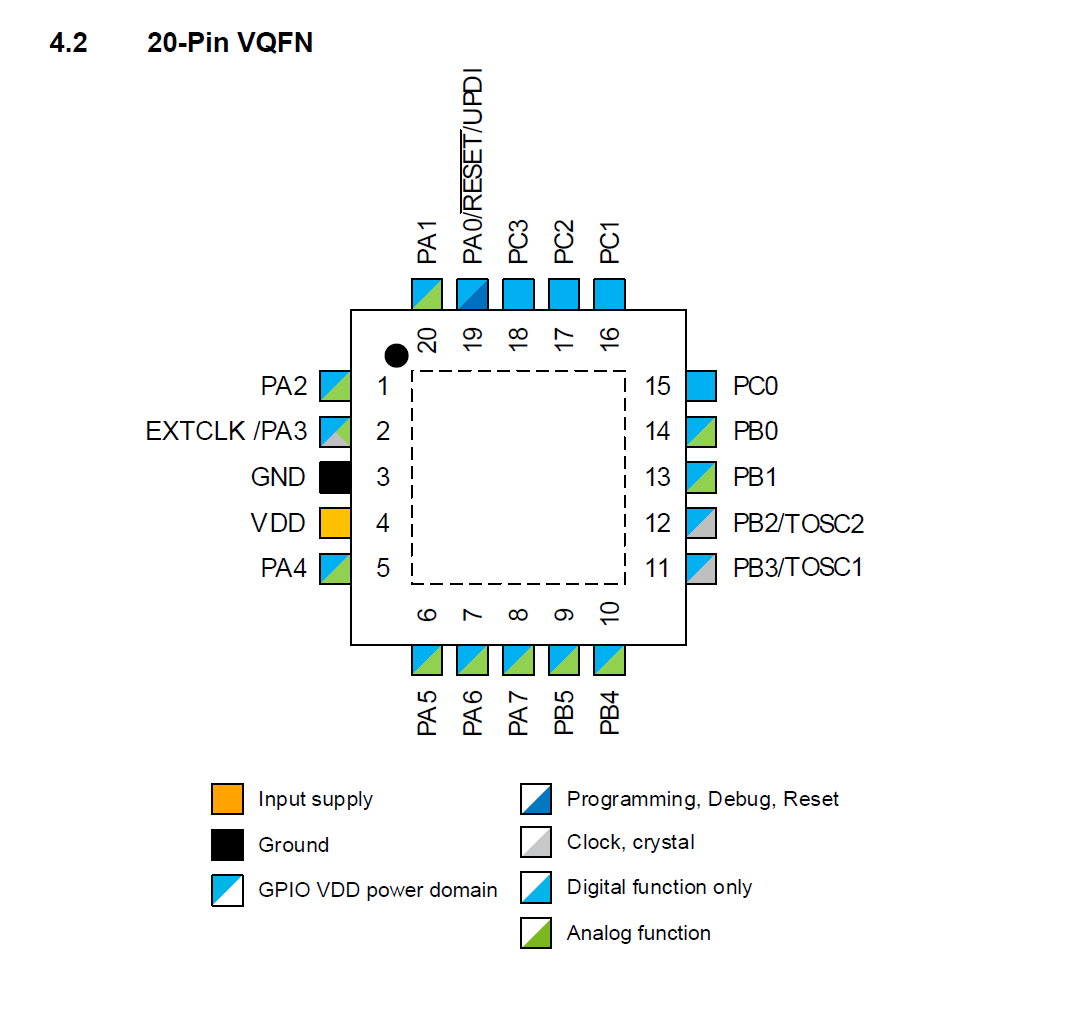
Fig02- The visualization of VQFN package
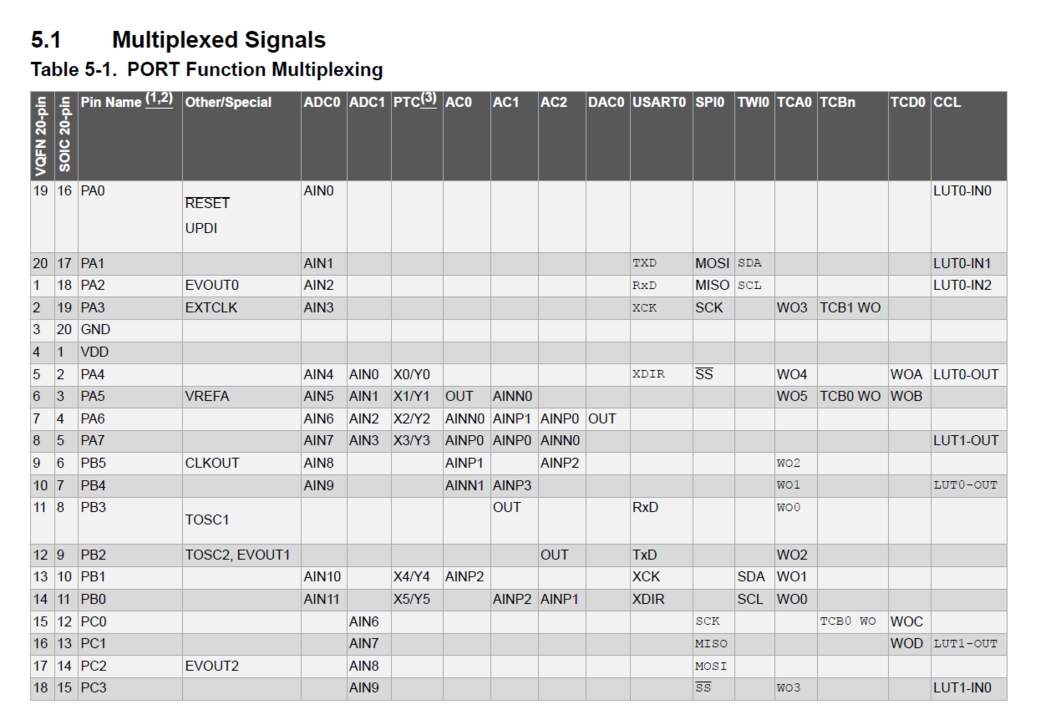
Fig03- The chart of the port and their functions
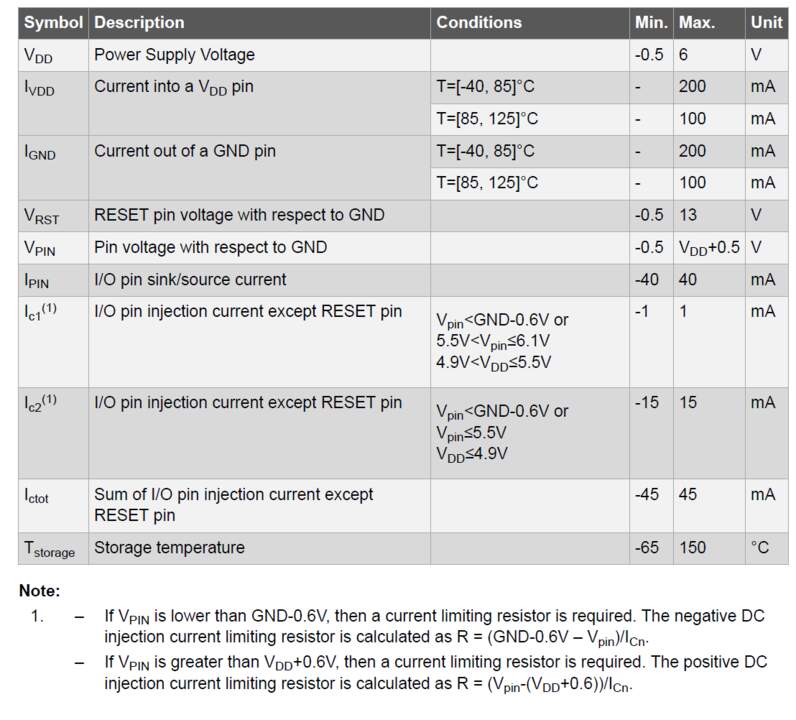
Fig04- The voltage and current of the board
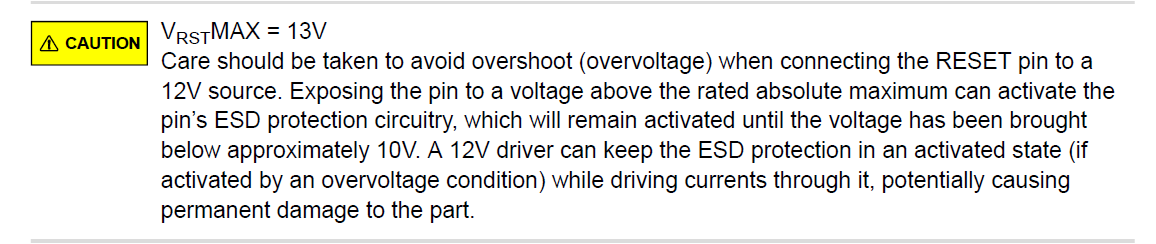
Fig05- warring for overvolting the board
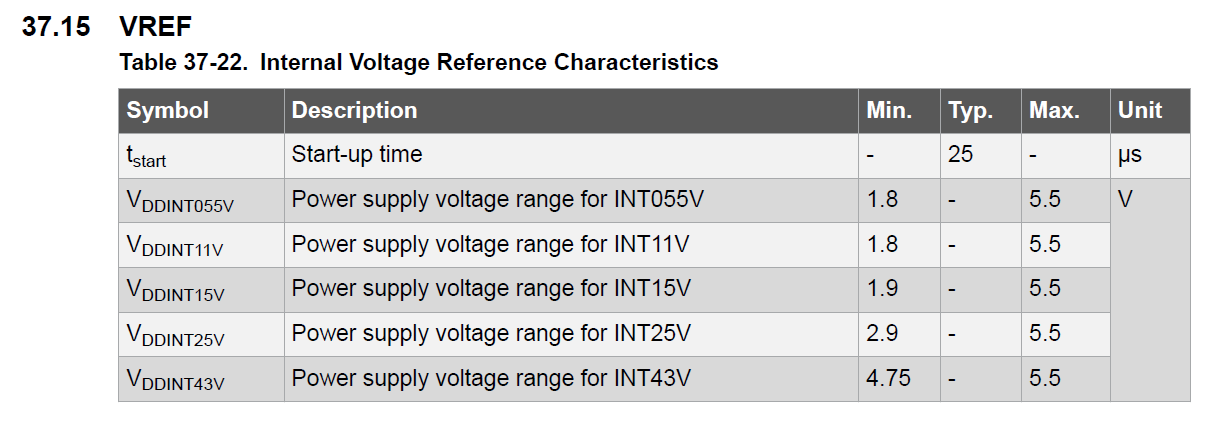
Fig06- The chart of internal voltage reference
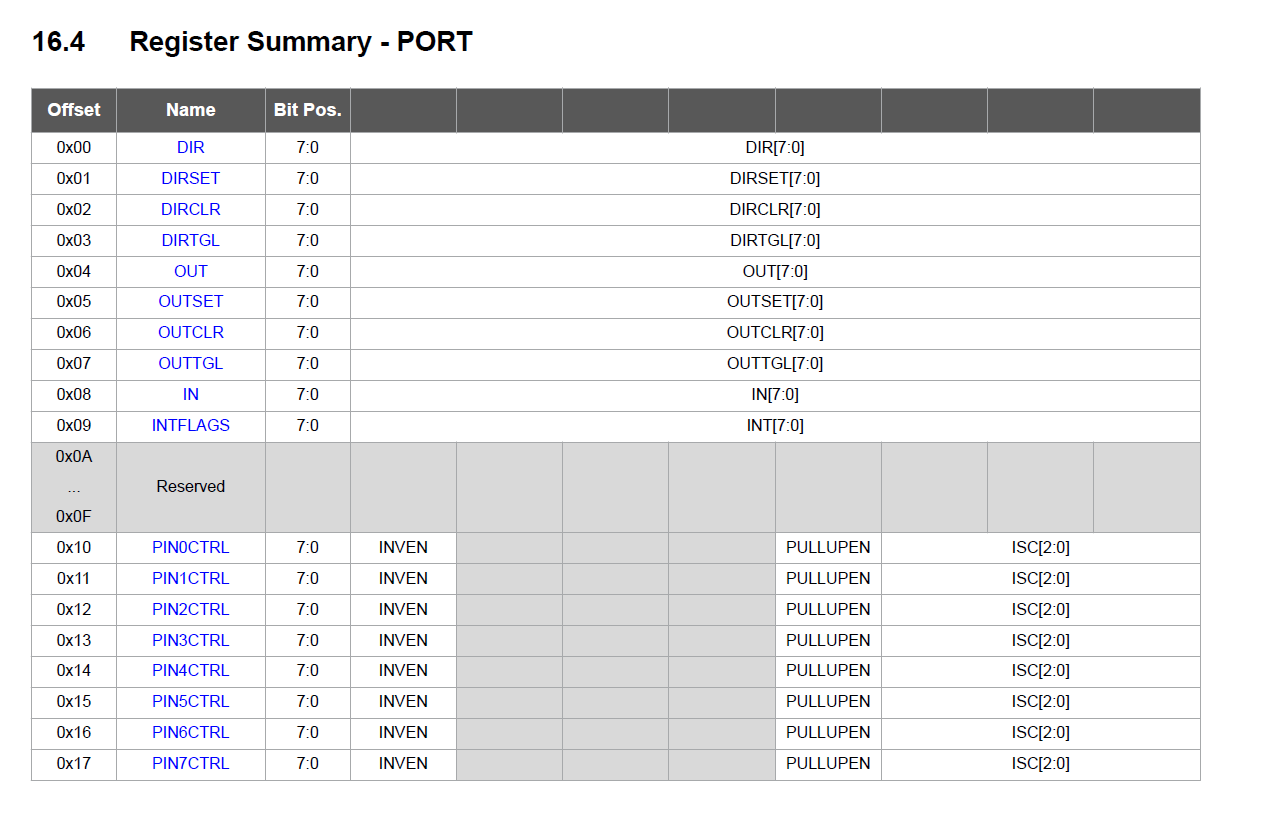
Fig07- Pin data register
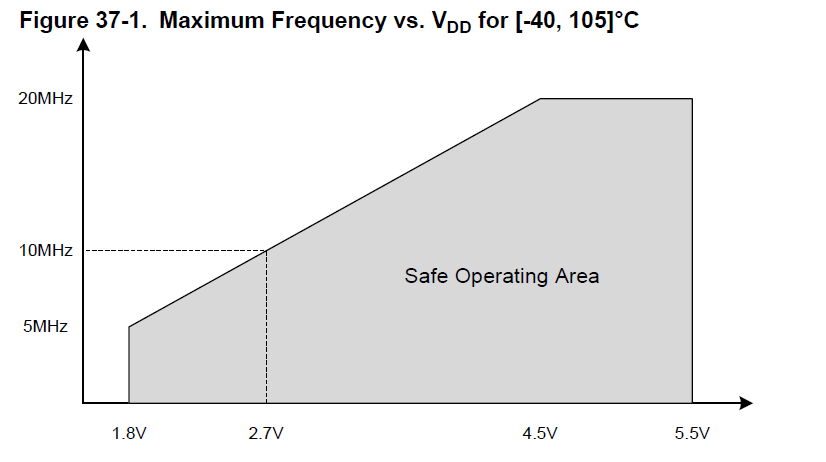
Fig08- The graph of the clock speed and voltage for safe performance
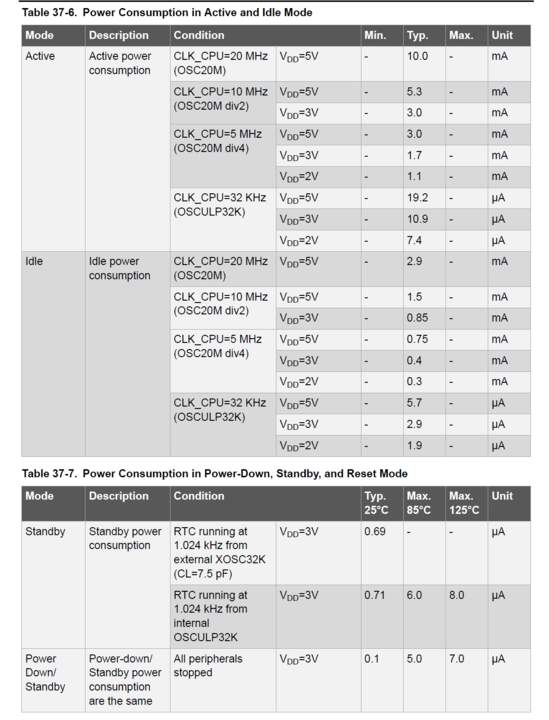
Fig09- The chart of the consumption of the chip base on voltage and current
class note
how to make the Computer
machine that can process the information
computing and Computer