Mechanical Design and Machine Design
-
This week we have a Group assignment
-
The Group assignment for this week is to
-design a machine that includes mechanism+actuation+automation
- build the mechanical parts and operate it manually
- document the group project and your individual contribution
- actuate and automate your machine
- document the group project and your individual contribution
Group Assignment
You can visit the Group oage to see the whole documentation of the machine. Group Page.
We started this week with a brainstorming on a lot of machines. we initially thought of creating a 3D pritning machine which
can be useful for the fablab in the coming time. A CNC cutter and a motorized camera slider were also discussed. We want to make something
whcih is beneficial to the college and the society and also covers all the imporatnt criteria laid down by the FABACADEMY.
Since lockdown is still underway and there is a problem of ordering materiaal from outside cities and counties so we dropped the plan for making
a 3D printer since it would have forced us to order a lot of material from outside whcih is not possible in current scenerio.
The CNC cutter was also dropped due to this reason itself. And we also got the instructions to reuse the material already present in the FABLAB.
We then decided to make a Automatic hand sanitizer machine which is in great demand and our fablab needs it also. We then thought of the design and wanted to
ensure that all the criteria are fullfilled. Then we came across this video which helped us make our design.
We discussed it with our remote instrutor and with his approval we then statred to work on this machine itself.
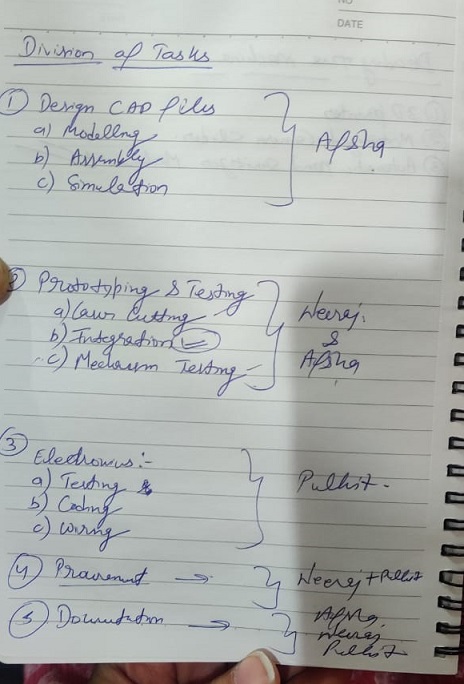
Responsibilties
Neeraj Gupta: Responsible for the fabrication and work as the lead to complete the assigned tasks according to the plan.
Afsha Rana: She is one of the best designer in our team and in our college as well so she is assigned the modeling and simulation
part of the machine and the fabrication of it.
Pulkit Talwar: He is the jack of all trades. He is responsible for the testing , programming of the circuit boards through online
simulators and documentation of the whole process.
Mechanical Design
Mechanisms, Actuation and Automation
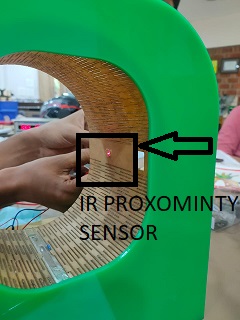
The machine has to have a mechanism inside it for which the arrangement of slider crank mechanism is used. The motor will be giving the crank motion and the other link will have a constrained motion. Actuators are responsible for moving, controlling or positioning a mechanism or system, make the working of automated equipment seamless and easy. Laser diode and an ldr sensor is used to actuate the mechanism of the machine. As soon as it senses the hand or some obstrution in its path then it will rotate the motor.
The design of the machine is prepared by Ms Afsha.
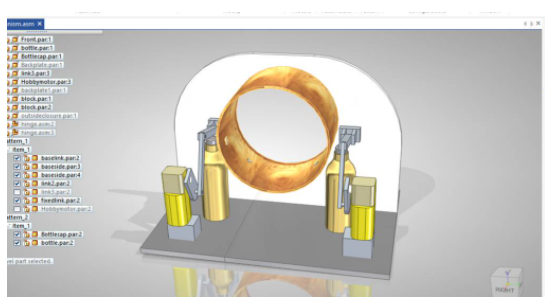
This is how the automatic hand sanitizer machine is going to work. The mechanism part is mainly shown here and its simulation.
My task was to fabricate the machine and for that i wanted to use the material which is availaible in the lab itself.
I made a list of the items whcih we would be requiring and i realised that most of the material is availaible in the lab itself. I bought the bottles from the market and the acrylic sheet was availaible in the lab itself.
The difficlut task which i realsied was the motion of the knob. I wanted to test the power of the motor if that would be sufficent to do the task becuase the knob of the bottle was very tight and i was not coonfident if sufficient torque would be provided by the motor.
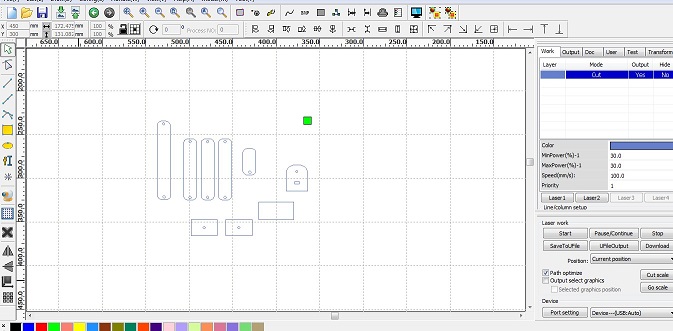
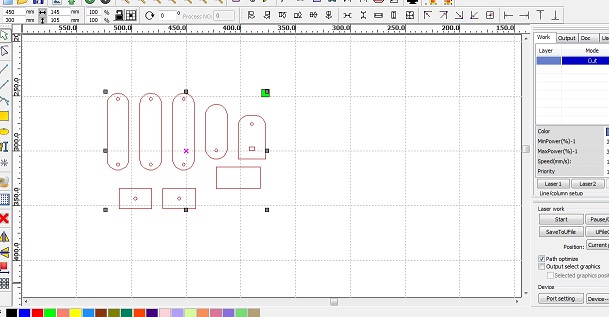
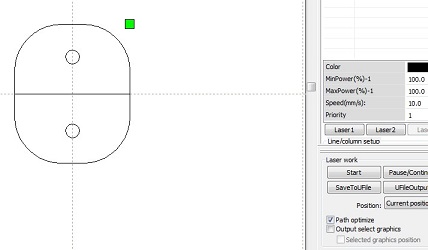
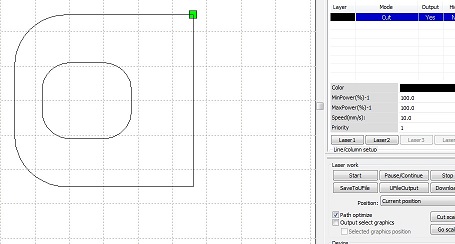
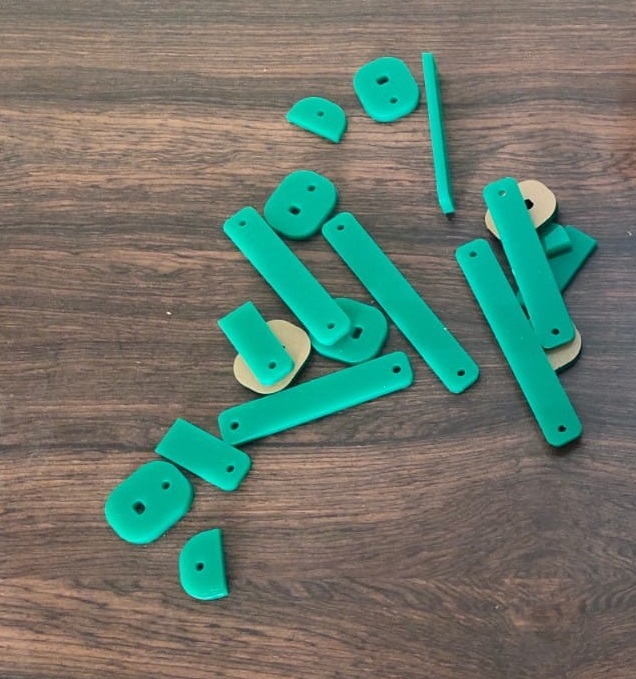
So i started with the testing. I cut some random links on the laser cutter and i cut the sheet using a cardboard. During testing we ealsied that we need to have the links in the same order put some data.
                        Link Lengths
                        4cm x 13cm
                        13cm x 9cm
                       all other links are taken as it is not mandatory to use them with spefic dimensions as it will depend on the motor we are using and the fasteners also.
Since there was an entanglement in between the links so we had to design the liks again to seeif iot working properly or not.
The links were then cut using that same dimensions and the motion of the bottle was achieved. I was so excited to see that because i was thinking that this motor is not going to be sufficient.
The process of laser cutting can se seen on this page
In the first trial the bottle knob was not geeting pushed and the side wall which was of a cardboard was also moving so all the force which should have transmittd to the bottle knob was not fully trasmiited.
In the second attempt, we increased the length form the base so that the knob is pushed. But since the base was not fixed so it was jot trasmitting the force properly.
In out third attempt, we achieved the required motion but then we also realised that the wall and the base should be hard and cardboard will not do in the lon run.
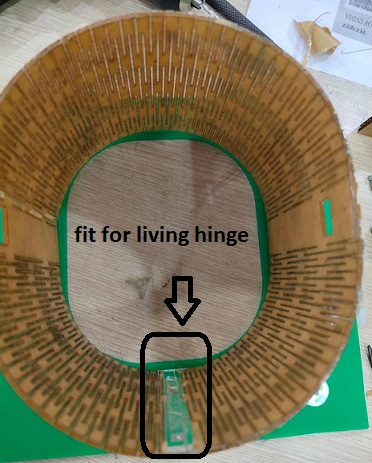
Now we have decided to make the overall structure of the machine using acrylic. I cut the links and the side wall using the acryl;ic sheet ut the center portion was circular in sahpe and i wanted to cut that circular shape using the acrylic only. so i thought of searching hoe to make cylinder using acrylic sheet and i found this video which helped me design the living hinge.
This page helped me to see the lot of applications of living hinges and the difefrent designs. I designed the living hinge in such a way that it combines at the end properly.
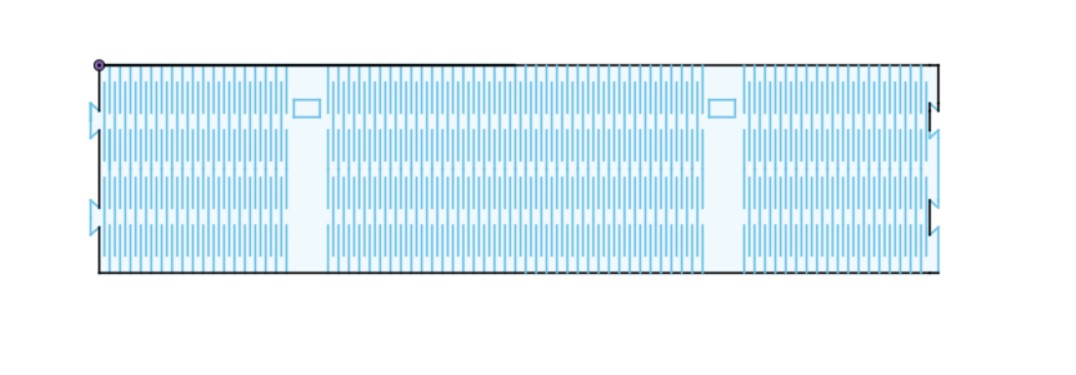
The part at the end made sure that it sticks to each other very easily.
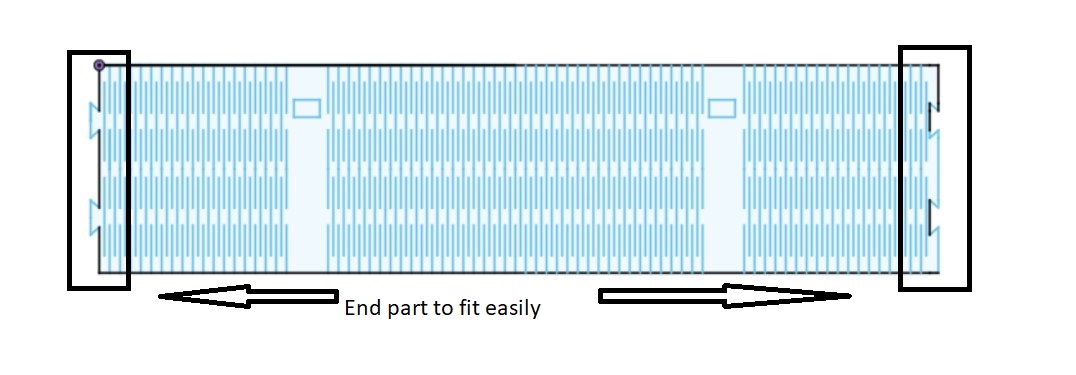
The living hinge in the first attempt got detached since the openings were also included in the same design but in the subsequent design this flow was removed.
In the next attempt the hinge came in a single piece and it was converted into the cylinder.
The end were also properly attached with the pressfit structure and with the help of the glue.
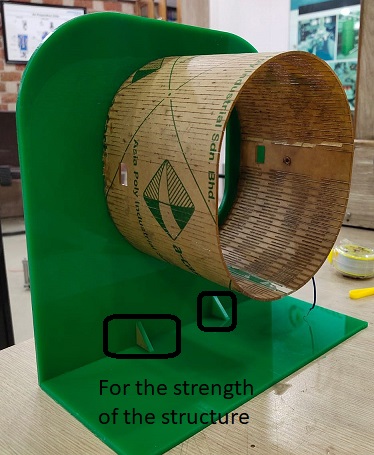
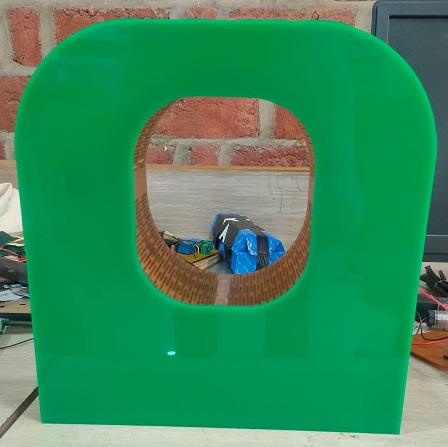
The cylinder then was attached or glued to the side wall of the machine which is also made of the acrylic sheet. we have useda 3mm acrylic sheet for the outer body.
Since with the movemnt of the motor , a force is transmitted to the side wall because of which it is required to give it strength. So i have glued two supports on the base which will resist its motion to the back side.
We had seen this in our trial with the cardboard that there was a lot of movement of the side wall and from there i desided to instal, them in place.
Now it was time to cut the links and come out with its working. So i decided to cut the links on acrylic itself since they have good strength and can transfer motion easily.
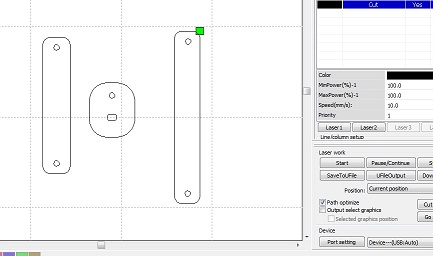
The links were then connected to each other using the fasteners, we had to cut the length of the bolt to make sure that it does not come in the path of the links.
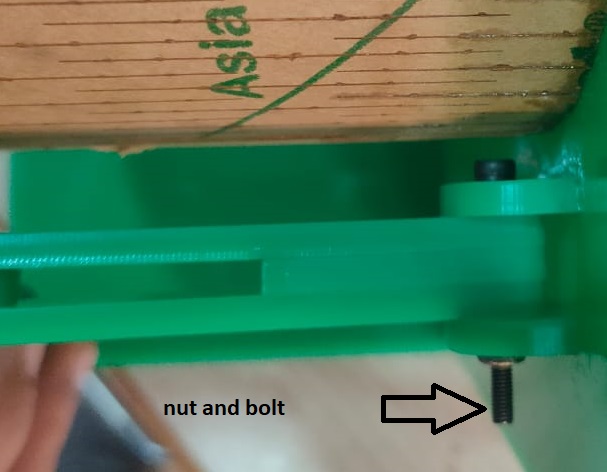
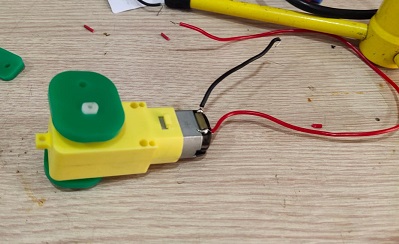
This is how the link is attached to the motor shaft. A tight arrangement is necessary for the motion transfer to take place. this is stuck to the shaft by the use of the glue as well.
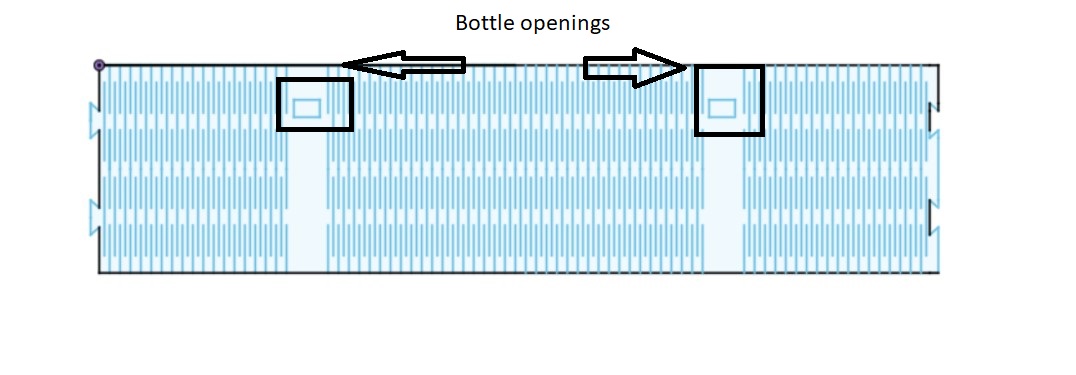
The bottle is then put in a box which has to be stuck to the base so that it is positioned at one place only. In the trial i had found that the bottle was moving and because of which we did not get the required push so this time we have covered the bottle first with the cardboard and then with the acrylic.
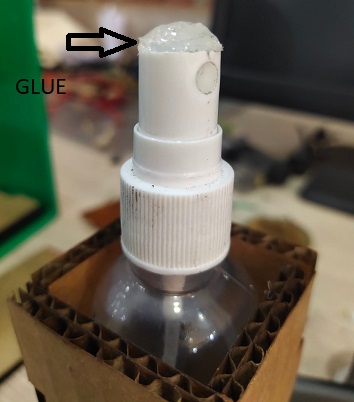
I had to put the extra glue on the surface just to make the surface protruding because the knob of the bottle was rotating and that was not required.
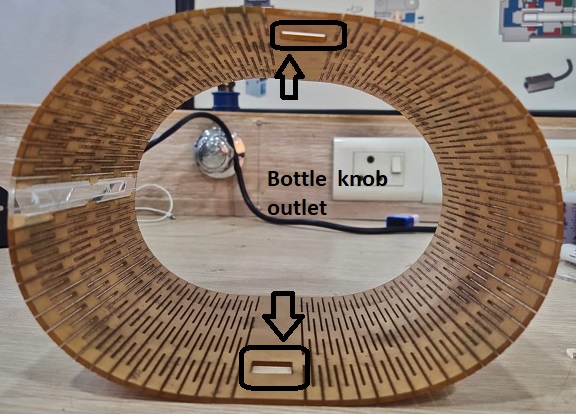
'We have drilled two holes in the living hinge since (ldr sensor and laser diode) has to be installd in the machine.
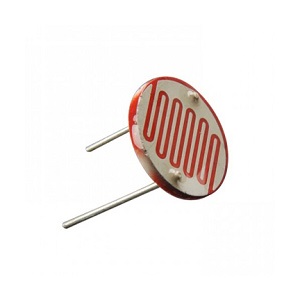
LDR SENSOR
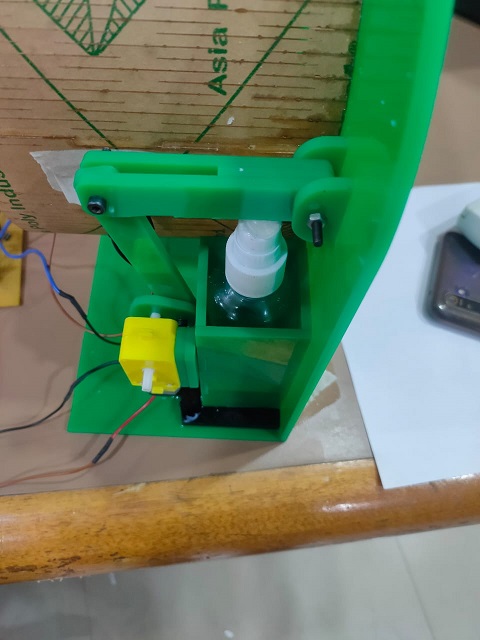
SO it is time to install both the sensors to the cylinder and motor also and test the working of the machine.


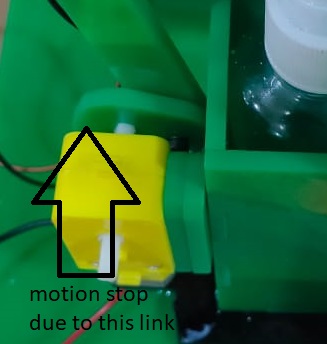
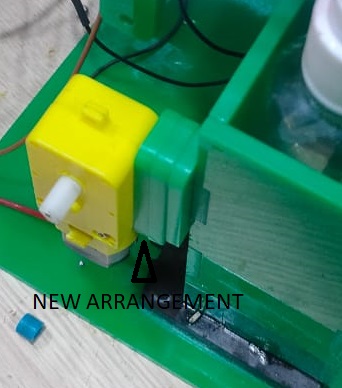
The motor was getting stuck on the base in between so we have to place one more surface to increase the length of the link.
Download Living Hinge Dxf file
Download New links Dxf file
Download Trial links Dxf file
At last with the addition of one more acrlic sheet we could get the uninterupted motion. The ldr sensor was able to switch on the motor when light was obstructed from its path and the constarined motion of the links was obtained easily.
Automatic Hand sanitising machine with Arduino
The machine was working without the use of any microcontroller. It is wise to use a microcontroller because it lets you control the circuit in many ways. you can add a lot of features and control them using microcontroller if you want on to your machine. The major reason for not using Arduino or any other microcontroller was that it incraeses the cost of the project. The machine which we have made without any microcontroller is costing around Rs 700( 10US dollars) which can increase to 14 dollars if we use an arduino board.
So we have run the machine using the arduino board as well.
The code for the board which we have used is
    /*This work by NEERAJ GUPTA is licensed under a Creative Commons Attribution-ShareAlike 4.0 International License.*/

 int sensorPin=A0;
int sensorValue=0;

int motorPin=8;

void setup() {
Serial.begin(9600);
pinMode(sensorPin,INPUT);
pinMode(motorPin,OUTPUT);
}

void loop() {

sensorValue=analogRead(sensorPin);

if(sensorValue<=600)

{
digitalWrite(motorPin,HIGH);
}
 else {
digitalWrite(motorPin,LOW);
}
Serial.println(sensorValue);
}
We have made the circuit on a bread board and checked it first if it is working or not. Then we ran it on our machine and hurray we did it with an arduino board as well.
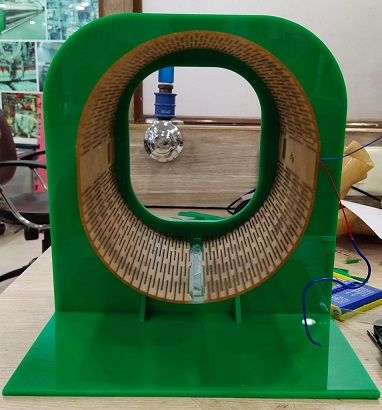
Fully Assembled Automatic Hand sanitizing machine
Controlling machine with Arduino
Now its the time to control the machine which we have developed . So i want to control the number of sprays coming out when the hand is detected by the ldr. The machine will spray 5 times in 1.5 seconds and then it will detect another hand and then it will again run for 1.5 seconds. We have provided delay 1500 when the motor is open and the delay of 3000 when the motor is closed.
If the hand remains in the hole for more than 4.5 seconds then the motor will start again but the chances of happening that is very less.
The code for the board which we have used is
    /*This work by NEERAJ GUPTA is licensed under a Creative Commons Attribution-ShareAlike 4.0 International License.*/

  int sensorPin=A0;
int sensorValue=0;

int motorPin=10;

void setup() {
Serial.begin(9600);
pinMode(sensorPin,INPUT);
pinMode(motorPin,OUTPUT);
}

void loop() {

sensorValue=analogRead(sensorPin);
Serial.println(sensorValue);
if(sensorValue<=600)

{
digitalWrite(motorPin,HIGH);
delay(1500);     // motor remians open for 1.5 seconds
digitalWrite(motorPin,LOW);
delay(3000);     // motor remians open for 3 seconds

}
 else {
digitalWrite(motorPin,LOW);
}

}
For more details about the machine you can visit our group page where the full details of the electronics and the design and the iteraions we made is given. You can click this link.