MOLDING AND CASTING
-
This week we have a group assignment and an individual assignment .
-
The group assignment for this week is to review the safety data sheets for each of my molding and casting materials, then make and compare test casts with each of them .
-
The individual assignment for this week is to design a mold around the stock and tooling that i will be using, mill it rough cut + at least three-axis finish cut and use it to cast parts .
The goal for this week is to learn about molding and casting and the Techniques that are used in order to make one part or two part molds, also to learn everything about the materials that we are going to use this week such as safety rules and how to use those materials in the best way possible .
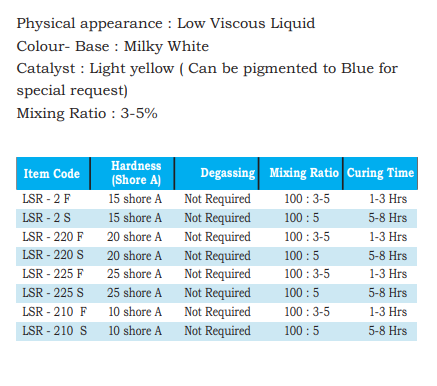
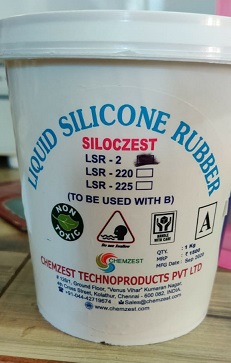
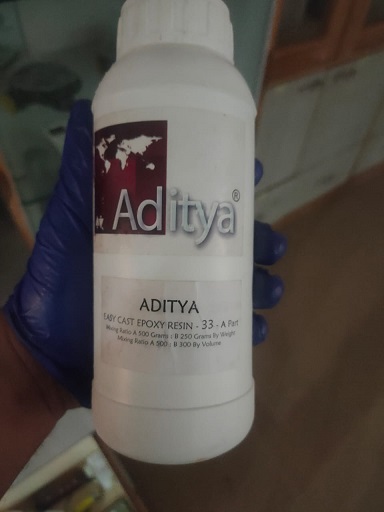
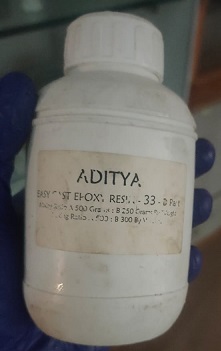
The materials we have at our lab are SILICOZEST liquid silcone & Aditya Easy Cast Transparent Epoxy Resin -33
The data sheet for the material is DATA SHEET SILICON RUBBER.
KEY FEATURES
            SILOCZEST LIQUID SILICONE RUBBERS
             1. Easy work ability process to make molds
             2. No Special Machinery requires
             3.Can get Fine details like Finger Print
             4.Heat and Chemical Resistant
              5.Available from shore hardness of 00A to 50 A
              6.Non Exothermic curing
            7.Eco safe
2. Aditya Clear Cast Epoxy 33
FEATURES OF Aditya Clear Cast Epoxy 33
1. Transparent
2. It’s like water so flows into each and every corner of mould.
3. No grinding or sanding after casting.
4. Easy Part A 100 parts : Part B 50 parts mixing ratio.
5. Non-Yellowing
Physical appearance :Part A having 3000cP and Part B having 2000Cp
Shore hardness : 80 A
Part A: Transparent
Part B: Transparent
Mixing Ratio : Part A 5:3 Part B
Working duration : 45min - 60min
Curing duration : 20hr - 2-4hr
for more information you can browse there website
We have one material each for the cast and the soft mold. The datasheet of both of them gives the information about the concentration which should be there to obtain the desired kind of cast and mold. The mixing proprtion written on data sheet for SILICOZEST is 3 to 5% and the mixing ratio for epoxy is 500gm of sol A and 300gm of solB.
Individual Assignment
Molding and Casting was not new to me but soon i realized that i only have theoritical knowledge about it and when it comes to design a mold and fabricating the product takes a lot of effort.
I came across the concept what i need to make and how i need to cast the design by Mr. Punneth (Our Remote instructor). This
page also helped me to understand the one part mold and two part mold better.
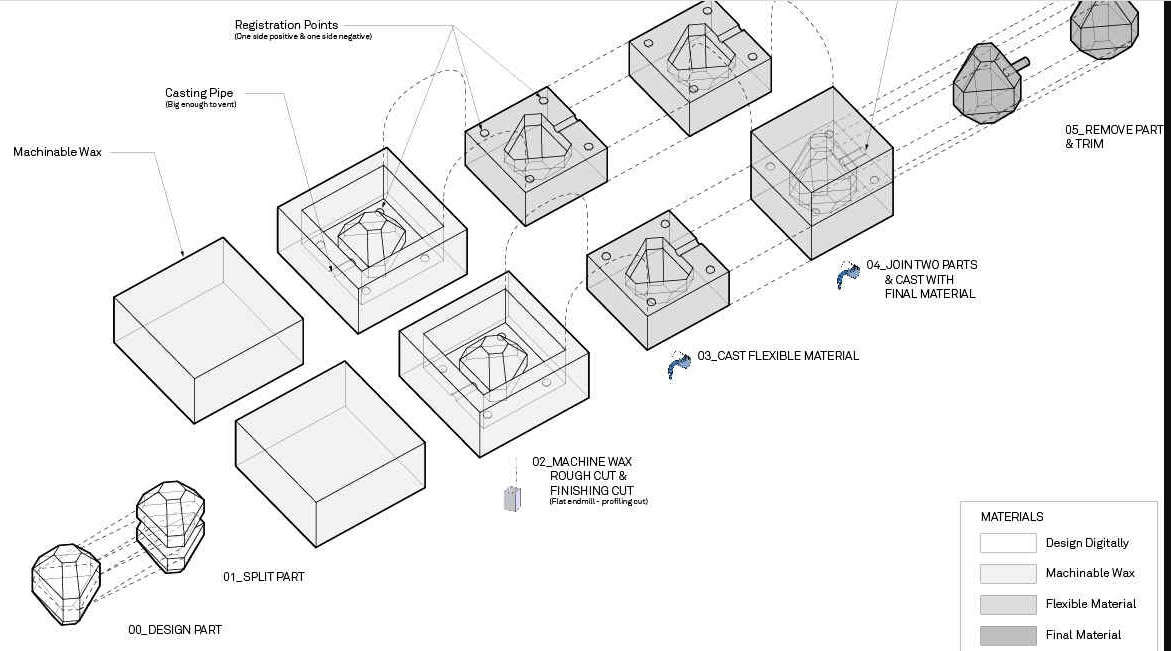
For a hard cast it is better to employ a flexible mold and for a flexible cast it is better to fabricate a hard mold. the mold is just a mirror image of the final product or we can also call it as the negative of the final product. But to produce a mold also we need to machine positive of the product and from that postive we make a mold and through that mold we can cast parts as many as we want.
So we need to design the part and then machine it to make a positive of the product.
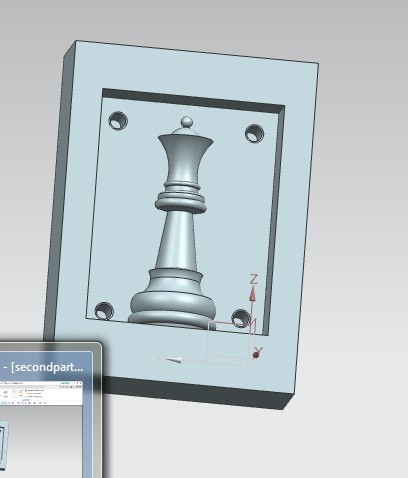
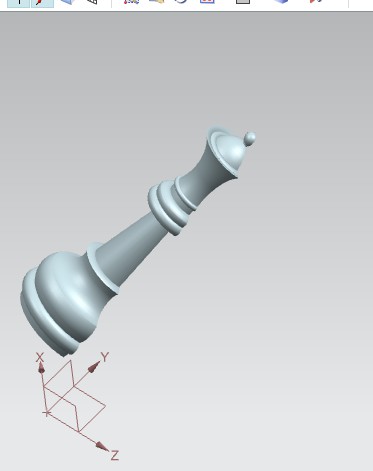
I tried to make the designs of various parts but then i opted to make a chess piece. I made the chess piece followoing the curves in the picture which i downloaded from the net.
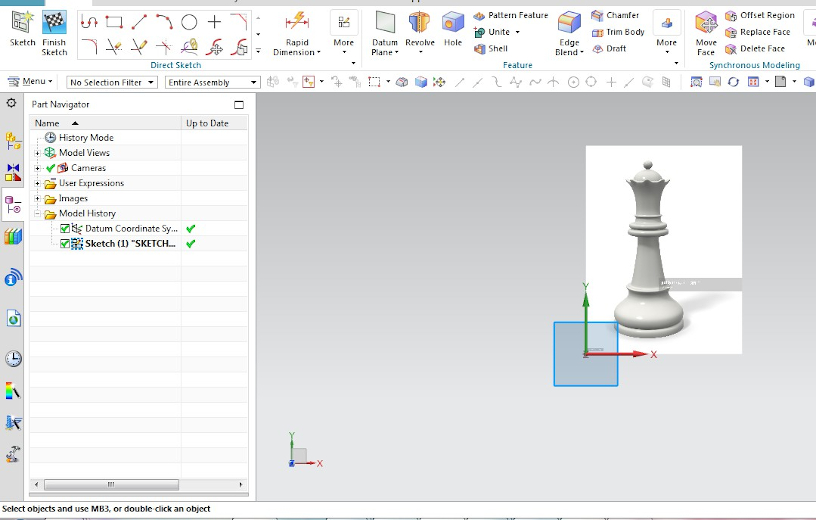
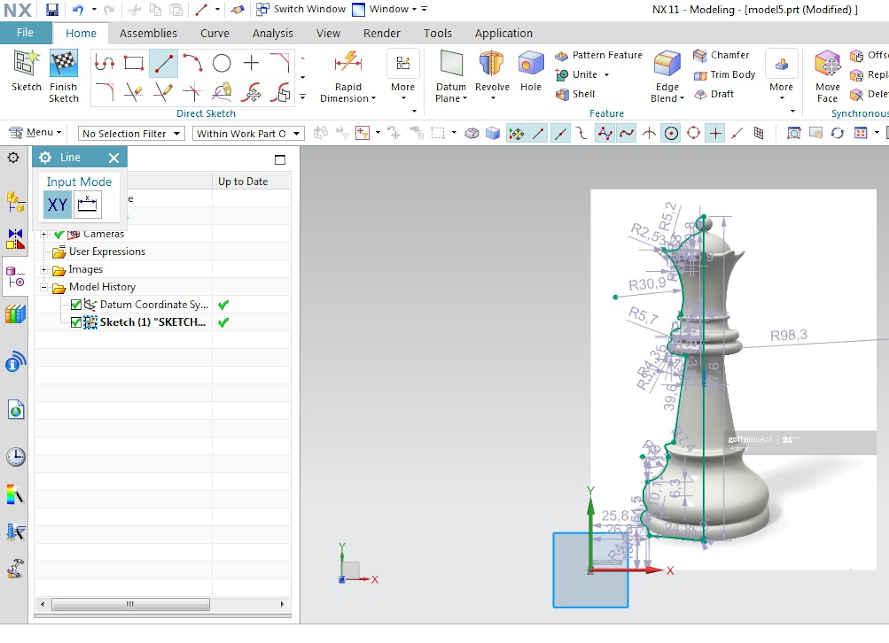
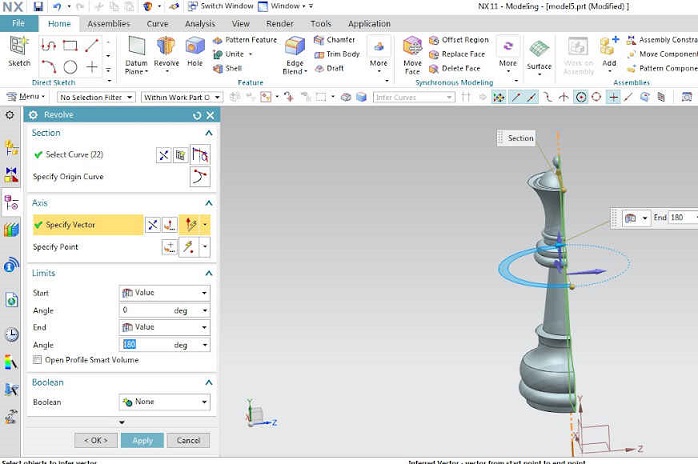
Then i used the revolve option present in NX11 to make the half of the piece.
The mold shold have arrangements to stick them together so i included protrusion at the side of the design so that it can go inside of the other one.
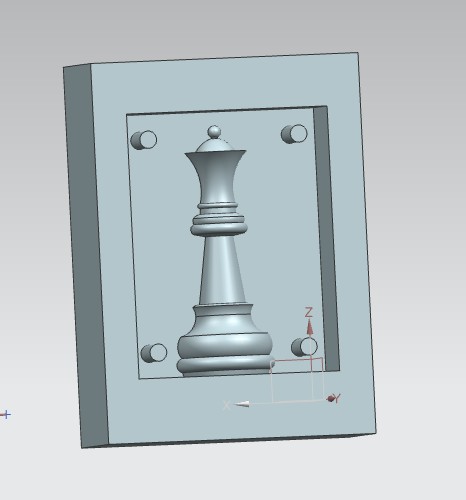
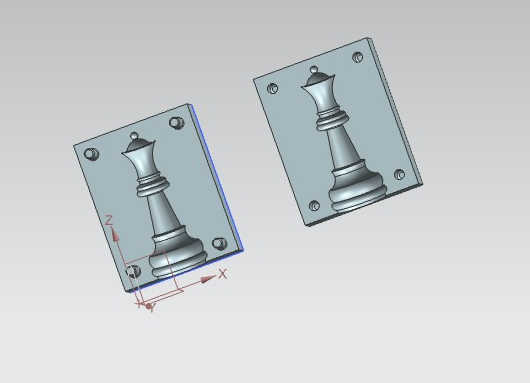
The other mold design is having the holes in it in which the protruded surface of the amle mold will go inside./
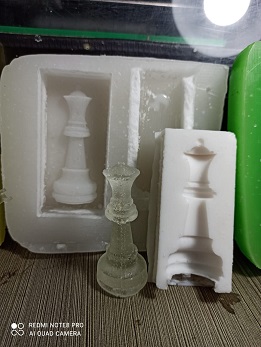
here you can see the both male and female part of the mold. Making two molds faciltates the alignment of teh catd which will come out .
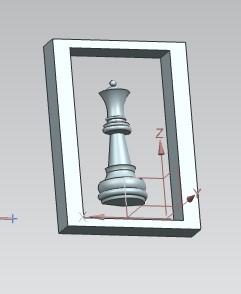
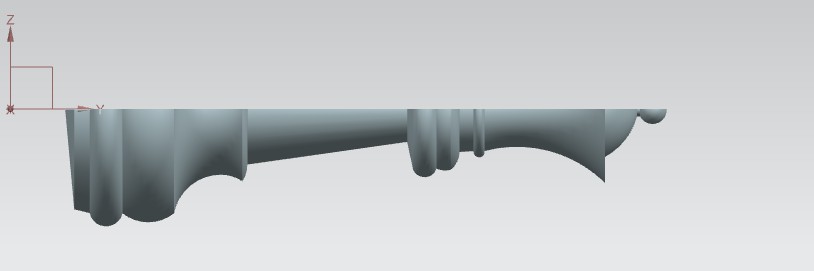
this figure shows the soft mold which will come out. you need to subtarct the design by making a rectangle over your main design and the shape of the soft mod wil come out.
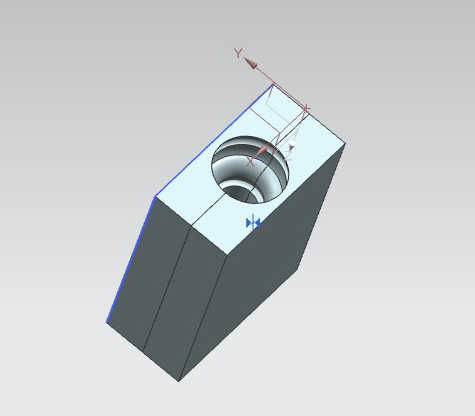
The soft mold shold have the arrangement for the epoxy to fill in so that when it solidifes the cast comes out. So here you can see in the image about the soft mold and its opening for the epoxy solution to go in.
The process of using NX is expalined on this page.
You need to export your design file in DXF format to open it in the modella player.
You can download the Modella Player from this page. This page willguide you to download the modella player.
After designing the Part it was required to machine it through SRM 20 whcih we have in our college. I used Modella Player to create tthe ttool patth. You can visit this page to see the working of SRM 20 and the use of VPANEL.
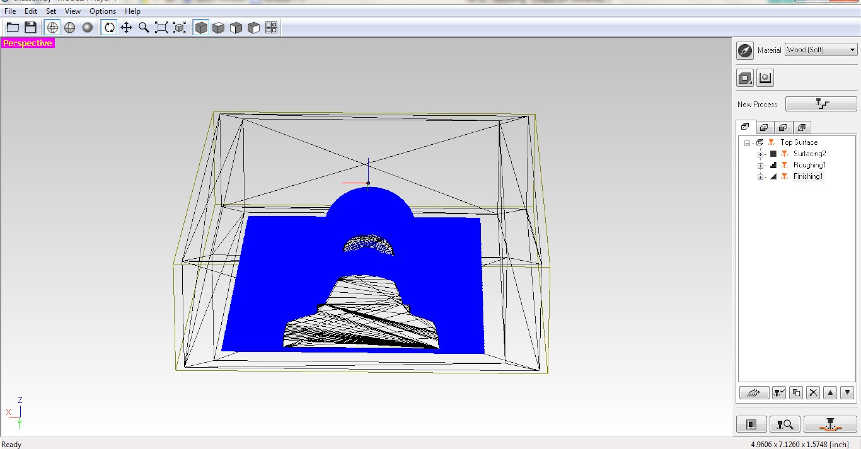
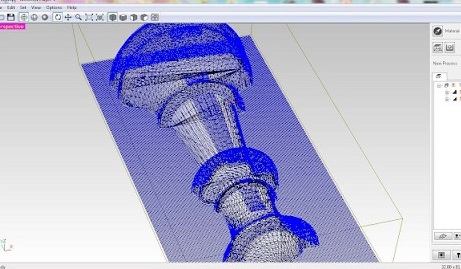
This is the homepage of the modella player and you need to import the file to the page.
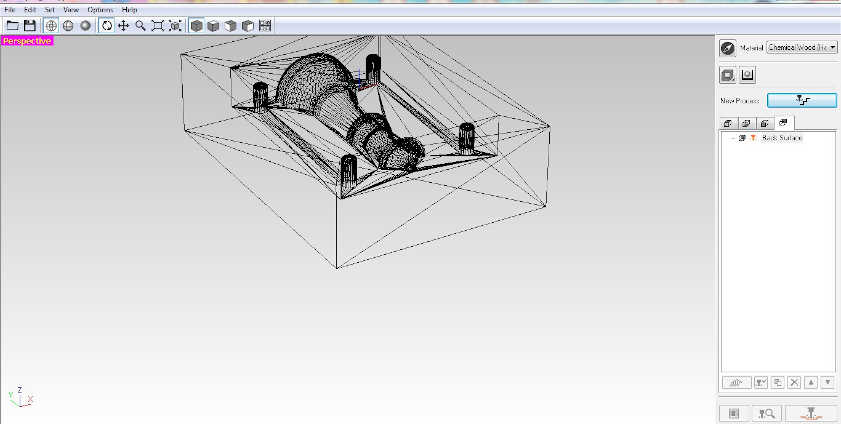
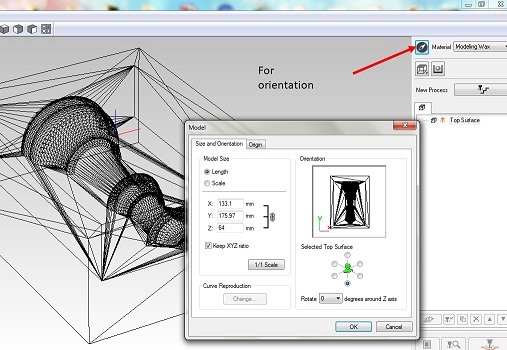
So when youi open the STL file then you need to change the orientation of the image since it will come to the screen at a random orientation. you need to align it in a way you want to mill it.
you can do it by clickinh on the upper right corner icon as shown in the image.
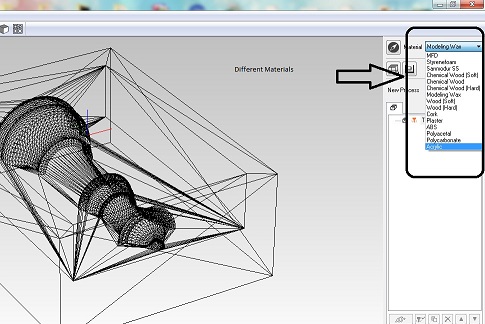
You can select the material which you are going to use for milling
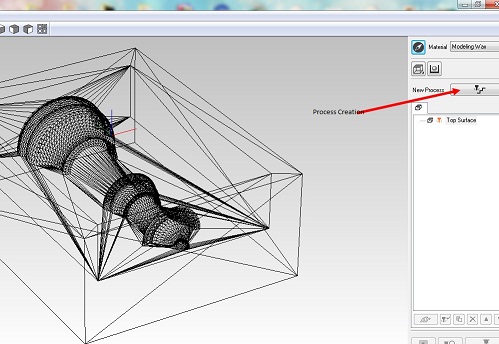
Then you can craete the new provcess by clicking n the Process craetion button.
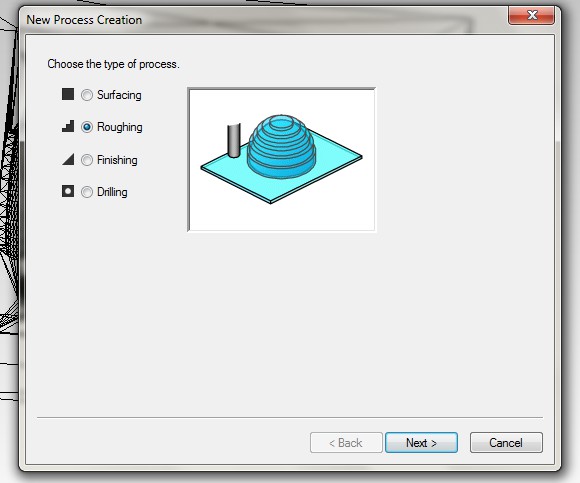
As you click on the new process creation button then there are options you see for surfacing, roughing , finishing and drilling.

If you have set the orientation in the first part then you need to orient it again.
So leave this page as it is if you have oritnted it before.
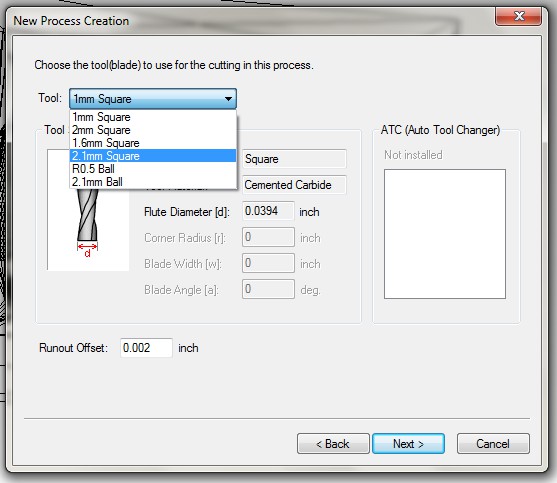
Then there is an option to choose the tool / blade for the cutting in the process. There are many options and you need to choos ethat option whioch is availaible with you in the lab and accordinh to the surface finish you want
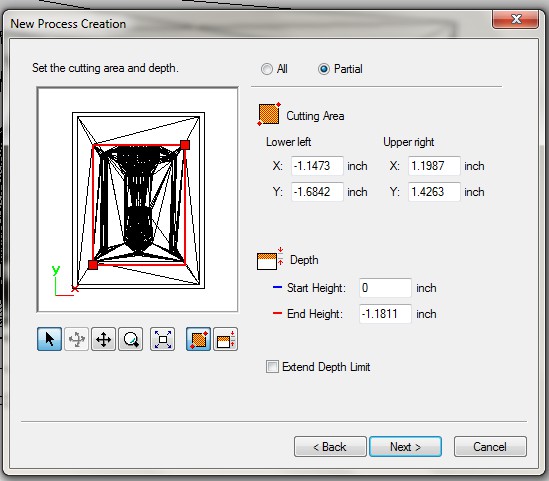
Since the Design file has the outer portion with the Chess piece inside and the main cutting portion is the inner part so you have the opyion to set the cutting area.Lesse the cutting area lesse will be the time taken to mill.
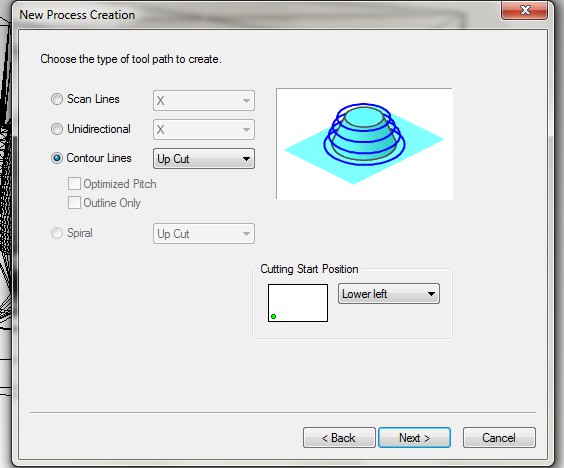
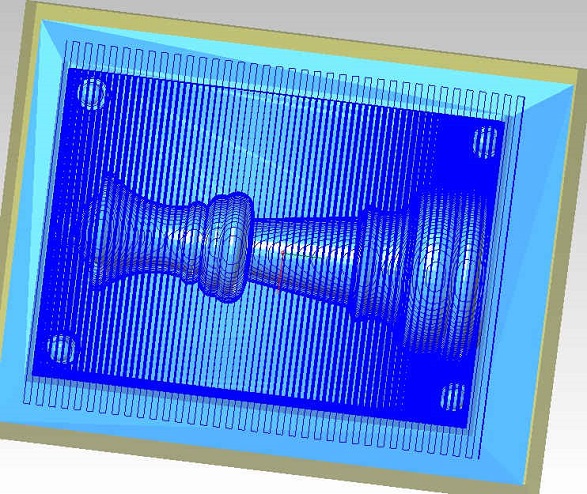
The there is an option to choose the type of toolpath from the three options where i have selected the contour lines .
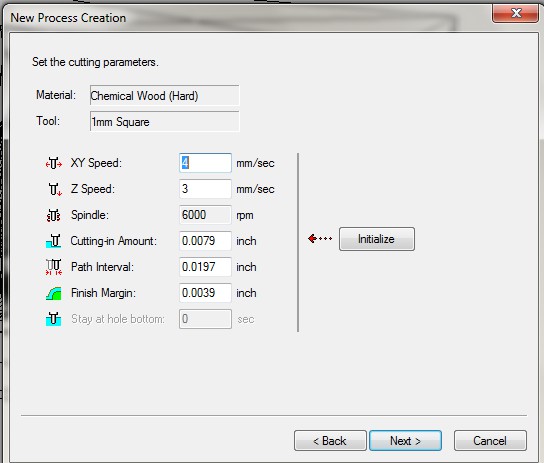
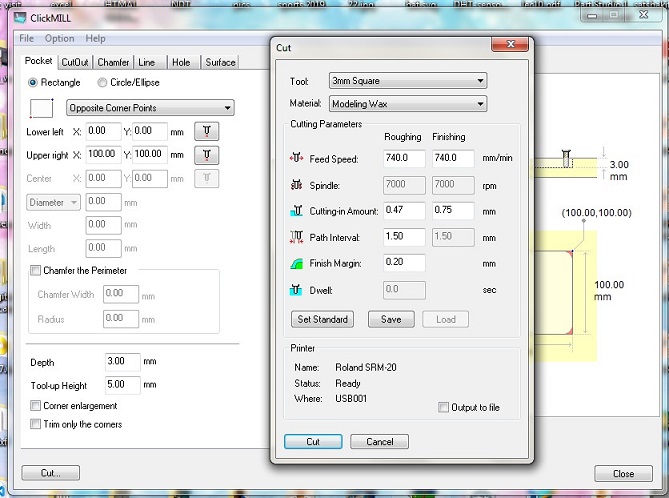
The cutting parameters are standardized for the type of material and the tool selected but if we want to change, we can change that as well.
the cutting parameter has the XY speed Z speed Spindle spped and cutting in amount( The depth of cut in one go), Path interval(same as the ffset percentage in fabmodules) and they can be changed according to the requirements.

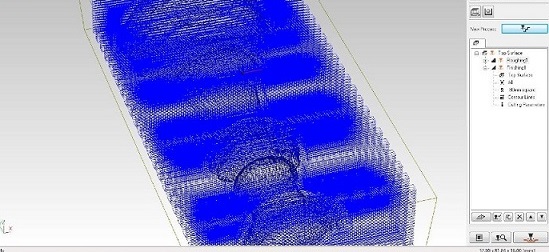
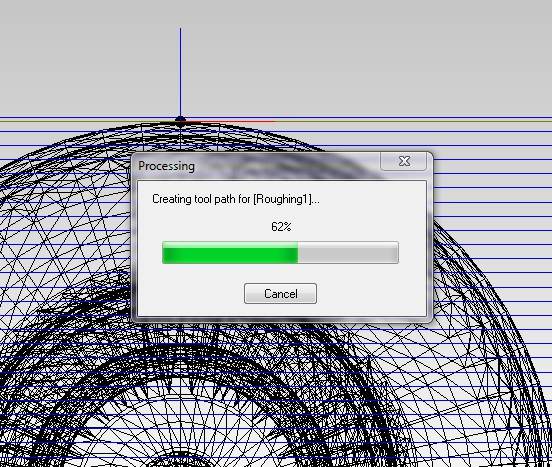
Then by clicking next you will get the Roughing and the finishing tool path.
You can see the simyulation jusy by clicking on the link on the right hand side lower corner where Preview icon is present. That preview will be availaible if you have virtual Modella installed.
Since this whole process is done under lcokdown so the tollpaths can change according to the avalaibilty of the material in the lab and the tools. So the setings which i used is availible at the bottom of the page.
Download ROUGHING AND FINISHING FILEAFTER THE LOCKDOWN
The design work which was required was completed in the lockdown time and it was time to mill the design for the hard mold. We initially were prepared to mill the hard mold on the MDF but soon to realise that the all the MDF which were ordered were glued together and nobody knows why that happened.
It was almost impossible for us to get that seprated since the glue was very hard and it could took us days to seprate them and with all these problems on our side came a rescuer Mr.PULKIT TALWAR. He had bought 5 kg of wax just after the lockdown and that had to be used in this week.
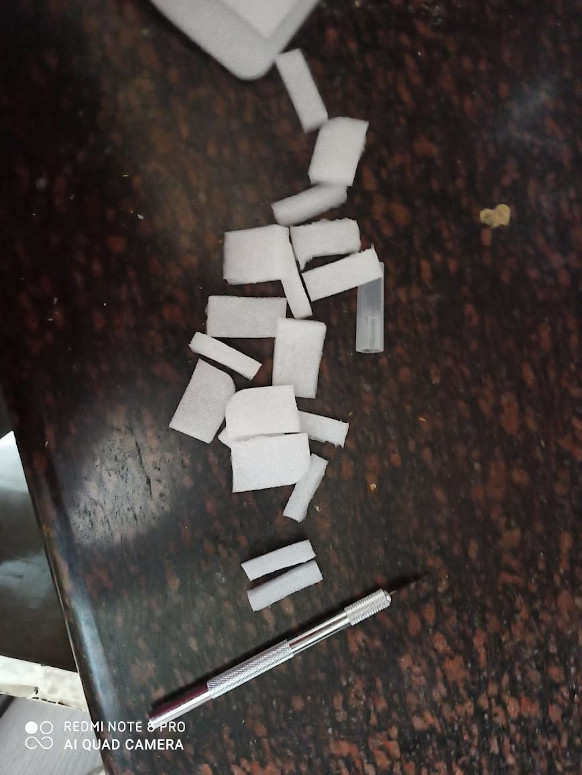
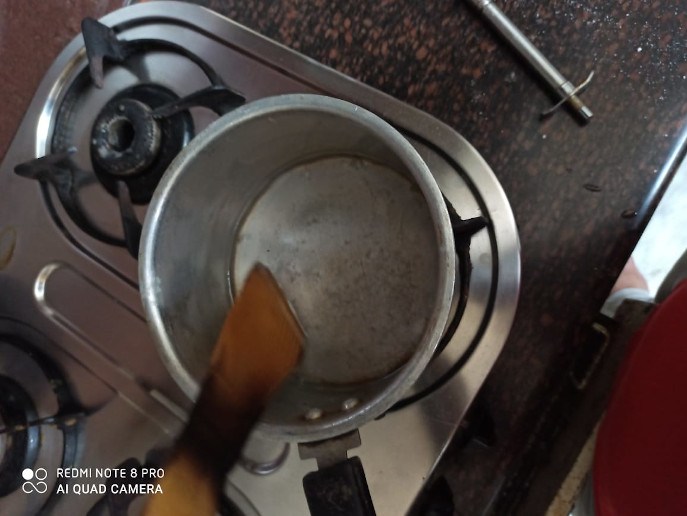
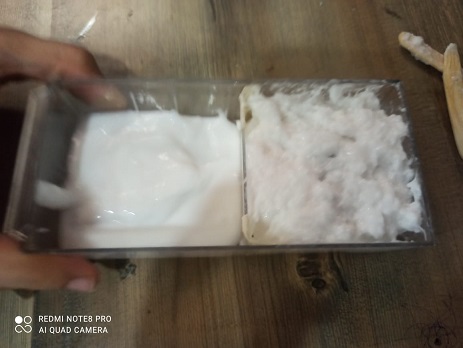
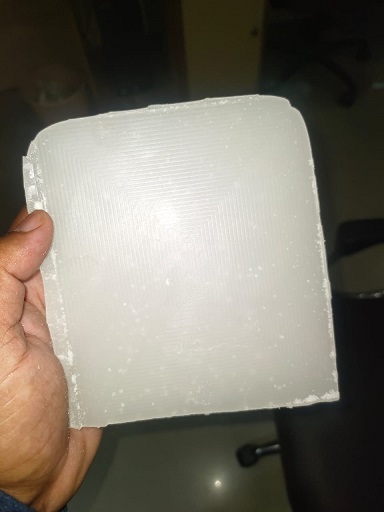
We did some experiments by mixing wax and foam and realised that the wax after solidifying had good stregth to machine with the amount of the foam added. The concentrartion of the foam is 10gm form in 1kg of the wax. The task which we had was to solidify the wax in such a way that it comes out in a unifrom dimensions but none of the wax were uniform as it was gtting solified form the coemers and as it came to the center a trough is created. we tried to put some liquid wax at the center on the way of solidifying and that helped a bit but still the thickness was not unifrom.
This is how the small pieces of the form were cut and mixed with the wax to give it strength and all the work was done in Pulkit's Kitchen.
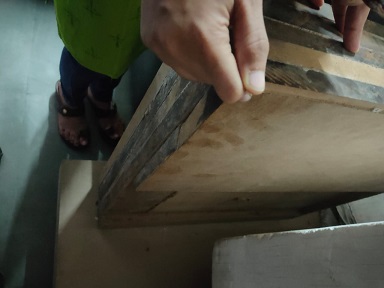
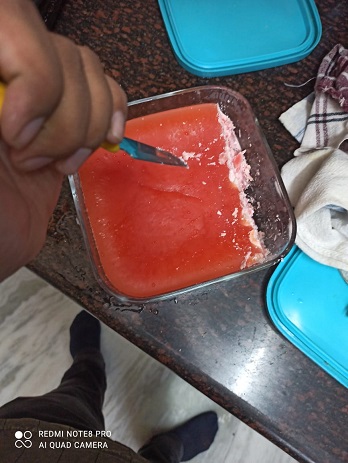
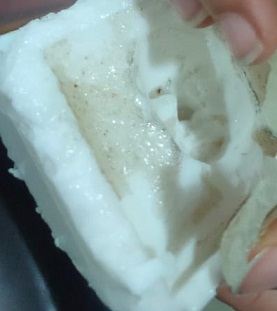
The wax was stuck initilaay in the glass box and it was removed with the help of higher forcesand from then on we applied oil so that it comes out easily.

We had to use the File to remove the extra wax coming out form the sides and top to make it smooth so that the Milling machine does not need much time to surface the wax.
Click mill is used to level the surface of the wax after processing it with a file and it was an experince since the path of the file going down was also not straight and we had to again do it with extra care.
Click mill has the optiion to select the tool and the material which you want to mill and you have to initilally give the dimension of the surface you want to level and then surfacing is done.
The quantity of the wax was less and we were unaware of the number of iterations which we are going to perform so i had to do some modifications in the deign so that i make only one mold on one wax. So i had to remove the protruding surface form my design so that only one can do the task of both of them.
The protruding surfaces were given just to make sure that when both the soft molds are attached then their alignment should be perfect otherwise the mislignmenst can be seen in the cast as well.
So we staretd with milling the surafce of the wax to level it so that we can have the mold on it and then we also thought to do some experiments with the eopoxy and silicon
We had the hard mould of a face form previous years and we tried to make some cast out of them and i realised that the experments were crucial as we learnt a lot from these experminets.
It was important to do the test with the silicon and epoxy as we had no prior experience and we just wanted to see how a soft mold comes out and how a cast is made. My target was to achieve a good soft mold and a good cast by appling the solution as reccomneded in the data sheet. the results were not appreciable but after that we got good results when we established the soltion mixture ratio. The ratio is written on the box of the silicon but there is a varying percentage from 3 to 5 percent. Initially 4.5 percent mixture was used for testing but then we saw that it got hard very quickly and the upper surafce was very uneven.
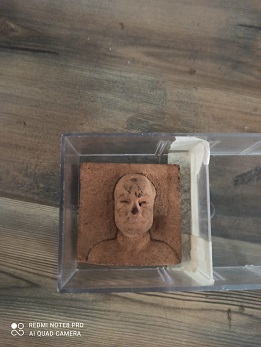
We have a hard mold of a Modiji's face which must have been done as a project before in our college.So we thought of using it for the experimentation and wanted to see if the features comes out well or not. We also had a cover made of plastic so we took that also and experimented on that as well. so in the first trial we experimented with Modiji's face. We had some silicon rubber left from the last year The first trial was very bad as the concentration of the rubber and hardner was 4.5% becuase of which the it started to solidify and the surface was not proper while the second test had good result as the surface of the soft mold was good and it did not statted to solidify just after mixing as was the case in out first trial.
But we realsied after the solidification of the silicon rubber that the features of the face came out quite nicely on it irrespective of the concentration of the hardner. Ity seemend form the upper surface that the concentratyion was not good and soon we saw that the features came out ver well.
SECOND TRIAL
In the second trial, the ratio was reduced to 3 percent as even recommeneded by many of the previous fabacademy pages. and this time the solidifaction time was around 5 hours and the surface of the silicon soft mold was very smooth. We had tested this with a prefabricated plastic piece. We did not used any oil or releasing agent in our experiments but still then it came out with a larger force. So we decided to use vaseline in our main mold and casts.
So the soft mold of both the experimnets are availaible and i want to test the epoxy by filling the epoxy in the cavity. So unlike epoxy, there is a clear ratio written over the box of the epoxy. It has asked to mix Solution A as 500gm and Solution B as 300gm and i mixed both of them in that ratio only and left it for a day to solidify.
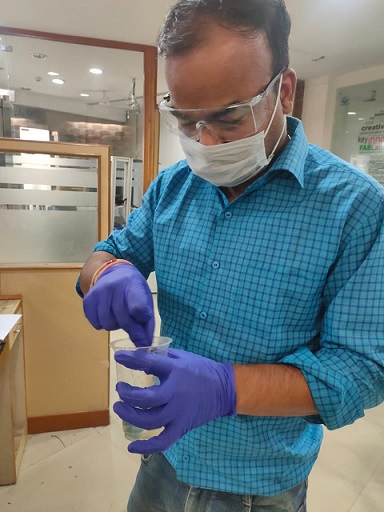
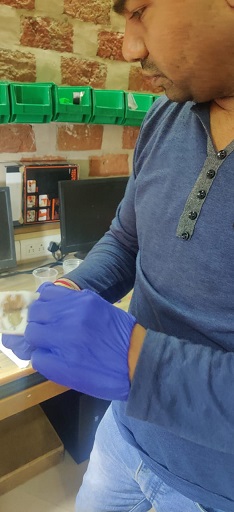
So we mixed epoxy also to test it and found that while mixing epoxy we did not rinse it well and i was also asked to wear gloves beacuse the chemical can be harse as well.

Working with virtual modella
since i have done some changes in my design so i am going to get you with all steps. And one more thing which i found this time and i was seaching for it in the lock down period was to add a tool which we are going to use to mill the board.
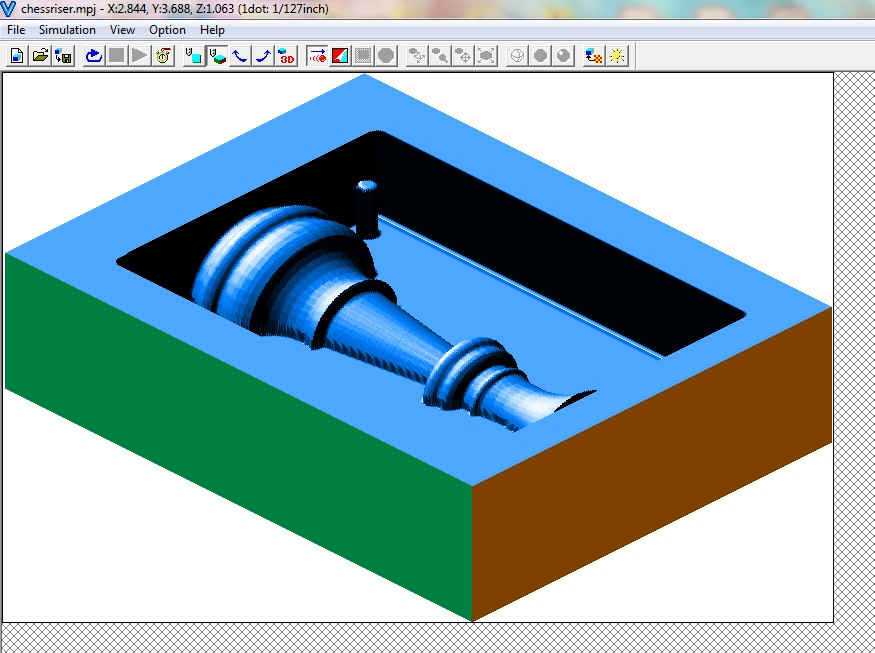
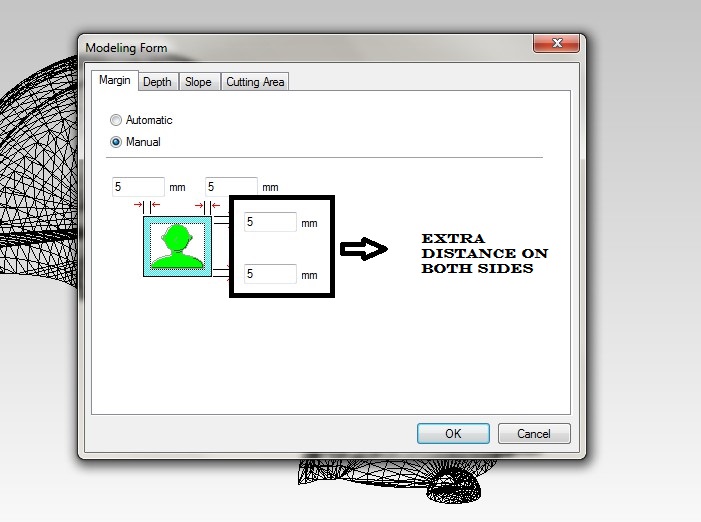
My design was not having any side walls and it had only the shape of the chess piece so i had to give it the side distance and the depth form the upper surface.

this is how the distance is given to the sides for it you need to click to SET and then Modeliing form.
The depth is seen and you can also adjust the base by adjusting it to center.

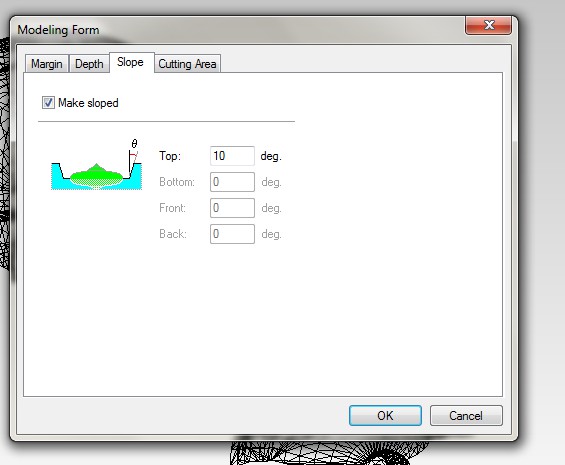
It is better to give the slope to the piece beacuse if the cutting length of the end mill is less then it will bump on the wall of your mold and will try to displace it
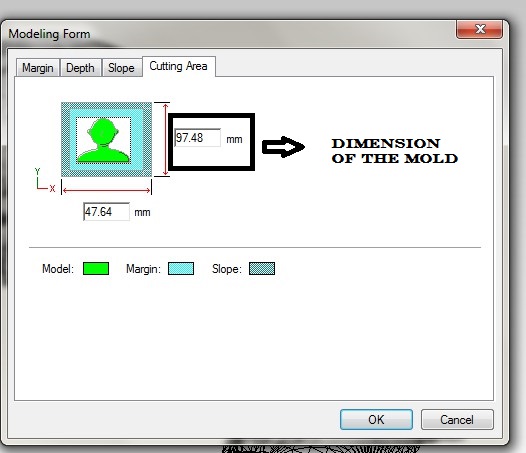
You can se the dimensions of the mold after adjusting the corners
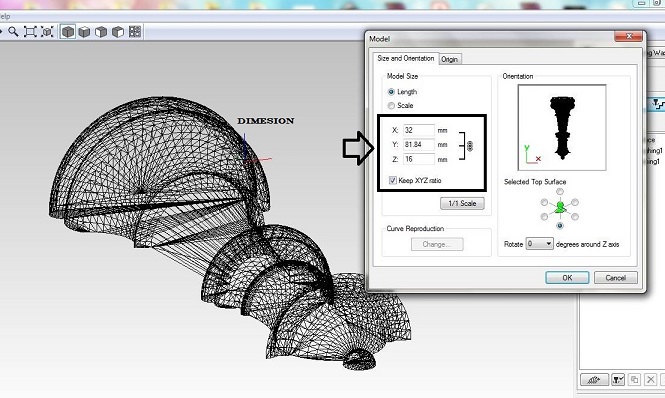
From here you can scale down the dimesions by using the scale option or directly by changing the length which adjust all other dimensions acordingly
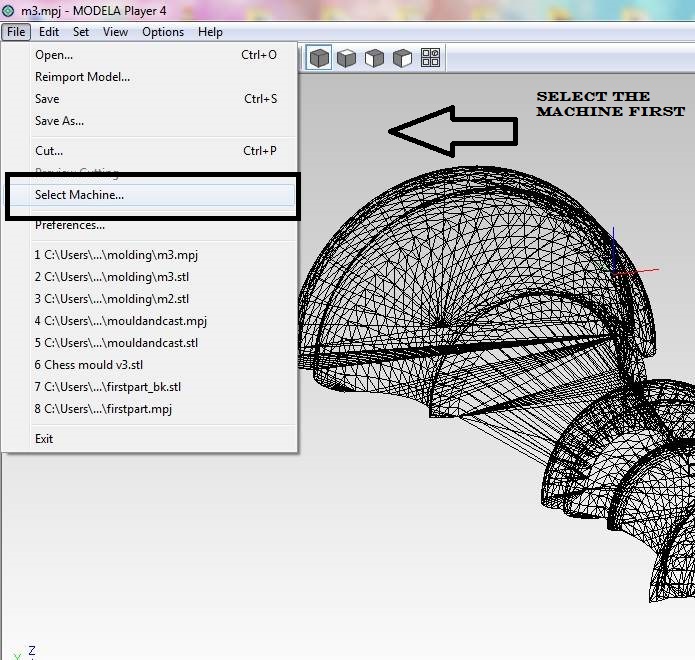
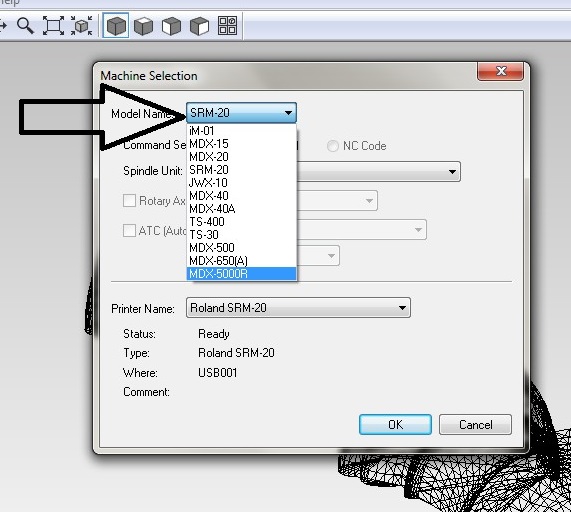
We have 1/32 end mill for finishing and 3mm toolo for roughing but they were not availaible in the list of the tool. Fot that we need to select the machine first which we are going to use and then we can easlily see the tools availaible.
Selecting the roughning and finishing toolpath. i have explained the process in the first half of this page on how to select tool and other parametrs for generating toolpath.
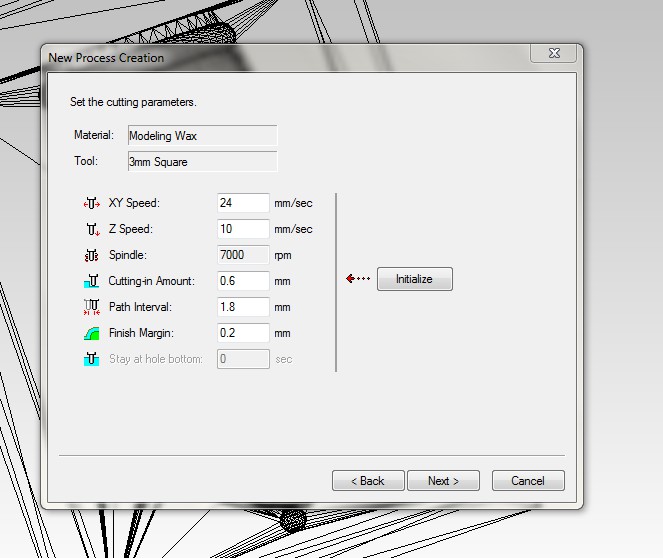
Parametrs of Roughing:
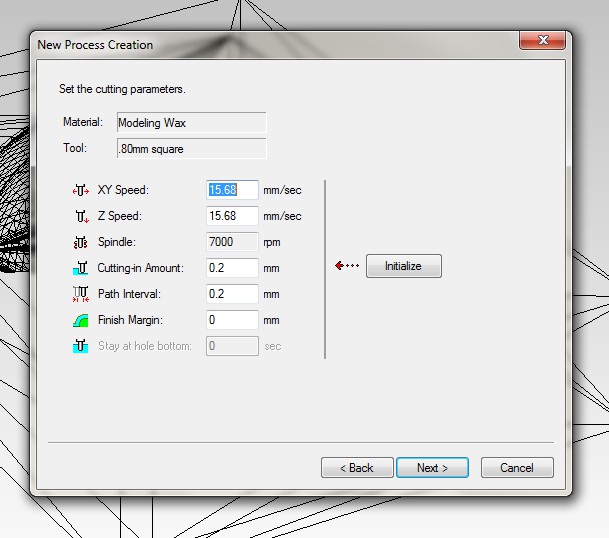
Parametrs of Finishing:
So you can see the differences in the cutting parameters of roghing and finishing opeartions.
The spped in the Roughing in the X and Y direction and the cutting depth is also higher than the finishing opeartion. The fininshing has far less path inteval of the tool which ensures that the finish comes out very well. The roughing tool interval is large because it is not concerned with the micro details of the model but the micro details comes when finishing operation is cari=rid out and that is the reason that we have less values of parameters in finishing as compared to the roughing.
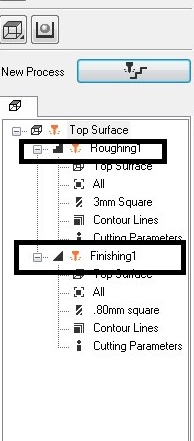
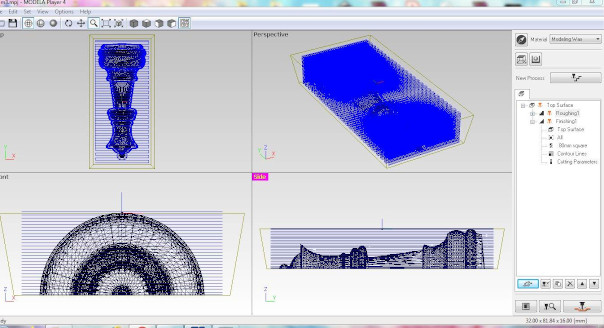
The Roughing toolpath
Finishing Toolpath
The depth from the top can be given with the option of cutting posityion setup.

Milled parts and chemical process
Initially i used thin double sided tape to stick the wax on the surface but after some time during milling, it moved from its posotion and i had to stop it, Them i applied the thicker double sided tape so that this problem does not ocur again. The good thing with the wax is that tool can go deeper at every pass much greater than the case of wood. So i did not take much time to level the surface and Roughning and milling operations were also done very easSILY. 3MM End Mill was used for roughing and .80mm tool for finishinf operation.
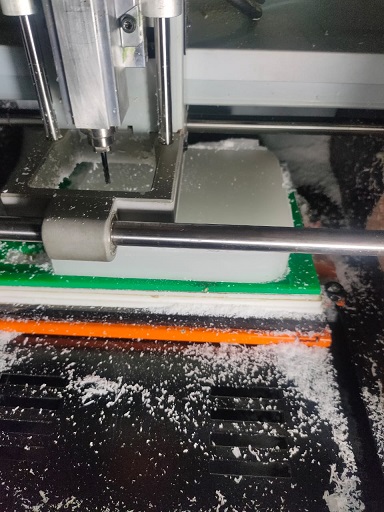
The levelling of the bed is done using Click mill. the operation of click mill for levelling of the bed can be seen on this page.
This is after surfacing of the top part. the toolpath can be easilty seen on the surface.
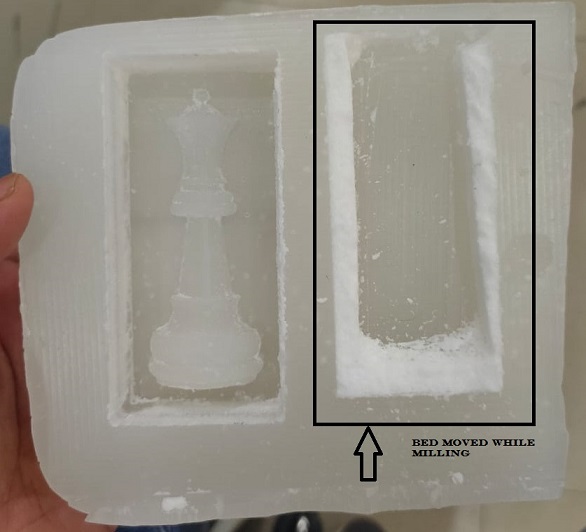
I used the thin double sided tape because of which the bed got misaligned because of the tool force during roughing so it is always required to clampit stronglu using hard double sided tape.
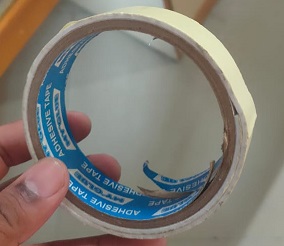
THICK TAPE
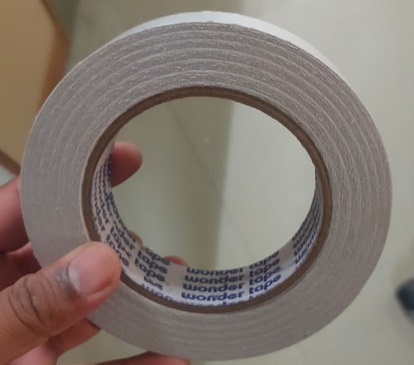
THIN TAPE
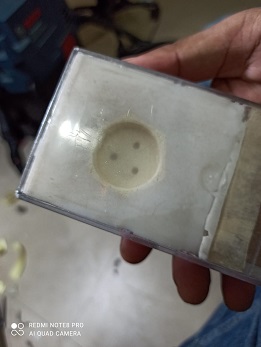
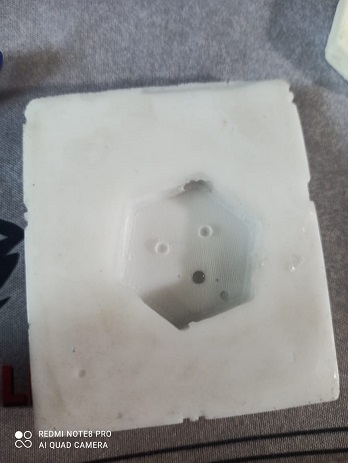
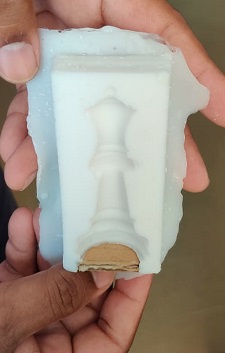
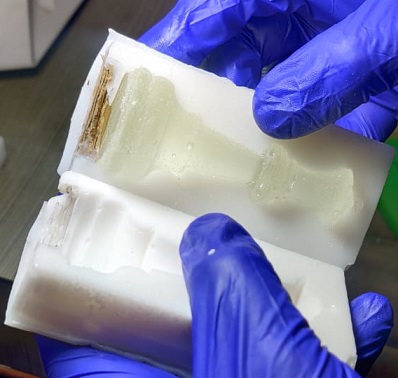
The hard mold came out very nicely but i realized that i have given extra portion on the botton side which will not allow me to craete a void to fill the epoxy from the bottom part so i took a cardboard piece and applied that on the bottom of the hard mold and when the silicon solidified, i removed that extra piece and again filled the silion solution in the hard mold itself. It is required to give some space for the epoxy to go in, if i would not have placed the cardboard beneath, then there would not have been a void which could facilitate the epoxy to go in thats why i had to place the cardboard which created a void because the cardboard was removable.

I had given the space in the bottom part also and is suddenly realised that it is wrong to solidify the siliocn rubber over ot because in that case there will not be any space left for the epoxy to fill in. So i applied a filler made of cardboard and it come out very well.
The ratio i used is 3 percent for the silicon rubber and hardnener as the recoomended ratio is from 3 to 5 percent
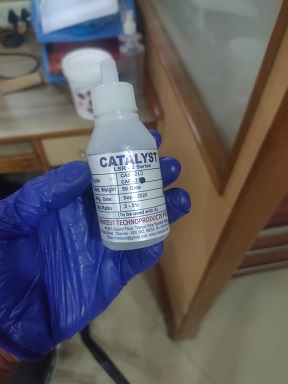
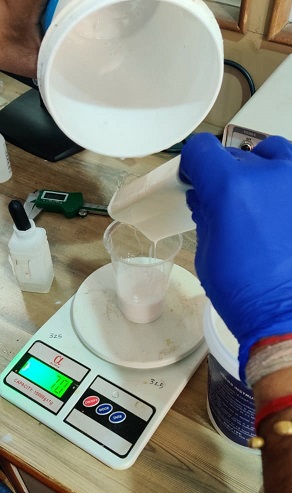
It is mandatory to use gloves and mask so that the chemical doesnot harm you in any way. I measured the amount of silicon which was required by filling water in the mould and emptying it in a glass which gave me the volume of the mould then i mixed the hardner in the ratio of 3percent hardner in the measured volume of silicon rubber.

It is recoomended that you take 5 ml more silicon rubber then the measured one because you will find that some of the silicon remioans inside of the glass and it becomes very difficult to remove it and fill in the mould.

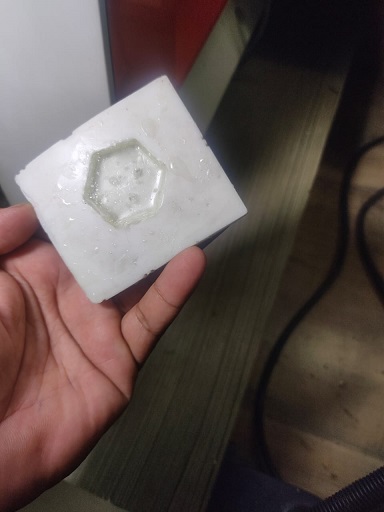
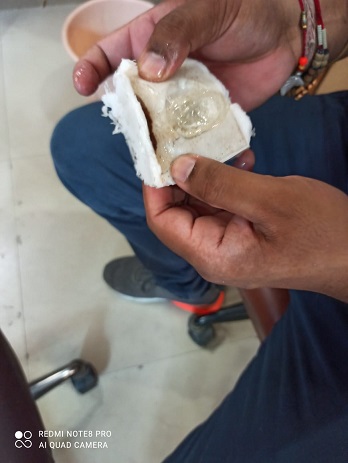
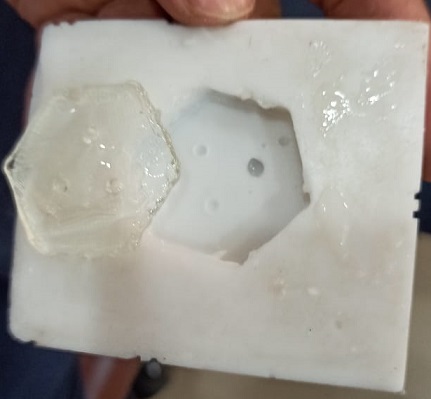
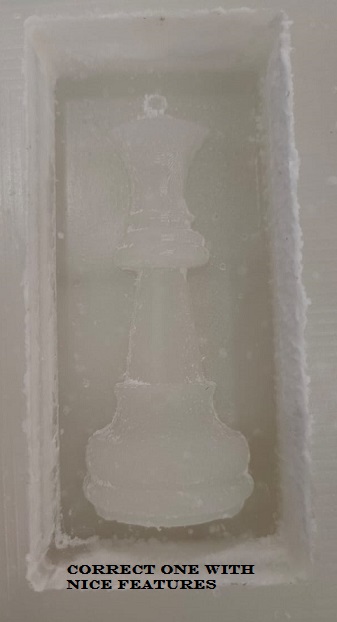
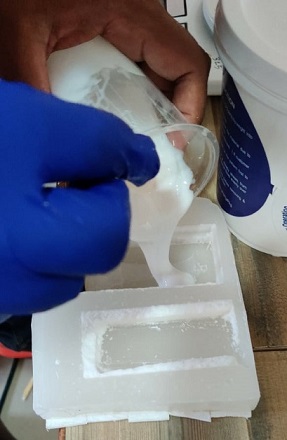
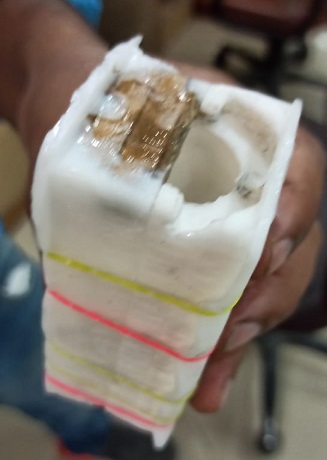
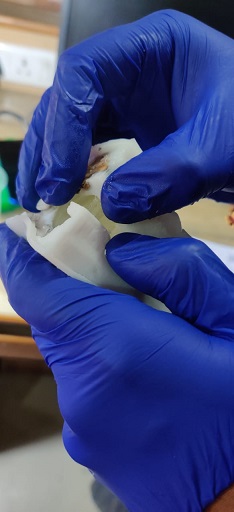
The silicon which came out was very nice i had to remove the cardboard from the bottom and again put one more silicon solution to solidify and i clubbed both of them together with rubbers to get a tight fit.
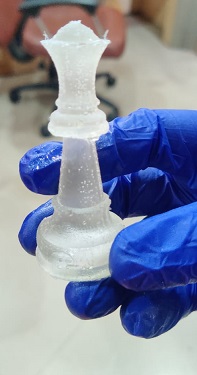
Now it was time to use epoxy to make the cast. We had taken some inputs from the test we conducted initially with the epoxy. It was required to mix the epoxy well. we used ADITYA EASY CAST EPOXY RESIN 33 A PART AND B PART. The mixing ratio is 500gm A part with 300gm Bpart.Mixing it well and need to make sure that the rubbles formed are very less. The bubbles if remains there will blast during solidification and will create voids on the surface resulting in degraded surface finish.
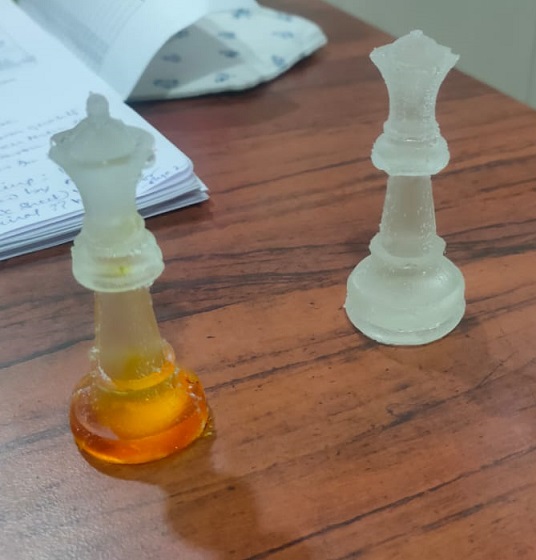
It took around 24 hours to solidify and the cast which came out was awesome. It looked really nice. There were bubbles which could be seen on the surface but overall the surface finish was also very nice.
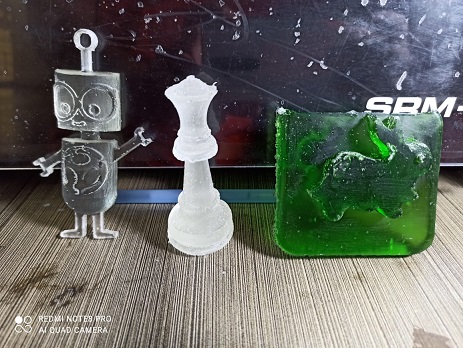
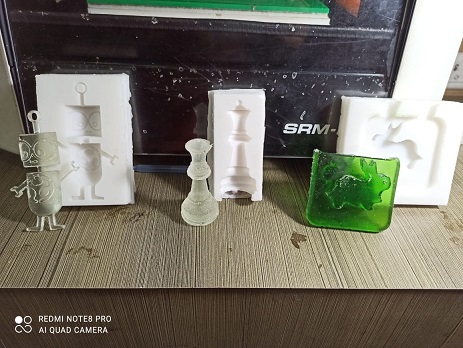
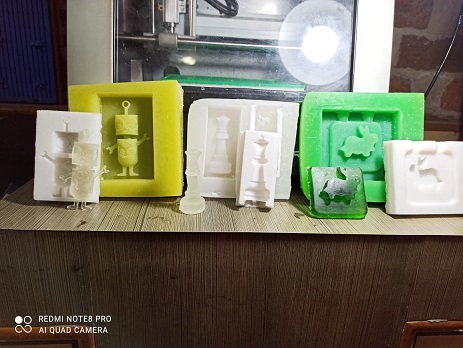
HERO SHOT
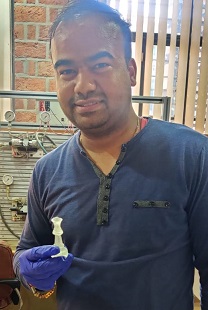
The cast and the negative soft mold and positive hard mold of all the three students.
Download ROUGHING AND FINISHING FILE
Download OLD DESIGN FILE
Conclusion
This week was very intersting, we actually enjoyed this week alot since there were a lot of things to explore starting from the wax makiing to machining of wax becuase nothinhg was known to us. Then i changed the NX design to minimize the use of the raw material. Working with and experimenting gave me a lot of confidence for product design. All three of us were so happy to see the cast come out well that we decided to make one more cast with improvents. The next one came out well as i added color onto the base of the chess piece and could see that the bubbles formed were very less as compaed to the previous one.