What you will find on this page:
-
2013 project
Individual project: remodeling the 3Dsimo
Individual project: 3D printing landscapes
Individual project: 3D scanning
Individual project: week assignment
Group project
Reflection on this week
Manuals and design files
2013 project
In the Academy of 2013 I managed to finish this project.
During this week I worked with several 3D scanning machines:
a kinect 3D scanner and the 3D scan function in the modela.
In software I used the app 123D to try and make a 3D model by taking
pictures.
In one of my previous weeks, I had experimented with Blender and printed out my creation
that I made back then: a viking sword.
Looking back at the webpage now it says that: "Im on totally new ground now. But we go for it." Funny how things can change in 5 years time. At the time of writing I'm surrounded by 8 3D printers, from which 2 are my own. In less than 5 years time I'm considered an expert in building and maintaining but also teaching on 3D printers.
The link to the old page can be found here
Go to topIndividual project: remodeling the 3Dsimo
Problem description
When we first heard about the 3DSimo 3Dprint pen in the lab, both Cristina (my boss) and I were exiting. Building your own pen! Yeey! We started brainstorming about it and decided
to add it to our Christmas camp over the Christmas holidays. But first we needed to make one. So on a not so cold December day in 2018 I took the box and build myself one. And I found some
problems. Nothing that an adult can't handle, but we're working with kids... It needs to be easy-ish and safe.
So I started researching. What can be changed, how can it be changed... What's the best but maybe not the most pretty option?
A list of problems that we encountered can be found here.
- The tube that guides the filament inside the pen is not always the right size.
- The tubes and feeder are not aligned correctly. Loading filament requires a disassembly.
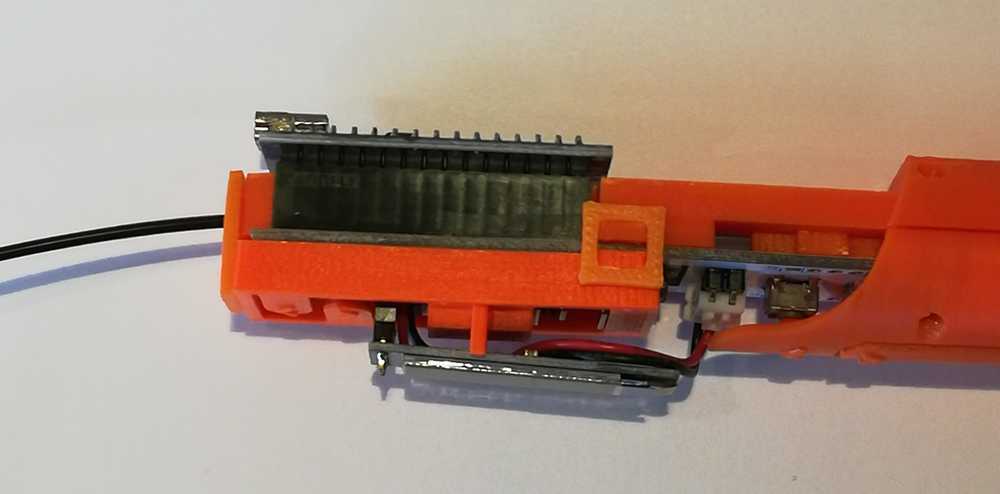
- The arduino nano is not protected from small children hands.
- The screen is only connected through the electronics and moves to much to be safe.
- The tiny bolts that need to be put inside the hull are tiny and the tolerance has been taken just a little bit to small to be easy workable.
- Cables for lefthanded people
It's not really a big problem as, we understand it as adults, but the children often complained about it. Easy solution: just cut of half a millimeter.
Inside the pen you have a PTFE tube, the feeder/motor and another PTFE tube. Going from the feeder to the first PTFE tube can be trouble some as it's not completely aligned. They did warn us for this within the manual, but as I tried several solutions (straight filament, pushing it all as much as possible to the bottom, double checking alignment of the tubes) I decided to just use a tweezer to feed the last part of the filament towards the top and keep it this way.

It's not a very very big problem, but we'd like to have it covered. Kids tend to drop the pens sometimes, it goes into their backpacks, so just a little bit of protection won't hurt.
We completely weren't happy about this part. They 'tried' to support the screen, but we didn't like the solution very much as it still moved.Both left and righthanded people had problems with this.
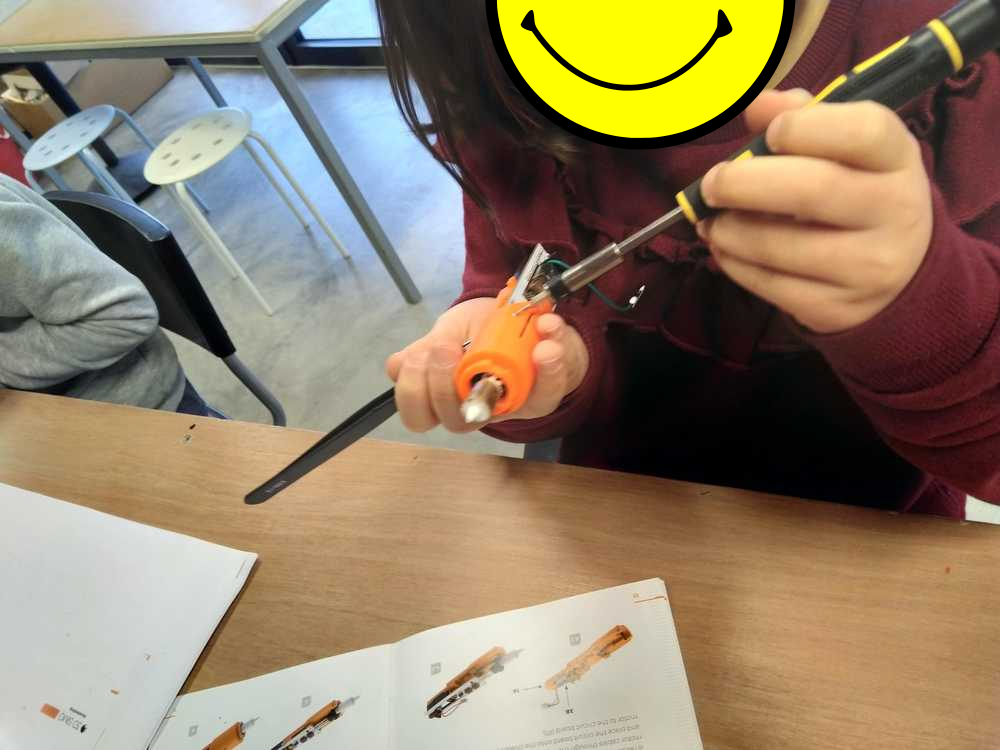
You might laugh at this, but the cables, when coming from the pen are really in the way for lefthanded people. For them, the cables always come on the same place as where you hold the pen. This brings forth another problem: the soldering on the motors/feeders is very very tiny. If you touch it to often, the soldering breaks. We had to redo the soldering several times because it broke while building or useing the pen.
I decided that in the timespan that I had, I couldn't do a full redesign of everything so I focused on the most important tasks: protecting the electronics.
First prototypes
As always, I decided to break one big problem down in several smaller ones. It might take some more time, but I'm more confident tackling one problem at at time. r
Testing with children
The testing with children went pretty good, though some other problems were experienced. As mentioned before, loading and unloading the filament can be a hassle as it's not completely
aligned inside. We fixed this by telling the kids to really watch the PTFE-tube when assembling and adding filament.
They weren't very happy eighter about having to
assemble and disassemble the pen all the time when they wanted to switch filament. But in the end they really knew the pen with ins and outs.
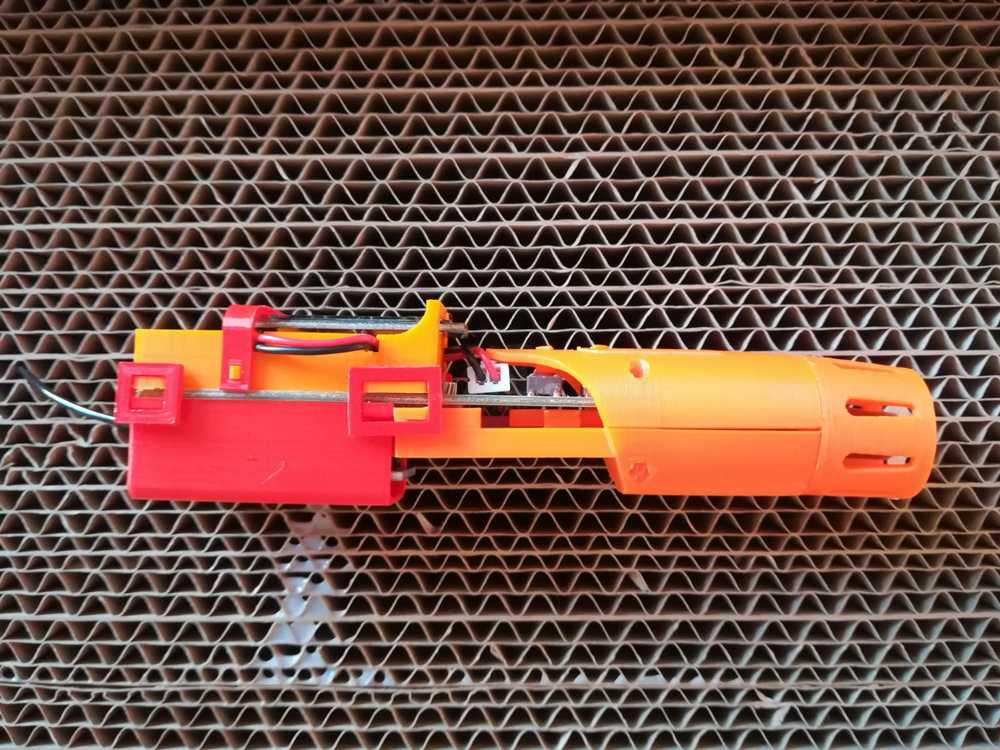
Another problem that we noticed was that the engine/feeder would come up after some time of printing. This was caused by the new design that I made before the camp. In the original piece, there is a bridge that keeps the engine/feeder down when working with the pen, I took this out as I thought it didn't have a real function. I was wrong. Therefore I'm making a new version where they do stay pushed together.
As the whole upper protector went up in height, I also needed to adjust the push buttons in the back of the pen. The measurement went wrong there so they were all to long. With my newly gathered information about drawing parametrically in Onshape, I'll adjust the height by adding parameters to them so that adjusting the file becomes easier.
A last thing to add: the pens, and new cases are drop-proof. As predicted, the kids often drop the 3D pen. Lucky for us, none of the pens got any damage.
The last thing we noticed was that the cables, connecting the plug and the motor came loose very often. The more you wiggle on it, and assemble and disassemble everything, the more it became loose.
- Loading of the filament without disassembly.
- Using the pen dislocates the filament and motor
Final solution
After the tests with the kids we found one more problem with the 3D pen. It all came up when the motor was pushing the fillement. It seemed like I had skipped some support. I readded it
to the pen and afterwards it worked fine!
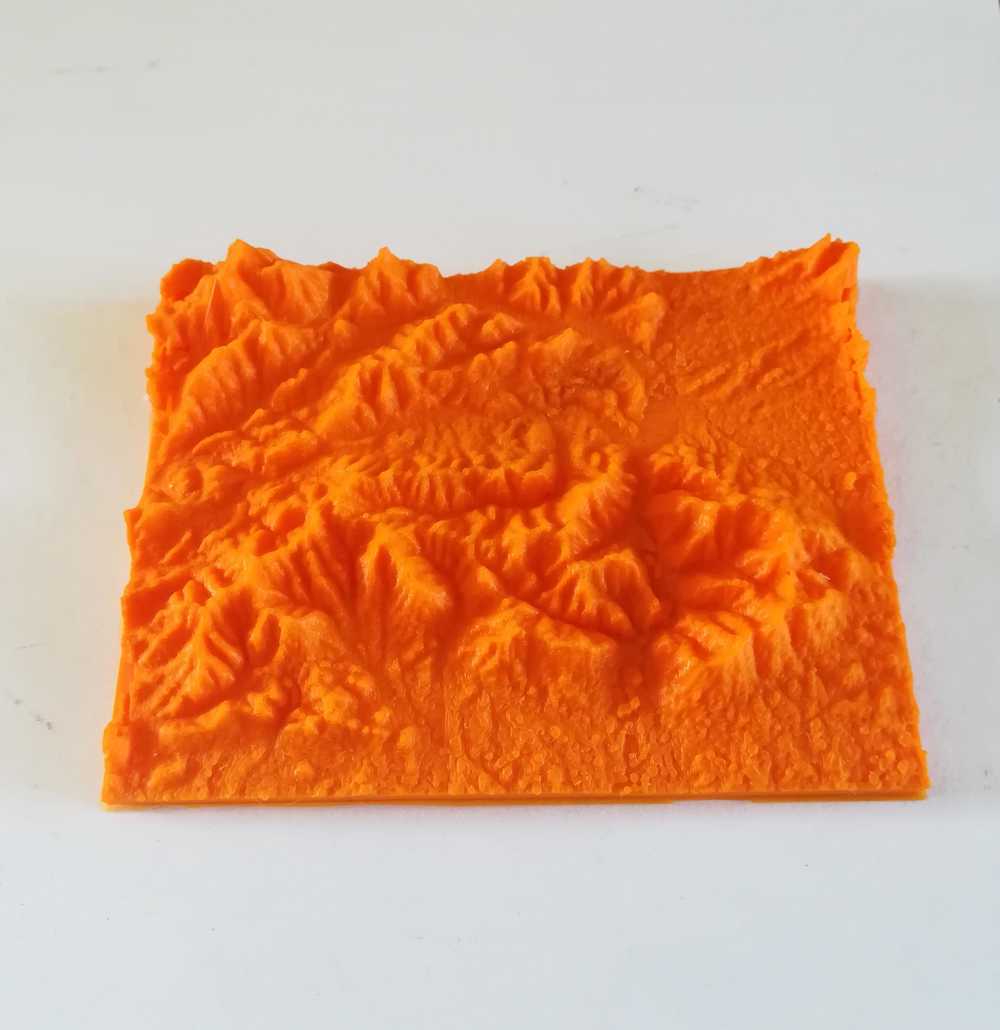
Individual project: 3D print landscapes
Problem description
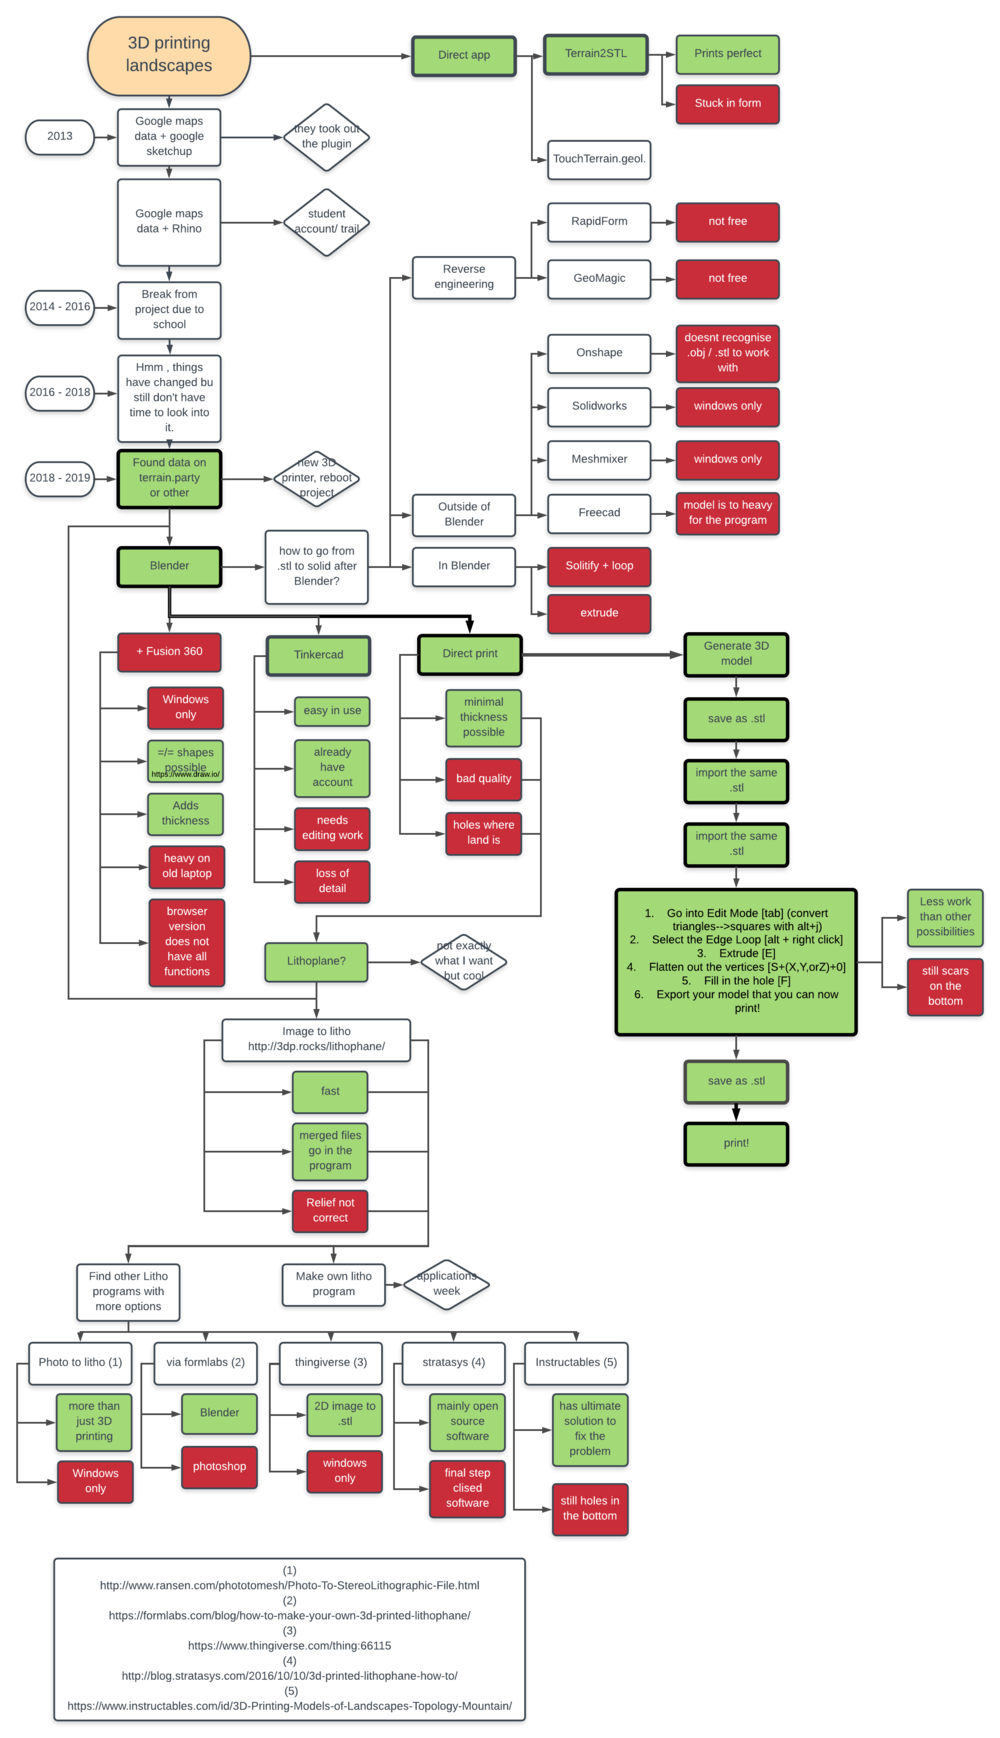
This has been an interest of me ever since I was a kid: geology and stones. After having lived in Iceland, I really wanted to feel the country again. Close my eyes and go over a familiar mountain with my eyes closed, remembering my time there. Back around 2013- 2014 I used Google Sketchup to do this, but recently, they took out the plugin. Next to that, I completely switched to Linux, a lot of software, like Funion 360 doesn't work on Linux. As I'm not planning on keeping a windows laptop around, I started researching the topic to see how far I could get with my known programs.
You might wonder, why don't you just use Fusion 360, Rhino... Well, I'm in a full linux system and those programs don't run on that OS. Over the past years, when I first got this idea I've used a lot of programs. Some of them still useful until today, others are not. A flowchart of the research and process in the past years to accomplish 3D printing landscapes.
Preparation: get your topographical data
So the first step in starting to 3D print landscapes is figuring out what part of the world that you want to 3D print. When you open YouTube and go searching for this kind of topics, you'll soon find American data.
List of websites where you can find downloadable data to make 3D models from:
- Global
- View finder panorama's
- Terrain party (open data)
- Google maps: switch to topographical view
- Open street map
- USA
In this tutorial I'll focus on data from terrain party, blender software and TinkerCAD, but I'll also mention other alternatives.
Workflow Blender to TinkerCAD
As always a more detailed workflow/manual can be found at the bottom of the page within the tab 'manuals'
- Step 1: download the terrain that you want
- Step 2: Get started with Blender
- Step 3: Save as .stl
- Step 4: import the .stl into TinkerCAD
- Step 5: Transform the .stl
- Step 6: export the data
Other solutions
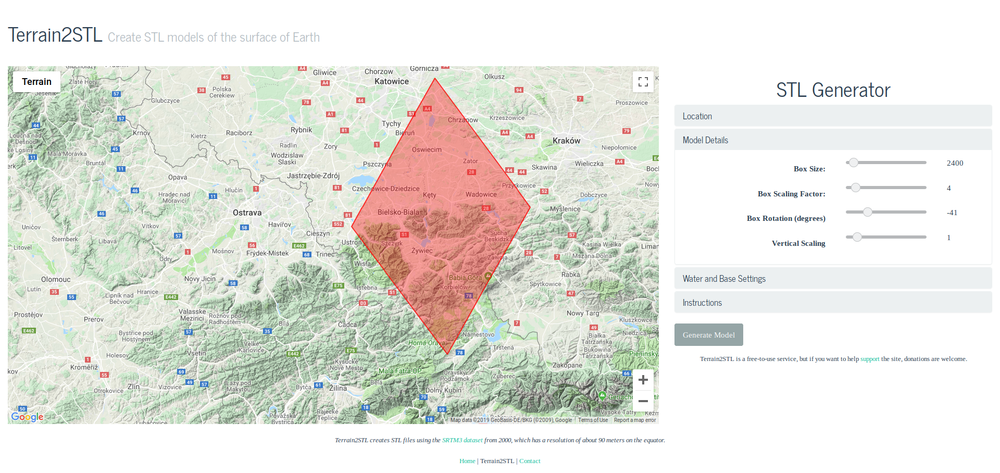
Terrain to .stl
One of the first other solutions that I found was
Terrain to .stl . It does everything behind the screens that you normally do in Blender. It's nice, but to limited for me. Also, the shape
that is your selecting square turns weird when using it.
Lithography
Another way of making landscapes that I found was hacking lithography. It's mainly made for pictures, but you can also print the 'merged.png' files with it that come with topographical data. It wasn't my intention to look into this, but it happened anyway, with the picture below as a result.
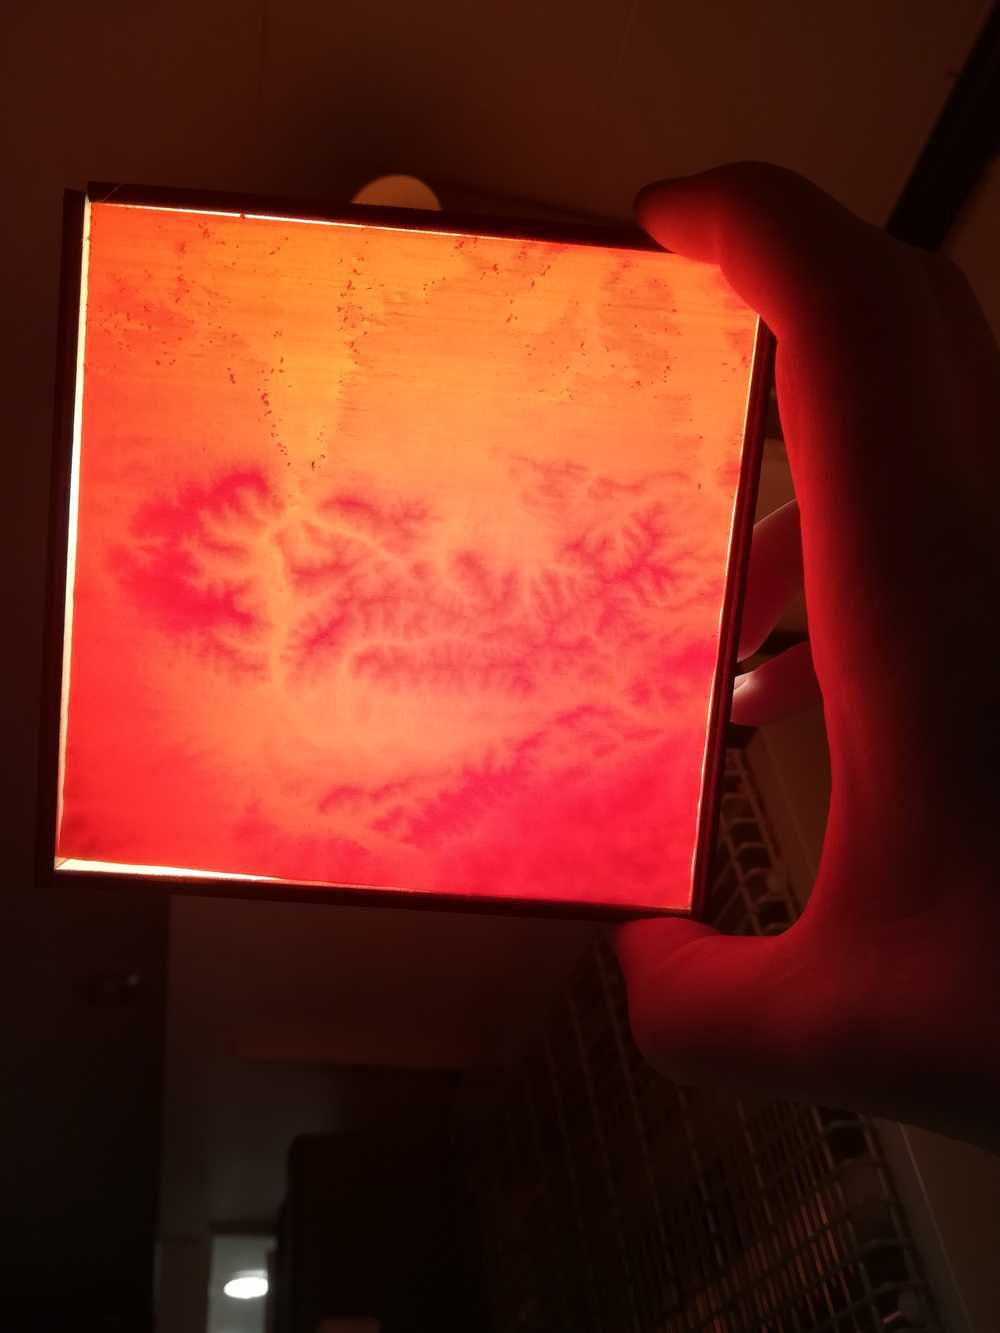
I made the print with Image to lithopane and my normal Cura settings.
Qgis
Another solution to make 3D printed landscapes is using the specific software of Qgis. As this is a lot more professional and a lot of terms are introduced to it, I'm leaving this one out of the detailed documentation for now.
Credits to:
- The video with which it all started
- Another one!
- Not really mentioned but: QGIS!
- .stl to solid in FreeCAD
- The last freaking piece of the puzzle was found here!
Individual project: 3D scanning
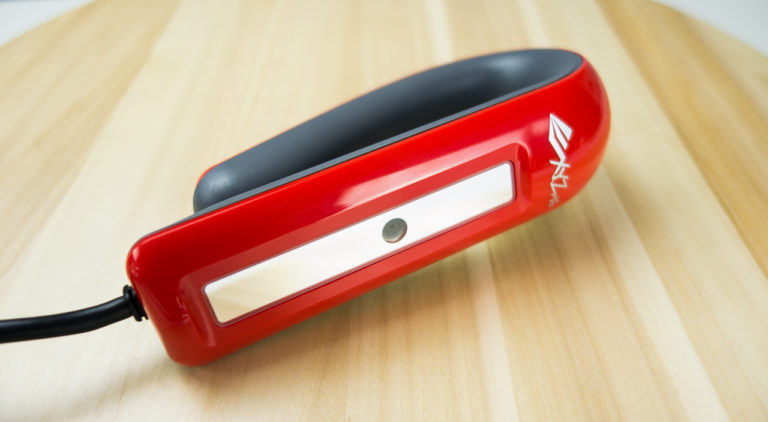 The scanner that I'll use for this assignment
For this I used a windows laptop with sense3D and the xyz handy scanner. My first challenge this week was to find a windows device that could run the necessary programs. At work we have several, but only one could run the software. The problem was that when we bought the scanner so many years ago, it included a small USB device. Sadly, this one got lost over time. The main software can be found online, but that one specific driver can not. Luckily, one laptop still had the driver and could also run sence3D as a backup.
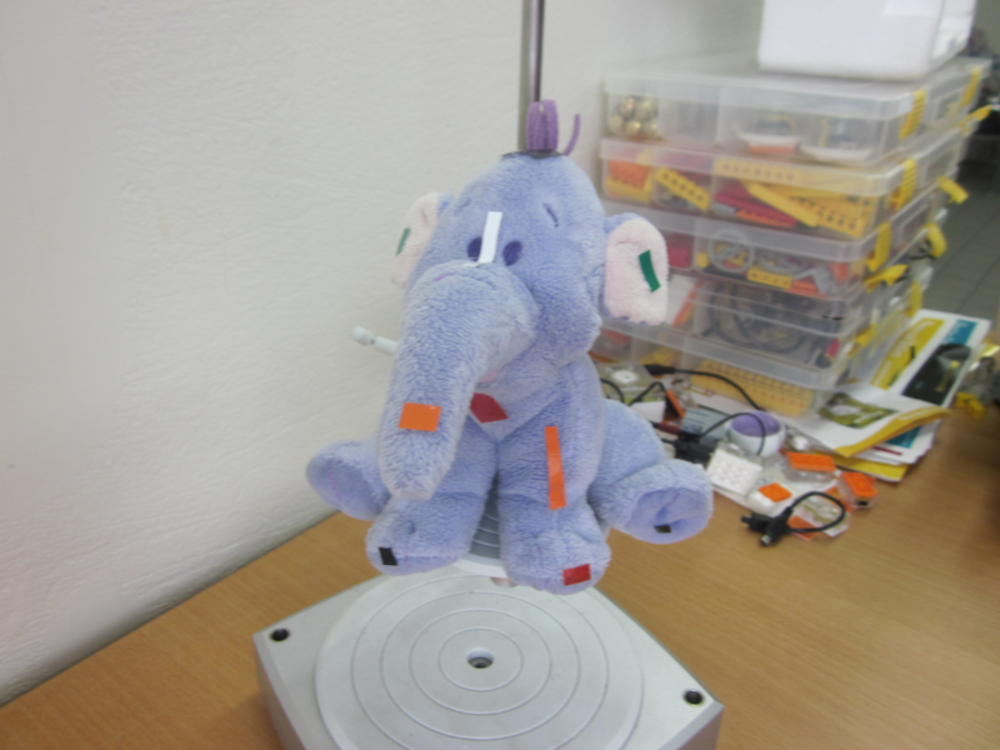
Once the computer problems were solved, it was time to scan an object. I found a big Dorus 3D print with a hat on in the lab, coming from the 'Dorus the dragon' show. As it had a lot of strange forms and 2 different colors and quite big I decided to scan this object.
The first tests with the 3D scanner were merely to learn how to work with the scanner. How steady do I need to keep my arm, how many movement can it handle and how fast can I move. The first test was done on a barstool with Dorus on. But it didn't turn fluently. Therefore I took one of our ergonomic chairs, put a piece of thick cardboard on it and placed Dorus on it. The new stool has a mechanism inside that makes turning easy. I just needed to give light pushes to make everything move while holding the scanner in my other hand.
Another problem that I encountered was that the black was to reflective. I had already made it easier for the scanner by putting little colored dots on all over the original object, but the reflection was another problem. The black hat was printed in a dark material on a very thin layer height. Due to the light sources there was a reflection to all sides. I first tried to scan the print with less light by shutting some lights and moving to a darker space. But eventually I took some dust out of the dust collector and put that on the original 3D print.
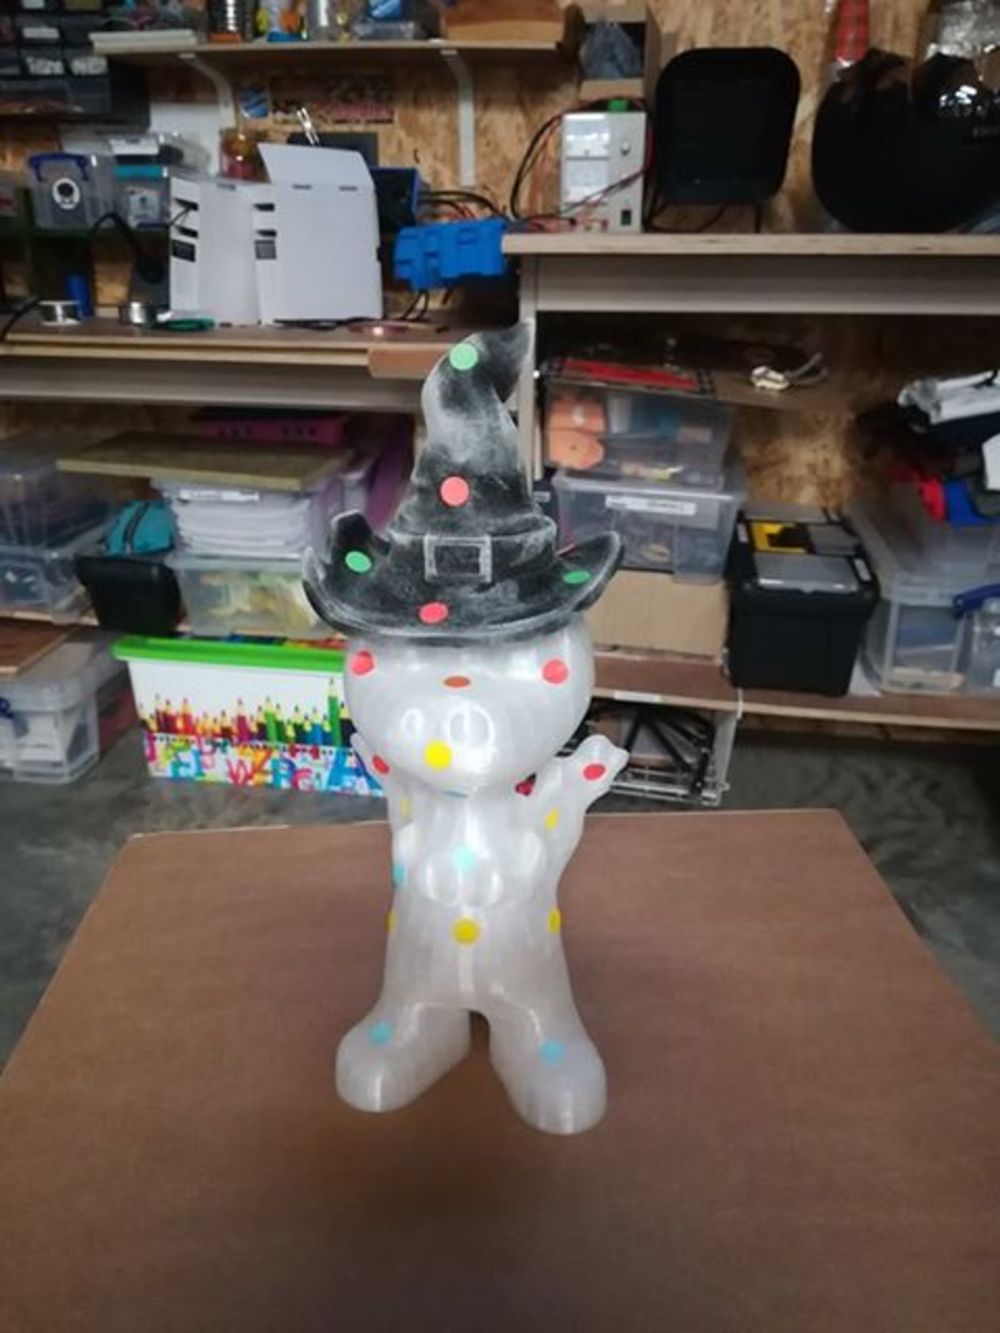
Funny enough, this resulted in a better result on on the hat than on the white body of Dorus.
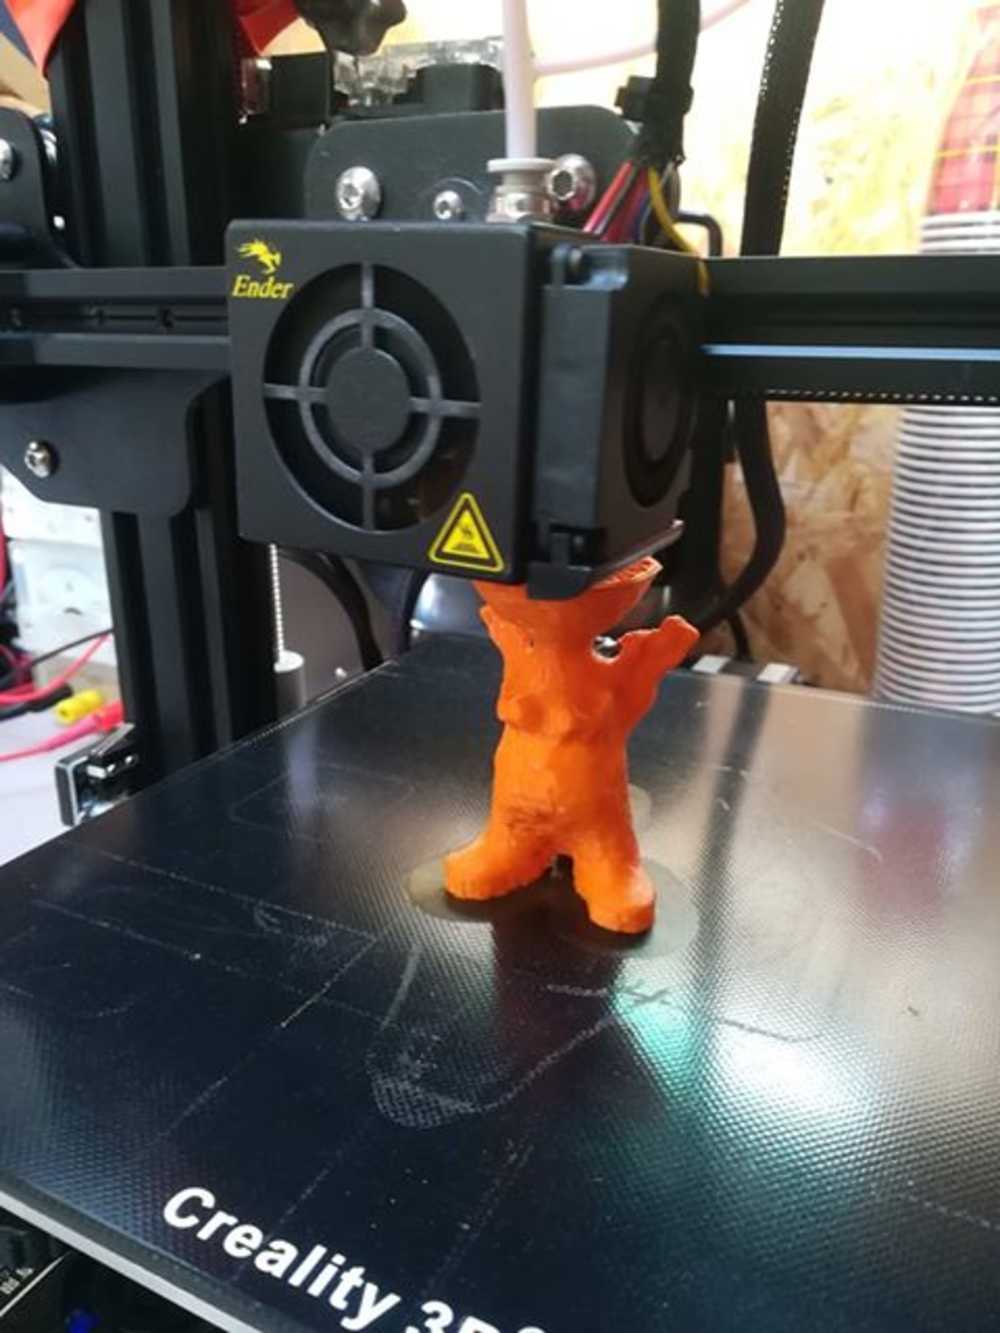
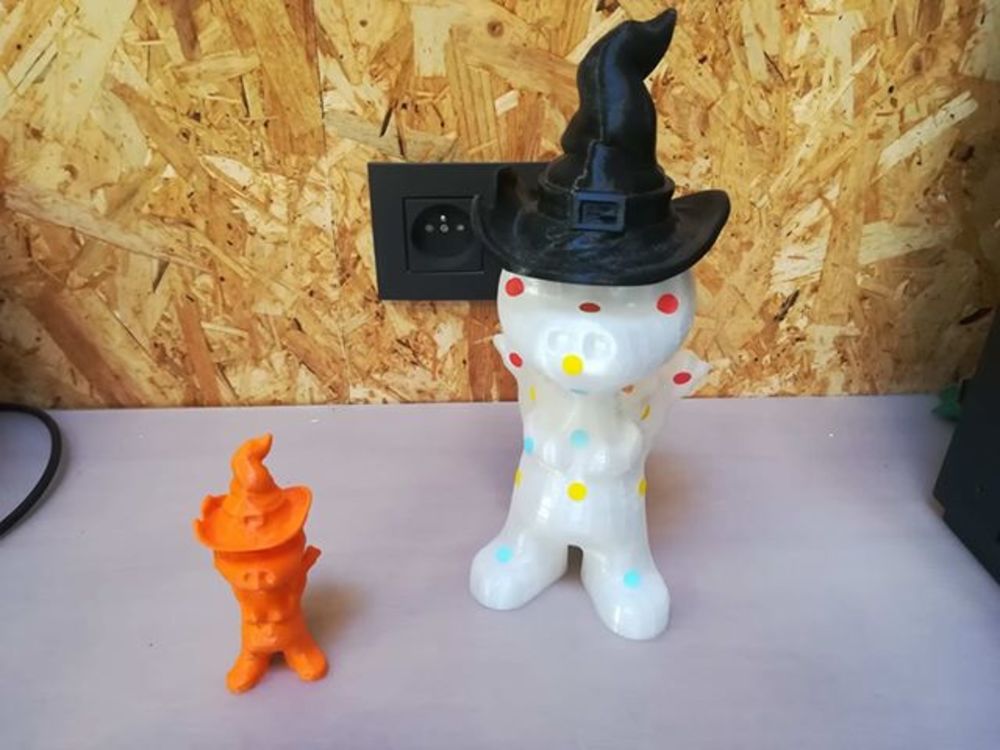
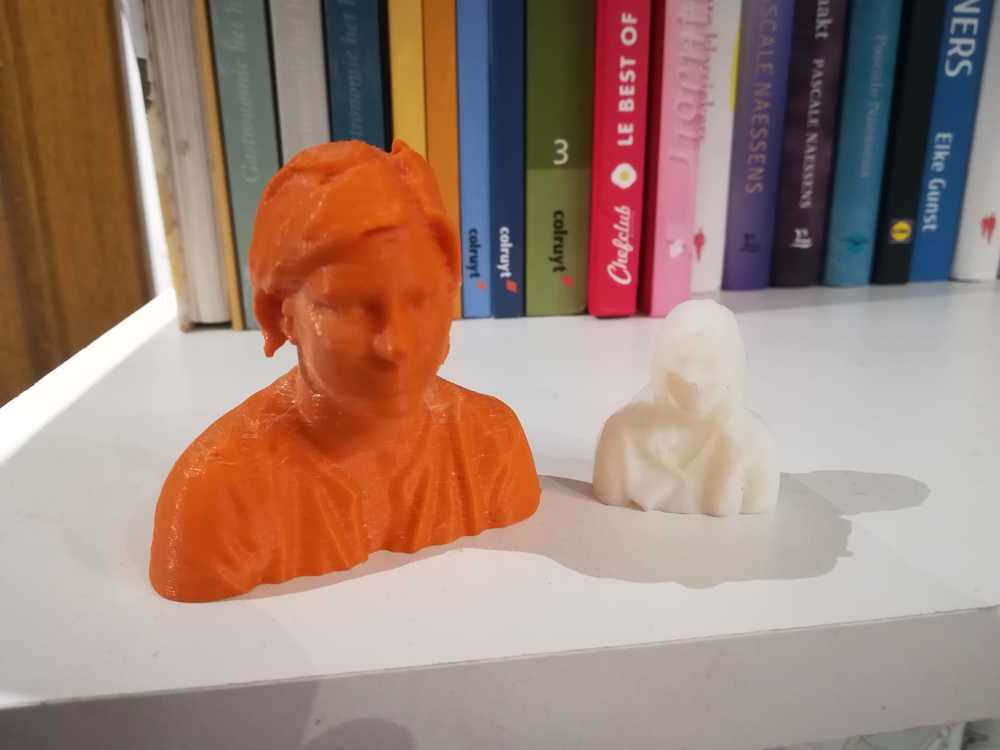
Next up was the printing itself. I took my printer with me to work and while doing other work, watched how my mini-Dorus started growing. The result came out pretty descent. Here and are some holes but in general I'm very surprised of the quality of the scanner.
In the lab I found another object, a dragon on a pilar (yes, we are fantasy book and dragon fans here), and scanned that one in to. The scanning went fine as the print was much rougher than the Dorus Dragon. But what I forgot before saving the .stl was to make use of all the in-program functions to adjust the file before printing. This resulted in a rounded base that is not made to keep up the whole structure.
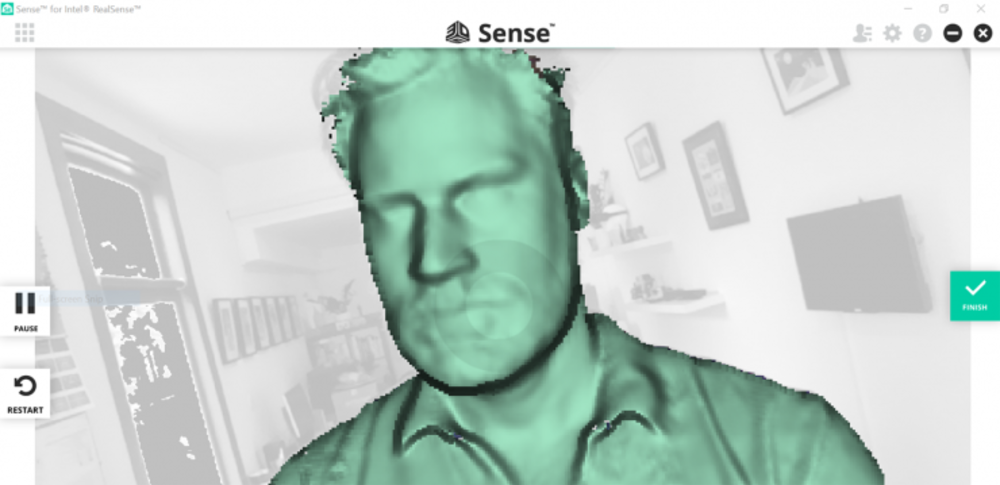 The software tells you if you are scanning correctly. Red for out of focus, white for to fast.
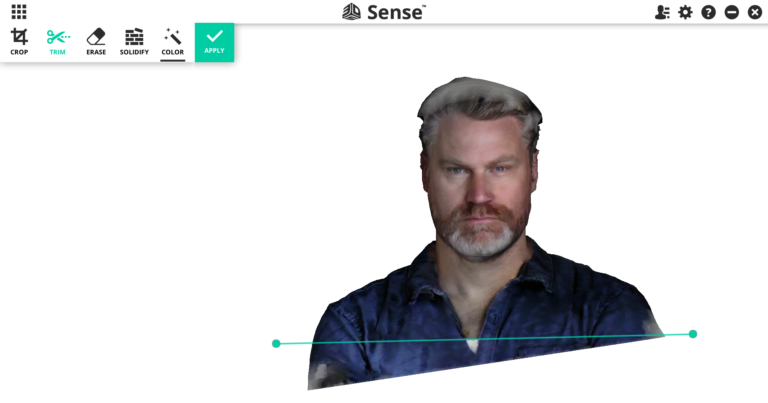 A image of the cutting tool that I didn't use
Every year, during the summer STEAM camps we also make 3D prints of the children and ourselves.
Note: Some additional pictures are taken from 3Dscan expert
Go to topIndividual project: week assignment
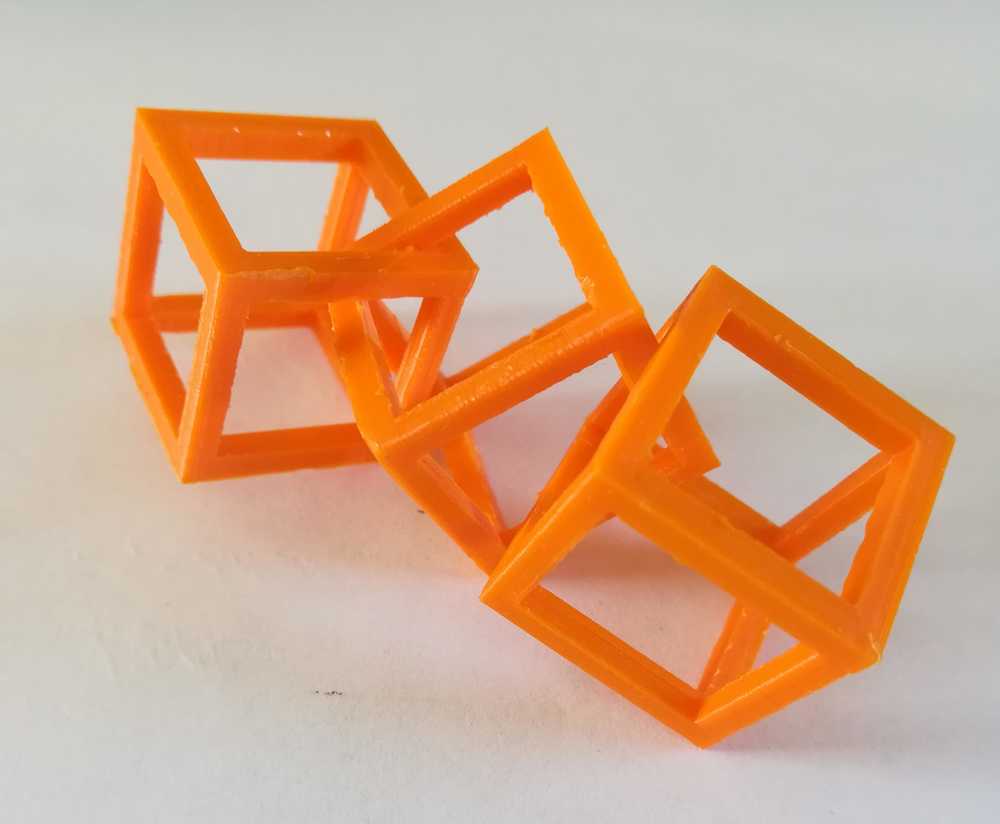
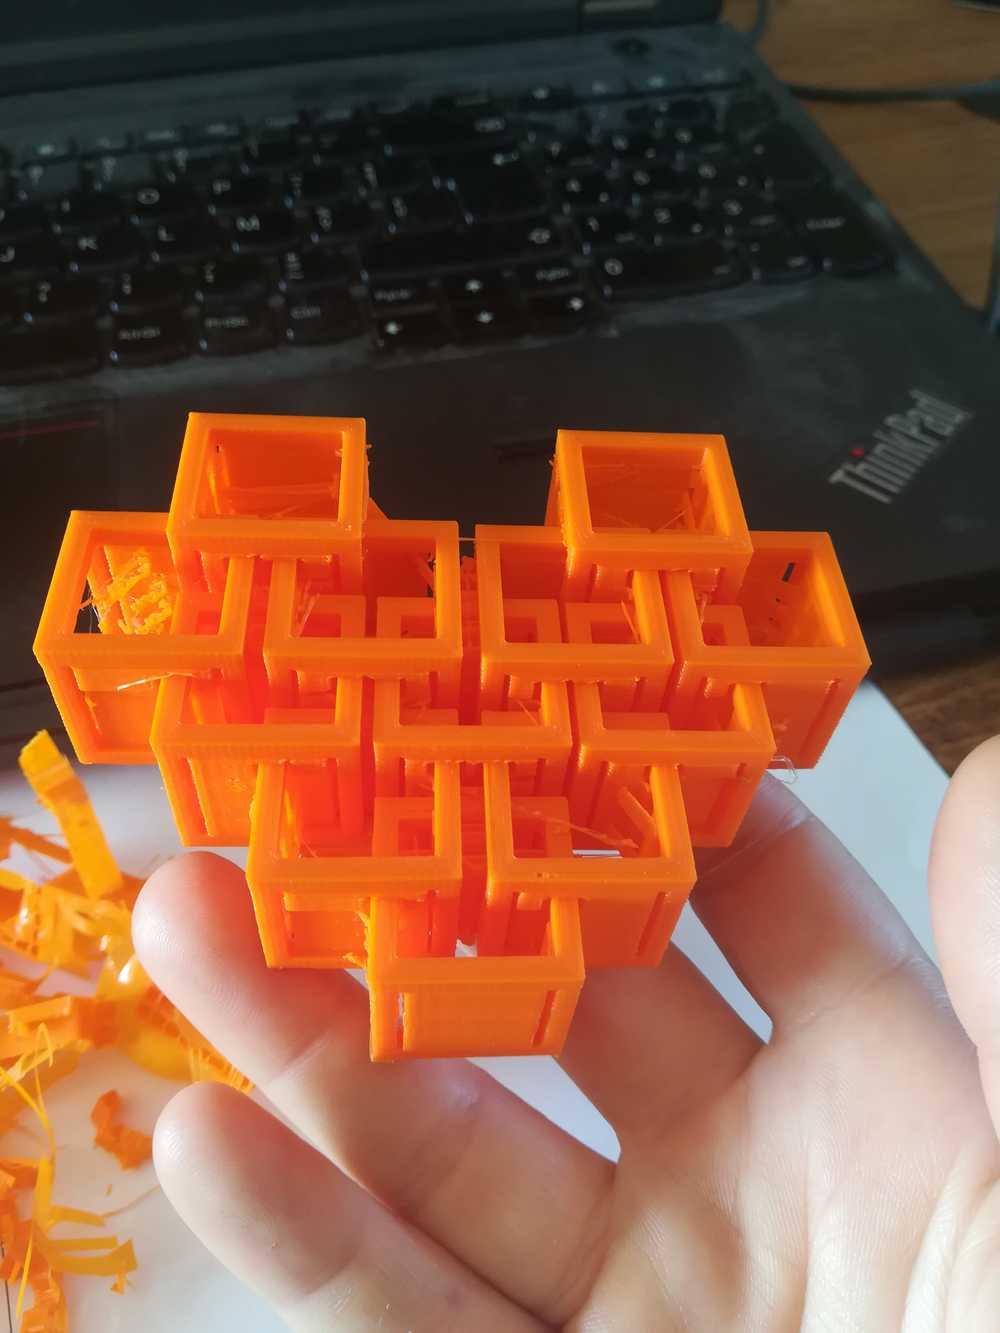
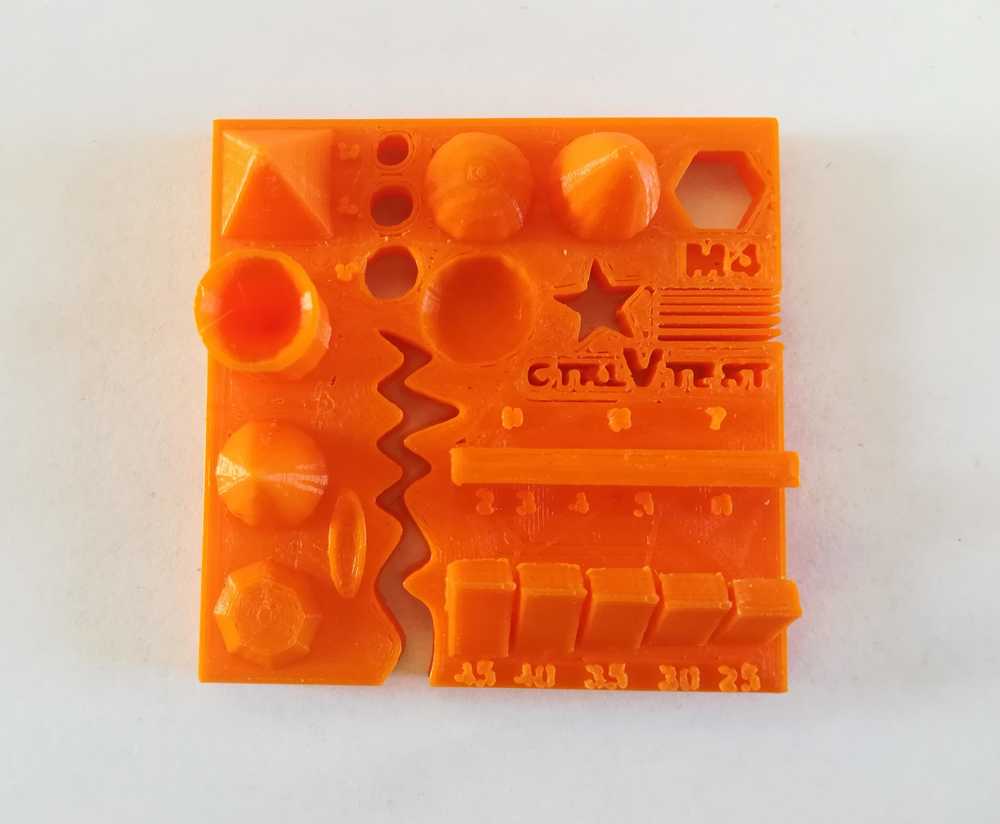
In this week we needed to design and 3D print an object that could not be made subtractively. I looked at my other projects that I did for this week and figured that most if it could be done by using a milling machine, even though that would be overkill. I decided to add this part just for fun. Whenever I'm teaching children about 3D printing and they are waiting for their print to finish, I give the 3D drawing challenges. The picture below is one of those challenges.
I know the solution to making the part, but never did or so printed it out. This assignment looked like the perfect opportunity for it. I'm aware that it's a standard shape and the internet is full of it, but it's nice to show my students the actual print now.
Workflow
When I project the picture on the screen in the class, most children start with drawing a cube, and rotating it until it fits the axxis of the picture. After that they try to add the holes, but ofcourse that makes it more difficult.
- Step 1: draw the cube
- Step 2: add the holes to 3 sides
- Step 3: put everything in assembly
- Step 4: print it out
Iterations
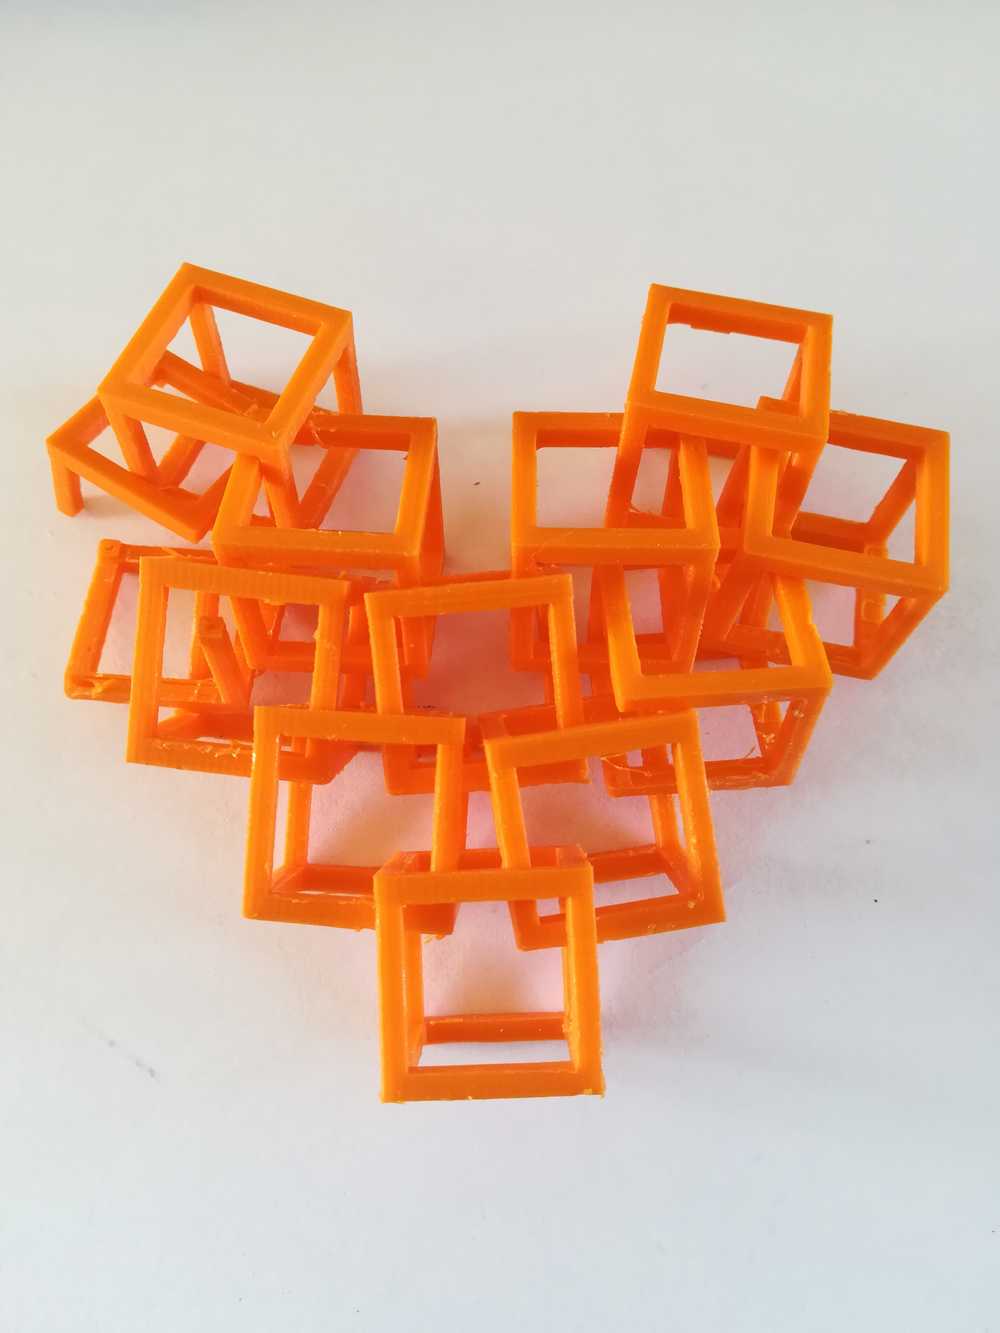
As I was filled with joy with the birth of my brothers baby, I decided to iterate and see how far I could go with adding cubes into a specific shape.
My fist test was with standard cura settings for my printer. The problem after printing was to get out of the support. After some hours and several tries, I managed to get all
the blocks free, only having to offer one block to the trash
For try 2 and 3 I brainstormed with Abdon from the Tecsup lab in Lima. He sliced the file for me
with experimental support. It didn't help to print the part.
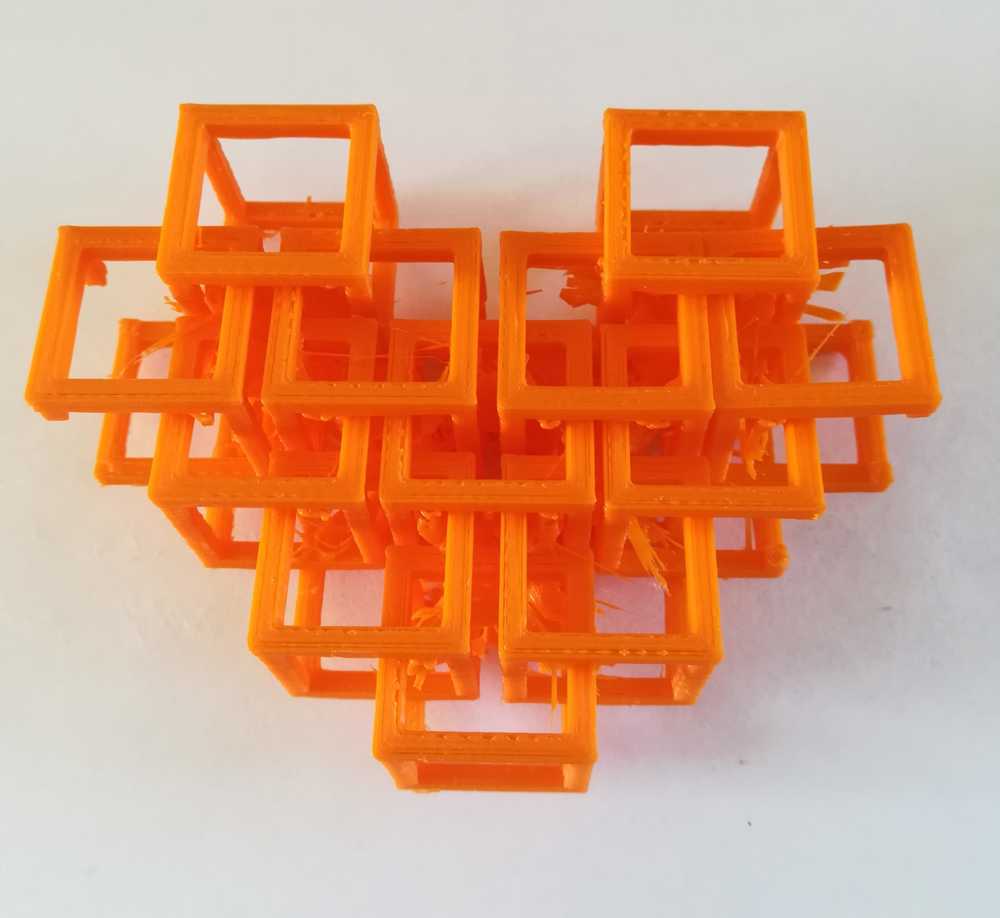
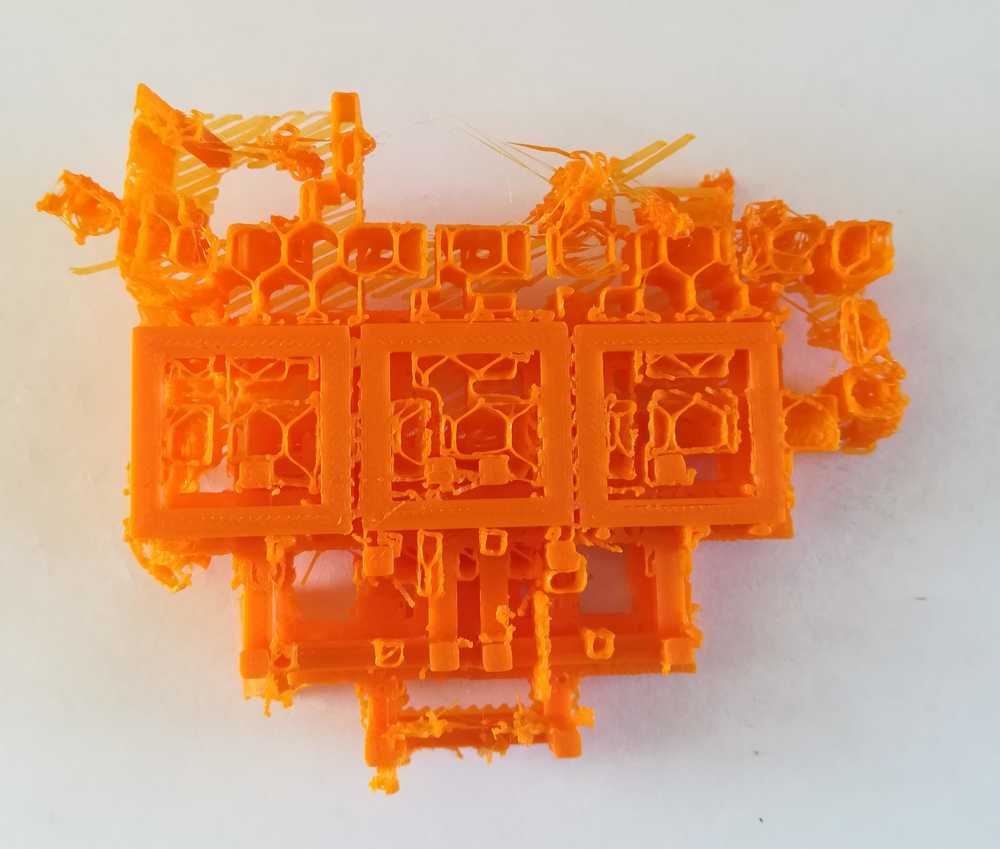
As a conclusion I could say that for the part that I want to print, I need my old support back, that one was solvable in water and toilet cleaner.
Go to topGroup project
For the group project I decide to test my own printer as most prints for my assignments will be printed on that one and not on the ones in the lab.
After my Velleman Vertex (see previous projects) got it's mother board blown up, I switched to an Creality Ender 3. Building the printer took me half an hour and trouble shouting another hour
Since then I've havent had any problems with the machine. Next to the Velleman Vertex this is a joy to print with.
Test 1: Test cubes
I think this is my most printed file ever. Partly because my first 3D printer needed a lot of those, but also because my cat loves them as a toy. They always disappear and are found back
under the sofa. Next to that, I altered the .gcode on a lot of cubes so that my students can see the infill of it.
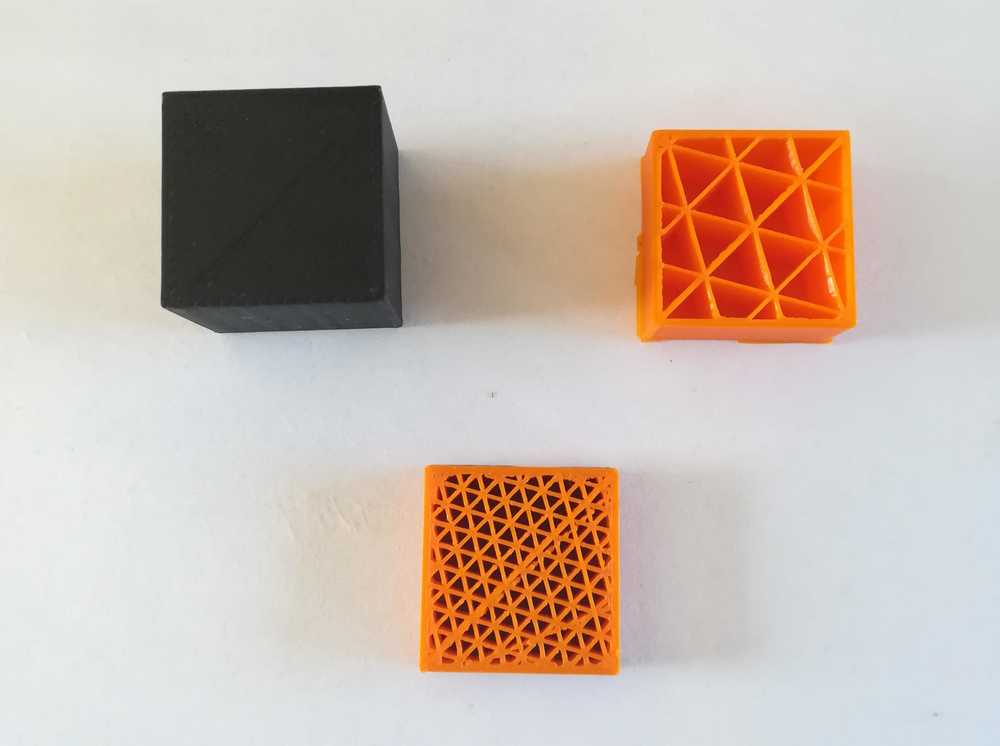
Test 2: Fitting pieces
I made a easy test file for the 3D printer. A cube with a width of 20mm x 20 mm x 20 mm and a hole inside of 10 mm x 10 mm x 20 mm. A second part was made the size 10 mm x 10 mm x 20mm.
I printed it out like this to see if it would fit. The properties of plastic are that they will always crimp a bit once cooled down. That's one of the main reasons of wrapping. I wanted
to know how much crimp I have on a normal part. When ever I measure the test cubes from above I come down to an almost perfect exact size. The first test didn't work, as expected.
For the second test, I took 9.5mm x 9.5 mm x 20 mm as size. It worked perfectly, even a bit to loose. You can settle between 0.3 and 0.2mm. As I always print with a raft, it's still a bit visible in the picture.

Test 3: Thingiverse test file
My original plan was to draw the test file myself, but why do this work as several other people already did this for you? I took my file from Thingiverse and printed it out on my
normal 0.1mm settings. It printed perfectly fine.
 The only thing that I could change were the amout of top layers and how they connected and tighten my pulleys for having better circles. I don't really care about the faults in it at the
moment as I don't need any of it for the kind of prints that I do with my machine. This is project management for me: or fix it and have the printer perfectly printing, or having it printing
perfectly for what I need now and change it once I need it and can spend time to it.
The only thing that I could change were the amout of top layers and how they connected and tighten my pulleys for having better circles. I don't really care about the faults in it at the
moment as I don't need any of it for the kind of prints that I do with my machine. This is project management for me: or fix it and have the printer perfectly printing, or having it printing
perfectly for what I need now and change it once I need it and can spend time to it.
Reflection on this week
When I found out the ways to do landscape printing by only using Linux and max 2 programs, I couldn't handle the excitement. I didn't start this project during this week, but it sprouted from a need, from home sickness. And with some more tweaking I'll be able to actually go home to the places that I love. Have litho's of them, maybe use them as decorative lamps in the atelier. Who knows. I'm happy to see that research on the topic was actually fruitful. It took me a lot of tutorials, being stuck because of the file, time, energy and patience, but here I am now. I successfully merged a lot, really a lot, of manuals together to come to this, simple one. If I find time somewhere in the next weeks, I could dedicate a full page only to the research and tutorials that I followed to get to the landscape part. This week was a good week. Boundaries were pushed, projects finished, up to the next!
On the landscape printing: As this is an ongoing project I left out programs what work with dotted data, QGIS, Sketchup, Rhino and any other Windows programs.The most exiting thing: I seem to have found at least 3 possible solutions without realizing it. And I got into litho printing. Generating another 1000 ideas in my head that will need some years to incubate and then conquer the world (or my livingroom and the minds of my students.)
Go to top