Week 07: Computer-controlled Machining
CNC (Computerized Numerical Control) milling is a subtractive manufacturing method, meaning material is removed to create an object. A few weeks ago, we covered 3D printing, which is an additive manufacturing method that builds object by adding material layers. In a subtractive manufacturing method, a shape is made from a stock material. Some of the common stock materials include: machinable wax, foam, veneer plywood, MDF, MDO, polycarbonate, aluminum. However, certain materials can be cut using only certain machines.
Group Assignment
In the group assignment, we tested the material we will be using for making our cuts at different rpm (spindle) and feed rate. Our classmate Nick has done a detail documentation on the assignment. In the individual assignment section I will be referring to the test result.
Individual Assignment
For this week, each of us is making something BIG. Although I had many ideas to use the CNC machines in the future for my art practice, such as making pedestals, sculptures, installations, etc. Since the CNC machine we will be using is located in Shanghai Tech, a university outside of Fab Lab O (Tongji University), we will only have one day to finish the cut. I decided to make a simple and functional object to learn the CNC machine.
Design
I wanted to buy a cart for my current art studio where I can store my supplies and place my palette while I paint:
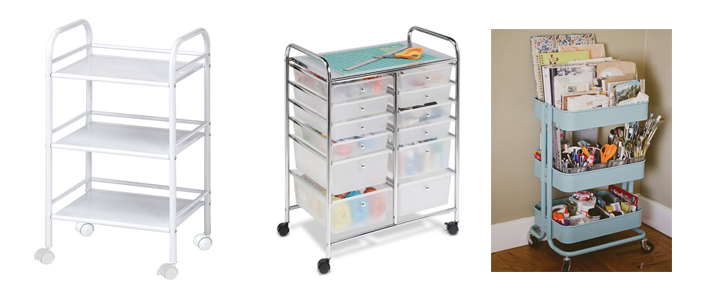
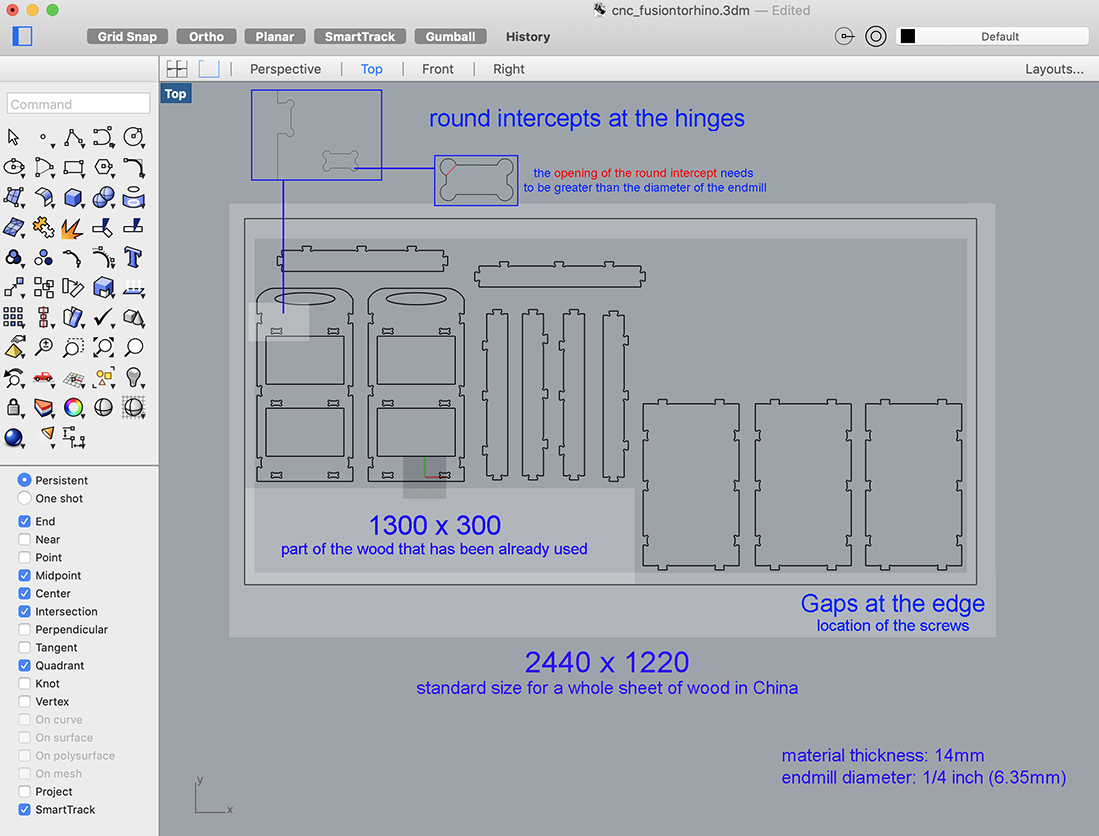
This is an object perfect for this week's assignment. I will need to place my palette, keep my brushes, pens, sketchbooks and books and store my paint on the cart. I used to have same cart as the one on the right of the image above, which worked well for my needs. I want to design something similar within the sheet of wood (2.4m x 1.22m) I am given. Here is the design I made first in Fusion, then prepared in Rhino. The design process was time-consuming, since I had to make sure the diameter of the round intercept is bigger than the endmill. The design is called the dogbone design. Since the endmill would leave a 3mm radius curve, the dogbone design leaves the angle open to ensure the joints are 90 degrees. I also needed to make sure the hinges attach.
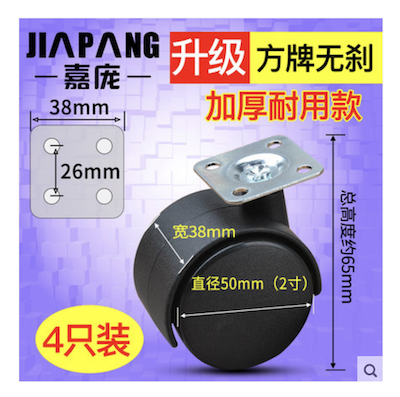
To make the cart move, I also ordered wheels to attach to the bottom of the cart:
VCarve
The CNC machine we use at Shanghai Tech is a Shopbot. It is a 2D and 2.5D CNC milling machine that allow cutting, engraving (resulting in a relief-like surface) on the x and y axis. Before running the machine, the .dxf design file needs to be converted into path for the Shopbot in VCarve:
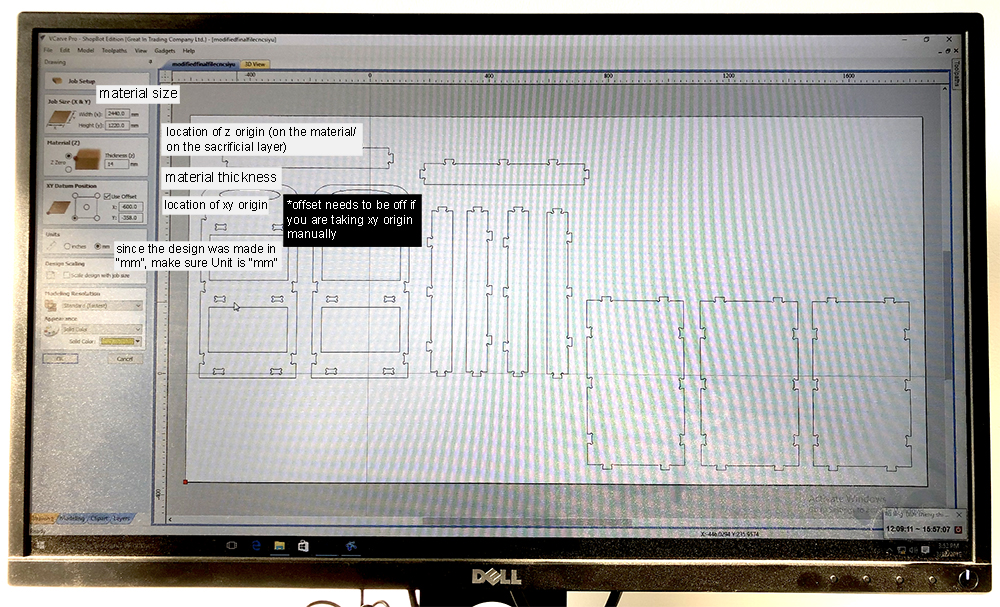
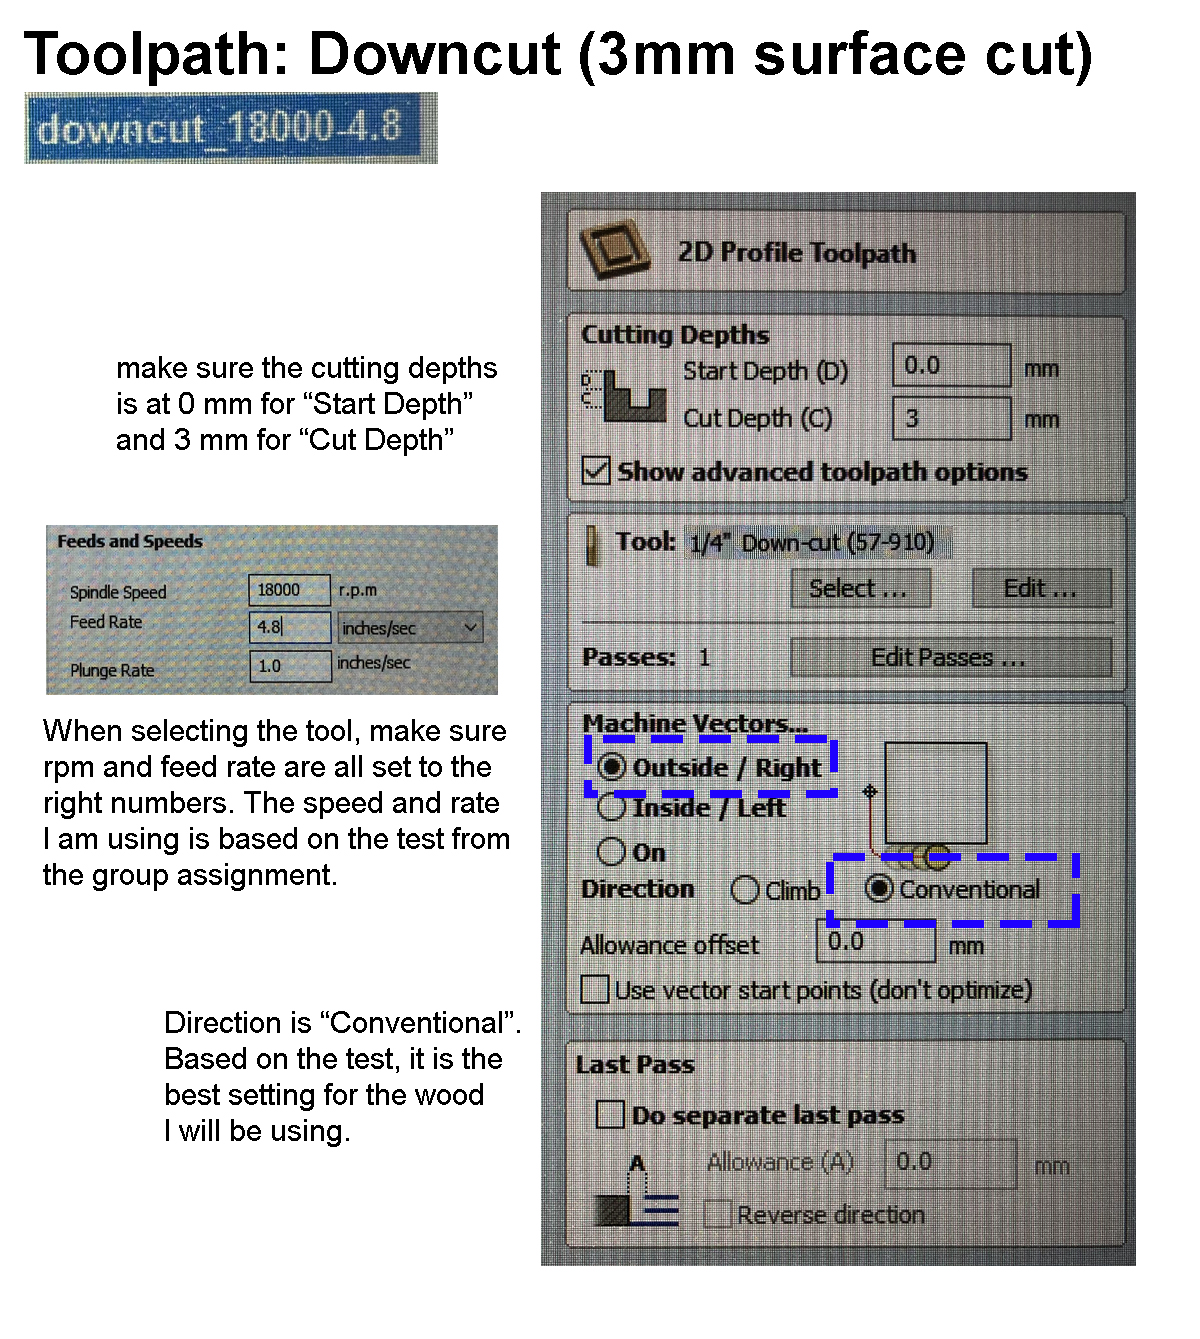
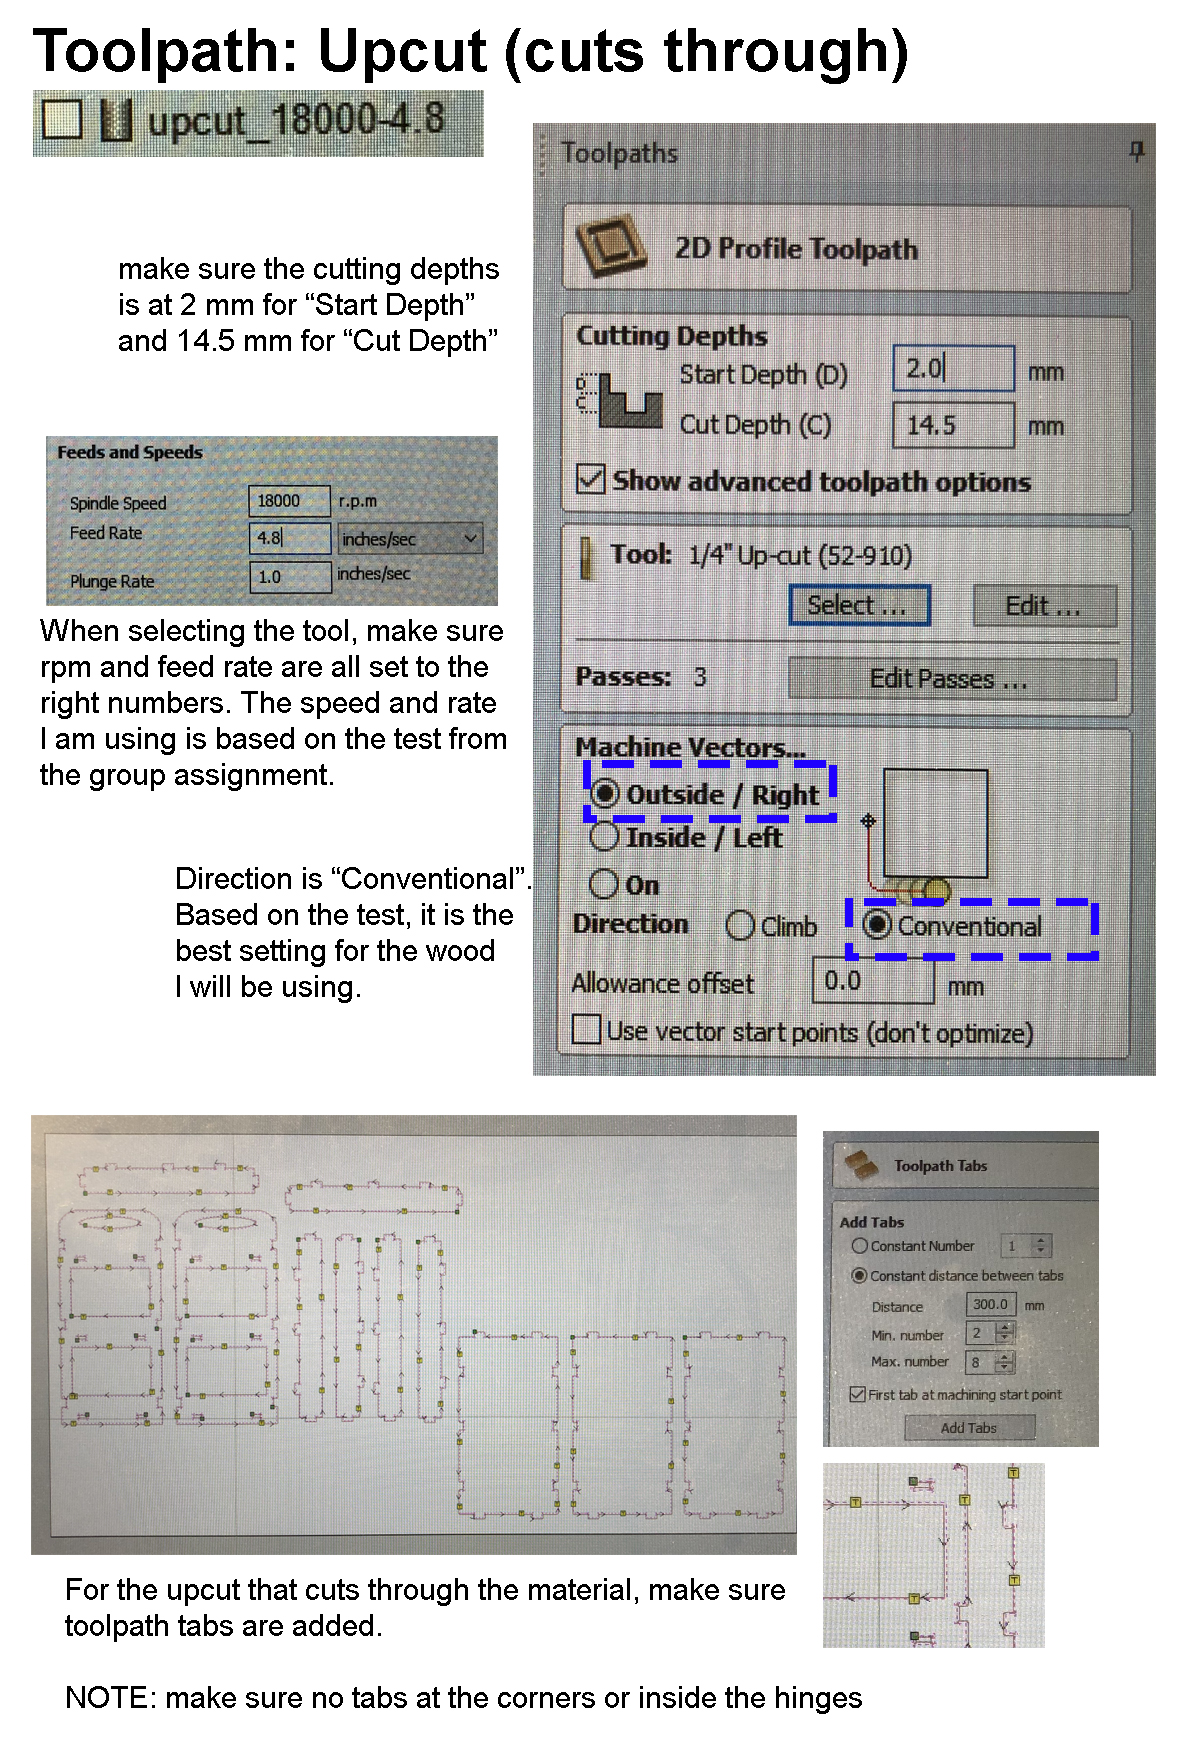
To make my edges clean, I decided to make two path, one 3mm surface cut with a downcut endmill and one uncut that goes through the material. I made two path in VCarve. Here are the settings I used to calculate the path:
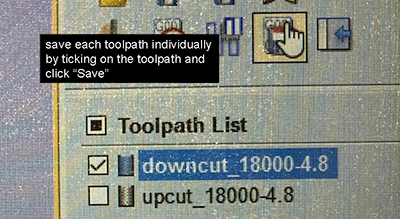
After the path are ready, I saved the files:
Shopbot
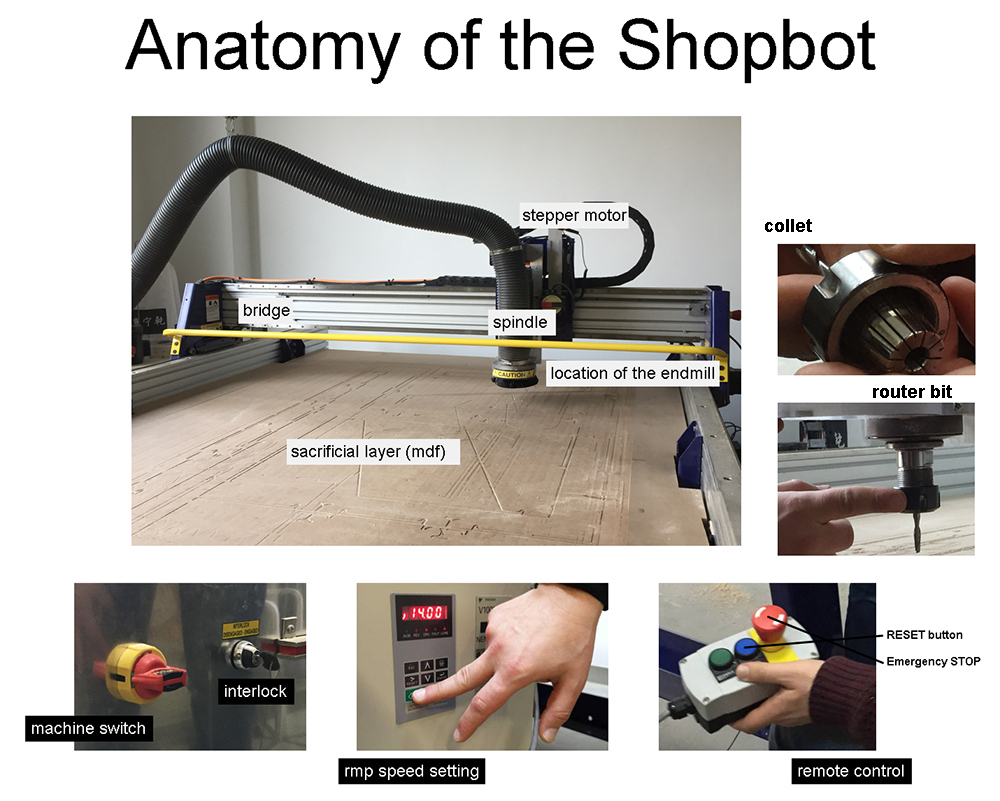
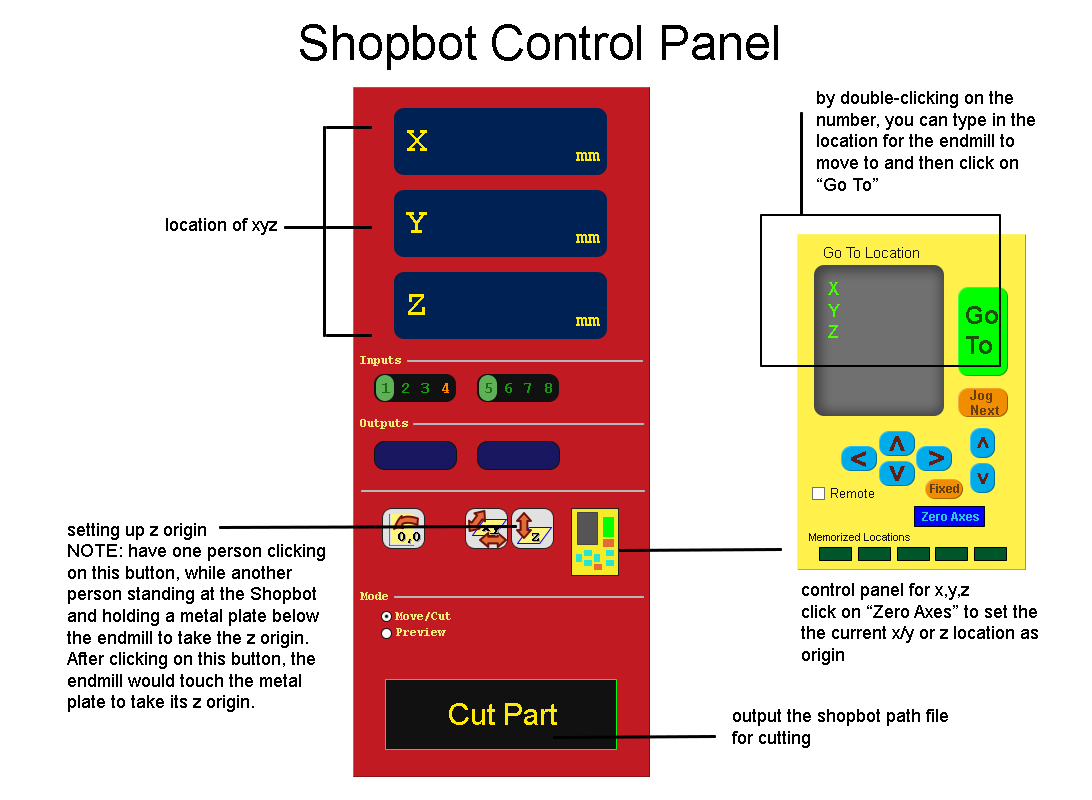
The movement of the machine is controlled through the Shopbot software on Windows:
Here is the procedure for making the cut:
I started from soldering the center component (U1) and then made my way out. Here is the step I followed to solder a component onto the board:
1. Turn on the machine and press RESET on the remote control twice (MAKE SURE YOU HEAR A SOUND when pressing the first time).
2. Open the Shopbot software and move up the Z. Then, move the machine to the X-Y origin.
3. Set the X-Y origin: open the Yellow Window on the Control Panel and Click on Zero Axes.
4. Set the Z origin using a metal plate.
5. Turn on ventilation.
6. Turn on the interlock and the spindle (since our Shopbot does not set up LO/RE automatically, we have to do it manually)
7. Send the tool path file to the Shopbot
BE CAUTIOUS!
1. Whenever someone is on the machine bed, make sure the Yellow Window is off.
2. Make sure the endmill is tightened, or else it might come off and break during cutting.
3. Make sure two people are present when taking Z origin.
4. Make sure goggle is worn when the machine is cutting.
5. ALWAYS have the remote control on hand when the machine is cutting.
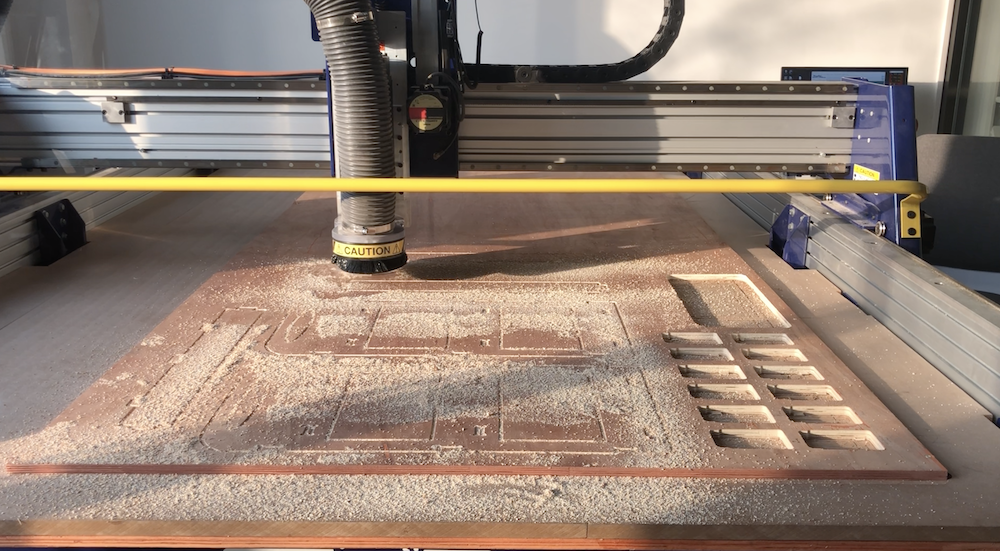
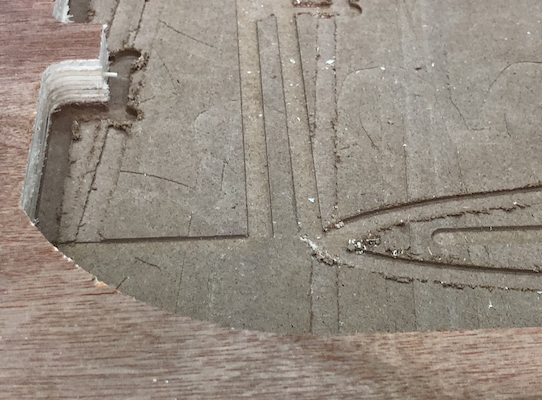
Issues with Cutting
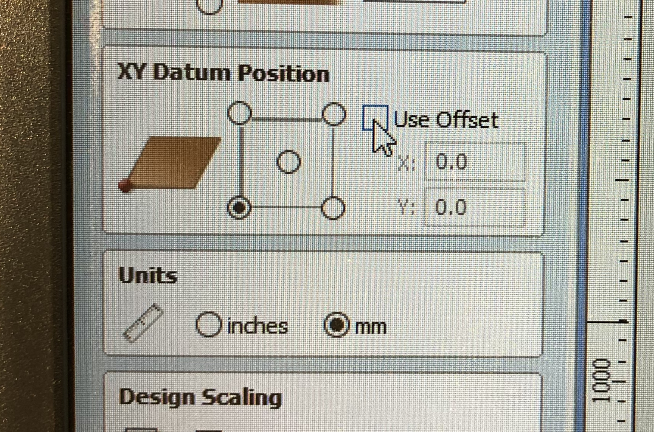
1. Under XY Position in VCarve, offset was on. The Bridge crushed onto the edge of the Shopbot when starting the cut.
2. The material is not fixed onto the sacrificial layer with enough screws, which makes the level of the cutting surface inconsistent. One part of the 3mm cut (downcut) went too deep.

3. The endmill was not screwed into the collet tight enough. It got loosen and went deep into the sacrificial layer during the upcut.
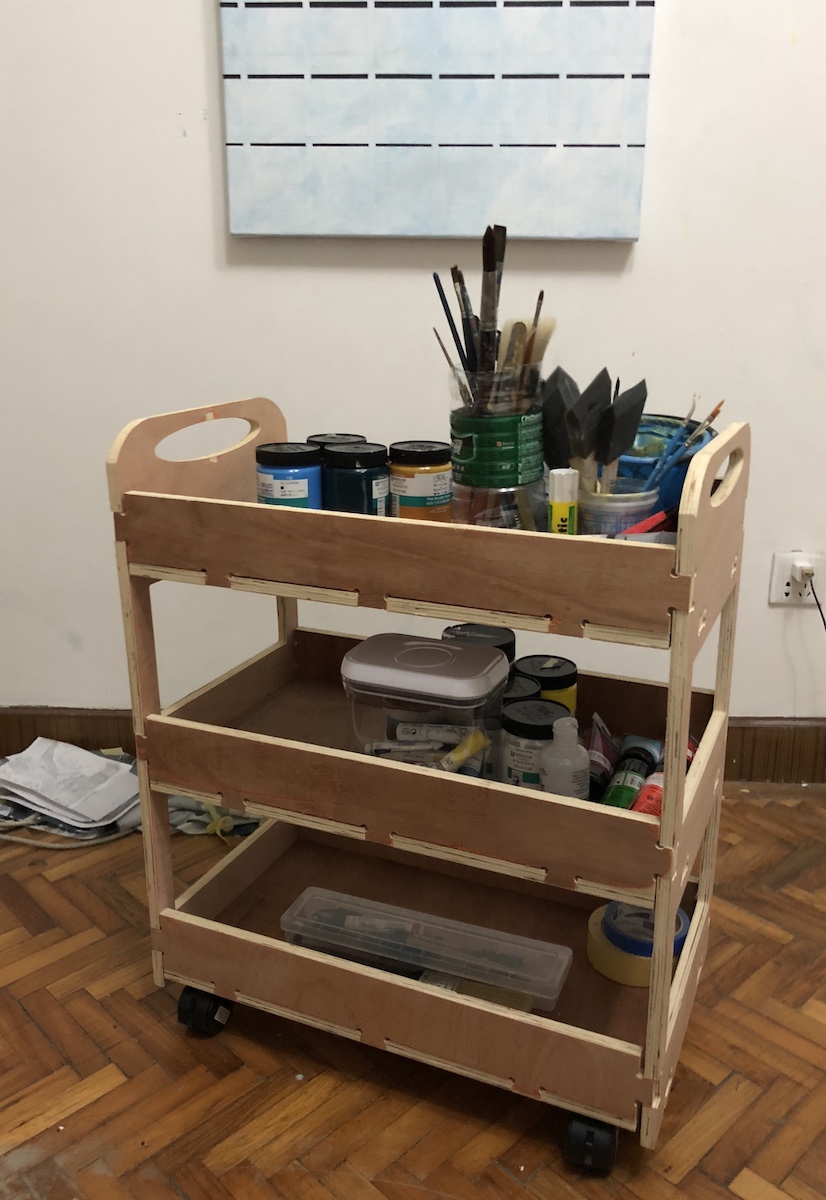
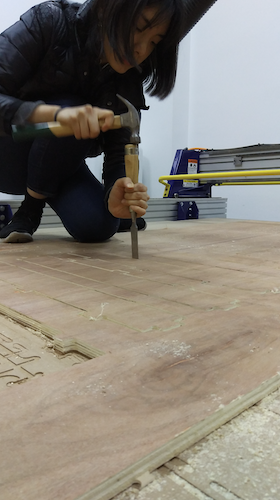
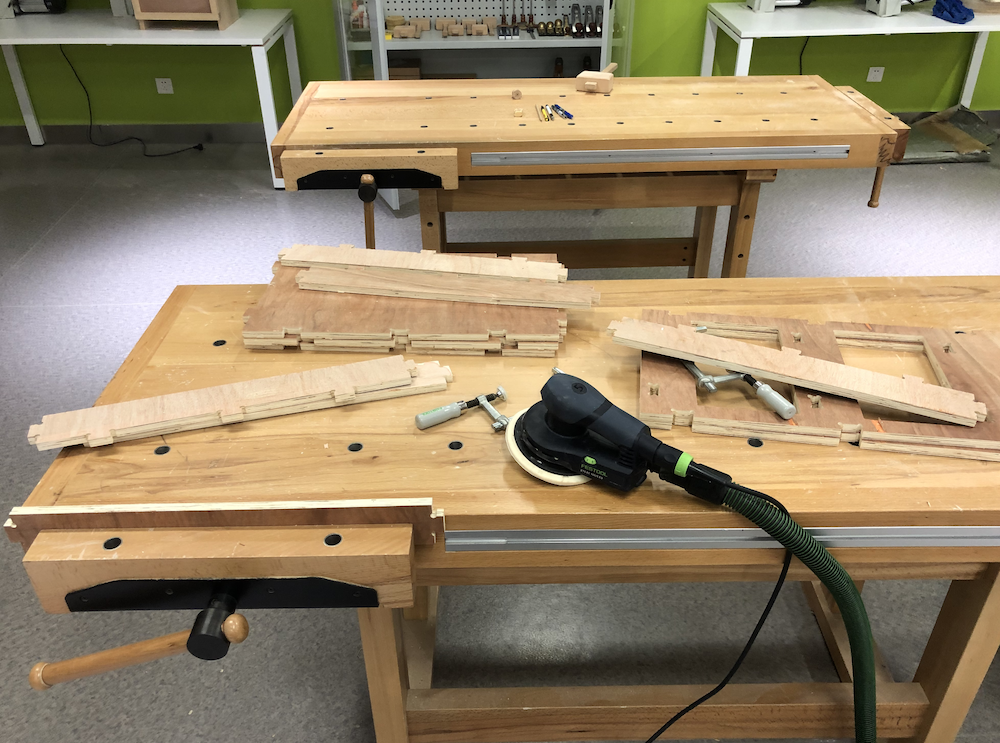
Finishing and Assembling
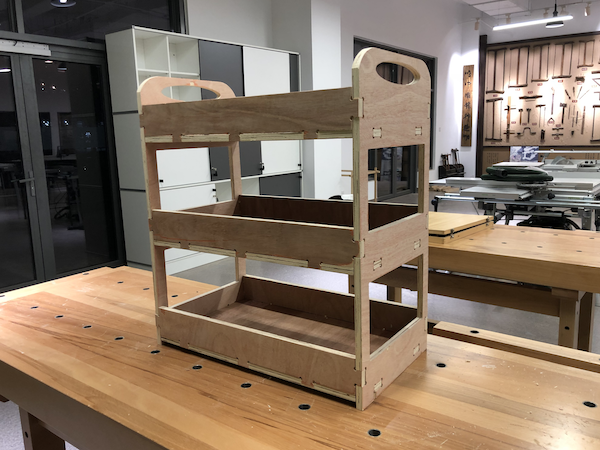
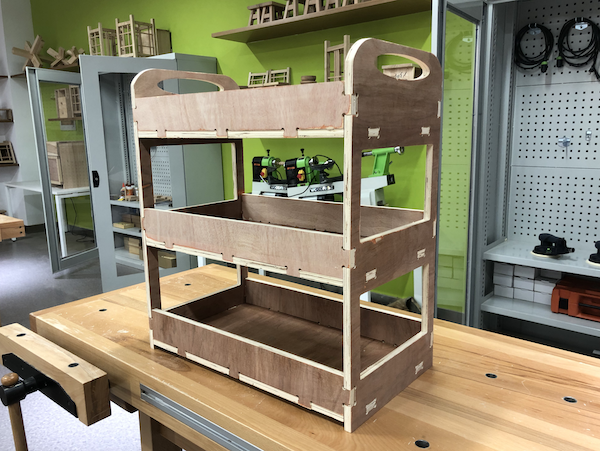
Object in Use