_week 18
wildcard week
This week is about experimentation. A week when we get to decide our own assignment and our own process.
Using equipment we didn't cover during the FabAcademy course or using equipment We learnt but applied in
different ways.
The things ot keep in mind is that whatever process we follow we must incorporate computer-aided design
and manufacturing.
During this week there is no group assigment only individual assignment.
Individual assignment
_TEST 1.0 LASER ORIGAMI
I wanted to start this week by experimenting using the technique called "laser origami". The idea behind this technique is to use the laser cutting machine to BEND acrylic, which normally you can do with a heating gun or heating angle device.
How does it work?
By defocusing the laser beam you heat an area (rather than cutting ir or engraving it) and this together with gravity will cause that the material starts to bend where the beam is burning.
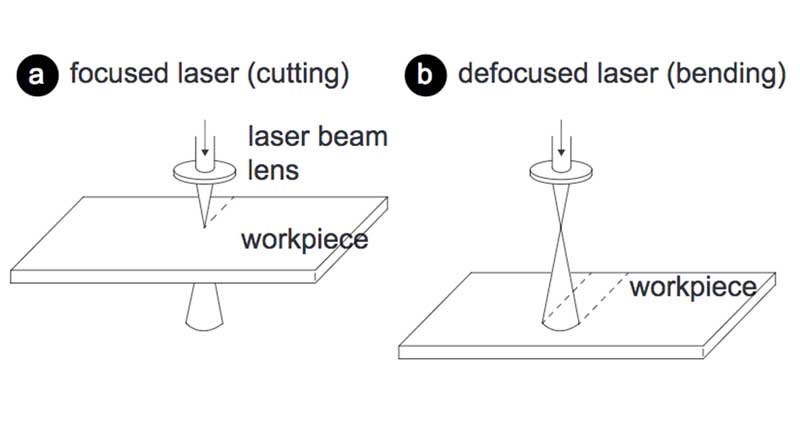
(image source: CSAIL)
Unfortunately there isn't much documentation online about how to achieve it, but I found a couple of
interesting articles about the laser origami technique that helped me to understand a bit more how to
test it. Plus, is hard to get good results quick, this process needs experimentation and will change
depending on the laser cutting machine you have:
_laser origami CSAIL
_wired article
_A and E article
_hackaday
_laser origami video 1
_laser origami video 2
p>The process
Get the materials you will need, which are:
1_ acrylic sheet (I used 2.5mm)
2_ a base or structure to hold the sheet higher (i used small pieces of wood)
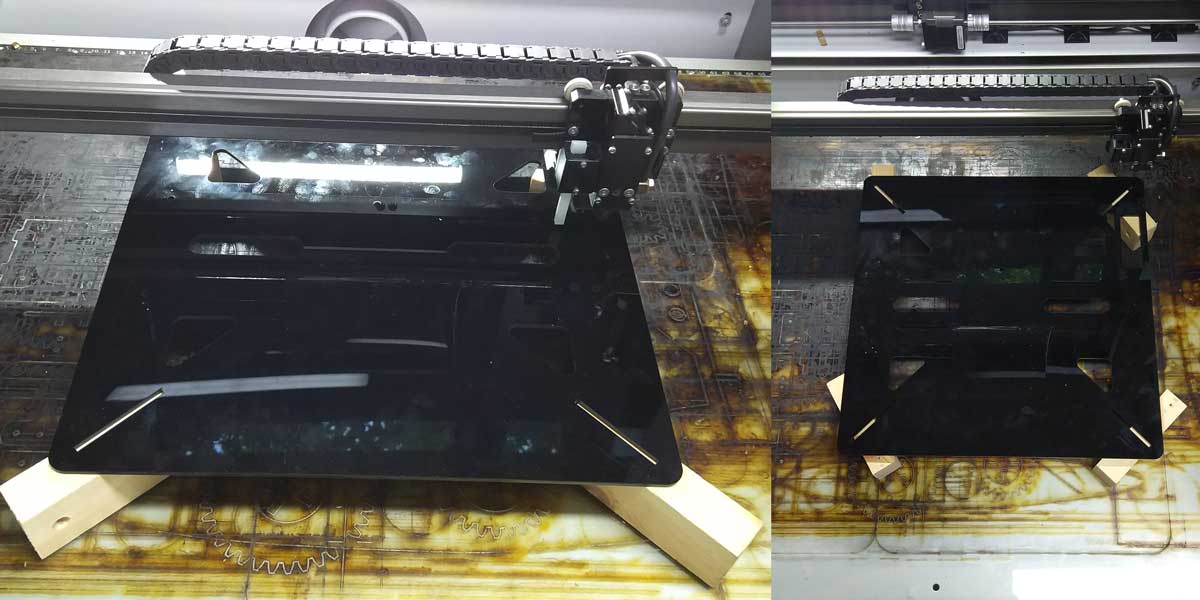
The firsts tests I did I wanted to bend a simple rectangle shape into 90°. I drew a rectangle of 80*25mm. I first cut the cutting layer as any other normal cutting task for acrylic.
I then decided to use the engraving task to do the bending. I did several tests that didn't work out.
During this stage I lowered the bed around 5-6cM, from the nozzle head.
You can see that the acrylic started to bend but is not enough. I repeated this engraving task several
times (10-15), and this is the first result:
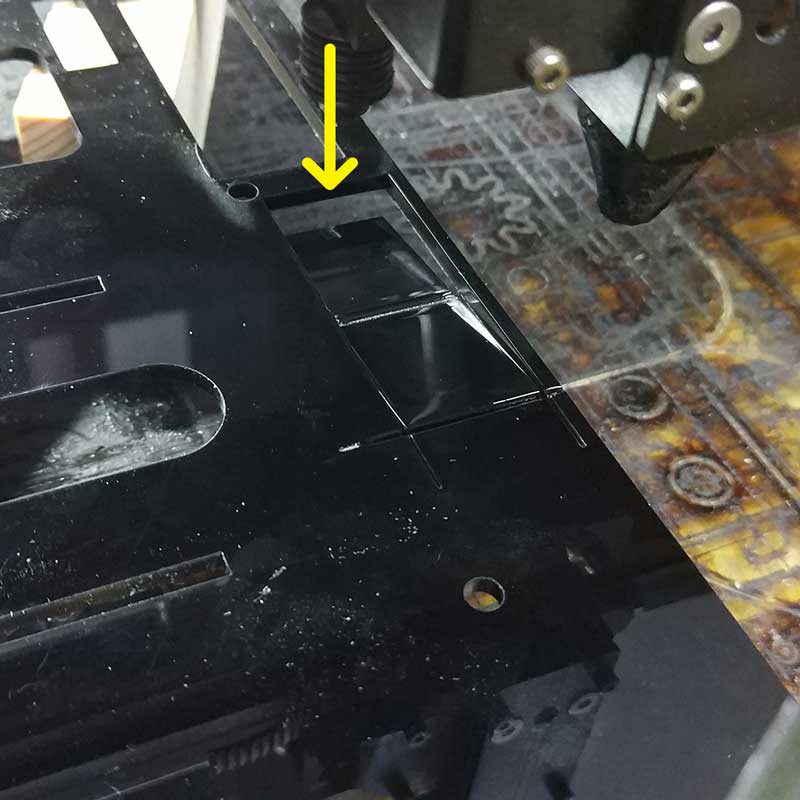
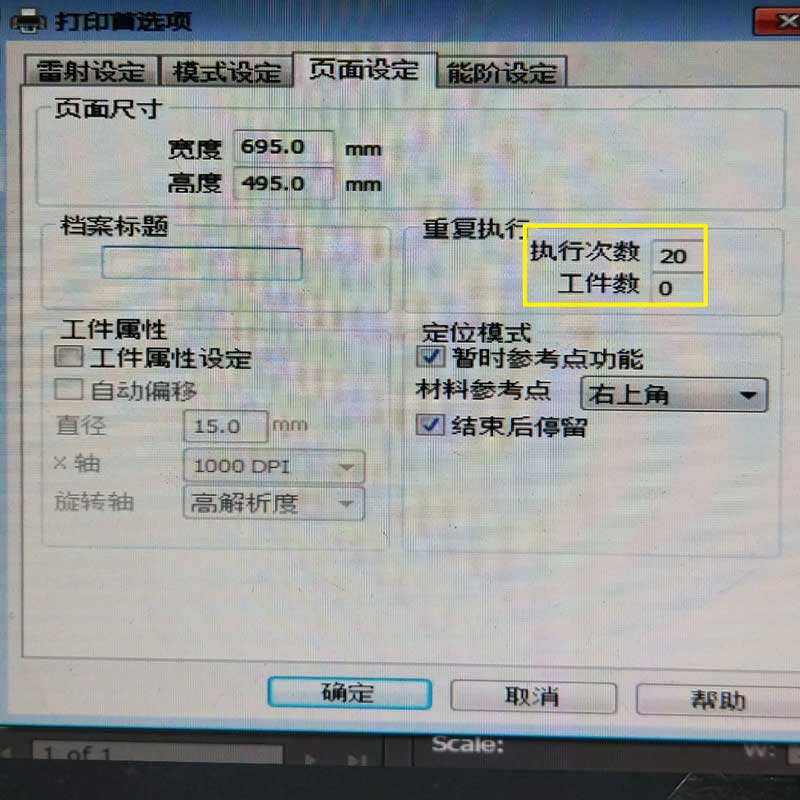
After this first tests I decide to use cutting mode instead of engraving and one of the settings that started to work out was using 95% power, 5% speed in cutting mode at a distance of 6-7cm from the nozzle to the material surface repeating the task 20 times.
As you can see from the result the bending is more evident but the bending line is too thick and it burnt too much material.
It took me long time while I was running this tests and I was not getting a good result, so I decided to move on and try a different task. So that I could come back to this once I had more time as this experimentation needs more time and much more tests.
I saw some videos where the acrylic is bent neatly (which is hard to get) and in some cases they used their hands to push a bit the acrylic once heated to achieve the bending needed.
I wrote a list of things to try out again:
1_Bigger shapes to cut out
2_The offset of the shape to cut out make it bigger (so that there is more space in between.
3_Use thinner acrylic 1.5-2mm thick.
4_Turning off the air that comes out of the nozzle, so that it doesn't cool down the surface.
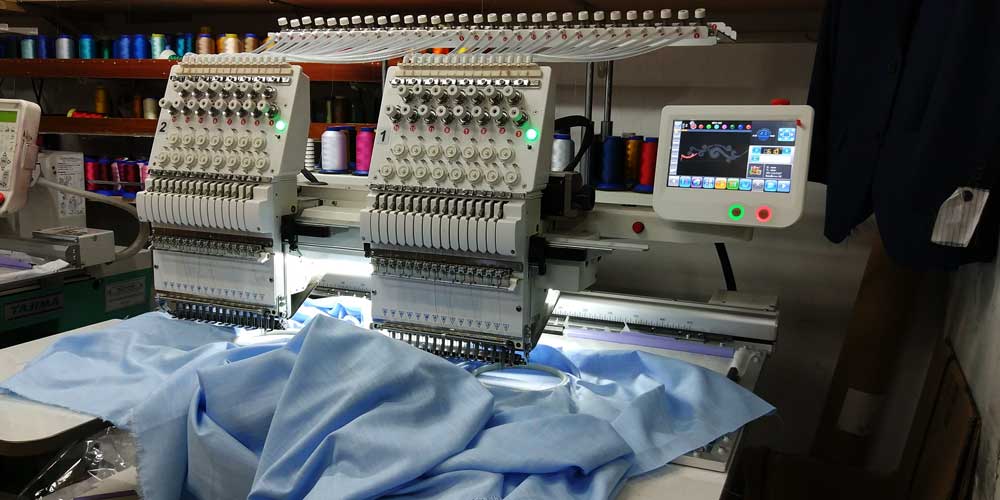
_TEST 2.0 EMBROIDERY
So, I decided to give it a try to the embroidery machine we have at the lab. We have a Brother Innovis NV 1250D model. Besides sewing and different functions you can do embroidery as well.
The process
You can create your own graphics and upload them into the machine to embroider them, I will explain how to do so later on. For the first test I decided to understand how to use the machine using the library of letters and symbols that is included in its software.
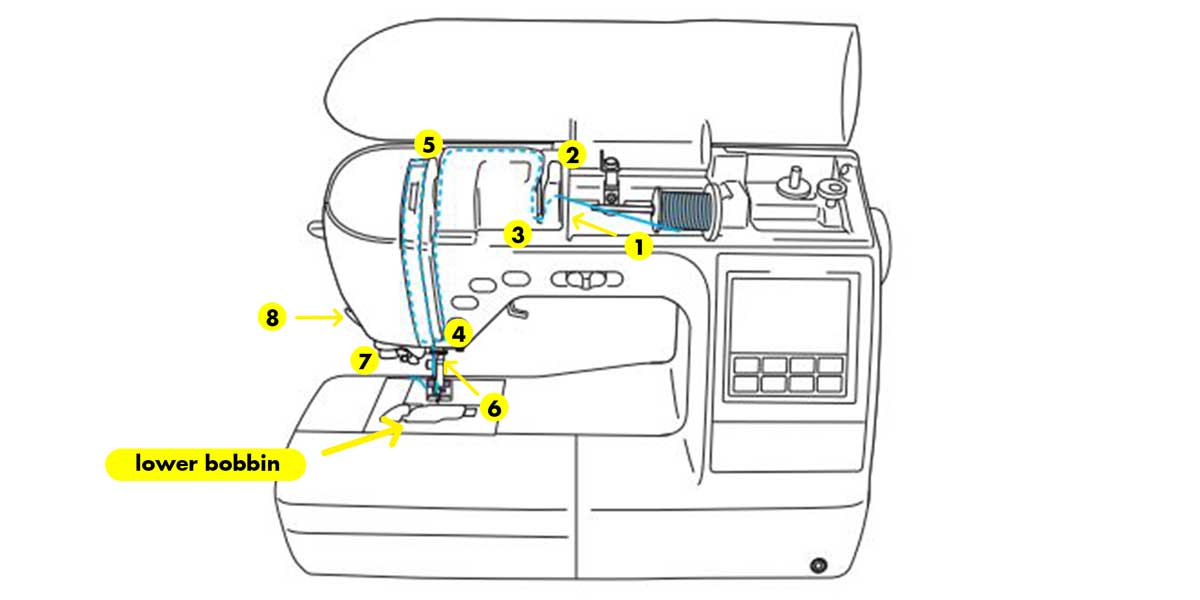
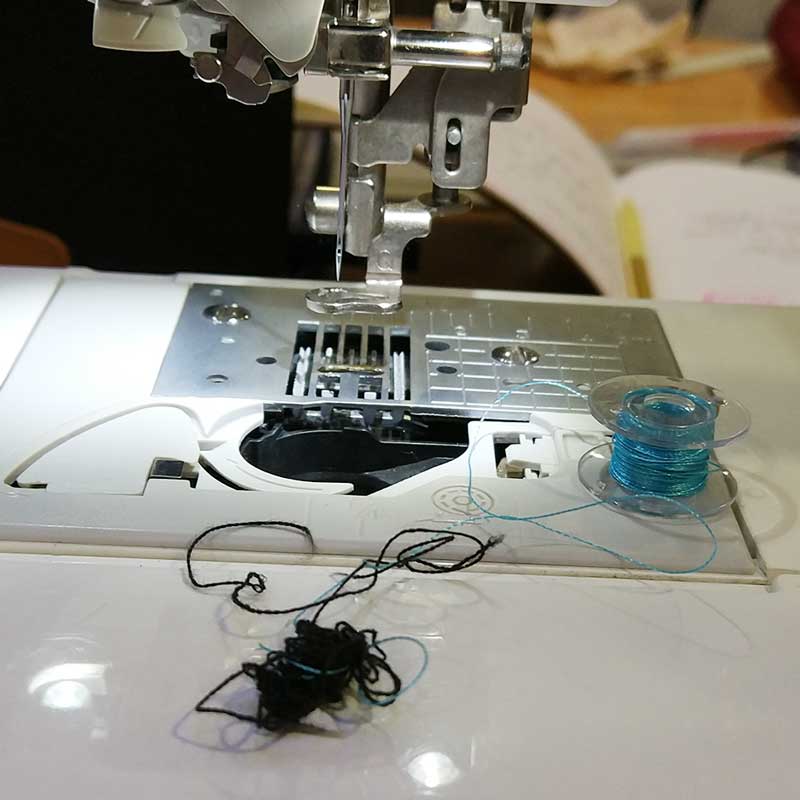
First thing to do is learning how to place the thread on the upper spool, which is very simple and is well explained on page 31 of the manual of the link above. Here is a diagram from the manual where I pin out the sequence on how to place the thread:
Once you place the upper spool, you need to make sure you load and place a bobbin that goes inside the indicated area. Without this bobbin you won't have the bottom stitch and you would be sewing in the air, so make sure to load one, check page 28 of the manual or ask your grandma how to do it =P if you don't have internet...
Once you place the thread you have to place the fabric inside the embroidery frame, depends the size of the embroidery you need as they come in different formats.(image source from Brother manual)
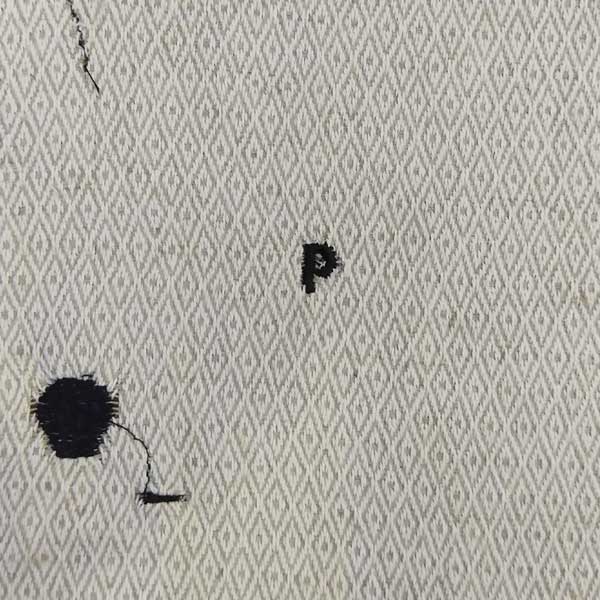
Then you can select the default symbols of the library, I started doing some tests using the alphabet letters available here:

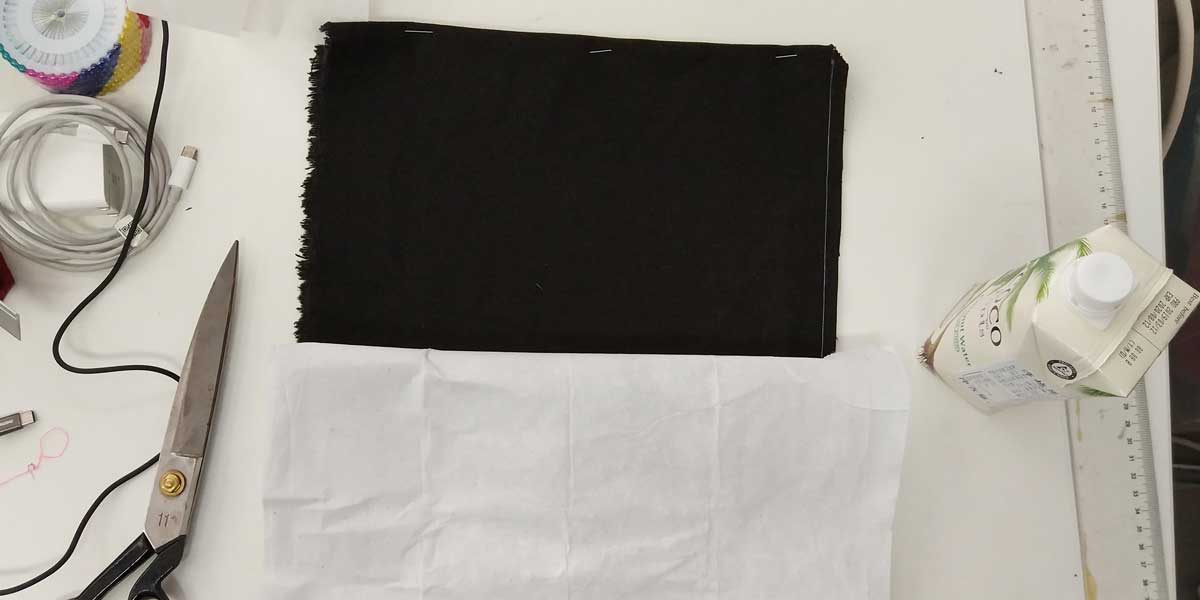
The fabric I used for the tests is a thick sort of cotton canvas, so I didn't use any backing fabric as is normally needed for thinner and delicate fabrics. This backing fabrics are normally non-woven interlinings that help to hold and secure the fabric in place, so that it doesn't move.
The following are the first outcomes of the tests I did:
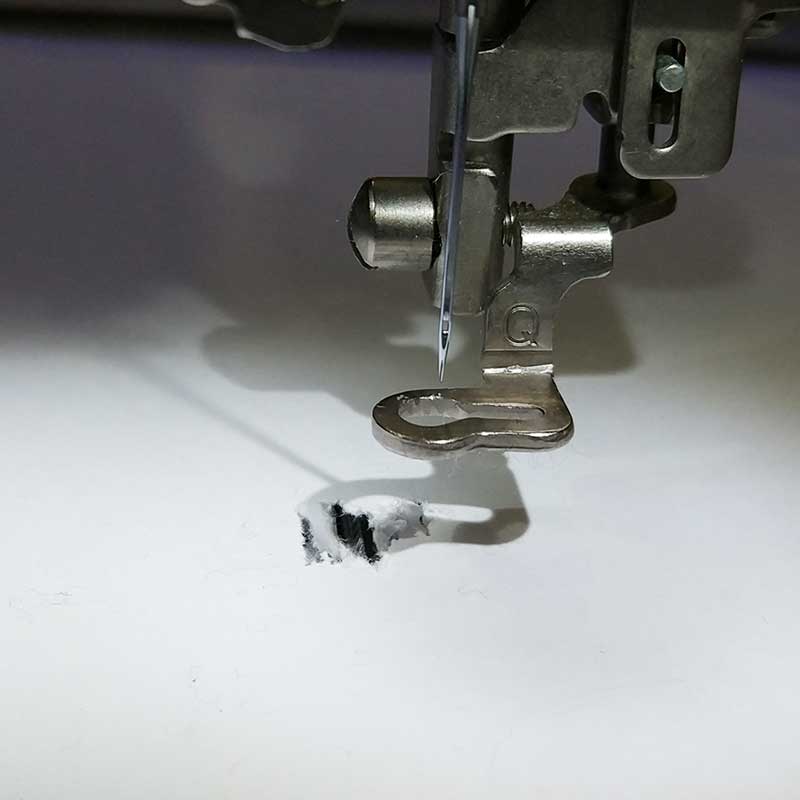
After running several tests in different fabrics and a fail attempt to use paper as material in my frame, and running several times issues like the lower bobbin got stuck (because the thread I was using was too thick), or the upper thread came out (that happened like 10 times or more) I decided to draw my own graphics and test them out.
CREATE YOUR OWN GRAPHICS
The files extension we need to create are called .pes and there is an extension available only for INKSCAPE that helps you to customize vectors parameters to output for embroidery.
This extension is called INK/STITCH, and as I normally use Adobe Illustrator to create vector graphics, I thought this was a good excuse for me to try InkScape and generate my own vectors.
InkScape is an opensource vector software. It is quite powerful but I find more intuitive and I prefer much more the workflow of Adobe Illustrator, but still, I would recommend this software to beginners and I find it useful as I sometimes teach public workshops to teach how to use the laser cuttnig machine, and when students don't have Adobe suite this is a very good alternative to use.
After downloading and installing Inkscape, download the extension of InkStitch and follow the installation instructions (this varies depending on the operative system you use). Then open InkScape and go to extensions > InkStitch to make sure you did the installation correctly, you should see the extension menu.
So the first test I did was creating a vector with one stroke outline and one small fill:
After drawing the shape, select it and go to Extensions > InkStitch > params, this will prop a window with a preview of the stitches pattern and you can customize and define the parameters of the stitches:
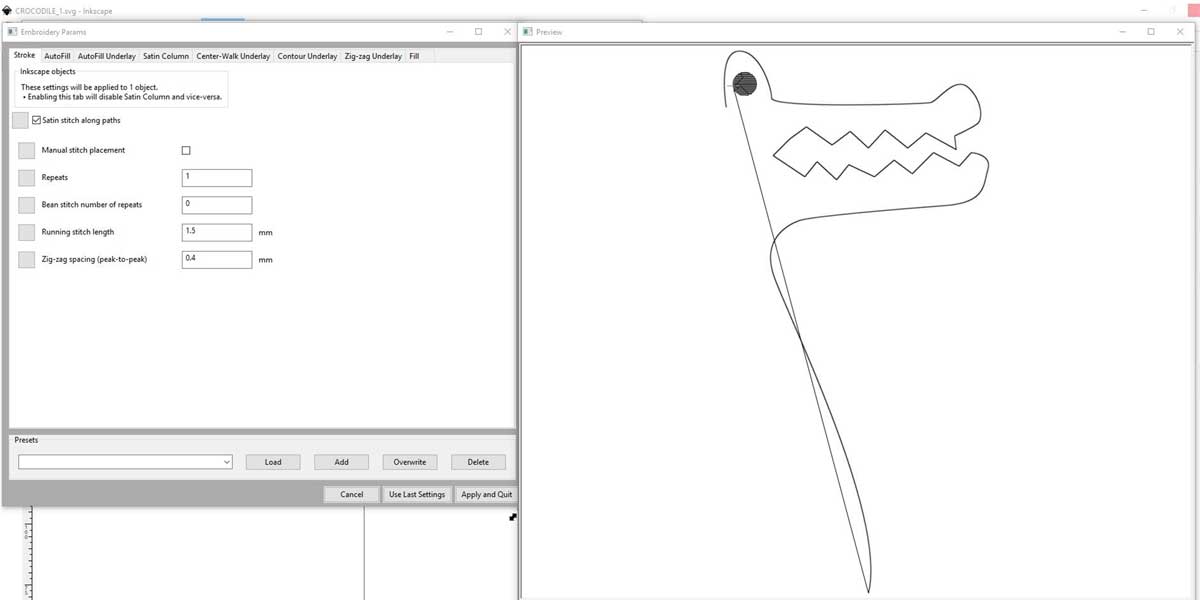
After selecting the parameters you can do Apply and quit and then save your file as
.pes so you can open it on the machine.
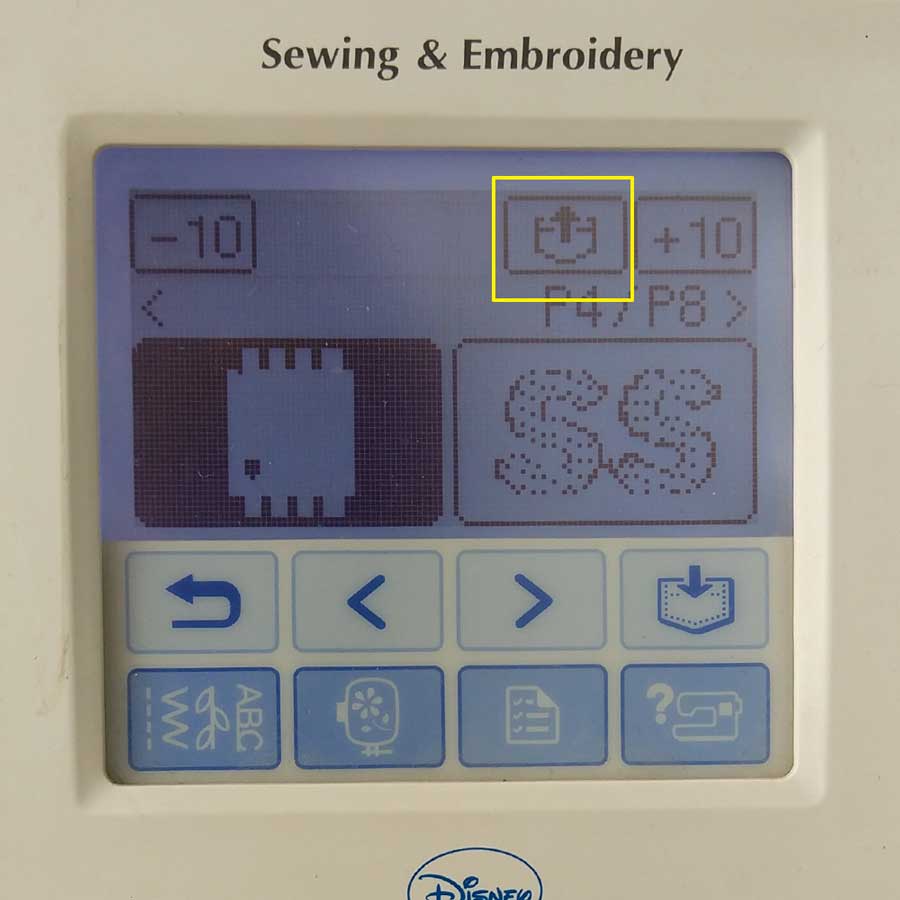
These are the steps to select your artwork from USB:
Select your .pes file inside the USB icon. Here you can select as well symbols or letters from the library:
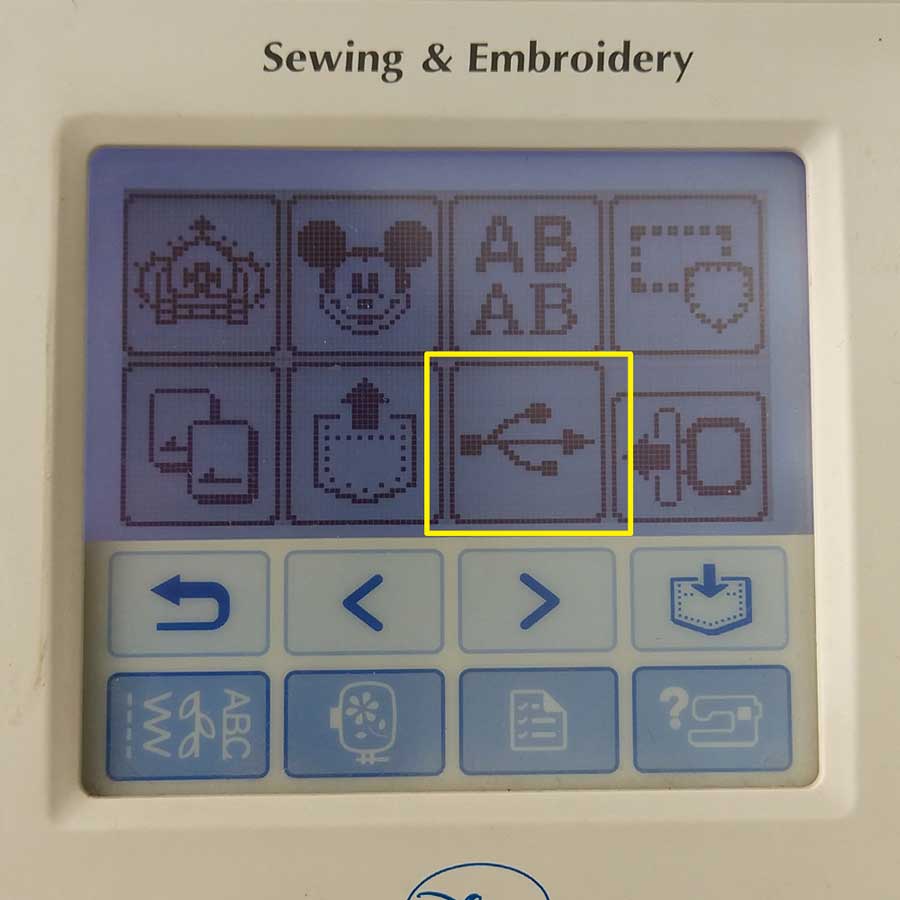
Once you select the file, click this icon to open the file:
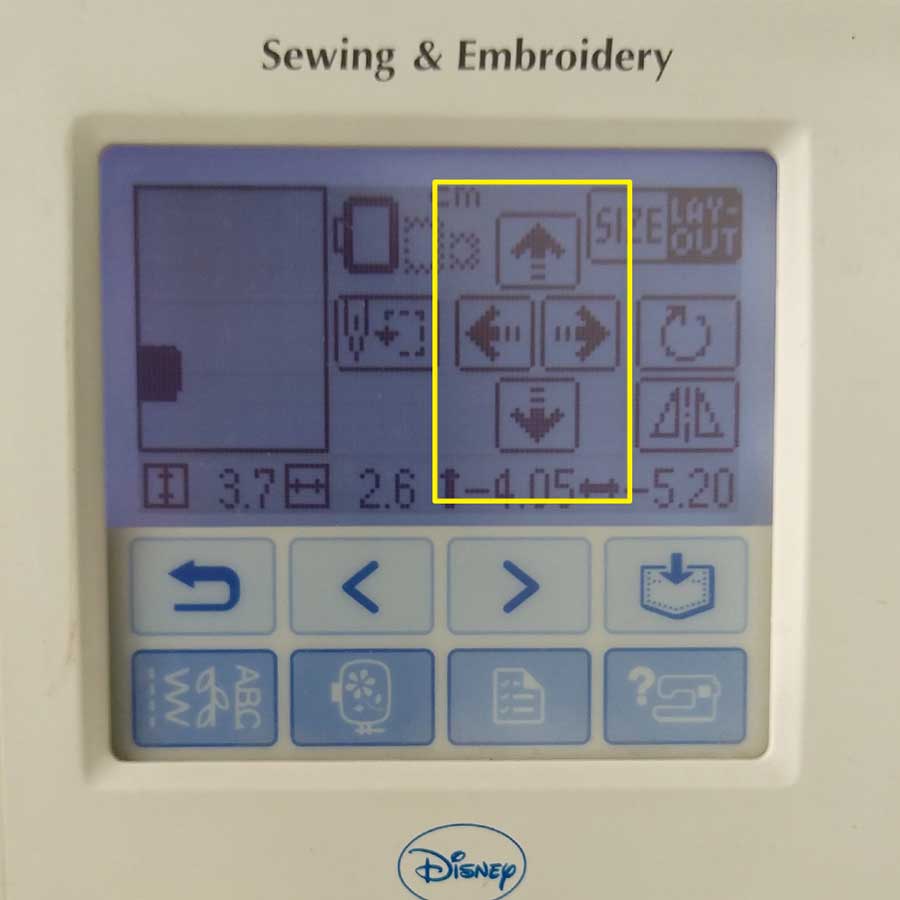
Inside this menu you can adjust the model size and position:

You can rotate, scale...
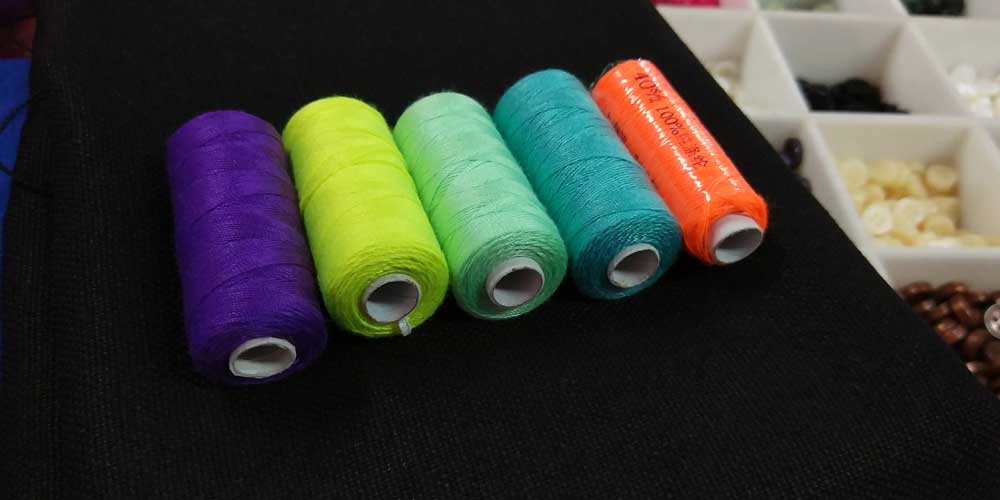
Here are some photos of the test I did using different thread and different fabric (without using any backing fabric)
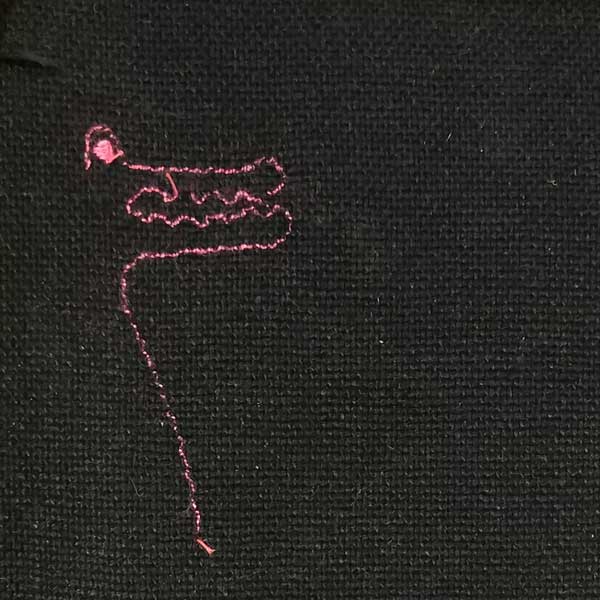
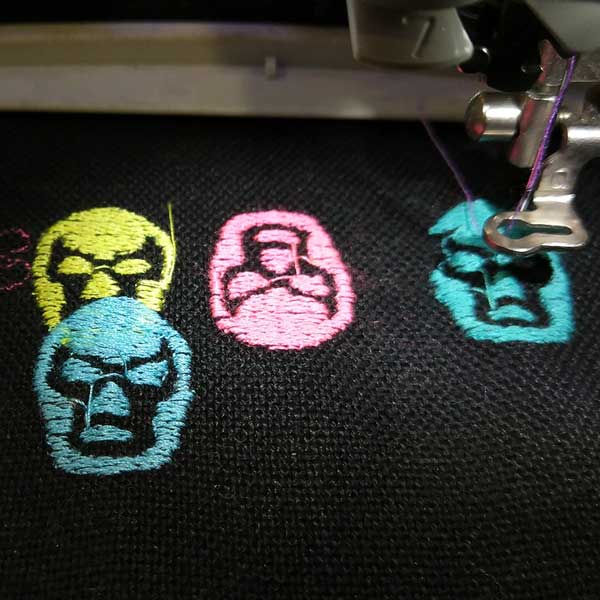
After trying this shape I decided to make new vectors on Inkscape. I drew a Blue Demon Luchador mask to test it.
This is Blue Demon in case you don't know him:

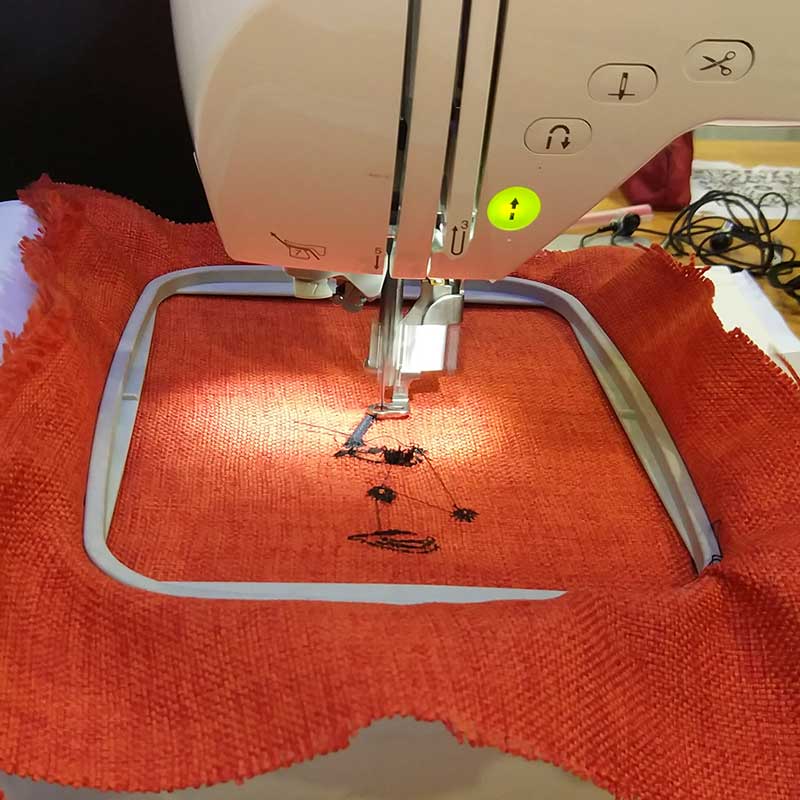
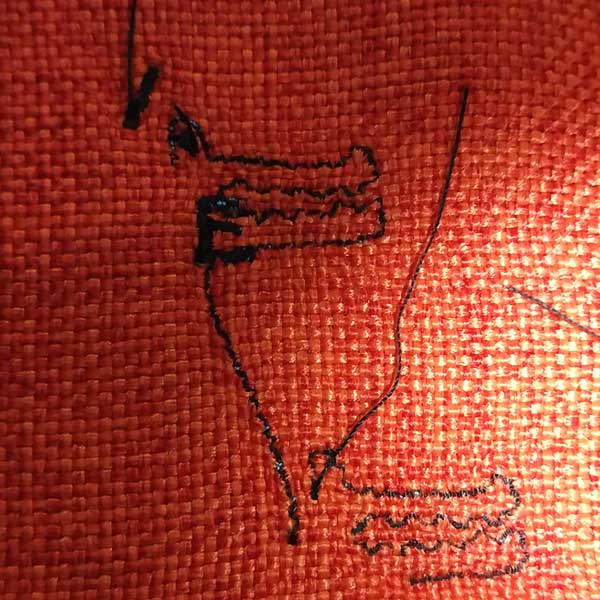
During my first trial I only did the outline of the mask. At first it seemed to look ok, but the stitches didn't come out really well, and you don't want to see the back it was a mess of threads:
The letter C on top of the head is not part of the design, is just a test I did as the stitching was
coming out pretty bad, so I wanted to see how a filled shape looked like, and here I decided to try new
tests of the same mask but doina fill rather than an outline. So I just added fill into my original
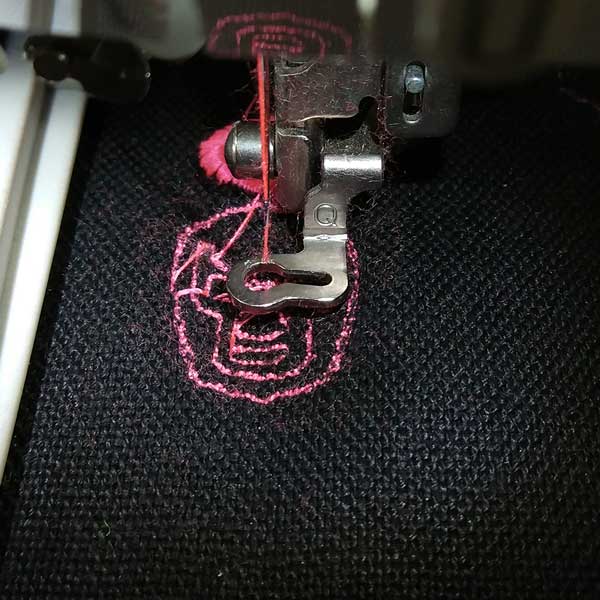
vector and did the new params again for the embroidery machine.
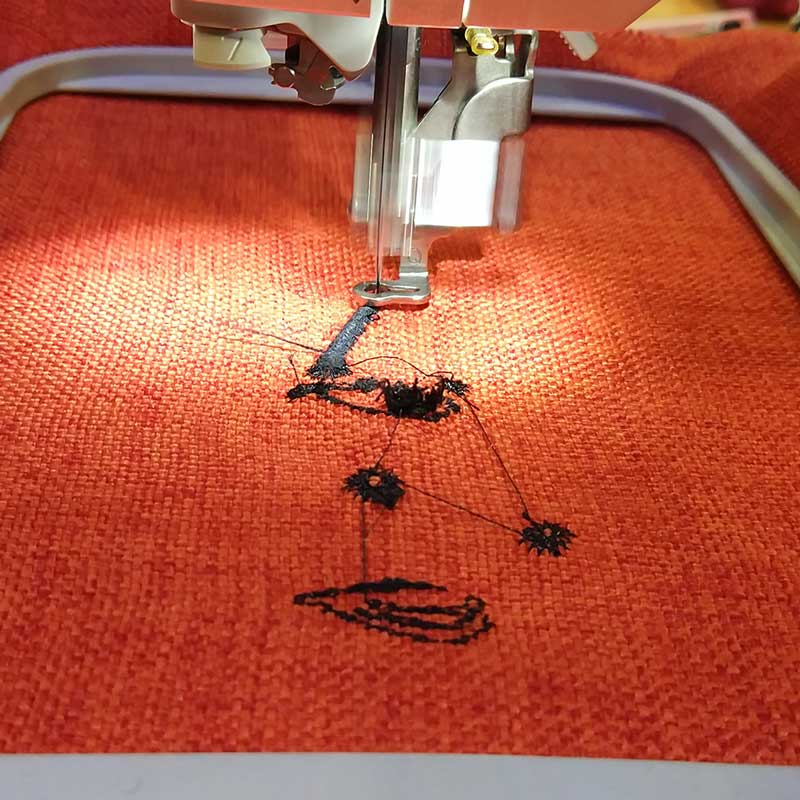
I ran several tests with different colors of threads and the result was pretty good, the back of the
sewing came out nice as well, and I used two different colors on the upper and lower bobbin so the back
side has a cool two colors effect.
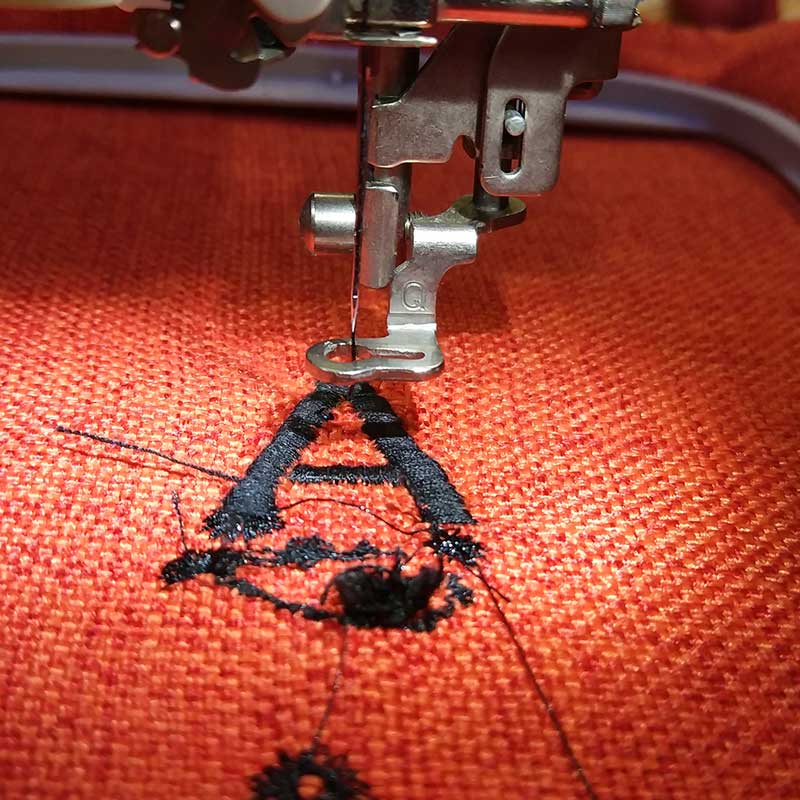
Here some photos of the process:
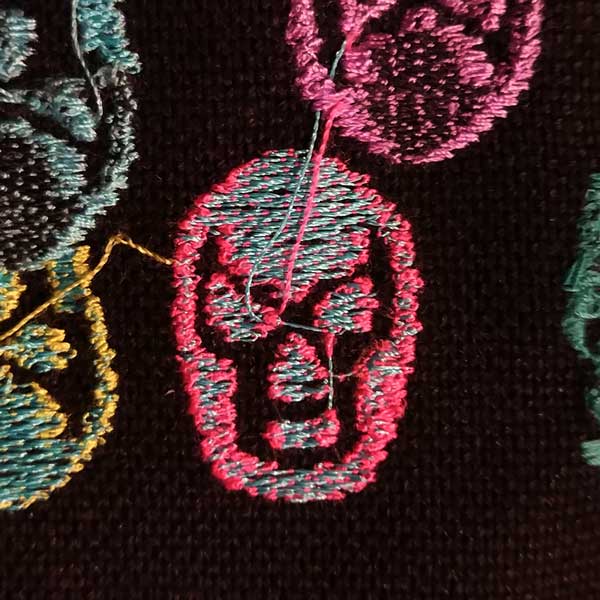
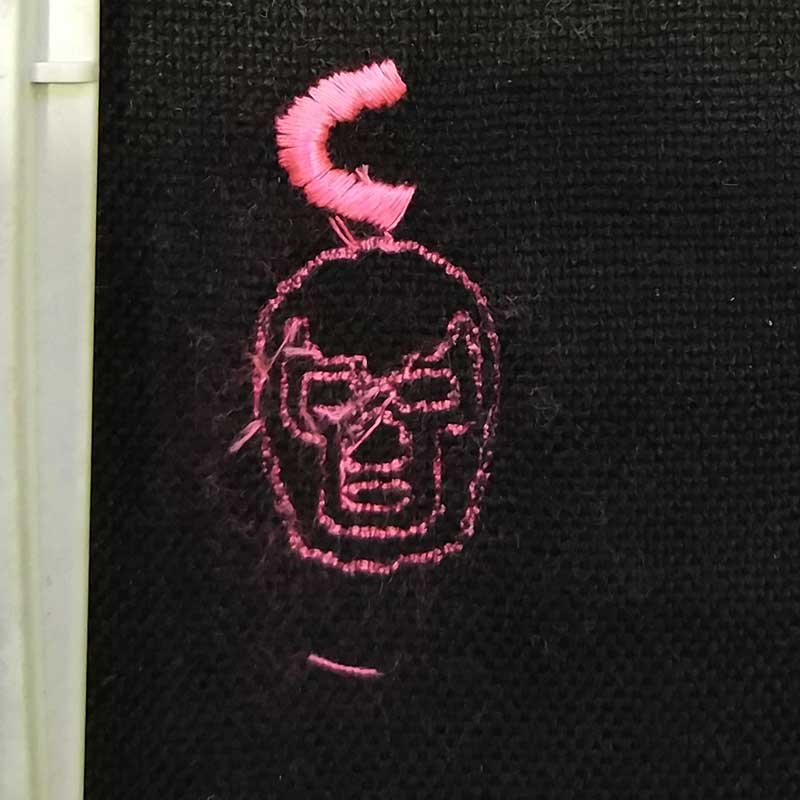
The third photo is a picture of the back of the embroidery. I don't know if my mother can be proud of it, as she is an expert seamstress, but I am proud of my first attempt of embroidery (although it needs tons of work).
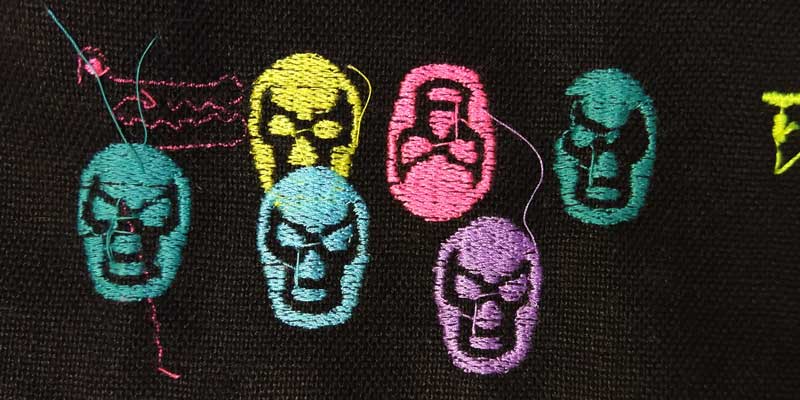
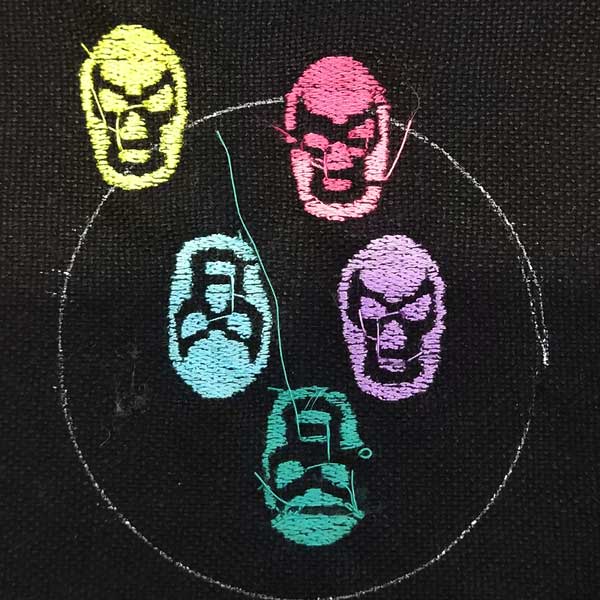
Here are some more tests I did, as you can see some resemble more of a luchador mask that has been run over by a truck:
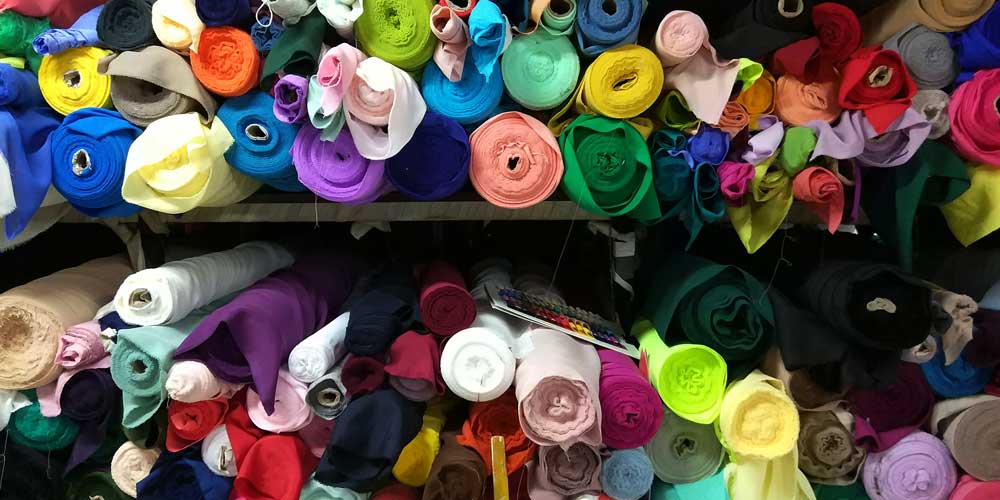
Forgot to mention that I went to the fabric market here in Shanghai, there are several here with nice materials and lots of tailors that can do custom-made outfits or others. I went there to buy some material and some ideas for this weeks task. I saw a couple of beautiful embroidery machines, a bit more complex than the one I am using:
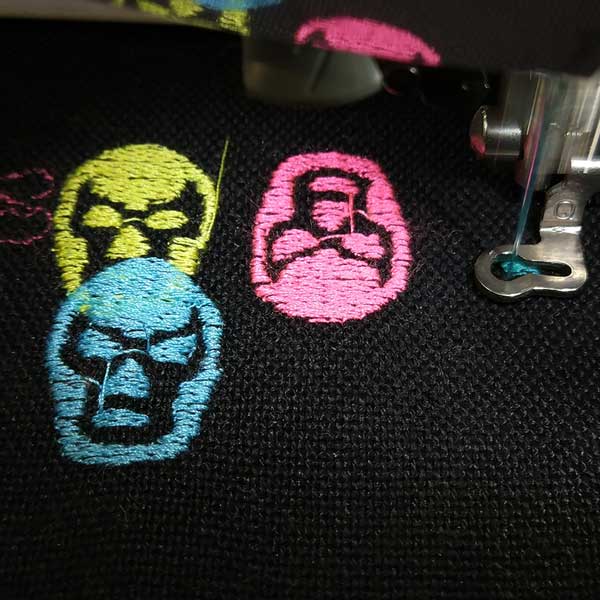
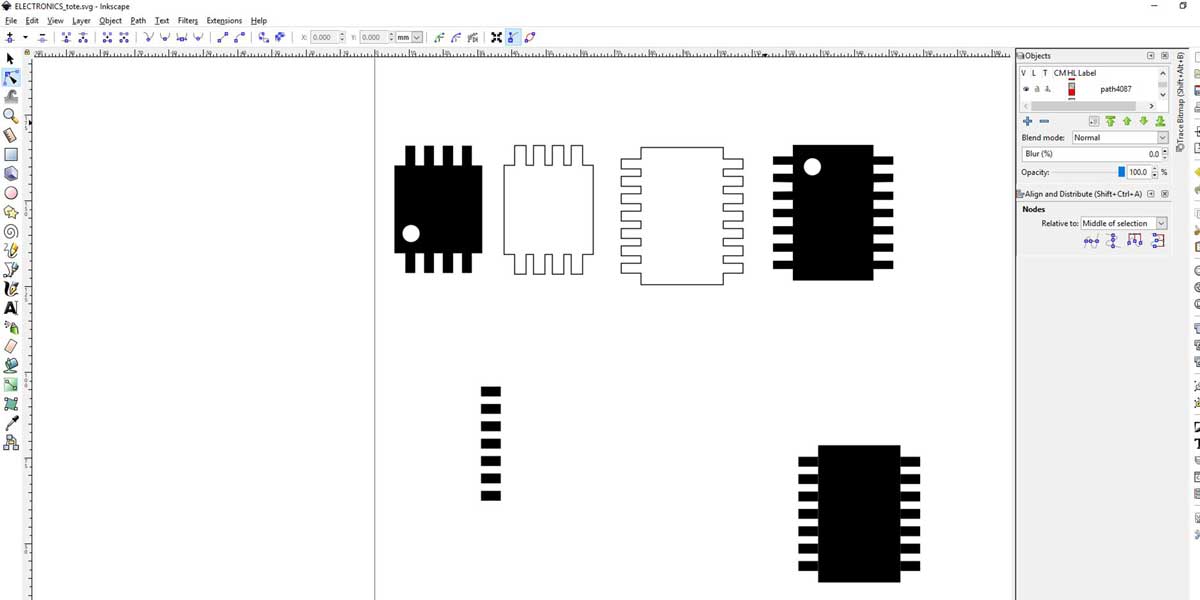
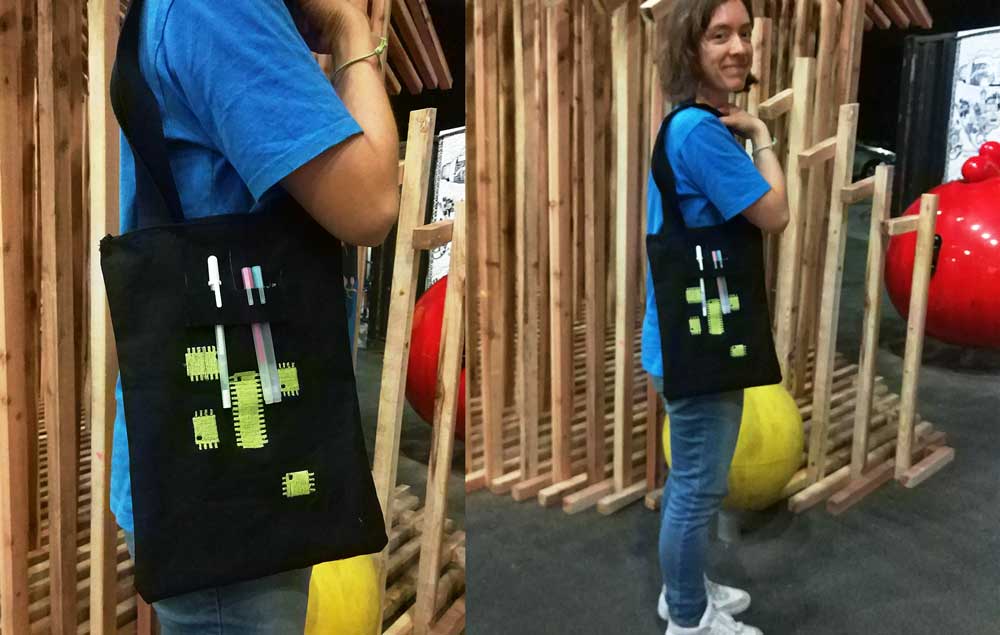
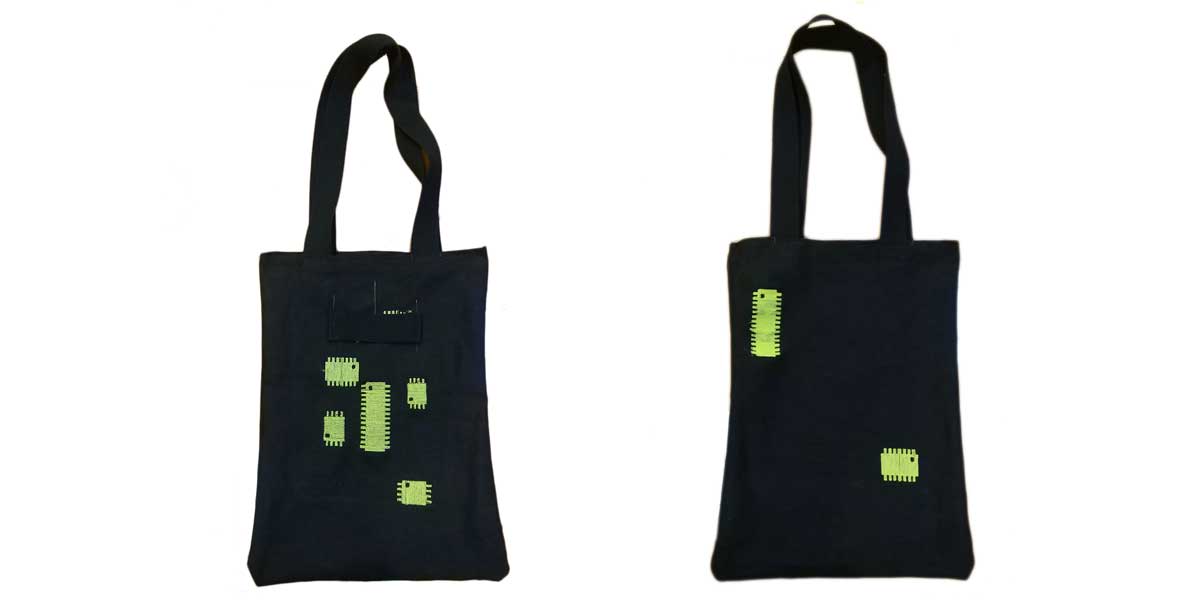
After this test I decided to make a tote bag with some graphics embroided.
Every week for my assignments I design an icon for each topic, and I decided to use some ATtinys I drew
back then:
I plan to do the tote from scratch, cut, sew and embroider so that I can learn better how to use the sewing maachine. This is how the tote will look like (hopefully):
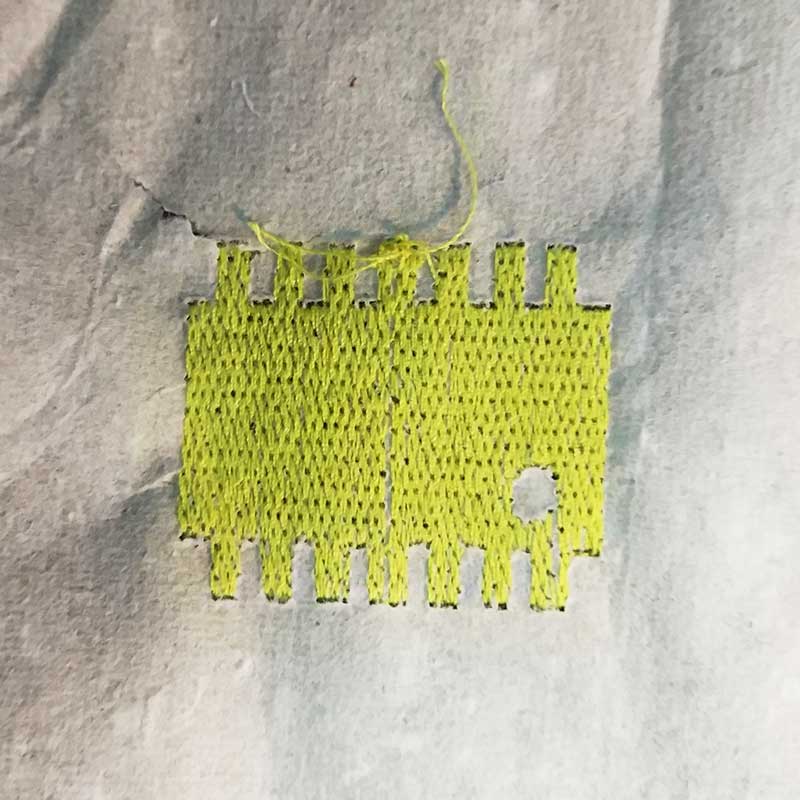
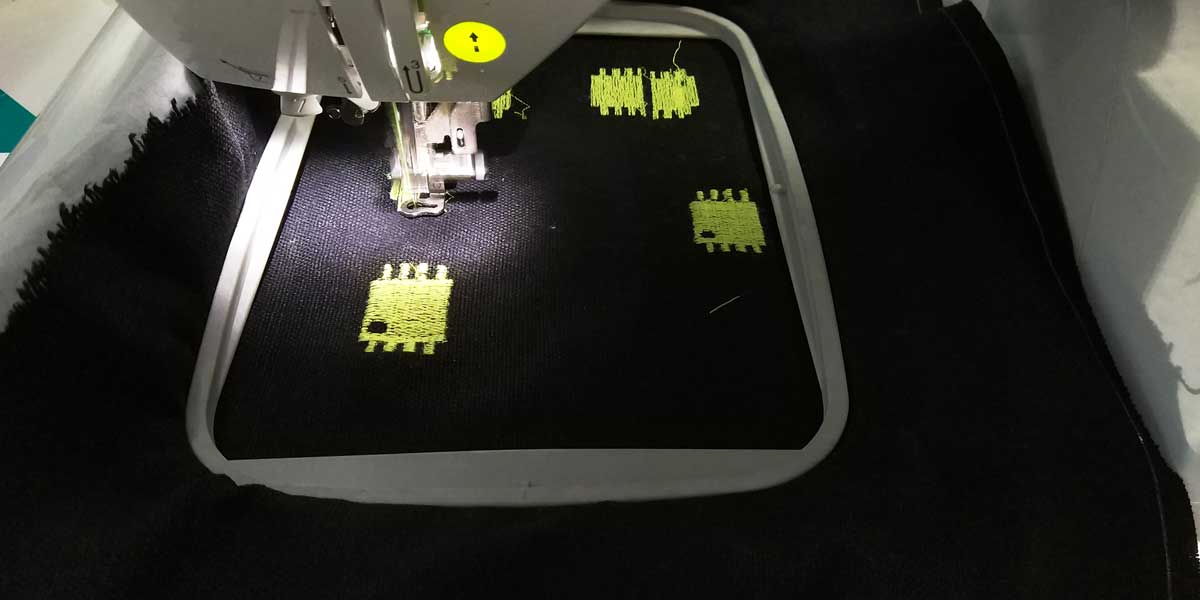
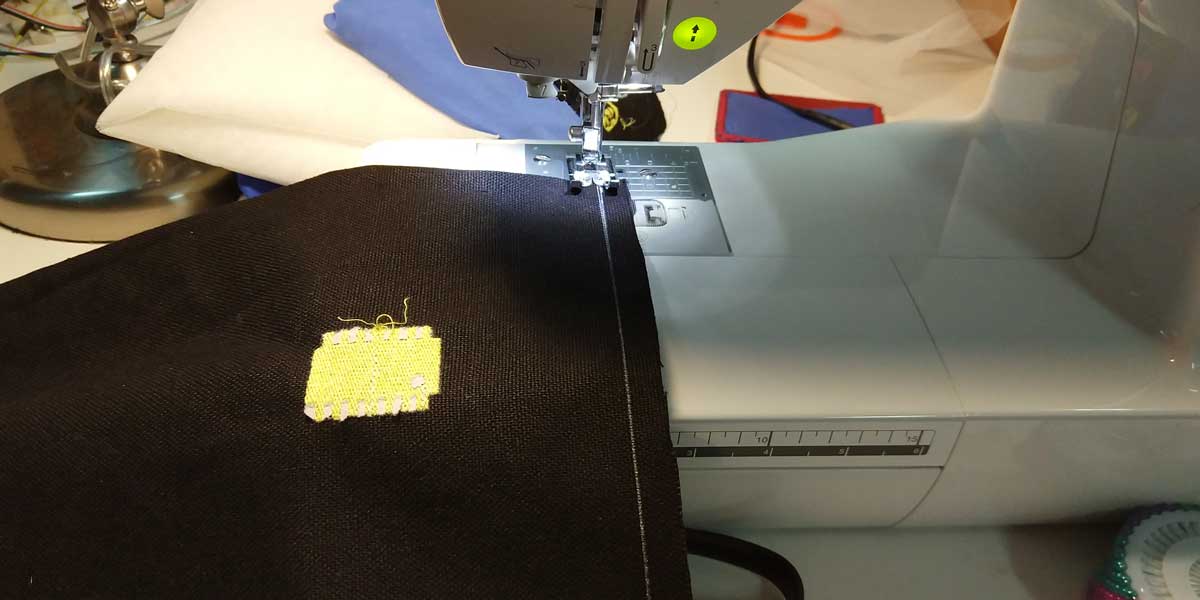
I thought I could use the vectors I had already designed on Adobe Illustrator but when I opened the file on InkScape and ran the InkStitch extension, for some reason it was not generating the params stitches and it kept loading without response, so I decided to re-draw from scratch the graphics of the AtTinys to use on the embroidery machine.
After drawing the graphics I did a few tests on the fabric I would use for my tote bag, but this time I
bought in the market some backing fabric to put behind, and I have to say the result this time was much
better that the previous test I did, so I would definetely suggest to get some backing fabric for
embroidery, even if the fabric is a thick canvas like the one I used.
Just as a useful note for myself the chinese word to find this backing is Zhǐ chèn.
Here are some photos of the process and materials:
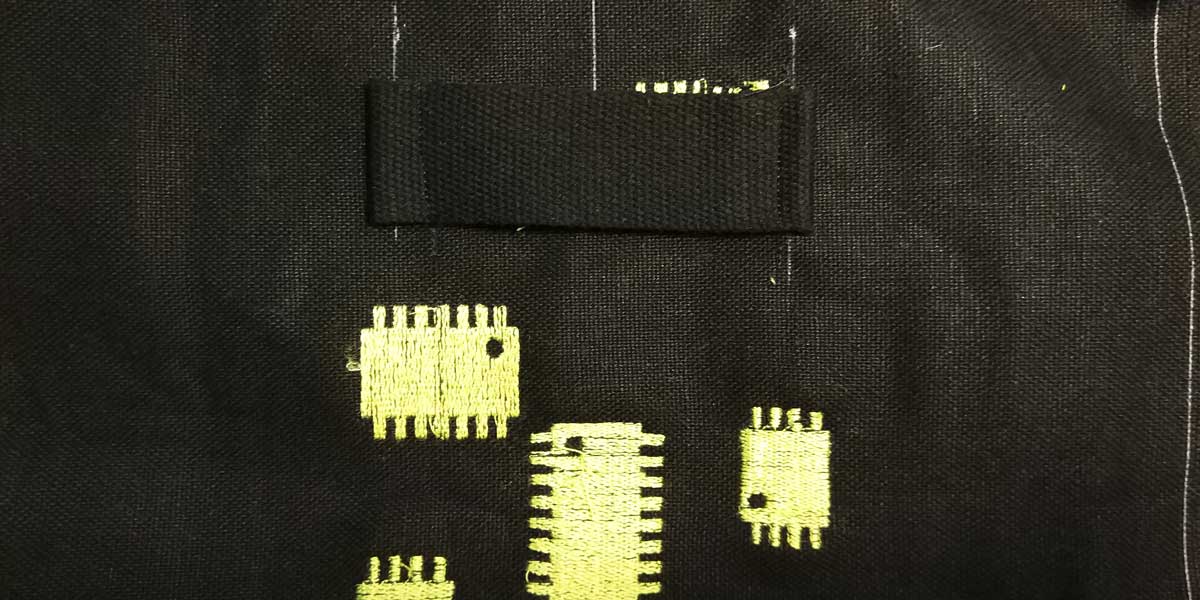
This is the back lining I used and the cotton canvas for the tote bag.
This is how the back of the embroidery looks, it works much better with the lining, I even like more the back than the front stitches.
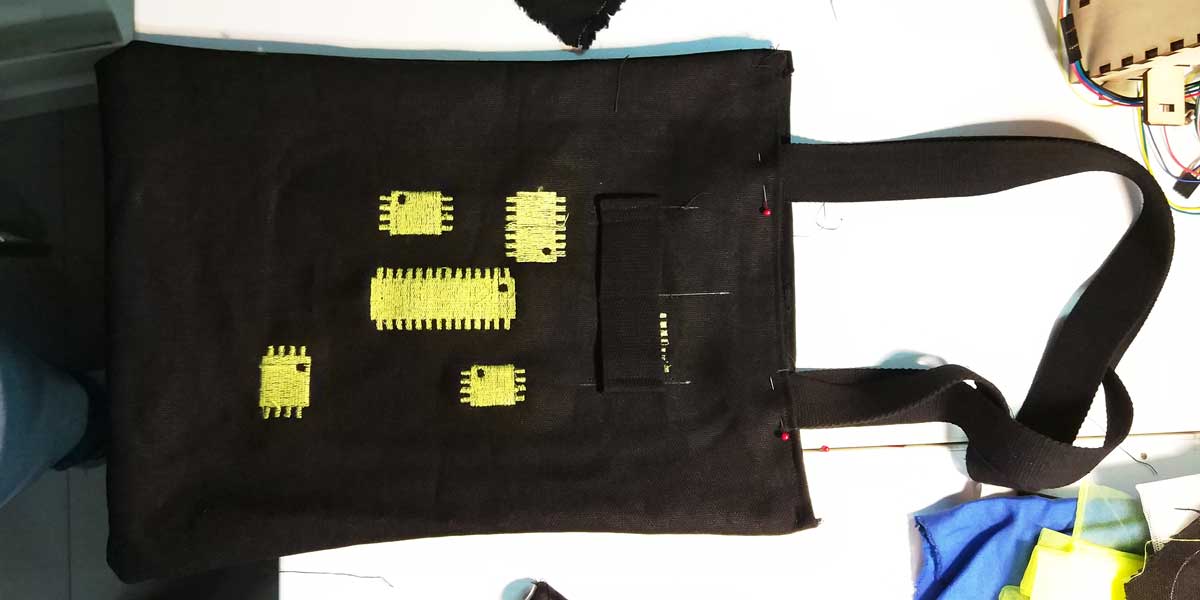
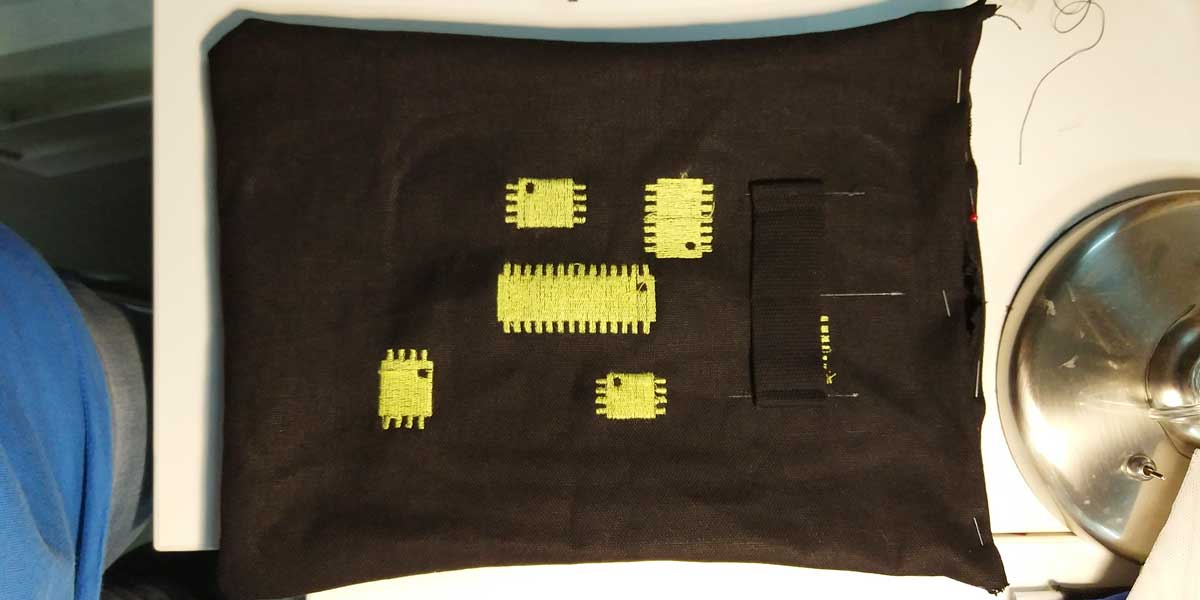
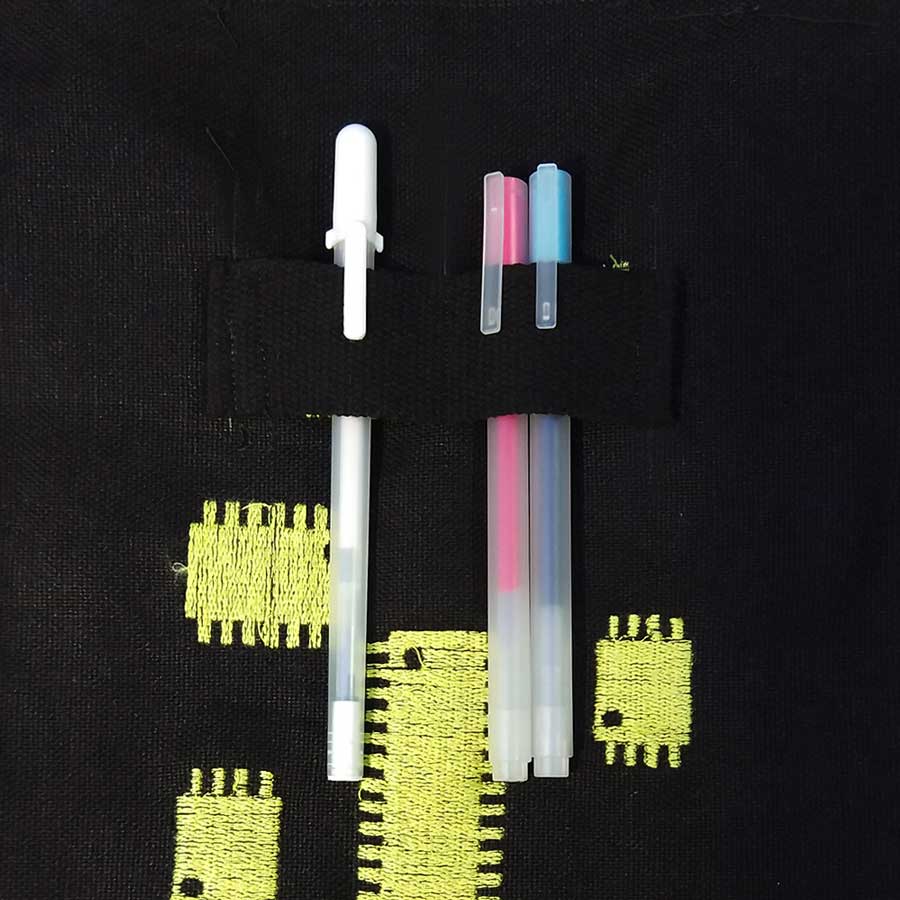
To cover some imperfections I added a belt to hold things like pens...
_TEST 3.0 3D PRINTING IN FABRICS & OTHER MATERIALS
While I was in Korea for FAN5 event, I attended a short workshop about 3D printing in textiles organized by Fabricademy mentors, and I learnt a few basic process on how to 3D print on fabrics using an FDM printer.
During this short training they showed us a very cool and interesting open source vector graphics scripting website where you can generate vector graphics like voronoi diagrams. The platform is called paper.js check it out!
The process
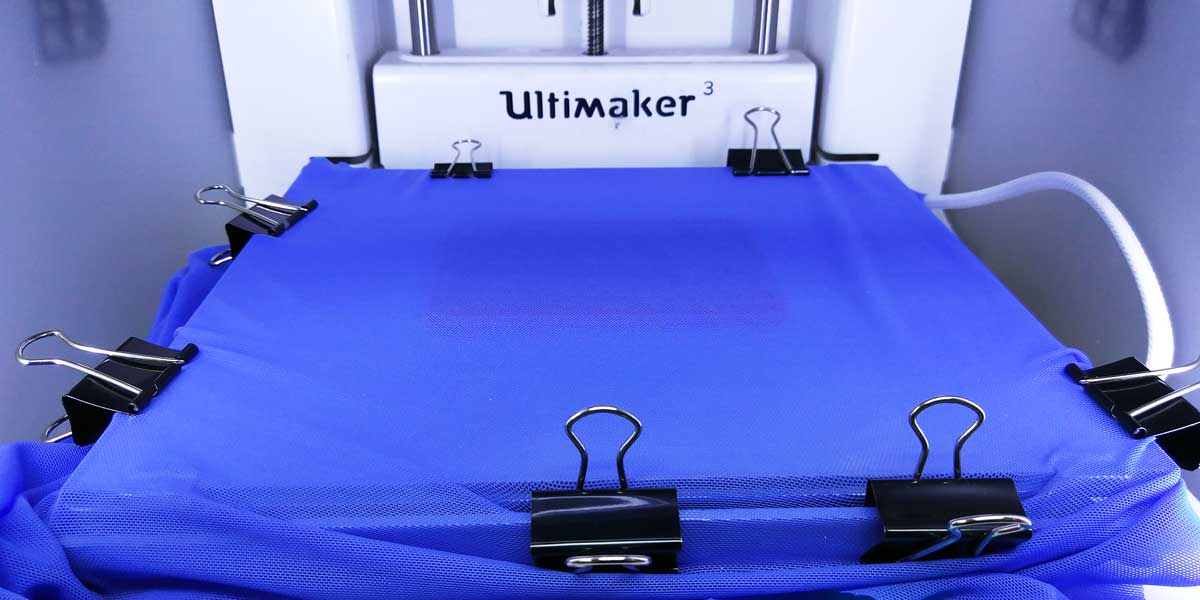
To 3D print on fabric or any other surface, you need an FDM printer so that you can interfere during or
before the process, and the printer should be open on the sides (for example a Prusa works pretty well
for this) this way you can attach well the fabric into the bed of the printer.
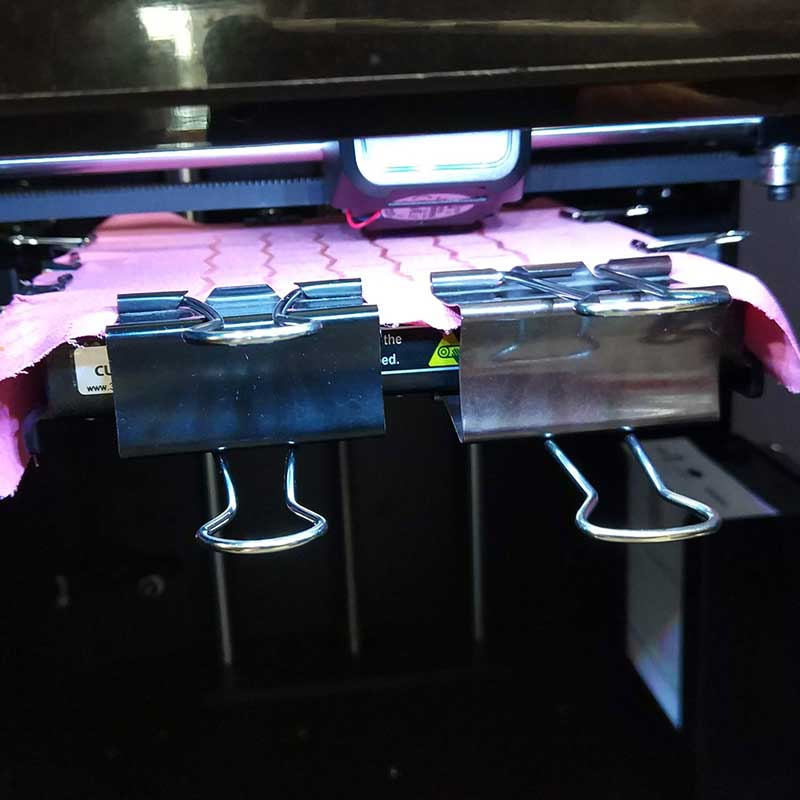
It is super important that the fabric is very tense and well clipped on all 4 corners, otherwise the
nozzle of the printer will get stuck in the fabric and you will get some ugly results.
Some fabrics they recommended me to try (that work best for this tests) are lycra, or strechable thin
fabric and polyester mesh type fabric, of course there are others too try but to begin with this are
good to test out as they adhere very well into the filament, they are thin and easy to attach (you have
to stretch them well while fixing them).
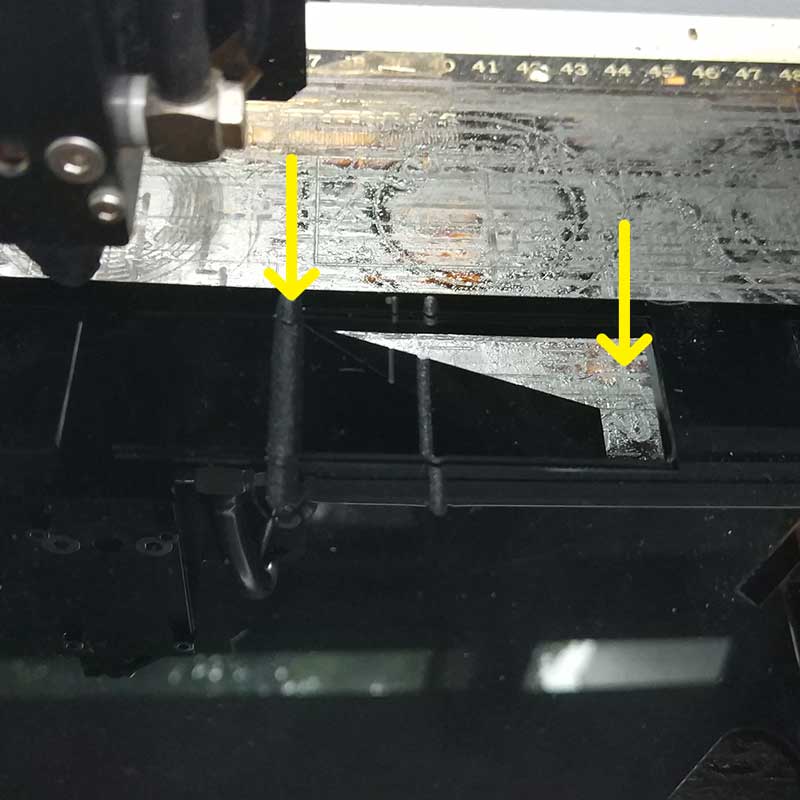
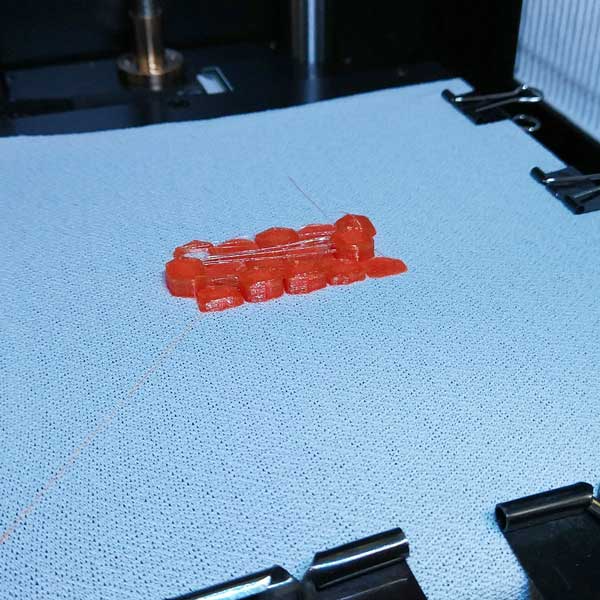
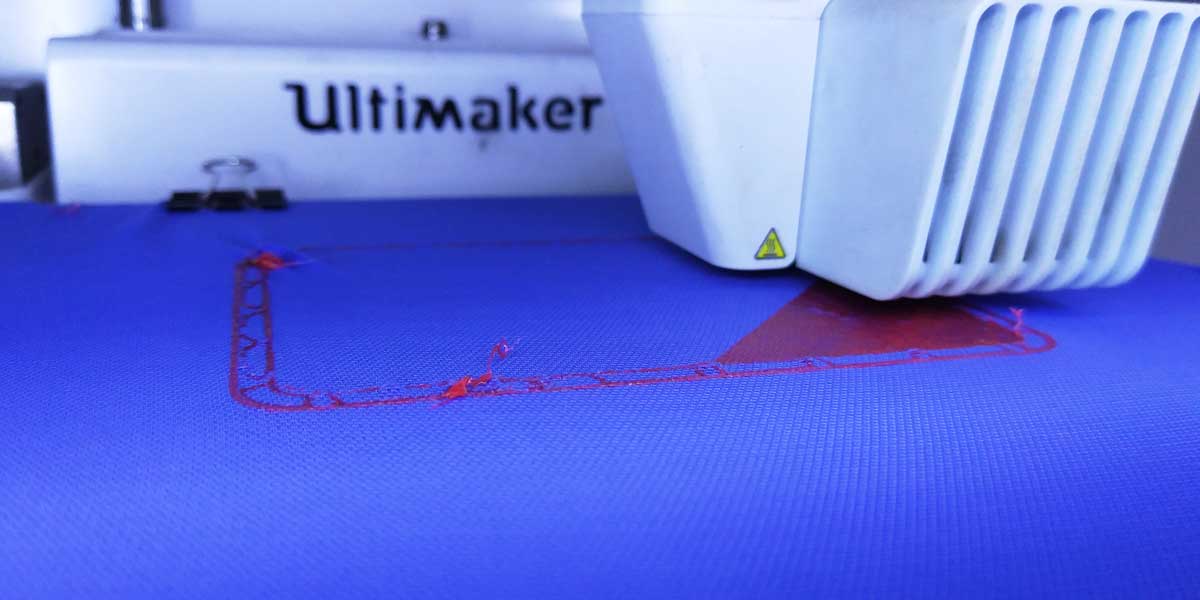
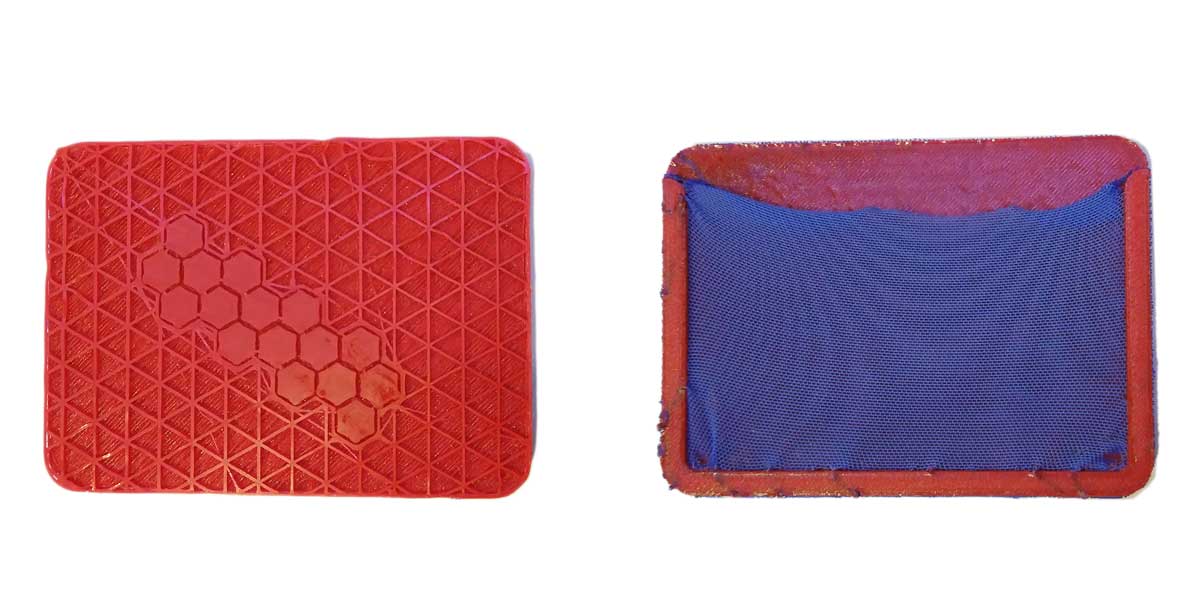
The first test I wanted to try out was using flexible filament (TPU**) and polyester mesh type fabric to make a coin wallet.
** TPU is a thermoplastic polyurethane that is extremely flexible.
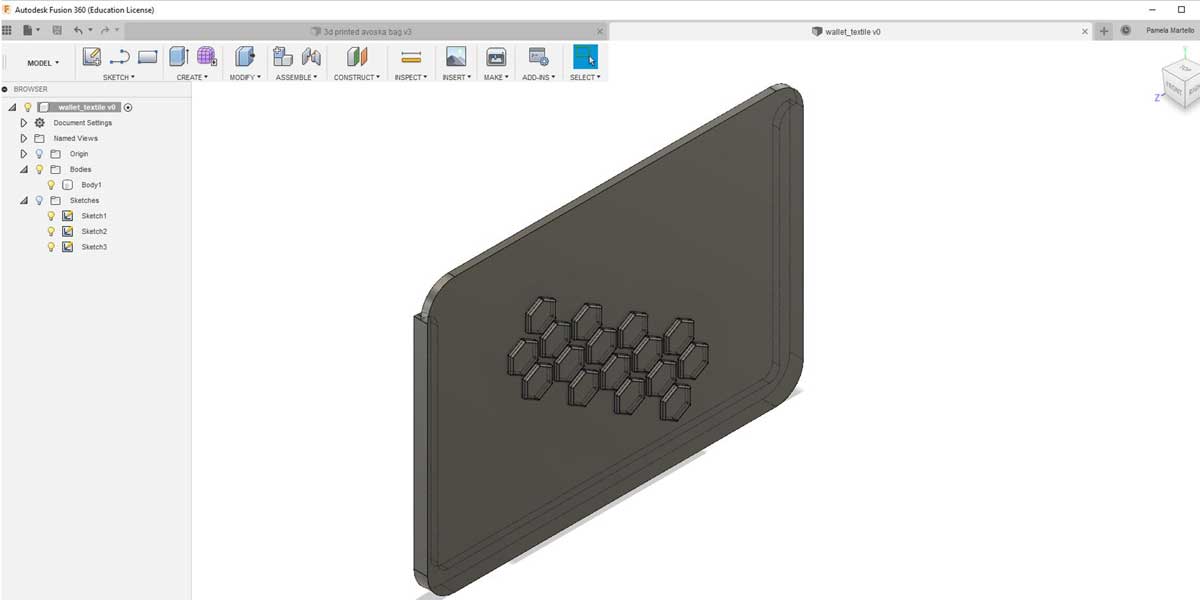
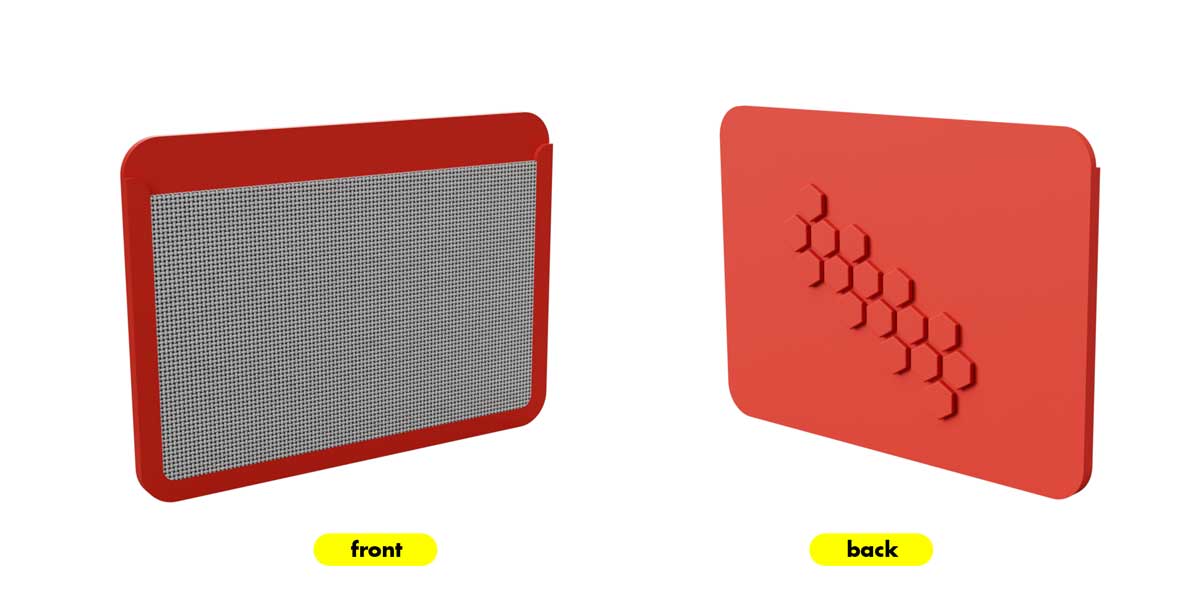
I designed the coin wallet using Fusion 360, and as you can see from the render the idea is to have the pocket that serves to hold the coins, made out of fabric. So my initial idea was to pause the print at a specific height, place the fabric and then continue the print the borders so that it would attach to the filament and create this pocket.
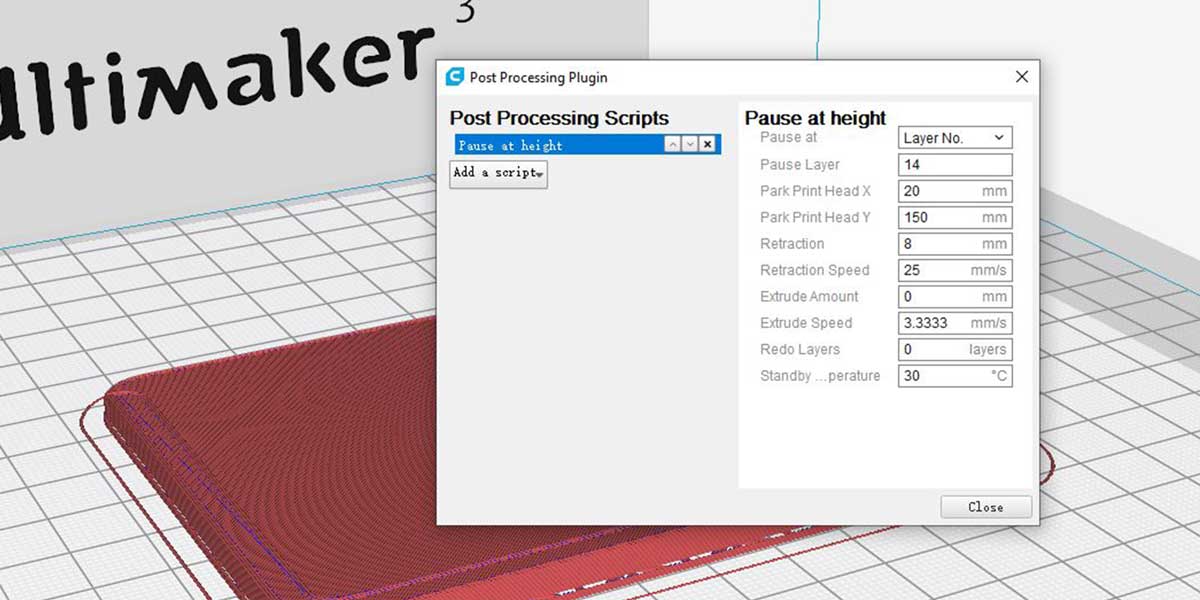
After doing my model I set up in CURA the parameters so that the printer would stop on the layer I needed
to place the fabric.
To set up pause at height function inside CURA just go to: Extensions > Post
Processing > Modify G-Code. This are the settings I used:
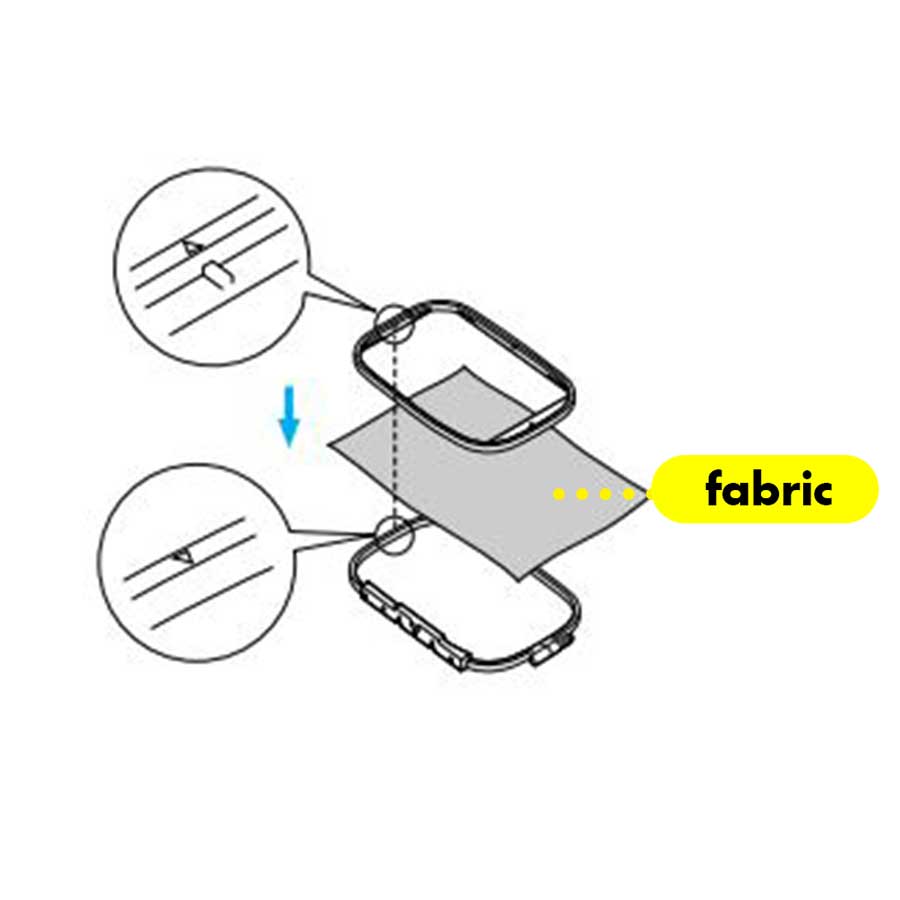
I placed the fabric when the printer stopped and ideally the printer would have stopped at the marked place on the diagram below (where I set on my G-CODE), but for some reason it stopped on a previous layer, so when I placed the fabric and restarted to print, it started printing all the surface which was not supposed to, this resulted in the filament covering all the fabric.
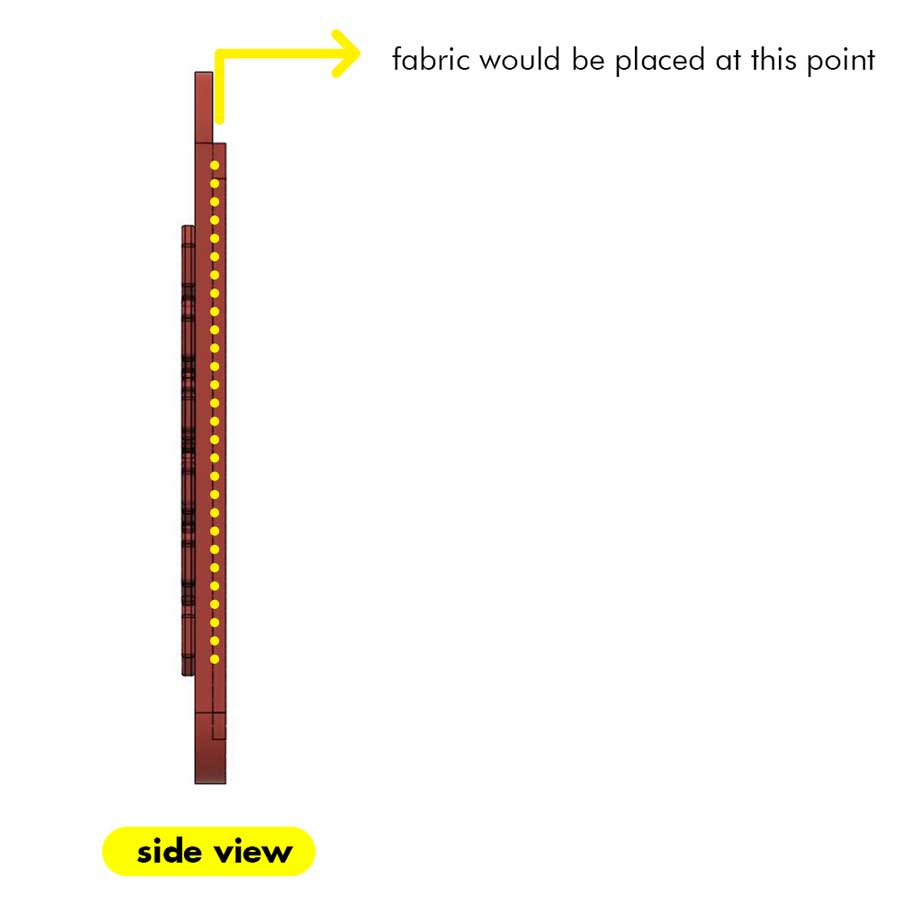
This is the error of the height, so what I just let the print continue.
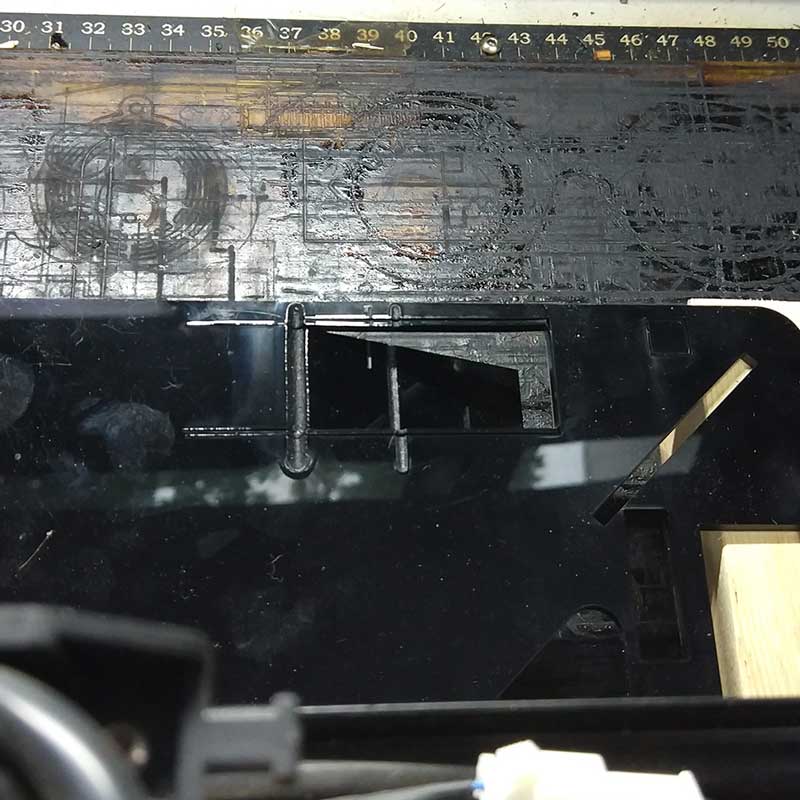
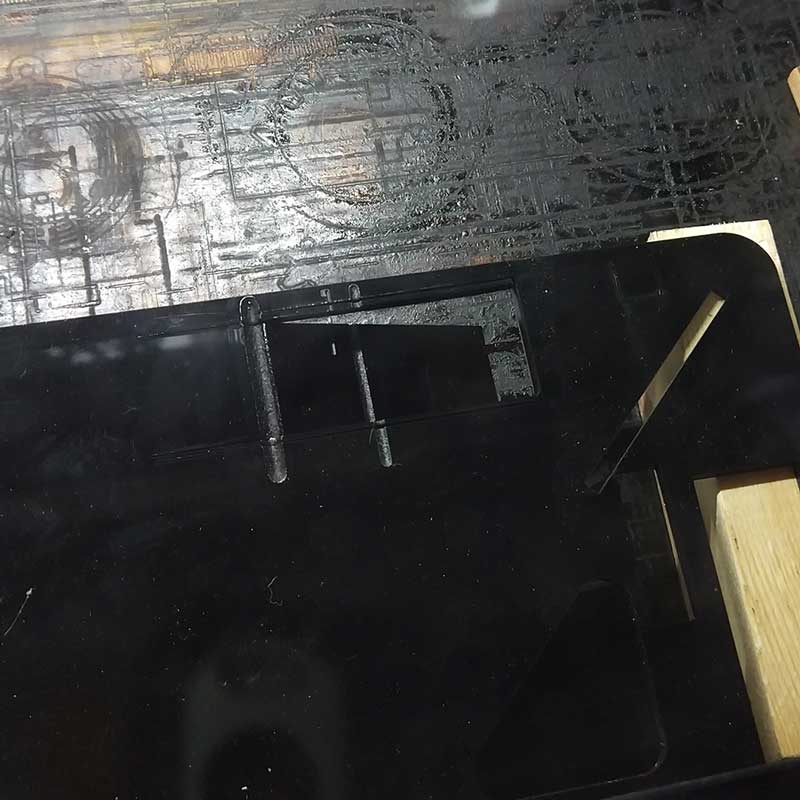
After this I stopped manually the printer at the height I needed and I folded the fabric to make the pocket as I needed.
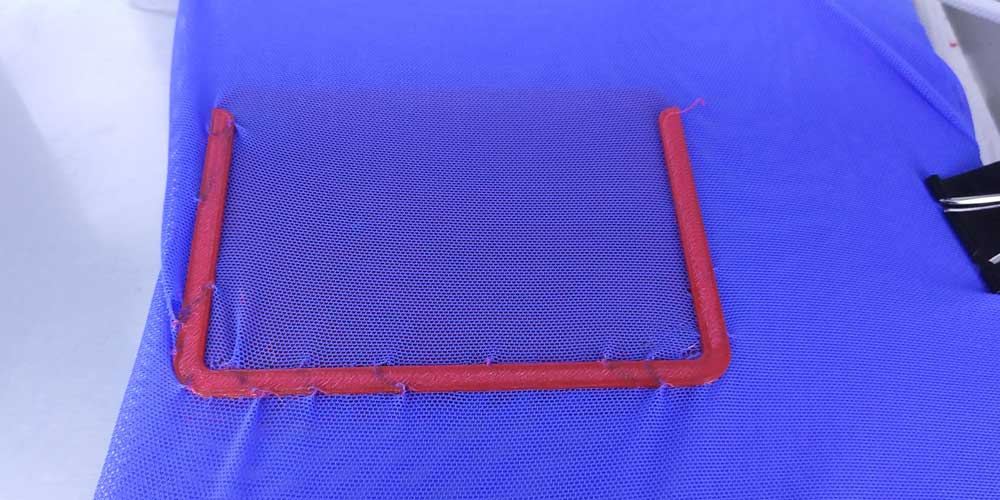
As you can see from the photo, as I folded the left edge and it was not wripping anywhere this caused the fabric to move and the printing didn't come out very well on that side.
The outcome

As you can see the fabric adheres really well to this type of fabric.
On the image below you can see the support I created (triangular grid), I left it as I liked how it look
with it, so as it is easy to remove I used the heating blow torch we have at the lab, to melt the
corners of the support generated and attach them to the wallet body
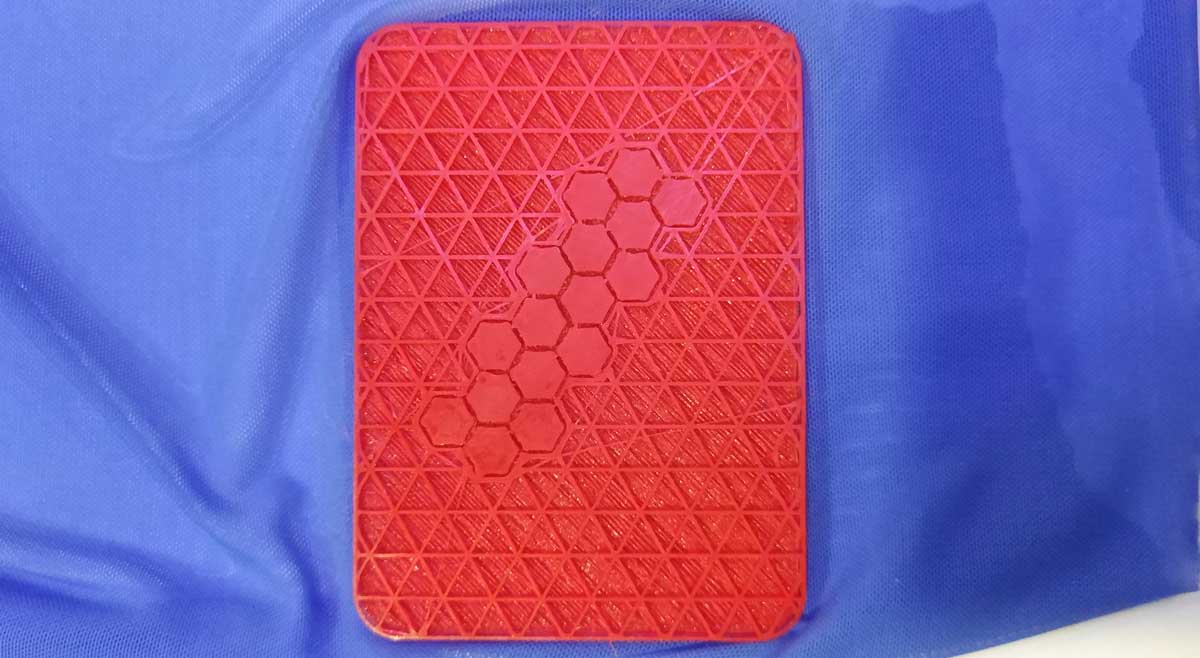
The outcome was not very clean especially because this fabric, although is nice to print on, is very hard to sew it as it is very elastic, so is hard for a beginner like me, to get some clean sewed edges.
_FILES DOWNLOADS
_luchador outline mask
vector
_luchador fill mask
vector
_coin wallet
_attiny44 .pes
_attiny45 .pes
_atMega328 .pes