Mechanical design + Machine design
Week 16 and 18
Like every week I started the week planning the assignment.
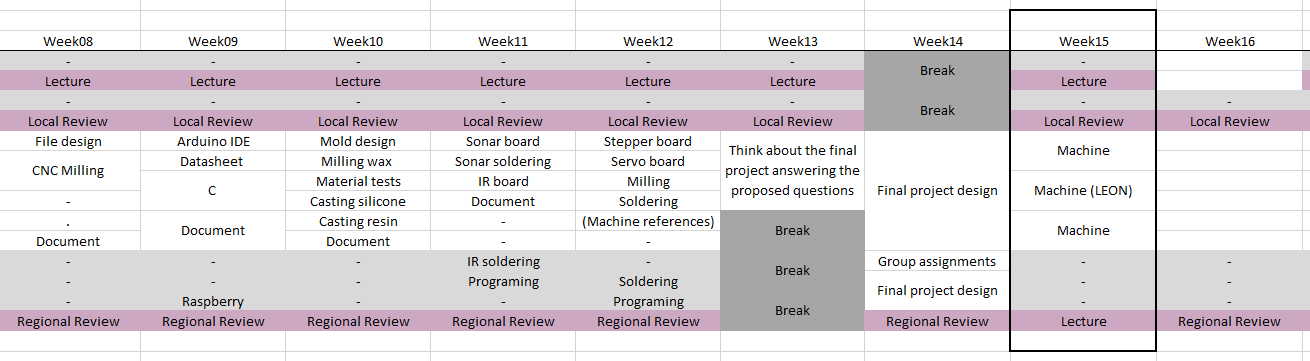
We are remote students supervised by our instructor Nuria Robles of Fab Lab Leon, so in order to do this group assignment, we decided to meet all together one weekend in Leon. We only had available the weekend of the April 27th, so that means that we did this assignment one week in advance, so the week before, instead of working on "Networking and communications" we had to work on the design of the machine and, to have as much time as possible available there, we decided to take to Leon the different pieces already fabricated. In such a way that in Leon, we "only" had to assemble the machine and automate it.
Cintya: the cylindrical drawing machine.
Please visit our group website!!
Idea
Before starting thinking about our machine, we decided to do depth research on the machines that other students had done in previous years. The ones that we found out more interested were: Peeler, Roto-Casting, Catapult, Lights Drawing.
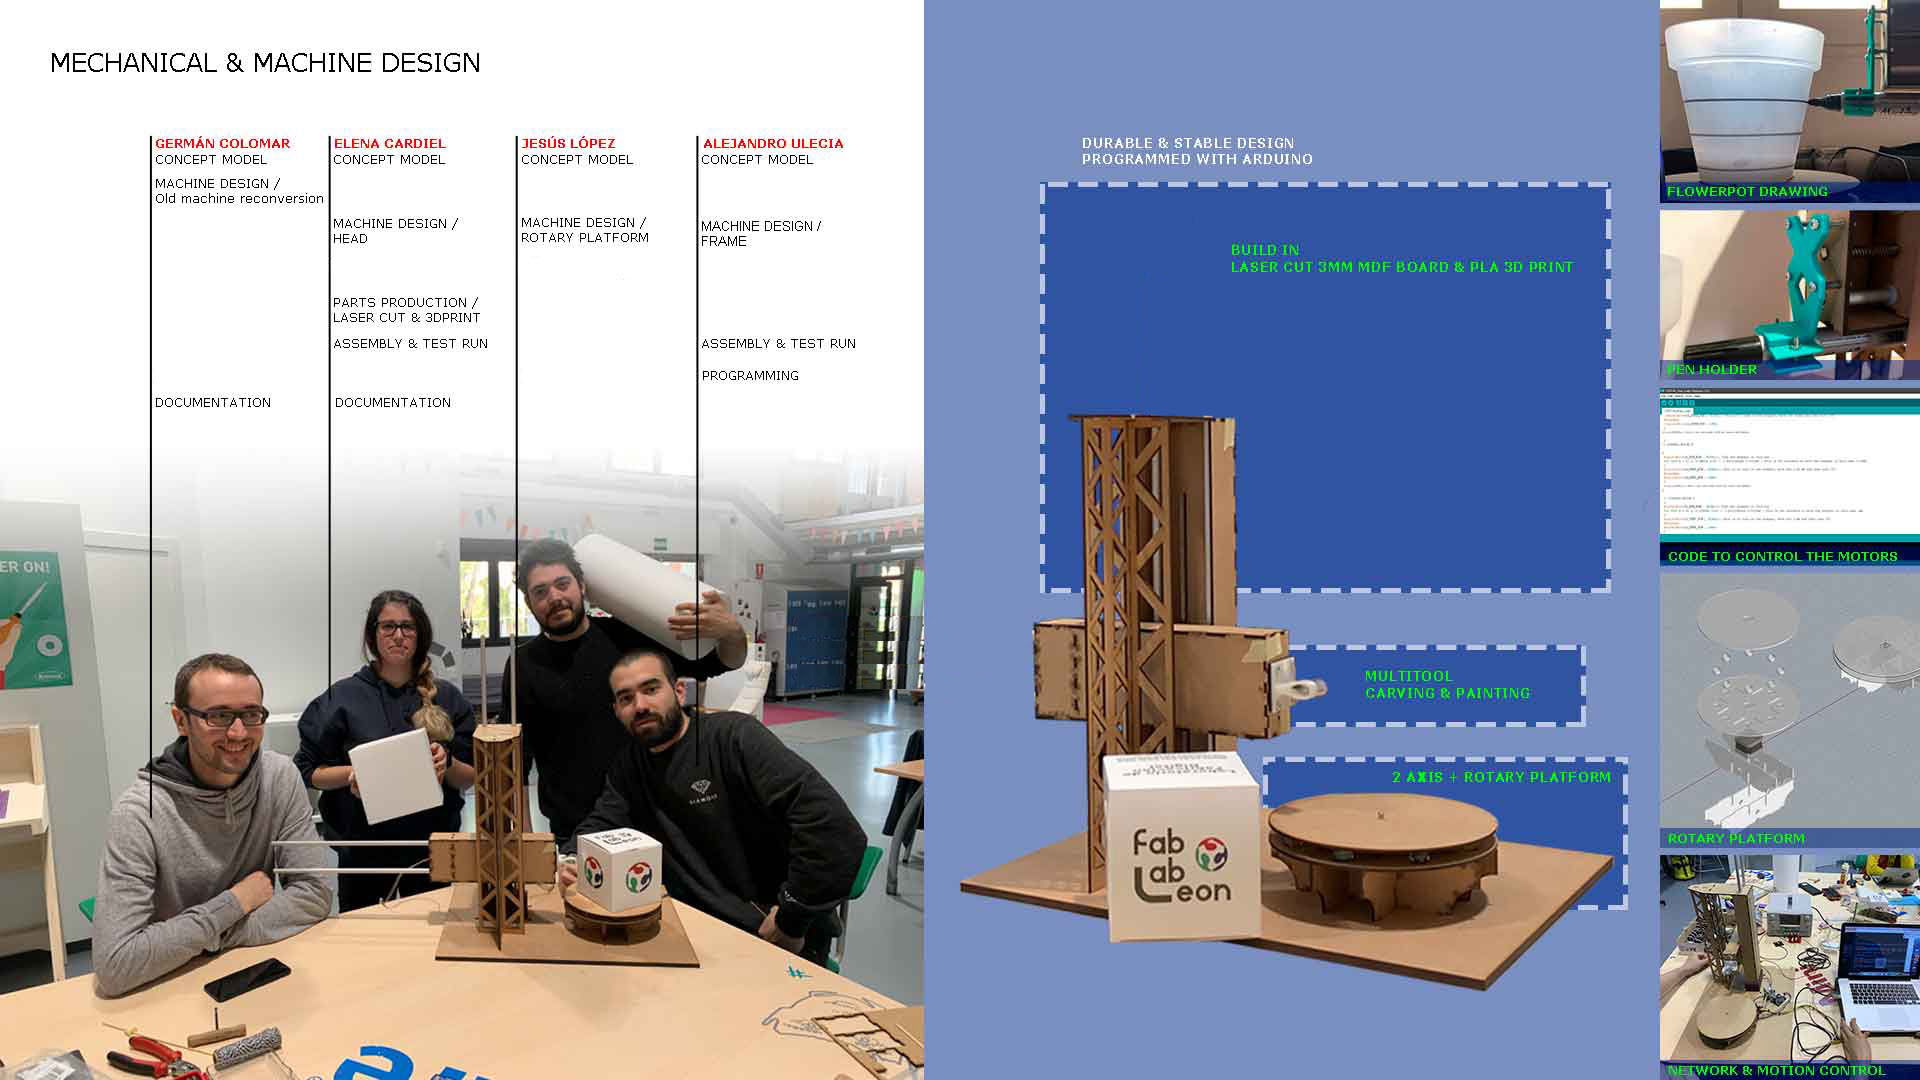
We finally decided to use Nadia’s modules and we agreed to make a vertical lathe, with two arms, a rotatory pedestal and various heads to generate different shapes, textures and designs.
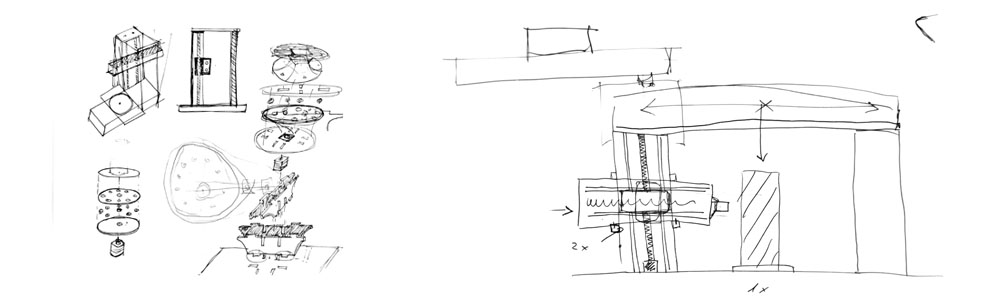
Design
We decided to divide this part of the work is three parts: Alejandro Ulecia would be in charge of the structure (the arms and base of the machine); Jesús López would design the rotatory platform; and I would make the different heads.
To know more information about the design please visit the group website or Alejandro Ulecia's webpage and Jesús Lopez's webpage.
Tools head: our first idea was to have a sheet of metal which we can fold and create like a “knife” that can “peel” the surface of a cylinder of FOAM. With this in mind, I started designing the “tool”. I placed the center of the attachment aligned to the center of the horizontal motor, which is also aligned with the center of the rotary pedestal. The blade has a bit in angle (15º), and the end of the blade is also aligned with the center of the horizontal motor.
The first version that I did had a moving part, so it could support different thicknesses of sheets of metal, however, I realized that with the force while cutting the blade can deform very easily.
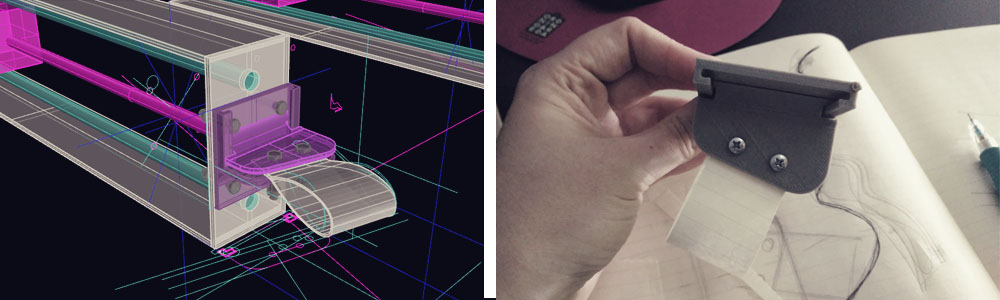
So I decided to do a second version where I added a “profile”, with a “rail” where to put the sheet of metal inside, so it will never lose the shape. I finally did two versions of this second version, a short one to just “peel” the surface of the FOAM, and a large one which is able to get deeper into the cylinder.
However, after assembling and trying the machine we realized that this head doesn't work very well, even if we sharp the sheet of metal, the motors aren’t powerful enough to cut the foam. We tried with clay and it worked good but not with the FOAM.
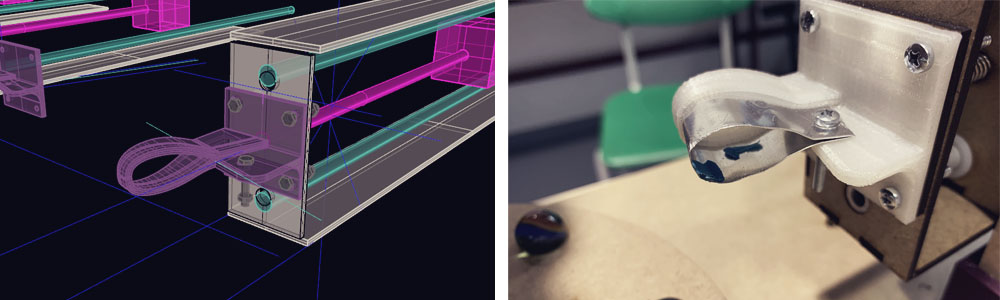
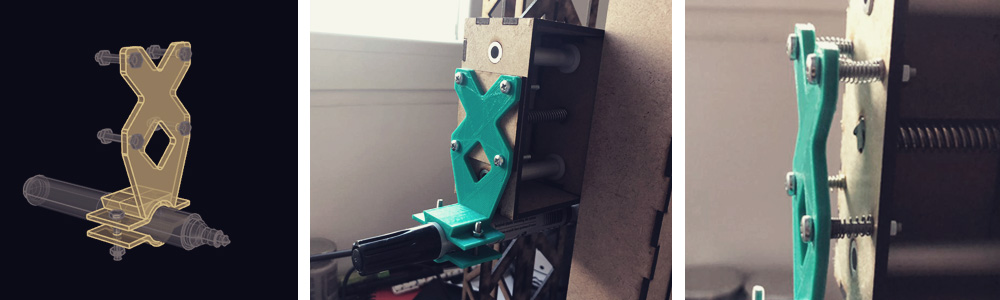
Then we decided to design a head to hold a marker, as we discovered that our machine worked better as a "cylindrical drawing machine" rather than as a "vertical lathe". This new head shares the same holes for the screws than the previous one and is also centered with the arm and the rotatory platform, but I decided to place the marker in the bottom part of the arm, being able in this way to draw very close to the rotatory base. Then, during the programming part, Alejandro included springs in each screw, avoiding future problems if the object that we want to paint is not perfectly circular.
A suggestion for future improvements would be to heat up the metal of the second version, in such a way that the material does not oppose to the cutting.
Fabrication and Assembly
We decided to fabricate the main structure of the machine, base and rotatory platform in MDF of 3mm. by laser cutting, and the base and head attachments in PLA by 3D printing. I was in charge of the fabrication process, so I fabricated the pieces in my Fab Lab, Fab Lab IE University, and I took the pieces to Leon.
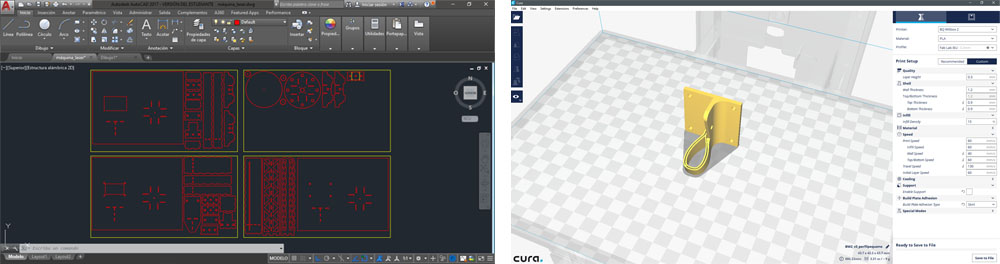
For the laser cutting, Alejandro and Jesús generated the outline of the different pieces and I took and put them in a single file. I used AutoCAD to prepare the file for laser cutting. Keeping in mind the maximum size of the laser cutter, I organized all the pieces and I sent it to the machine. We finally used almost 4 panels of MDF of 3mm of 810x450mm., as we decided to used a three-layer base to be sure that the machine was totally stable. It took around an hour to cut all the pieces.
At the same time, and after checking that the files were well done as a closed object, I prepared the files in CURA to be 3D Printed and I sent them to the machines. The base attachment took 2,5h. and the heads around 30 minutes each.
When everything was done, I checked that everything fits together properly. Everything was fine, except for the footprint of the pedestal in the base. For some reason, some of the holes were moved, so I had to fix the file and cut the 3 layers of the base again.
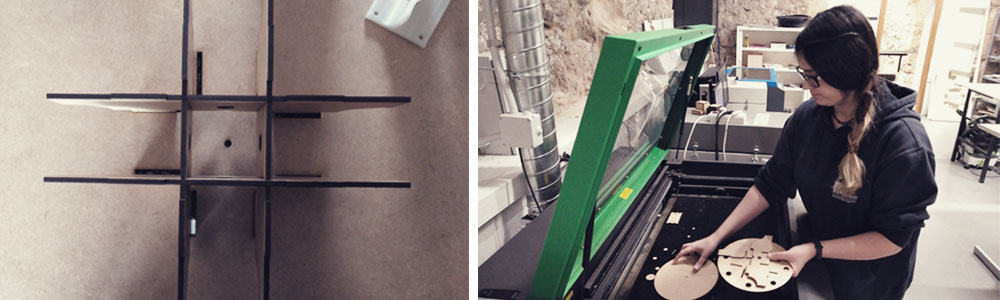
While assembling the machine we had to recut some pieces because we forgot to add the supports for the bars and endless screw. I only took fifteen minutes between preparing the file and cutting the new pieces and we could complete the assembly.
Alejandro and I did together most of the part of the assembly process. We took around 2 hours to assemble the machine. To reinforce the structure we glued the MDF pieces with hot and white glue. We also had to cut one of the endless screws, as our horizontal module is smaller than the original Nadia's modules.
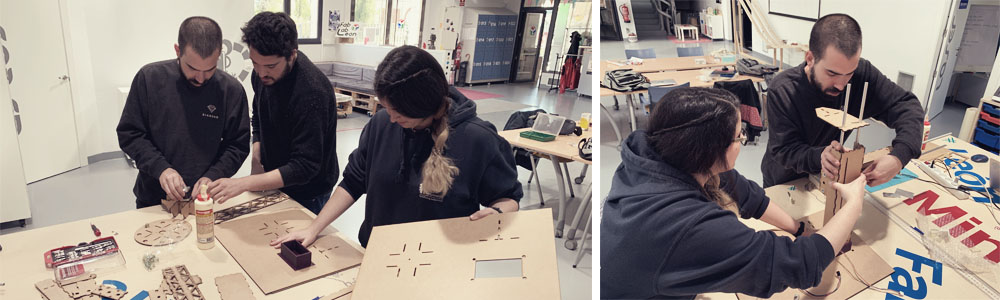
You can see below the assembly process:
Programming
To know more information about this part please visit the group website or Alejandro Ulecia's webpage, Jesús Lopez's webpage and Germán Colomar's webpage.
Group website
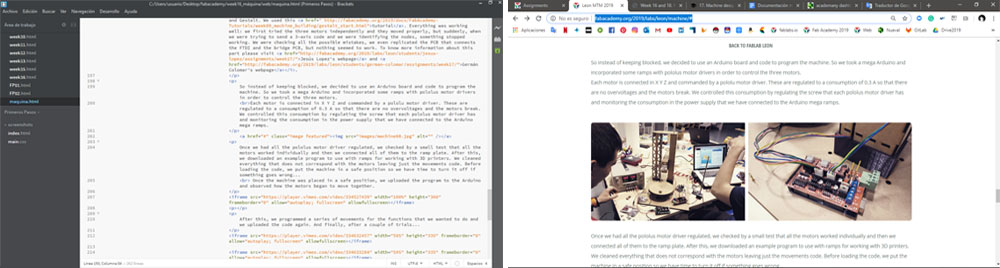
I also was in charge of the group website. I created a Word document in Google docs where my coworkers wrote the explanations of their part of the assignment. Then I created the structure in .html format and using Brackets to edit the code I included all the information, photos, and videos. Germán helped me with the documentation doing the final video and slide.
Files
Here you can find the completed set of files that we used to make the CINTYA machine: Machine Leon 2019 _ CINTYA: the cylindrical drawing machine.
You can also find these files at the end of the group website.