Interface and Application Programming
Assignments
Introduction

So in I am not that good with Programming. So it was difficult to me that making a programmed application and user-interface. But I decided to learn some coding for this weeks assignment. So I caught up with "Processing". So lets see what is Processing...
Processing
Processing is a flexible software sketchbook and a language for learning how to code within the context of the visual arts. Since 2001, Processing has promoted software literacy within the visual arts and visual literacy within technology. There are tens of thousands of students, artists, designers, researchers, and hobbyists who use Processing for learning and prototyping.
You can download and learn more about Processing from Here
THere are lots of tutorial and examples are available on above link. Throught that I lerant to code and make programs.Here is the layout of latest version of processing
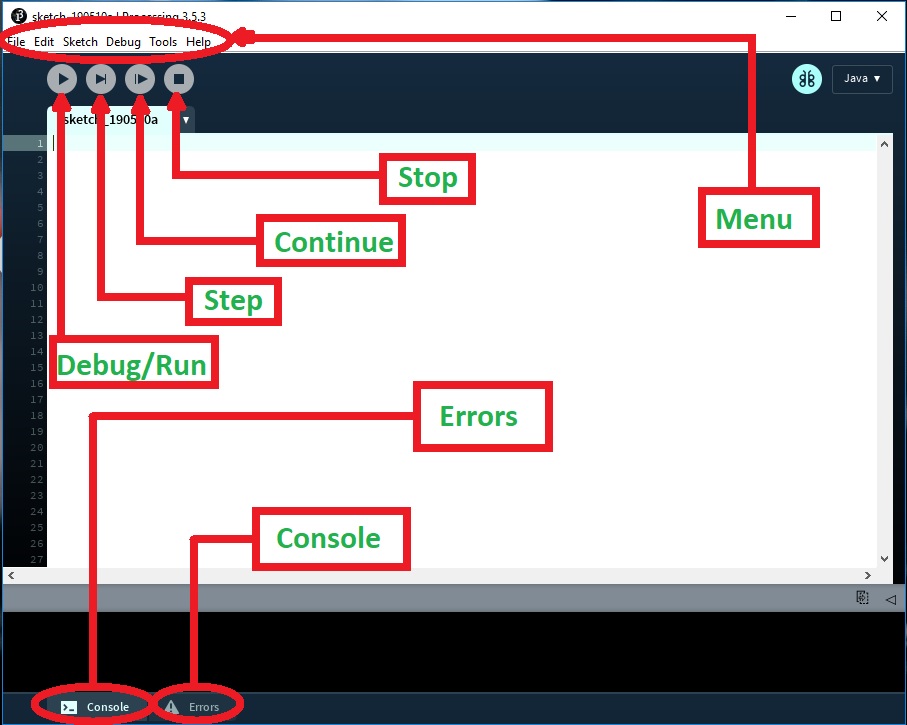
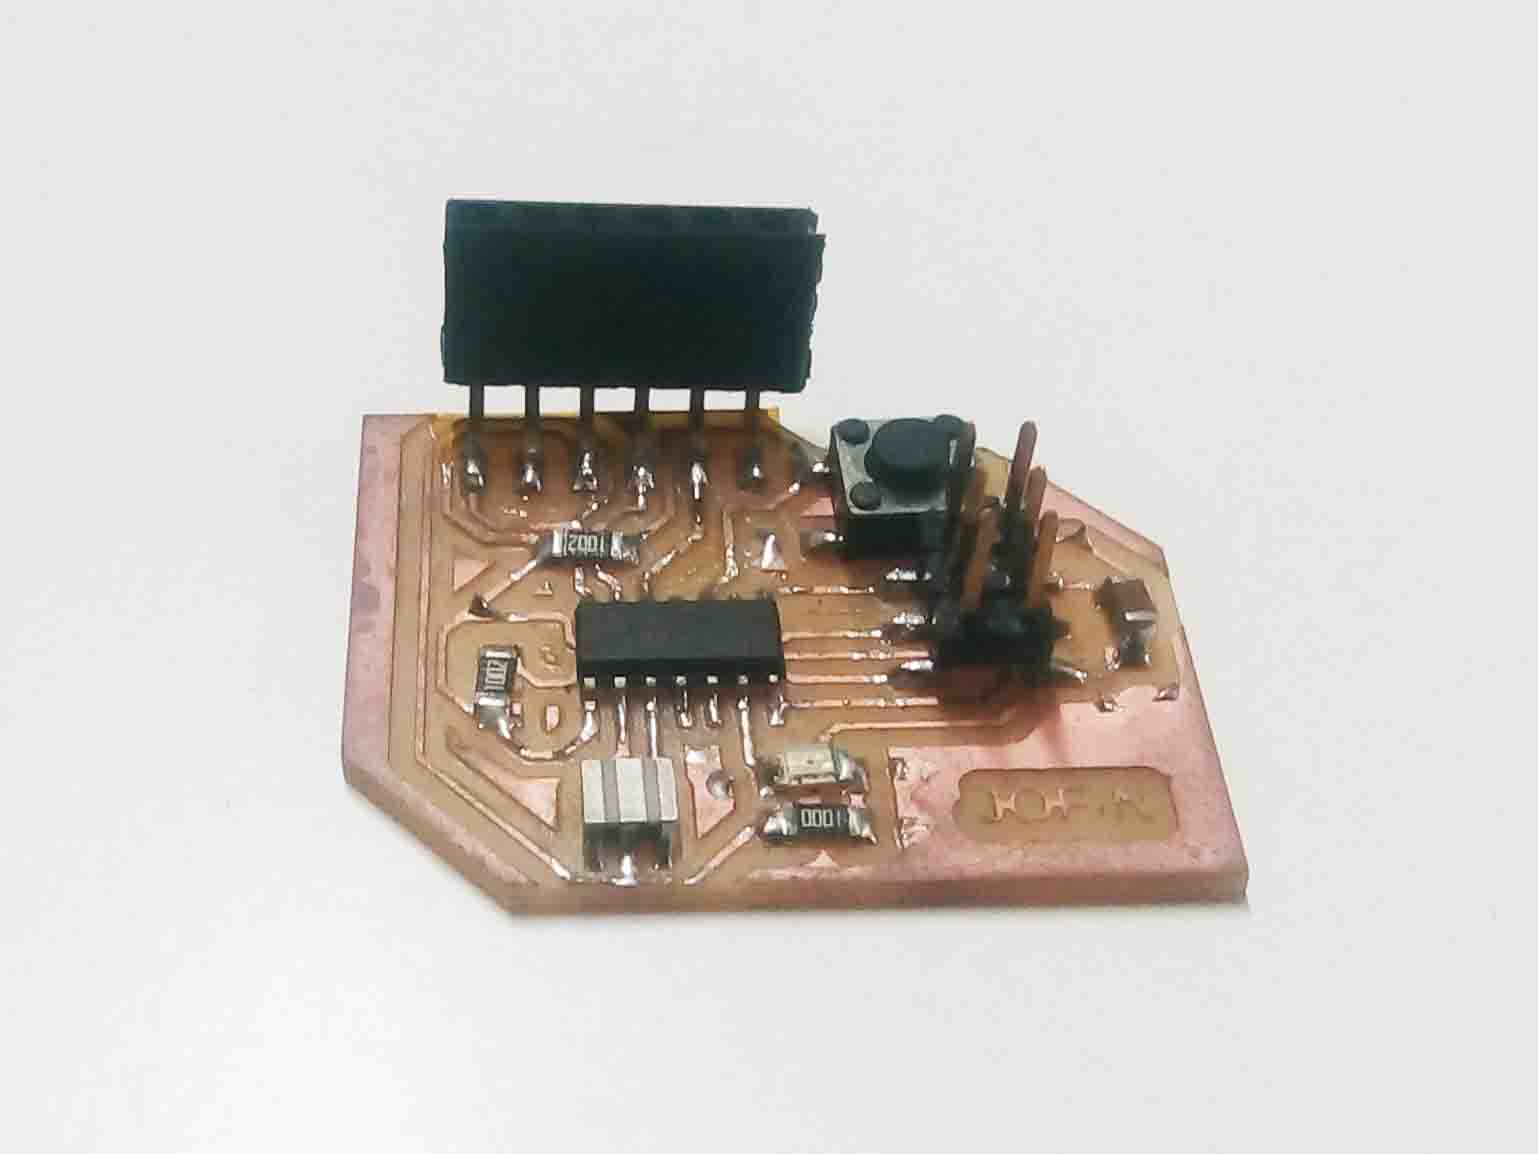
The layout of processing is lot similar to Arduino IDE. So it was a bit easy to understand the functions. Instead of a loop function, processing have a "Draw" function. Now we need is an Input/Output device. I have already made few circuit boards in the previous weeks. I choose the "Echo Hello Wodld!" board from Week 7.
Now we have all the things that we need. Lets code..
Processing:- Coding
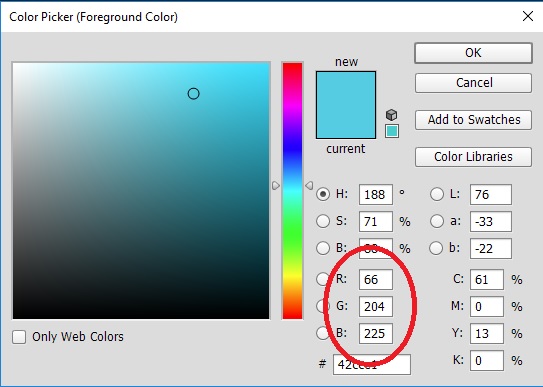
I am going to make a user interface using procesiing for "Echo Hello World " board.I need to make a button in the processing. So as I said, I am a beginer to processing. So I staerted with baby steps. First I code thesize of the canvas and background. The background color is selected with the help of "Photoshop color Pallet"..
But I need to make a background with grid so that it look catchy.
Here is the code...
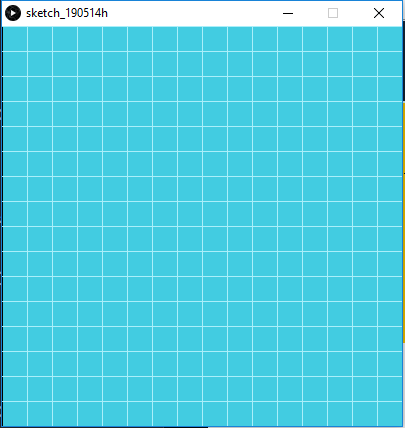
int grid = 25;
void setup(){
  size(400,400);
background(66,204,225);
for (int i = 0; i < width; i+=grid) {
  line (i, 0, i, height);
   stroke(169,239,250);
}
for (int i = 0; i < height; i+=grid) {
  line (0, i, width, i);
  stroke(169,239,250);
}
}

void draw(){
}
Here is the visualization of the following program...
NOw we have the background. Now we need to make a circle for the button that switch ON/OFF the light. For that I use an "Ellispse" function. In this function the numbers are denote each coding. Here is the represention of whats these numbers means.
ellispse(X-cordinate, Y-cordinate, length, width);
I also give the stroke as 10. Here is the code...
int grid = 25;
void setup(){
  size(400,400);
background(66,204,225);
for (int i = 0; i < width; i+=grid) {
  line (i, 0, i, height);
   stroke(169,239,250);
}
for (int i = 0; i < height; i+=grid) {
  line (0, i, width, i);
  stroke(169,239,250);
}
}

void draw(){
   ellipse(200, 200, 150, 150);
  fill(255, 0, 0);
  stroke(10);
}

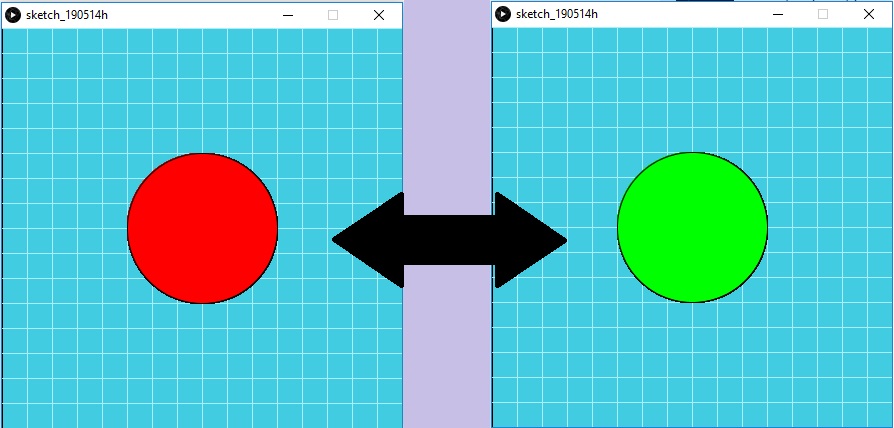
The trick part was to change the color at click. For that I had to add a new functions and edit some existing function. Here I used a function called "mouseReleased()". This enable to access button when it is clicked. But first I need to define the region of the button been held. So I give the following line for that..
((mouseX>100)&&(mouseX<300)&&(mouseY>100)&&(mouseY<300)&&(r == 0))
The function (r == 0) store the color on one click. Here is the code...
int grid = 25;
int r = 255;
int g = 0;

void setup(){
  size(400,400);
background(66,204,225);
for (int i = 0; i < width; i+=grid) {
  line (i, 0, i, height);
   stroke(169,239,250);
}
for (int i = 0; i < height; i+=grid) {
  line (0, i, width, i);
  stroke(169,239,250);
}
}

void draw(){
   ellipse(200, 200, 150, 150);
  fill(r, g, 0);
  stroke(10);
}

void mouseReleased() {
  if ((mouseX>100)&&(mouseX<300)&&(mouseY>100)&&(mouseY<300)&&(r == 0)) {
    r = 255;
    g = 0;

  } else {
    r = 0;
    g = 255 ;

  }
}
Here is the visualization...
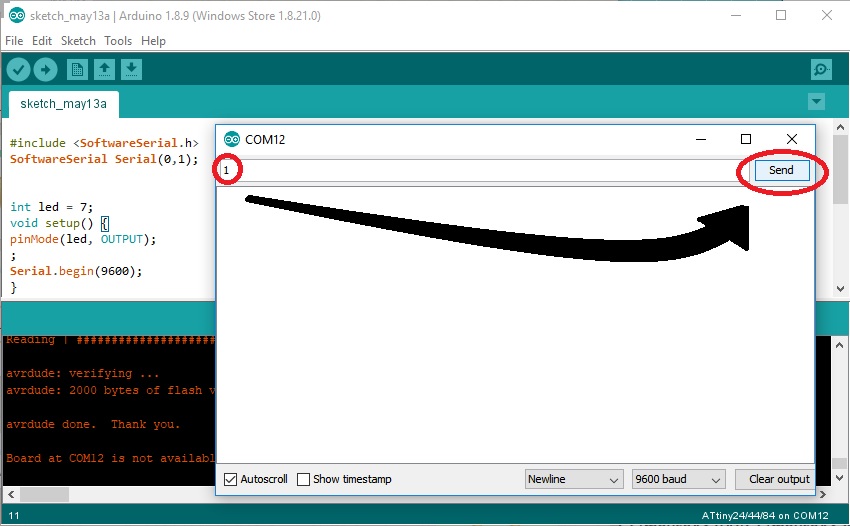
So now I have to do is to introduce the serial data to processing from the "Echo Hello world" board. For that I have to code the board again using arduino IDE. Here is the code...
#include <SoftwareSerial.h>
SoftwareSerial Serial(0,1);


int led = 7;
void setup() {
pinMode(led, OUTPUT);
;
Serial.begin(9600);
}
void loop(){
if(Serial.available() > 0) {
char ledState = Serial.read();
if(ledState == '1'){
digitalWrite(led, HIGH);
}
if(ledState == '0'){
digitalWrite(led, LOW);
}
}

}
I test the circuit using serial monitor. It was designed to turn on the light when the serial data recieved is "1". Here is the serial monitor...
NOw I have to add the serial transmission part in processing. For that I added these commands
import processing.serial.*;
Serial myPort;
In setup..
myPort = new Serial(this, "COM12", 9600);
In loop..
myPort.write('0');
myPort.write('1');
Here is the whole code...
import processing.serial.*;
Serial myPort;
int grid = 25;
int r = 255;
int g = 0;


boolean button=false;


void setup() {
  myPort = new Serial(this, "COM12", 9600);
  size(400, 400);
  background(66, 204, 225);
  for (int i = 0; i < width; i+=grid) {
    line (i, 0, i, height);
    stroke(169, 239, 250);
  }
  for (int i = 0; i < height; i+=grid) {
    line (0, i, width, i);
    stroke(169, 239, 250);
  }
}


void draw() {

  ellipse(200, 200, 150, 150);
  fill(r, g, 0);
  stroke(10);
}

void mouseReleased() {
  if ((mouseX>100)&&(mouseX<300)&&(mouseY>100)&&(mouseY<300)&&(r == 0)) {
    r = 255;
    g = 0;
    myPort.write('0');
  } else {
    r = 0;
    g = 255 ;
    myPort.write('1');
  }
}
Here is the video of working...
So that was a sucess...