Group Assignment: Review the safety data sheets for each of your molding and casting materials, then make and compare test casts with each of them
This week's group assignment is to read datasheets for different material and cast them.. So below attached are the three different datasheets for 3 different materials with different/relavent viscousity and dry/solidfying time. There are more parameters as shown worth attention but i just worked out major of them.
 Then continuing the group assignment i casted my individual assignment again but this time with a different material, bismuth metal. There was nothing special just a few steps to cast my chess piece again with metal. Below shown is the furnace that heat's up to different temperatures as shown using the potentiometer.
 As metal is given in a solid form so we first melt it using the furnace at 300 degree-centigrade and then fill our mold with it to make the cast.
Note: We simply switch on the furnace and wait a few minutes untill temperature rises to 300+ degree-centigrade. Once the metal is melted into liquid form simply take the glass and fill the mold as following.
As metal is given in a solid form so we first melt it using the furnace at 300 degree-centigrade and then fill our mold with it to make the cast.
Note: We simply switch on the furnace and wait a few minutes untill temperature rises to 300+ degree-centigrade. Once the metal is melted into liquid form simply take the glass and fill the mold as following.
 Next leave it untill it cools down and gets solid again. It won't take more than 5 minutes to get into solid form.
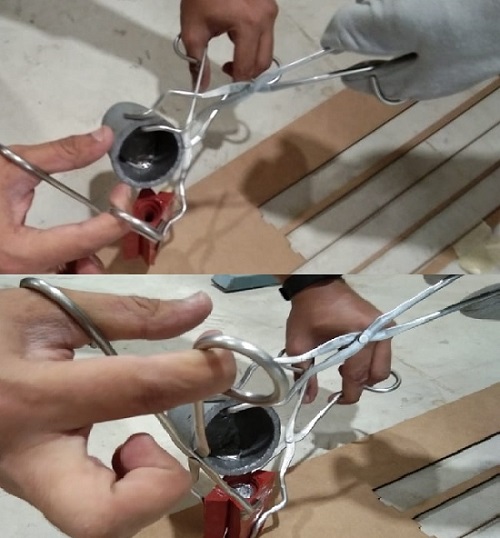
 Now just remove one side of the mold first and then wait 5 more minutes as our metal cast still is hot.
 That was it. We have it ready.
 Conclusion: Although metal casting is slightly more dangerous compared to plastic casting but also with metal casting you don't need to make any tricky solution to cast as it is melted metal purely that is poured into cavity to cast. Another sgnificant advantage of metal casting is that it takes no time no extra activity like vaccuming just melt the metal and pour it and after 5 minutes your cast s ready. Whereas plastic allso solidifies quickly but not quickly as metal, but plastic is less risky but it envolves other acts like making solution with some ratio of materials and then vaccuming it. Another thing to add is that metal give you smoother cast/surface whereas due to vaccume and other stuff plastic gets relatively irregular and rough.
Individual Assignment: Design a 3D mold around the stock and tooling that you'll be using, mill it, and use it to cast parts
As an individual assignment i went through different ideas but made following piece(King in chess). In this week i learned this new skill of sketching over a 2d picture and extruding it to get a 3d model of it. I first sketched a 2d picture as following.
 With revolve extrude i ended up having my chess piece.
 As top notch was not meant to be revolve so i had to extrude it flat separately.
 I mistakenly made the negative mold first as shown but then my local instructor guided me that i need to make positive mold as the assignment is about milling..
 Hence i just sketched two rectangles(edited my previous sketch of extruded rectangle). Extruded base one and extruded cut the other. I then added some offeset around 25 degrees to have tapped boundaries. Join command summes-up designing process for this week and i have my design ready for milling..
 I then used modella software to generate machine readable files(in this case .prn). Below we can see the final outlook of my chess piece in modella.
 You can follow this video from one of my local instructors(Rasheed Ahmed Qazi) to get going easily with modella and generate .prn files.
Now it is about machine and this time again we are using roland SRM20. Below attached is the output of SRM20 against .prn files. I used 1/8 flat end-mill for both roughing and finishing.
You can follow this video from one of my local instructors(Rasheed Ahmed Qazi) to get going easily with modella and generate .prn files.
Now it is about machine and this time again we are using roland SRM20. Below attached is the output of SRM20 against .prn files. I used 1/8 flat end-mill for both roughing and finishing.
 Note: First take a glass of water, fill your mold and measure the weight of water in grams. Mine was around 50 grams. Now multiply this weight with factor of 1.4 as the material(Mold MAX 60) we are using is dense/viscous against water, amount we get now is the material needed in grams to make a negative mold(in my case 70grams = 50*1.4). Take 3% of the blue colored material and 97% of the red one. Mix them properly and fill the mold we did mill. Keep them in vaccume for some time and let it dry.
 After sometime..
 Now we have our mold ready so let's cast! To do so again take a glass of water and do what we did a while ago. Fill your mold and measure the weight of water in grams. Now n this case we dont need to multiply any factor as there is no such differance in viscousity of water and our material(Smooth cast 305). Material in use now is 1:1 so we need 50% of each(A and B). Now mix them properly and fill the mold. Keep them in vaccume for some time and let it dry. That is it we have casted our part.
 One of the problems in my design was that it required double sided mold but i made single side. So first i made one of the molds and casted two parts separately and glued them. But ended up having an unstable piece so i made another mold and joined both of my molds. Added a whole at bottom to inject the material and my results this time were pritty nice.
 Click here to get design files.. Mold, cast and enjoy!

This work is licensed under a Creative Commons Attribution-ShareAlike 4.0 International License
Copyright © 2019 Azmat Hussain