Group Assignment: Test the design rules for your 3D printer
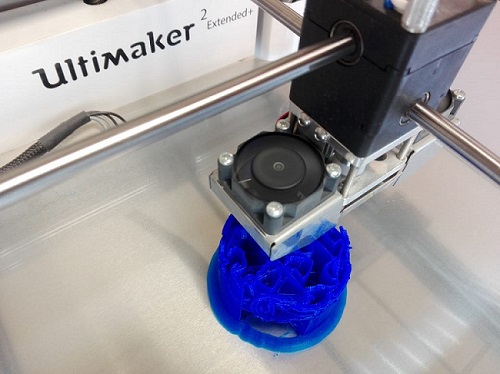
In this week again as a group assignment we had to earn some familarity with week machine (that for this week was 3d printer). Below you can see two of ultimaker's 3d printers(Ultimaker2+ and Ultimaker2 Extended). As purpose of the group assignment was to understand and operate 3d printer to conclude how precise work could be done with these printers so we just downloaded a couple of 3d designs and printed them.
First we downloaded & installed cura (the software tool to generate .gcode for understanding of our 3d printer) and then generated .gcode file for 3d printer as following..
1st: open cura and import/open .stl file of your 3d design(that could also be generated directly from solidworks and/or other platforms) but the files we downloaded already had .stl version of its 3d design. so-
As purpose of the group assignment was to understand and operate 3d printer to conclude how precise work could be done with these printers so we just downloaded a couple of 3d designs and printed them.
First we downloaded & installed cura (the software tool to generate .gcode for understanding of our 3d printer) and then generated .gcode file for 3d printer as following..
1st: open cura and import/open .stl file of your 3d design(that could also be generated directly from solidworks and/or other platforms) but the files we downloaded already had .stl version of its 3d design. so-
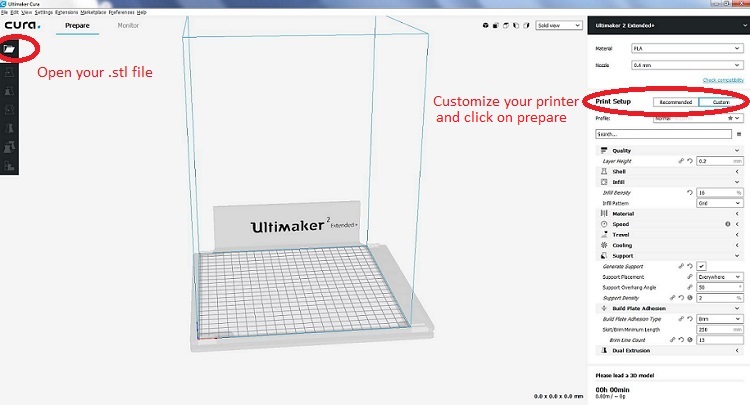 2nd: Customize your print by choosing support(if any), material, wall thickness etc but as in our case there is no support to be added so..
3rd: you dont need to do much just click on prepare button shown above and let cura expose its cabalities.
2nd: Customize your print by choosing support(if any), material, wall thickness etc but as in our case there is no support to be added so..
3rd: you dont need to do much just click on prepare button shown above and let cura expose its cabalities.
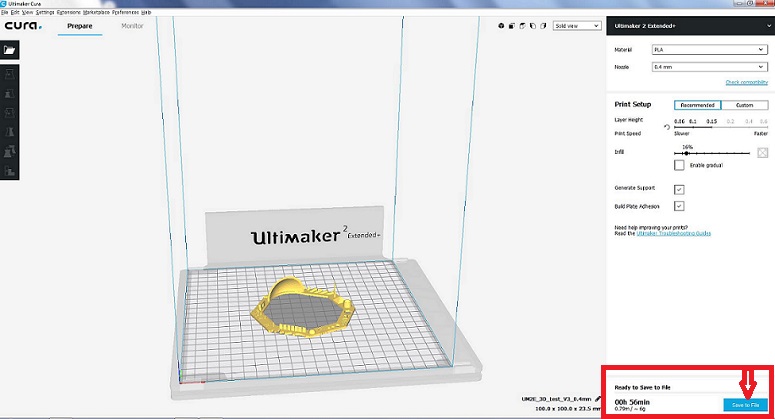 4th: Now just save the file and choose formate of file as .gcode and that is it.
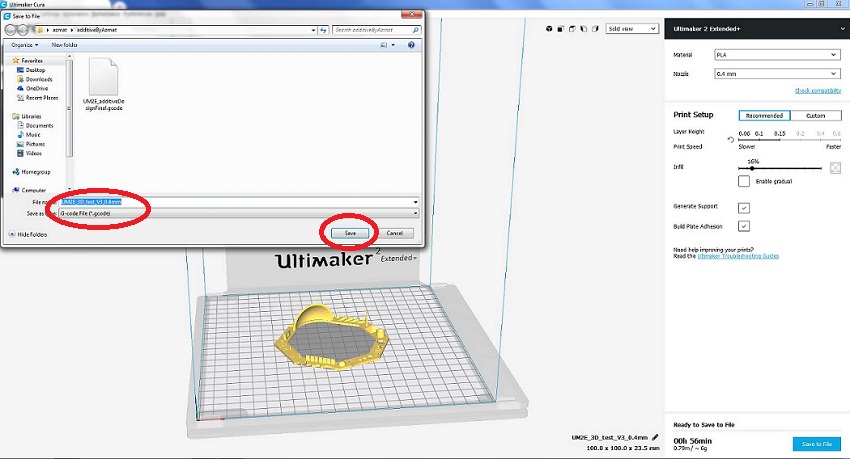 Our file is ready. Copy .gcode file to sd card plugged in your 3d printer and that is it - Let's go to printer..
Now for printer. 1st: Insert the SD card, and switch on printer. You will see following scenes..
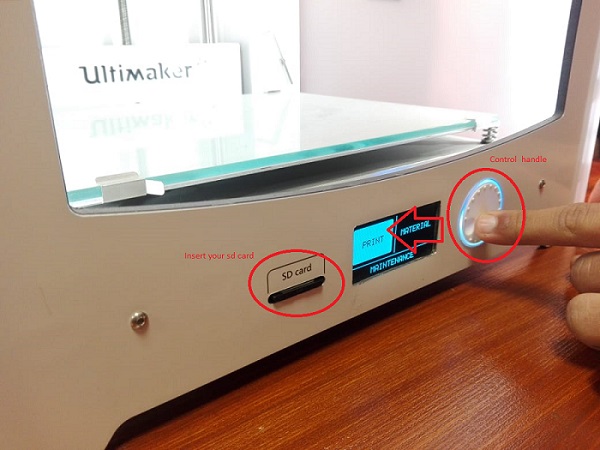 2nd: By rotating above shown handle select print and push its center.
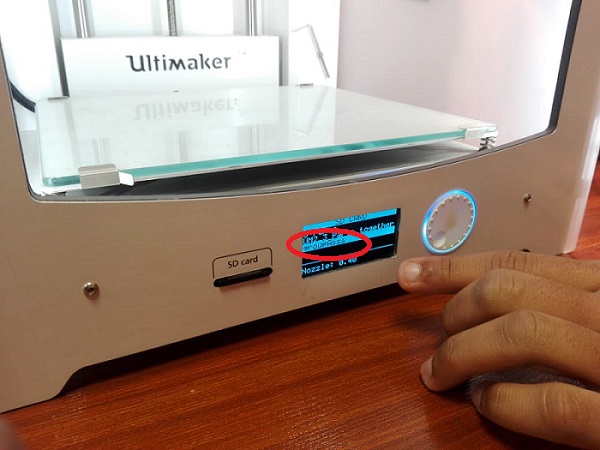 3rd: Now again use the control handle-rotate it and scroll down to .gcode file you copied in SD card > push control handle center again to start printing.
 Now just leave it to printer. After heating up the bed and nozzil it will start printing. Below you can see the final test design we printed as a group assignment. With this group assignment we were actually able to understand how effectively we can 3d print an object with different angles, holes, curved/irregular surfaces and what are the limitations of 3d printing for such basic shapes. This assignment helped us understand following.
1. Writing with 3d printer
2. What minimum diameter we can have? like for wholes
3. Making shells by adding some support
4. How sharp edges could be printed?
5. Other stuff like angles, surfaces etc

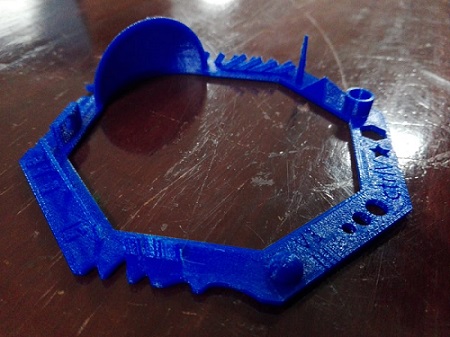 We also printed another design shown below for practice by repeating all above steps(downloaded files from the mentioned site).


Individual Assignment: Design and 3D print an object (small, few cm3, limited by printer time) that could not be made subtractively, Also 3D scan an object and optionally print it
Design and 3d print an additive 3d objectFor individual assignment i actually found following 3d additive design on pinterest and started working on it.
 I initially had no idea about how to start, but while searching for help i fortunately found a video tutorial on youtube that helped me make somewhat relavent design. There were few problems with the tutorial as i was not able to find a few cammands and tools in use, but in the end i made it by putting some time and patiance. I failed at first but then i managed to do it. First while using smart dimension in my geometrical sketch, some of the shapes lost their orientation so i was not able to make basic part like the star as it should look. Then it was problem with some of the features like surface and a few other tools you will see in video tutorial were not available in my solidworks so i tried making a probablistic basic curved structure. But i ended up being failure again. So what i did next was, used my college friend's laptop(changed solidworks) and managed to get my design over the line.
1st: I sketched the 3d design as following.
I initially had no idea about how to start, but while searching for help i fortunately found a video tutorial on youtube that helped me make somewhat relavent design. There were few problems with the tutorial as i was not able to find a few cammands and tools in use, but in the end i made it by putting some time and patiance. I failed at first but then i managed to do it. First while using smart dimension in my geometrical sketch, some of the shapes lost their orientation so i was not able to make basic part like the star as it should look. Then it was problem with some of the features like surface and a few other tools you will see in video tutorial were not available in my solidworks so i tried making a probablistic basic curved structure. But i ended up being failure again. So what i did next was, used my college friend's laptop(changed solidworks) and managed to get my design over the line.
1st: I sketched the 3d design as following.
 2nd: Trimmed the unwanted sketch and extruded bass of curved sketch as shown below.
 3rd: Just used the circular pattern as shown to get following results.
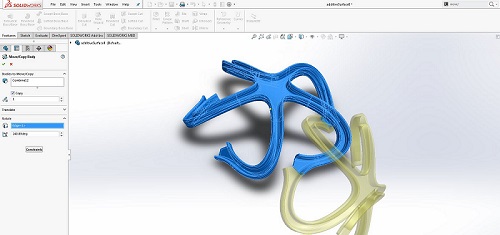
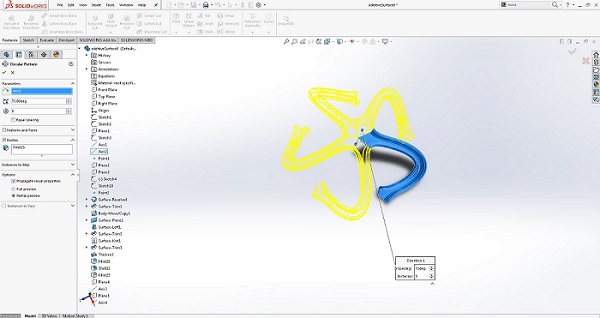 4th: First selected all parts and made them a single body using combine tool > then used Move/Copy tool and copied the body by selecting it and then by clicking on rotate clicked on the edge i want to rotate about and the degrees that in our case were 240.


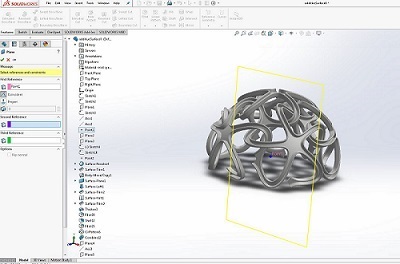
 5th: Again repeating 3rd step of circular pattern but this time for the whole body rather than just one part.

 6th: Repeat step 4 and you will get following results.
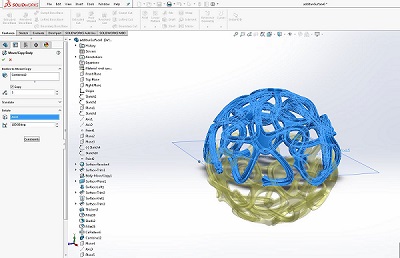 That is it we have our 3d design ready.
 Now just save it as a .stl file and lets go to cura. Below you can see how i actually reduced my print timing by adjusting a few parameters as shown.
 Let's move to printer. Repeat the steps discussed in group assignment to print it.
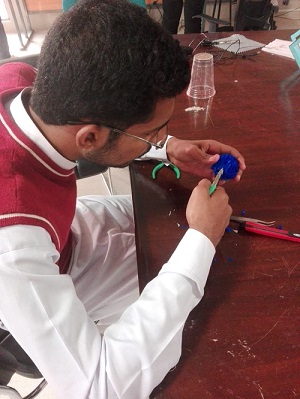
 Removing support.
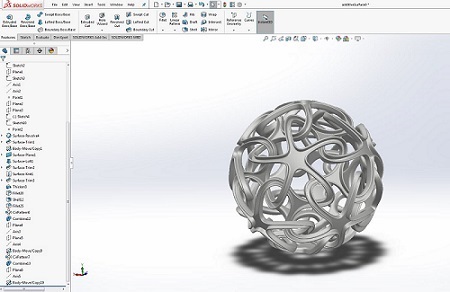
 Tan tara! That is it we have our additive design ready.
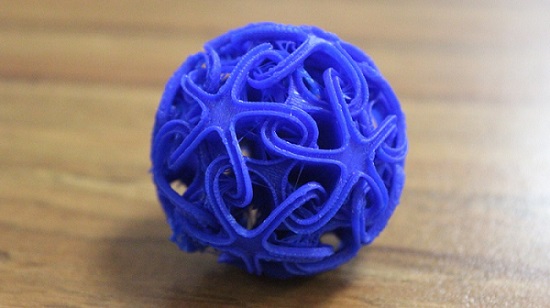 Oops! There is a problem. Actually the design looks fine but i am not able to separate the support as it is almost all over inside the sphere. Hence if i go on to cutting that support it will cut star legs as those star legs are over-lapping support so i was not able to make it clean enough but still i managed to illustrate how this design is additive.
3d scan an object For 3d scanning we struggeled alot with sense named scanner but ended up having reasonable results. Problem was to rework it in some other 3d softwares like blender etc. Below shown is the final result from sense. Becuase i didn't consider sense results as an assignment also that it was creating problems earlier to this result so didn't have any working record. All of us at FAB LAB Khairpur learned it together and then everybody individually tried scanning themselves.


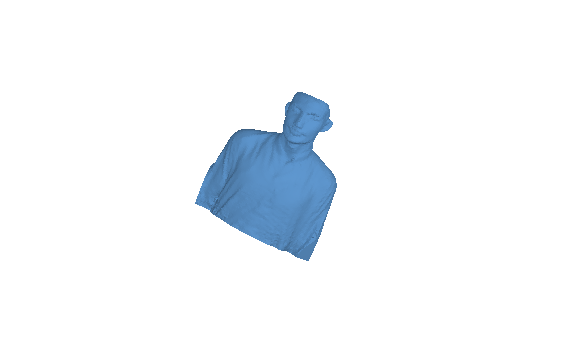 But as an assignment i scanned my self with kinect. It was very easy to use and lovely to experiance. Below we can see how i did it..

 Click here to get design files..

This work is licensed under a Creative Commons Attribution-ShareAlike 4.0 International License
Copyright © 2019 Azmat Hussain