Week no.7
- Computer-Controlled Machining
- CNC Tooling
- Cutting parameters
Assigments :
- Individual assignment: Make something big !!!
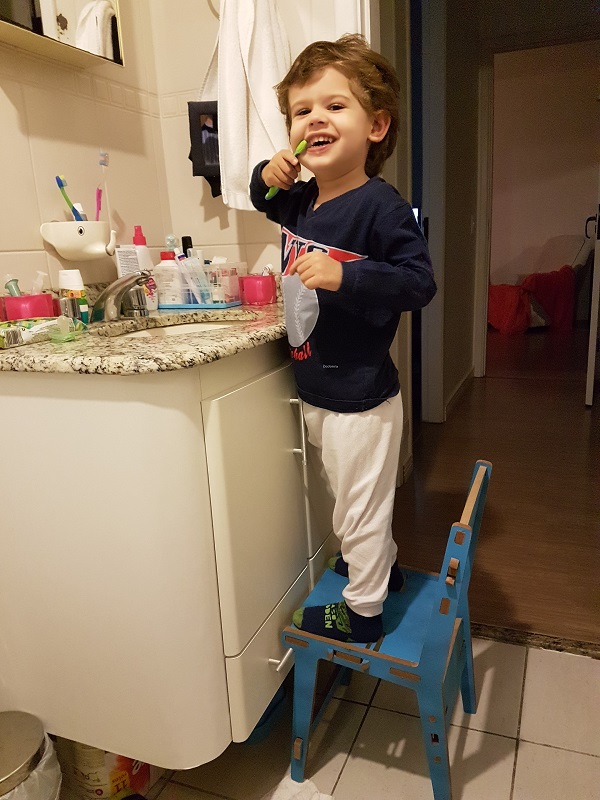
Wooden Chair
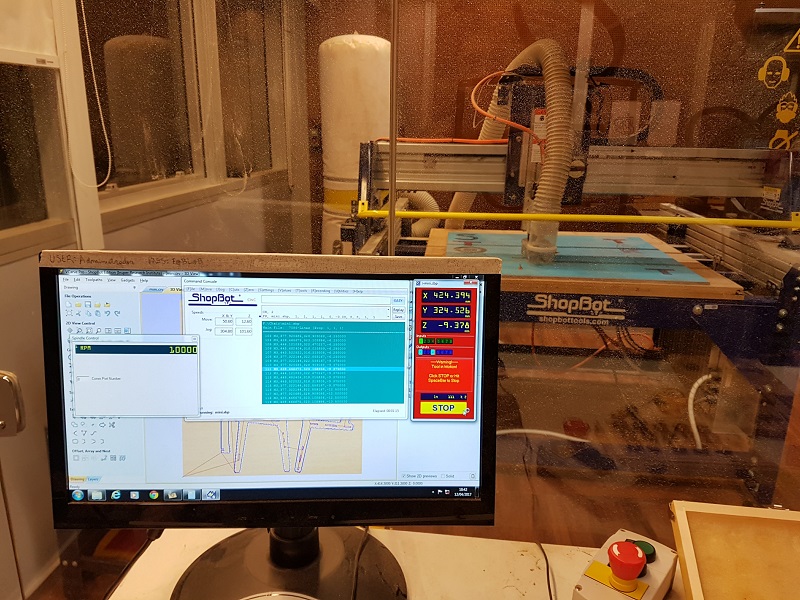
For this week task I worked on the ShopBot milling machine to fabricate a wood furniture. So I choose to make a wooden chair to my little two year old son.
As for the assignment : "Make something Big", of course I need to adjust the proportions for it to be used by a child, but still it will be relative big... at least for my son ! :)
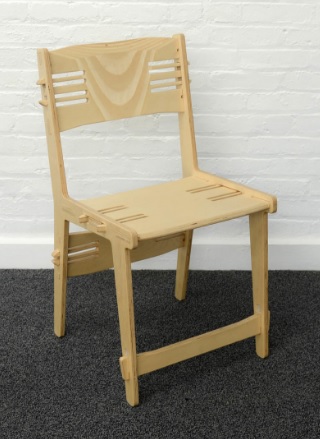
Since the assignment is focused on CNC machine operation, tooling and milling cut parameters, I began with a open source project from Ryan McKibbin "Snap Chair" at www.opendesk.cc
- Softwares Used
- VCarve Pro - ShopBot Edition
CNC Machining
First I needed to scale down the original size to 70%, giving a chair a total height of 600mm. With this size it should be ideal for my son, today he is 2.6 years old and 96cm tall.
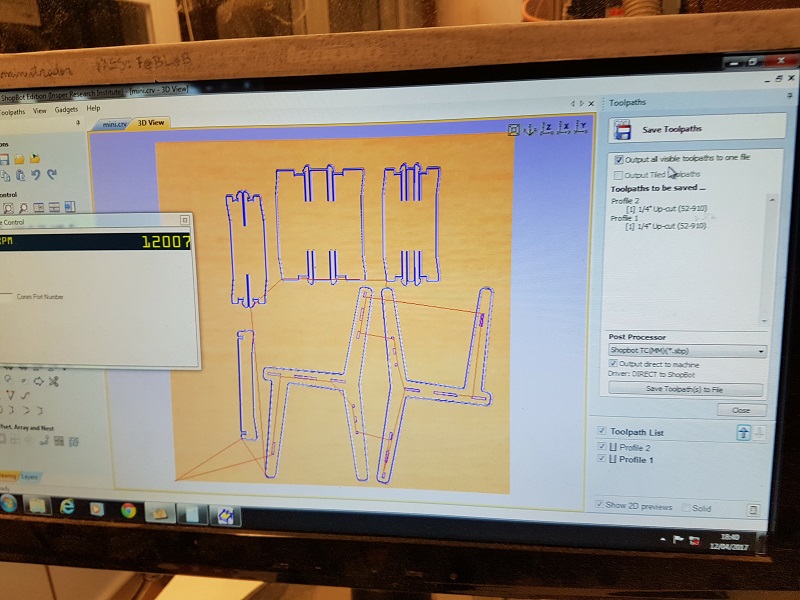
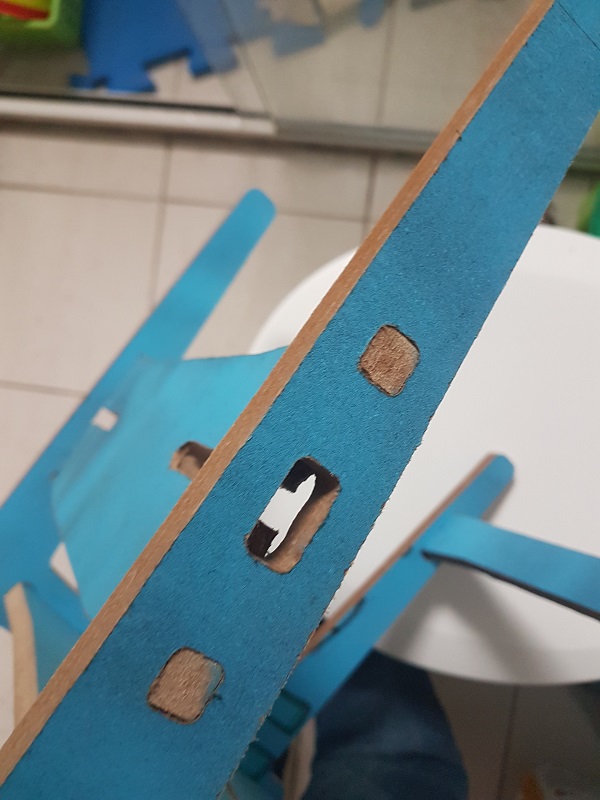
So I downloaded the originalproject files – non commercial use – and opened the DXF directly into the Vcarve software that can edit like a 2D Scketch. Give it a scaling of 0.7 and manually edited the Kerfs and slot joints to make sure it would fit with my 12mm width Board with a 0.4mm interference for a tight fit.
After adjusting I ran a Vector Validator to check for overlapping lines that could prevent toolpath creation.
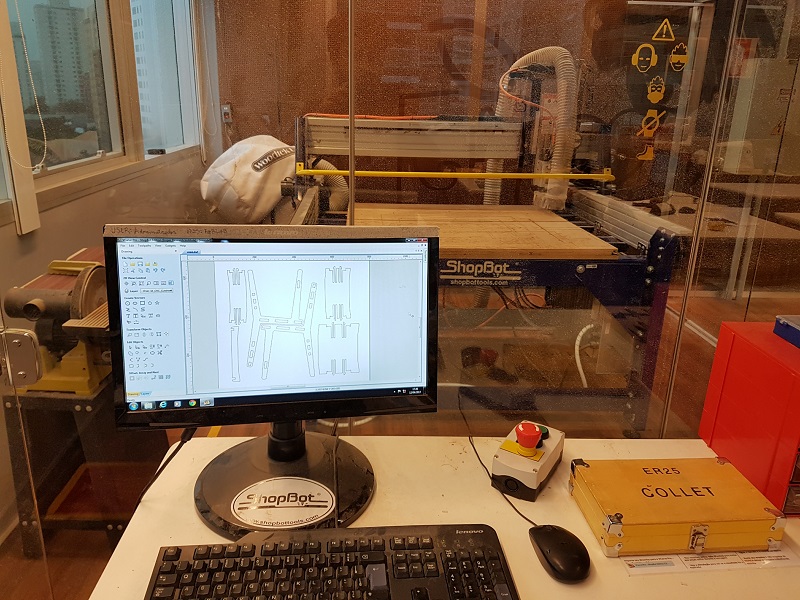
Once I had a clean Sketch, just generated the toolpaths and create the Shopbot G-code file (.spb) and previewed the Job in screen I could check the path and the order. Added some tabs to prevent the parts getting loose during the milling.
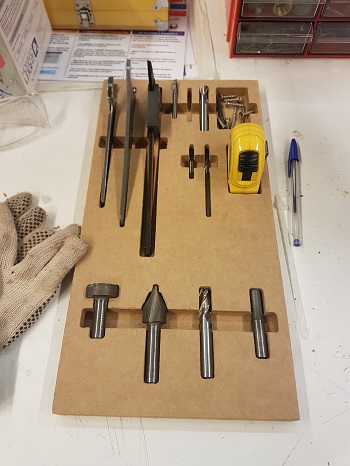
For the tooling, I basically used a Top End mill to make a downcut into a MDP (Medium Density Particleboard). Following the operation parameters, the the profiling toolpath strategy was automatically created by VCarve based on my setup input:
- 12mm MDP recycled board, 1m by 1m
- HSS top end mill, 6mm diameter
- Toolpath generation by V-Carve software (profile strategy)
- Feed speed 4mm/s, 1500RPM
- Cut Depth 4mm, helical path
Construction Steps
Our Shopbot has a wooden table that were previously machined in place to get a perfect alignment or zeroing. I placed my MDP Board in top of it and make my G-code run 20mm above the surface, a void milling. That way I could check the toolpath, position my board and finally clamp it to the table with common wood screws. Those screws were strategically positioned to avoid collision with the Mill Bit. After all set, I zeroed the Z axis referencing the surface of my board and started the milling job. The construction steps are shown above (Swipe the pitcures):

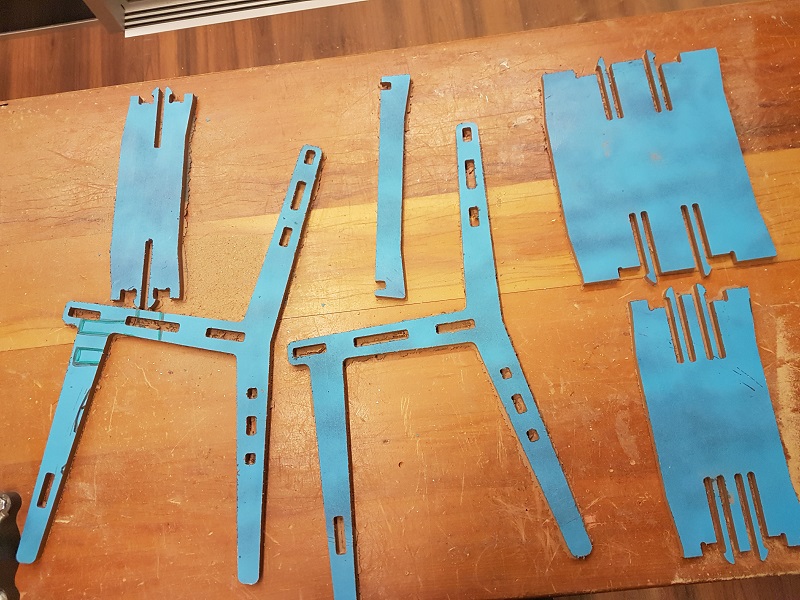
After Milling I lose those screws, remove the board and separated the chair parts from the board. Ussed a belt sanding machine to rip off the tabs. I notice that the other side dint get the same finishing as the top, so I used sandpaper to get off the remaining scraps of wood.
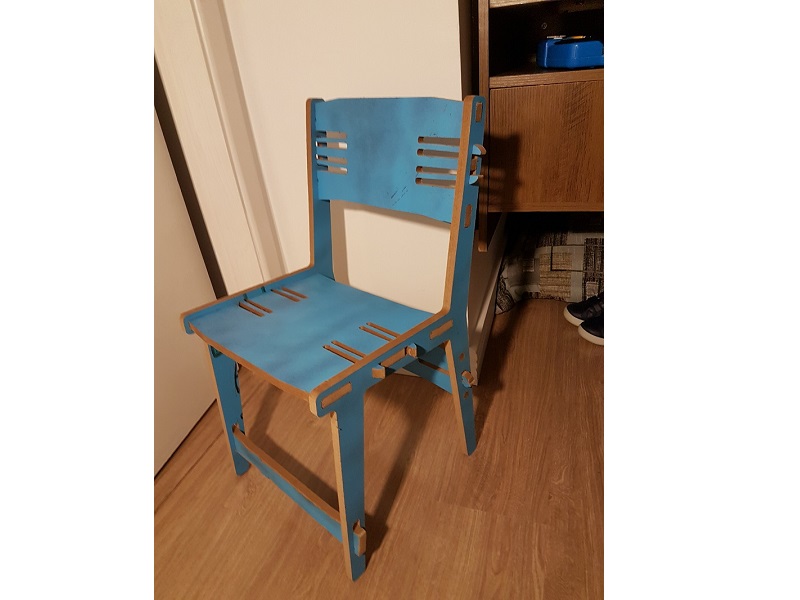
That same day late at night I brought home and assembled the chair parts. It´s a press fit joint, no screws ! As I assembled, I notice the interference was a little too much as two clips cracked as I pressed in, a minor detail.
For me it was a pleasant assignment, I´m very happy with the final result. But not just me, it seems someone else liked it a lot !!