Group assignment: 3D Printer Test
Creality3D CR - 10 printer
3D Printer Test
We will have a test on the Creality3D CR-10 Desktop Printer and Prusa i3 MK3 to test the ability printing. The featuures of CR-10 printer is:
- Nozzle Diameter: standard 0.4 mm
- Nozzle temperature: below 250 Degree Celsius in normal state, 270 Degree Celsius
- Build Volume: 300 x 300 x 400 mm
- Multiple 3D printing filaments: ABS / PLA / TPU ... etc.
- Heat bed
We decid, Yousef and Mohammed to test the 3D printer by using a design from Thingiverse that will show up the ability of our 3D Printer. The test was made as follows:
- Z-Height Check
- Warp Check
- Spike
- Hole in wall
- Raft Test
- more Overhang Steps 50° - 70° (needs special care, like cooling)
- 2 different extrusion widths: 0.48mm & 0.4mm
Yousef has documented the Prusa group assignment as shown at the end of his page.
It's really good to use the performance that the 3D printer provides for prototypes projects as you can expect.
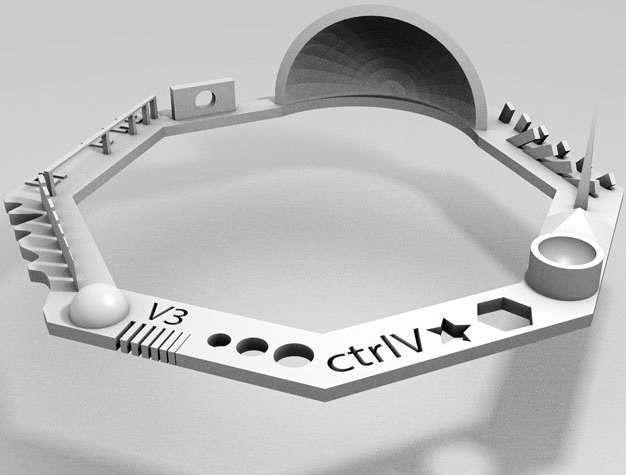
Download: Test Your 3D Printer V3
I used PLA filment for test the CR-10
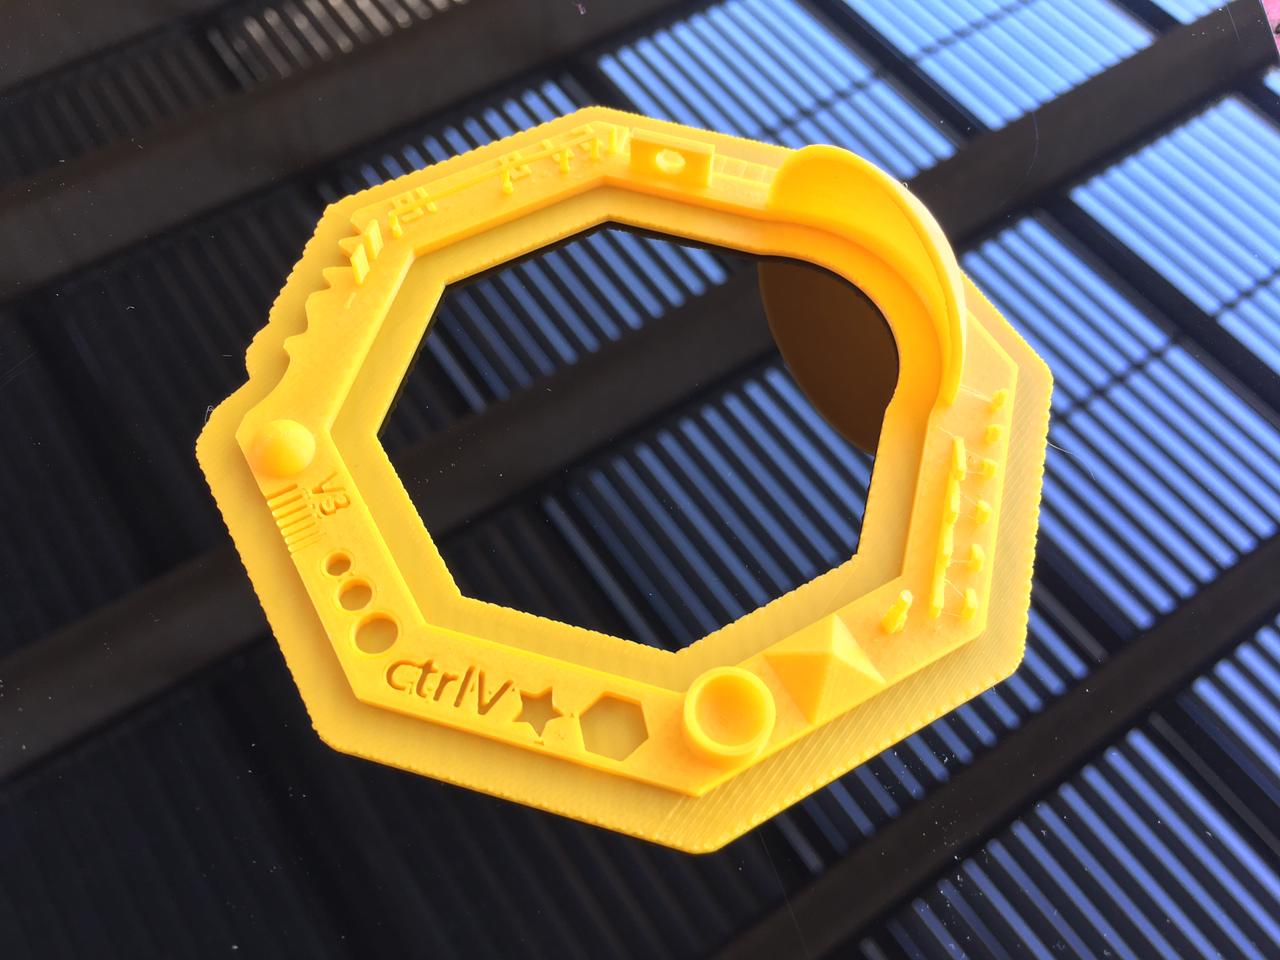
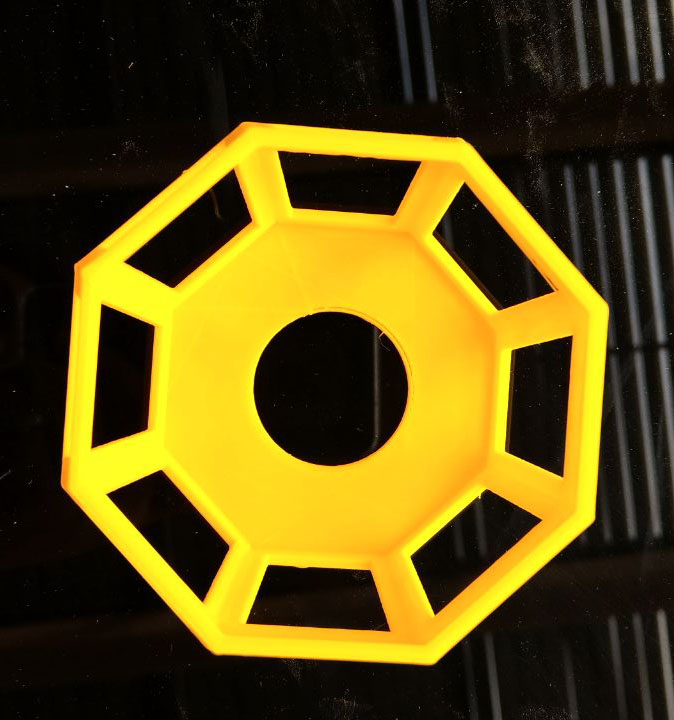
The hexagon should fit the M4 nut but when I tested it didn't fit because it's small by 0.7 mm from the original design.
The Star shows you how the printer could print the sharp edges and it looks fine
The Pyramid get fine details
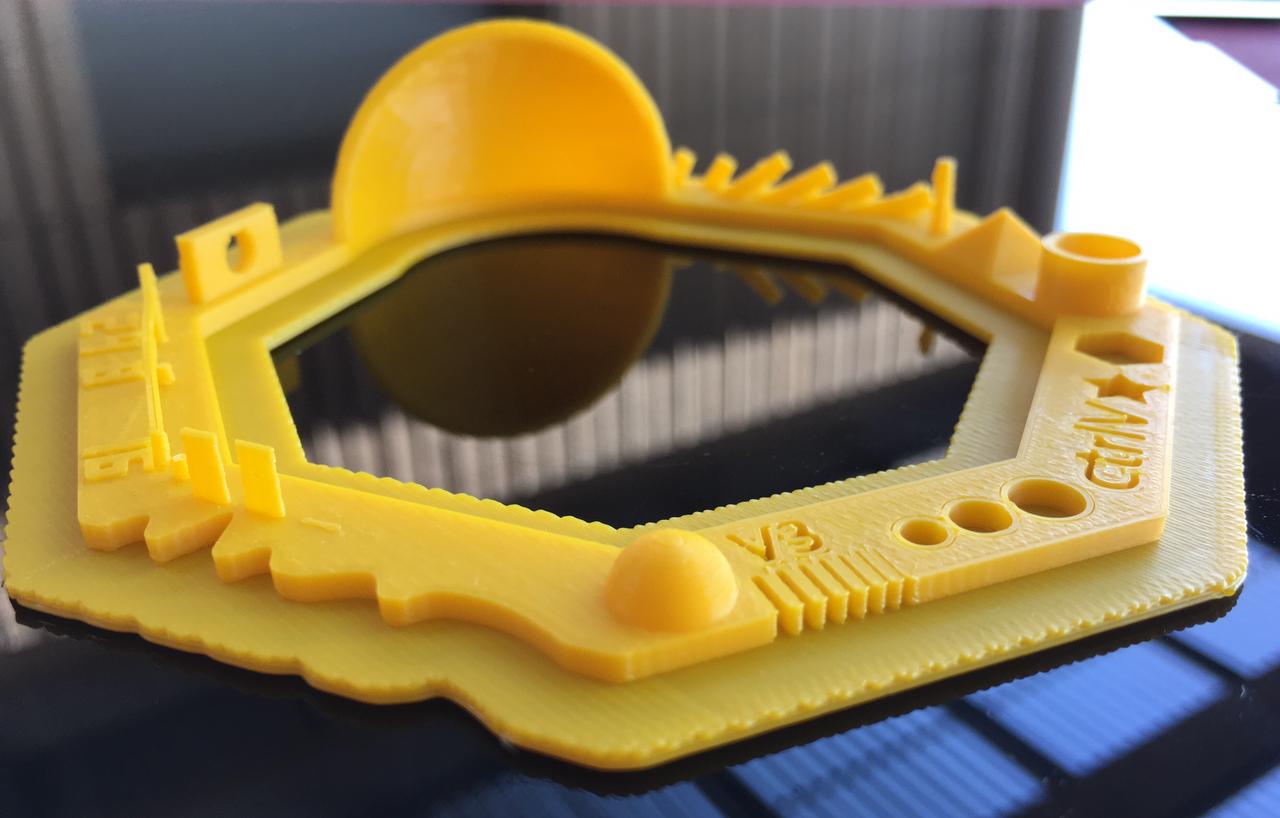
Hole size supposed to be 3 / 4 / 5 mm and what I get 2.8 / 3.7 / 4.9 mm.
FFor the Walls, CR-10 couldn't print all of them. It's only printed two walls form the left.
Dome circle get nice looks as shown in the image..
Vertical Hole it's 4mm as the original size in the design.
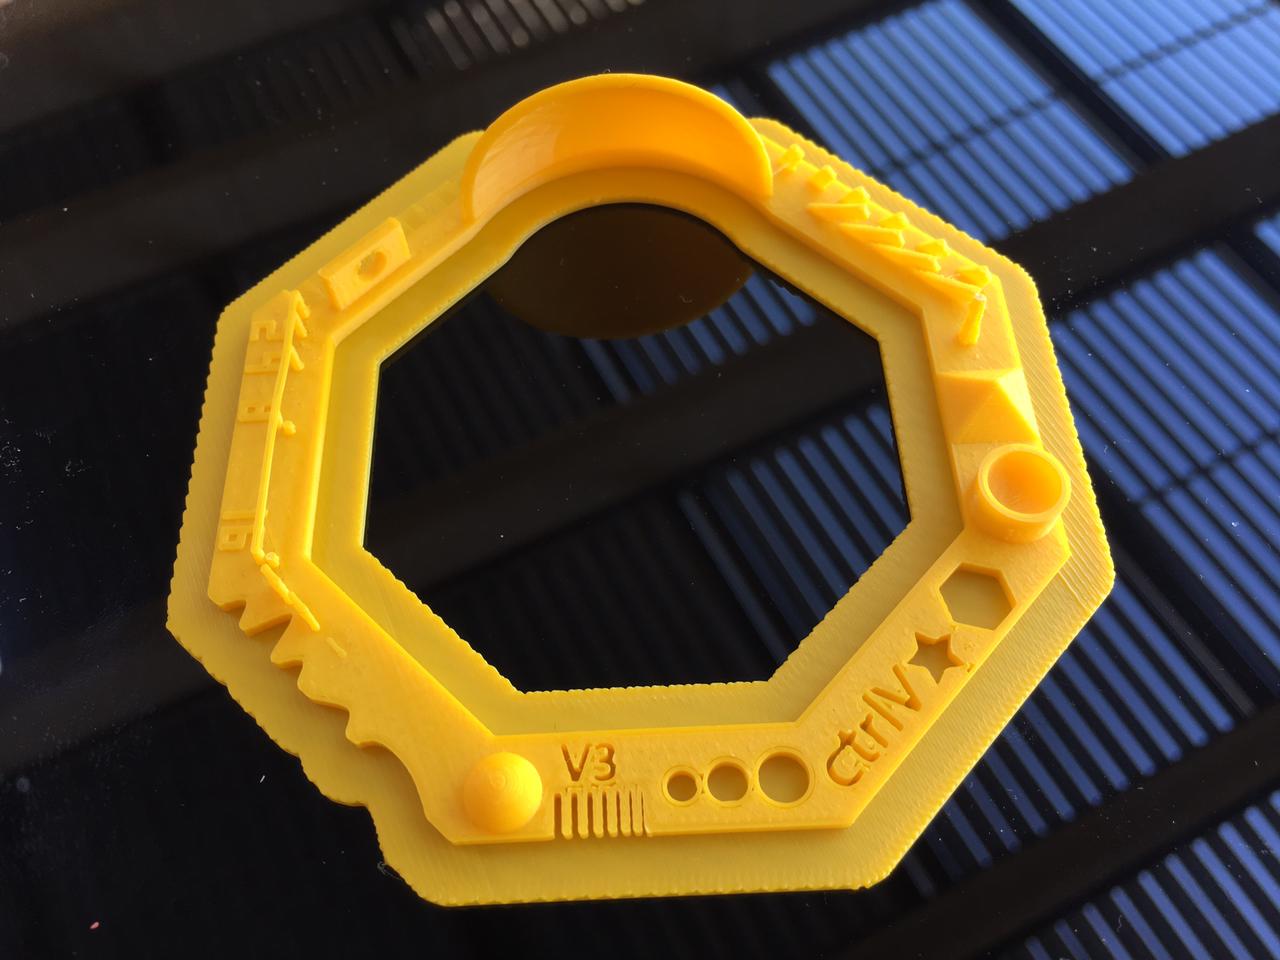
The wave goes smoothly in the print.
Spike was printed fine but not that strong enough
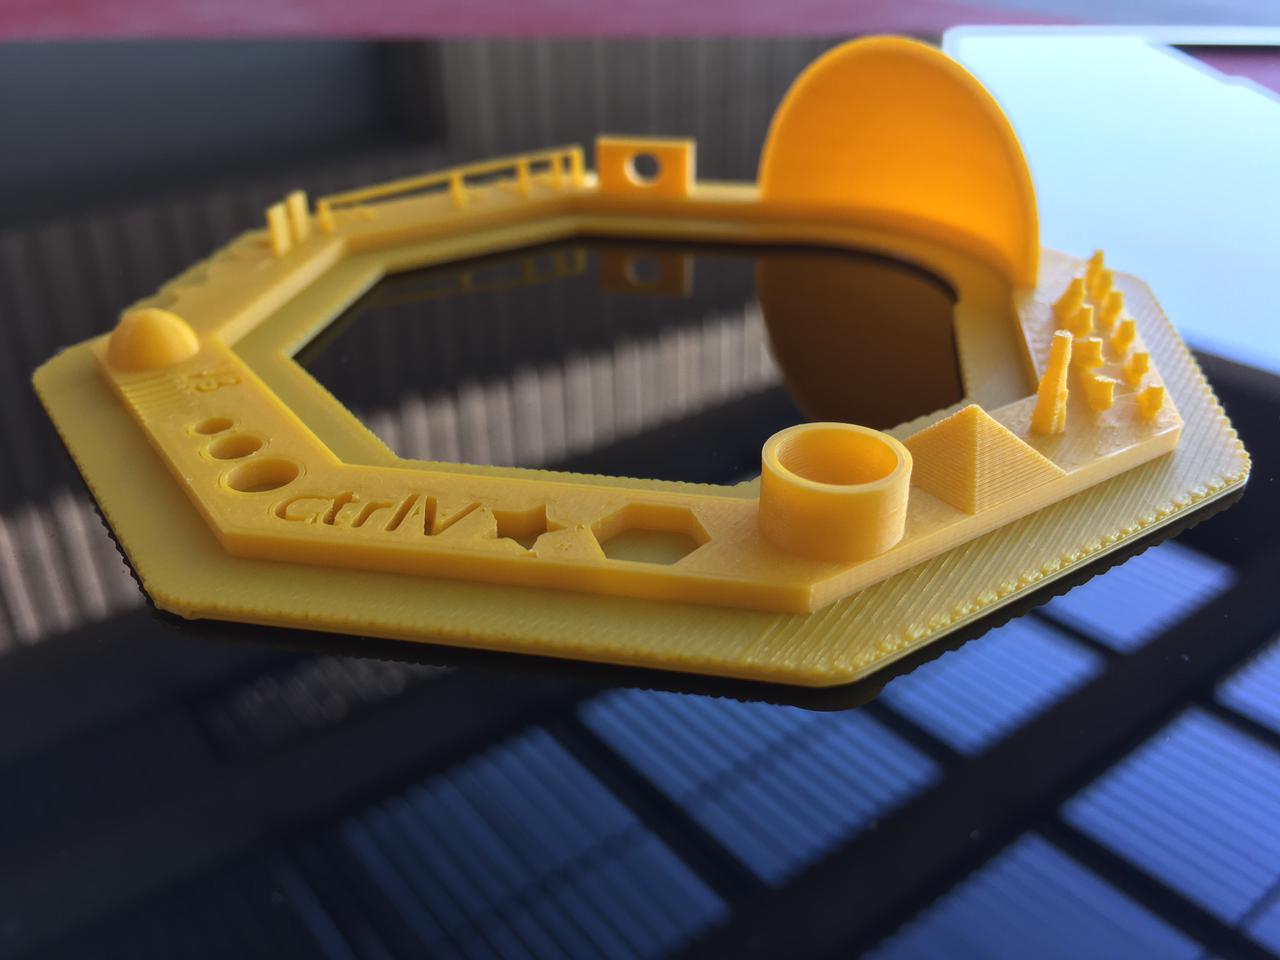
3D Fonts and Bridges get a good results
Text "ctrlV" it seems good
_________________________________________________
3D Scanning
Using phone for 3d scan
First Try
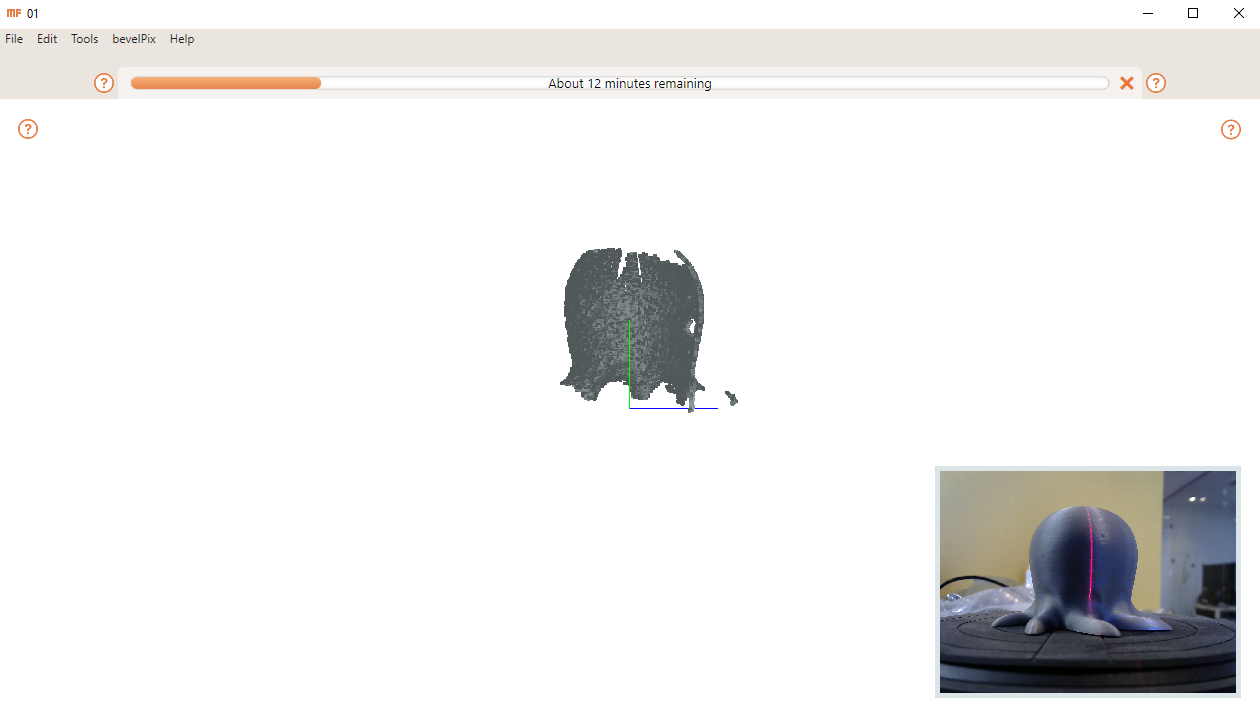
It will be amazing to do two different experiments in 3D Scanning, so I decided to do a scan with phone mobile and the other with Matter and form scan. First, 3D scanning for any object that already printed. I have an android phone, but I couldn't get good results when I did use the SCANN3D app from google play. However, I asked my friends to use his apple phone to try a different app and I found one called "Qlone - 3D Scanning Solution". By the way, it takes a long time to get a result because the way to scan the object.
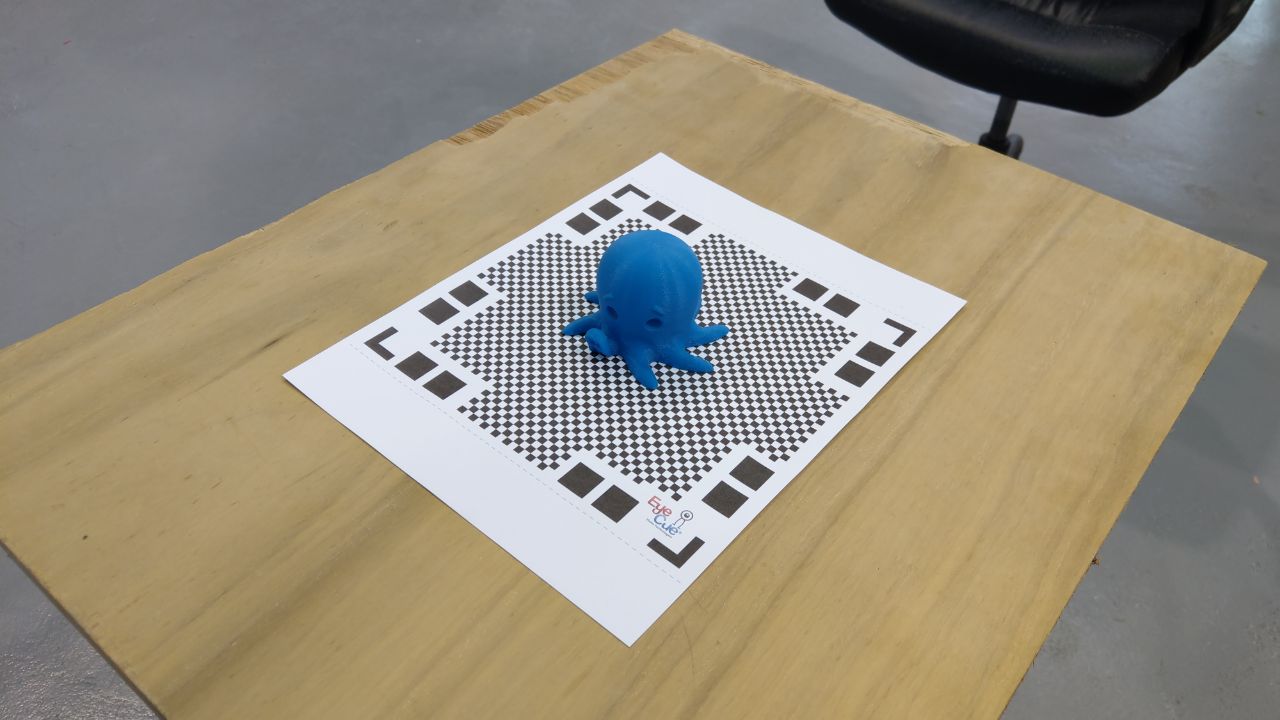
The paper down the object is required to be able to scan

Once you open the app you will notice a slice dome on the object and you must pass through these slices during your scanning
Once you finish the scanning it calculates your scanning to get a 3D module
The only thing that I cannot get using the Apple app is the STL file format
In the android app, I noticed that if you are going to scan any object you must make sure you don't have any shadows or object it doesn't reflect a strong light. So, I thought if I use the same page that I used when I scanned the object by apple phone it will be a good reference.
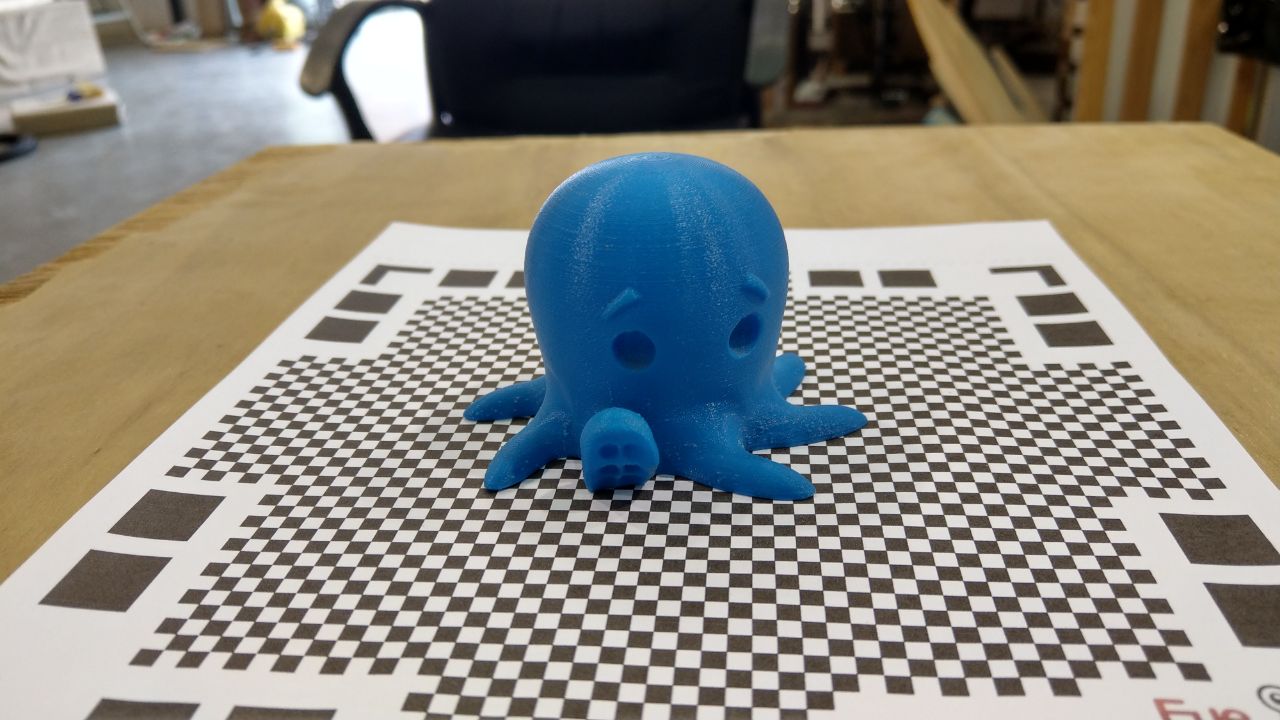
Find the the STL file for the result
Download: Scan
The first step needed that before starting the scanner is to make sure the contrast light around scanner is not too high or low and mostly like soft-lightbox that used to take pictures. Once you get a perfect location then you need to calibrate the scanner before your start scanning the object. The steps below will show you more details.
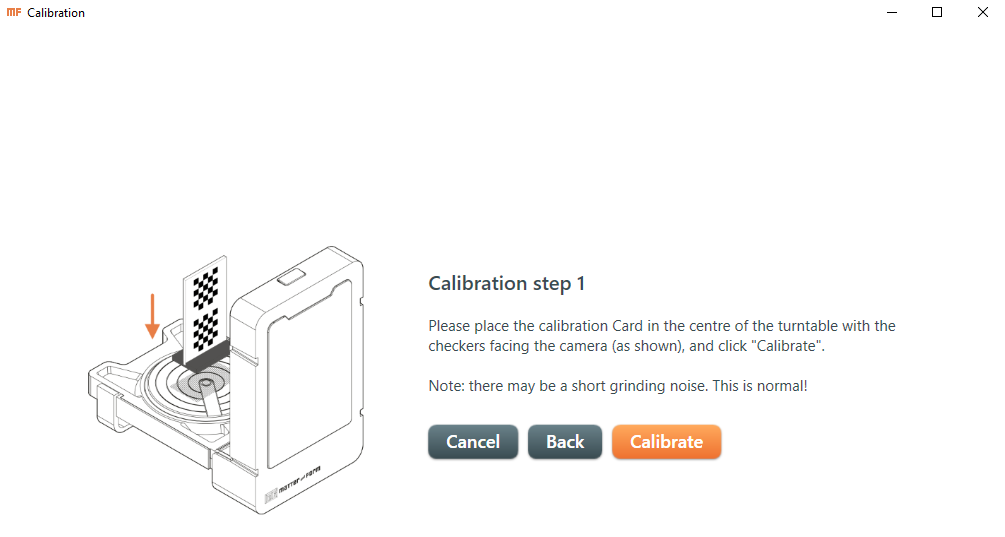
If you download the software and you open it, the first step is to calibrate the scanner
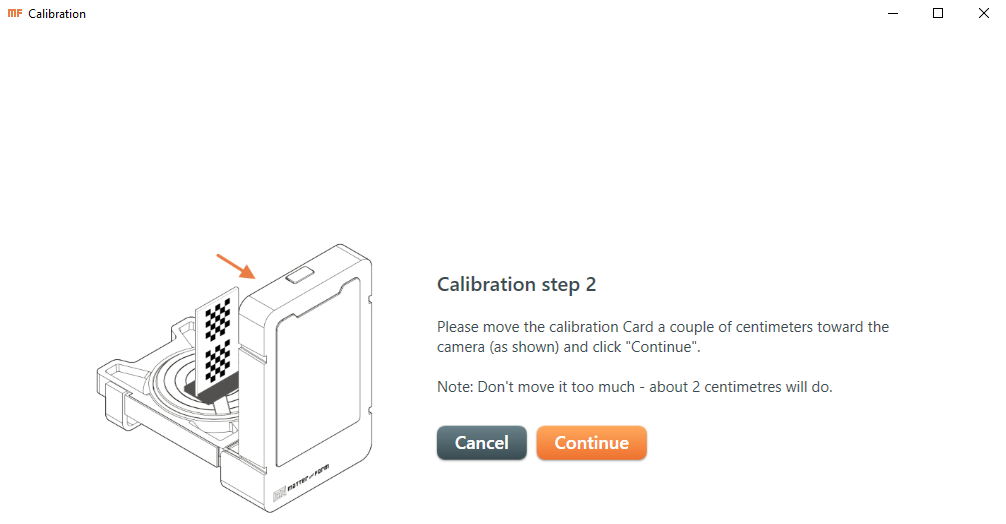
The scanner contains calibration card to use it for calibration and you will move the card from middle to nearest of the lens of the scanner
while calibrating the scanner
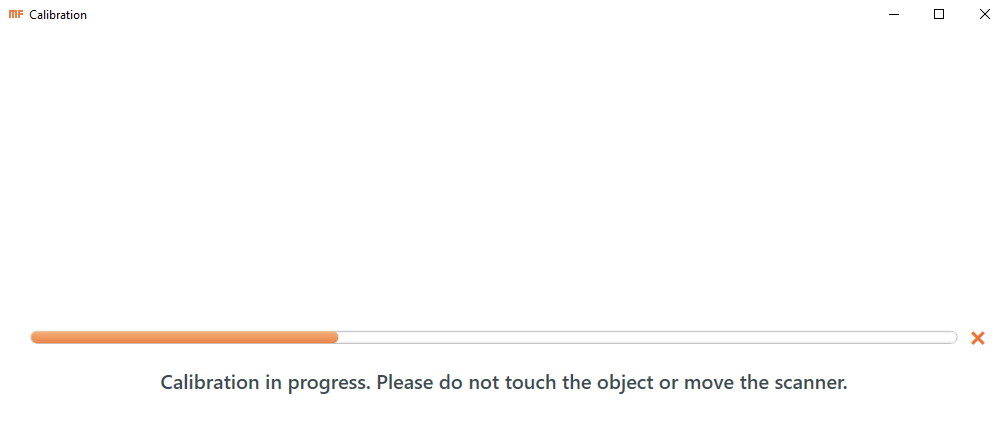
I did play with settings specifically with geometry settings and texture settings and do multi-scanning for the same object.
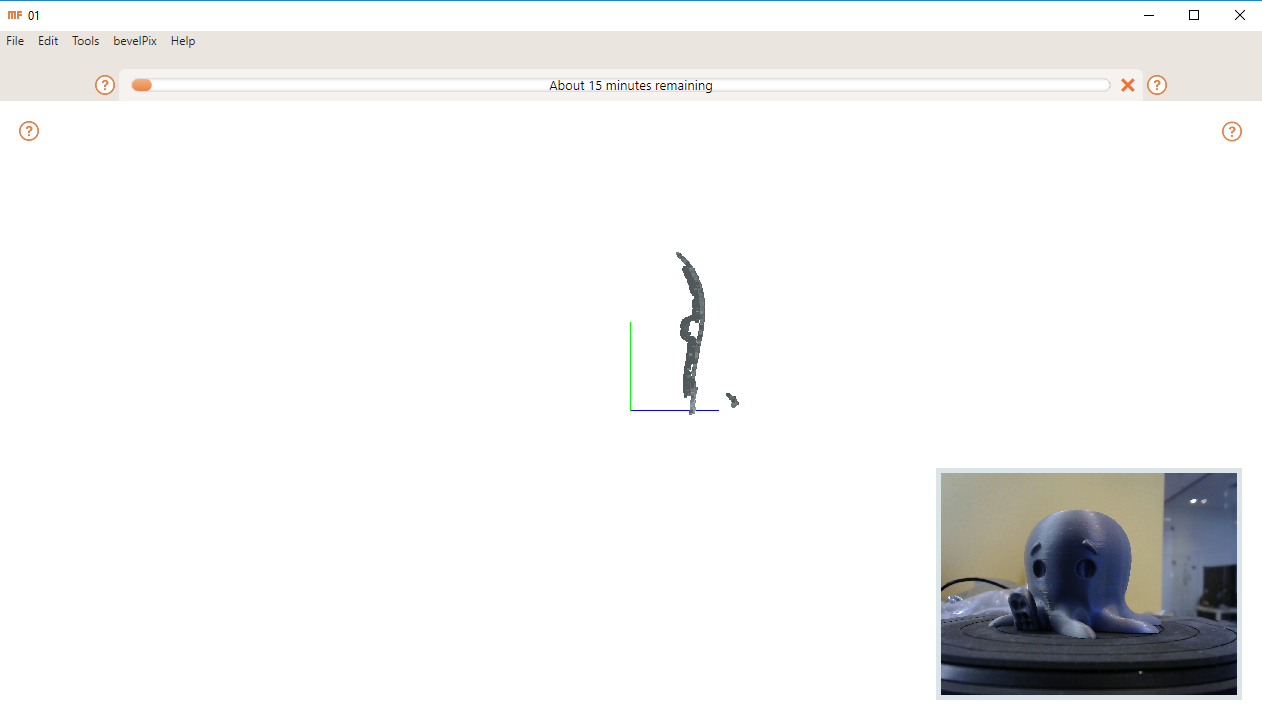
while scanning
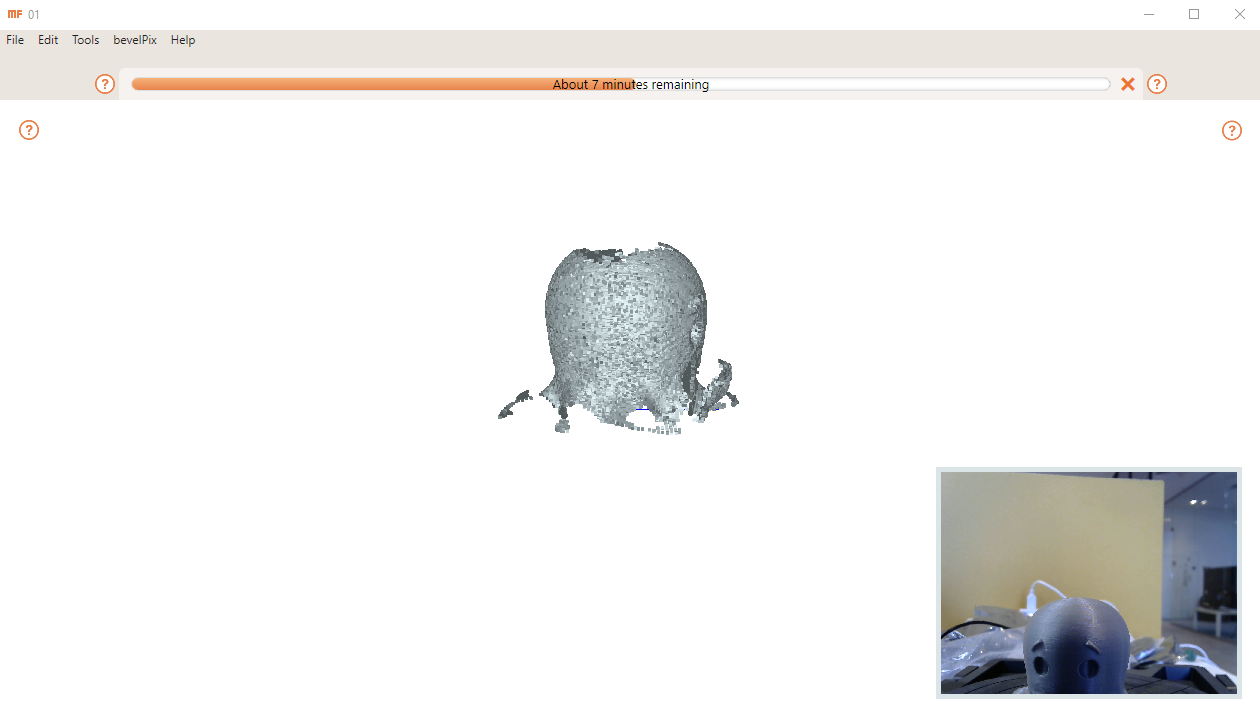
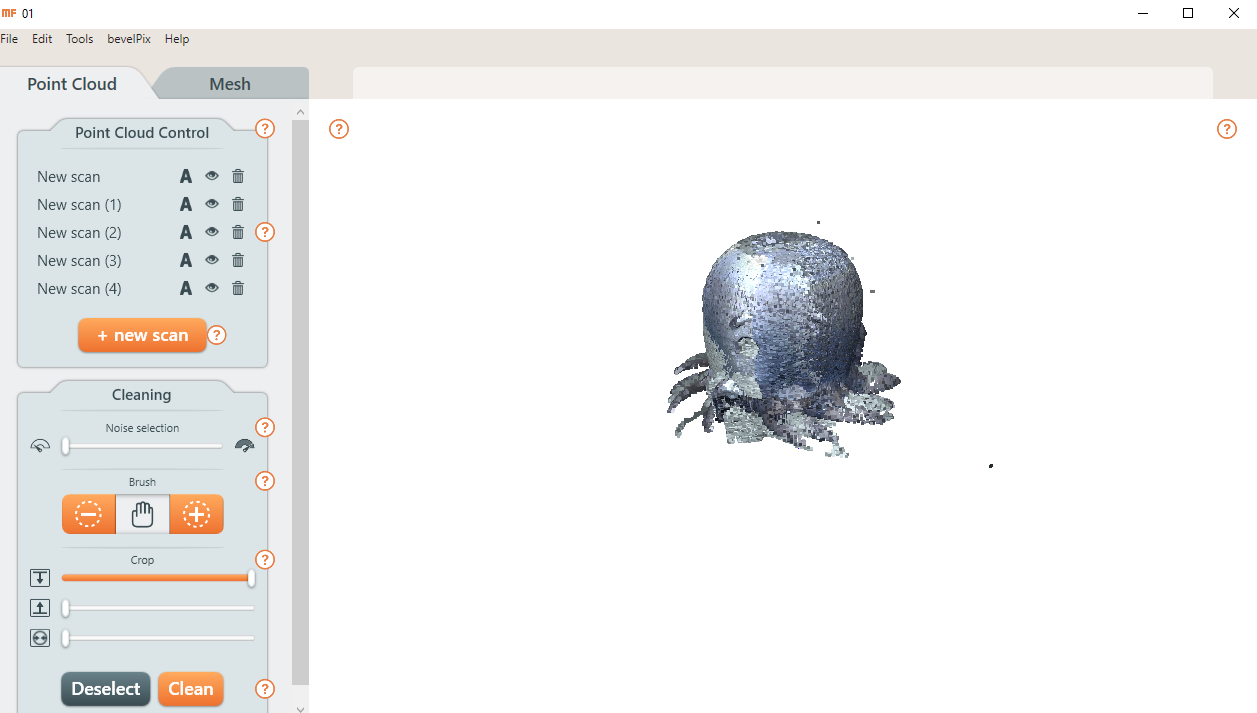
Once you finish the scan you must do mesh to get the result for your multi-scanning
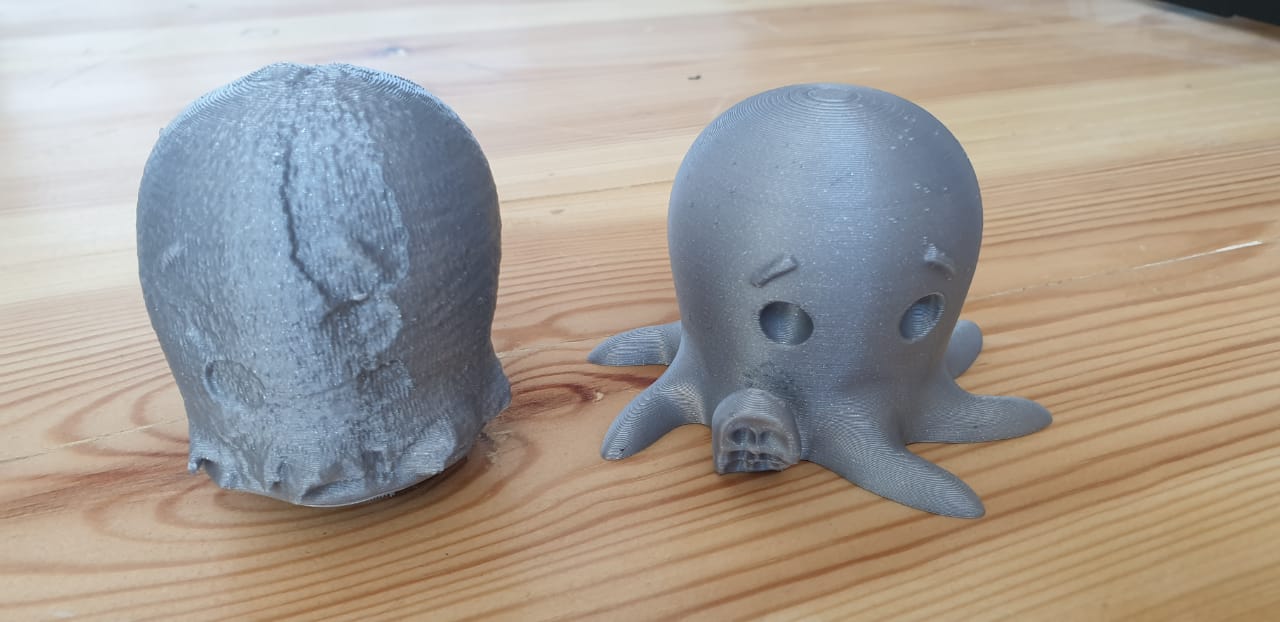
the result after printed the scanning object with the image shown. In the left the object printed after scanning and on the right the original object printed before scanning.
Download: Scan
_________________________________________________
A 3D Desgin & 3D Printing
Using Oneshape for 3d design
Design a lighting shade
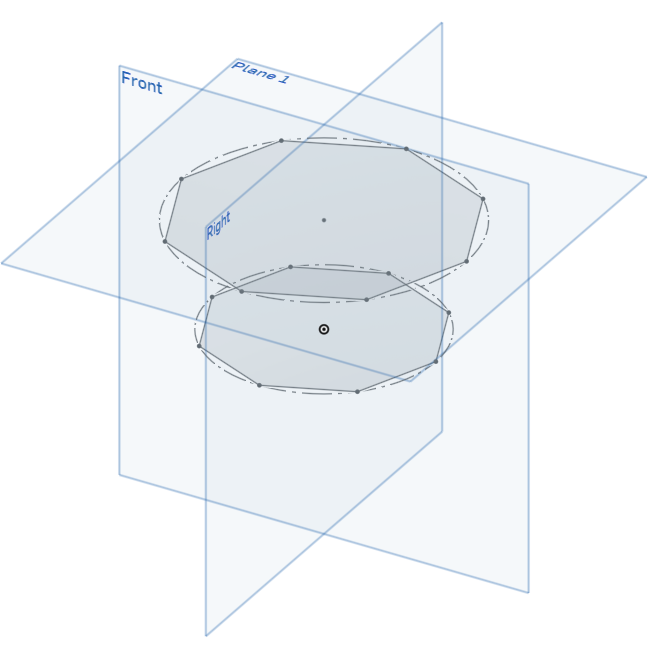
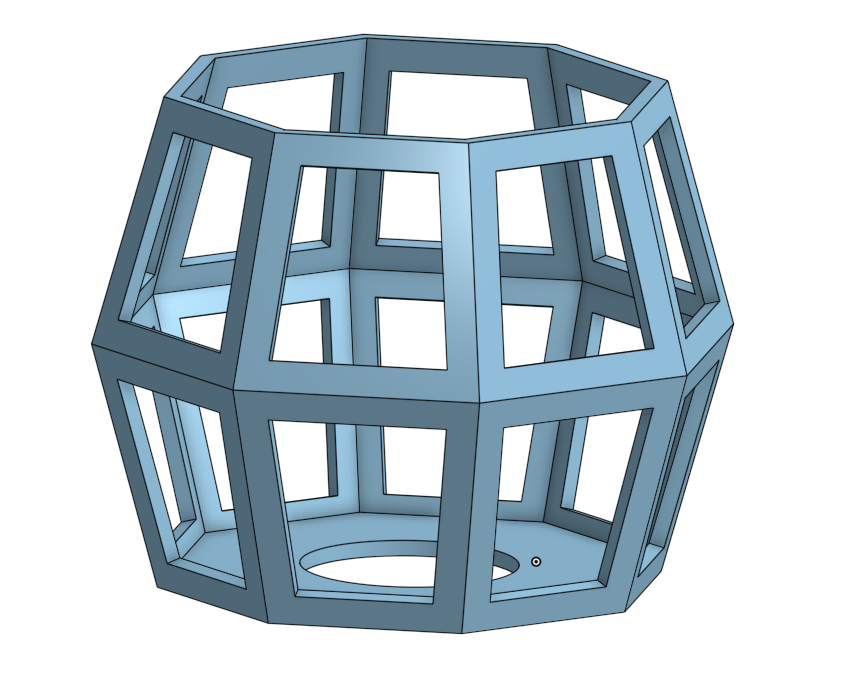
In this assignment I preferred to practice on Onshape and do something useful. In the design, I have made a pentagon shape in two different planes with two different sizes. Then I use the loft for the first time to connect two shapes. After that I use mirror on the sketches to get the design bellow.

This design took almost 5 steps to be done as it is:
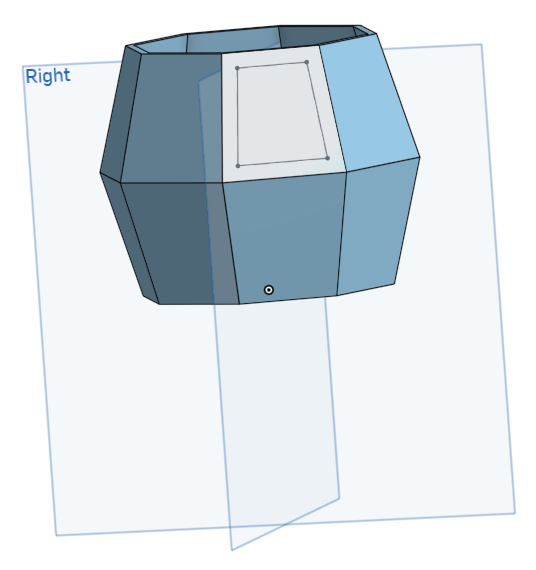
- The first step was drawing an octagon shape on the top with the measurements that you decided.
- The decond step create a plane above the top plane and redraw an octagon shape and distance between the planes 40mm
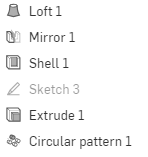
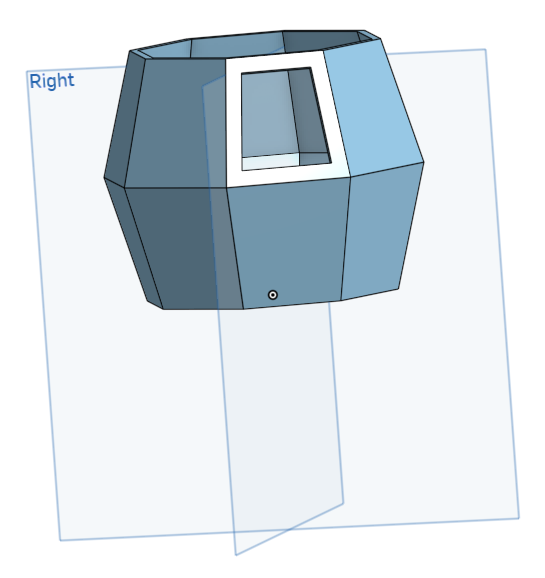
- Third step was using the loft tool to connect the two planes to get the first shape. After that using the Mirror tool the sketch was duplicated upside down.
- The fourth step was using the shell tool which gave the option to hollow the shape.
- The fifth step was to draw in one side of the shape to make a hole using extrude tool then circular tool to duplicate the draw in all the sides and repeat the step for the upside-down shape.
- The last step it's optional to make a circular hole, only if you would like to use the design as a lampshade.
Download: Design
Onshape Design
the first and the second step as I explained in the design steps
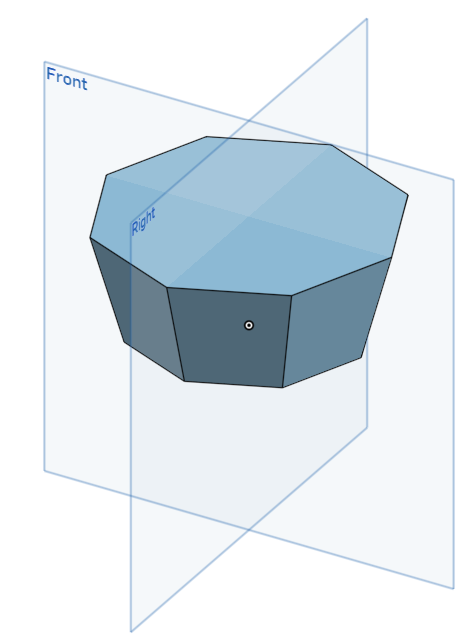
loft step
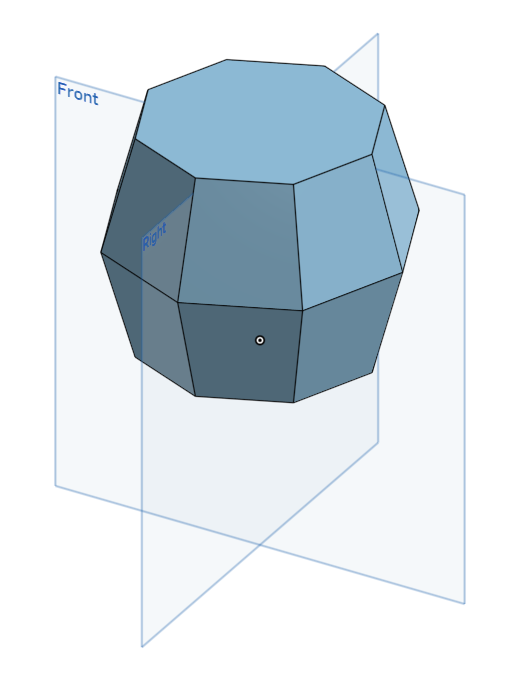
mirror step
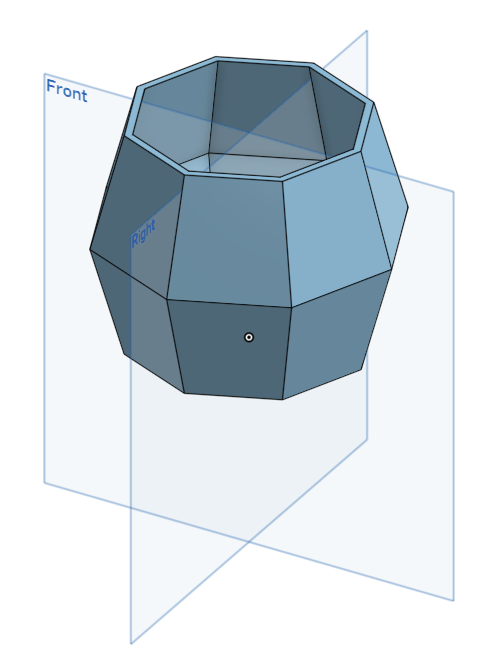
shell step
draw the shape you would like to hollow
extrude the draw
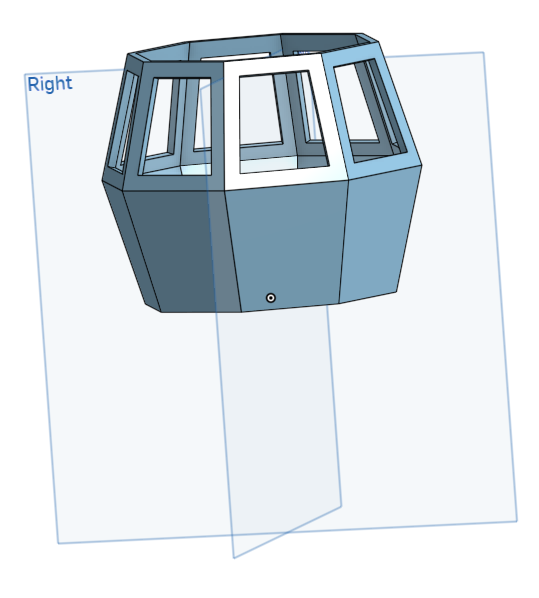
Circular pattern for the extrude
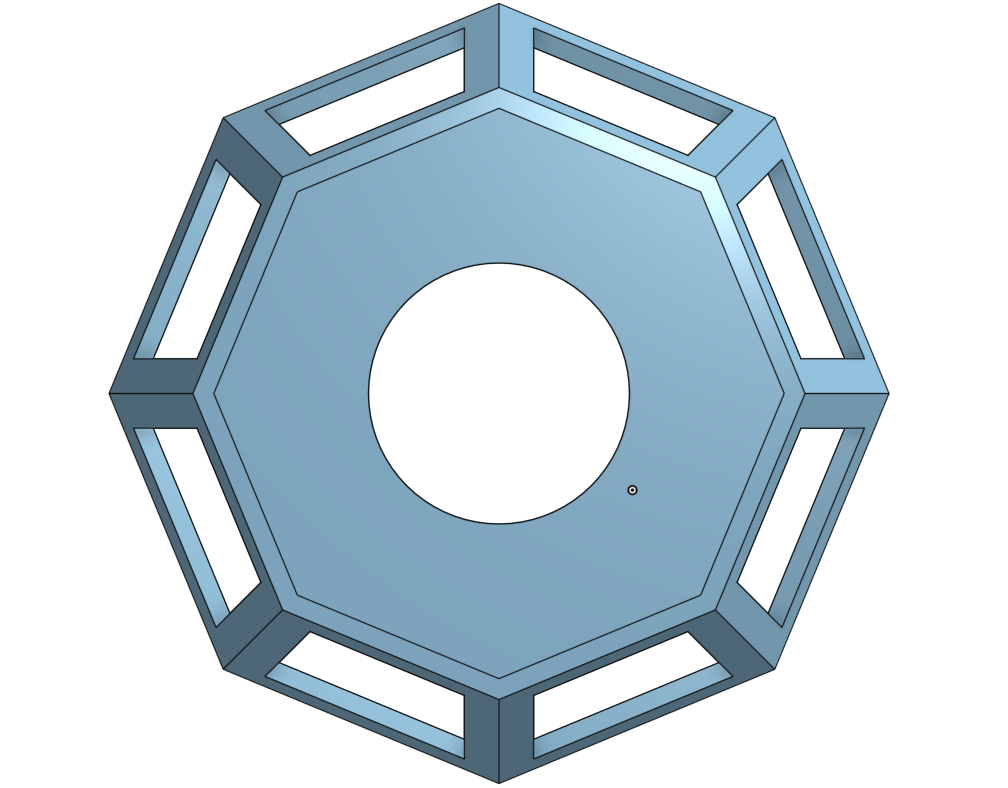
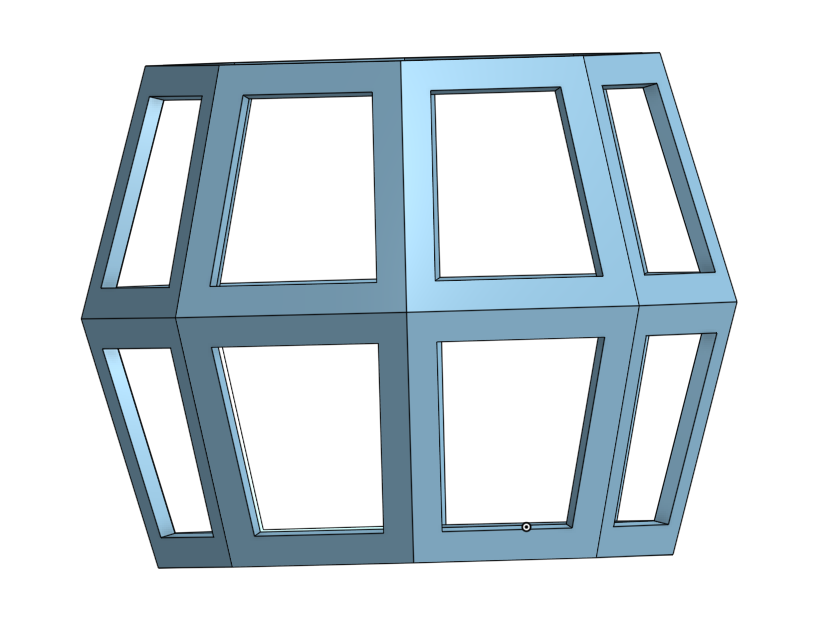
Top View
Side View
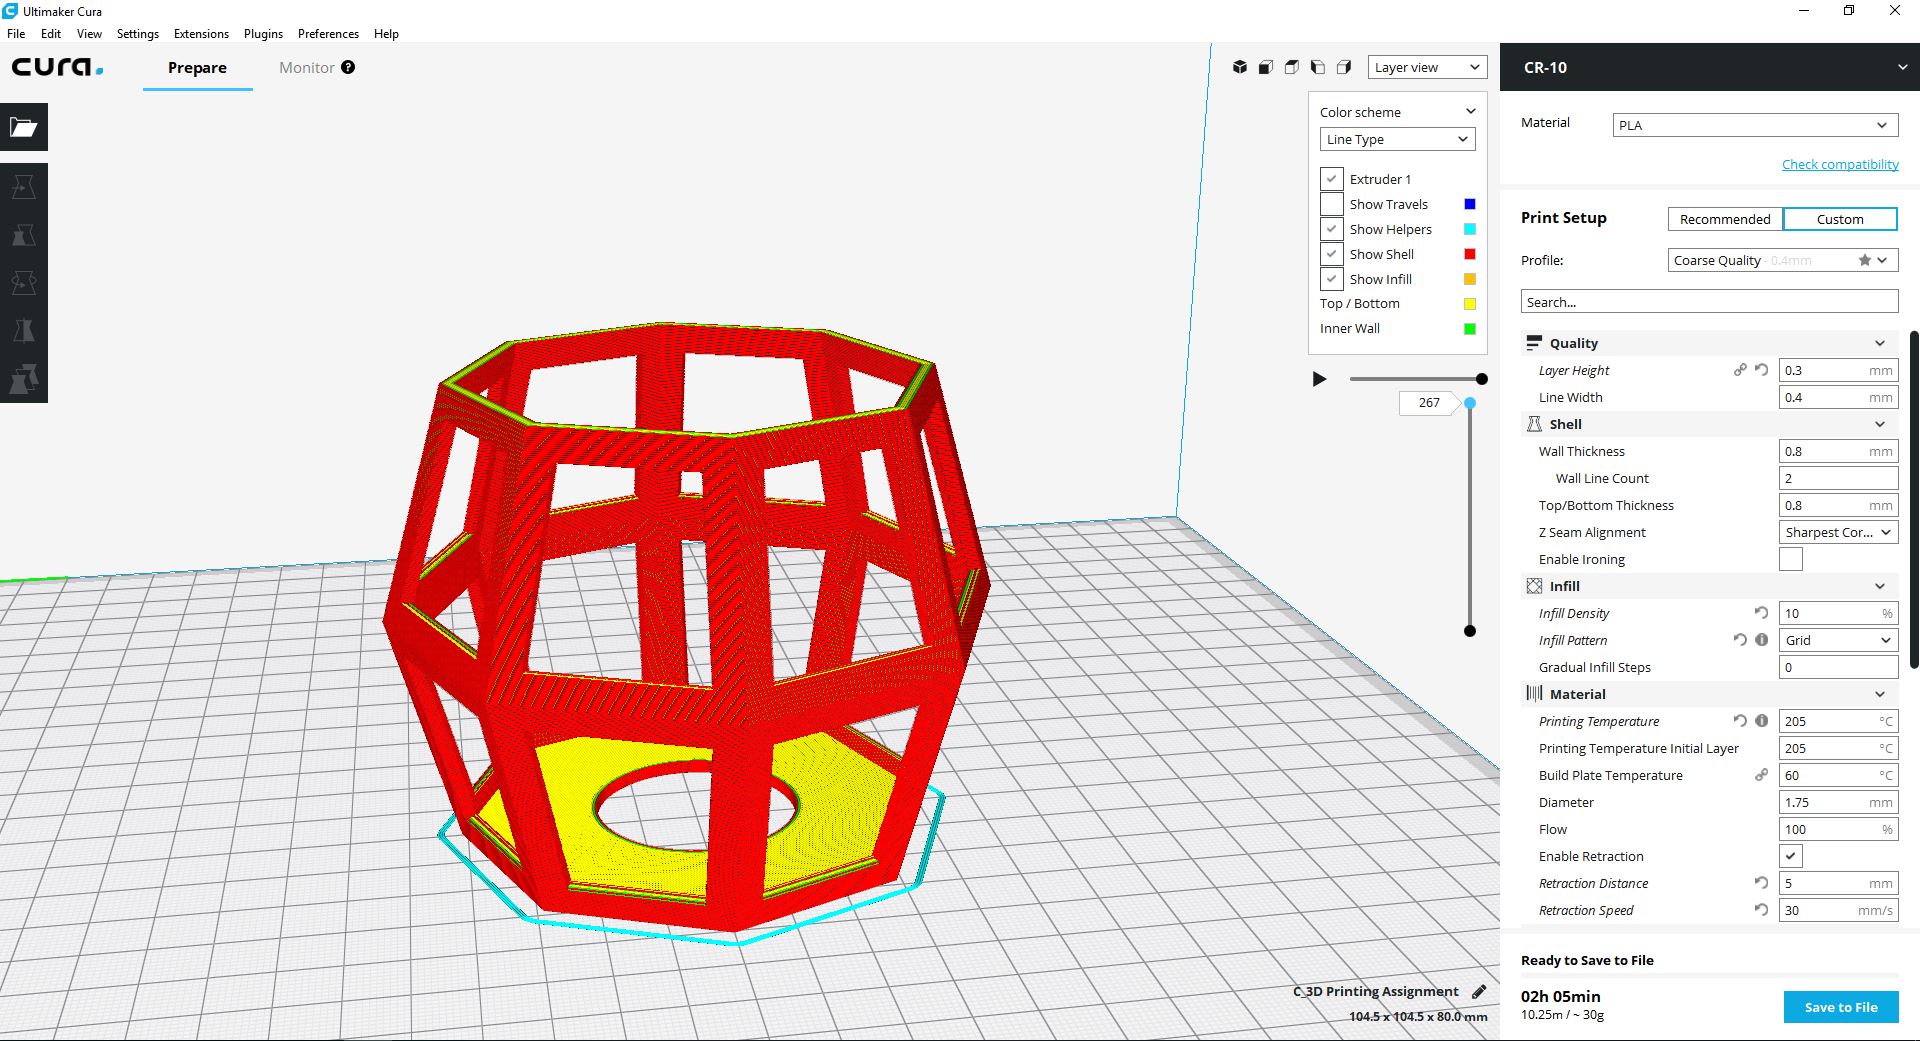
Settings to print
You can either use the default setting or do what I did
Quality layer I choose 0.3 mm becuase my print doesn't has more details
wall line count is 2 because it doesn't' hold something big to be more strong
Material printing temperature was 205 Celsius, which is a perfect temperature according to my experience with PLA filament
Material Build Plate temperature which depends for the room temperature where the printer is located, and I choose 60 Celsius.
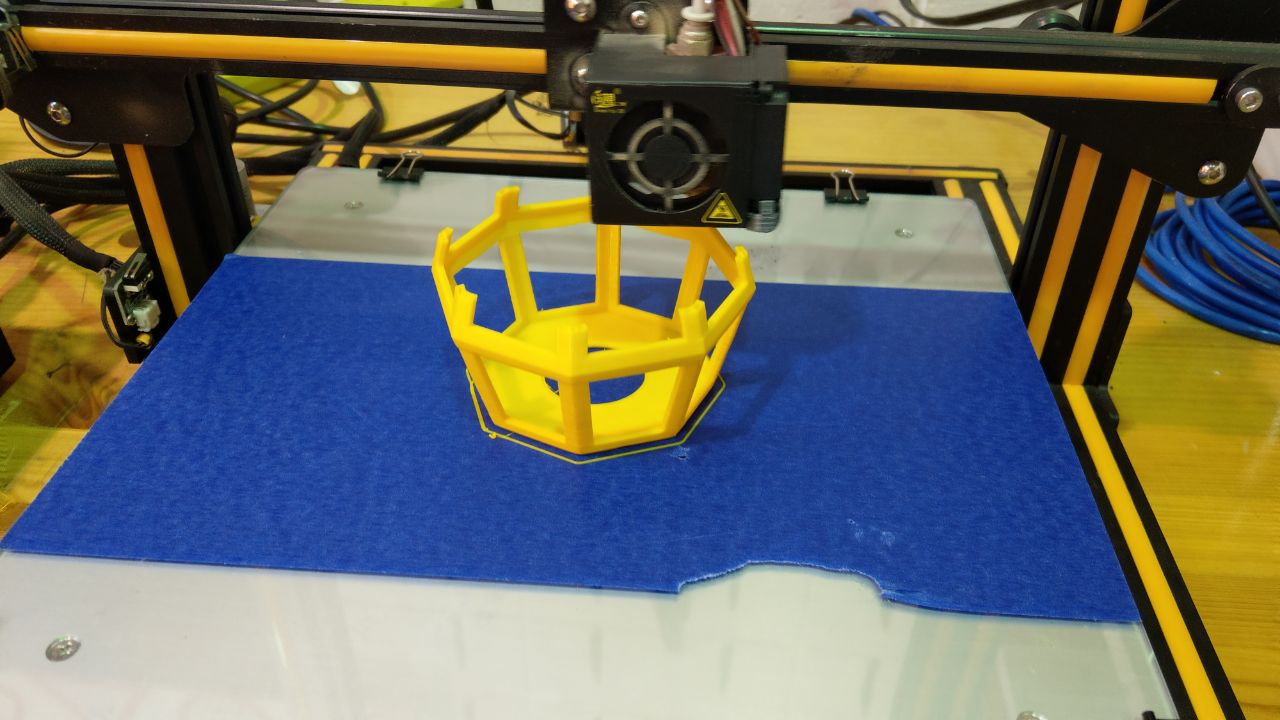
Printing the design
3D Printed Top View

3D Printed Side View