Week 3: Computer-Aided Design
This week I learned how to create models in raster, vector, 2D, 3D and render formats. I'll start with basic geometries until I get to the possible design of the final project.
Raster
GIMP
GIMP is a program for editing digital images in the form of a bitmap, both drawings and photographs. It is a free program and we can download it from this page . The interface can be seen in the image .
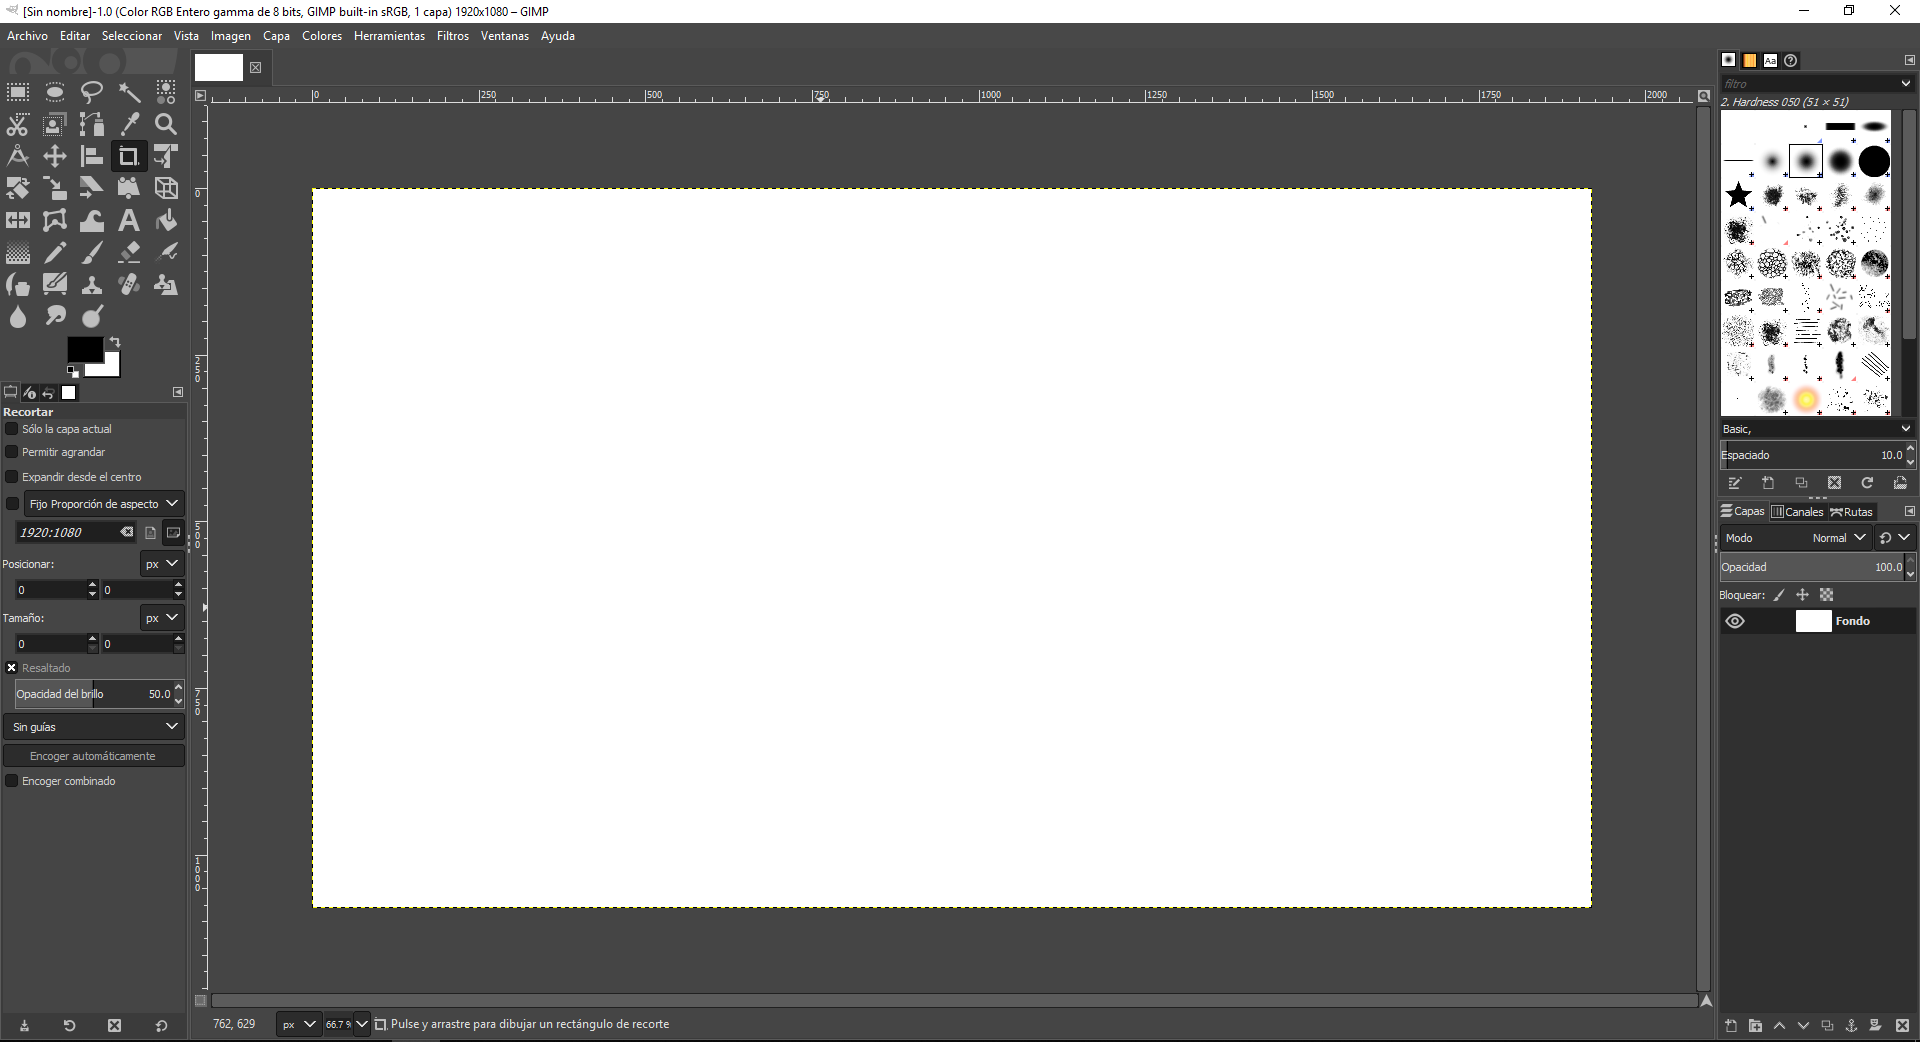 Fig.01 - GIMP Interface
 It has a window with few tools such as selector, measure, focus, brush, panel of colors but a large number of filters.
At the text level, the source it handles is very poor at the difference of the adobe range. At first I found it hard to get used to it but I managed to install, scale, change colors and filter an image of the Nazca lines. Finally, we must consider the extension format when saving the file, this is shown as.xcf
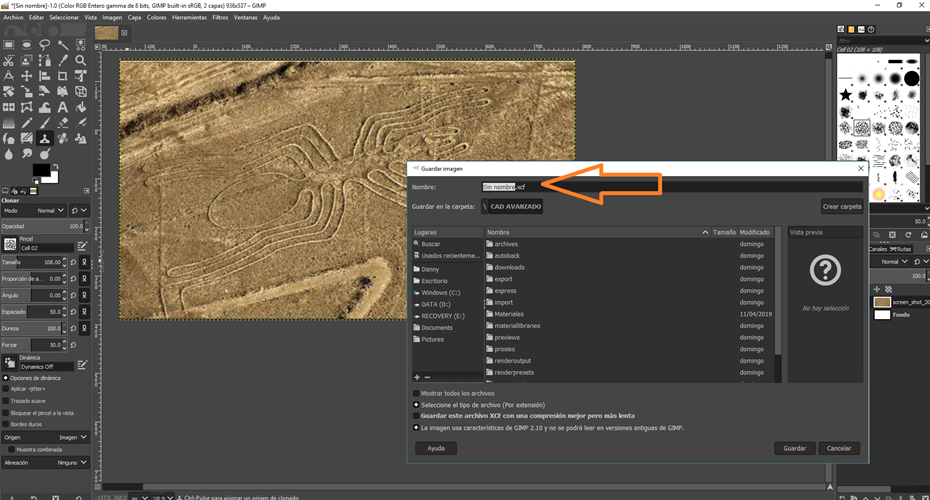 Fig.02 - GIMP Model
 Photoshop
Photoshop is a raster graphics editor, which will be used mainly for the retouching of complex photographs and some icons that you want to modify from the core. The home screen shows us design tools in an orderly manner. The new document, it offers us the control of units in which we want to work according to the region where we are, in my case I will use millimeters.
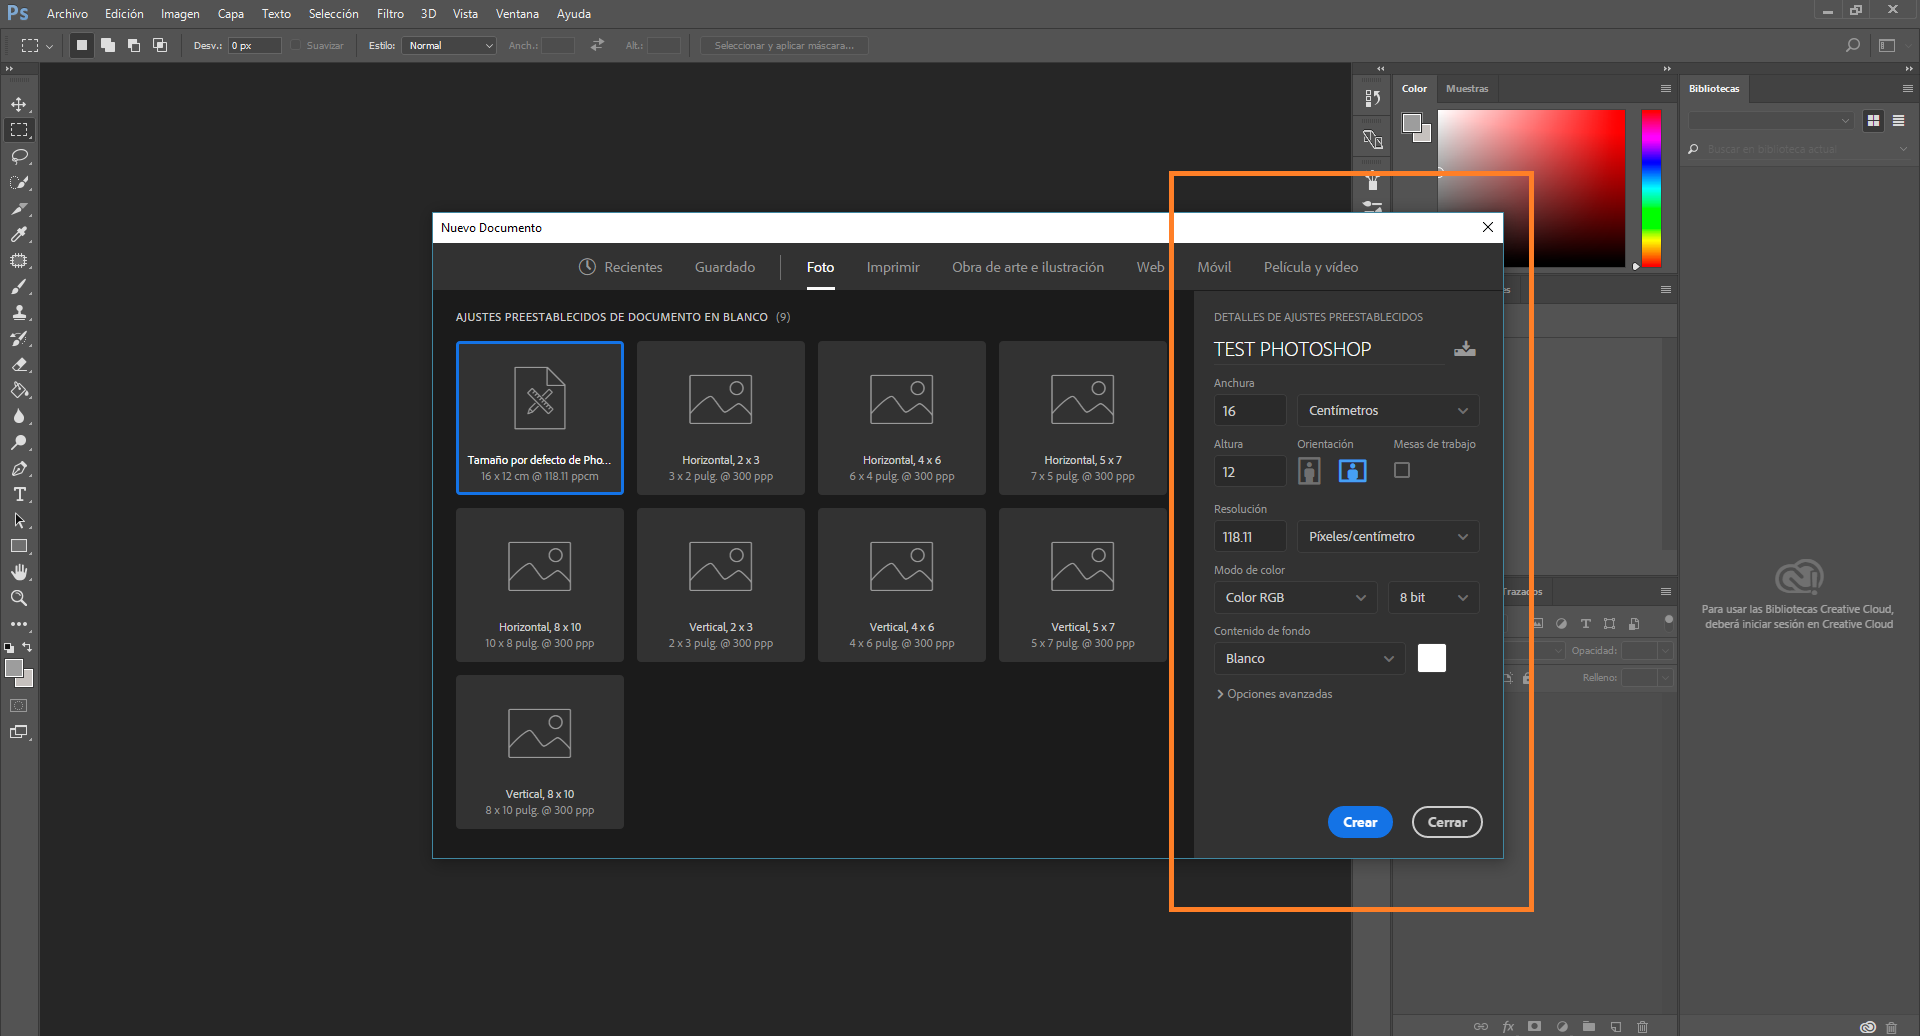 Fig.03 - Photoshop Interface
 To insert a new image we only need to open it, if we are going to work with several images these will be inserted in independent tabs. Insert an image of a geodesic that will be the structure to study for the design of the pavilion for the final project.
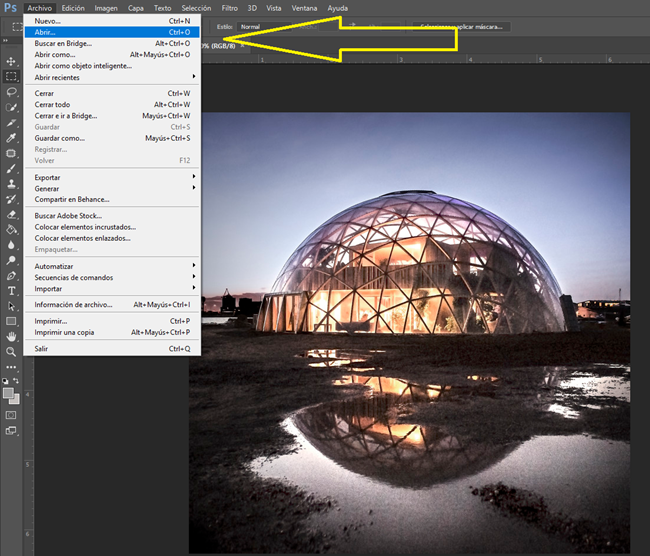 Fig.04 - Open file
 The quick selection tool allows us to select elements to edit. In this photo I wanted to modify the environment where the dome is located, I only want the structure to appear. Just select the area to work and use the delete key.
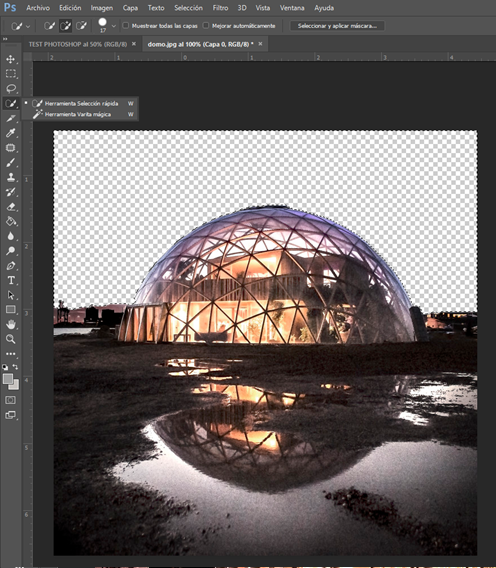 Fig.05 - Cut background
 After selecting the geodesic image, use the cut and paste tools to move them to another image that was placed in a new tab. As you can see in the image, it has the sea in the background. To give a mimetic effect, use the clone stamp tool.
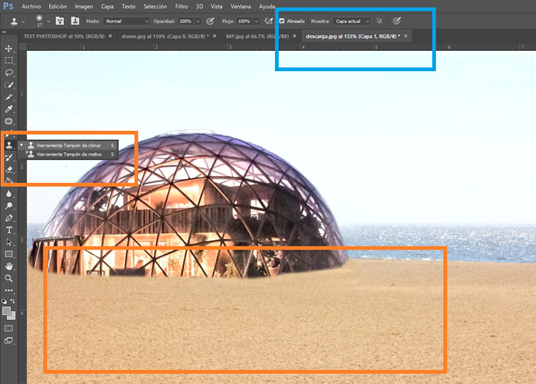 Fig.06 - Clone Tool
 I like Photoshop since it has advanced filter effects, it's just a matter of accommodating some settings to show the final design.However, to make simple editing work I recommend and will continue using Paint3D, since it has a fast interface execution and advanced cutting selection that is the main tool in Photoshop. Because, with the little design experience I have, an image in Paint3d was cut, pasted, edited and exported in 15 seconds, while in Photoshop it could take up to 4 minutes.
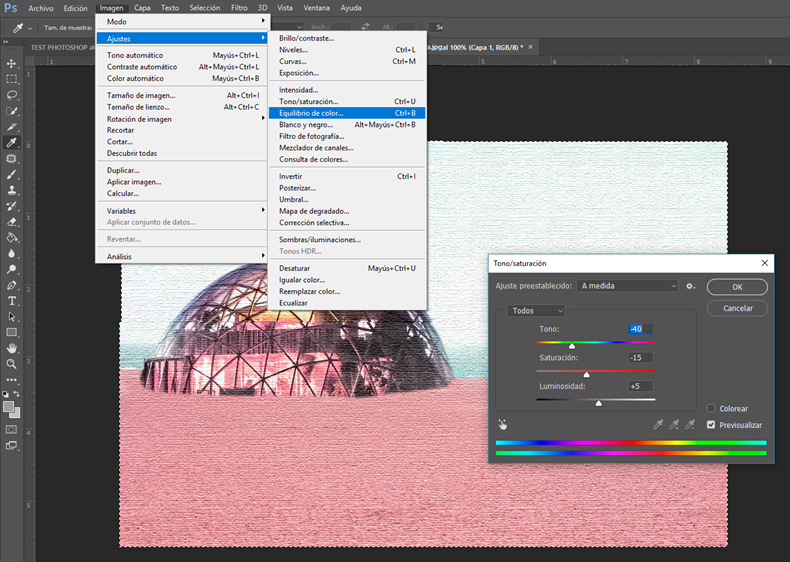 Fig.07 - Image Settings
 Download Photoshop Files
Vector
Inkscape
Inkscape is a free and open source vector graphics editor. Inkscape can create and edit diagrams, lines, graphics, logos, and illustrations.
Each update adds more command that complex vectors can be made over time. We can download it from this page .
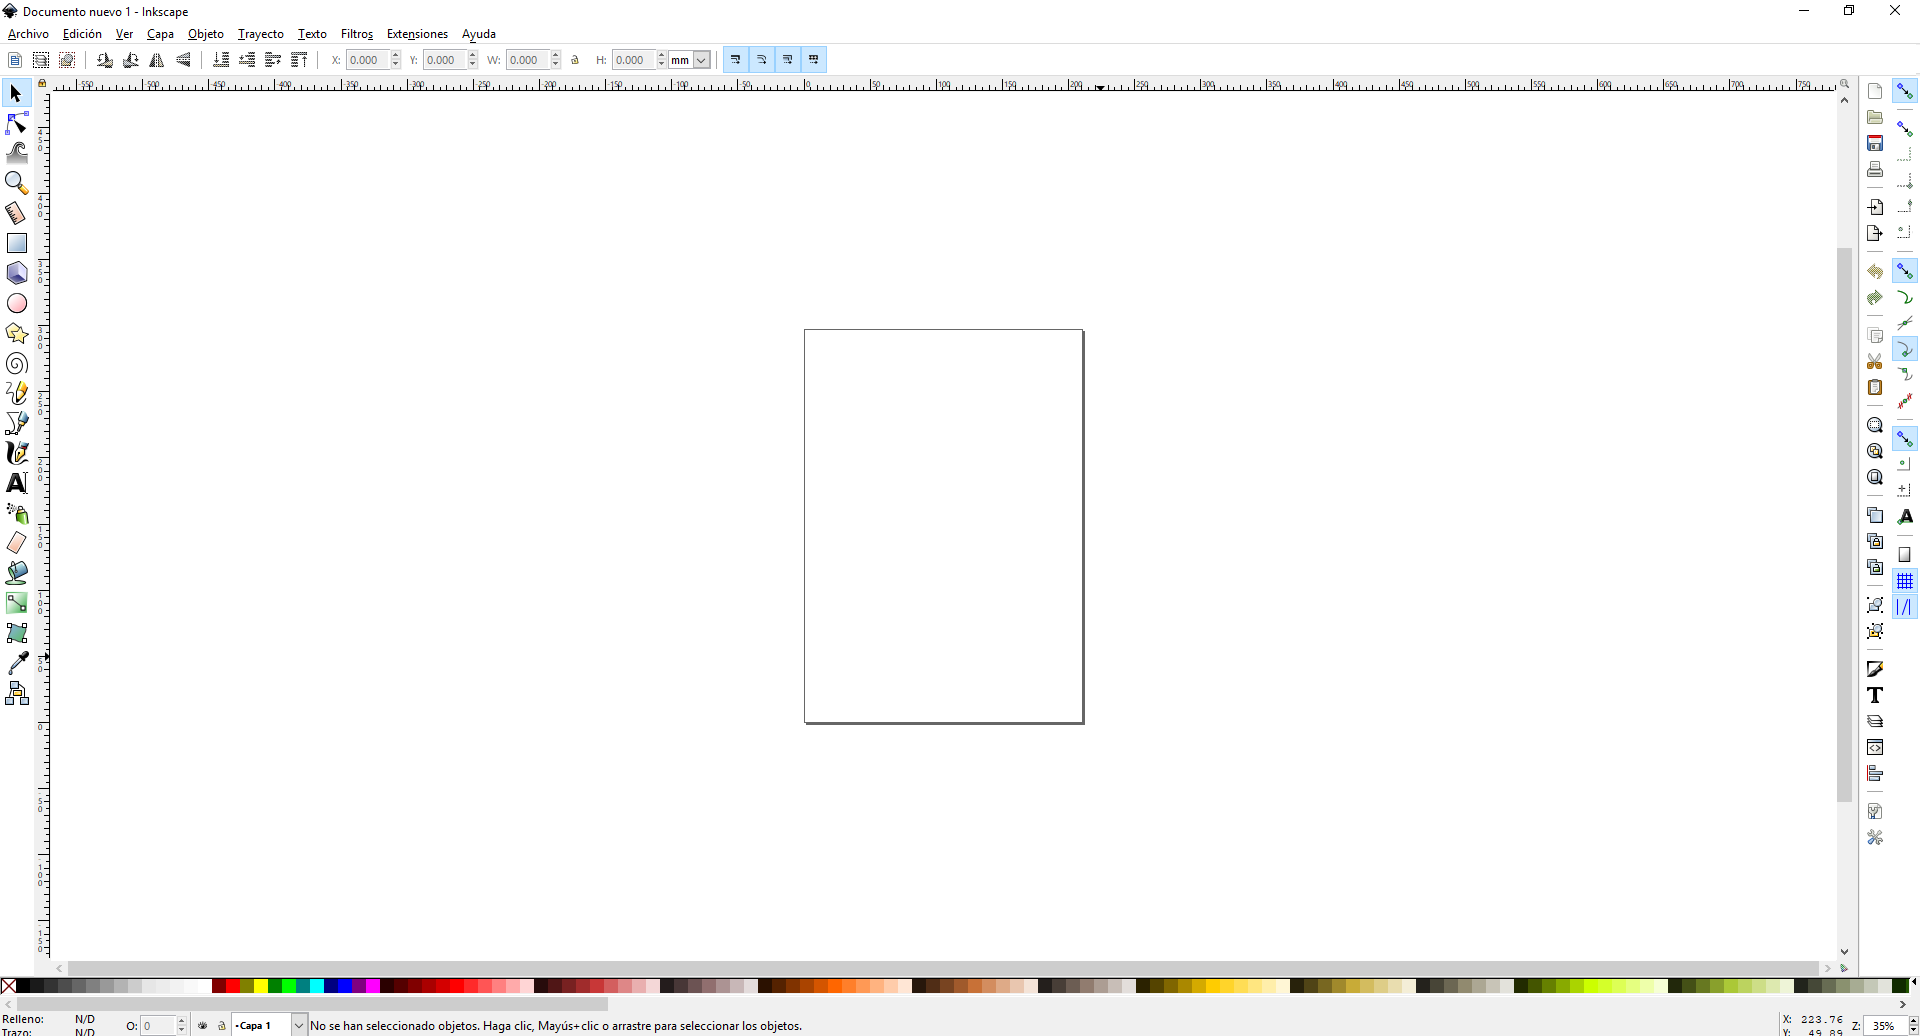 Fig.08 - Inkscape Interface
 I tried some drawing commands and note that it shows only basic tools in the window of its interface to develop a simple design work.
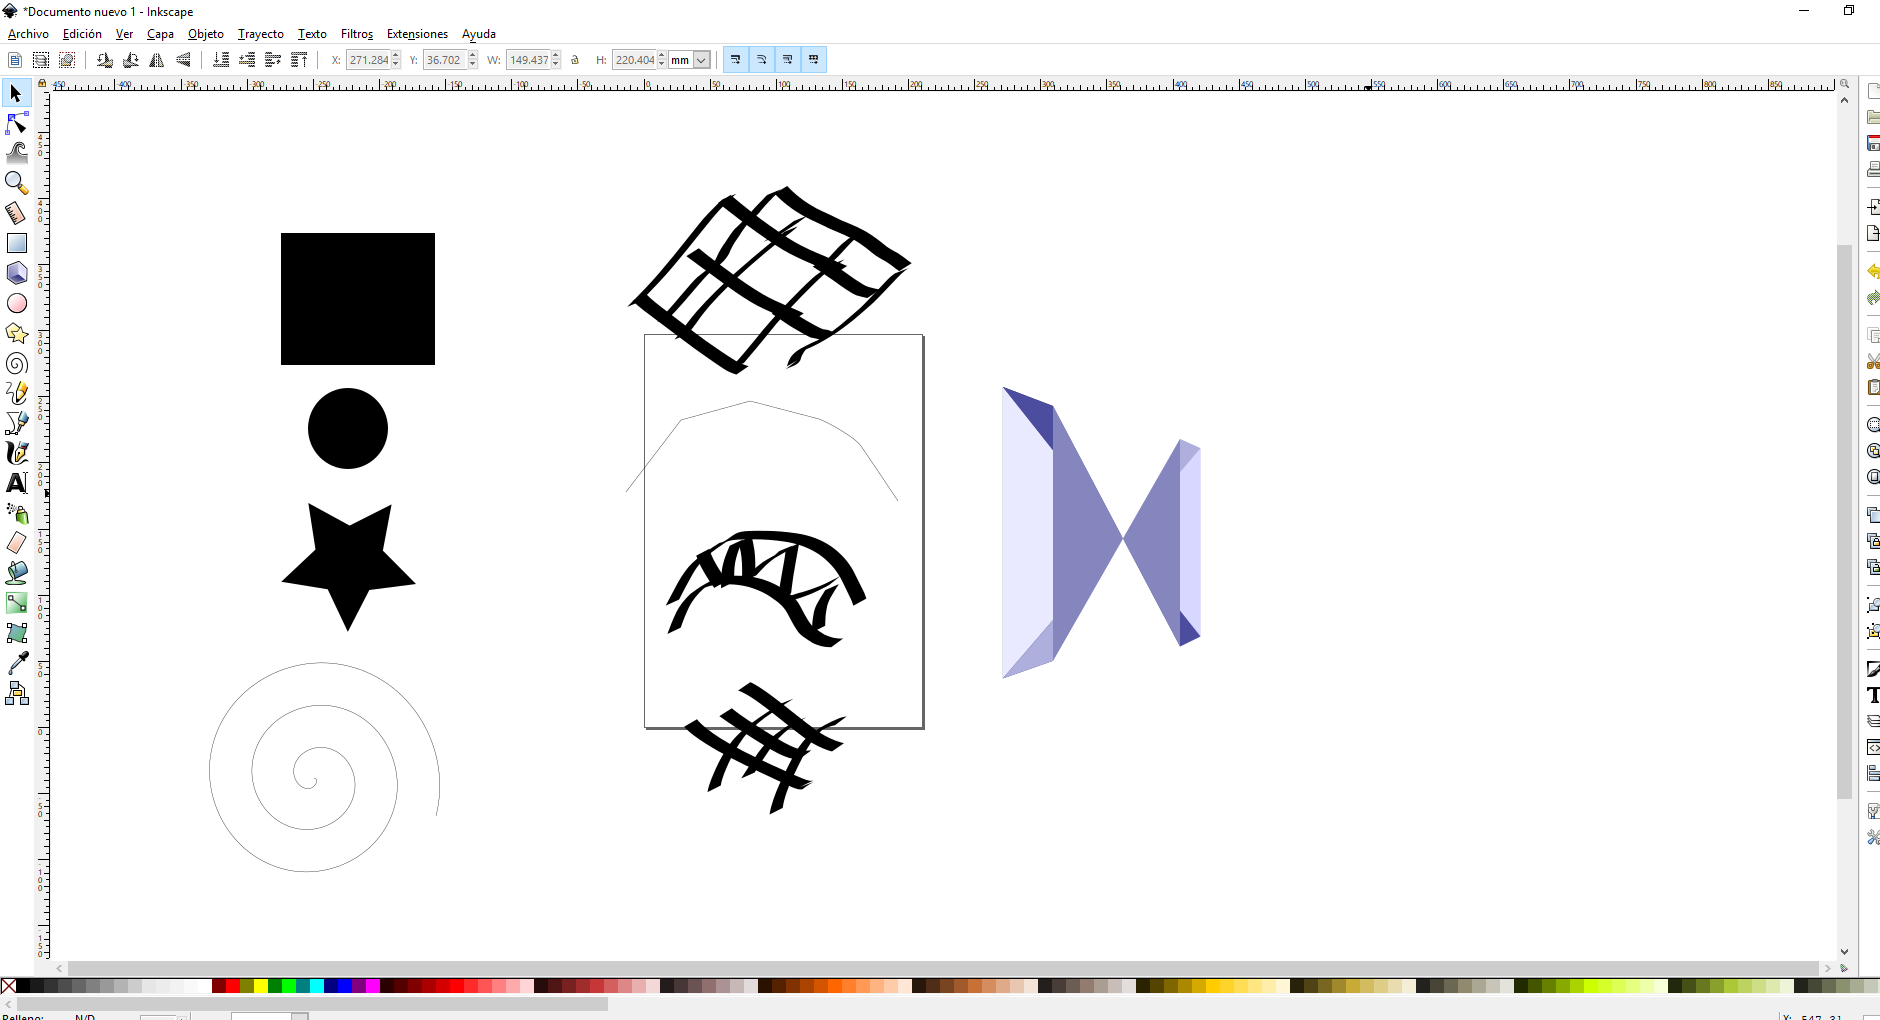 Fig.09 - Inkscape Model
 It has some options to save the file, if I want to work with the extension of inkscape we must be careful since the format is .svg and the file is observed as a default web page.
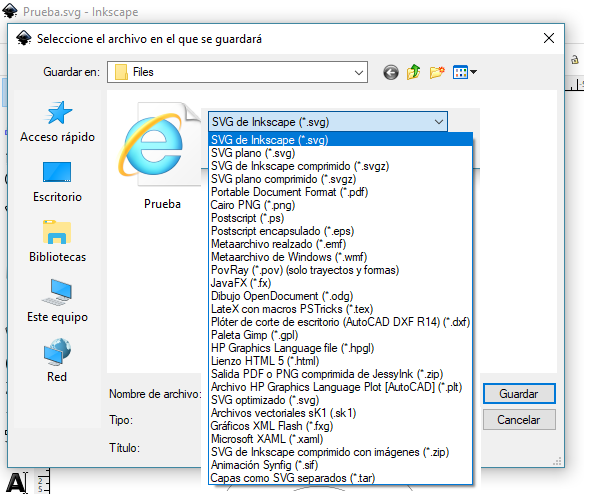 Fig.10 - Inkscape extension
 Illustrator
I will use the adobe program, since it is a vector graphics editor that works on a drawing board. For my taste the best, since it has more tools than Inkscape
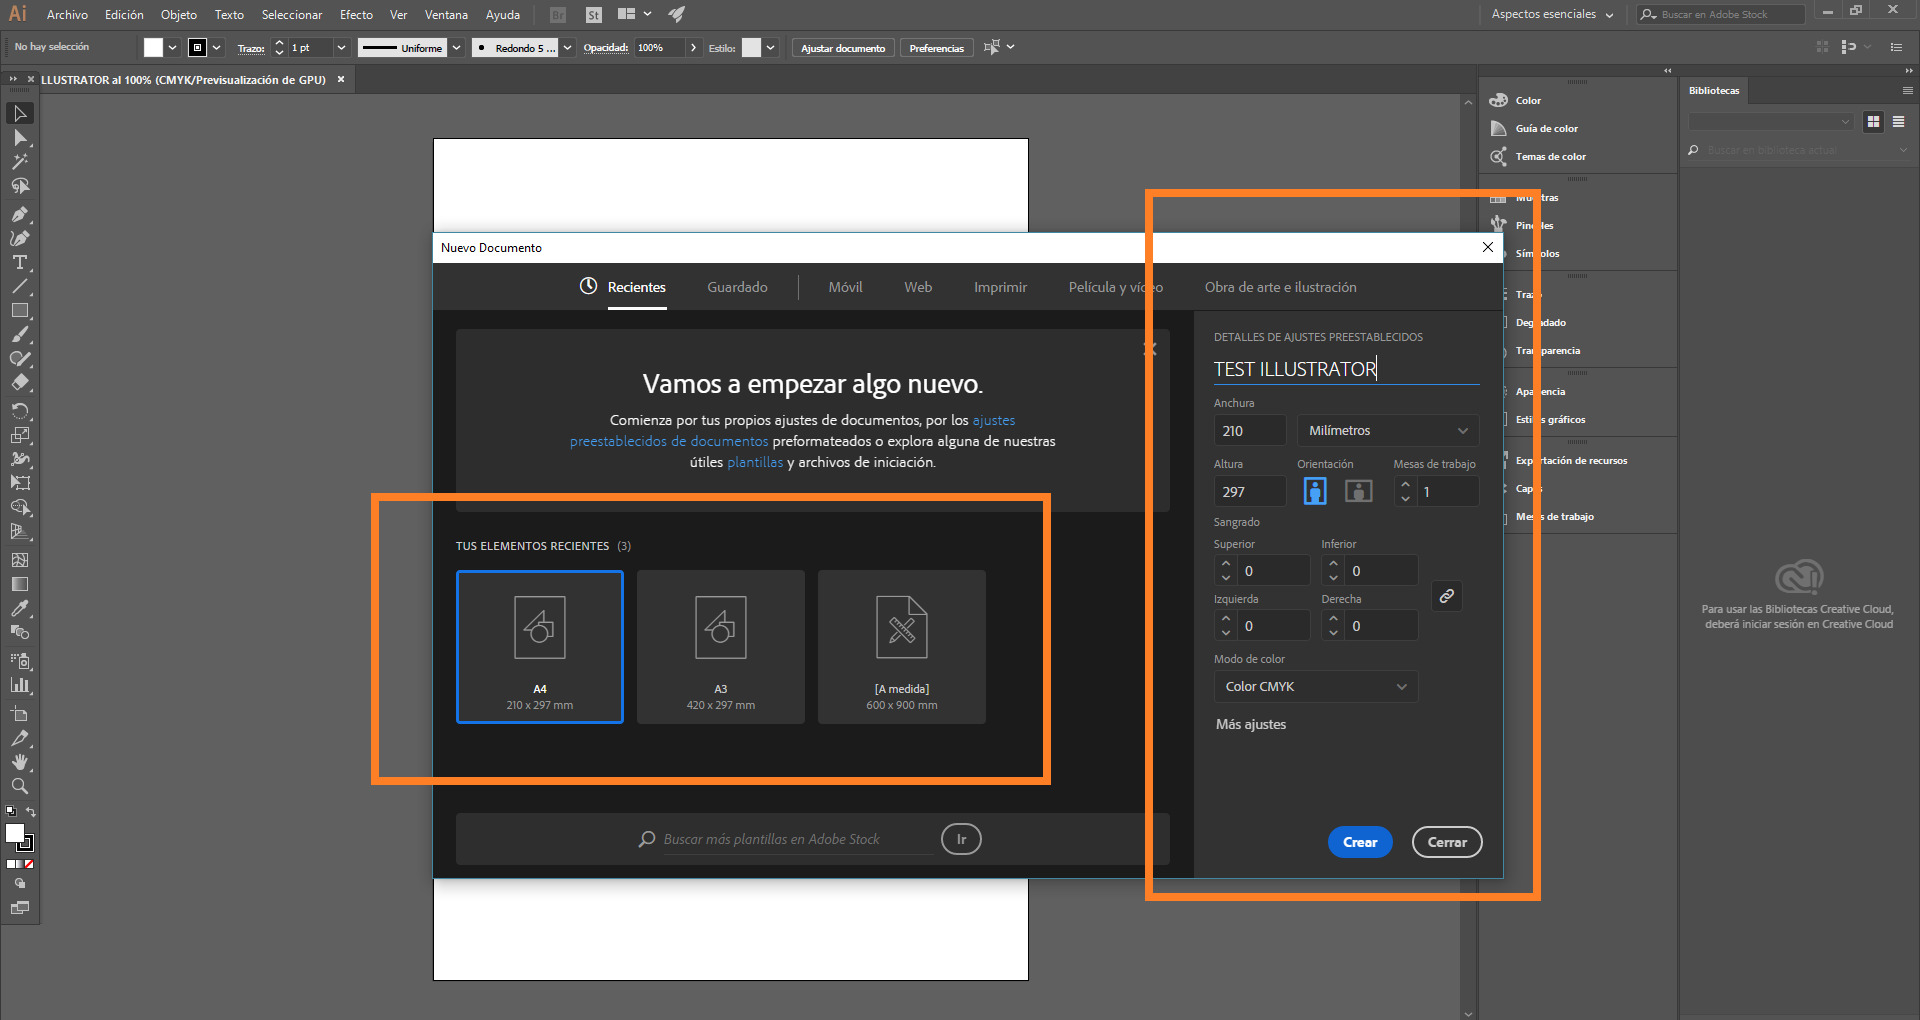 Fig.11 - Image Adjustments
 We must be careful when embedding the images, because if we move them to another computer they may not be visualized again.
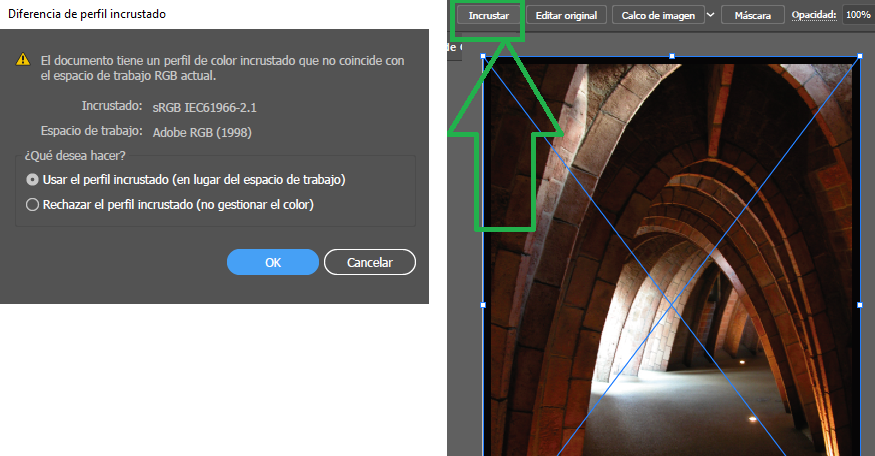 Fig.12 - Embed Image
 I learned to crop images in a circular way from the HTLM code; however, I consider that this program is very useful when creating different styles of cut out silhouettes for our presentations. Making a right click, the options window will open and the option to cut will be seen
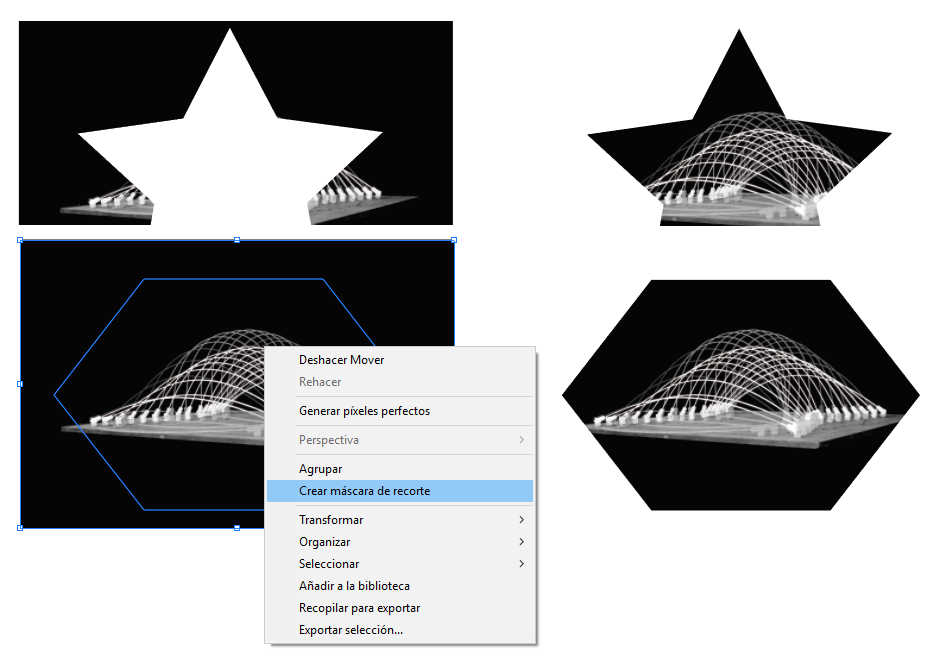 Fig.13 - Clipping mask
 The task of passing a bitmap image to vector is a complex task that needs a lot of time, and patience until we get the result we want. Nowadays, illustrator incorporates a functionality that allows us to perform this operation quickly without the need to use the pen tool in a very automated way, this tool is called "image decal". In this case we will not take a preset, we will indicate that we want to work in low quality photo.
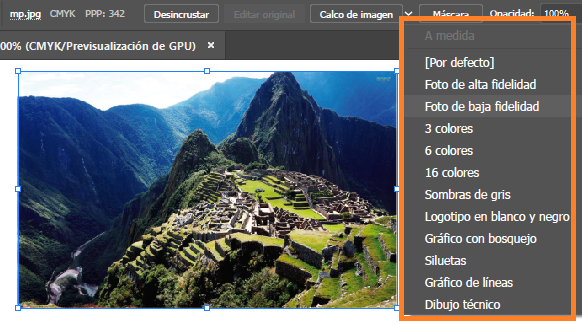 Fig.14 - Image Tracing
 Using the tool expand, as we see, the image is quite complex so it has a lot of points.
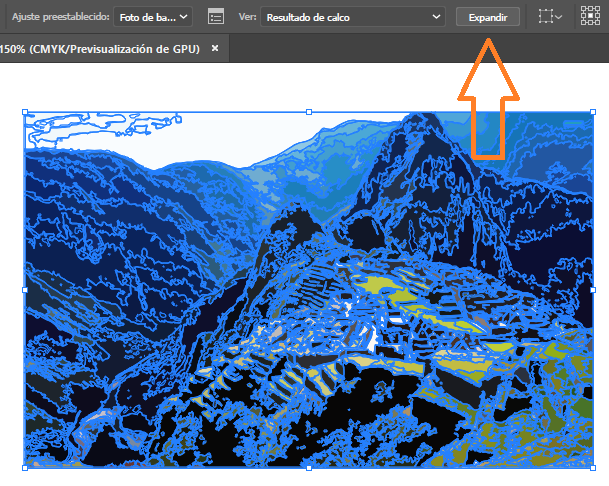 Fig.15 - Expand Tool
 We eliminate the parts that do not interest us in the image and we can work with the polygons of the different parts. We can easily change the line thickness, color.
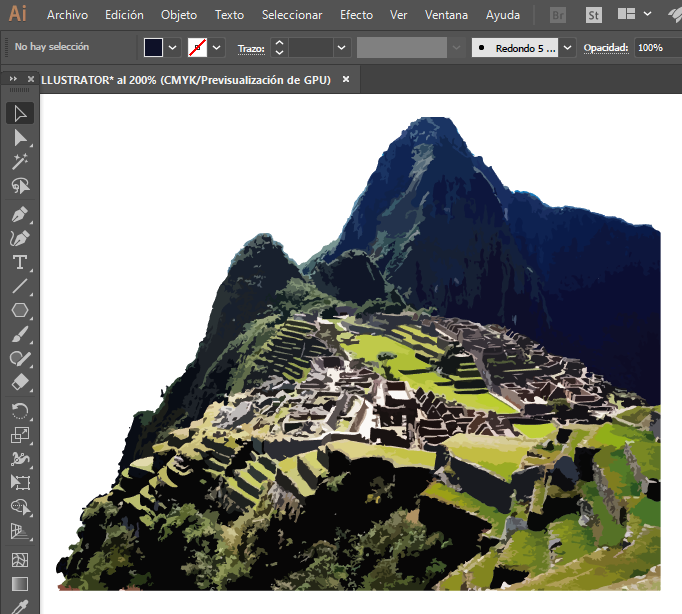 Fig.16 - Image Vector
 To save the image in different formats we will need to export the file.
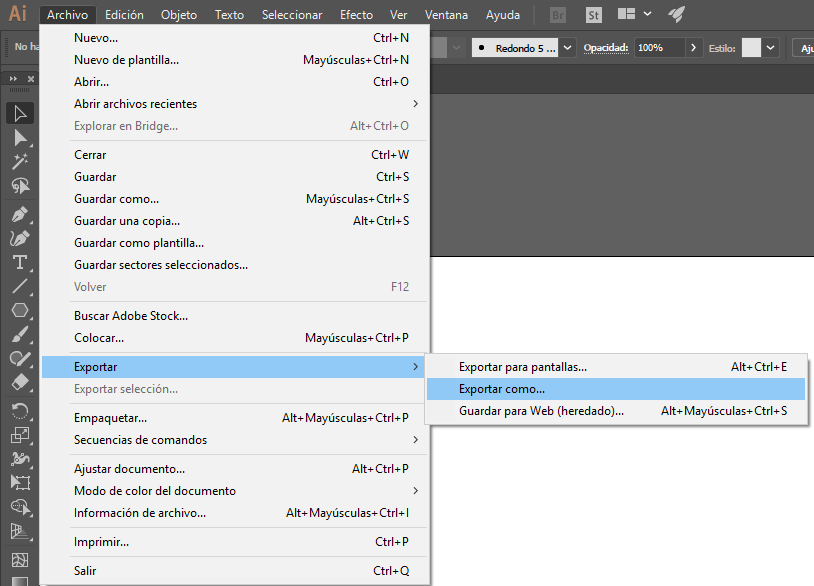 Fig.17 - Saving Adobe Illustrator Files
 However, it offers us the option to change the resolution, smoothing and background. In the learning process, when I used adobe illustrator, I found some drawbacks. In the future, if you consider working with rendered images, exhibition panels, the capacity of our computer should be considered. It is necessary to have a considered amount of GB RAM and a good video card, since you could lose your job when it is exported.
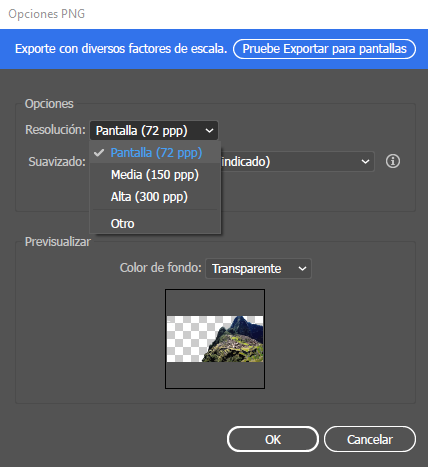 Fig.18 - Change Image Resolution
 Download Illustrator Files
2D
AutoCAD
AutoCAD is a computer-aided design software used for 2D drawing and 3D modeling. As well as the Adobe platform, Autodesk also provides licenses for university students and professors. The 2D design template works with the extension .dwg that comes from the word drawing.
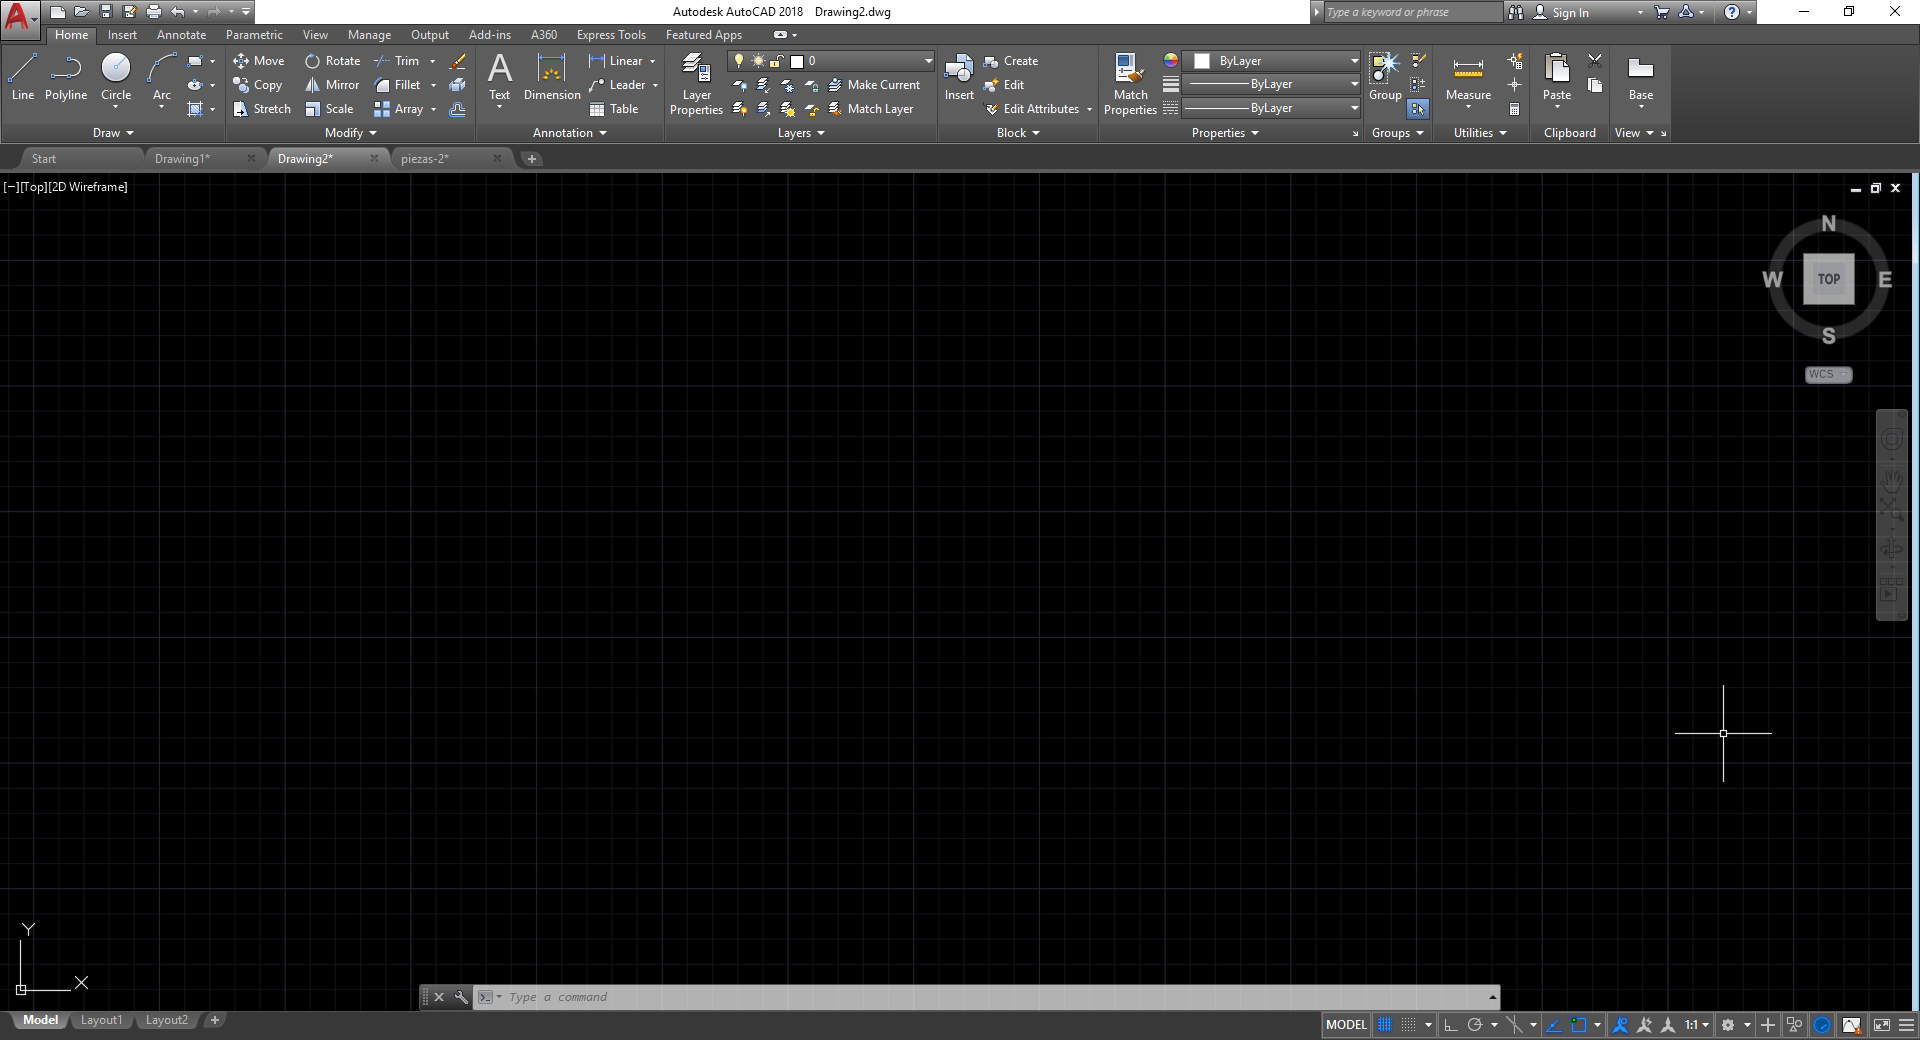 Fig.19 - AutoCAD Interface
 The work table of the program is not so complicated to use, even when you are new. The drawing tools appear by default so installing a plugin is not necessary. In the development of the fab academy, I will use this software to geometrise the design of the pavilion that I want to build. With the arch tool, project the shape of the pavilion. With the Split or trim command I managed to create openings for the intersections of the structure. With the line tool, project some axes to take into account the wheelbase.
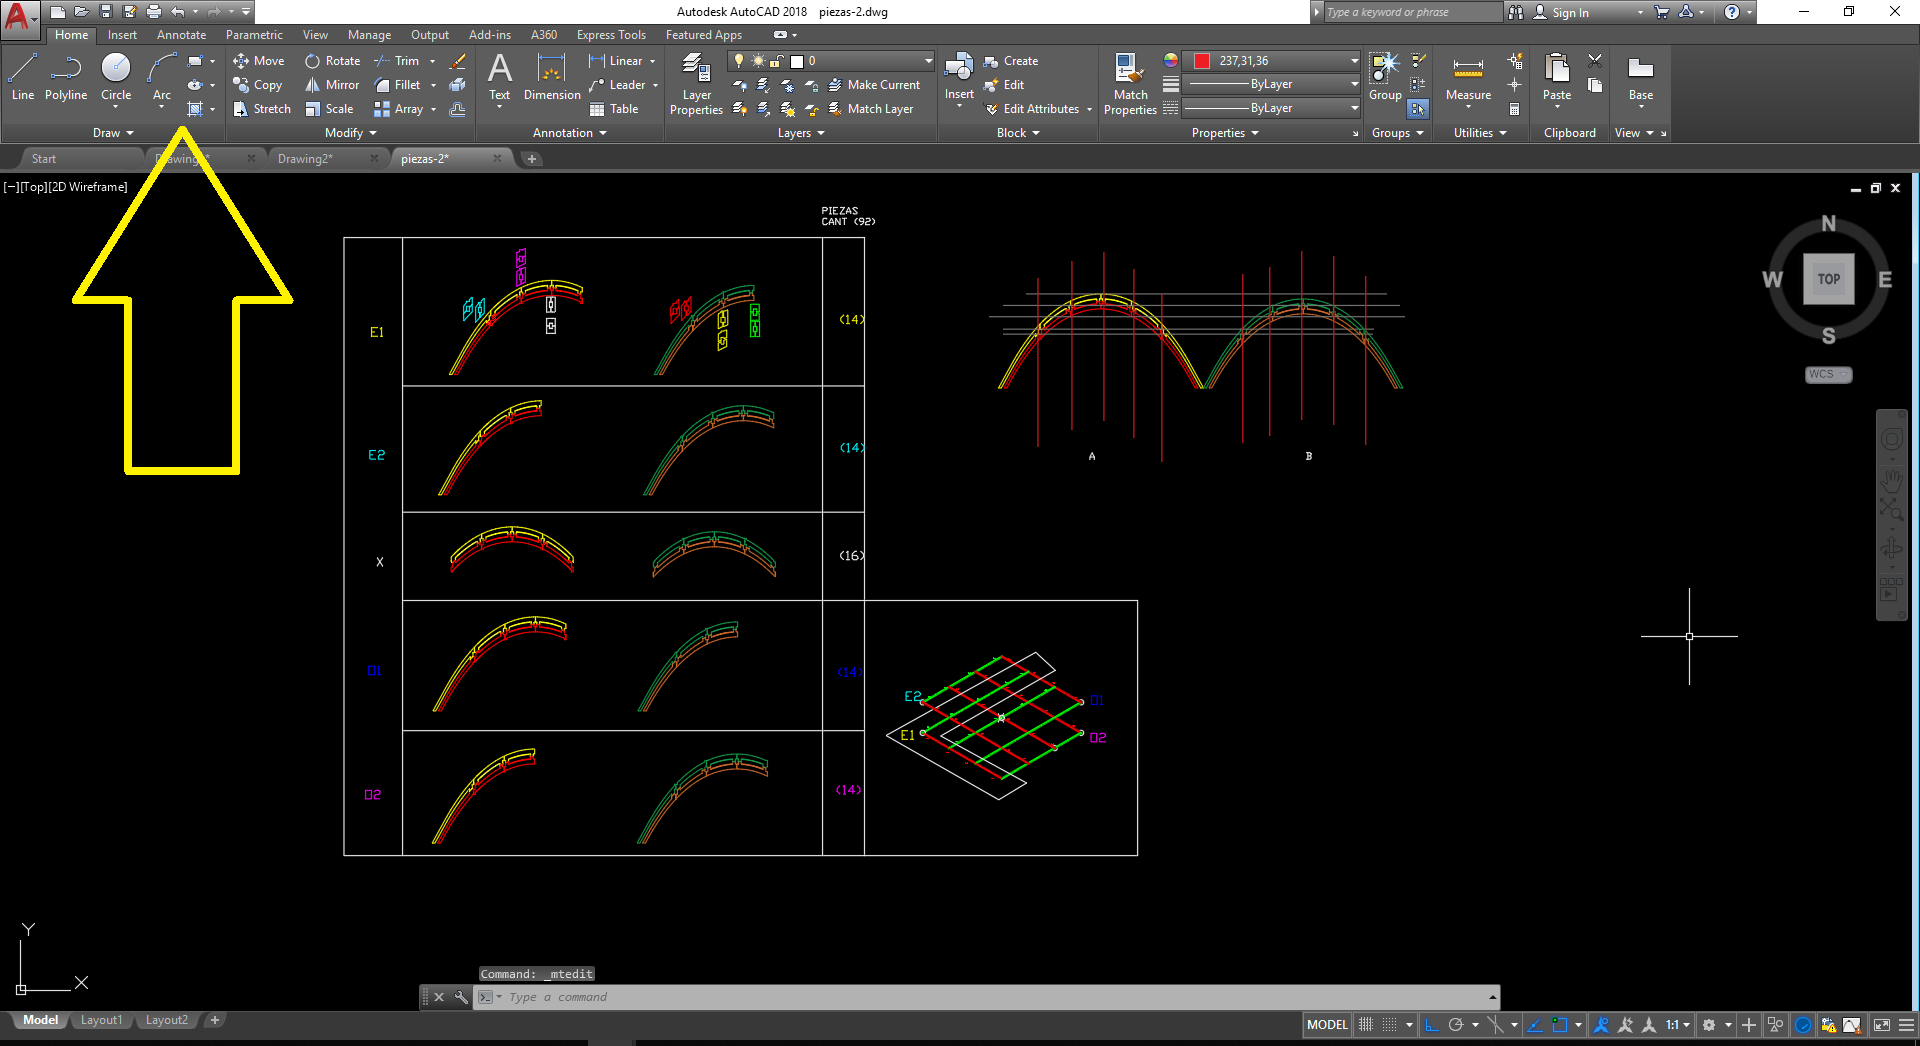 Fig.20 - Home Draw Tool
 One of the main features of autocad is to convert the files to PDF, for this we write LAYOUT and the work table will be opened.
In this we can create the presentation of a plan or work the correct scale of the project.
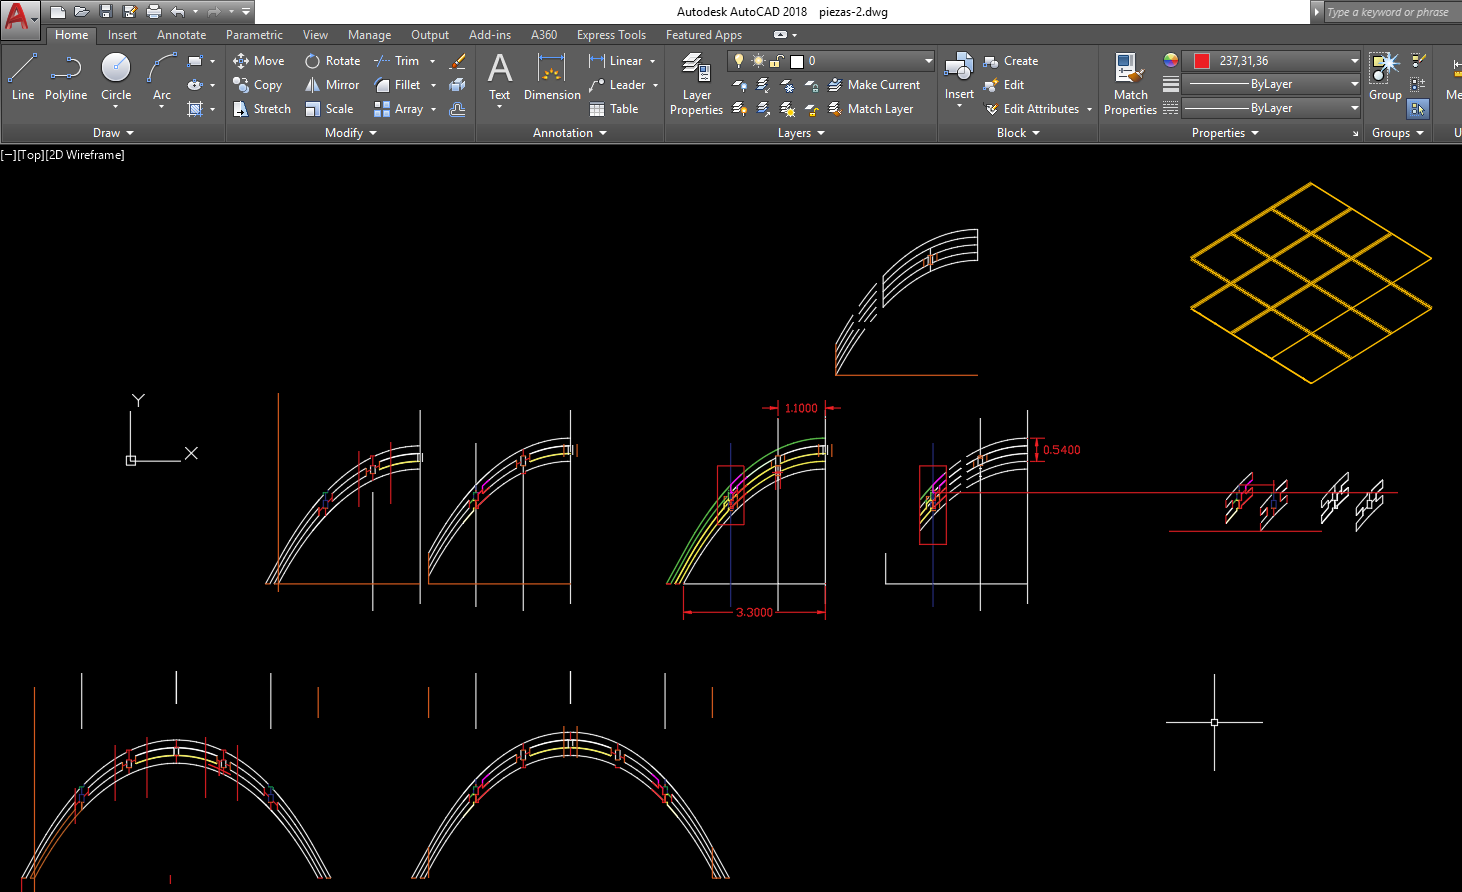 Fig.21 - Layout Tool
 To export from layout, we write the PLOT command and the following table will appear .
In this we can choose the sheet size, focus the work, change the scale and most importantly choose the line thickness in the plot style table. The other options we could leave by default and we give OK
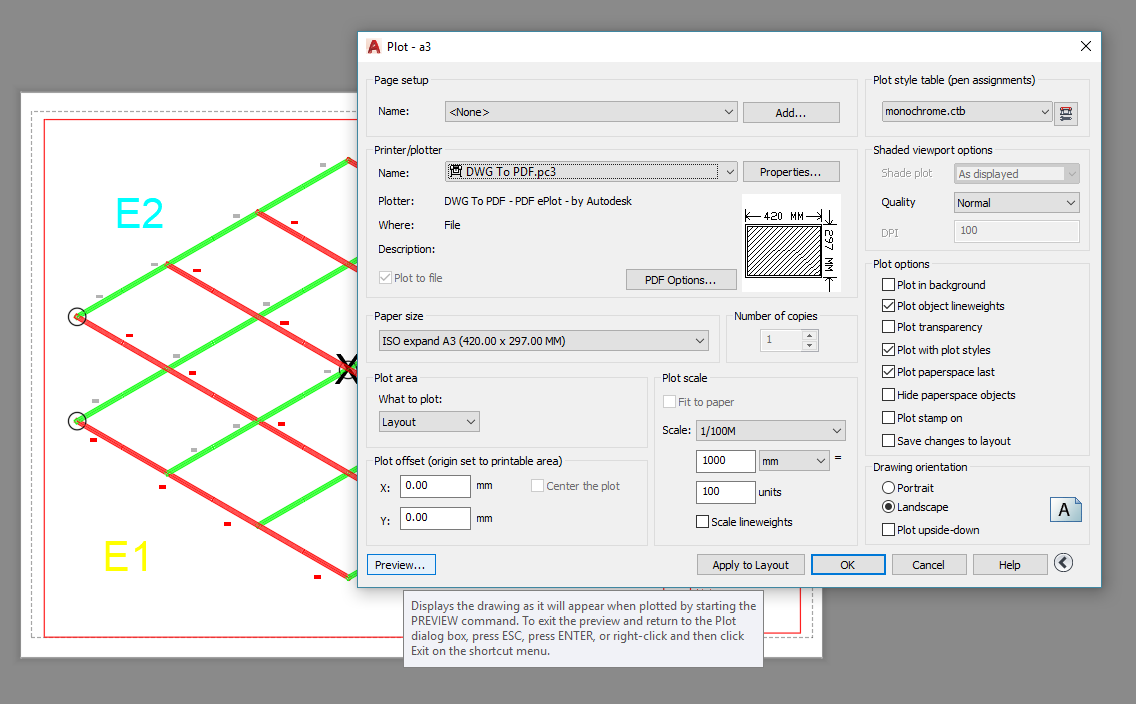 Fig.22 - Plotter/Printer
 From a PDF reader, we will be able to visualize how the work is done
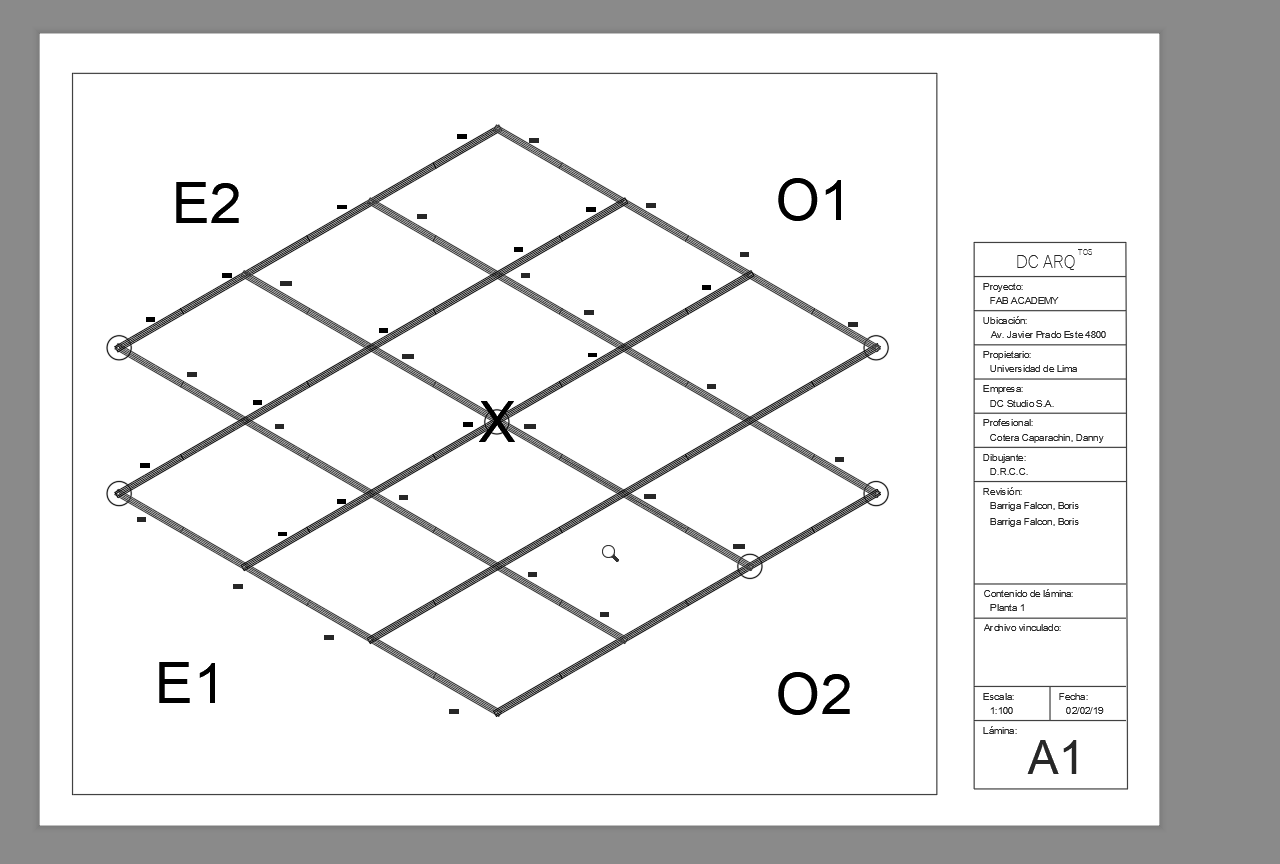 Fig.23 - Drawing PDF
 First time I work in the autoCAD 3D format, the quick way to access 3d modeling is by clicking on the corner of the orientation cube. It also controls the views of the created object. I created a sketch in lines of how the pavilions could be.
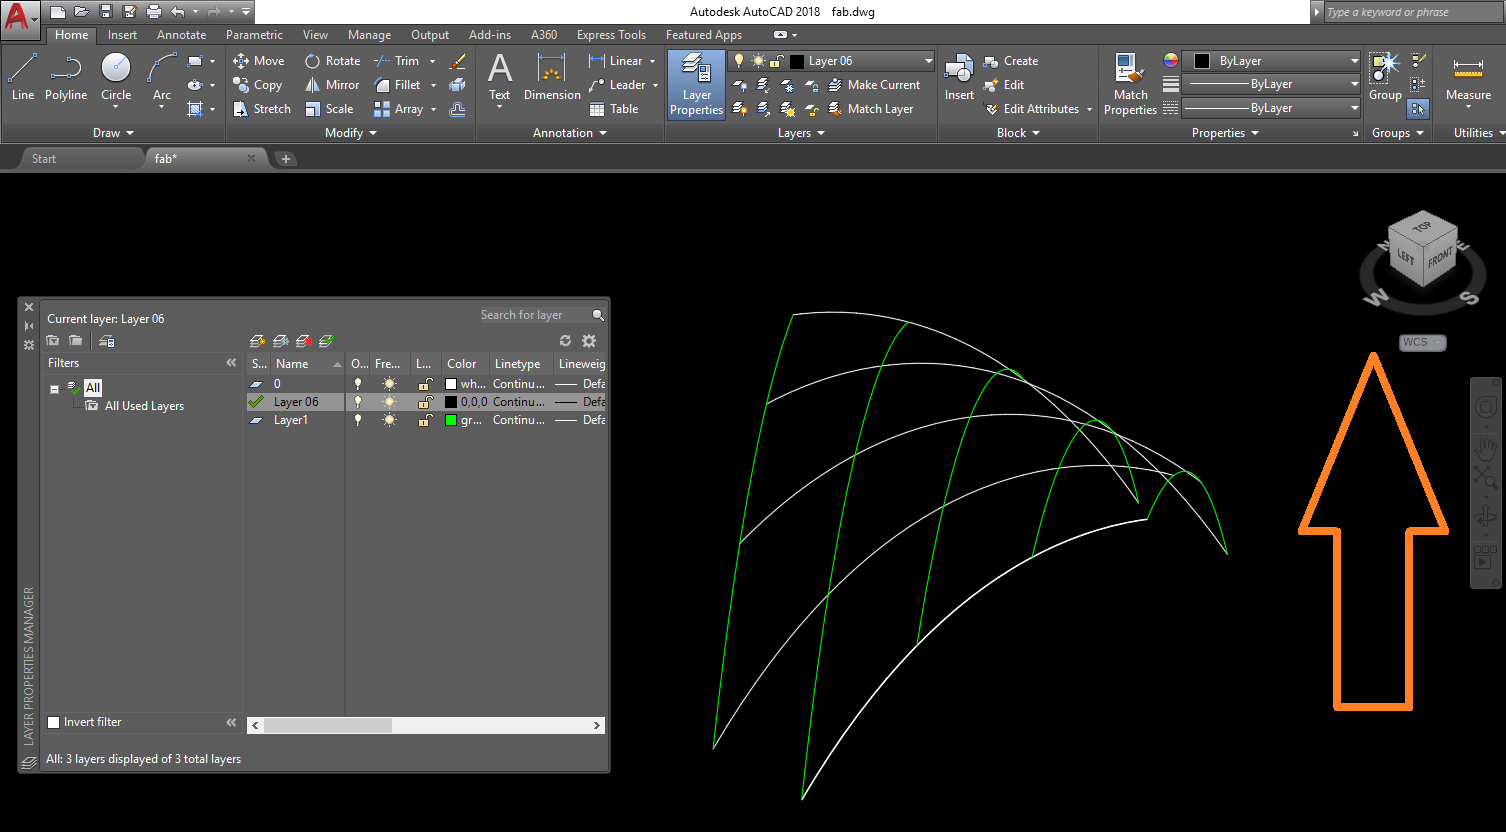 Fig.24 - 3D AutoCAD
 On the 2D platform I managed to draw the design, but having no control of the views, I do not have height reference and I also feel that I am going to delay in designing the extrusion of the pieces in 3D.
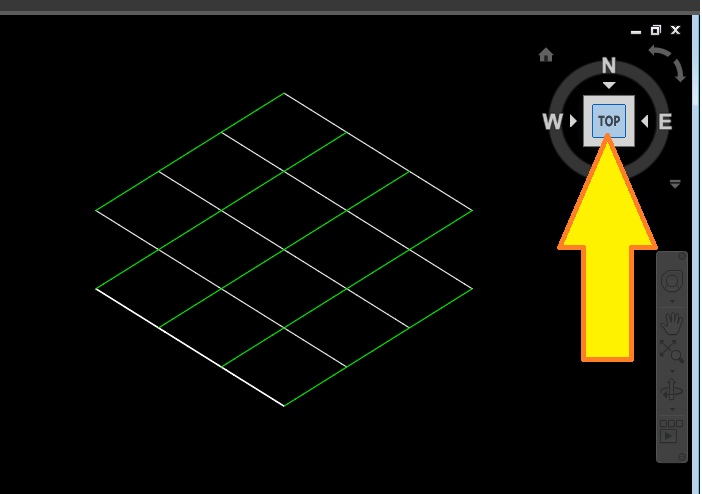 Fig.25 - ViewCube
 Download AutoCAD Files (.dxf)
3D
SketchUp Pro
SketchUp is a program of graphic design and modeling in three dimensions based on faces.
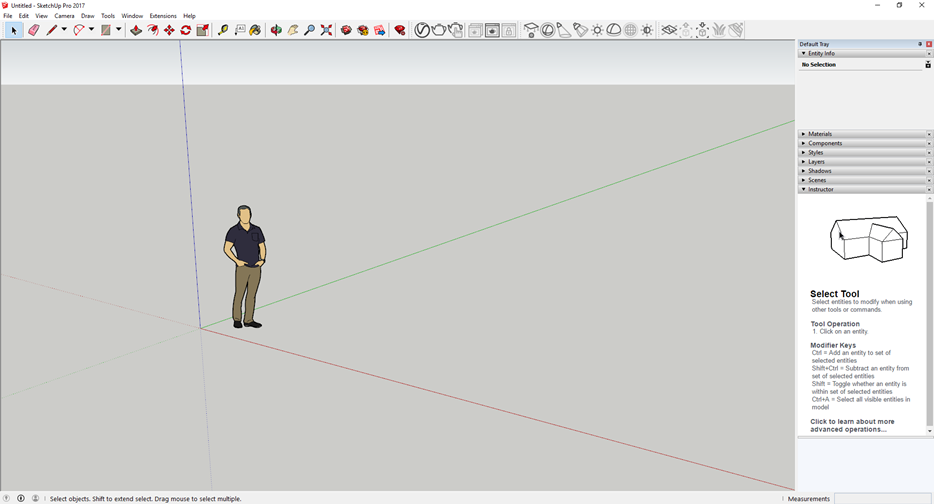 Fig.26 - SkecthUp Interface
 The first difficulty in working on sketchup was that I could not create a complex geometry such as the catenary. I will still work with arcs, however, I decided to finish the geometry of the pavilion in the AutoCAD program, and then import them and work on a 3D design
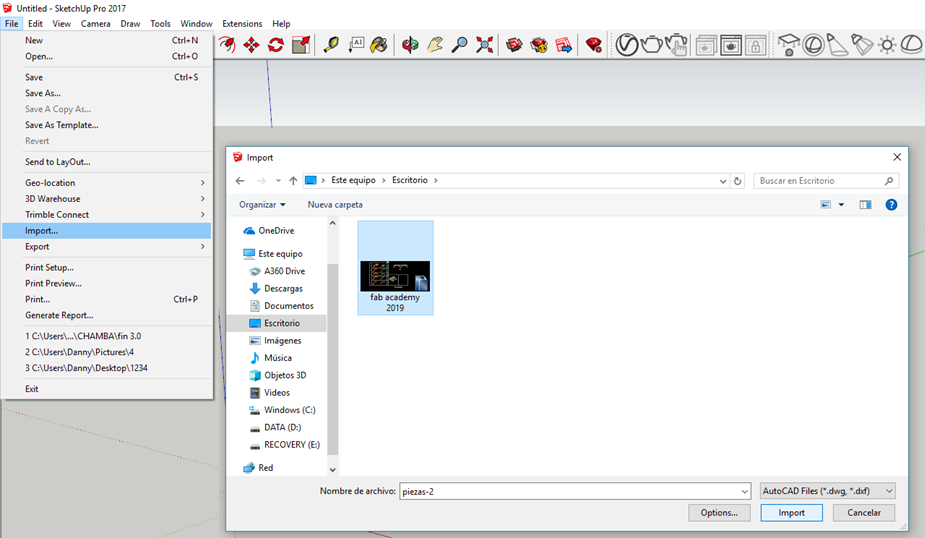 Fig.27 - Import Files
 The .dwg extension was imported into the sketchup program and looks like this.To work on them as in any program, we must first exploit them
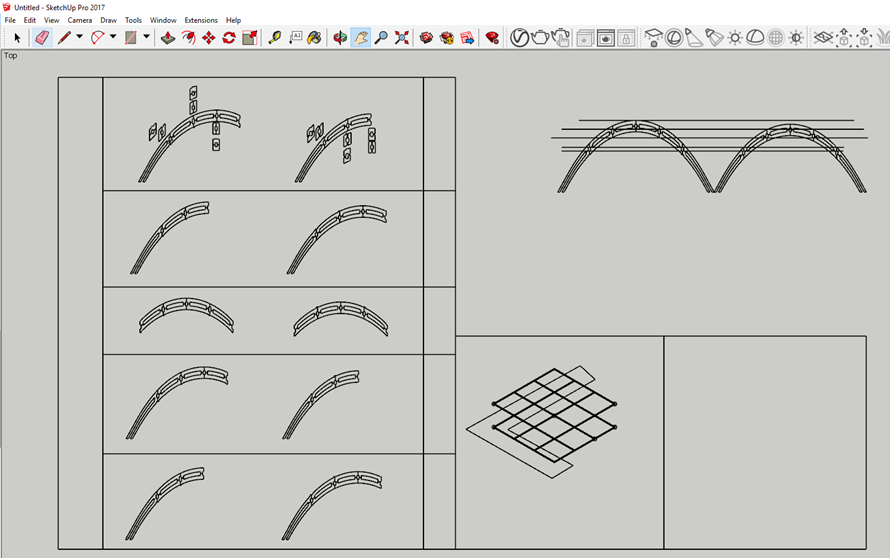 Fig.28 - Work Table
 To bring a geometry from 2D to 3D, we will use the pull tool. By not having a work table with views, extrusion governs the orientation of the face
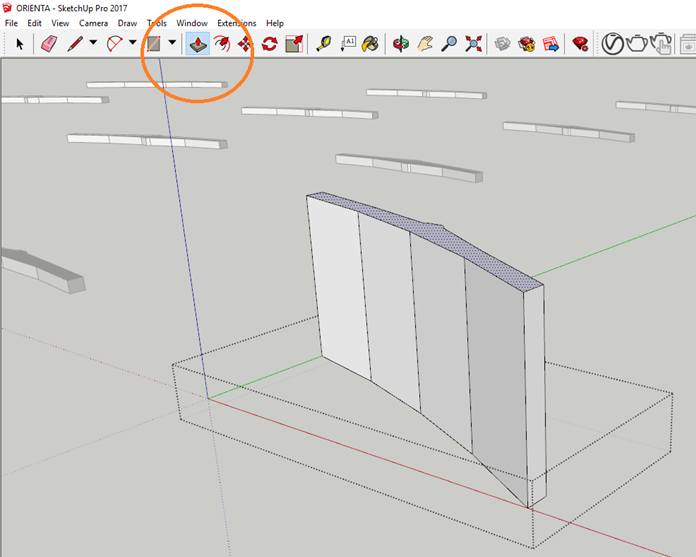 Fig.29 - Push Pull Tool
 It has a frame in which you can control the color, texture and opacity of the created objects.
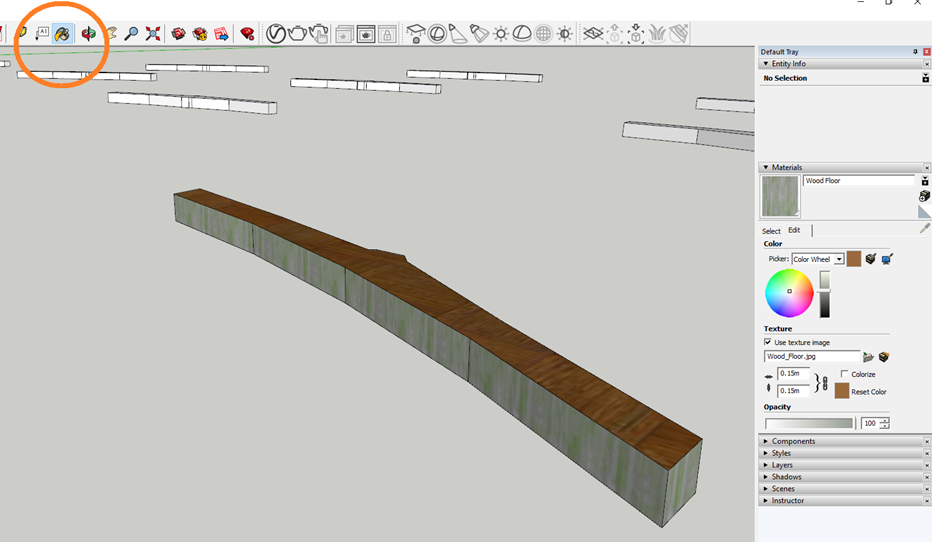 Fig.30 - Paint Tool
 With the tool rotate and move, as well as a puzzle, it is possible to assemble the proposed structure. However, the Sketch Up Pro program has a deficiency, the pieces of the structure, having a rotation, do not present an exact location.
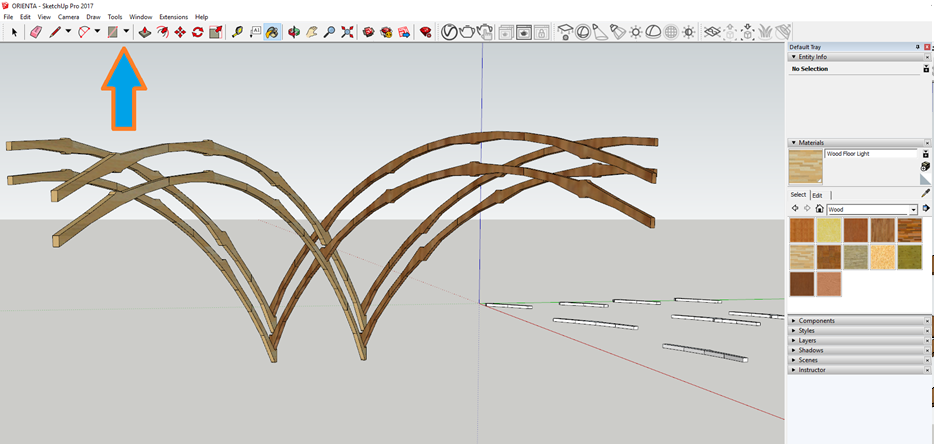 Fig.31 - Viewport
 Download SketchUp Files
Rhinoceros
Rhinoceros 3D is a software tool for three-dimensional modeling based on NURBS. You need a license that can be obtained on the rhino3D website.
I consider it to be user-friendly software. When executing the program the work table presents a bar of graphics for execution of geometries (1), a window of history of commands (2), a bar that will show the pluggins installed (3), a window of tools that allows us to control the part of post production (4), viewports for a better control of measures in the design (5) and a control in the 2d object snap (6)
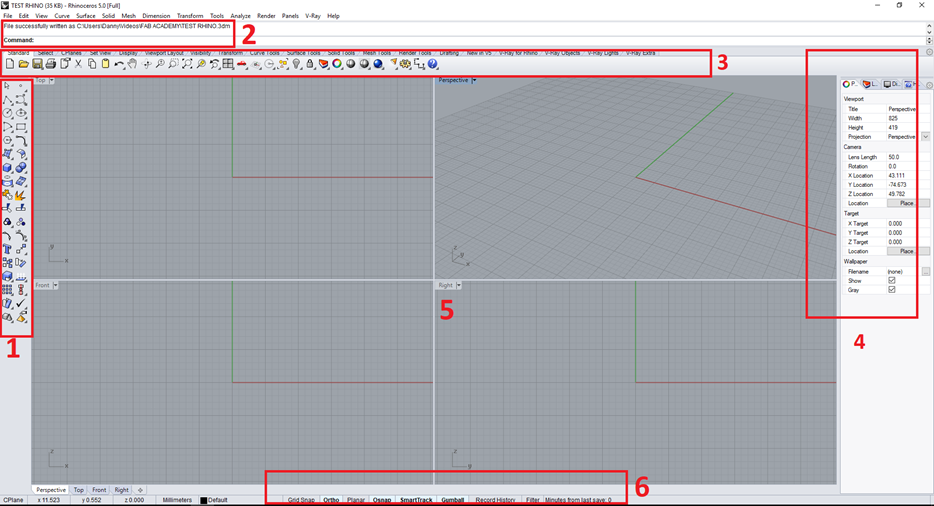 Fig.32 - Rhinoceros Interface
 The software has a large number of extensions available when exporting
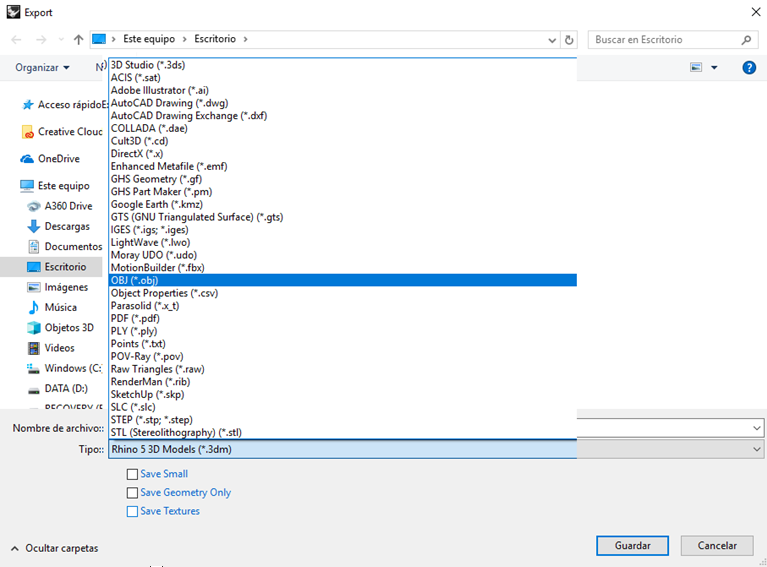 Fig.33 - Import Files
 I will show how a structure can be generated from an element that exists as an ellipsoid. Generate lines in two directions (1), with the geometry execution tool create an ellipsoid and place it on the lines (2), use the "project" command to generate lines that adapt to the geometry of the ellipsoid (3 ,4).
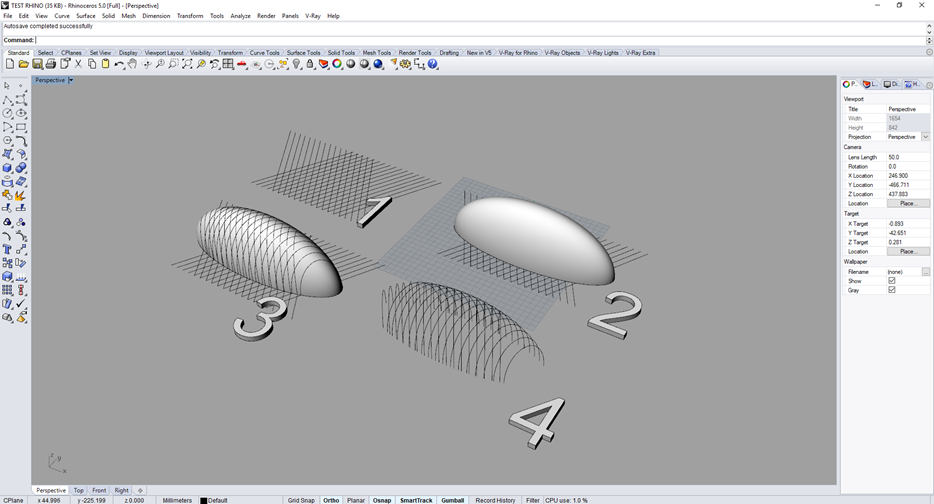 Fig.34 - Rhinoceros Perspective Viewport
 However, rhinoceros3d offers parametric modeling with grasshopper, a pluggin that is installed from the web page grasshopper3d. When executing grasshopper from the command history a window will appear (Fig. 30)
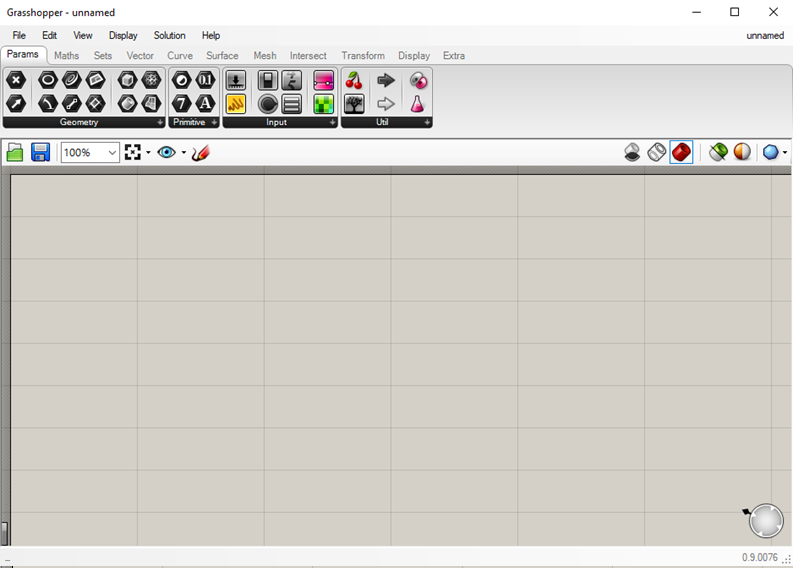 Fig.35 - Grasshopper Interface
 In the window I write the CRV command and create a domain that controls the curves (5), to have control of all the lines I select the option multiple curves.
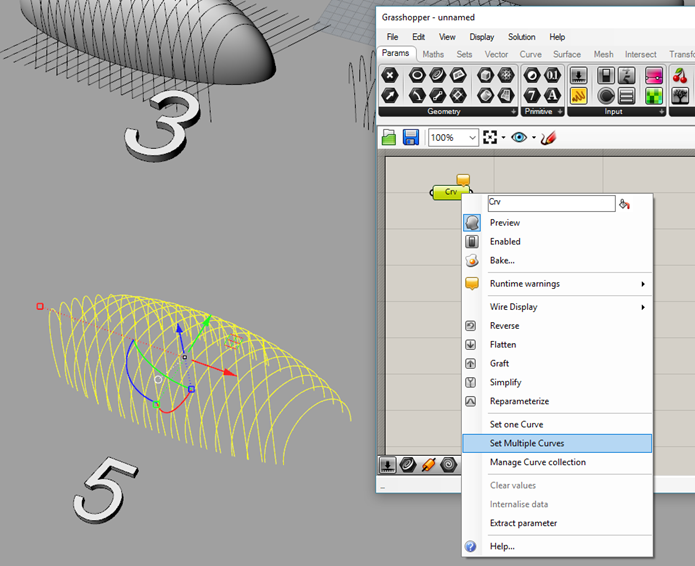 Fig.36 - Set Multiple Curves
 I write the command "pipe" in the window to give thickness to the lines, this domain has inputs such as curve, radius and closure. By joining the series to the domain we can generate the solid to create and on the screen we can see a green color in our design. To have it in the work table (6) we need to right click on "bake".
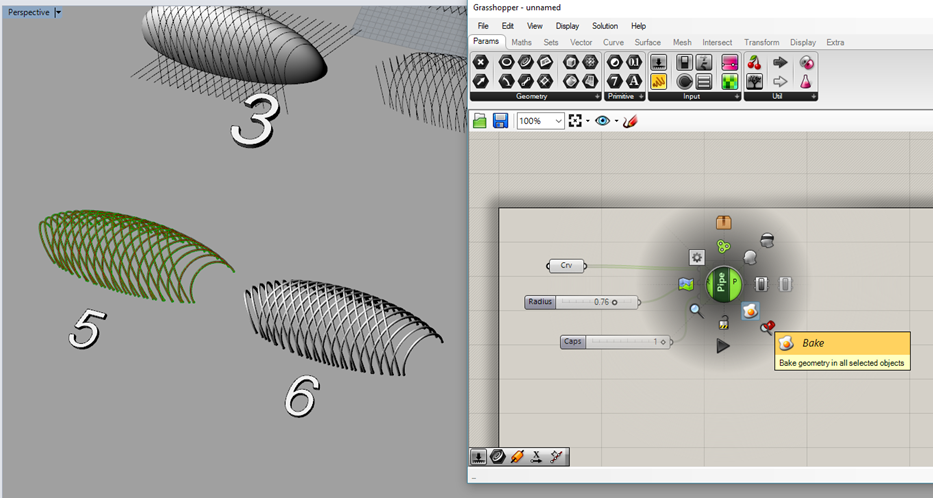 Fig.37 - Bake Tool
 If we forget to save, Grasshopper has the default option to notify us when closing the program.
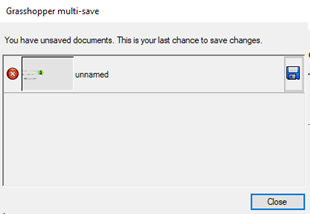 Fig.38 - Grasshopper Multi-save
 Download Rhinoceros Files
Download Grasshopper Files
Render
It is a term used in computation to refer to the process of generating a realistic photo image from a 3D model. To show some photos of the final project, I will try to render the final project with V-Ray, a rendering engine used as an extension for some computational graphic applications. V-Ray can be found on the website chaosgroup, with a trial license.
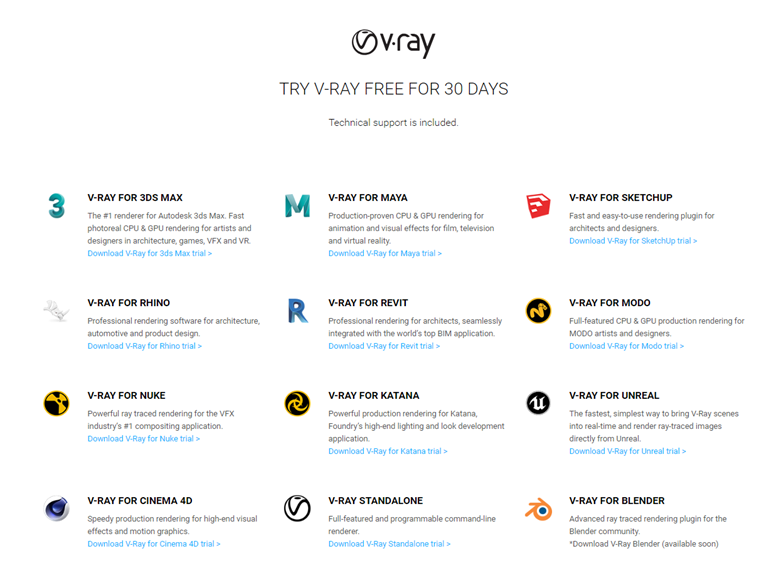 Fig.39 - V-Ray Website
 V-Ray SketchUp
To access the v-ray pluggin, just click on the V symbol, which is located in the toolbar. The v-ray asset editor allows us to configure the dimensions and background, the advantage is that it is already configured by default. We just need to click on the lamp to render the project.
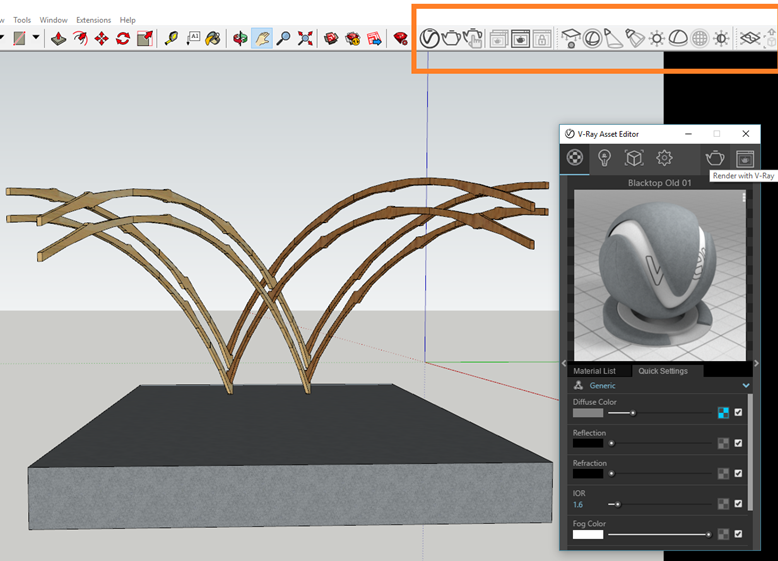 Fig.40 - V-Ray SketchUp Settings
 A preview of the image to be rendered will open and when you finish the process, you will be ready to save it.
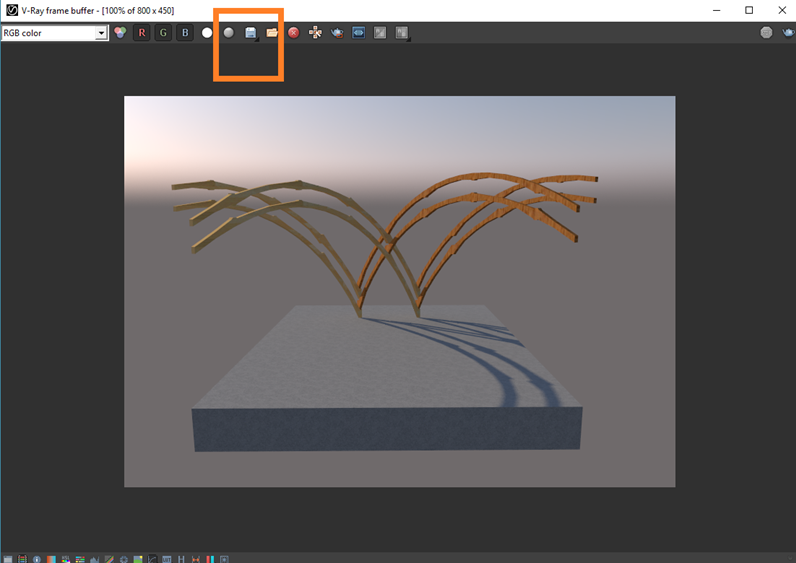 Fig.41 - V-Ray SketchUp Render
 Download SketchUp Vray Files
V-Ray Rhinoceros
I decided to populate the rhinoceros v-ray and note that the platform is similar. Placing material to the design is a bit complicated since in sketchup you have materials ready to use. In this we must import textures from the material box.
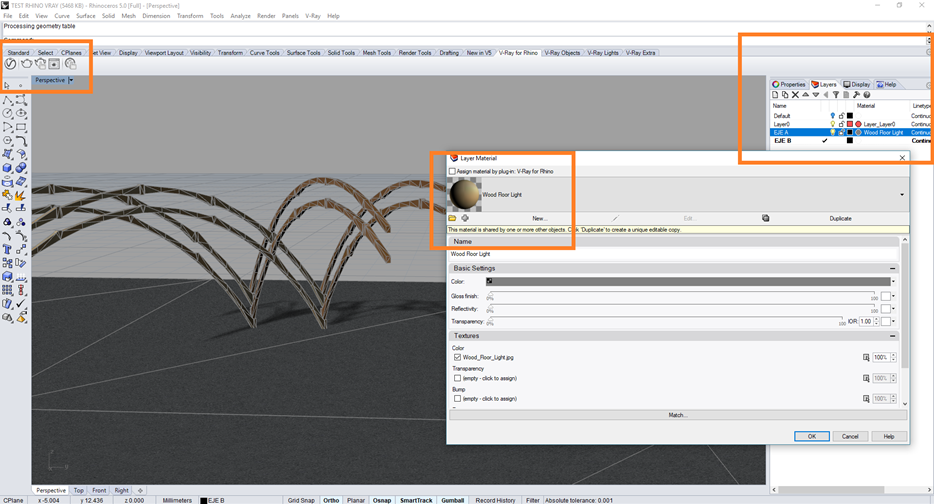 Fig.42 - V-Ray Rhinoceros Settings
 I use the same sketchup v-ray setup on the rhinoceros v-ray. The result is evident, this presents a more realistic quality.
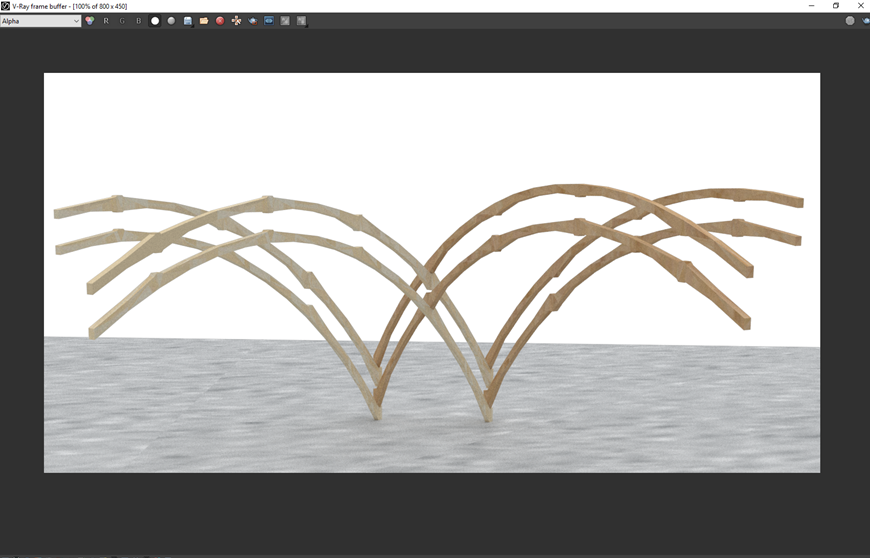 Fig.43 - V-Ray Rhinoceros Render