Aim:
To understand the methods of developing graphical interface
Task 1:
To find the what are interfaces and Their need.
The applications that help in guiding a particular device and help you navigate through it's multiple functions are termed as Interfacing applications,
These are usaually a set of blocks that work according to the conditions specified for the action of each...
For example:-
As seen above the blocks define the action of the particular switch as, when pressed, do___ if not do ____
The reasons why we need application interfaces are seen here:-
- Specifies how software components should interact
- Used when programming graphical user interface (GUI) components
- Makes it easier to develop a program by providing all the building blocks.
- Etc..
Hence considering the utility of mine and the need of the assignment I decided to work through a few apps, and programming languages.
Task 2:
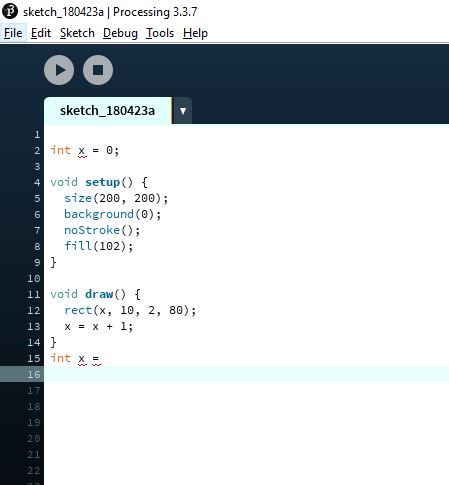
Developing an Interface for Iput devices..
For this task I wanted to try and see how do we read the data from the serial port, for which I had planned to work with the board and the Ultrasonic sensor which was developed in the Input Devicesweek.
For this task I decided to go with the processing language, for me this language was a complete new parameter to learn hence what I had planned was simple..
My plan(expected):-
The concept was simple to read the data from the serial port and plot a graph that would varry with the change in data(irrespective of the measurments.)
Sub task:- To understand processing
The basic task was to understand the basics of processing language and it's structure, in order to work through it..
For this I had found a link that guided with all the commands for processing...
Considering all that I needed here listed are my conclusions with understanding the language and the codes that I needed
- The basic it need two sketches
1.To be burnt on the controller board for initiating the communication
2.To be made in the sketch pad of processing that would read the inputs from the serial port..
- The syntax that I found about the processing was quite similar to that of the Arduino Ide
1. The Arduino IDE has a basic structure of "void setup and void loop"
2.Where as the processig has a basic structure of "void setup and void draw"
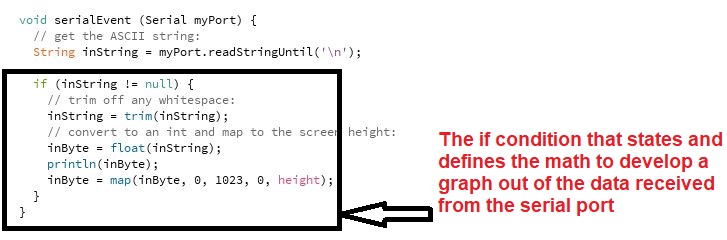
- The image here guide you through the functions of the basic available strata
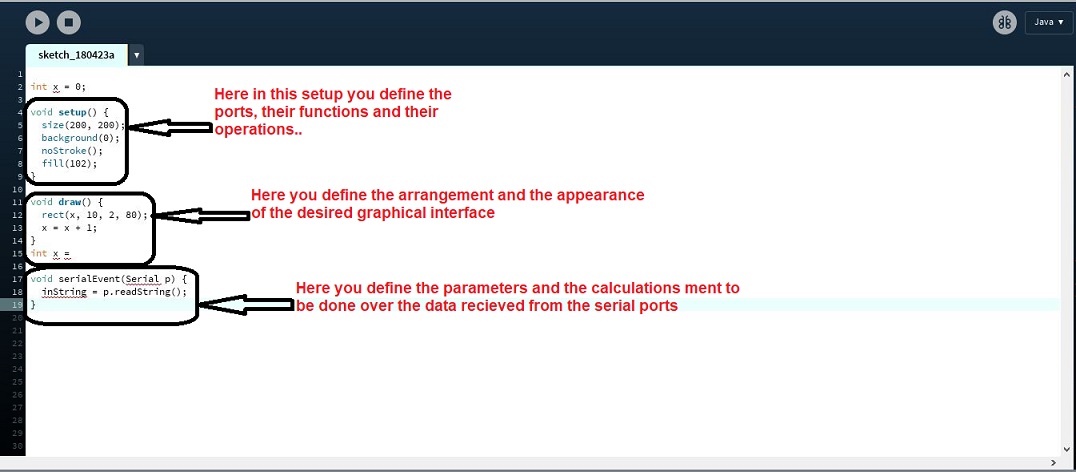
- After this there was a set of commands that I had to work with inorder to get hands over the application that I needed, which I prefered over learning the entire language ..
1. Serial communication commands, these commands are used to directly communicate with the data comming through the serial port.
2.The basic functions of if and else to add conditions
3.And the conditions sepcified in the panel of void draw used to draw the graph, basically the GUI
Sub task:- To write a program to read the serial communication(Processing)
For this I had a plan in mind to note down a progaram that would be universal for each and every input fed through the serial port (in terms of only numbers), and would generate a graph like format (to display the change and not the measurements)
..
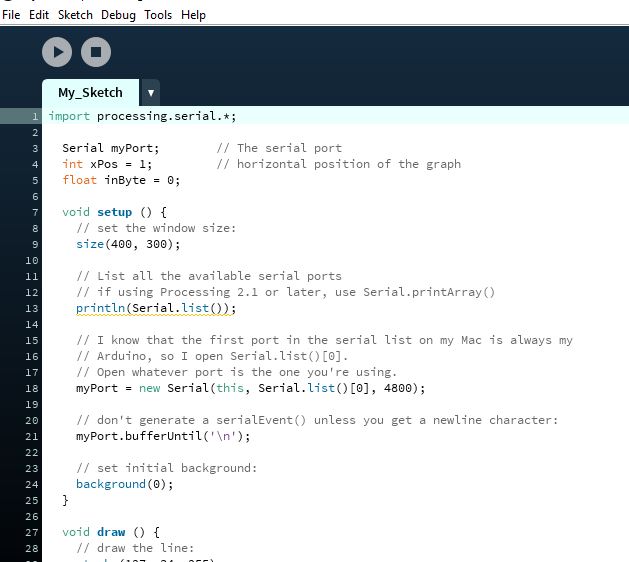
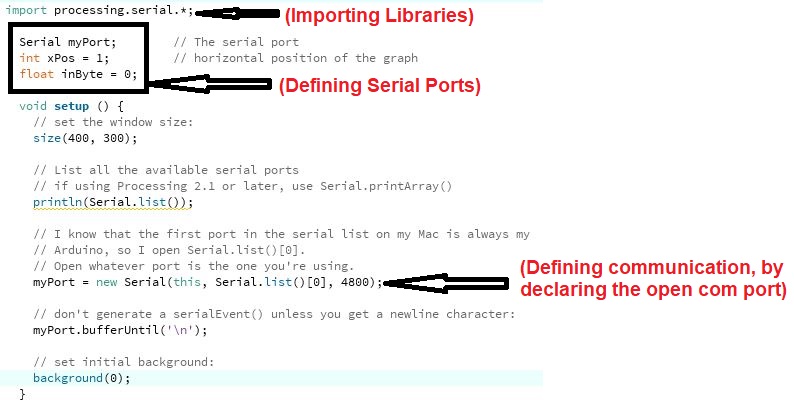
For this intially I tired on working with the Serial Communication side for which I took referances from the program mentioned Here.
And made the first draft of the serial communication as seen here..
The next step was to design how would the graph be generated and what function would show what..
Here this condition of if and else helps in development of the incremental graph that is governed by the input in the serial port, this was a code I tried to build using this referance code
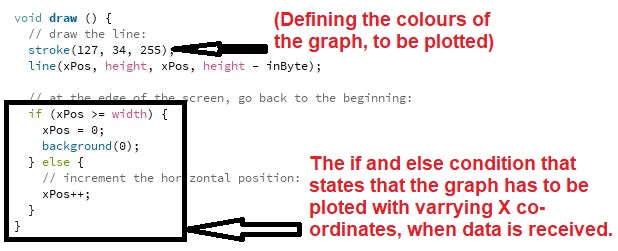
Where the backgroud tag, defines the colour...
The next part was to define the serial event, i.e the process ment to be carried out on the data string found and guide it to the graph
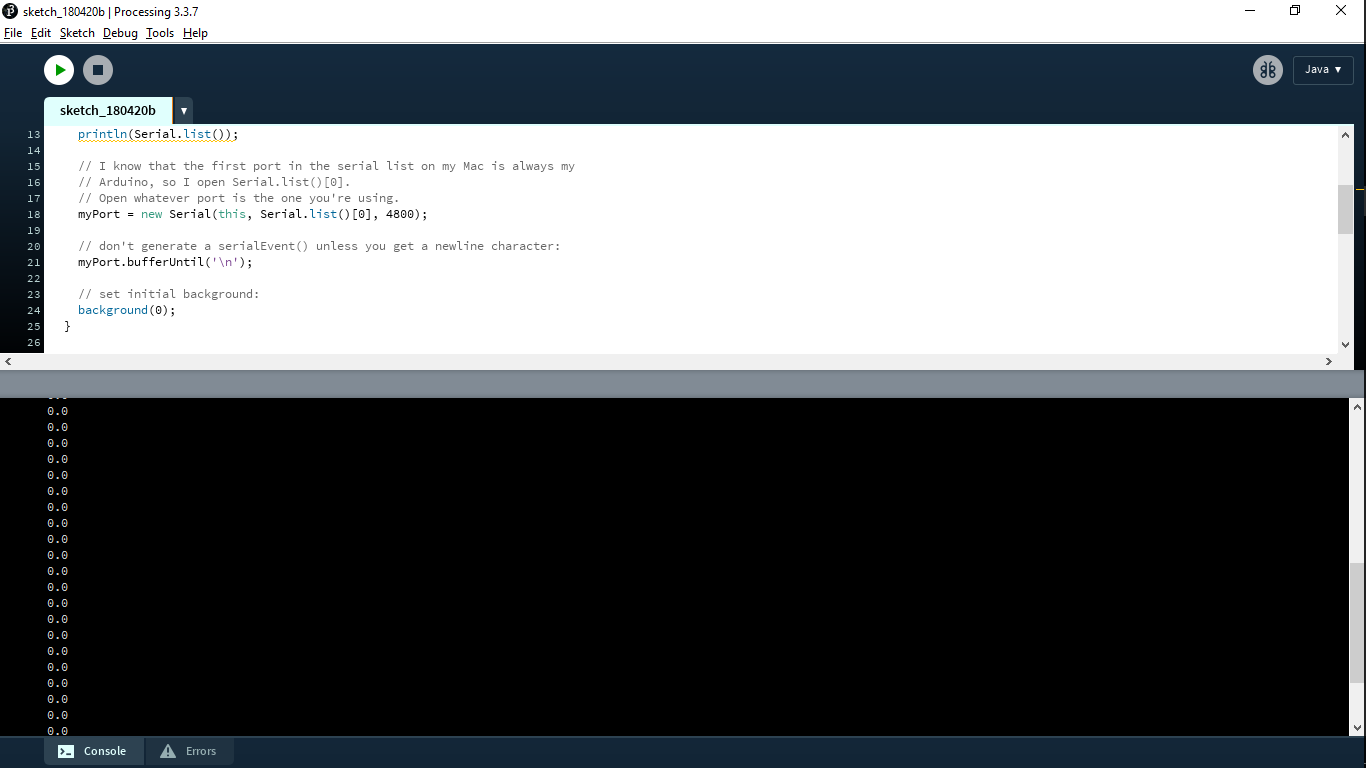
Hence following seen is my code to read and plot the input, in the processing language,
And the next steo left was to write and burn a code on the board to communicate with the serial port..
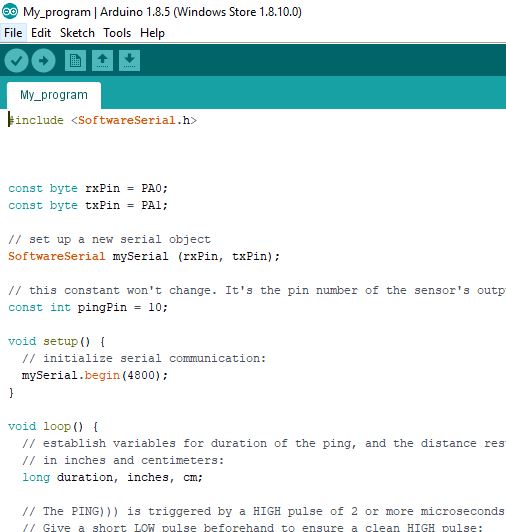
Sub task:- To write a program to read the serial communication(Arduino)
In this entire process the function of the sketch on arduino was to just communicate the data to the serial ports, hence I actually didn't edit much of my sketch that I had in the input week(the ping program)
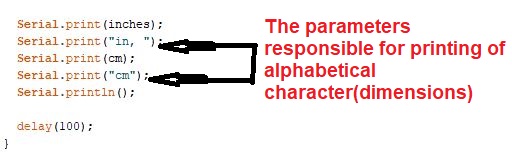
The only change I made here was to only print the data in inches, to be printed only with numeric characters and no dimensions.
Hence this was the sketch I had got..
This I had successfully burnt over the arduino....
Problems faced
For this code there were not so hard efficient problems that made me sratch my head rather they were simple corrections in the code, made according to the need, as listed here...
- The first thing faced was the issue was regarding getting a "NaN" error, that meant the data recieved was not a number, this was because the inital output of my arduino sketch was like this..
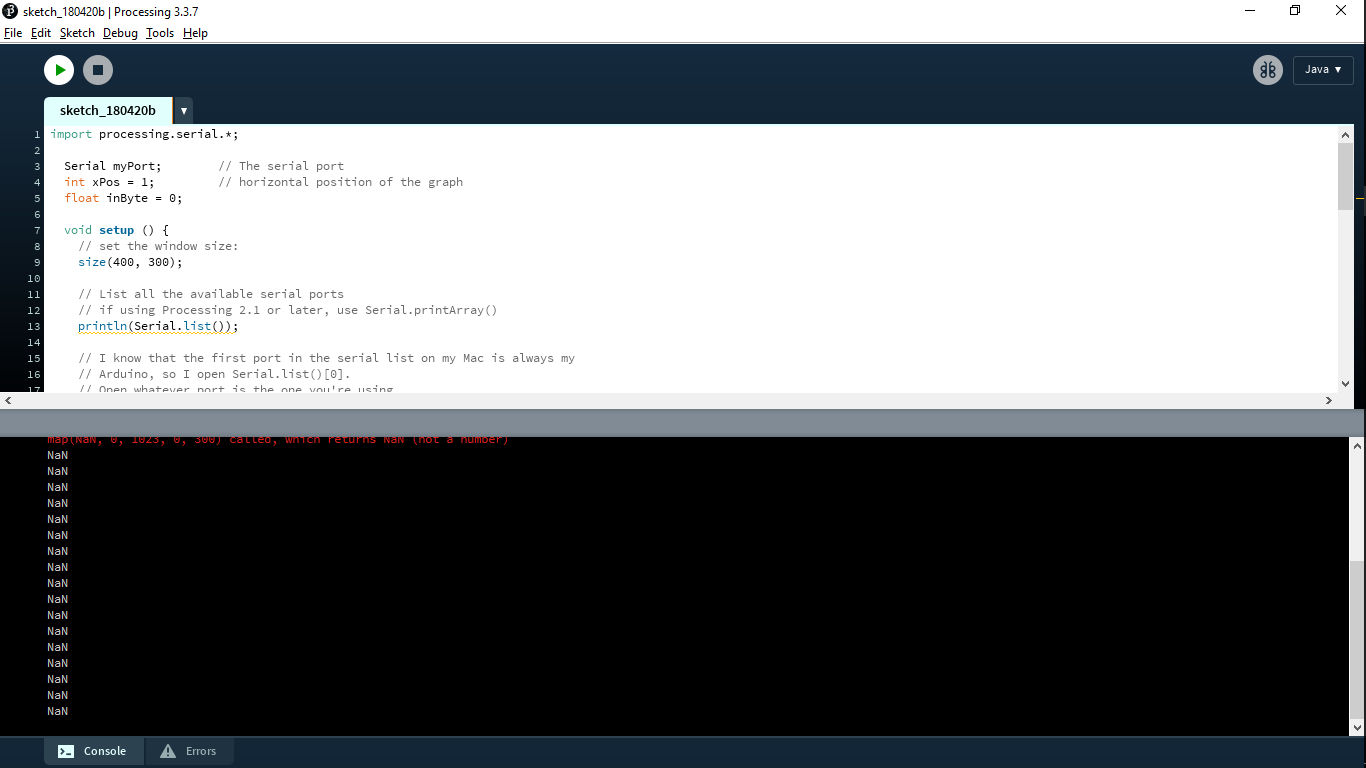
here the output was alpha numeric this was a mess for the processing program that I had compiled, hence I deleted the parameter that generated the output like the one seen above..
And this issue was solved. - The next thing seen was the error as one seen below..
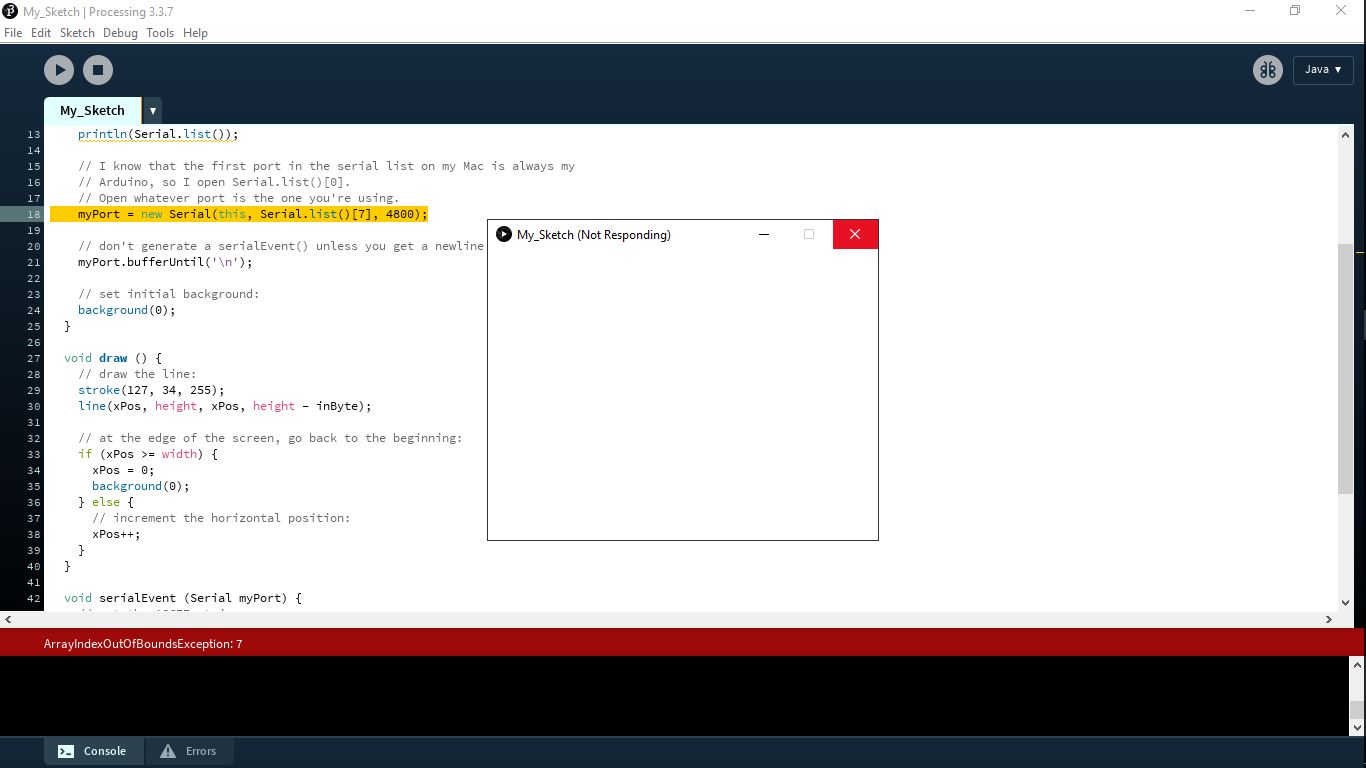
This error is seen because the port here was not declared properly, here the port that was listed was seen as COM7, yet the actual port taken for the communication was the 1st port hence the number had to be "0", Zero because the arrays and serial work the same, where the 1st countable digit is zero
Hence here port 1 = 0
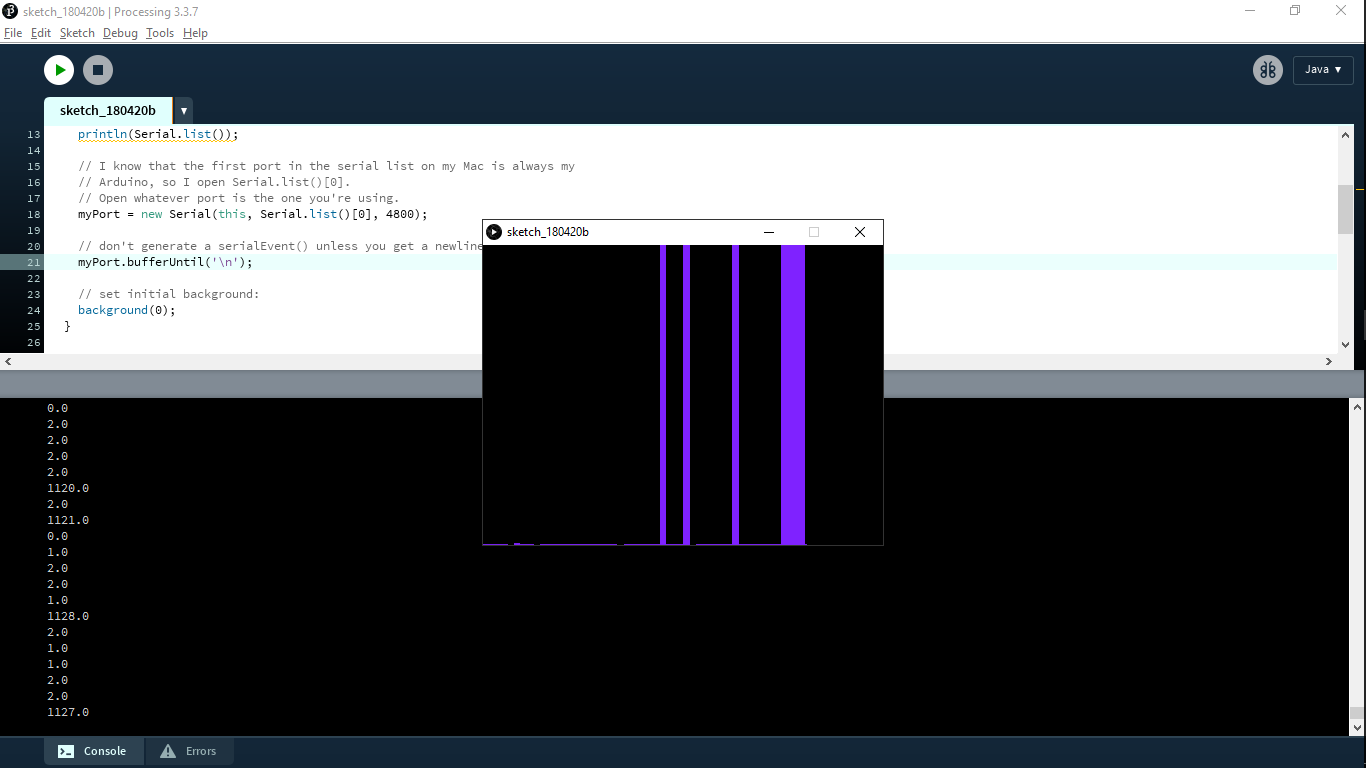
After all of the struggle this was my output
- Dry run without any sensor connected
- The fully functioning sensor..
- The video of working with the sensor..
Task 3:
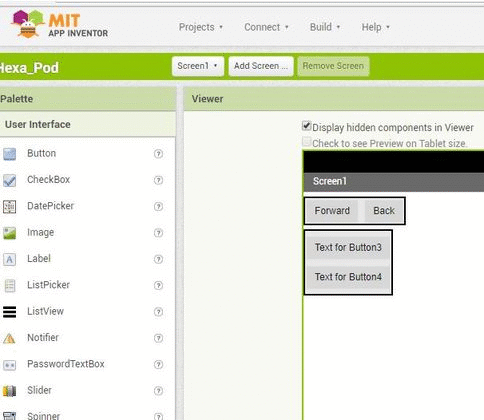
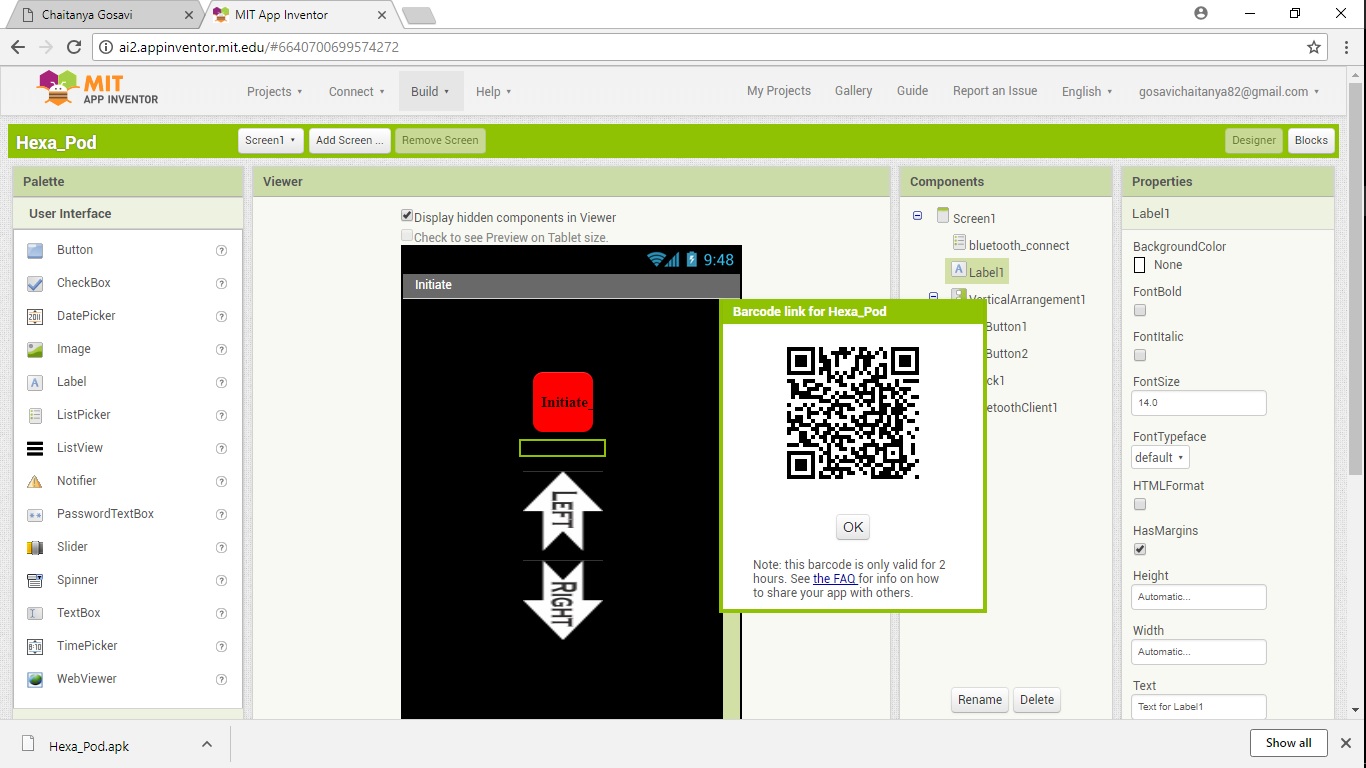
Developing an Interface in MIT app Inventor a (Output)
This week I aslo wanted to try working with android app development, but I was unaware with the high end languages as one in Android Studio, hence I was suggested with MIT app inventor, which has a basic structure similar to a computer language known as scratch.
Initially I tried to install the product onto my machine but someway it was not working as fine as expected, hence I went to it's online portal.
This was pretty well, here I actually wanted to develop a remote like interface, that could communicate with my expected device via bluetooth.
For the same following was the screan that I had..
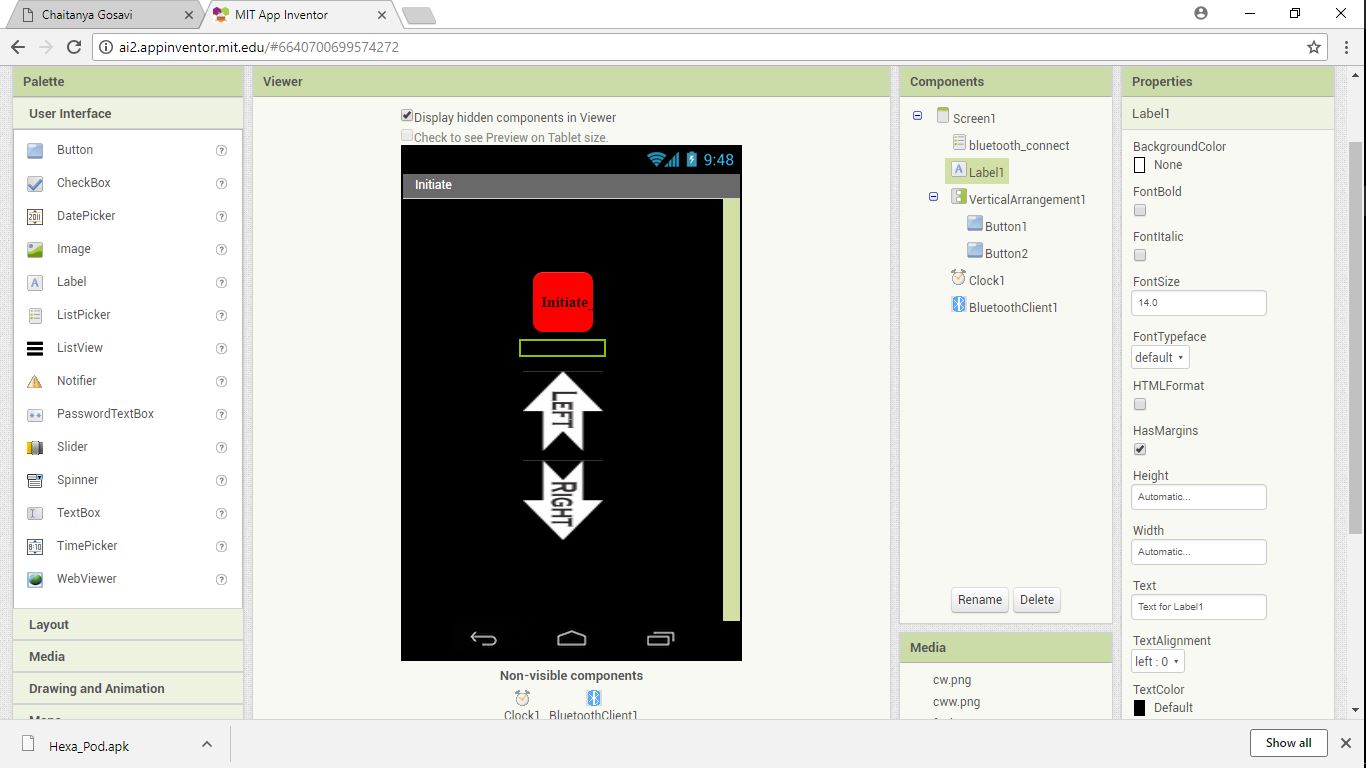
Behind which ran a block files of code that resulted in the communication between the boards..

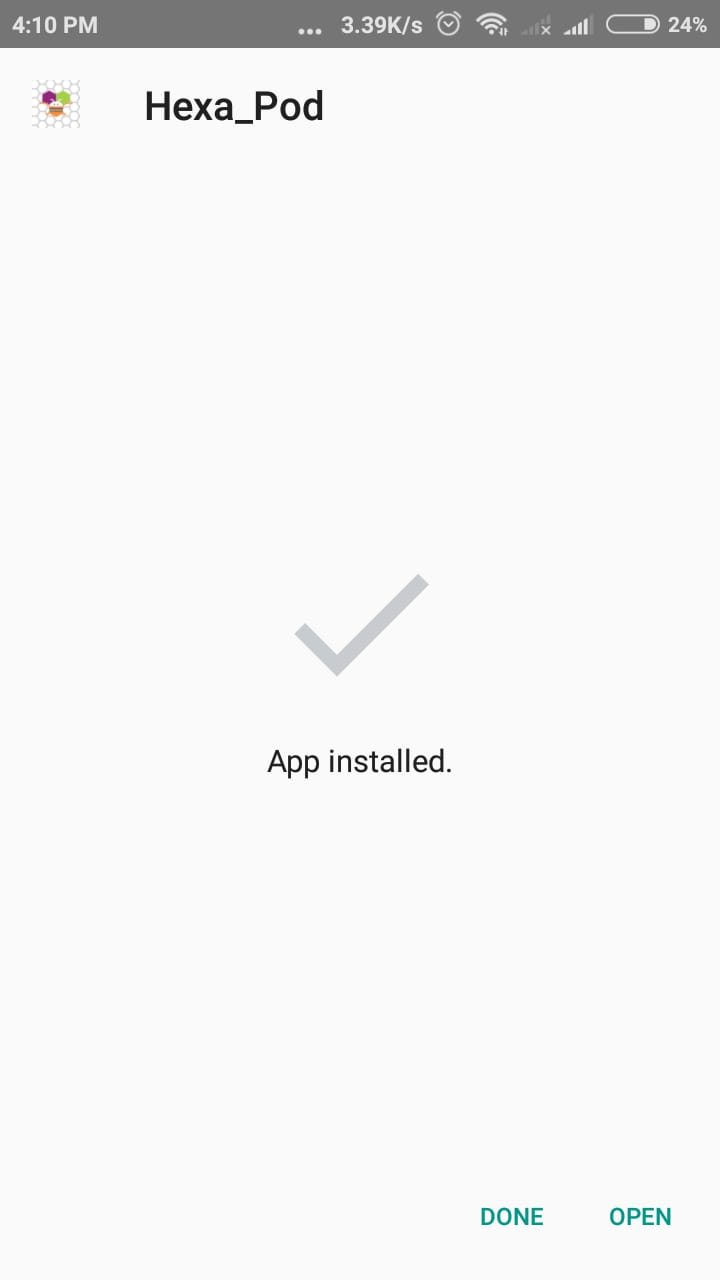
Once this was generated I tried to downkload the apk of the app, by builind a QR code and scanning it on the phone.
Then the app was installed on the phone..
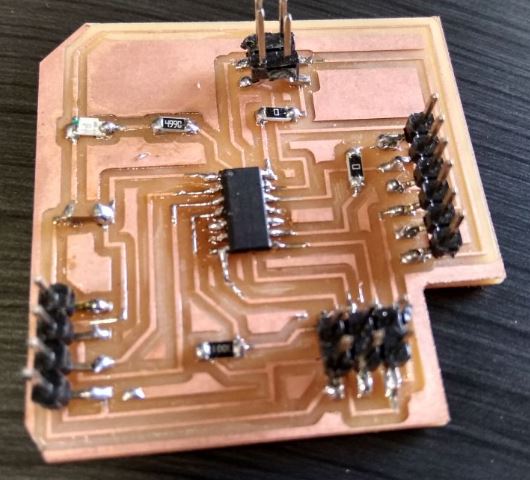
In parallel the thing to be worked on was the reciever side of the circuit, it was a code that was supposed to be burnt on the arduino had to behave as following...
The button on the app when pressed would send a signal in the form of an alphabet, which would be received by the arduino via bluetooth.
And here in the arduino we burn a program which has the commads as it runs the motor in a particular direction when the particular letter is received.
Following was the code that I had compiled for the same
Which gave me satisfactory results as seen here...
Task 4:
Group Assignment
To try compare between various softwares possible.
For this we had taken a few referances out of ones we used and few general, those included ones few that we used and few that were new to us...
Which were listed as here:-
1.MIT app inventor
2.Processing
3.Matlab
Following hence briefed are the advantages, experiences, and issues faced about these tools.
- Processing:-
This was one of the most common tool that all of us had begined with, this is actually a good tool, the functions that we had understood, about what the tool was actually capable of were, it can recieve data from the defined serial port as the arduino ide does and then we are able to define the actions that could be taken over the data.
That includes making forms, graphs or plotting diagrams.
Basically it puts the data in the from of tangible and intangible outputs, this is advantageous for non programmers to learn the basics of programming.
The advantage is that the language and the programming interface is quite similar to the arduino, hence if you are familier with the strata of the arduino, then the use of this programming environment does not seem that difficult. - MIT app Inventor:-
This is basically an app development environment, where the application is designed for a certain operating system, in our case android.
Our experience with the app invetor was pretty easy, here we had been with developing application interfaces for output and input devices, to either control them or get readings for them.
Following were our experiences with MIT app inventor:-- This app basically has a very basic interface of programming where we literally join jigsaws to make logical deductions.
- The inventor has supports for live testing of the app.
- The final development of the app is just a click, as compared to parallel softwares (unity, etc)
- However there is actually certain basic skill set required in order to understand all the peripherals of the inventor
- There are lot of components (clock, listpicker, etc) that actually baffle the untrained person.
- Also there has to be a perfect set of logics pre defined and known in order to test that out, since it's actually difficult to locate.
- Considering these we can say that its a pretty good platform for development but needs quite of initial efforts
- MATLAB:-
For example:-
Basically the use of each app is very subjective according to need, and there is preferably no equal or common ground where all of them could be directly compared.
Since all the apps are equally good and powerful in their working and user assistance.
In short, from the above analysis we can say,
- The processing language is a very versatile platform, when we deal with serial communcation with the microcontrolers, it rather shares a familier strata with arduino IDE, and the commands to generate the graphical interface are quite appealing and easy
- The App inventor is a juvenile yet a strong interface for amature and mid range developers, which is rather fast due to it's graphical environment, and the facility of providing live testing results.
- Matlab on the contrary is a very powerful and production grade software that actually require a specific skill set, and knowledge and it's quite difficult to be just attempted, without much knowing.
On the contrary it is a very powerful software capable of serial communication, app development, complex algorithmic calculations.
Thus stated is a brief analysis on all the environments we have used.
All the workables codes have been included above..